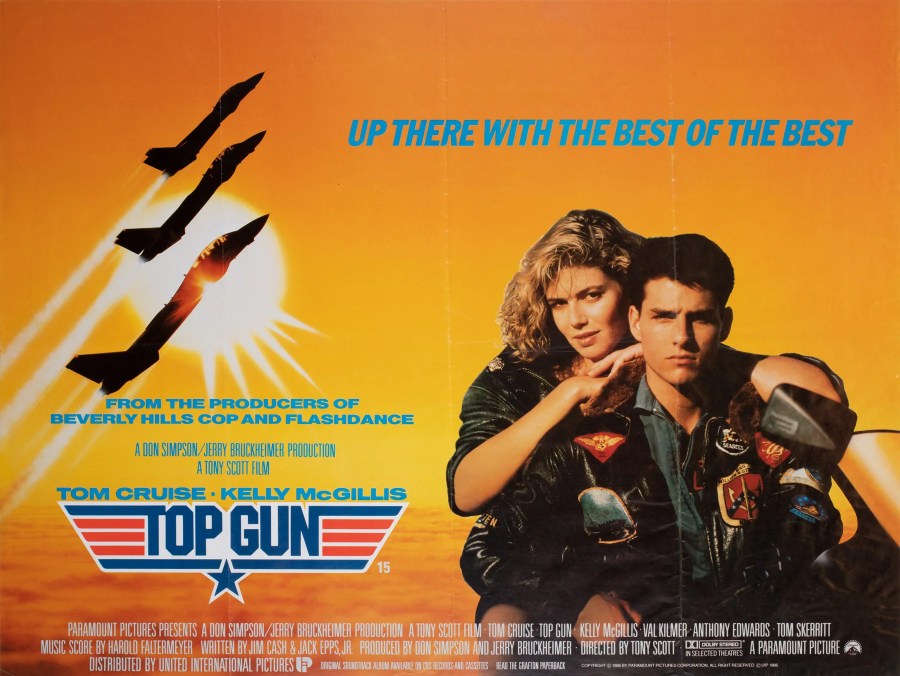

In 1986, the world was introduced to TOPGUN on the big screen and it became a cultural phenomenon. I was in high school at the time, before the internet and way before social media. I was reading magazines and books about fighter aircraft and listening to a steady diet of rock music on my cassette deck or Walkman. Life was good.
The summer was hot and having been reared on Hollywood’s Brat Pack 80’s movies everyone was looking forward to seeing what this big new movie was about. What got me hooked was’t the cast-It was the real star of the movie, the Grumman F-14 Tomcat!

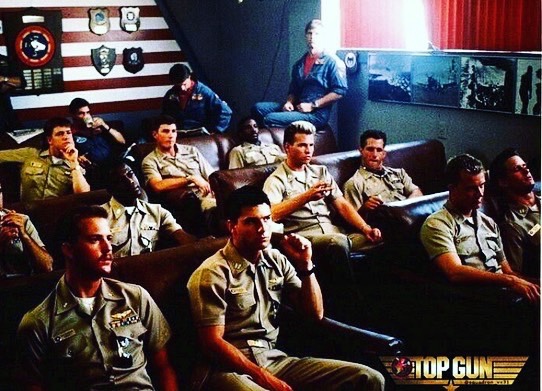
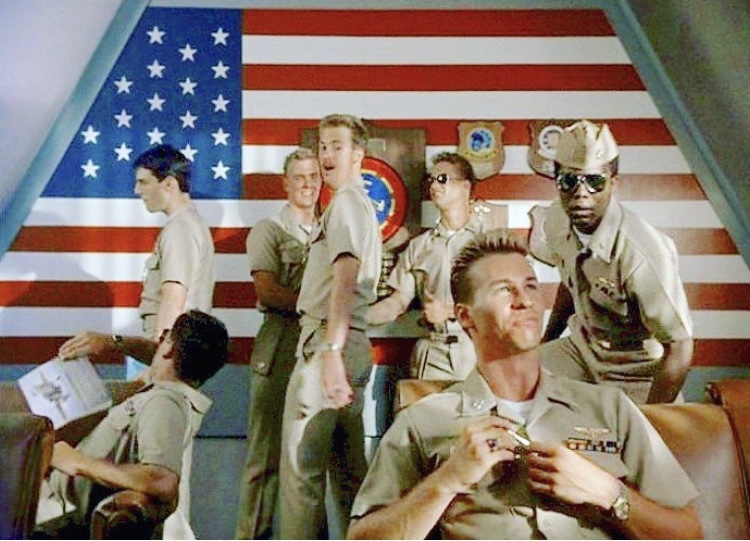
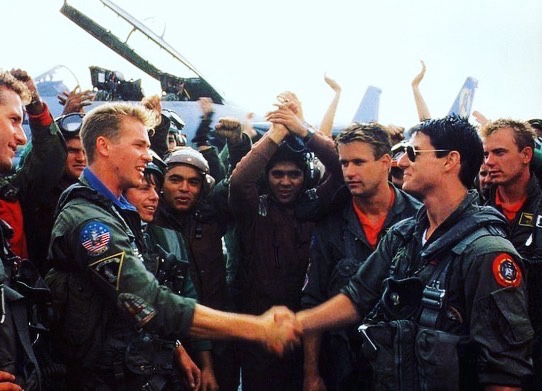
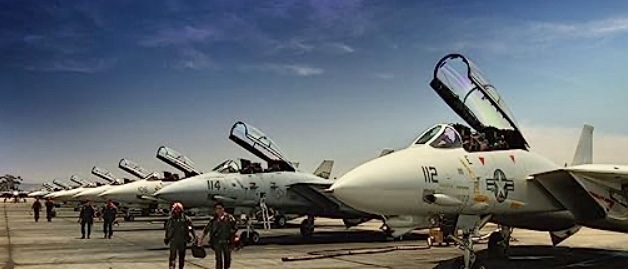
In TOPGUN we follow cocky fighter pilot Pete “Maverick” Mitchell and his RIO Nick “Goose” Bradshaw who after narrowly avoid being sent to the brig on their own carrier after an incident in the South China Sea and after being chewed out for it by the ships C/O, he informs our hero’s that they are going to TOPGUN, the United States Navy Fighter Weapons School. They were going to NAS Miramar, more commonly known as Fightertown, USA.
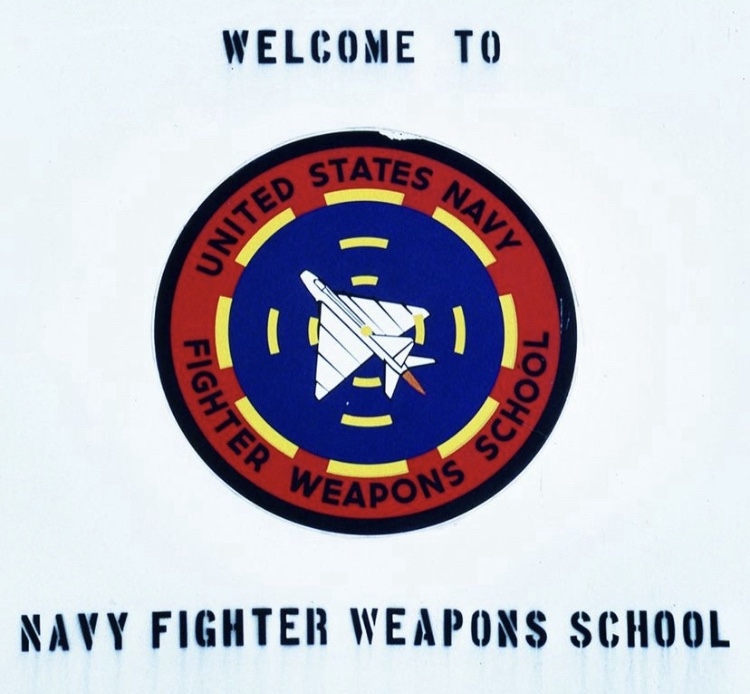

“On March 3,1969 the United States Navy established an elite school for the top one percent of its pilots. Its purpose was to teach the lost art of aerial combat and to ensure that the handful of men and women who graduated were the best fighter pilots in the world.
They succeeded.
Today, the Navy calls it Fighter Weapons School. The flyers call it: TOPGUN.”
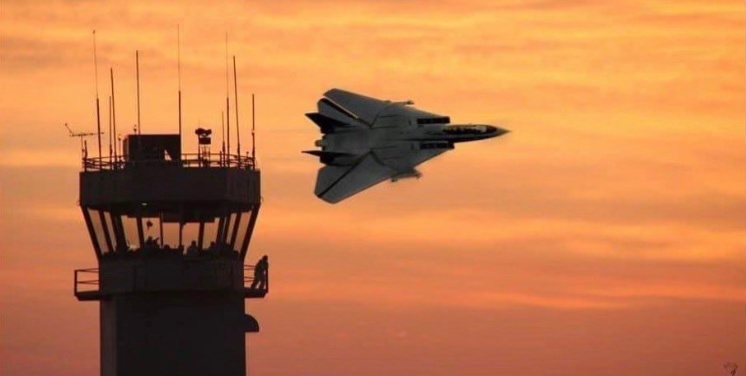
As the film opens to F-14’s on a carrier deck at sunset with Kenny Loggins soundtrack “DANGERZONE” cranked up to full volume, I became totally enamoured with the F-14 Tomcat. The girl I went to the movie with felt the same way about Tom Cruise!
If you are a fan of the legendary F-14, then chances are you have seen the movie and its sequel. If you haven’t, treat yourself!
After seeing the film I was fascinated with all things TOMCAT, TOPGUN and US Navy aviation-I still am! And at some point I knew one day I would build myself that Tomcat that Maverick and Goose flew in the movie. This summer the time came at last-I had everything I needed and in my studio it was 1986 all over again!


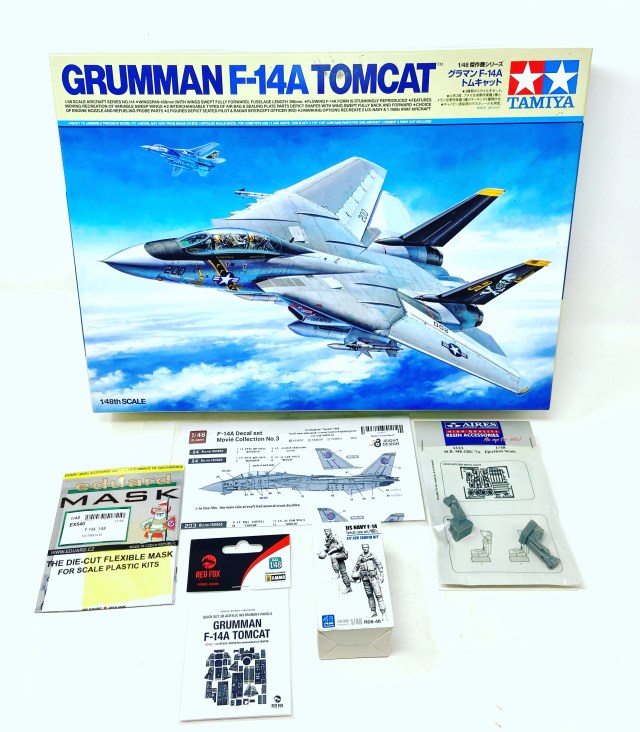
Building that Tomcat: My starting point for this project was the 1/48 Tamiya F-14A Tomcat. In my opinion, the finest model of the Tomcat in the scale. In order to build a realistic replica of one of the jets used in the film I would need to do a bit of research.
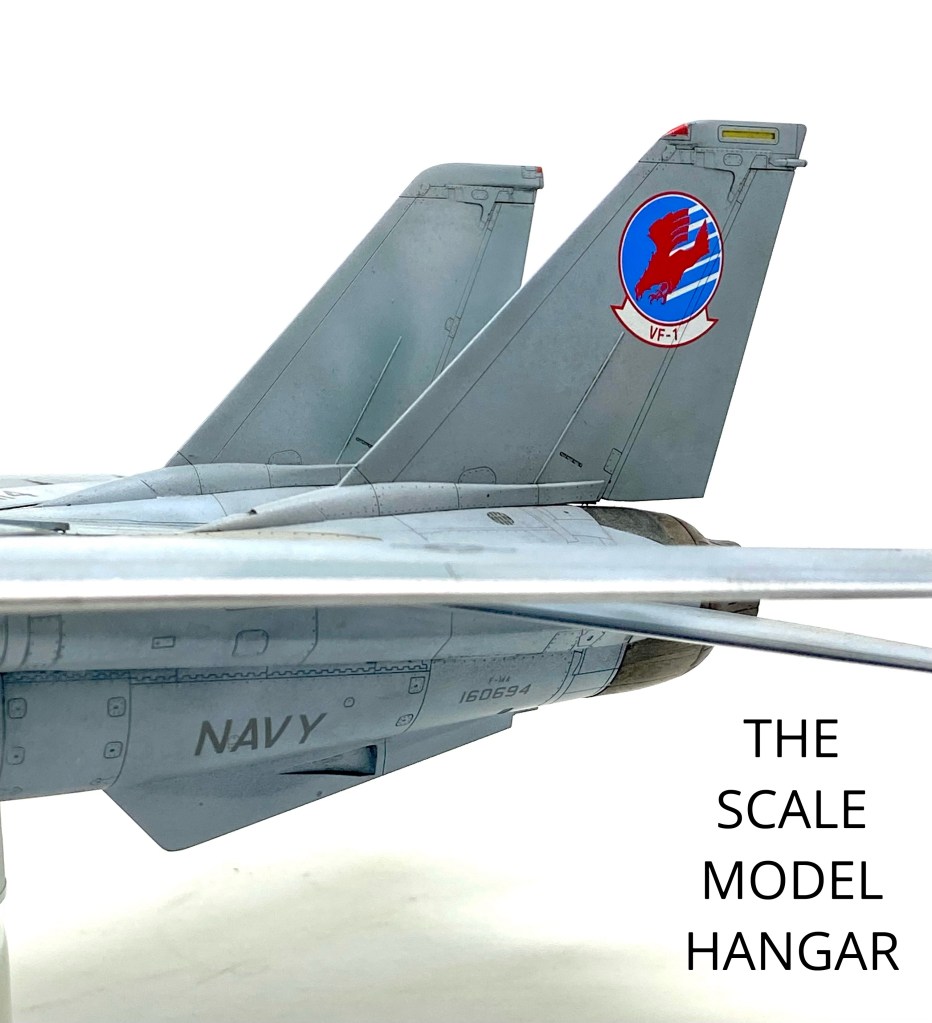
It turns out that the US Navy and Paramount Pictures had three F-14’s that were portrayed as “Hero” jets, meaning that all three F-14’s were given fictional squadron markings and modex numbers. In the movie Maverick’s jet is portrayed by two different Tomcats, Bu No’s 160694 and 160665. Both jets were adorned with the fictional VF-1 squadron insignia, Model numbers and character crew names on the canopy frames. Getting the markings correct was important and I had previously purchased cheap homemade decals online which really were poorly printed and sub par. When Jeight Designs produced their TOPGUN movie decal sheet I was excited to see how good they were and bought a set immediately.
I was not to be disappointed, they were in the correct scale, superb register and included markings for all the hero F-14’s in the movie and also a set for the fictitious Mig-28 which in the movie was portrayed by the real TOPGUN Adversary F-5’s painted in a sinister all black scheme with soviet red stars on the wings and tail.
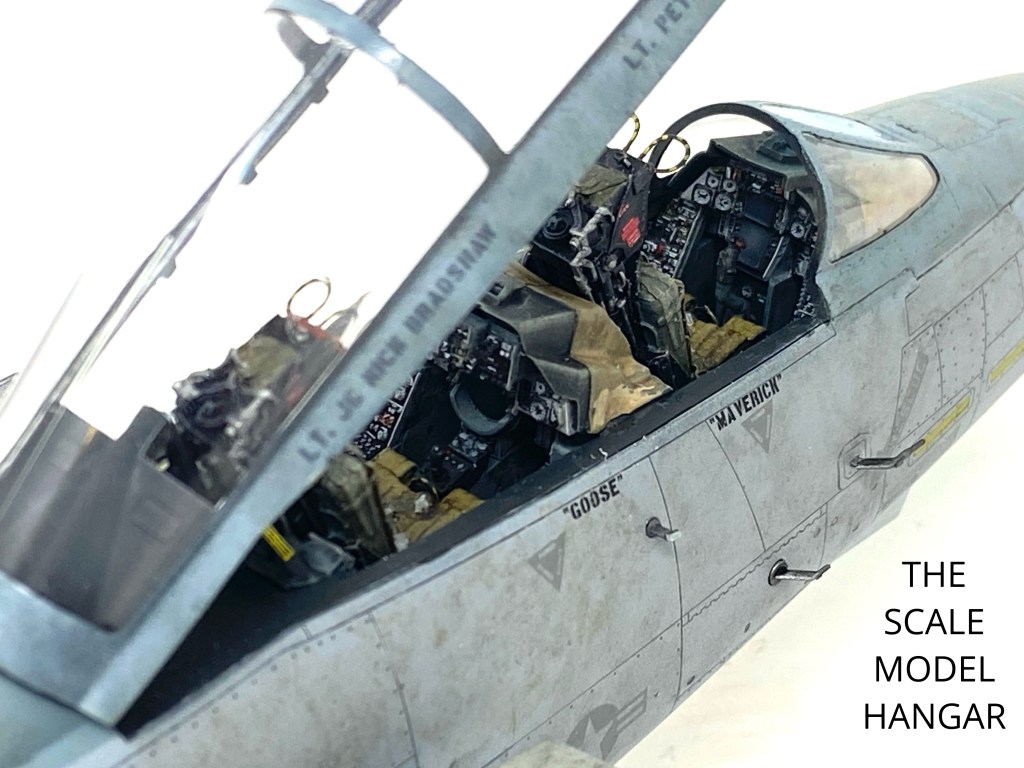
So two items ticked off the checklist- Kit and decals were good to go. Next up, I thought about detailing the model and how I wanted to portray it. It was right around the time that R2 miniatures had just released their 3D printed F-14 crew figures in 1/48 scale specifically designed for the Tamiya Tomcat. In passing coincidence, both figures bore a striking resemblance to Maverick and Goose. Go figure……..
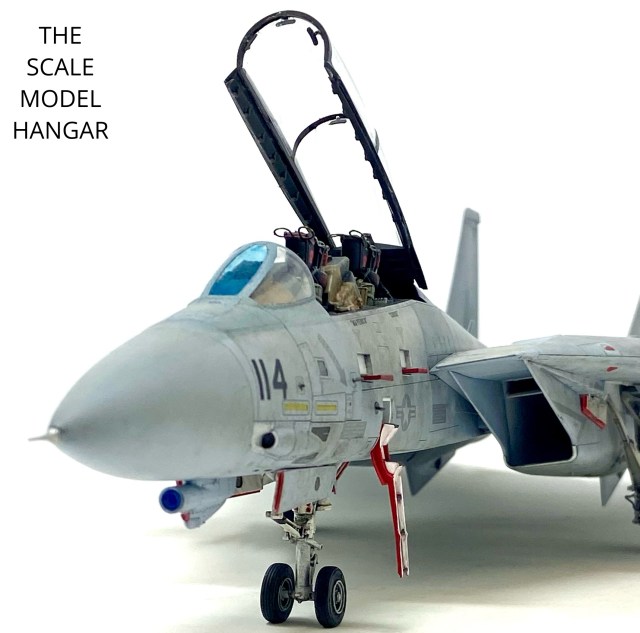
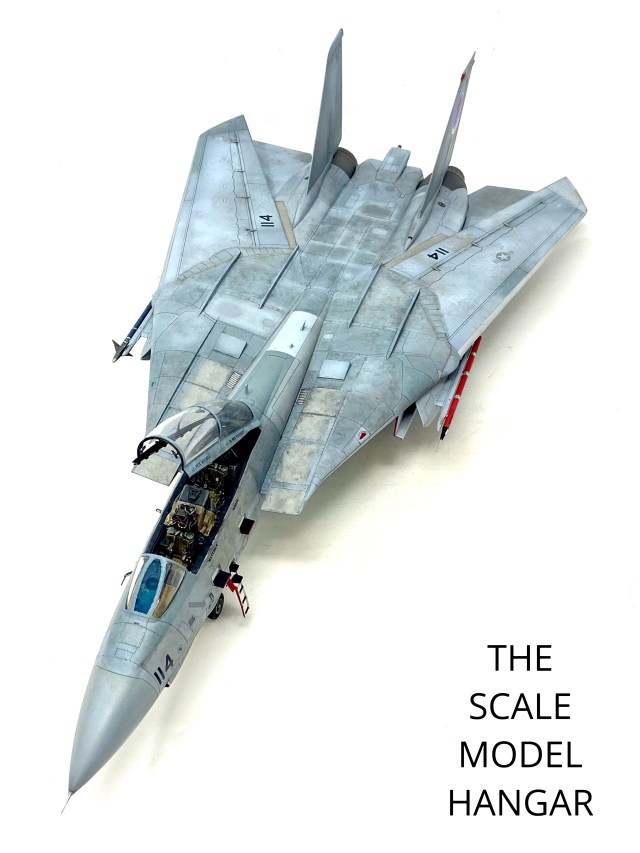
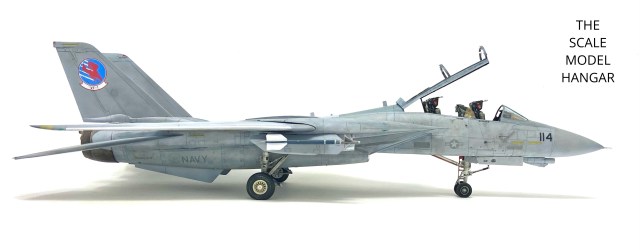
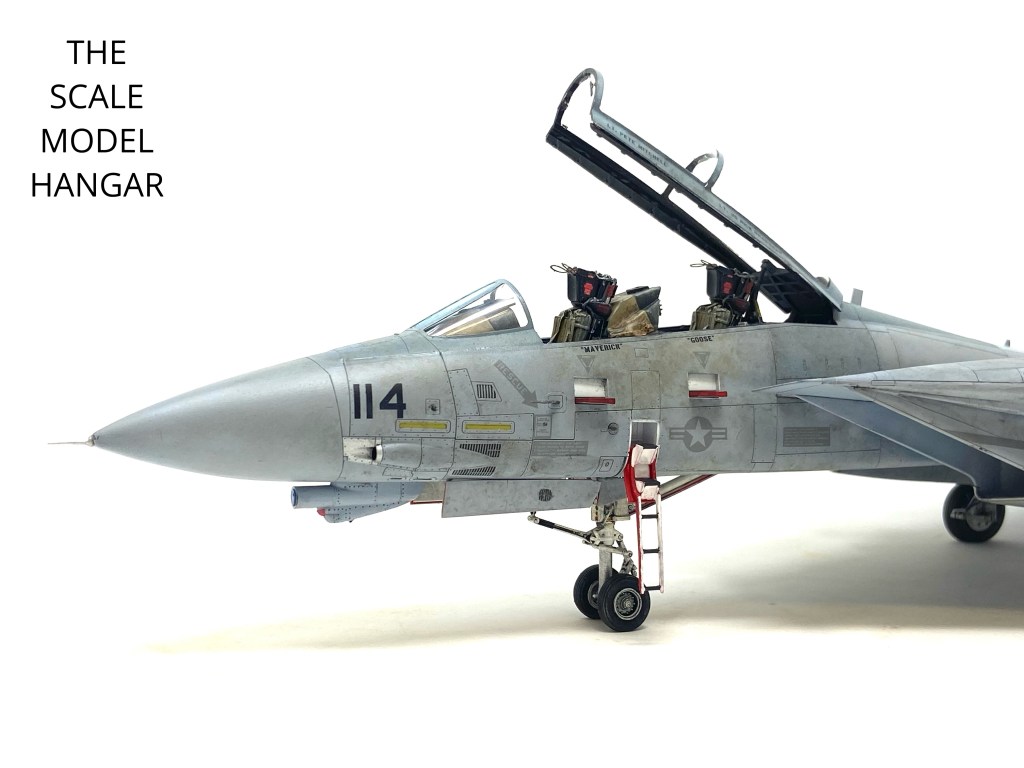
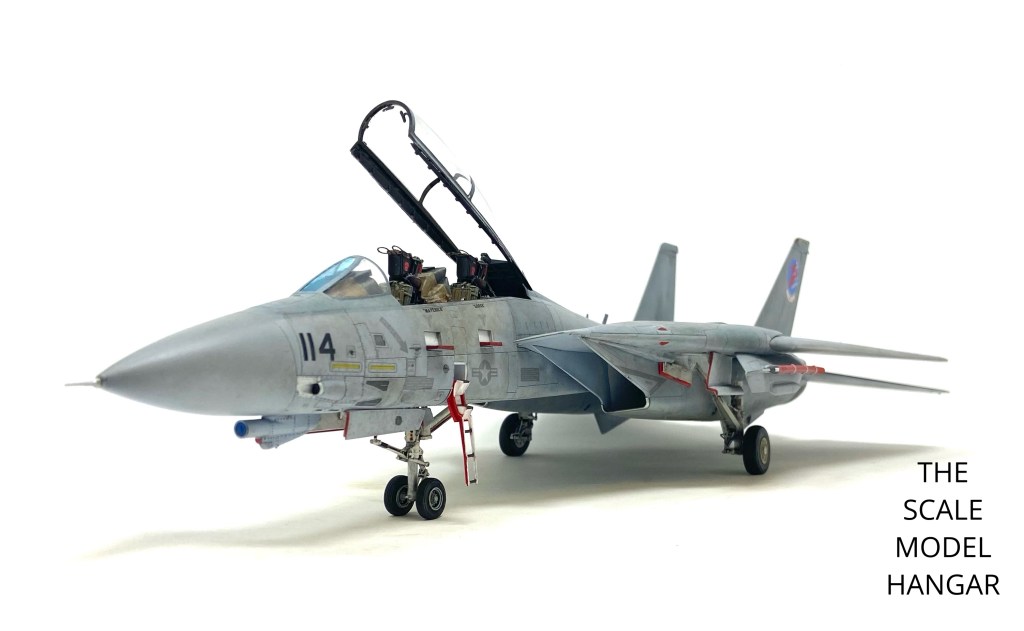
I now had an image in my minds eye of how my finished model would look. I would build the F-14A on the deck, wings folded in, cockpit open and ladder down with Maverick and Goose getting ready to go on their next mission. I also decided early on that this F-14 would be a stripped down version without any weapons pallets underneath the fuselage, just equipped with a training sidewinder and targeting pod which would be the standard load out at TOPGUN.
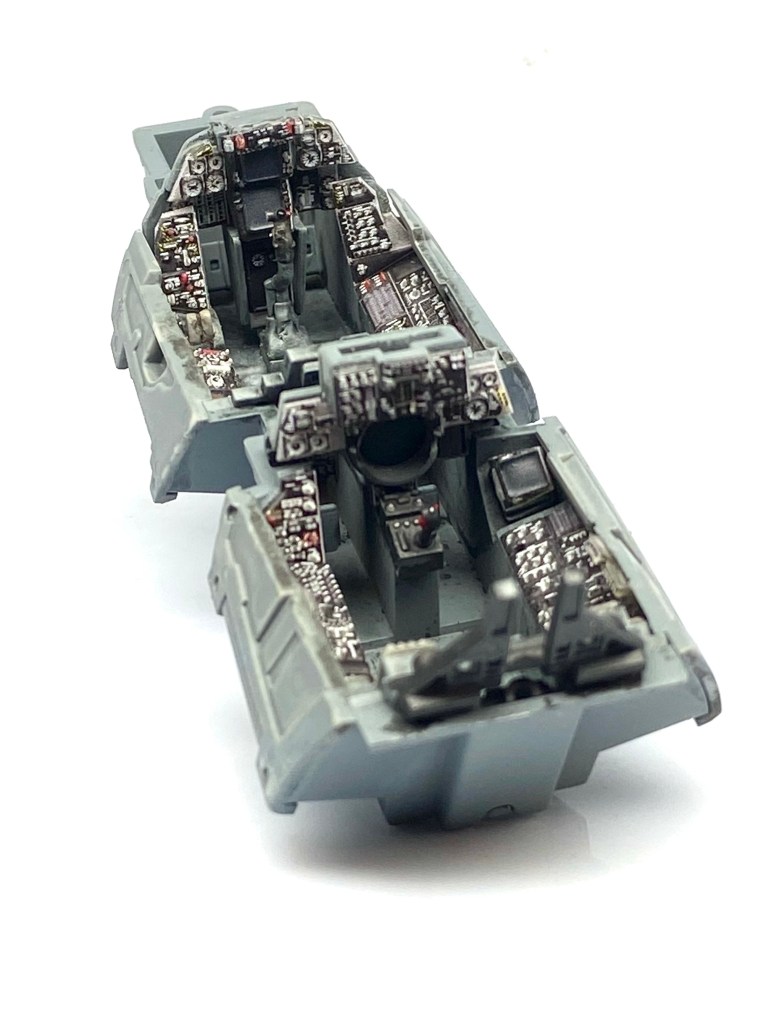
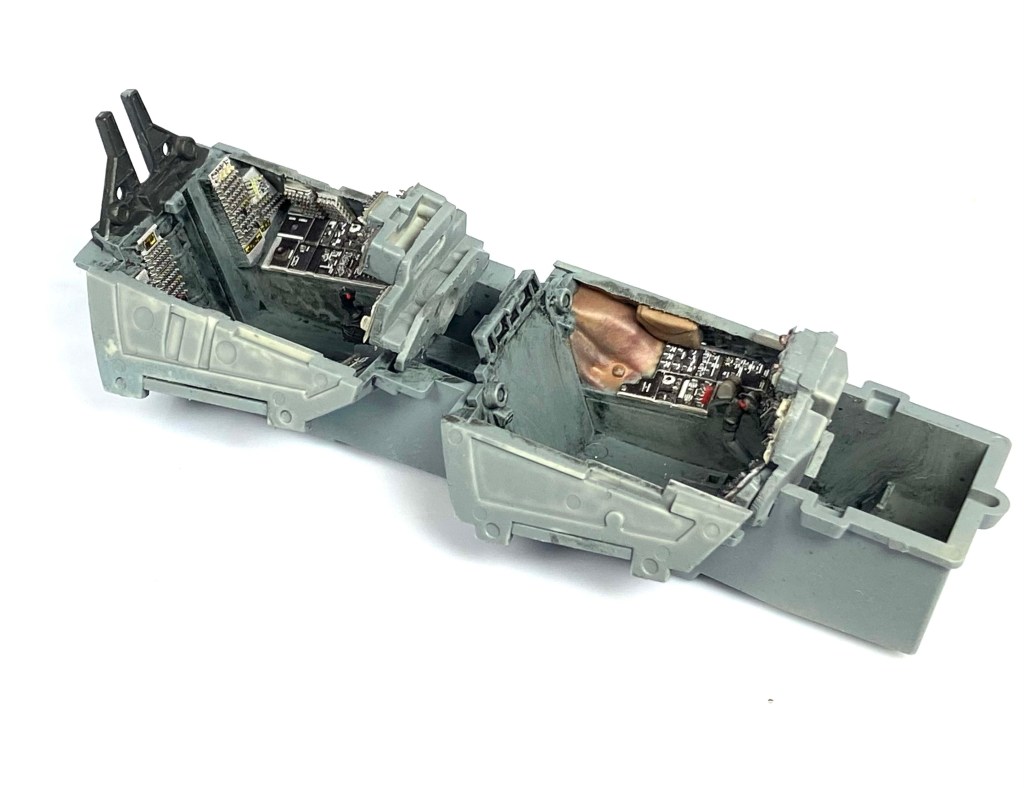
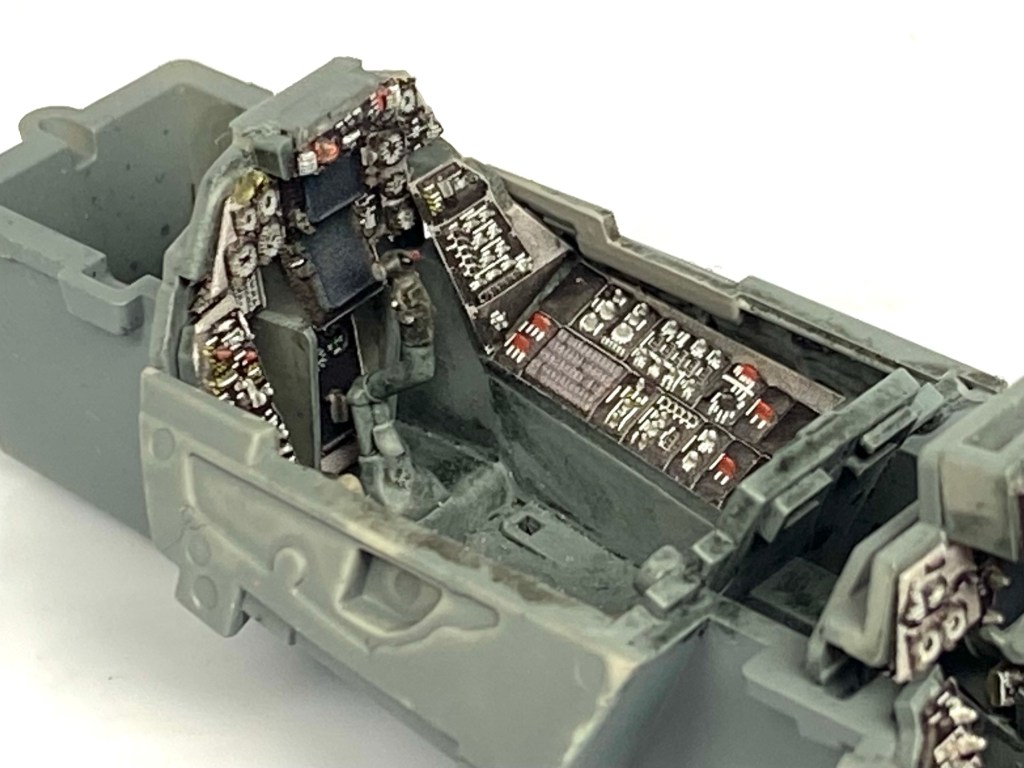
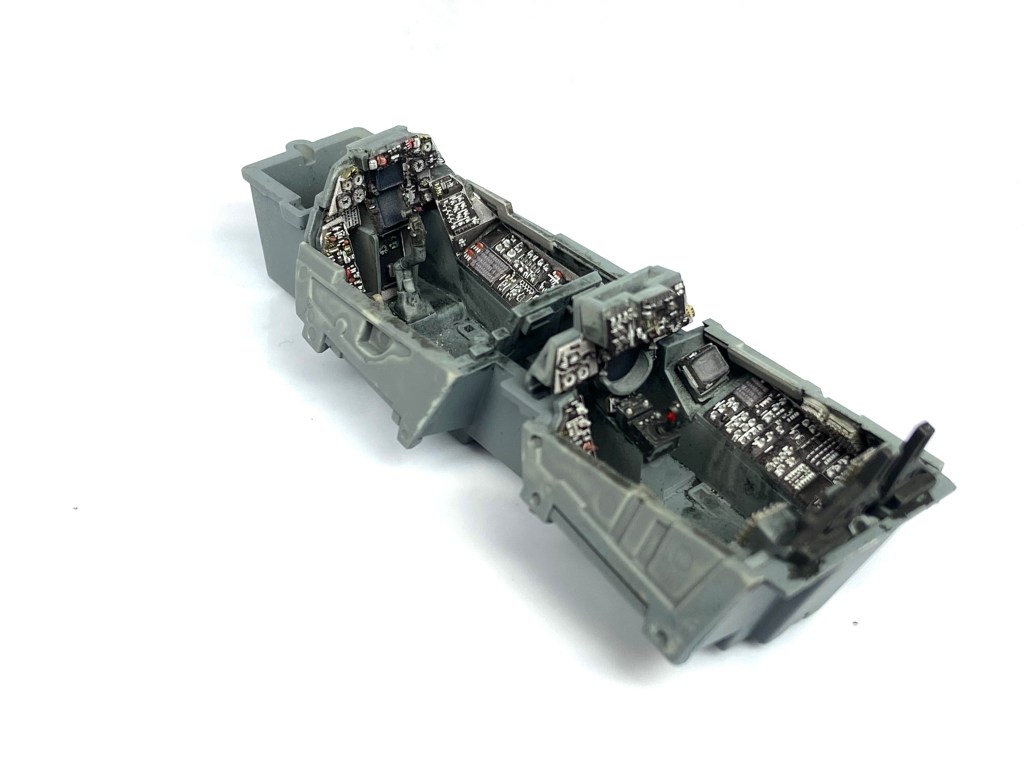
To further enhance the look of the model I purchased a 3D printed cockpit set from Red Fox Studios and resin ejection seats for AIRES. Now I had everything I needed to make the model I had wanted for so many years.
Construction commences!
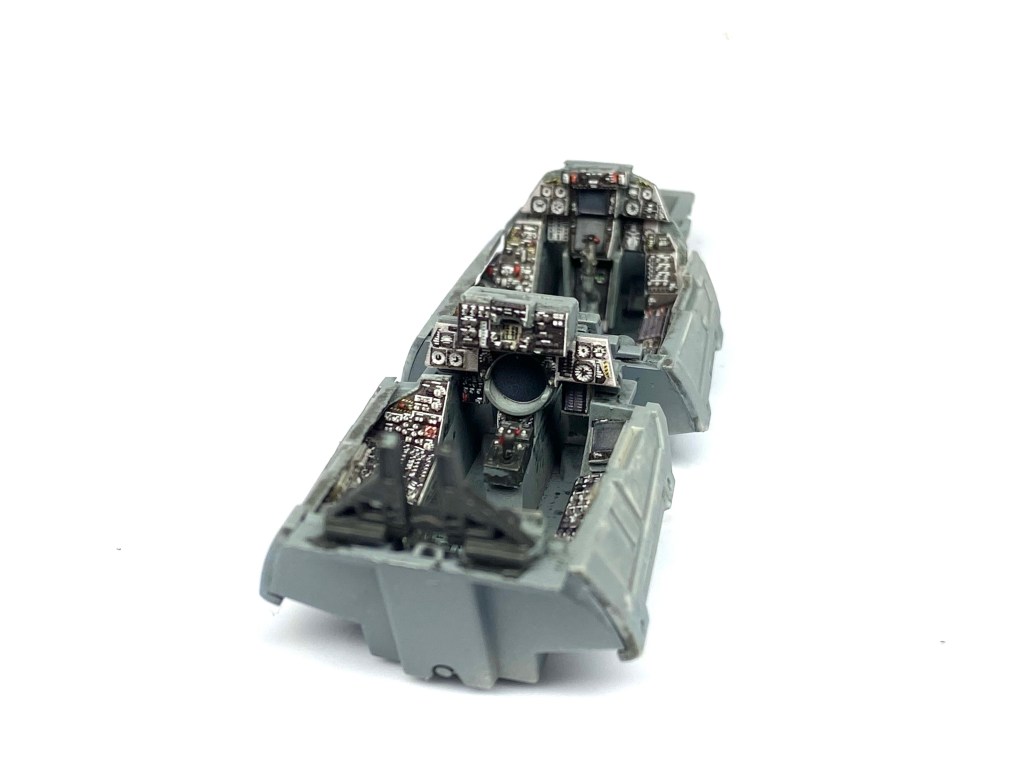
As with most aircraft models we began by putting the cockpit together. This entailed my building the kits cockpit tub with its separate panels installed then sanding all of the kit raised details off in order to fit the Red Fox Studio’s cockpit parts. Here is how the cockpit looked after painting and detailing:

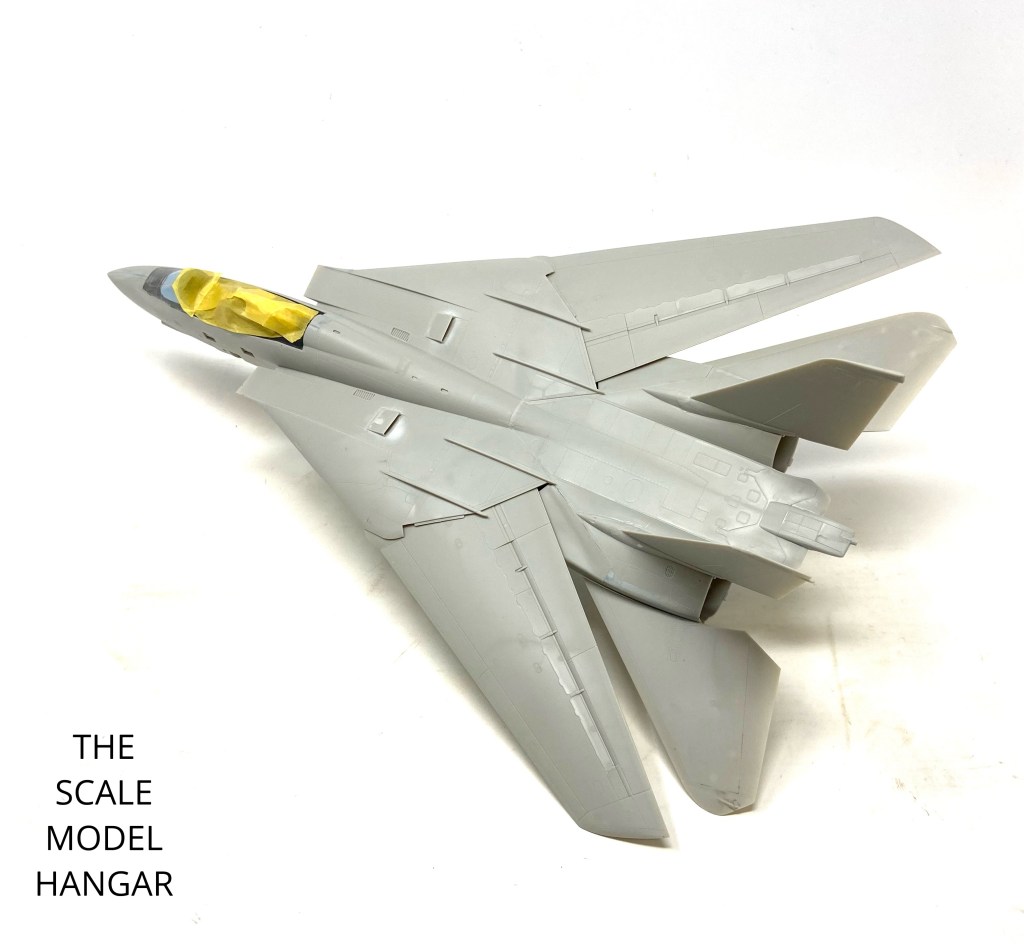
After this I moved onto building the airframe in short order. The Tamiya kit is so well engineered, the build plan so clear, it’s foolproof.
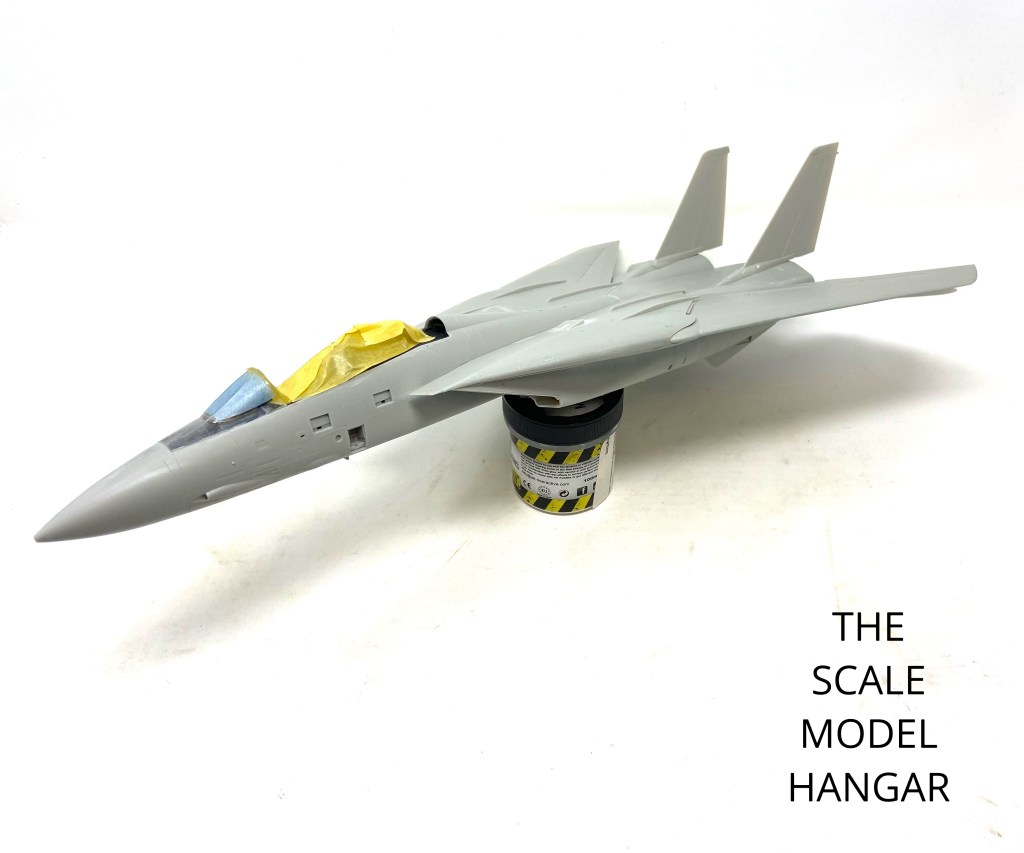
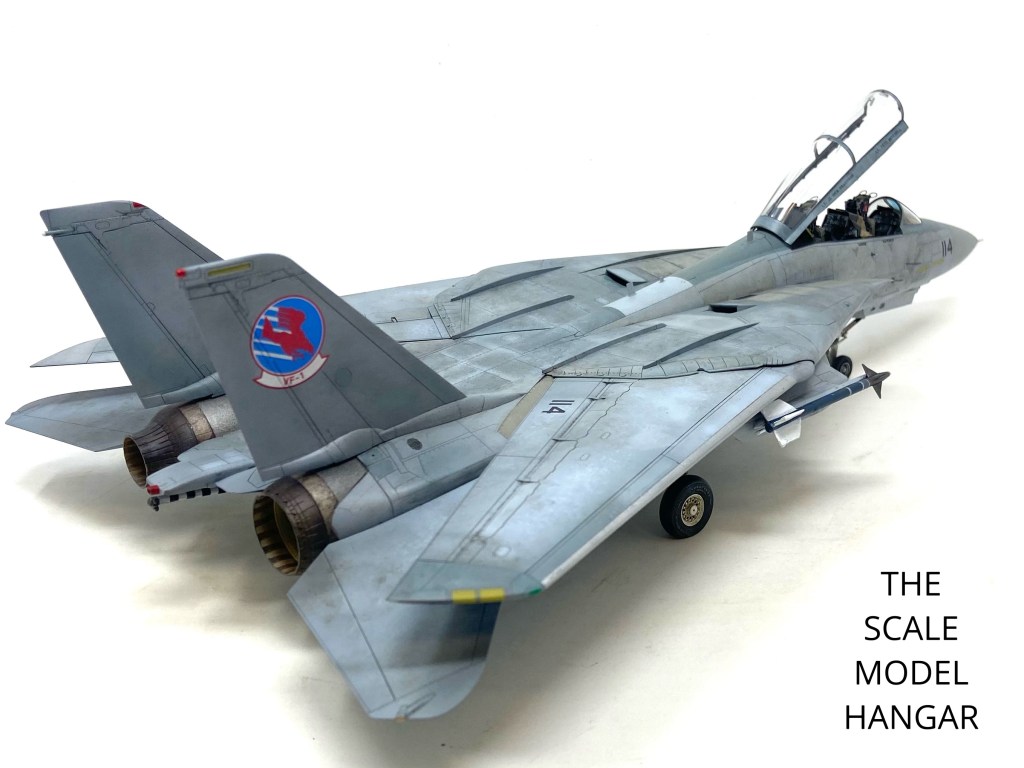
It should be pointed out at this stage that the later F-14’s had reinforcement plates on the tail fins and these are not depicted on the Tamiya F-14A kit. I had Tamiya’s F-14D in my stash and sure enough it comes with the later reinforced tails so I swapped them out and fitted them to my F-14A. Both sets of tails are interchangeable between the A and D model kits.
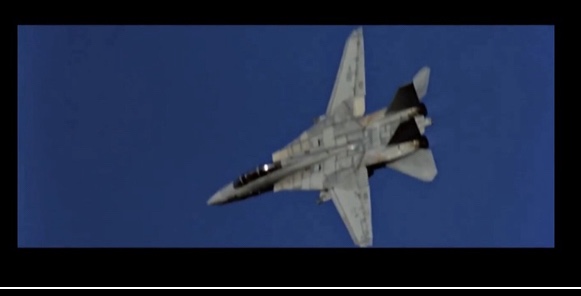
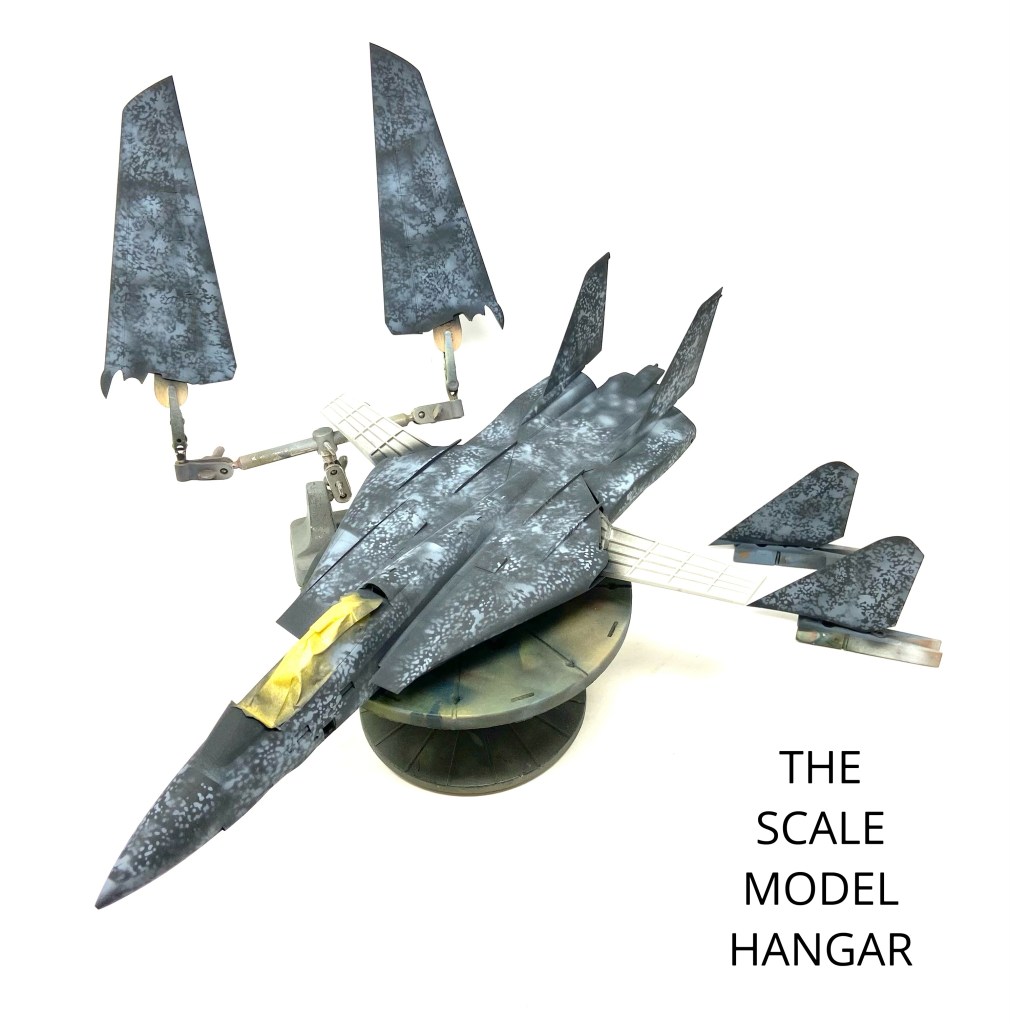
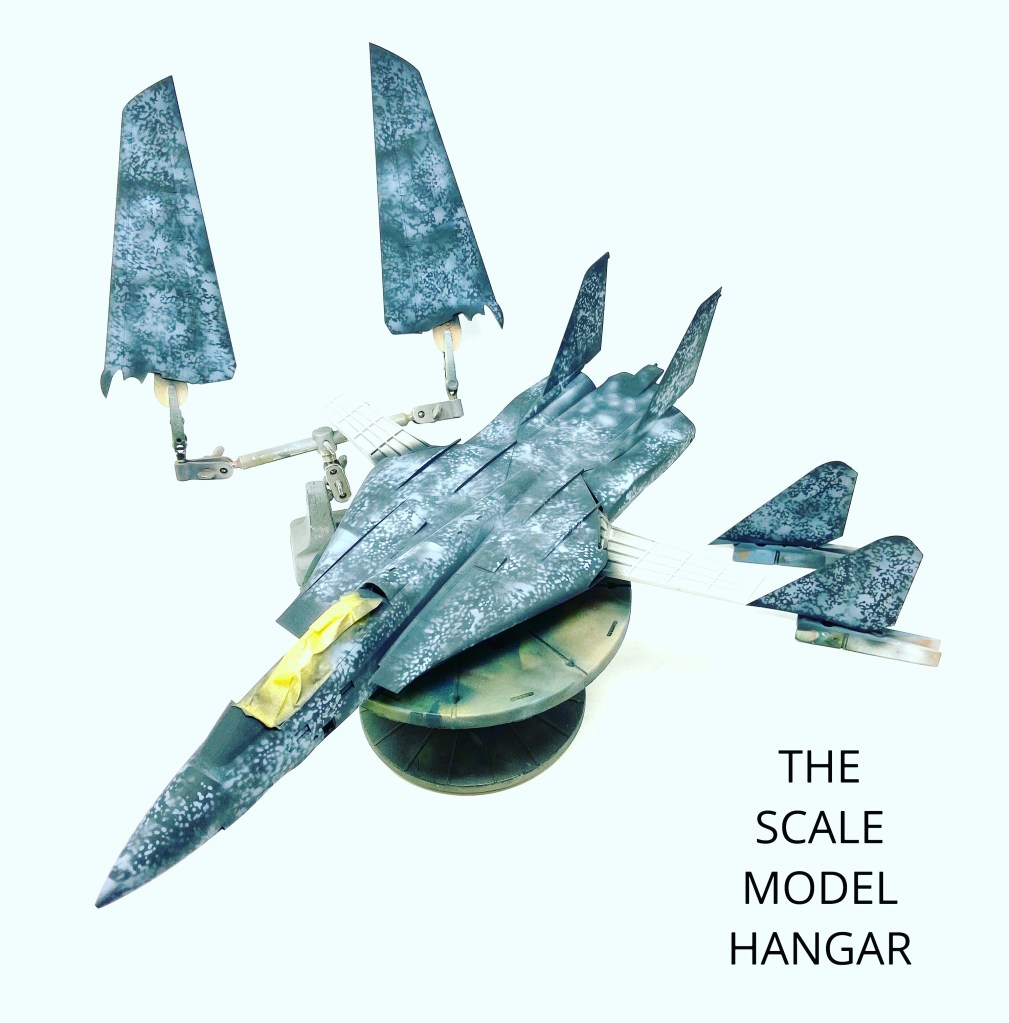
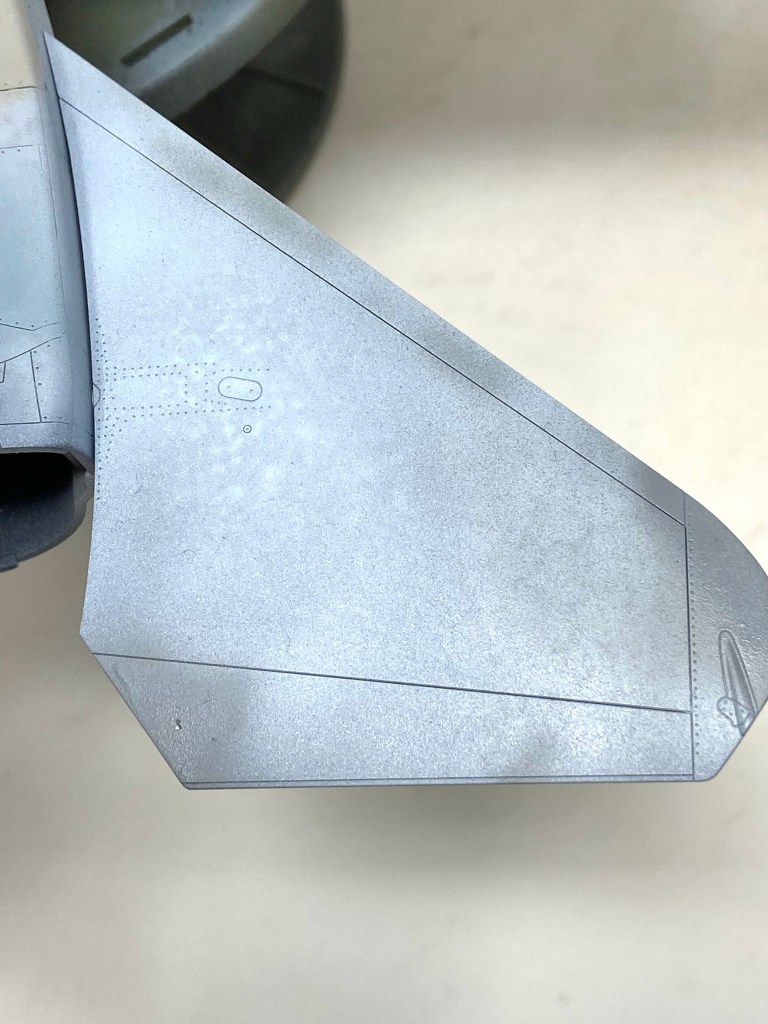
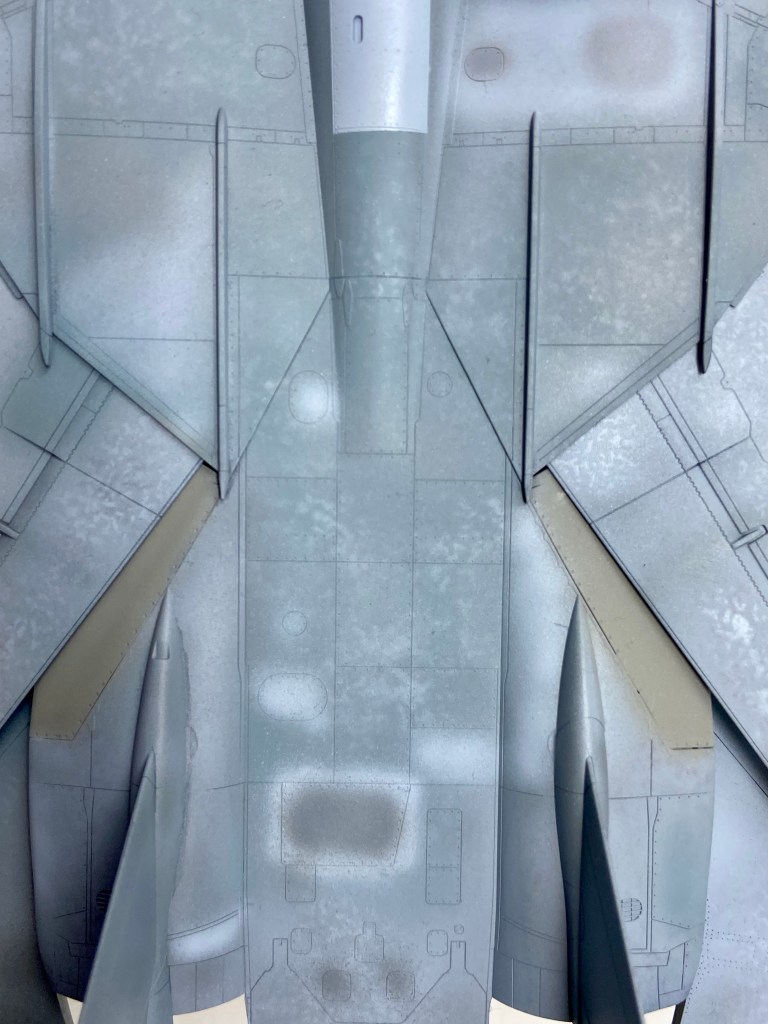
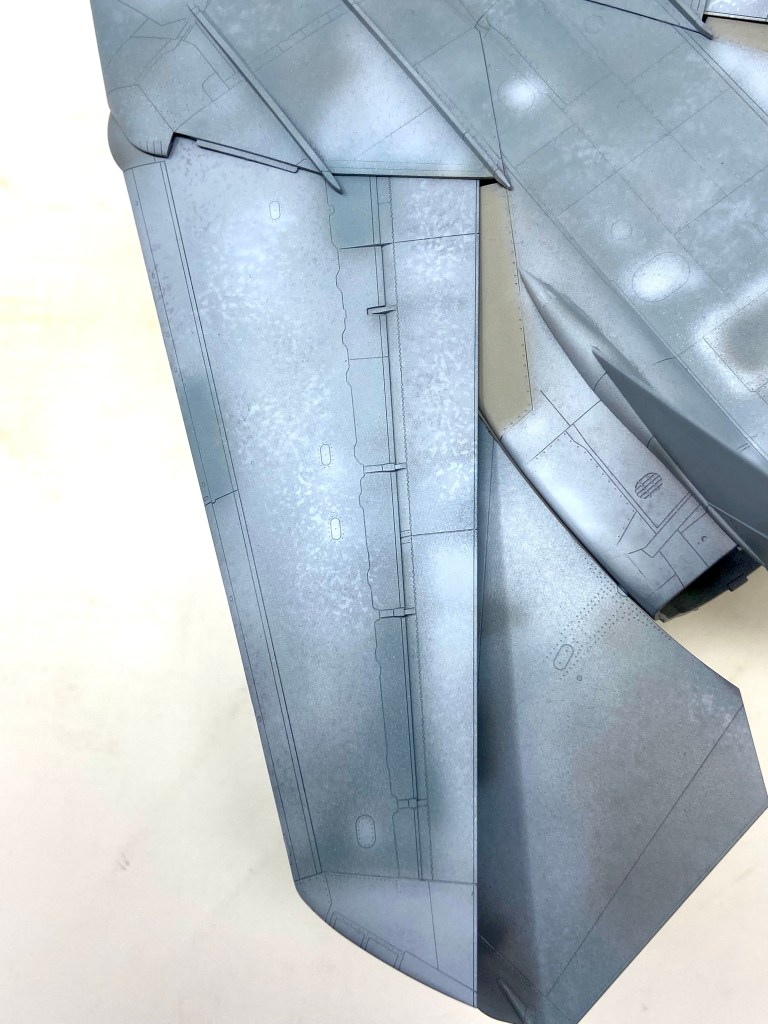
One of the most difficult tasks on this project was to recreate the worn patchy finish that the line jets used in the film had. I had to watch the movie again a few times and study stills from the film to capture the look that I was after:
To accomplish this I used my tried and trusted layering method:
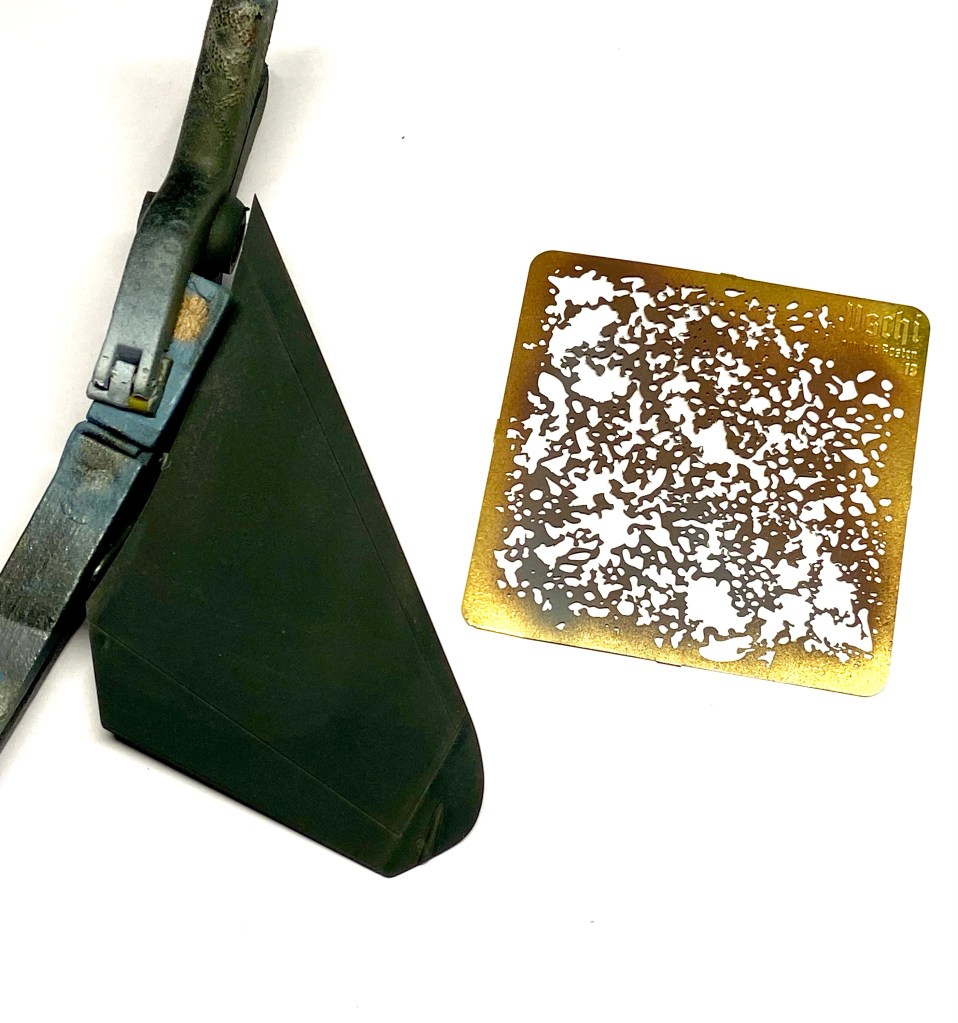
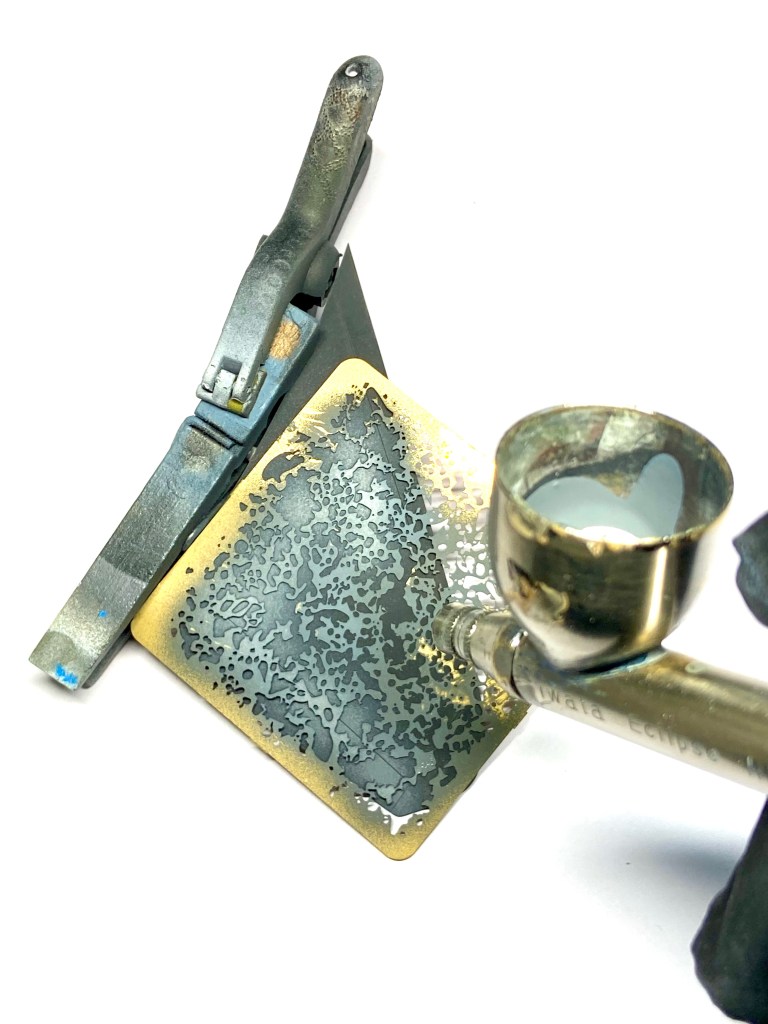

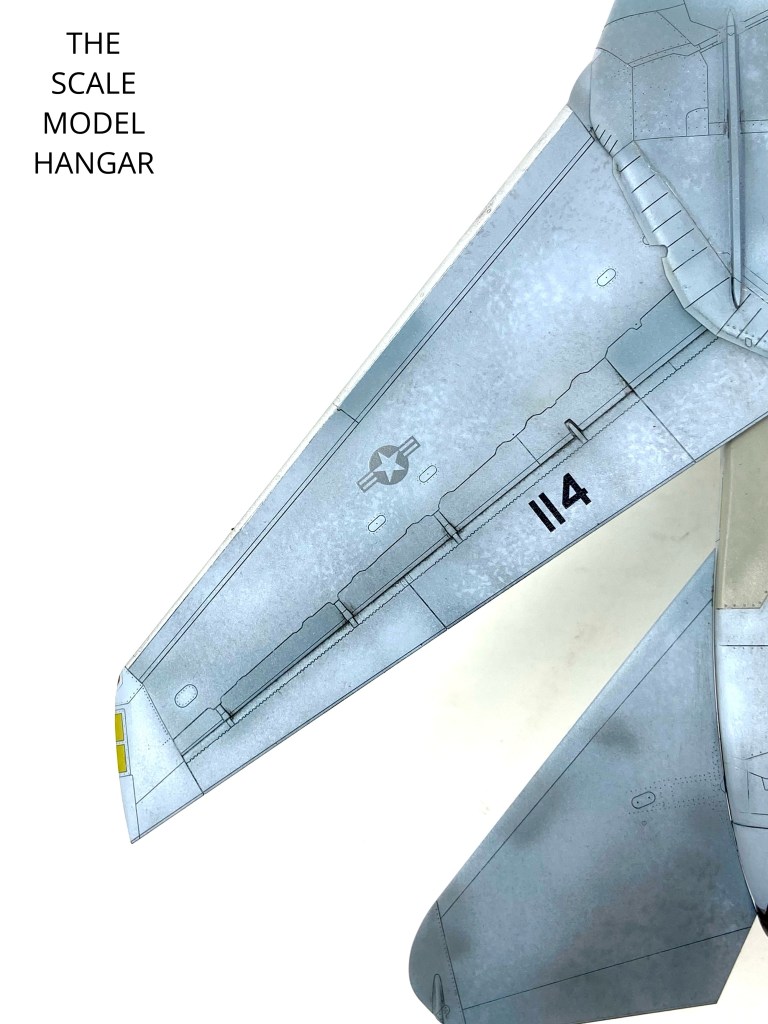
Starting with a black primer, I airbrush the model with its primer coat. I use Tamiya NATO Black for this as its fast drying and gives a smooth matt finish. Then using a mottle stencil I sprayed a random pattern of medium grey which leaves a disruptive paint finish similar to salt erosion on the model.
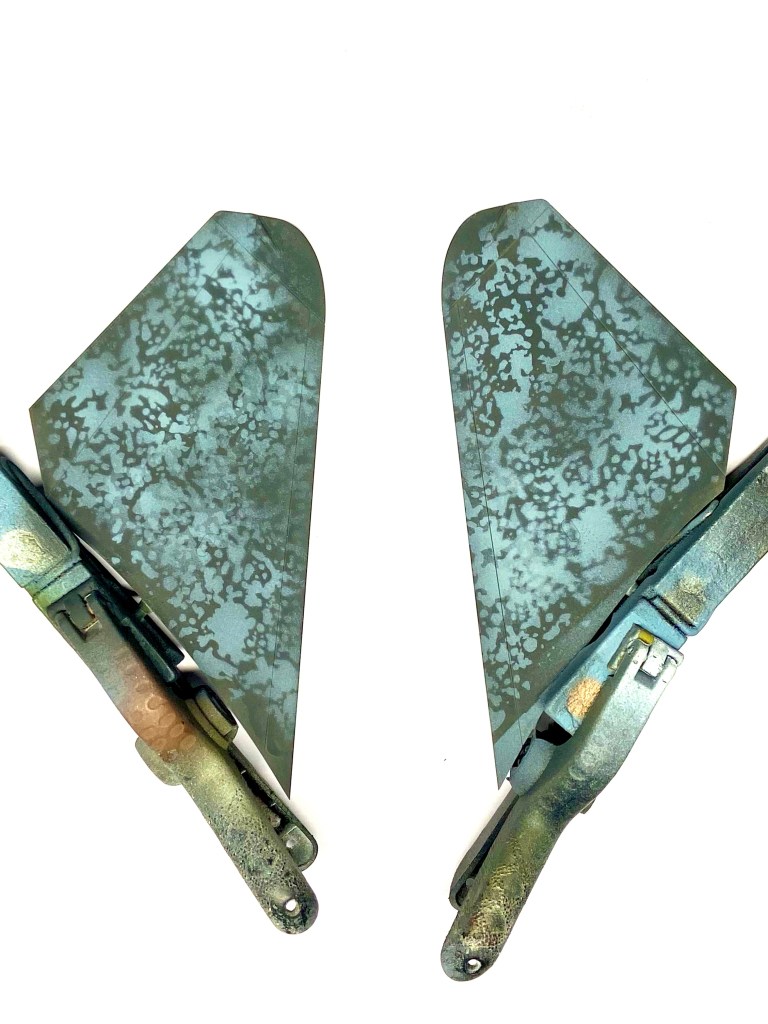
In the next three steps we can see the paint effect on the entire airframe by adding the grey mottling to the black primer, then adding a contrast colour mottle, again using the stencil technique and finally the three tome TPS Grey camouflage grey colours airbrushed over the mottle layers.
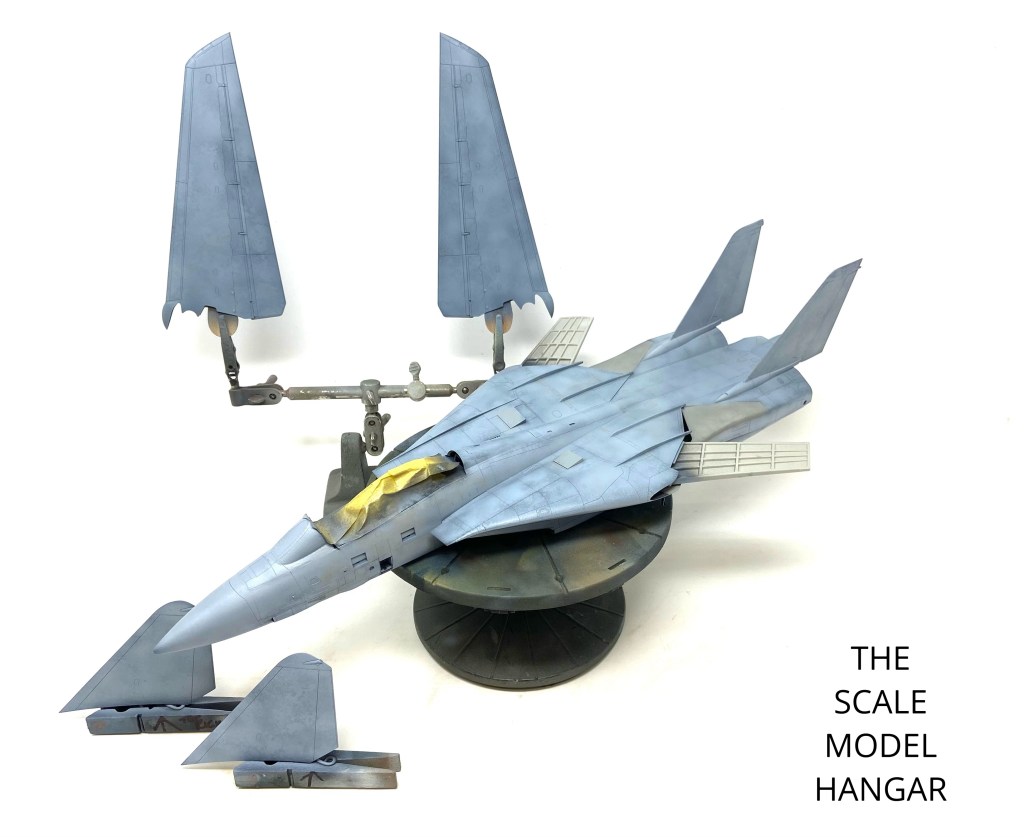
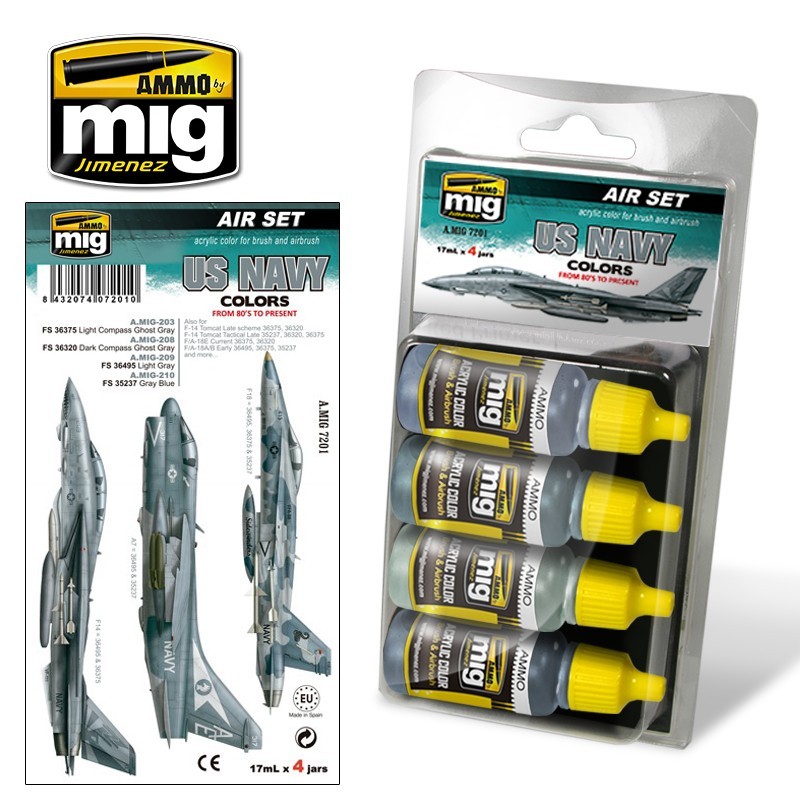
For the US Navy TPS (tactical paint scheme) I chose to use Mig AMMO Acrylics FS35327 Grey Blue, FS36320 Dark Ghost Grey and FS36375 Light Ghost Grey.
In the gallery below you can see the effect of the mottle layer paint method to portray the salt erosion on the F-14’s airframe and the subsequent, numerous re-sprays that have been applied by navy maintenance crews over time.


Once I was satisfied with the paint finish, I then picked out the smaller paint details such as formation lights and bare metal leading edges on the wings before adding a gloss coat to the model in preparation for the decal phase. I also set about painting the F-14’s exhaust nozzles and landing gear.

To achieve the burnt metal effect on the exhaust nozzles I primer coated them in gloss black acrylic, then I sprayed them with Alclad II Burnt Iron. Once this metallic coat was cured, I painted the inner liners with Buff and then again after drying time I clear coated the nozzles in preparation for weathering.
I used Tamiya’s weathering pastels, burnt blue, burnt red and copper to add the metallic burnt effects to the nozzles. Once I was happy with the effects, I then sealed everything in with VMS satin varnish.
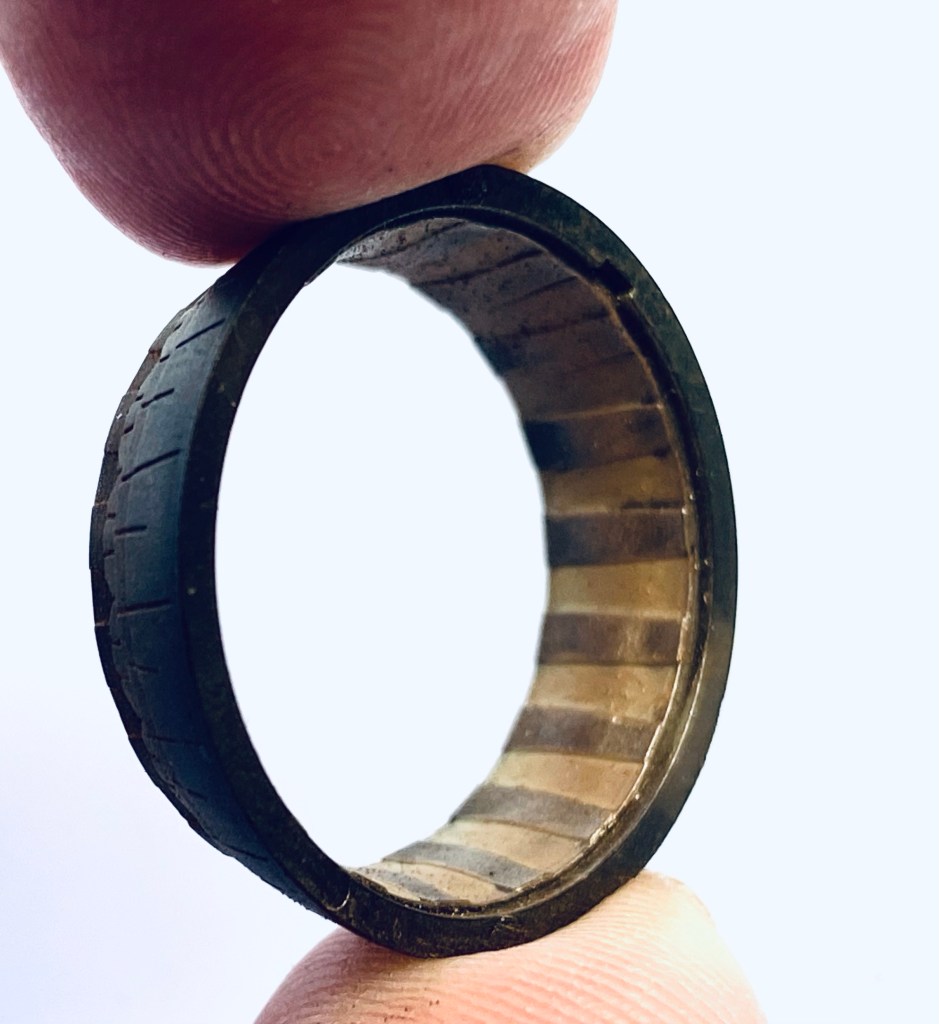
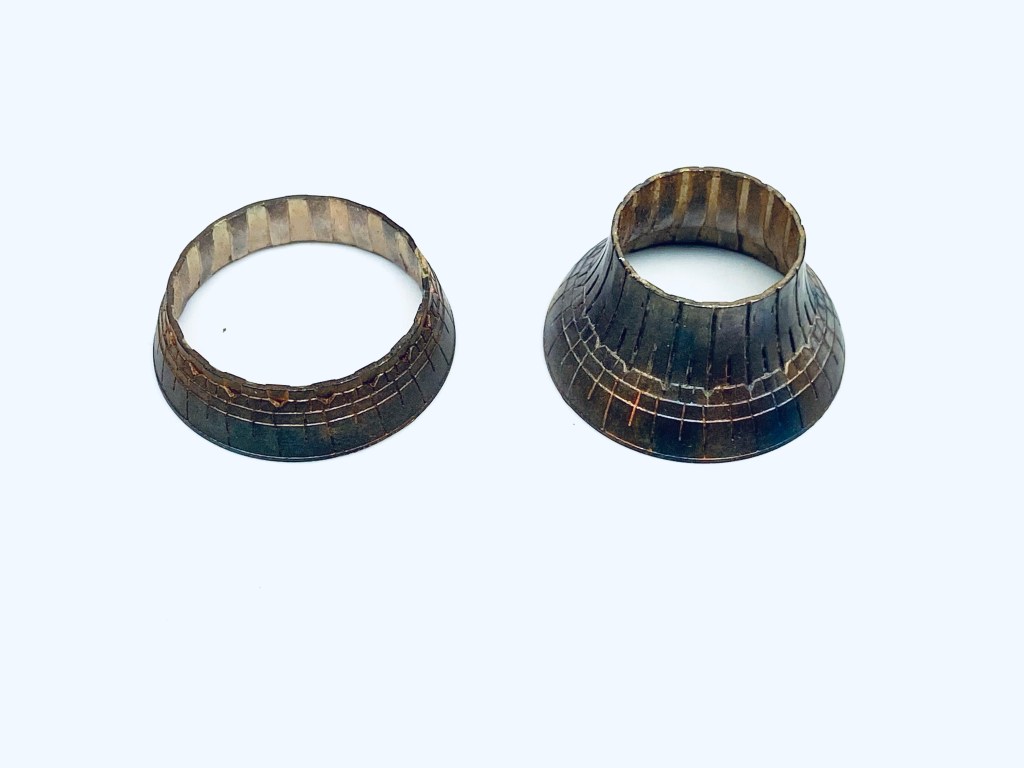
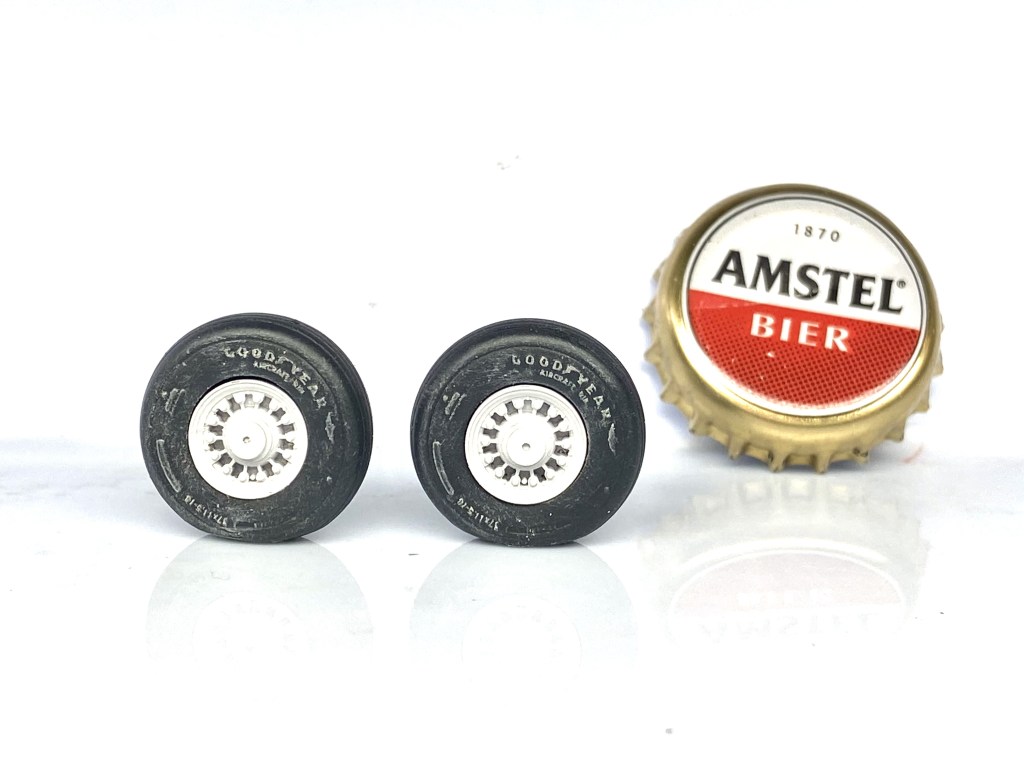
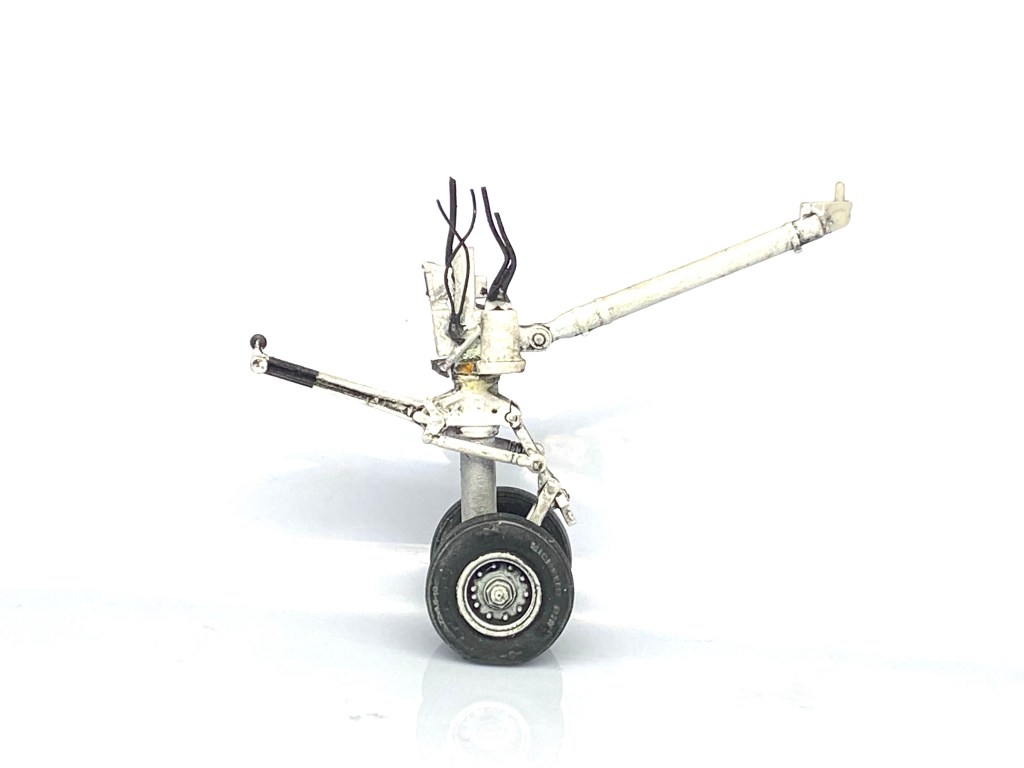
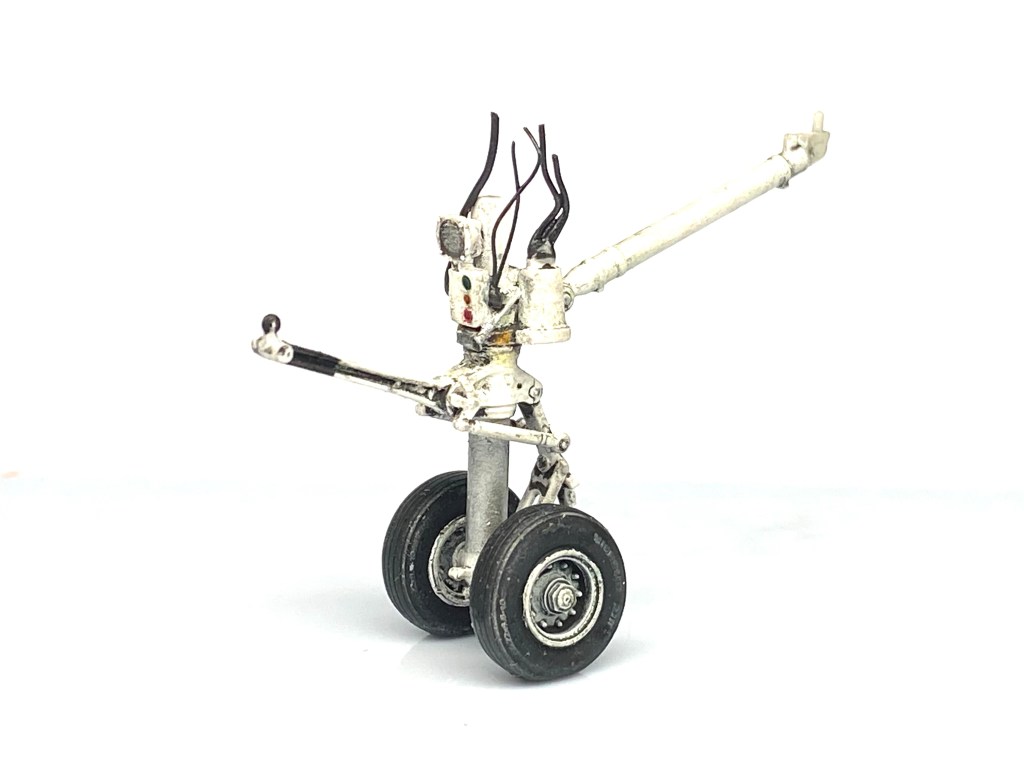
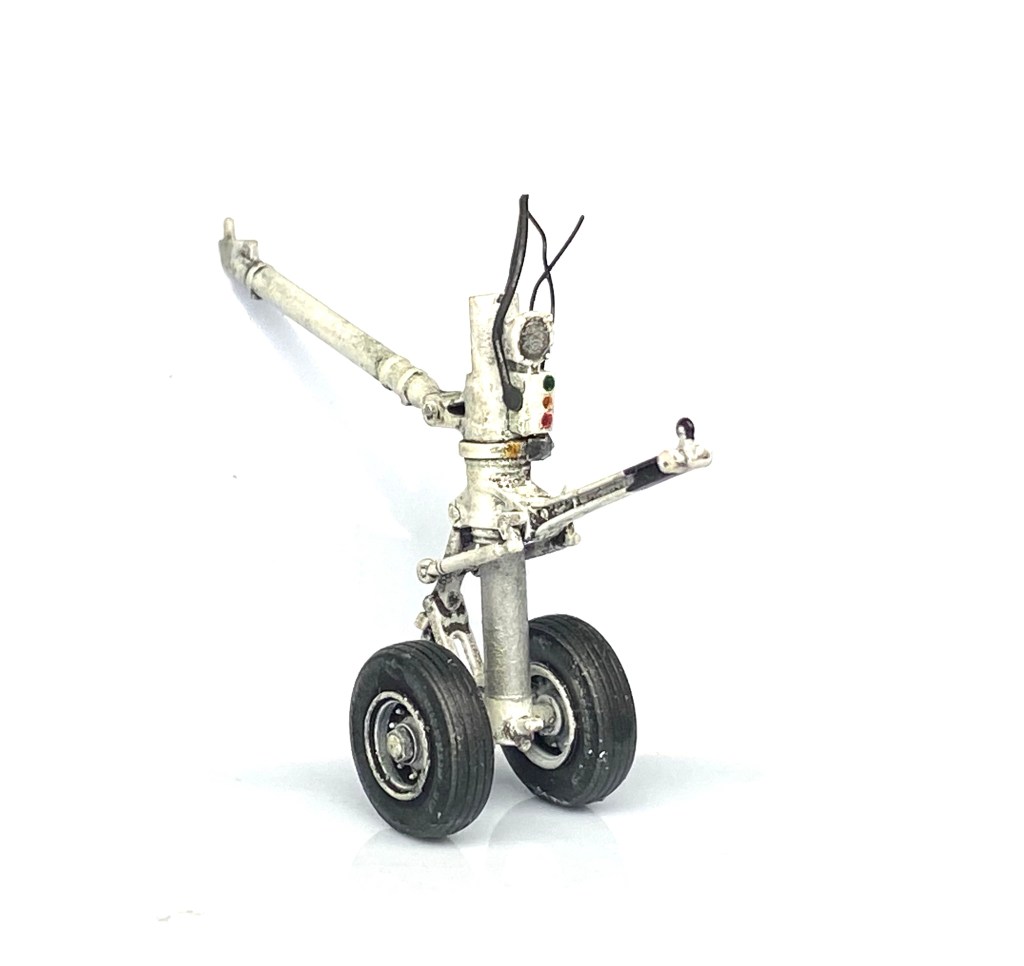
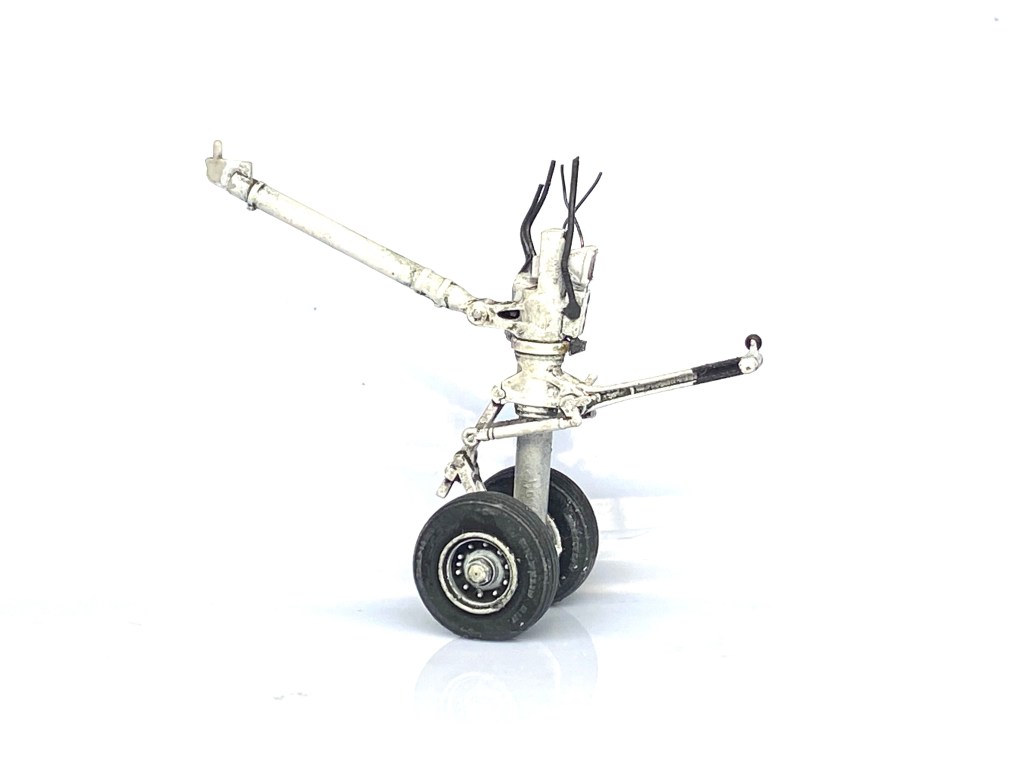
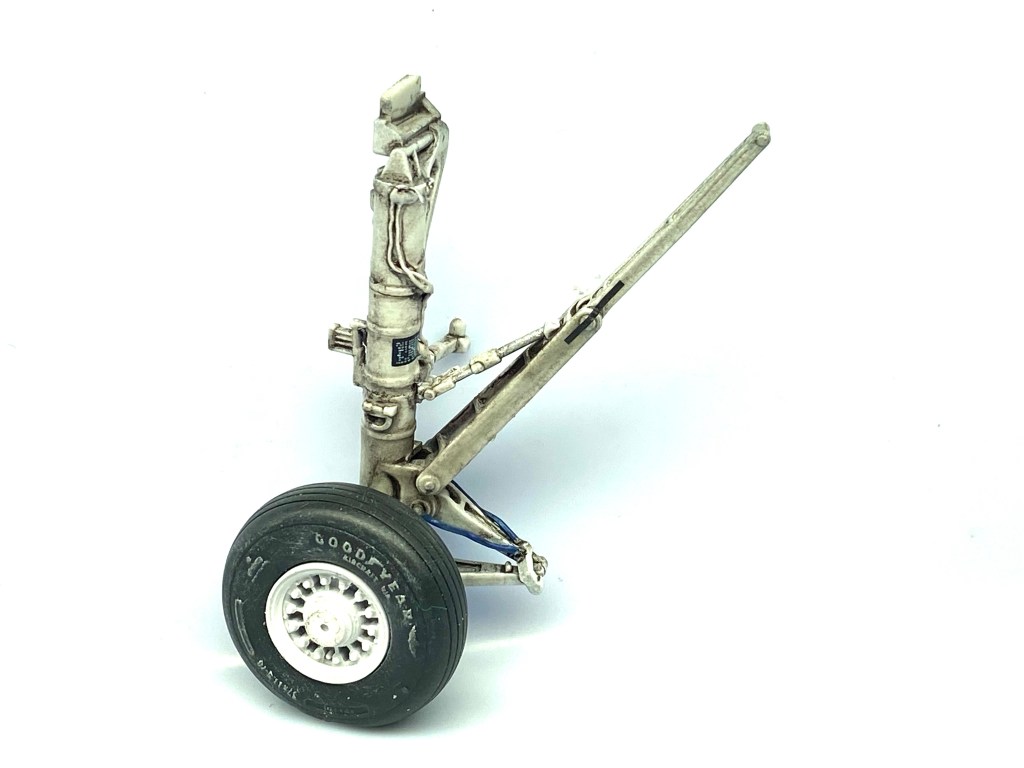
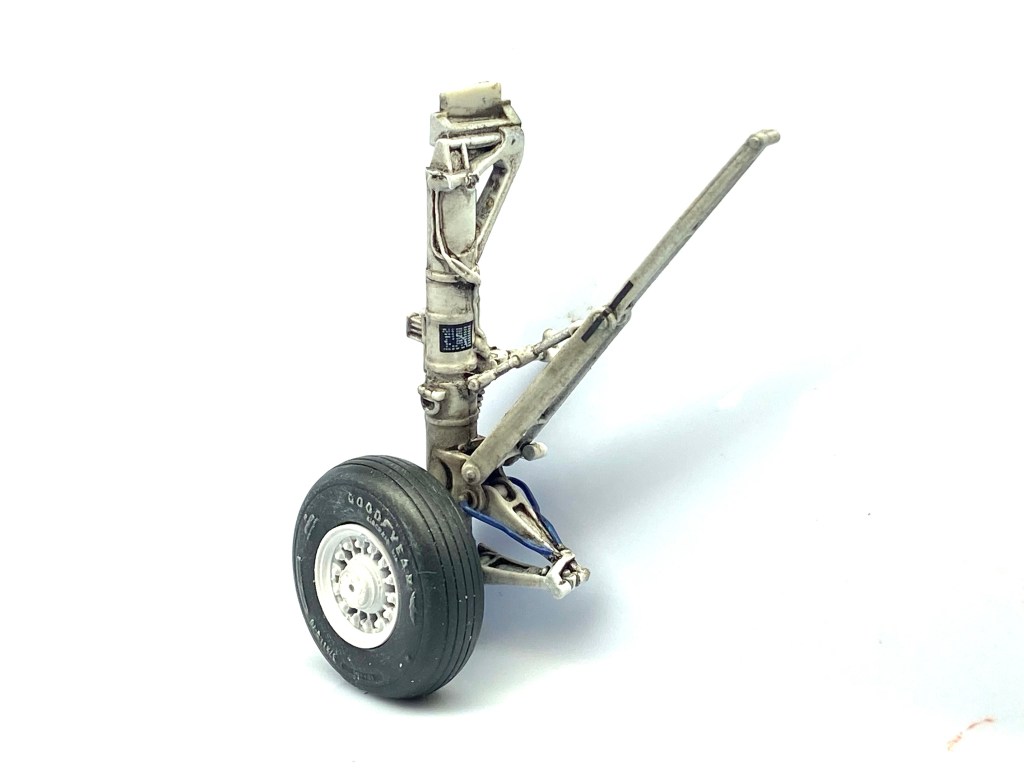
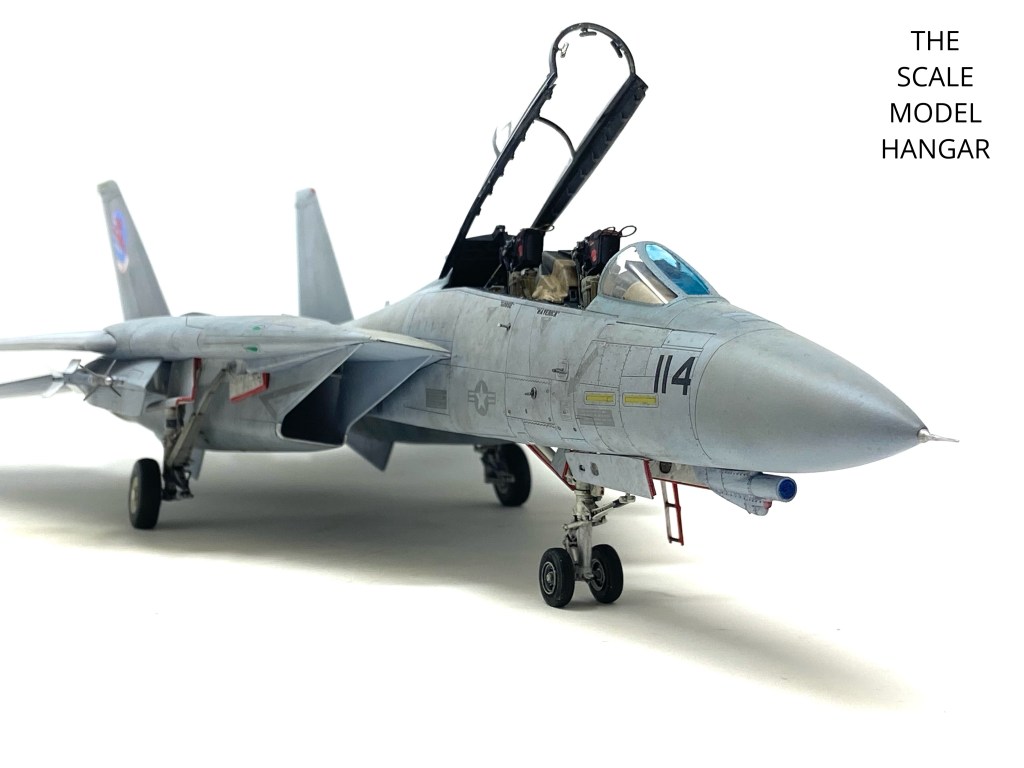
Next, I moved onto the Tomcats landing gear. By this time I had purchased a set of Eduard resin wheels for this model as the Bu No. that I was building was equipped with different wheel hubs from the early kit versions. F-14 wheel hubs are either Early, Mid or Late. For this model we are using the Mid issue hubs.
I assembled the nose and main landing gear as per the kit instructions and I added lead wire to depict the hydraulic lines found on the real aircraft:


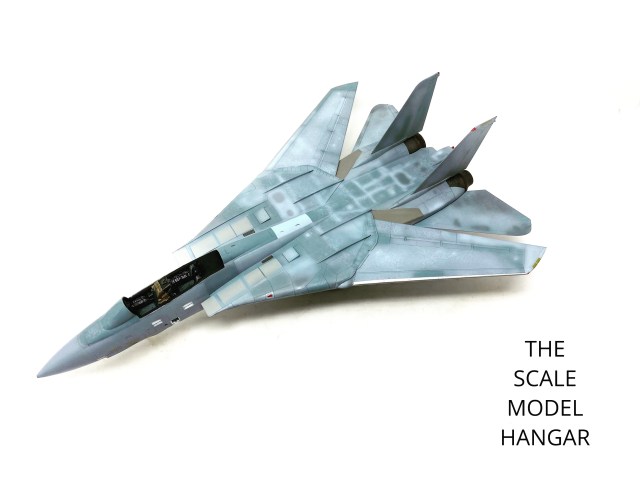
Returning to the airframe, it had previously been sprayed in gloss clear ready to apply decals. The Jeight Designs decals performed flawlessly, I throughly recommend them! They settled into the kits recessed details with a little help from Microsol decal solution and looks superb when dry.
Weathering!
As is my long standing method, all decal work was again sealed in with a clear gloss coat, I use Tamiya X-22 Clear acrylics for this as it provides me with a strong clear barrier to protect the all the previous work.
For the US Navy’s TPS grey scheme I chose to highlight the models engraved details with Mig AMMO panel line wash. These ready made enamel washes come in a range of colours that can enhance the look of the completed model. For this Tomcat scheme I used Blue Dirt. This dark blue shade is just right and not as stark as a dark brown or dark grey wash. Once I had picked out and highlighted all of the recessed details I then turned to the OPR (Oil Paint Render) technique to apply all the smears and smudges of grease and dirt that appear around a navy airframe. I used a combination of Ochre, Starship Filth and BurnT Sienna to replicate the dirt seen on the movie jets airframe.
This was a long process to get the look I wished to achieve, but I think it was worth my time. The entire airframe was given it final clear finish, a generous coating of VMS satin varnish.
I was very close to the finish line now so I launched straight into painting and detailing the AIRES ejection seats and detailing the canopy frame. I also painted and finished the weapons and figures.

Here are some photo’s of the finished airframe with the all the external parts added to the model:


Not too much later, I had painted up and detailed a display case for the model and my figures were as good as I could make them. It was time to complete the finished display depicting a moment in the TOPGUN story with Maverick and Goose on the ramp at NAS Miramar back in the long, hot summer of 1986……..
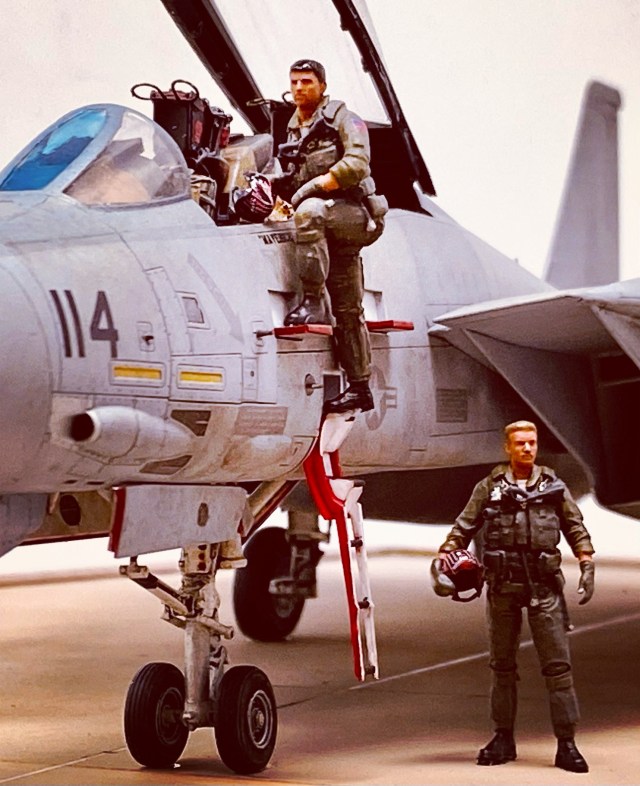


I hope you have enjoyed this build as much as I have, now I have my own piece of TOPGUN memorabilia on my self and one hell of a cool looking’ F-14!
Time to turn and burn! Happy Modelling!
Darren.

As I’m a massive fan of both the film and the F-14, I would just like to say you have nailed as an artist also with the details of how you have achieved the your amazing results
Looking forward to
More of your projects in the Hangar
LikeLiked by 1 person
Thank you Tony! You are most kind. Glad you like it as much as I do!
LikeLike
Absolutely outstanding build, and a great article too, got me in the mood for a Xmas TopGun double bill now.
The Tamiya cat’s really are the biz, I’ve built the ‘D’ in VF-31 markings and have an ‘A’ in work, and maybe another ‘D’ lurking in the stash!
Keep up the awesome work, and in the meantime have a fantastic Xmas and New Year 🎄🍻
Kind Regards,
Grae
LikeLiked by 1 person
Thank you so much! I love the VF-31 F-14D’s too. Thanks for your kind wishes and Merry Christmas to you and your family.
LikeLike