Hello and welcome back to The Hanger.
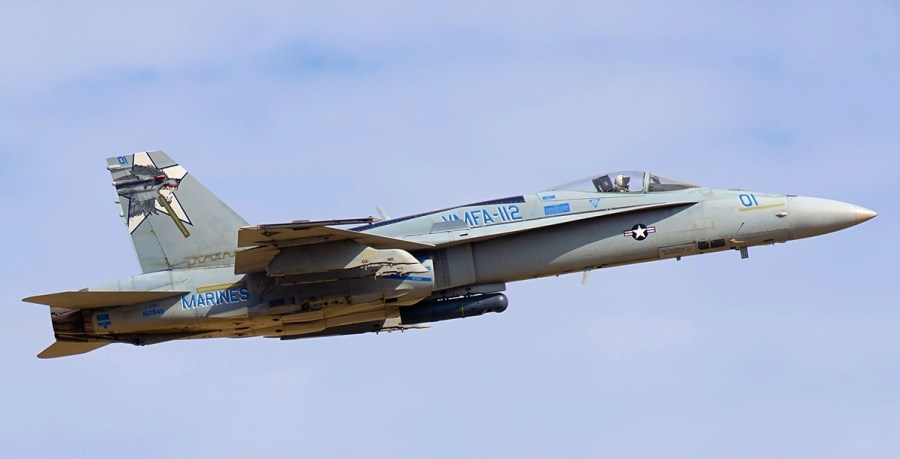
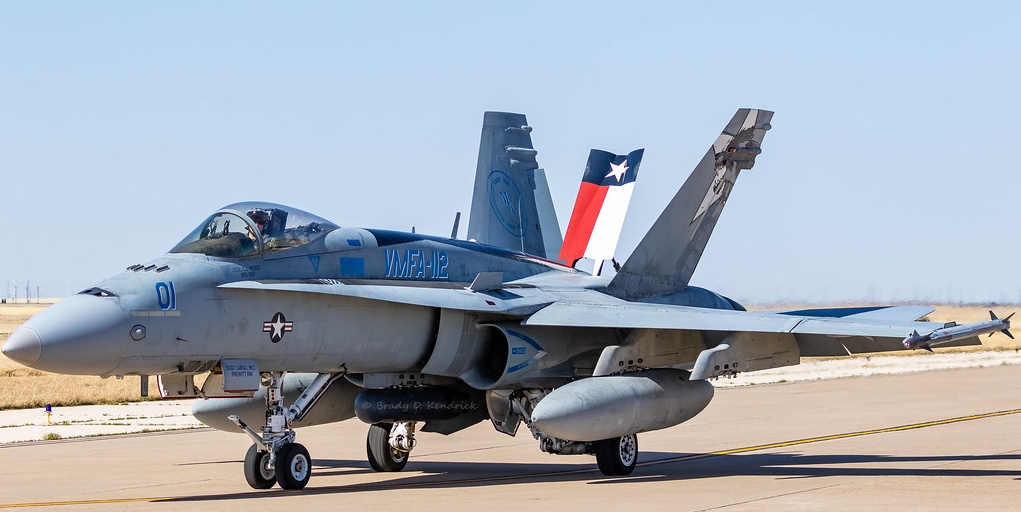
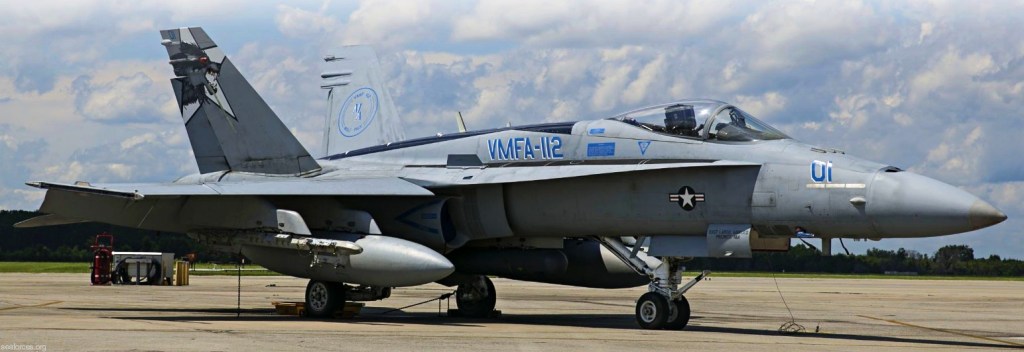
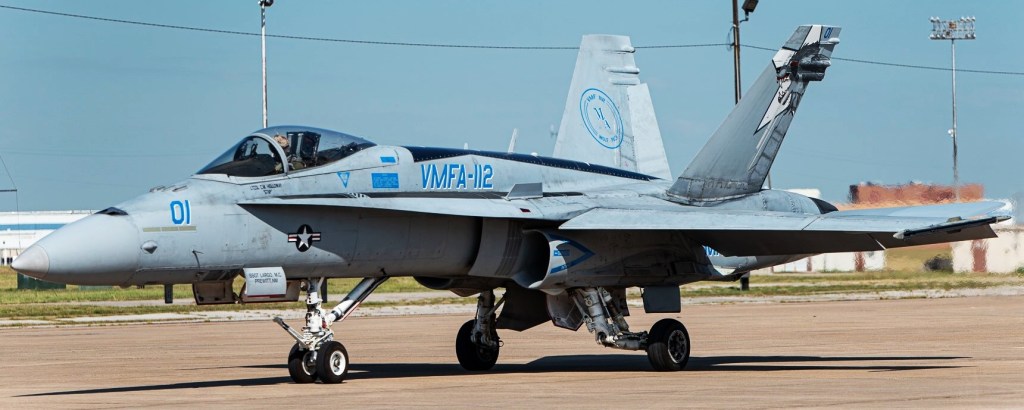
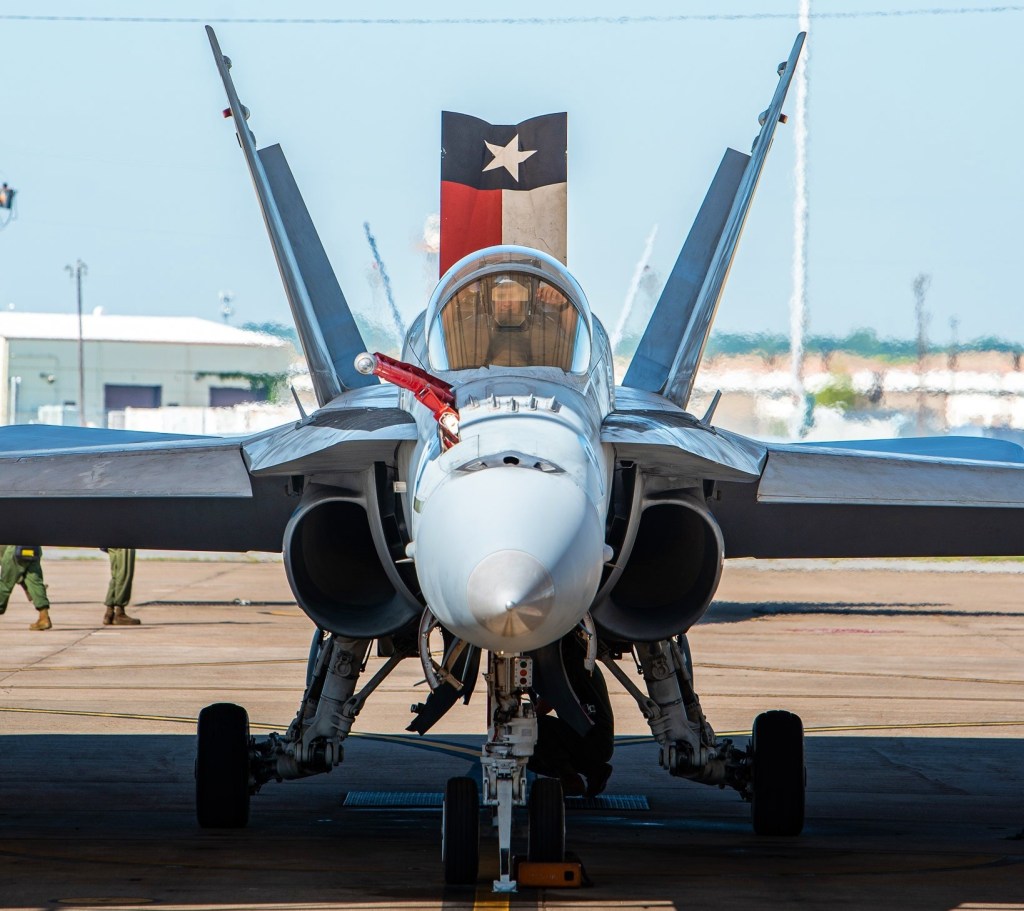
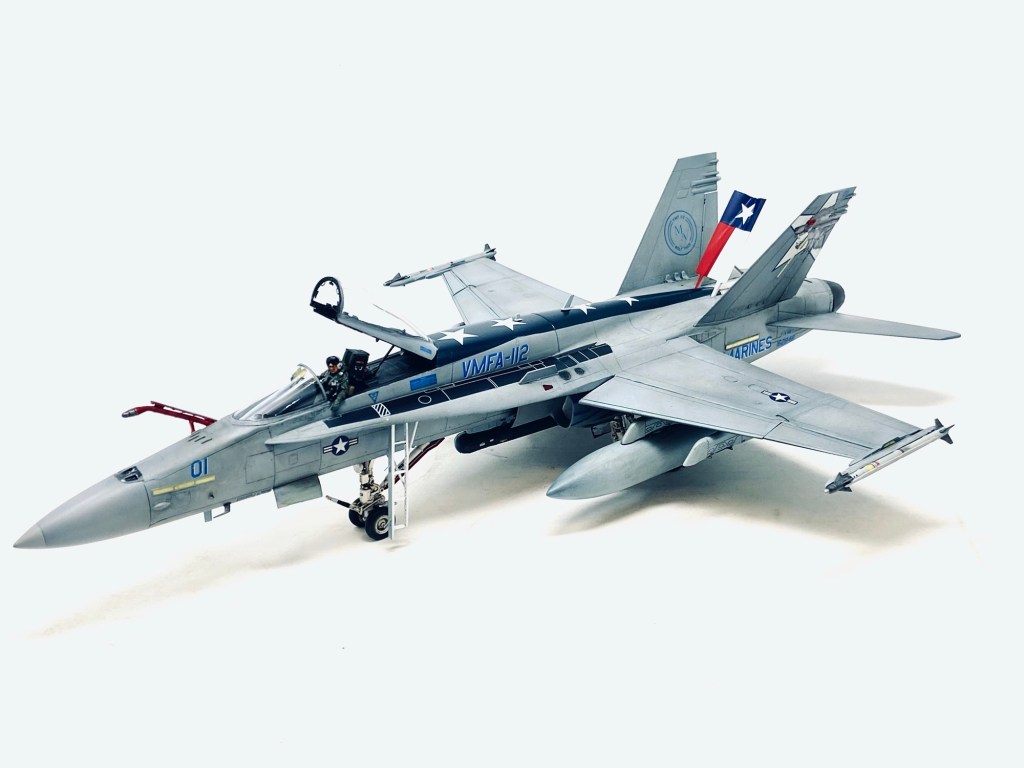
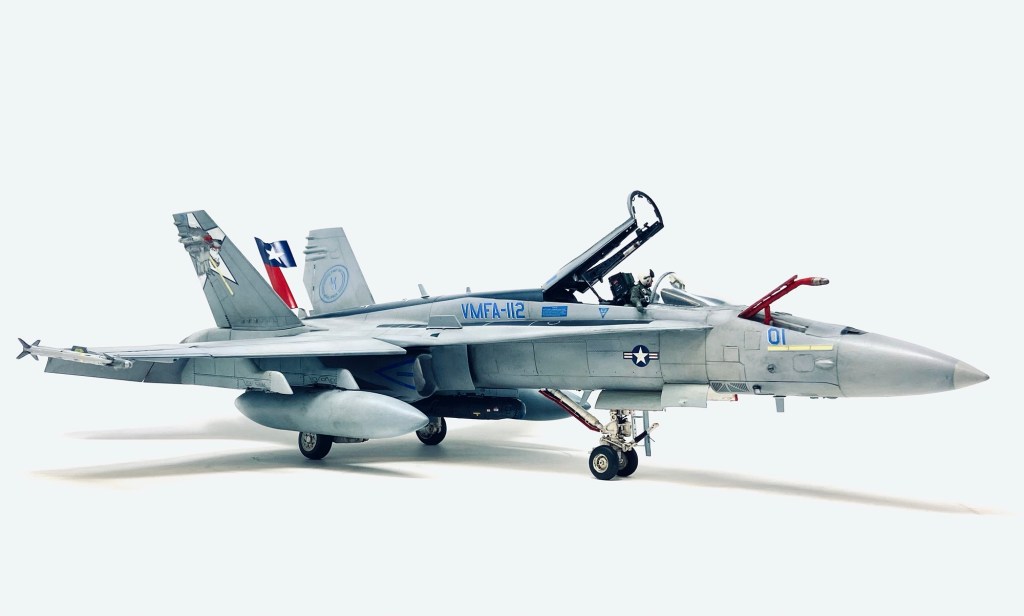
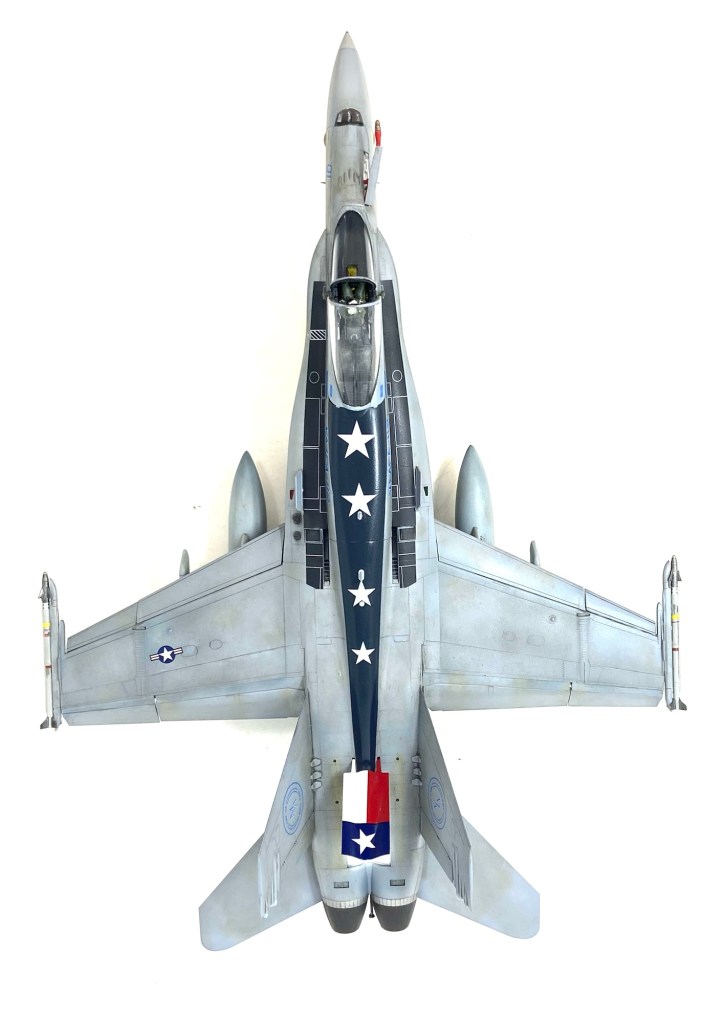
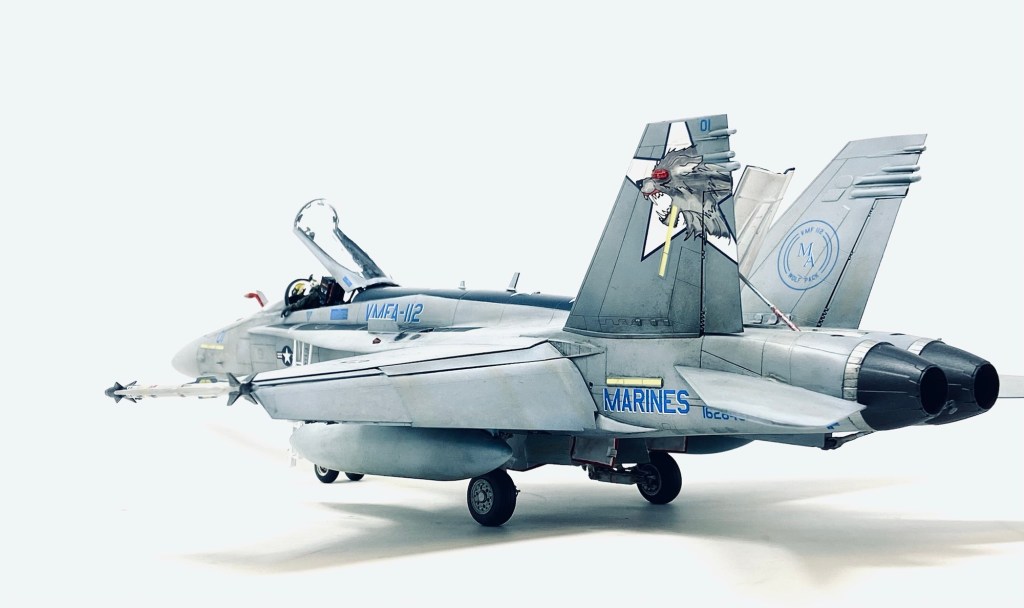
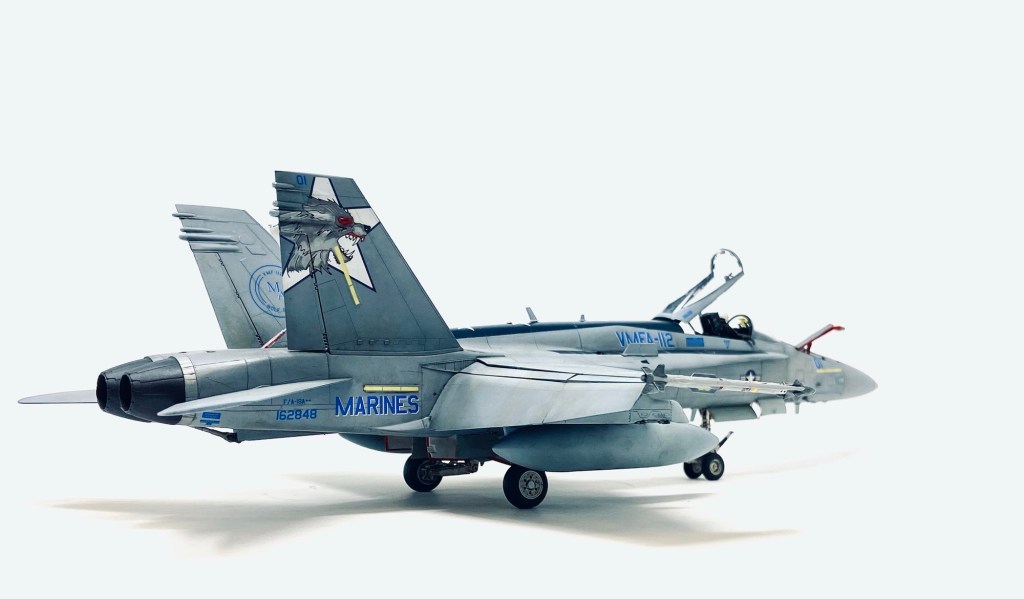
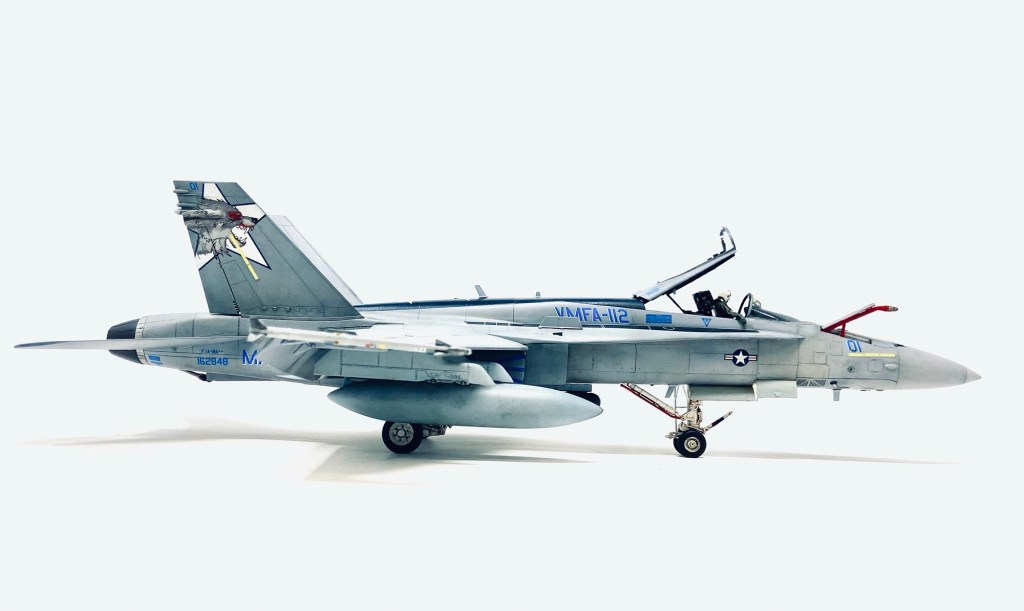
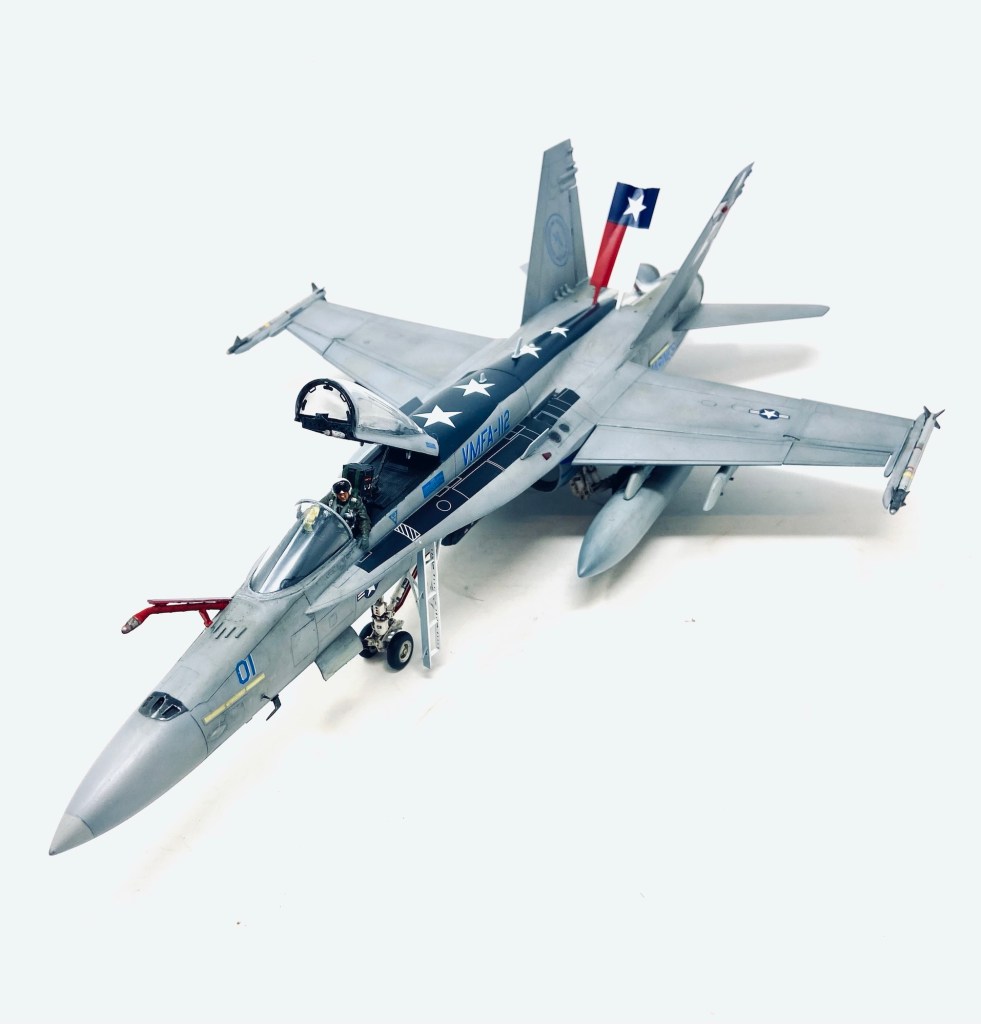
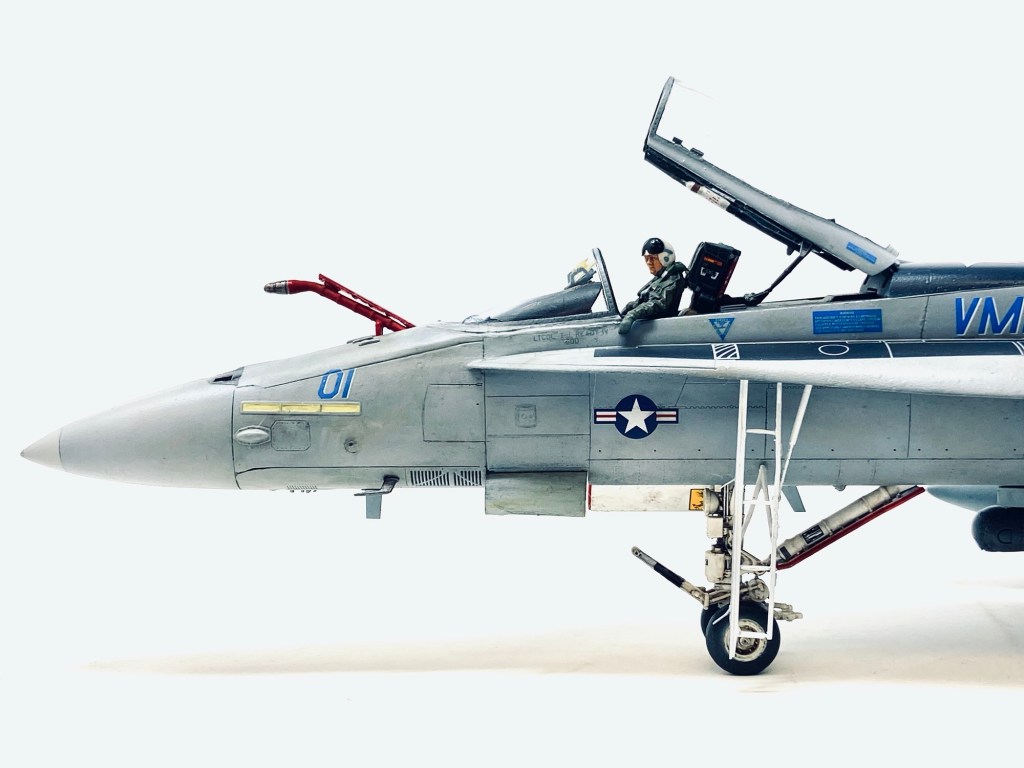
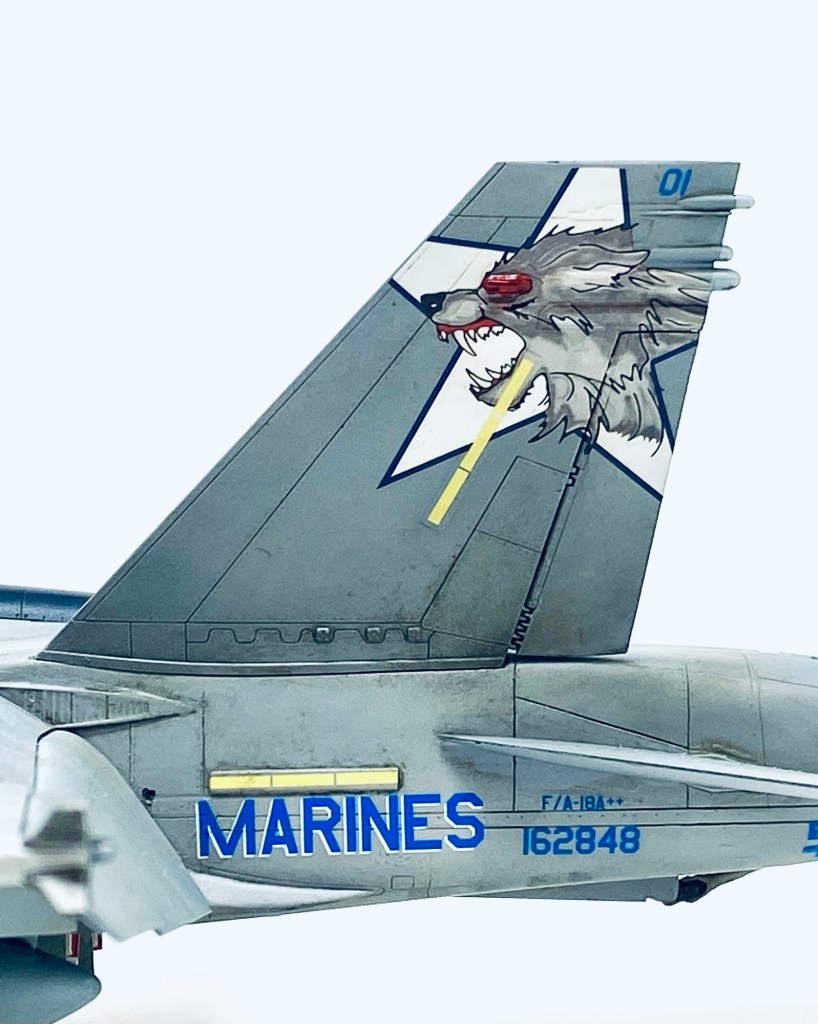
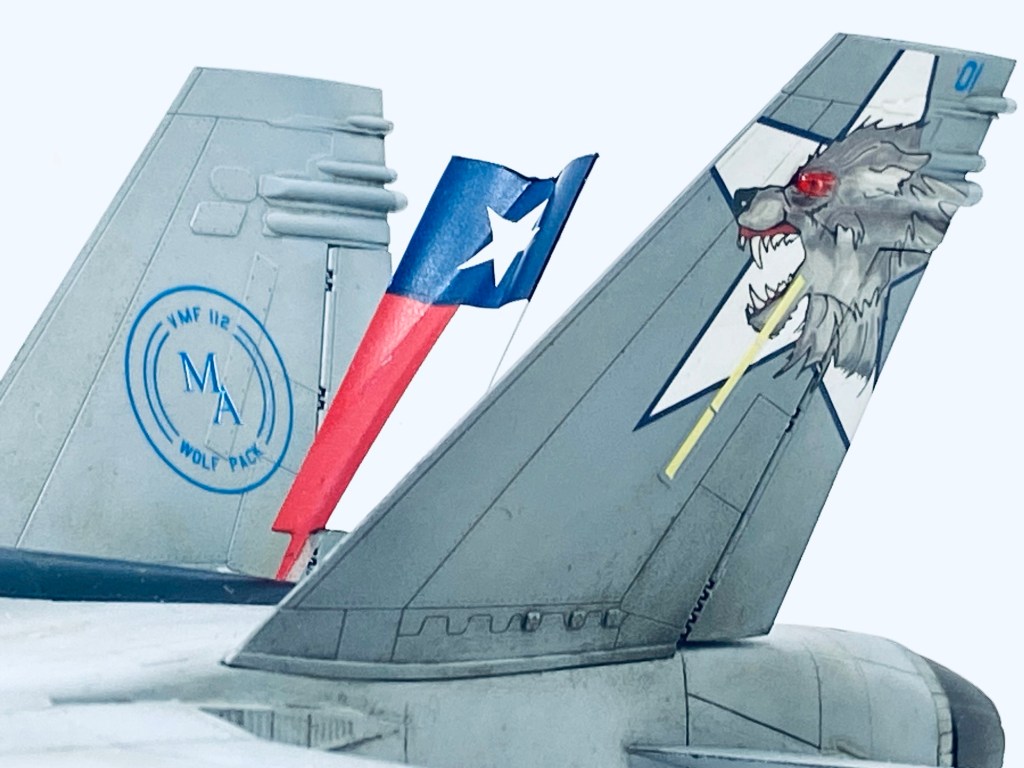
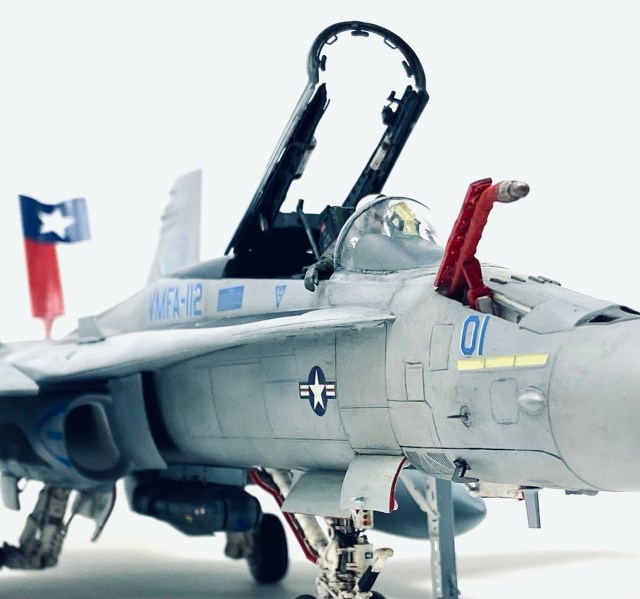
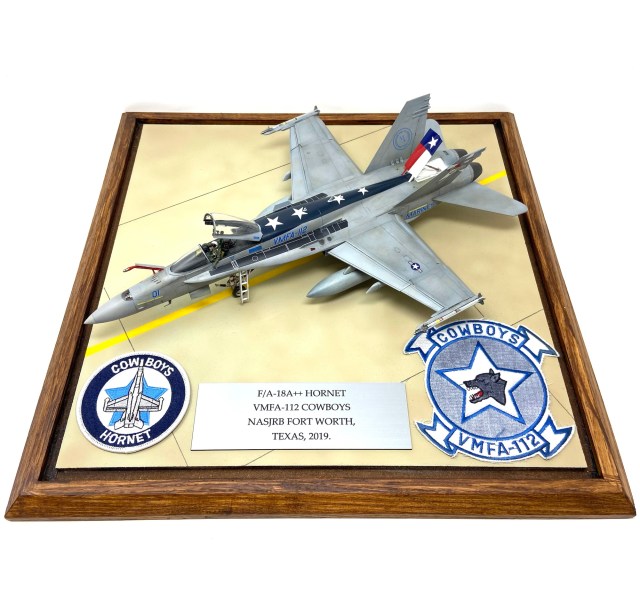
Every once in a while I will see an aircraft that will just stop me in my tracks, make me stare eyes wide open and dream of building it in miniature. This is exactly what happened when I saw this beautifully adorned F/A-18A++ Hornet. This F/A-18 Hornet belongs to USMC squadron VMFA-112 COWBOYS. This squadron is based at NASJRB, Fort Worth , Texas. This unit falls under the command of Marine Aircraft Group 41 (MAG-41), 4th Marine Aircraft Wing (4th MAW). Their tail code is MA.
A little history about USMC Squadron VMFA-112:
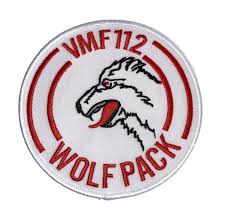
During World War II the squadron known then as VMF-112 Wolfpack saw extensive action throughout the Pacific Theatre of Operations especially at the Battle of Guadalcanal as part of the Cactus Air Force. By the end of the war, its 140 air-to-air kills ranked it third among Marine Corps squadrons.

In 2002, VMFA-112’s aircraft were reconfigured to the F/A-18A+ aircraft. The Cowboys were the first Reserve squadron to deploy on a Western-Pacific exercise since the Korean War. In the summer of 2004, the squadron supported Operation Jungle Shield and Exercise Southern Frontier while operating out of Japan, Guam and Australia. In 2005, VMFA-112 deployed to Oerland Main Air Station, Norway, for the multinational exercise: Battle Griffin. VMFA-112 has been working closely with sister squadron VMGR-234 on what has been called the “Herc/Hornet Expeditionary Package.” The conceptual program would allow an F/A-18A+ to land on a hastily constructed runway and refuel and rearm quickly without having to return to base, as is the current operating procedure. The program would be in keeping with the Marine Corps nature of self-sufficiency.
The squadron was deployed to Al Asad Air Base, Al Anbar Province, Iraq in late 2009. During their deployment, the Cowboys supported the ground withdrawal from the major cities in Iraq, supported special forces during numerous missions, and provided key aerial surveillance for intelligence. The squadron was the last fighter/attack squadron to leave Iraq closing that chapter on the Iraq War.

Building the dream
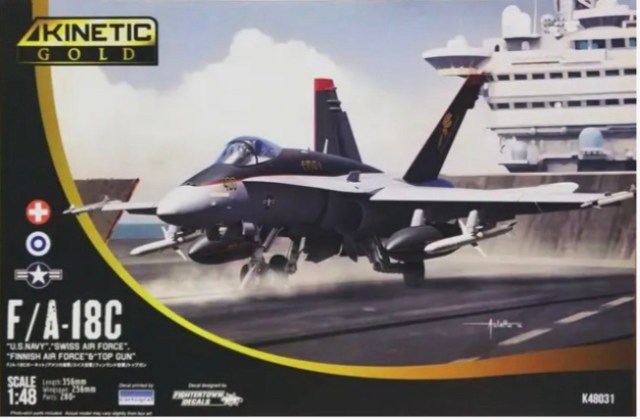
Having seen this great looking Legacy Hornet, I knew I just had to build it and have it my collection. Finding an F/A-18 model kit in 1/48 scale was easy enough. Hasegawa, Hobbyboss and Kinetic all offer models of the C model Hornet in this scale and they can all be modified to the modellers own specifications. The trouble was, I could not find for love or money, the 1/48 scale decals I would need for this project.
Last year, fortunes turned and it was announced by Two Bobs Aviation Graphics that they would be producing a commemorative decal sheet for the USA IMPM national convention that all attendees to the show would receive. Unfortunately I was not able to go and I went on various Facebook modelling groups in the hope that someone, somewhere just might have the sheet and be willing to trade. I was lucky that two awesome individuals offered to help me out and within the hour a fellow modeller from IPMS USA had generously offered to send me the markings for for free. Thank you Phil Peterson!
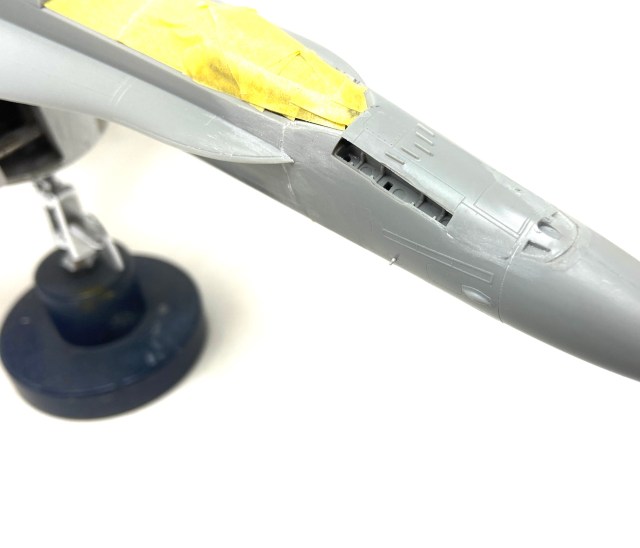
I started the project with a 1/48 Hobbyboss kit and although nicely detailed, the kit did have some issues that were a dealbreaker for me. The instrument panel is buried too far inside the forward cockpit and the intakes were not the best shape. The more I tried to improve it, the worse things became. But I still pushed on and eventually had a decent airframe. One thing remained, replicating the blade antennas on the nose of the aircraft just forward of the cockpits windscreen.
I searched for some aftermarket blade antenna’s in 1/48 scale but none could be found. I resorted to an attempt at scratch buying my own, which I did and I was pretty pleased with myself for doing so but when I saw them attached to the model, they were still too large for 1/48 scale. I and my tired eyes had just about had it. I wanted so much to make this model as accurate as I could and this one detail had stymied me!
Sitting back, trying to figure my problem out, I happened to notice quite by chance, a build of Kinetics F/A1-18C Hornet and it had the very antennas I needed attached to it! Further enquires quickly revealed that Kinetic’s “Charlie” model was tooled with the blade antennas already on. So I put my old Hobbyboss Hornet away and ordered Kinetics model tooling of the Legacy Hornet.
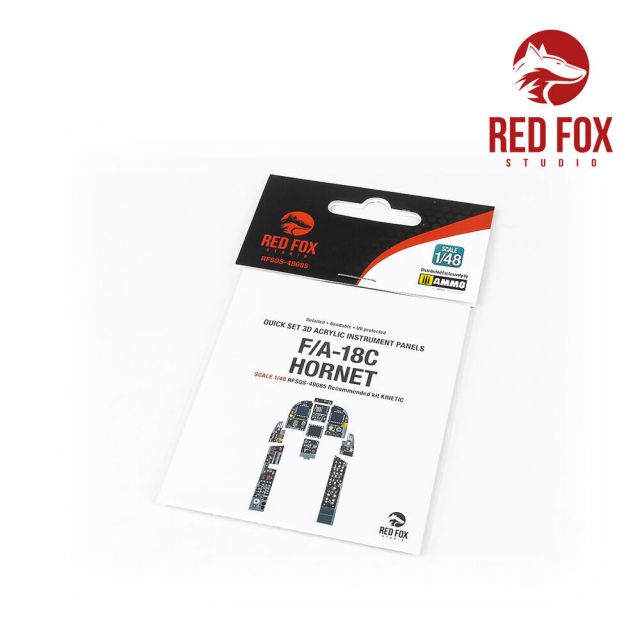
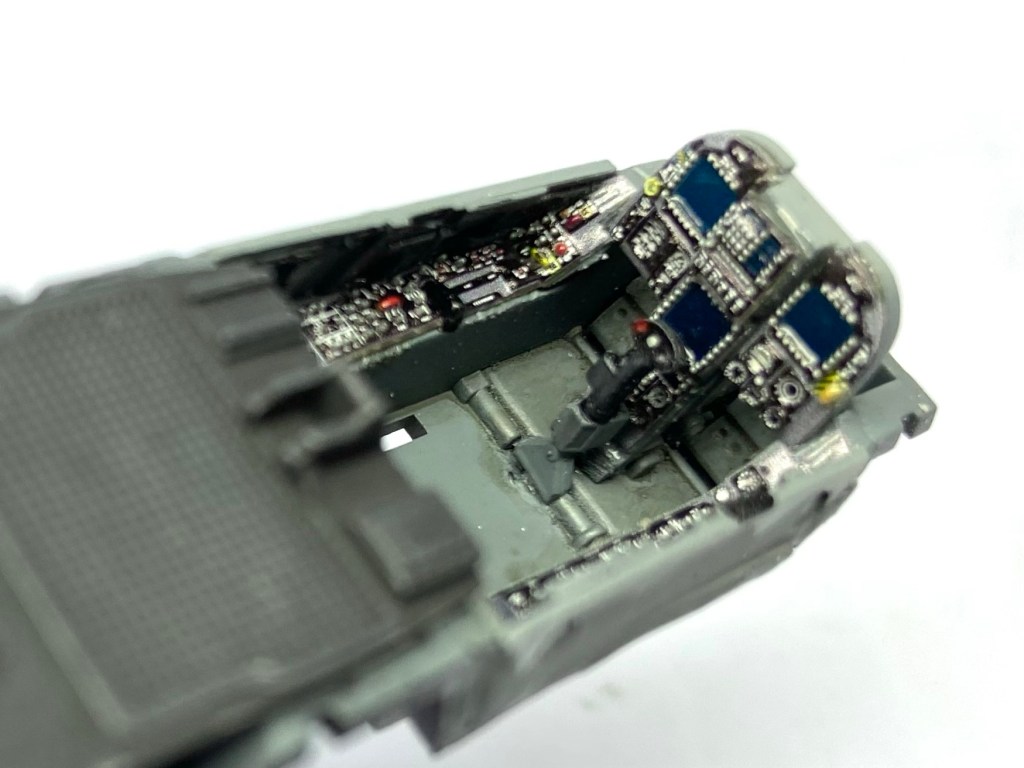
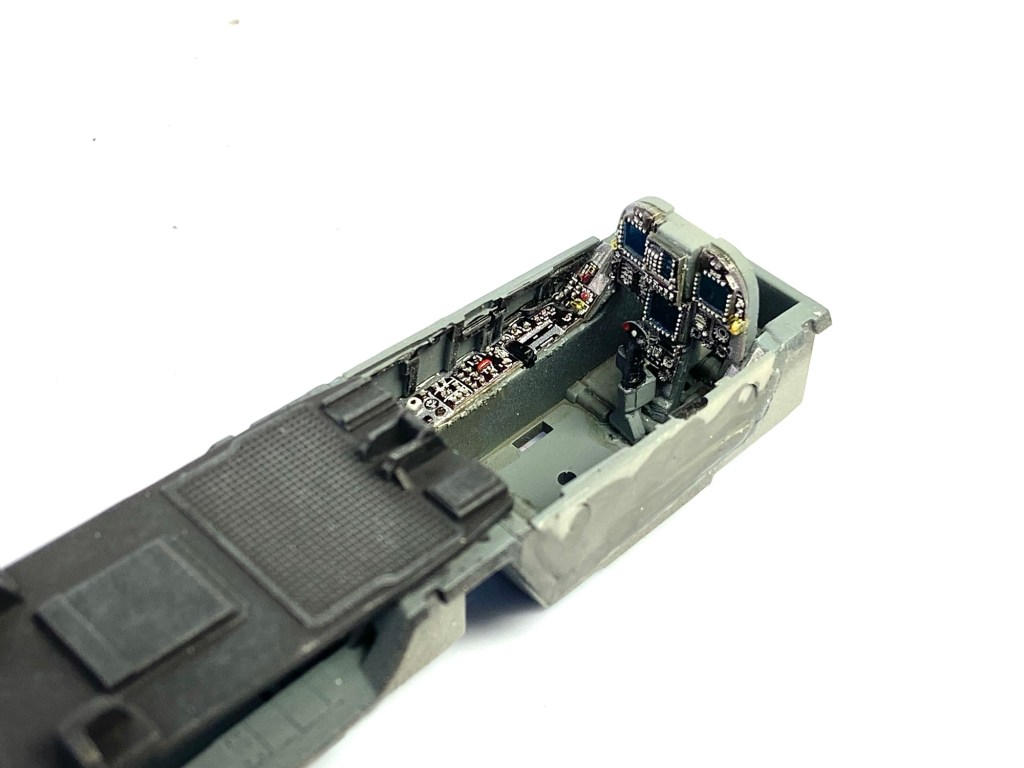
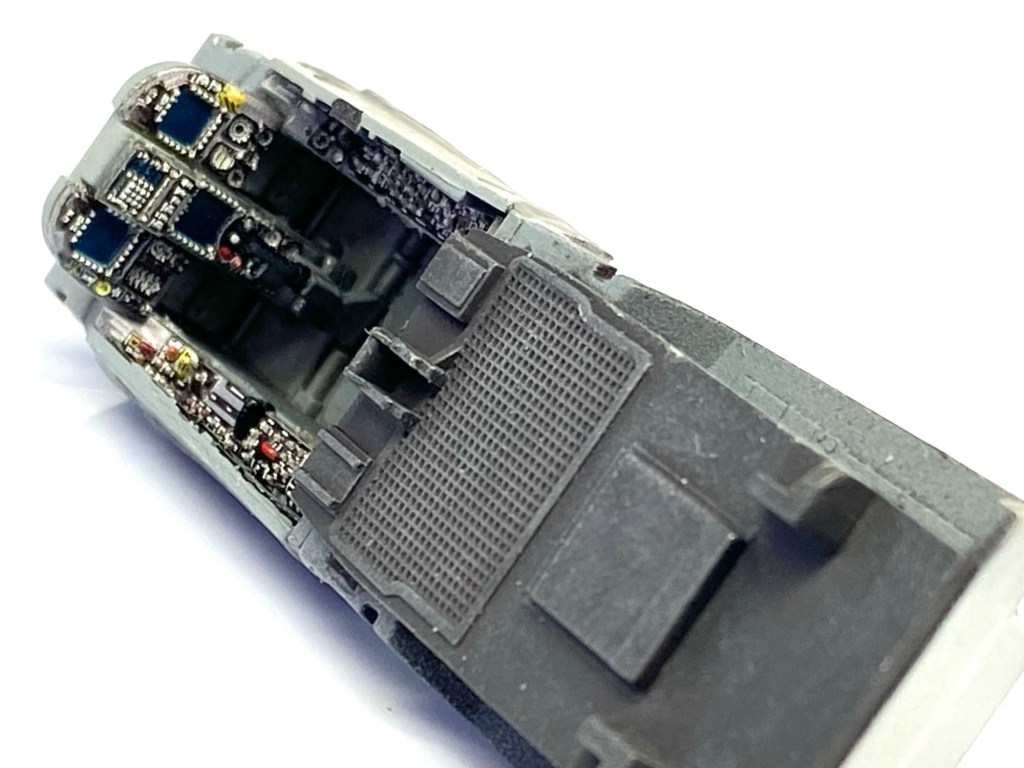
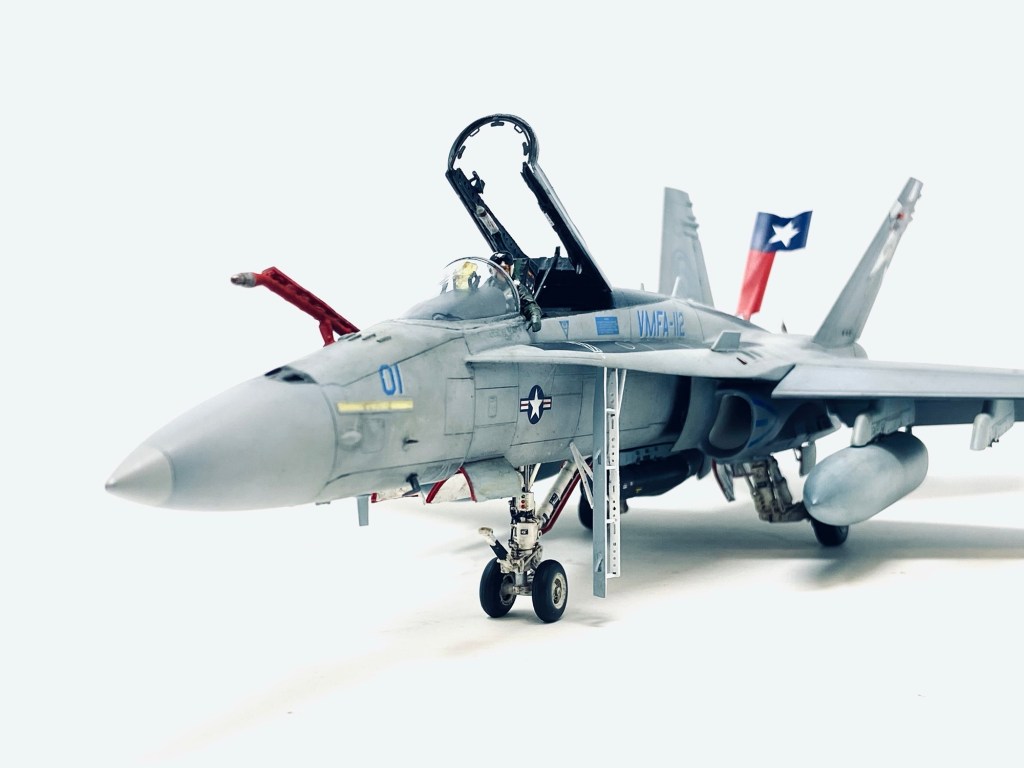
While ordering my Kinetic kit I also ordered some aftermarket items to further enhance my build. I purchased a cockpit detail set from Red Fox Stuido’s. I have to say Red Fox really do lead the way in cockpit enhancements. Their highly detailed and realistic 3d resin printed, pre painted parts are specifically designed for the Kinetic kit and drop into place with a dab of white glue.
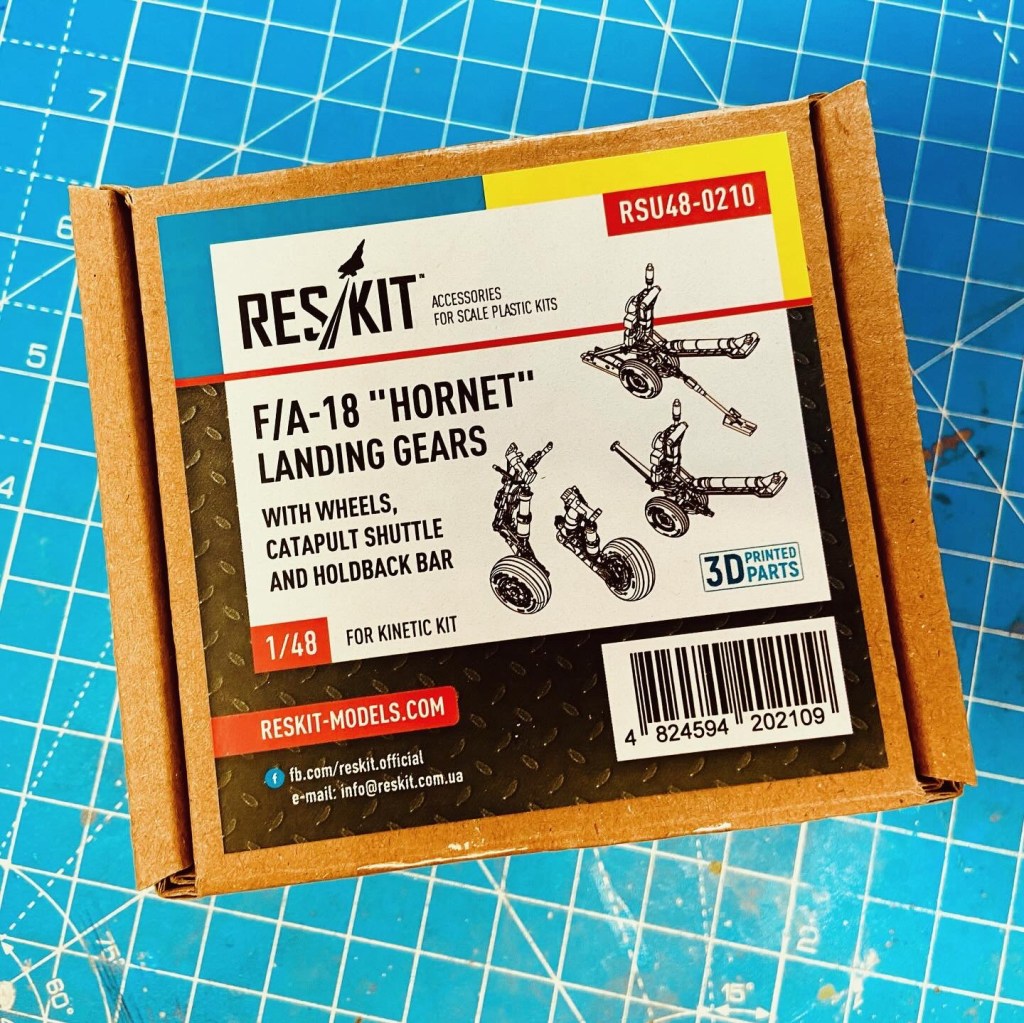
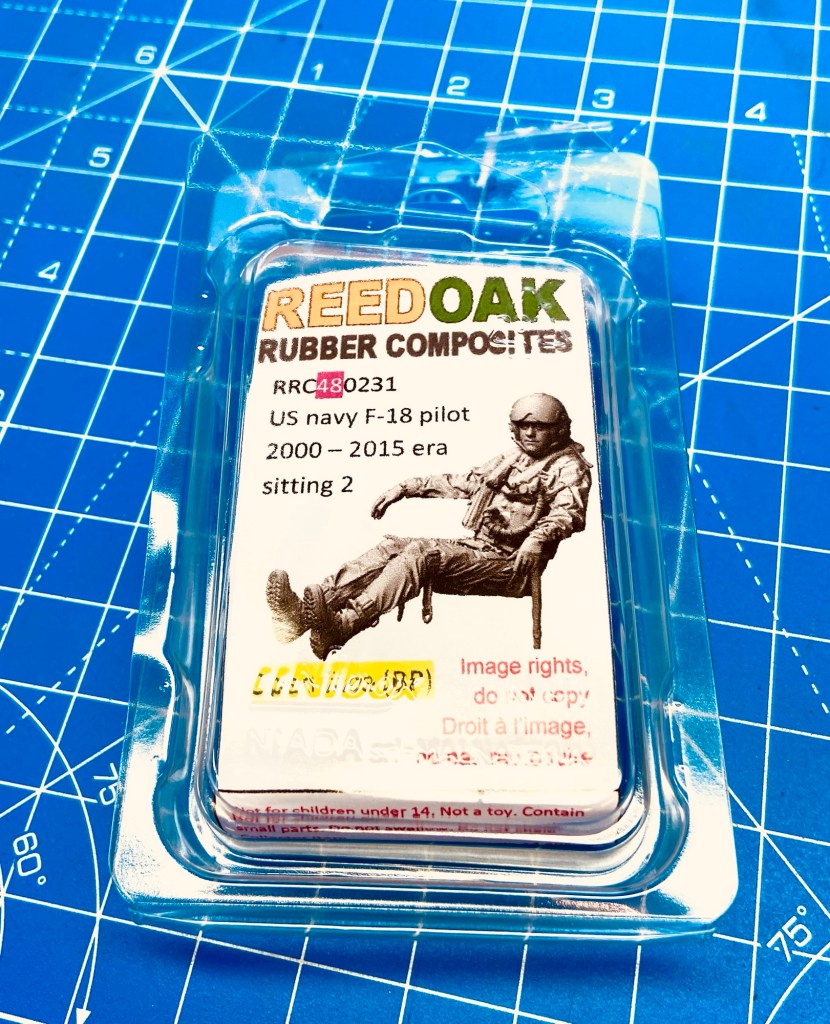
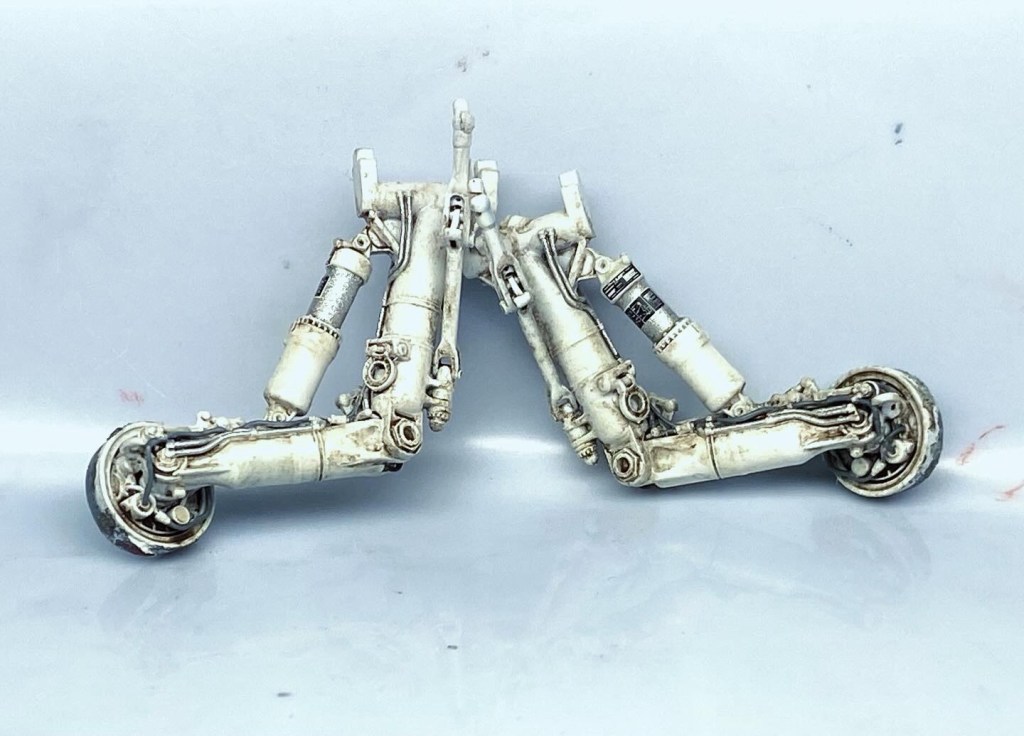
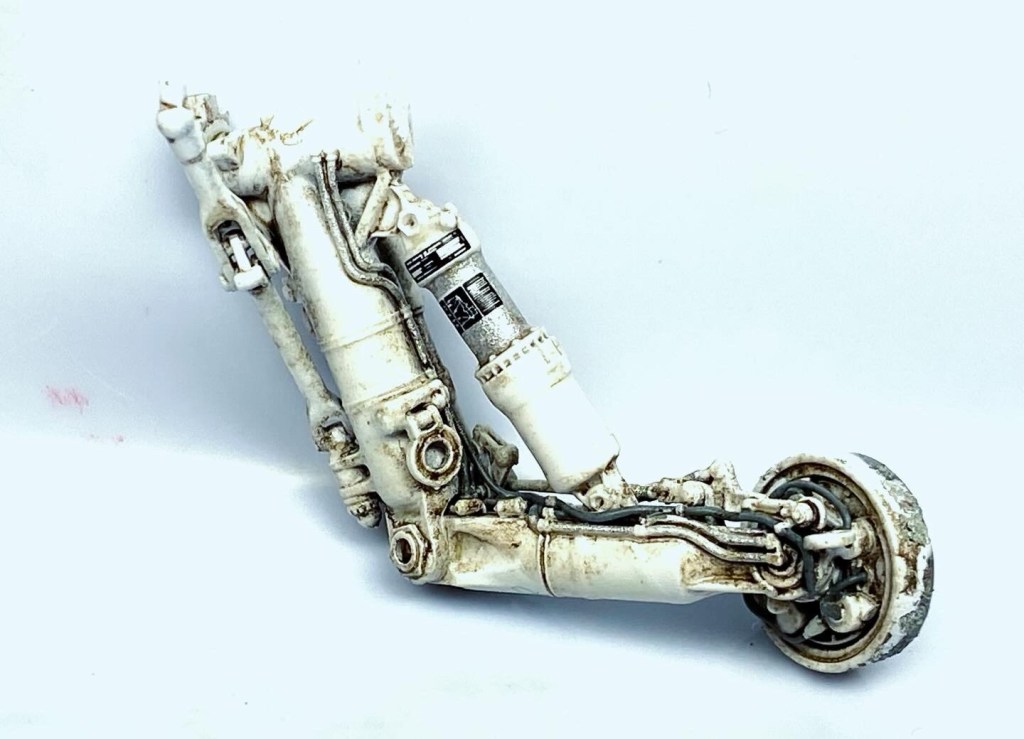
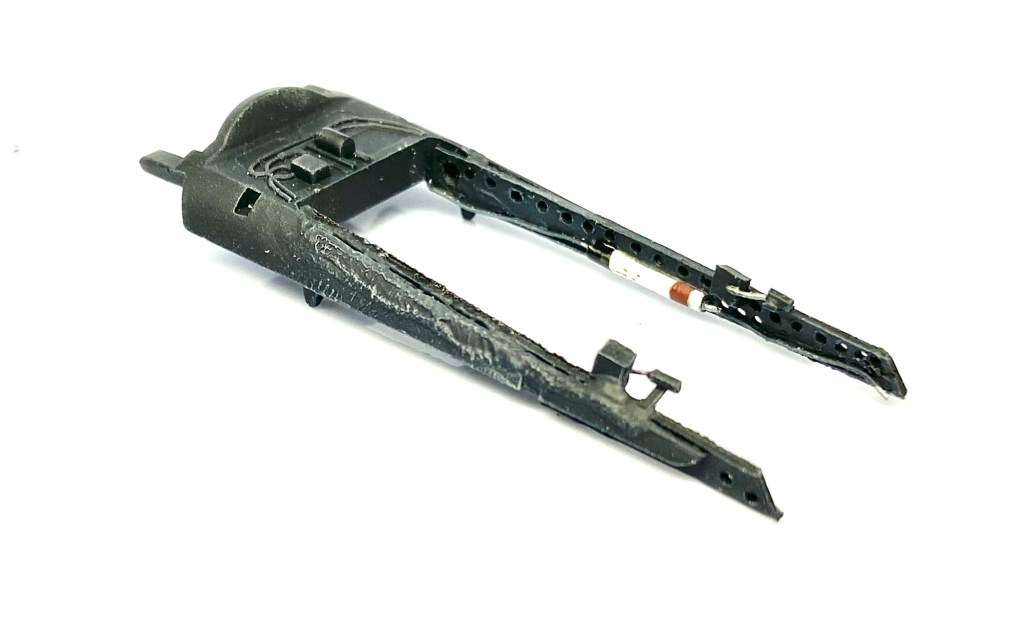
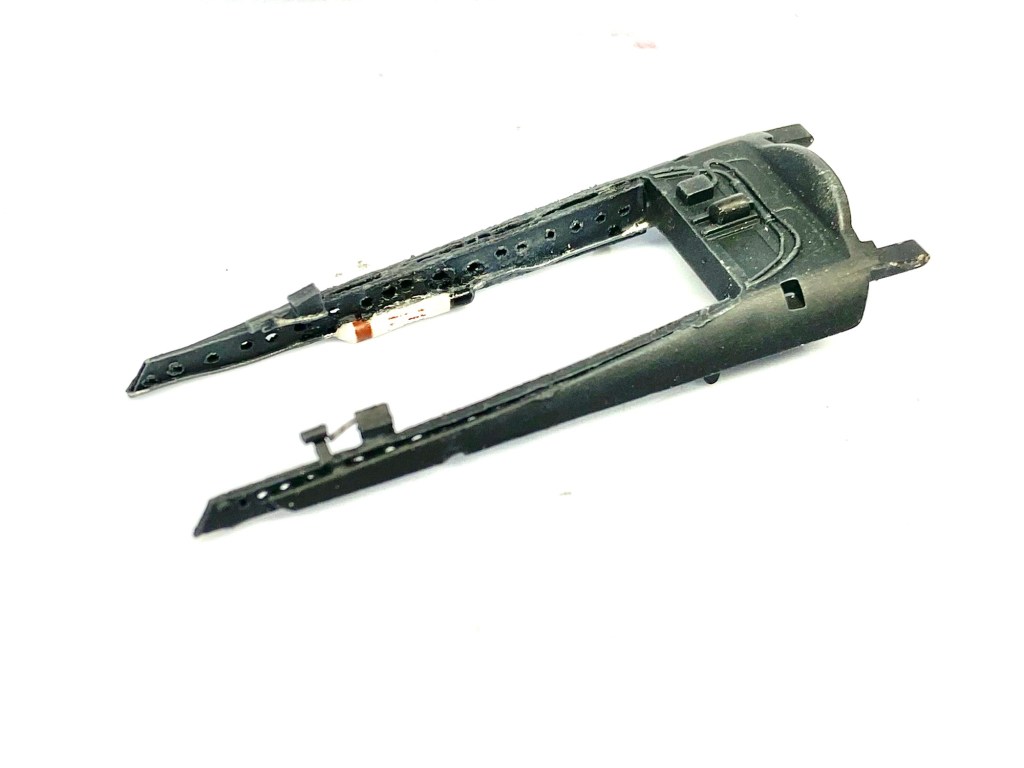
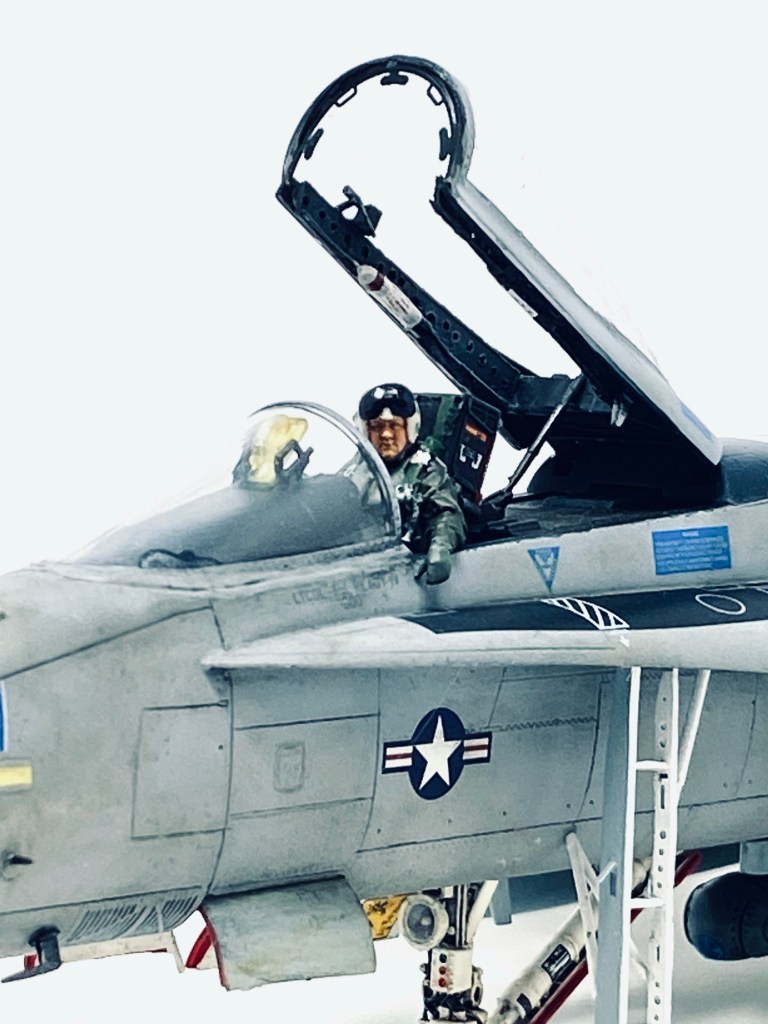
I also bought some Reskit 3d printed landing gear and a pilot figure from Reedoak:
Building the Legacy Hornet
The Kinetic F/A-18C can easily be used to portray a F/A-18A++. The A++ models are older airframes modified to the same specifications as the C model. Now with all that I needed, it was time to get to work and build the aircraft that I hd been dreaming about for so , so long. Work commenced in the cockpit:
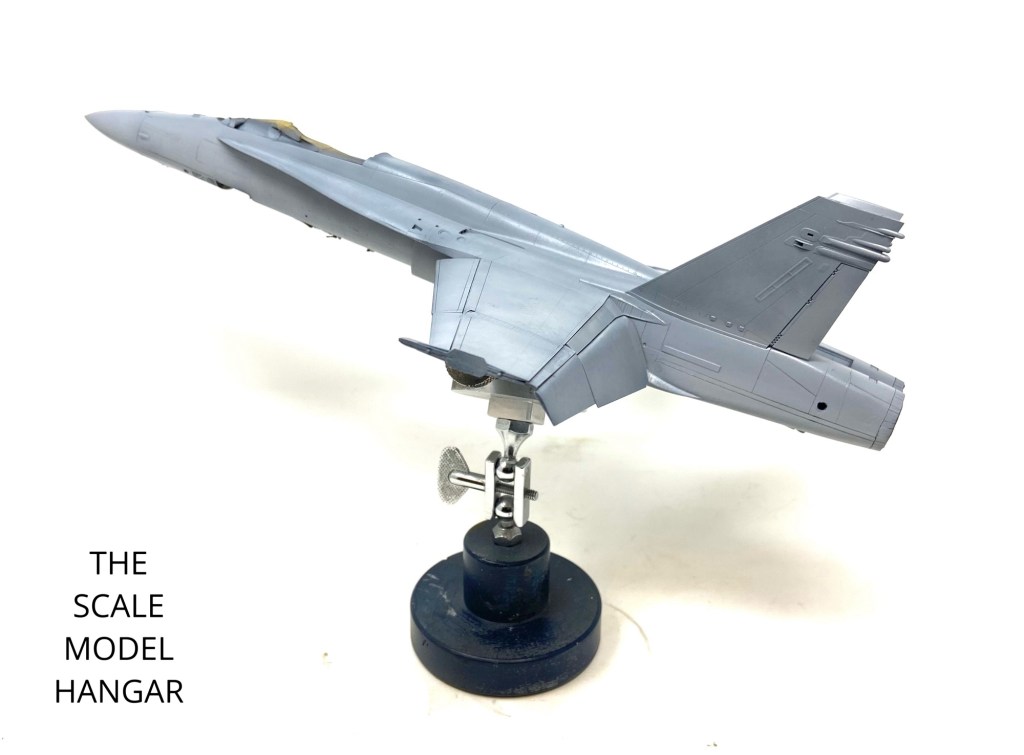
With the Hornet’s office completed in short order my attention turned to the Hornets airframe assembly. Each model manufacturer has their own way of breaking down the parts of a model kit and each has their own pro’s and con’s. In the case of the Kinetic kit, one has to be very careful when mating the parts of the front of the aircraft together. I would recommend several dry fitting attempts to see how the parts fit together before committing to gluing them. I would also recommend one you remove the tabs on the nose gear well bullhead to allow a better fit to the nose assembly and shave off just a slither of plastic from the back of the nose assembly before attaching it to the main fuselage. Fortunately this joint runs along a panel line, but I experienced difficulty cleaning it up to match the lines of the airframe. Some sanding and filling was required in this area and also some detail re-scribing.

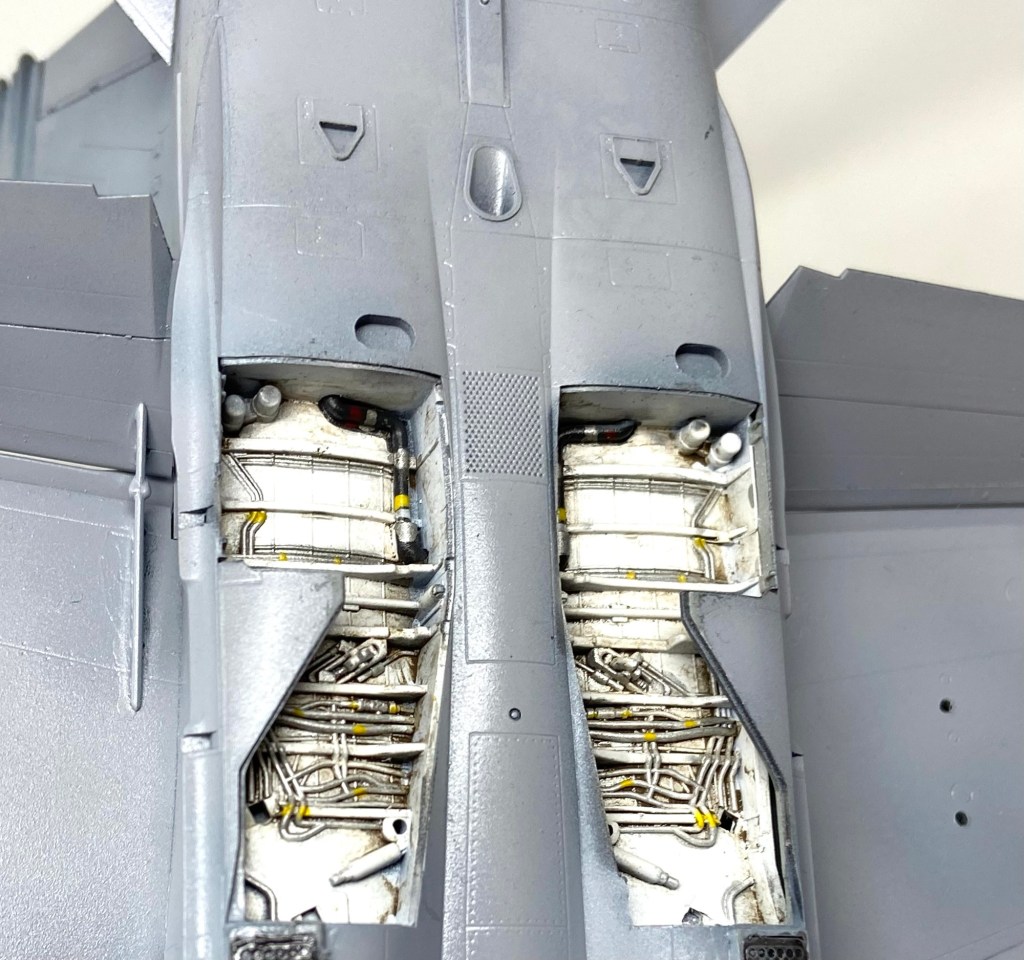
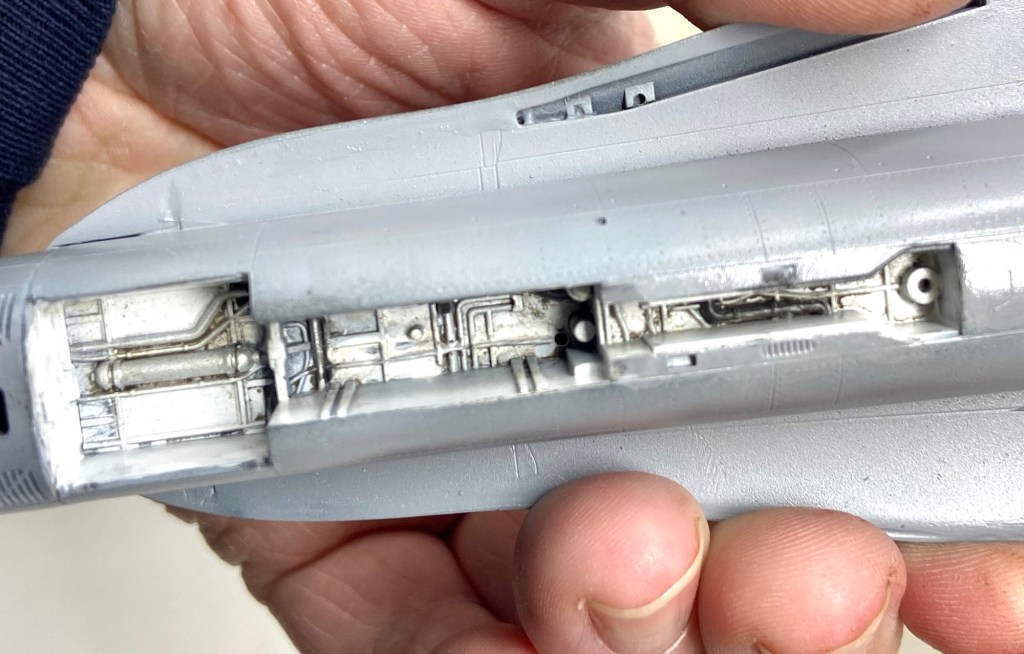
The Kinetic kit has a lot of great detail , including the inside of the main landing gear bay. I decided to hand paint the details to add another point of visual interest:

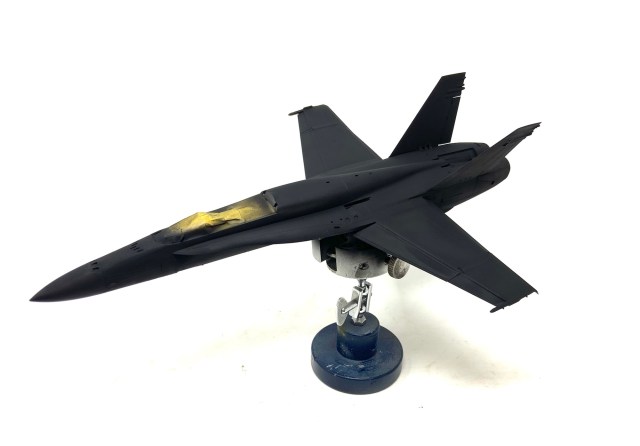
Next was the painting process-This is where I begin my layering method of painting: First, a primer coat. For this I used Tamiya NATO Black acrylic. Its quick drying and dries to a dead flat matt finish the will show up any scratches or blemishes on the surface of the model.

In the photo above we see the first mottle coat. By airbrushing with a stencil, using a contrasting colour-In this case a warm brown shade, I have broken up the monotone black surface. This will ad an effect of depth to the paint finish.
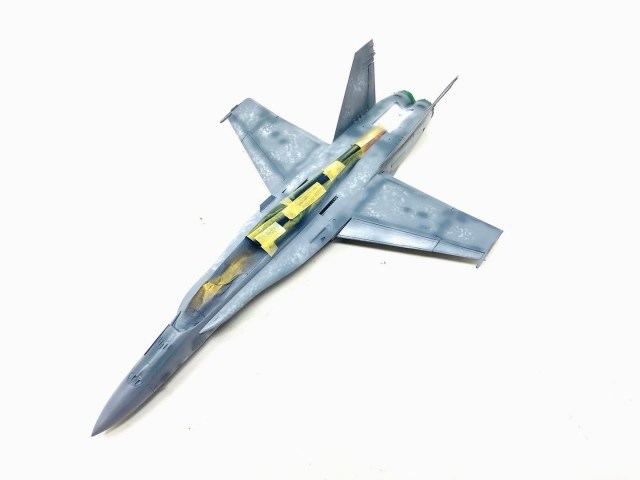
In the photo’s above and below you can see a third layer, another mottle coat, applied again with a stencil in shades of grey.


With the next fourth paint layer, I apply the intended camouflage colours. For this I used Mr Hobby acrylics H308 FS36375 Grey and H307 FS36320 Grey. After the painting I applied a gloss clear coat to protect the paint from the next layers of work.


Adding the details:
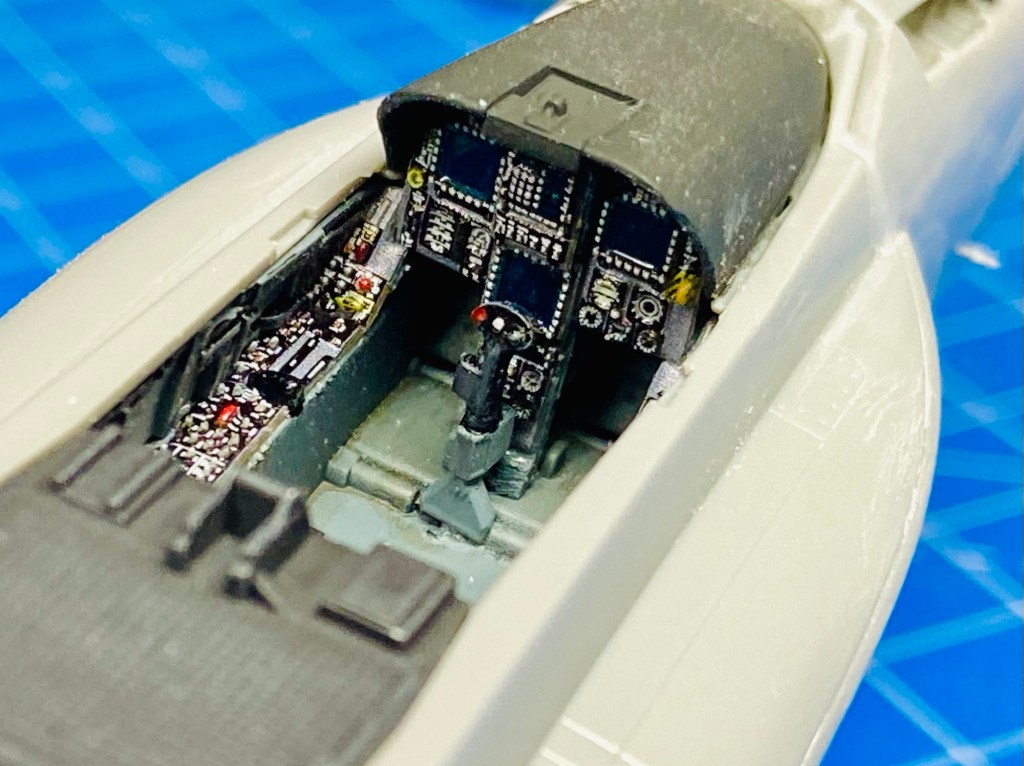


Above, we can see the finished cockpit with its shroud fitted.
Below, we have the Reskit 3d printed landing gear painted and finished.
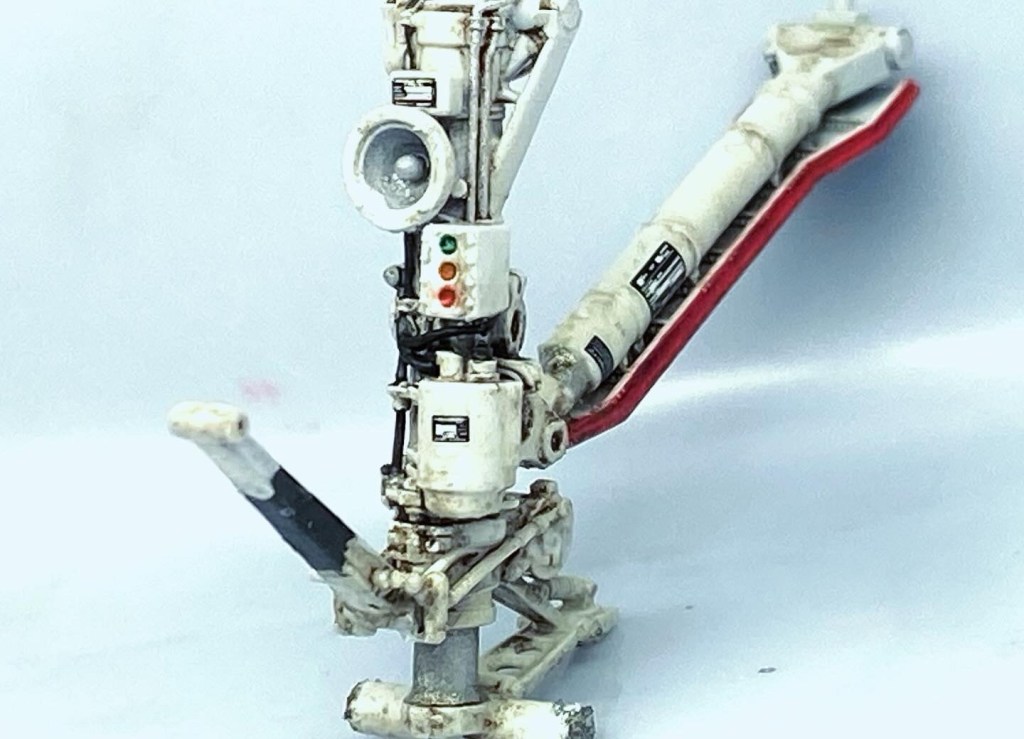
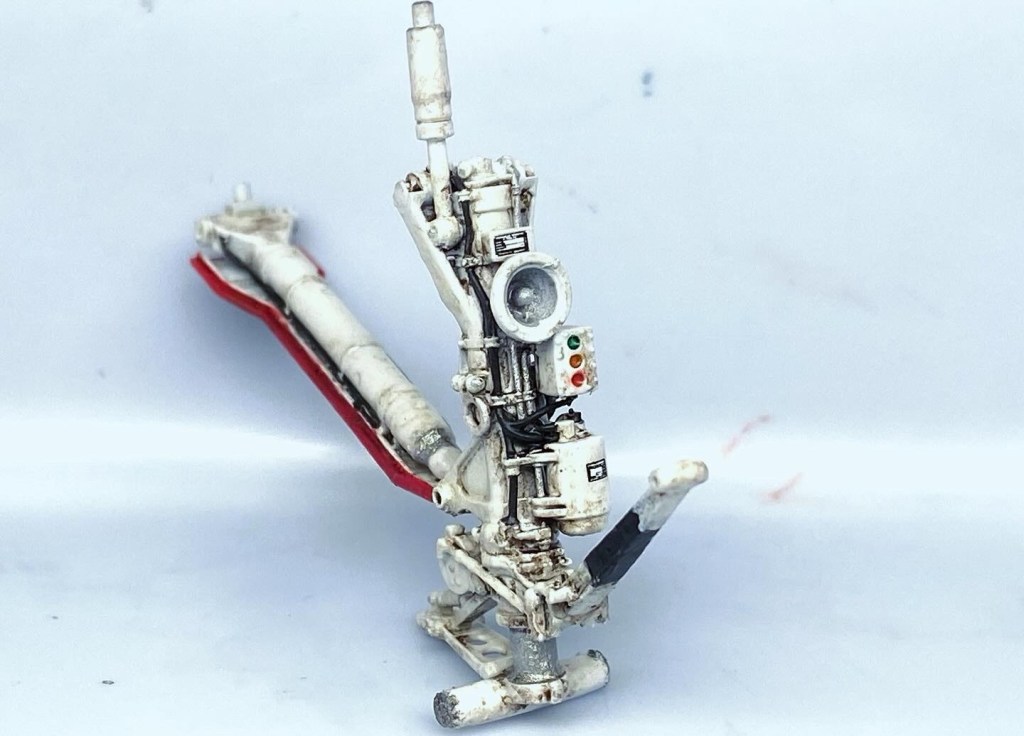
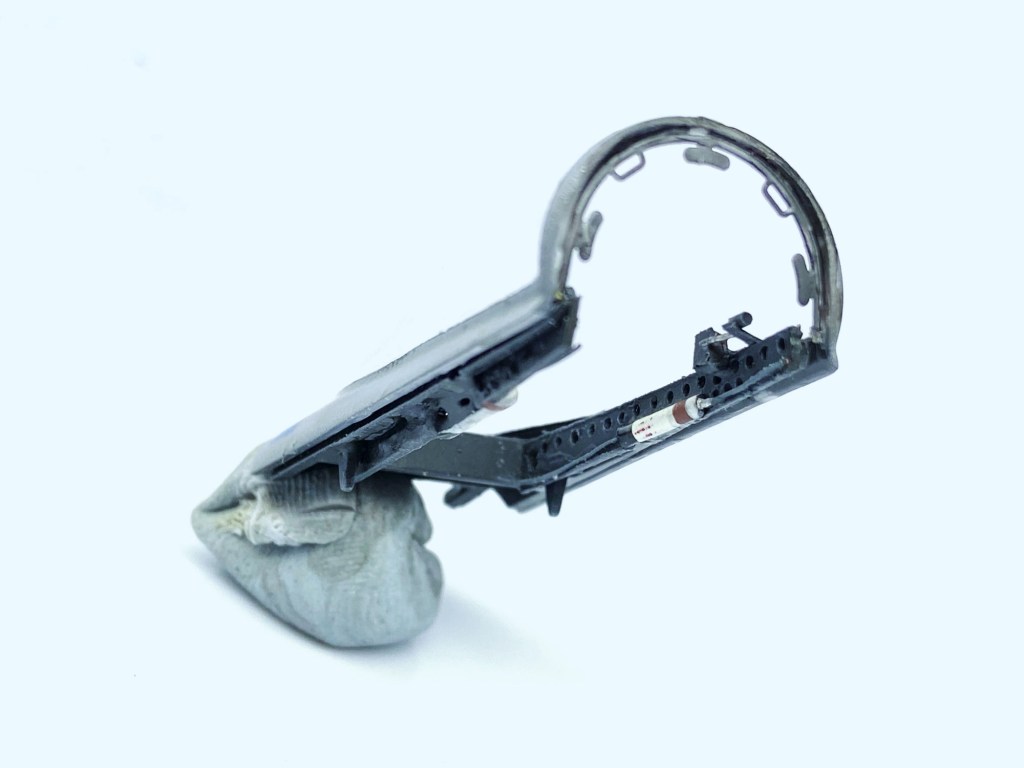
Another detail that I wanted to capture was the Hornet’s internal canopy frame with it wiring and sensors. At the time of making this model no one was producing this detail in aftermarket, so I endeavoured to create my own. Using the kits basic canoy frame, I added plastic card, sprue and wire to replicate the appearance of the Hornet’s canopy interior:
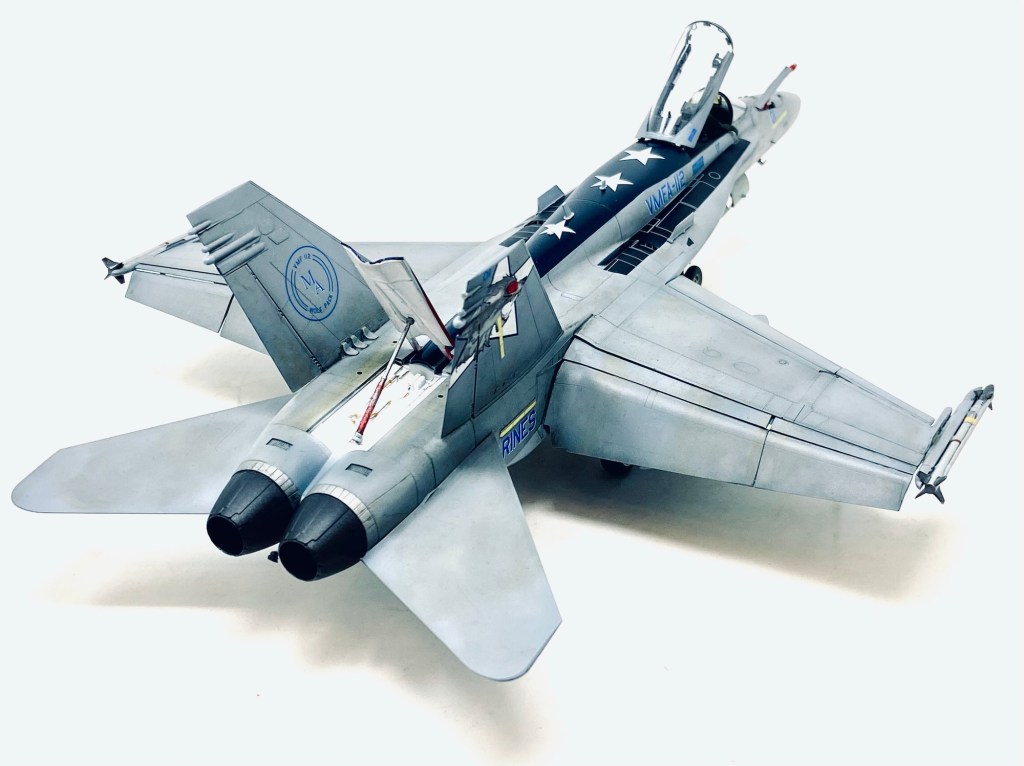
The next layer on the airframe was those prized Two Bobs decals that would bring my model to life. All the decals performed well as one would expect from Two Bobs. Once all the decals were in place they were all treated to Microset and Micros decals setting solutions and when dry, the model received another clear coat to protect the decal layer in preparation for the weathering process.
Weathering is one of my favourite modelling processes and I think it really does breath life into a subject. For this model, I studied as many photographs as I could to get a sense of what I would need. This particular Hornet was the the squadron 2012 “Showbird” and as such its hi-vis markings appeared to more recently applied than the rest of the aircraft so I left theses area’s cleaner than the rest of the airframe. To weather the grey paint scheme, I applied Mig Ammo Dirt Blue panel line wash to all the recessed details and I used oils and pastels to replicate grease and grime stains in the high maintenance area’s. this weathering work, with the previous layers of mottled paint gives a nice operationally used appearance.
Wing load
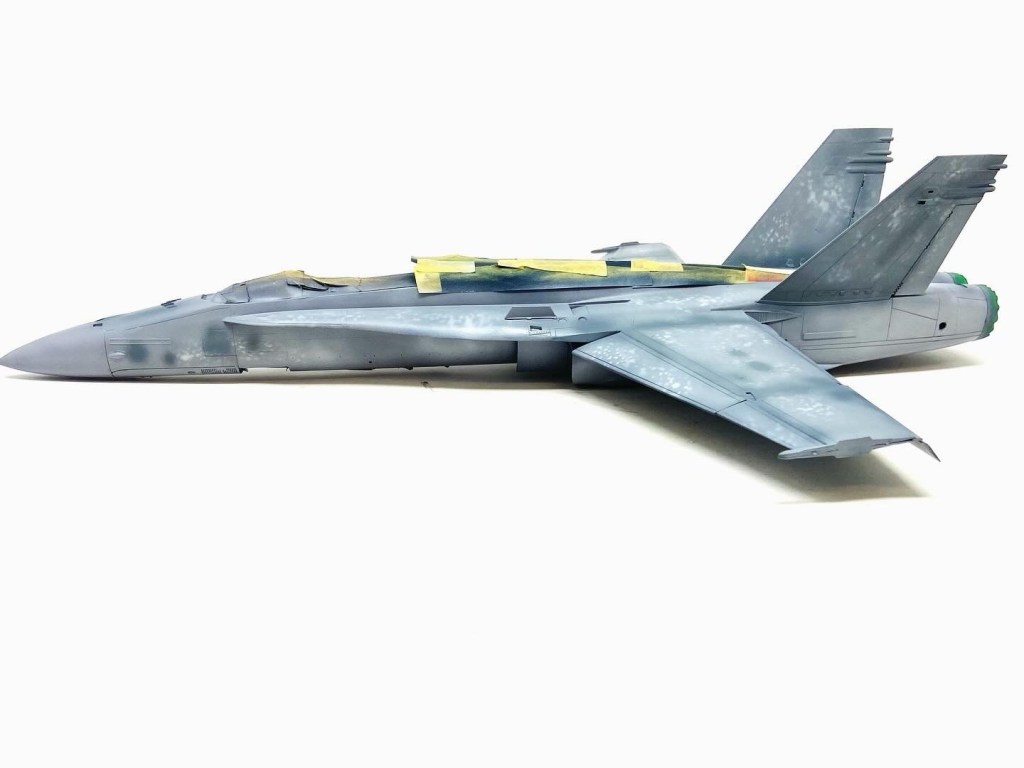
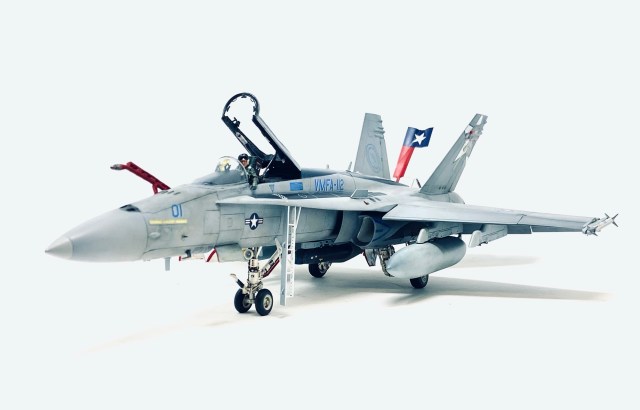
To show this Hornet in its usual weapons configuration, used the kit AIM-9X sidewinder missiles and external drop fuel tanks with the AN/AAQ-28 Litening targeting pod on the centreline pylon. The fit of the wing stores from this kit was not good, the missiles did not line up with the wingtip launch rails so I cut them off and positioned the missiles in the correct place with superglue. Also, the drop tank to wing pylon fit was poor. A noticeable gap is left if one uses the kit parts as Kinetic would instruct you to use. I modified the parts to achieve a much closer, more realistic looking appearance. At this point I feel is only fair to warn fellow modellers that the instructions for the model kit were not designed or set out by someone who understands model building techniques. Some guess work/reference checking is required on the part of the model builder!
Even with the problems the kit has, it still builds up into a decent replica of the F/A-18 Hornet. Here then is my USMC VMFA-112 F/A-18A++ Hornet.


I hope you have enjoyed this model as much I have. It was a challenge to realise this project and it did have difficulty along the way, but I am very happy with what I have accomplished.
Thanks for stopping by, hope you visit again soon. Take care and Happy Modelling!
Darren.