

I was instantly taken with the unusual blue camouflage scheme and wanted to build my own 63rd FS Thunderbolt.


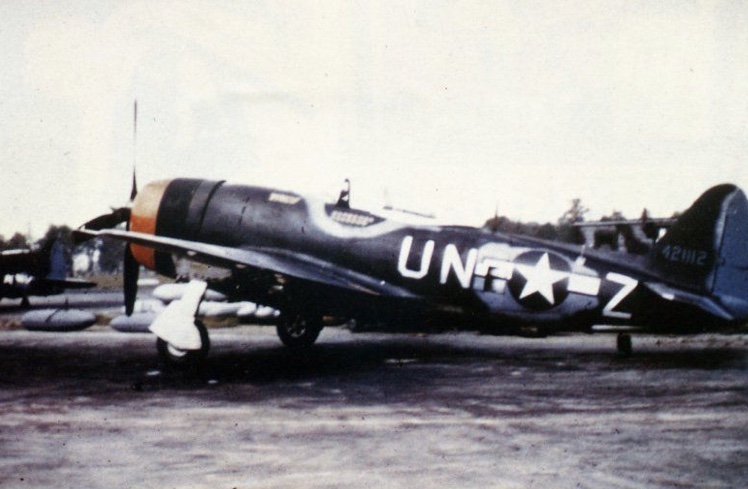
 After reserching various schemes of the 63rd FS and buying aftermarket decals for this subject I eventually decided to use the decals provided by Tamiya to build the aforementioned “UN-Z”
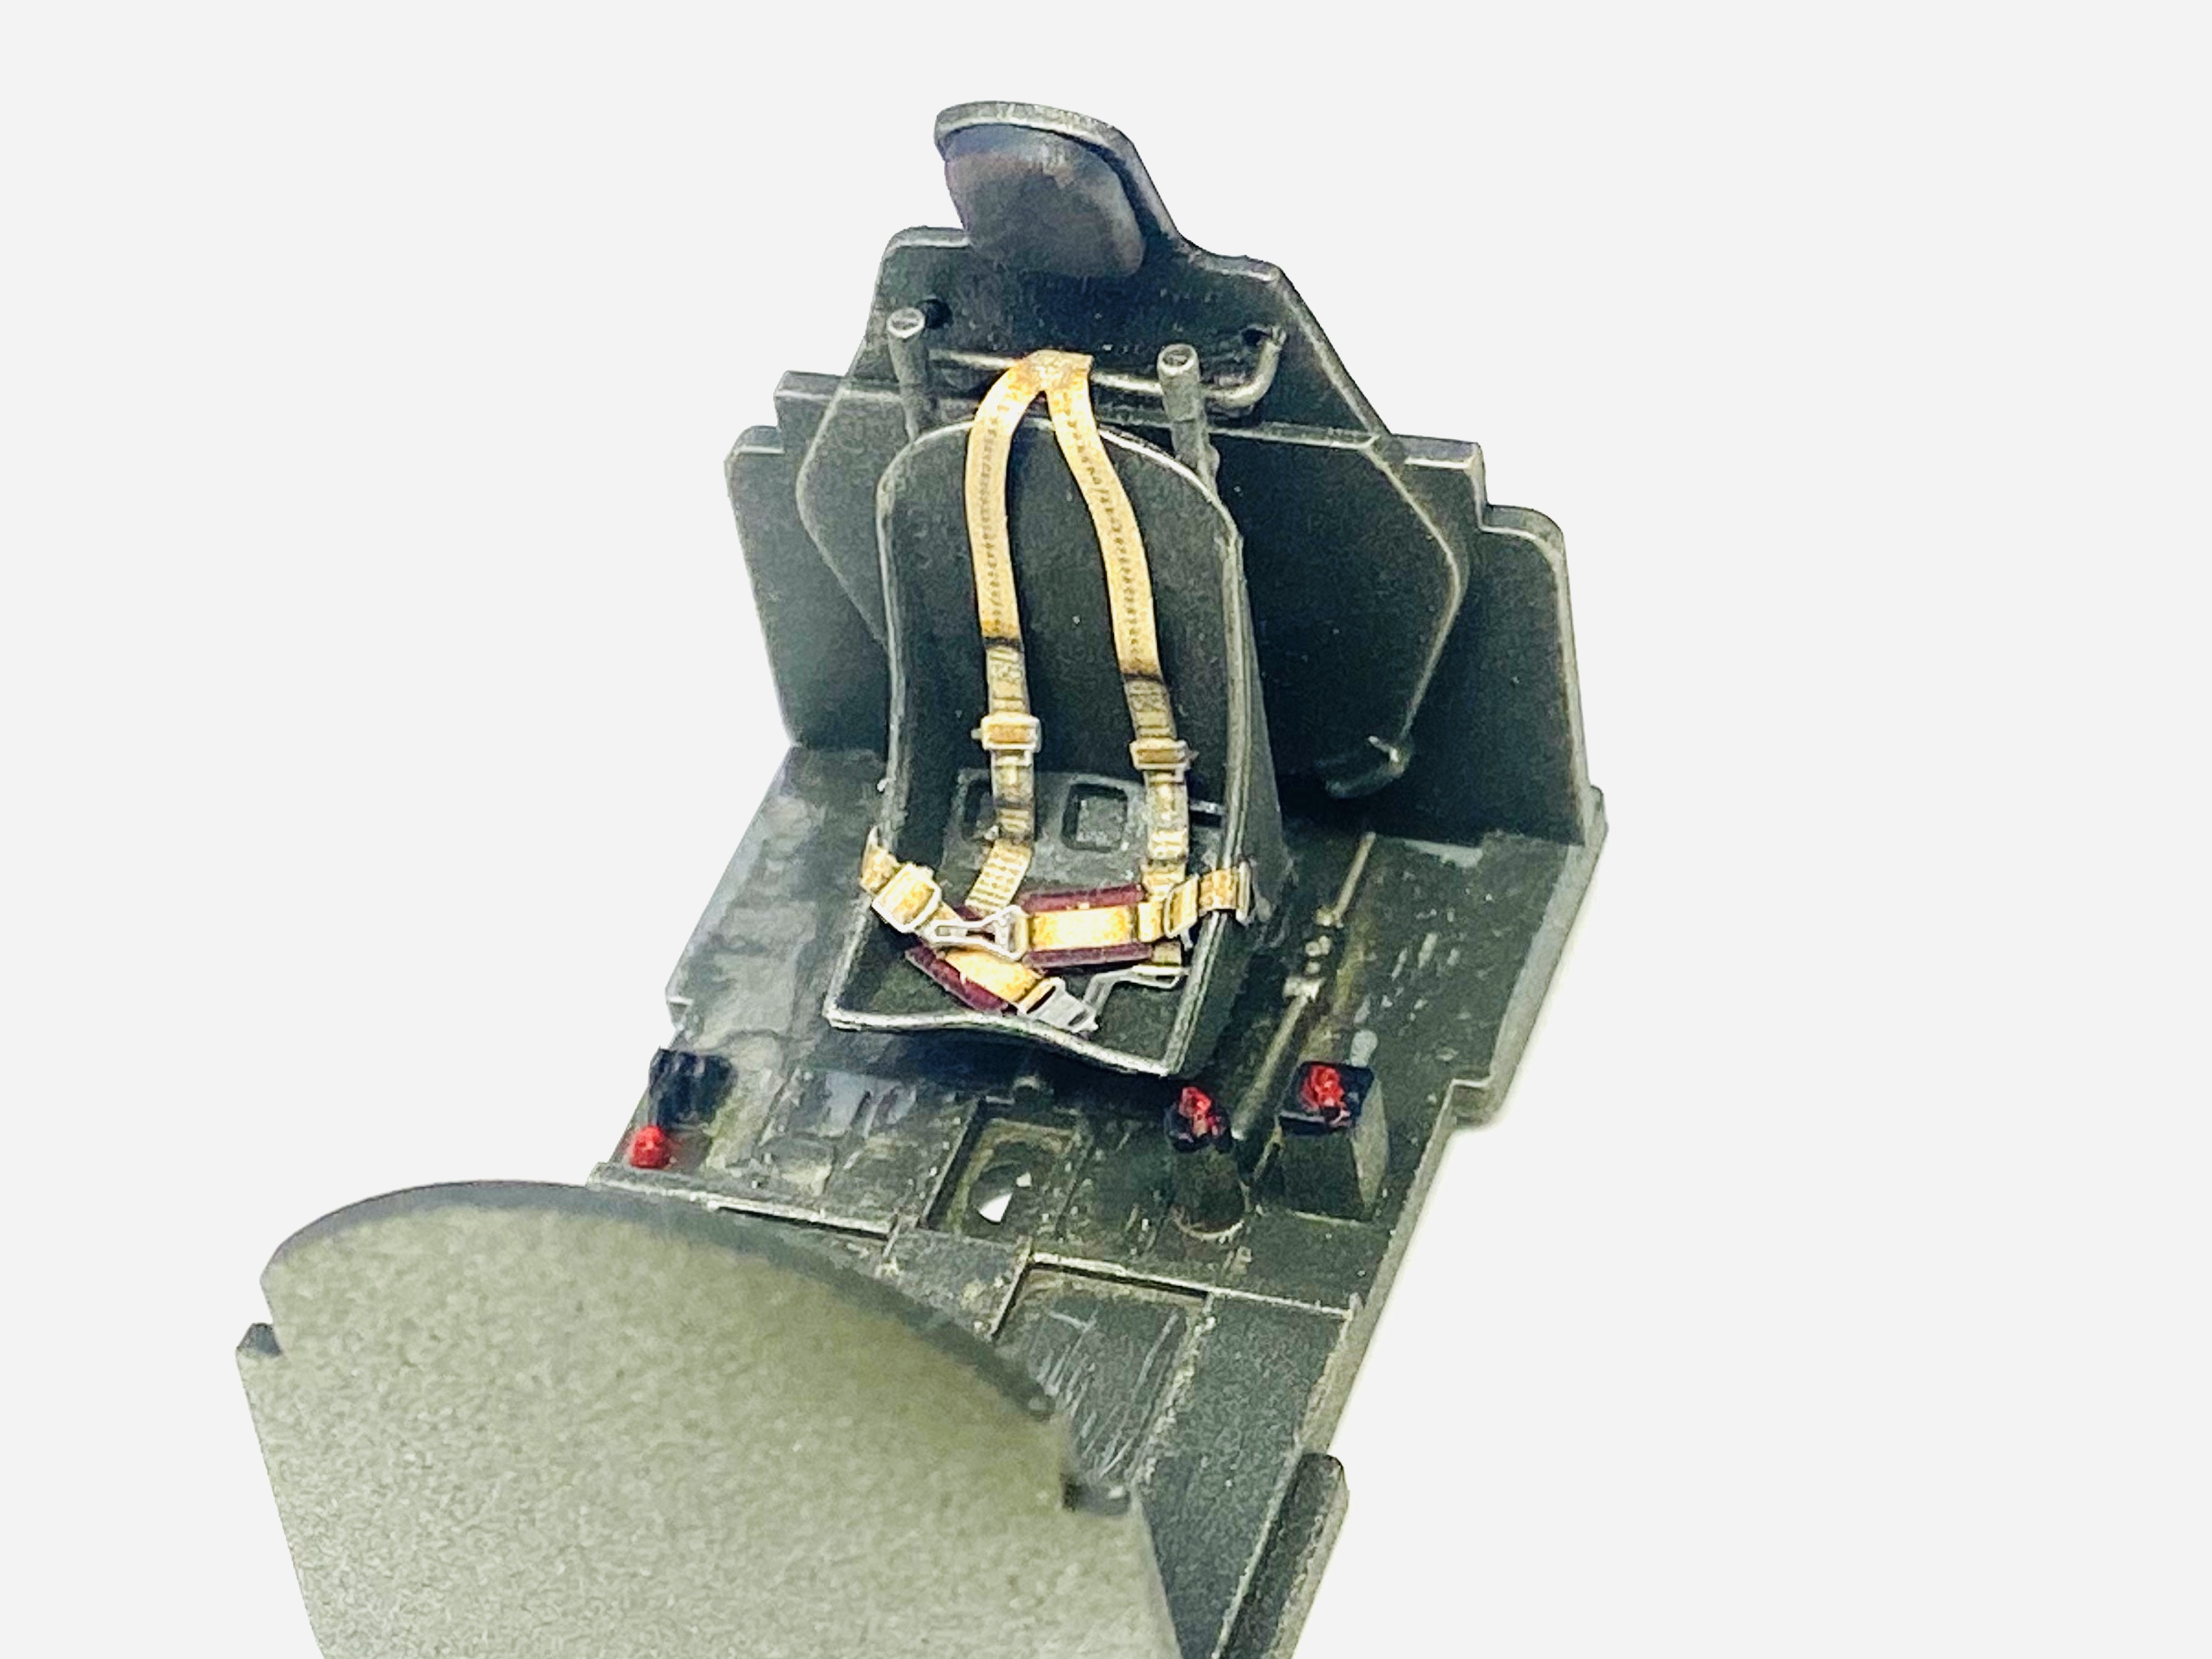

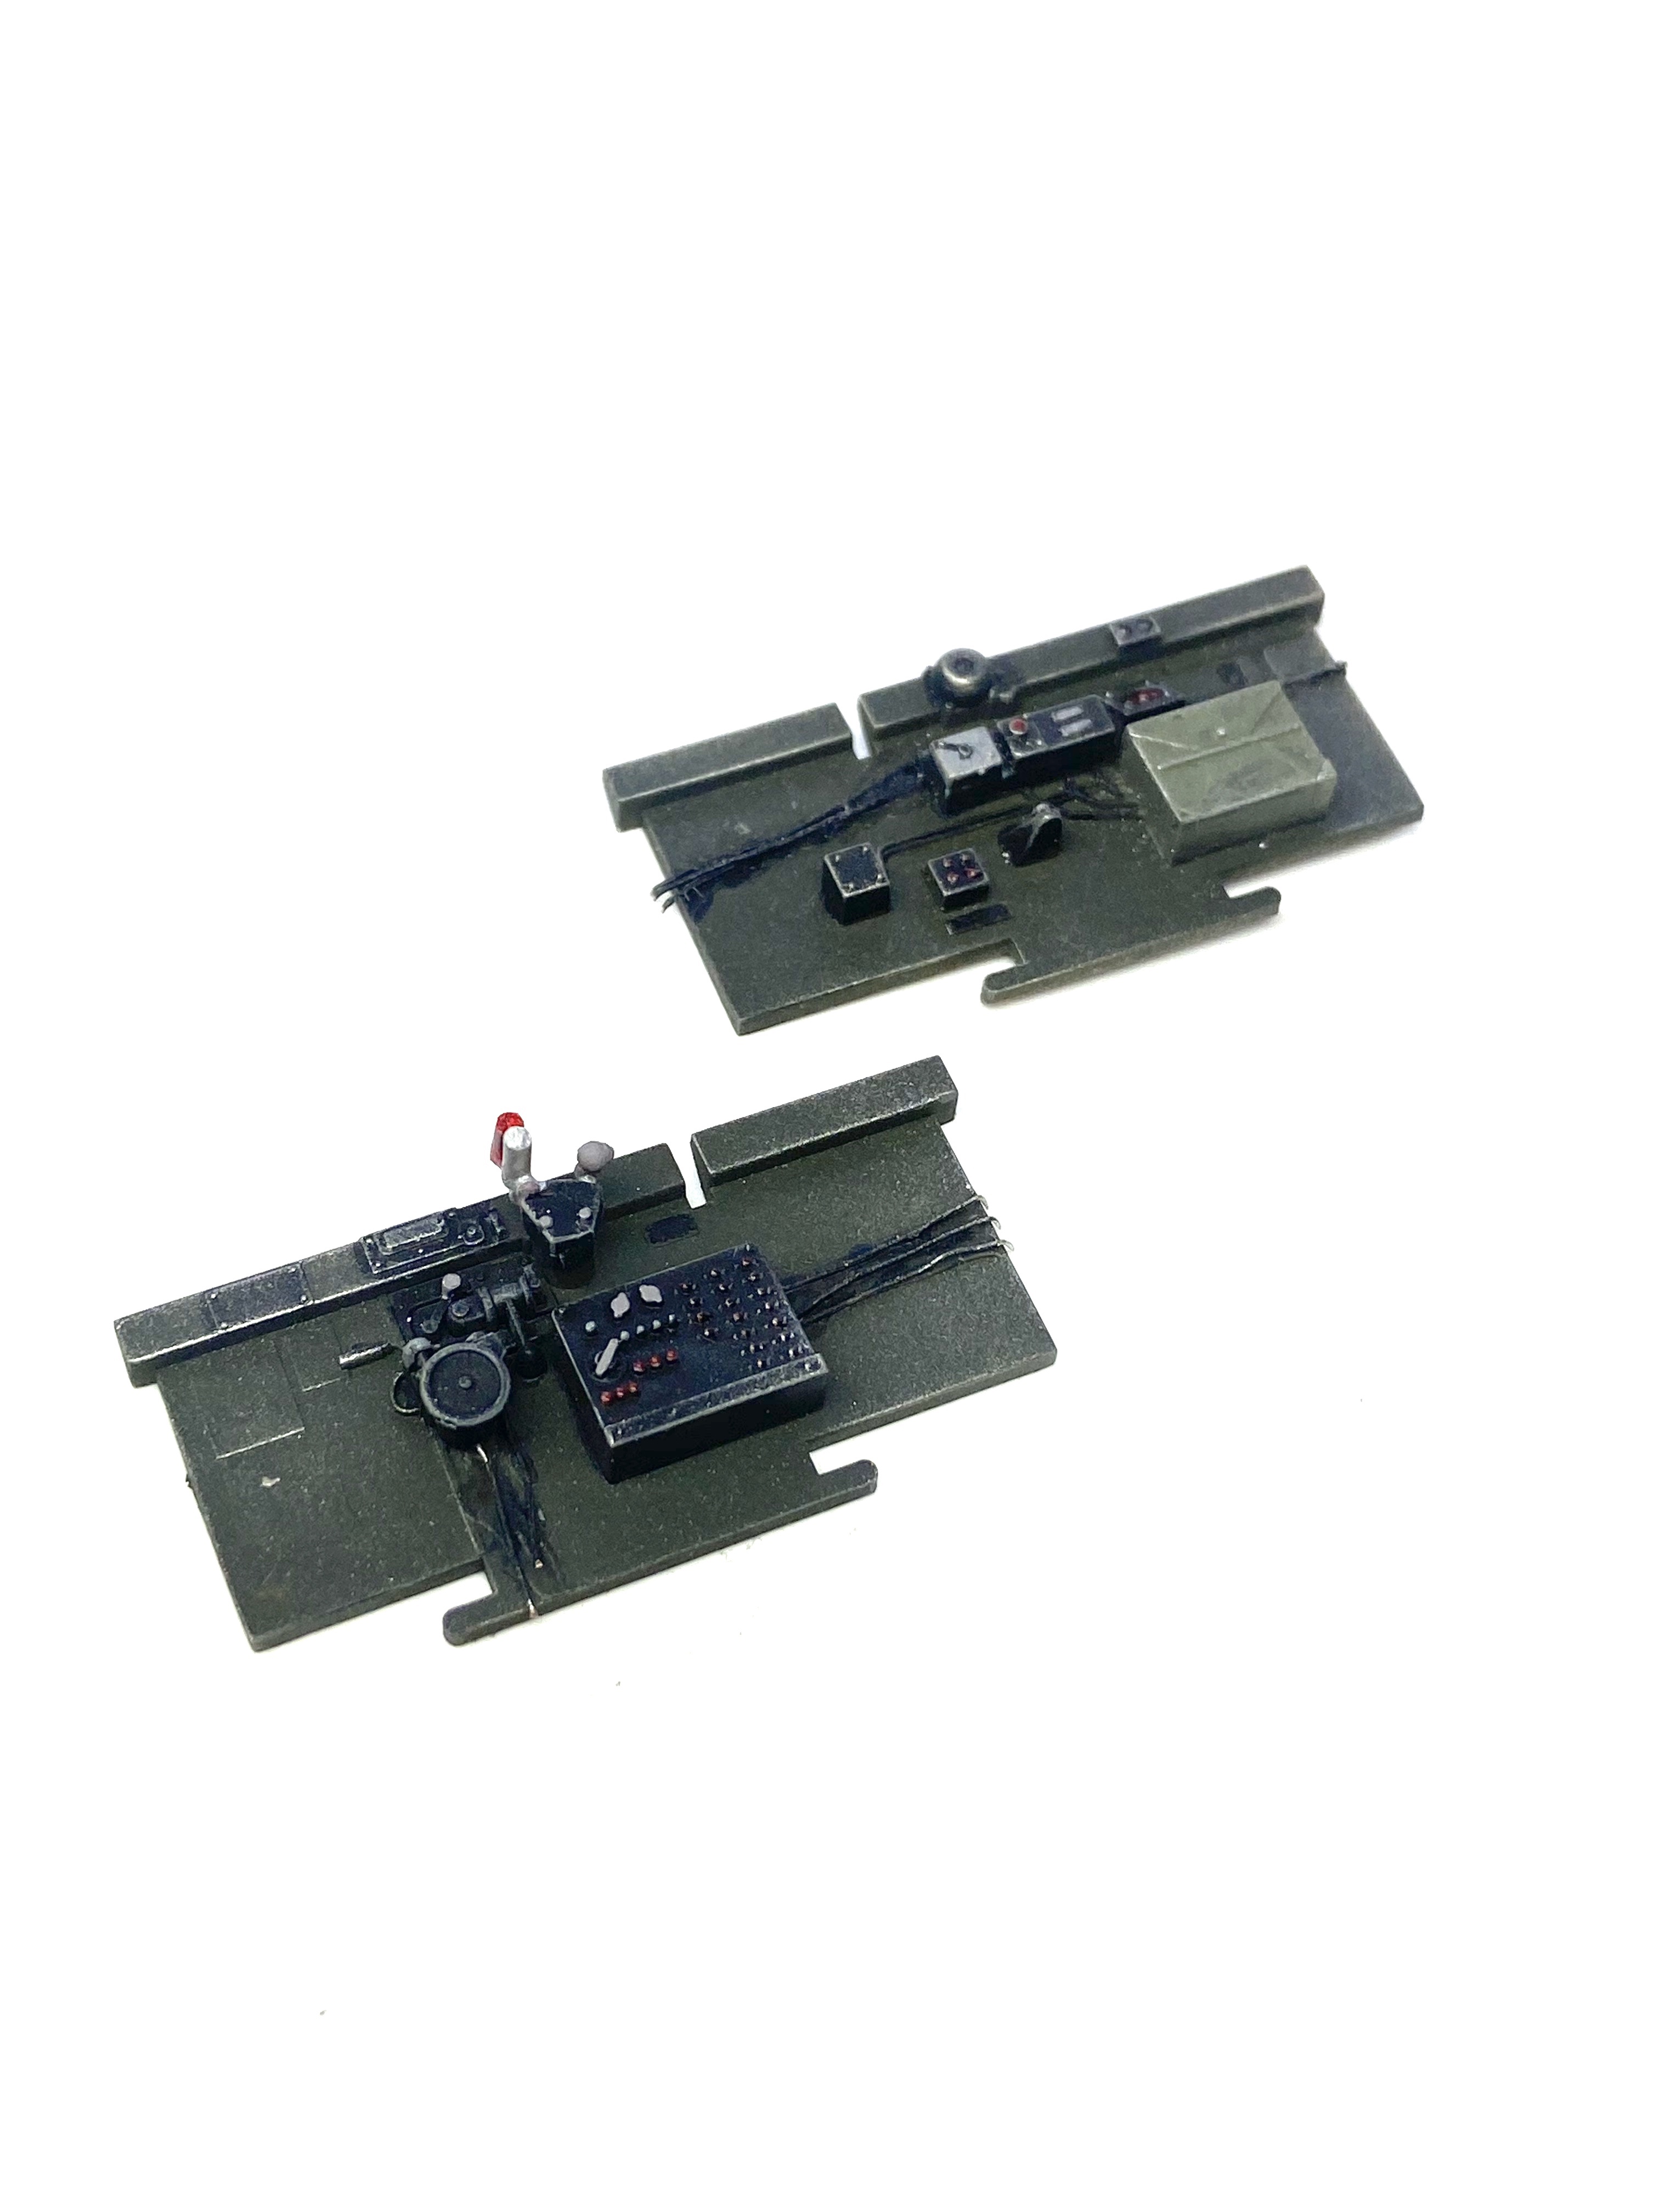
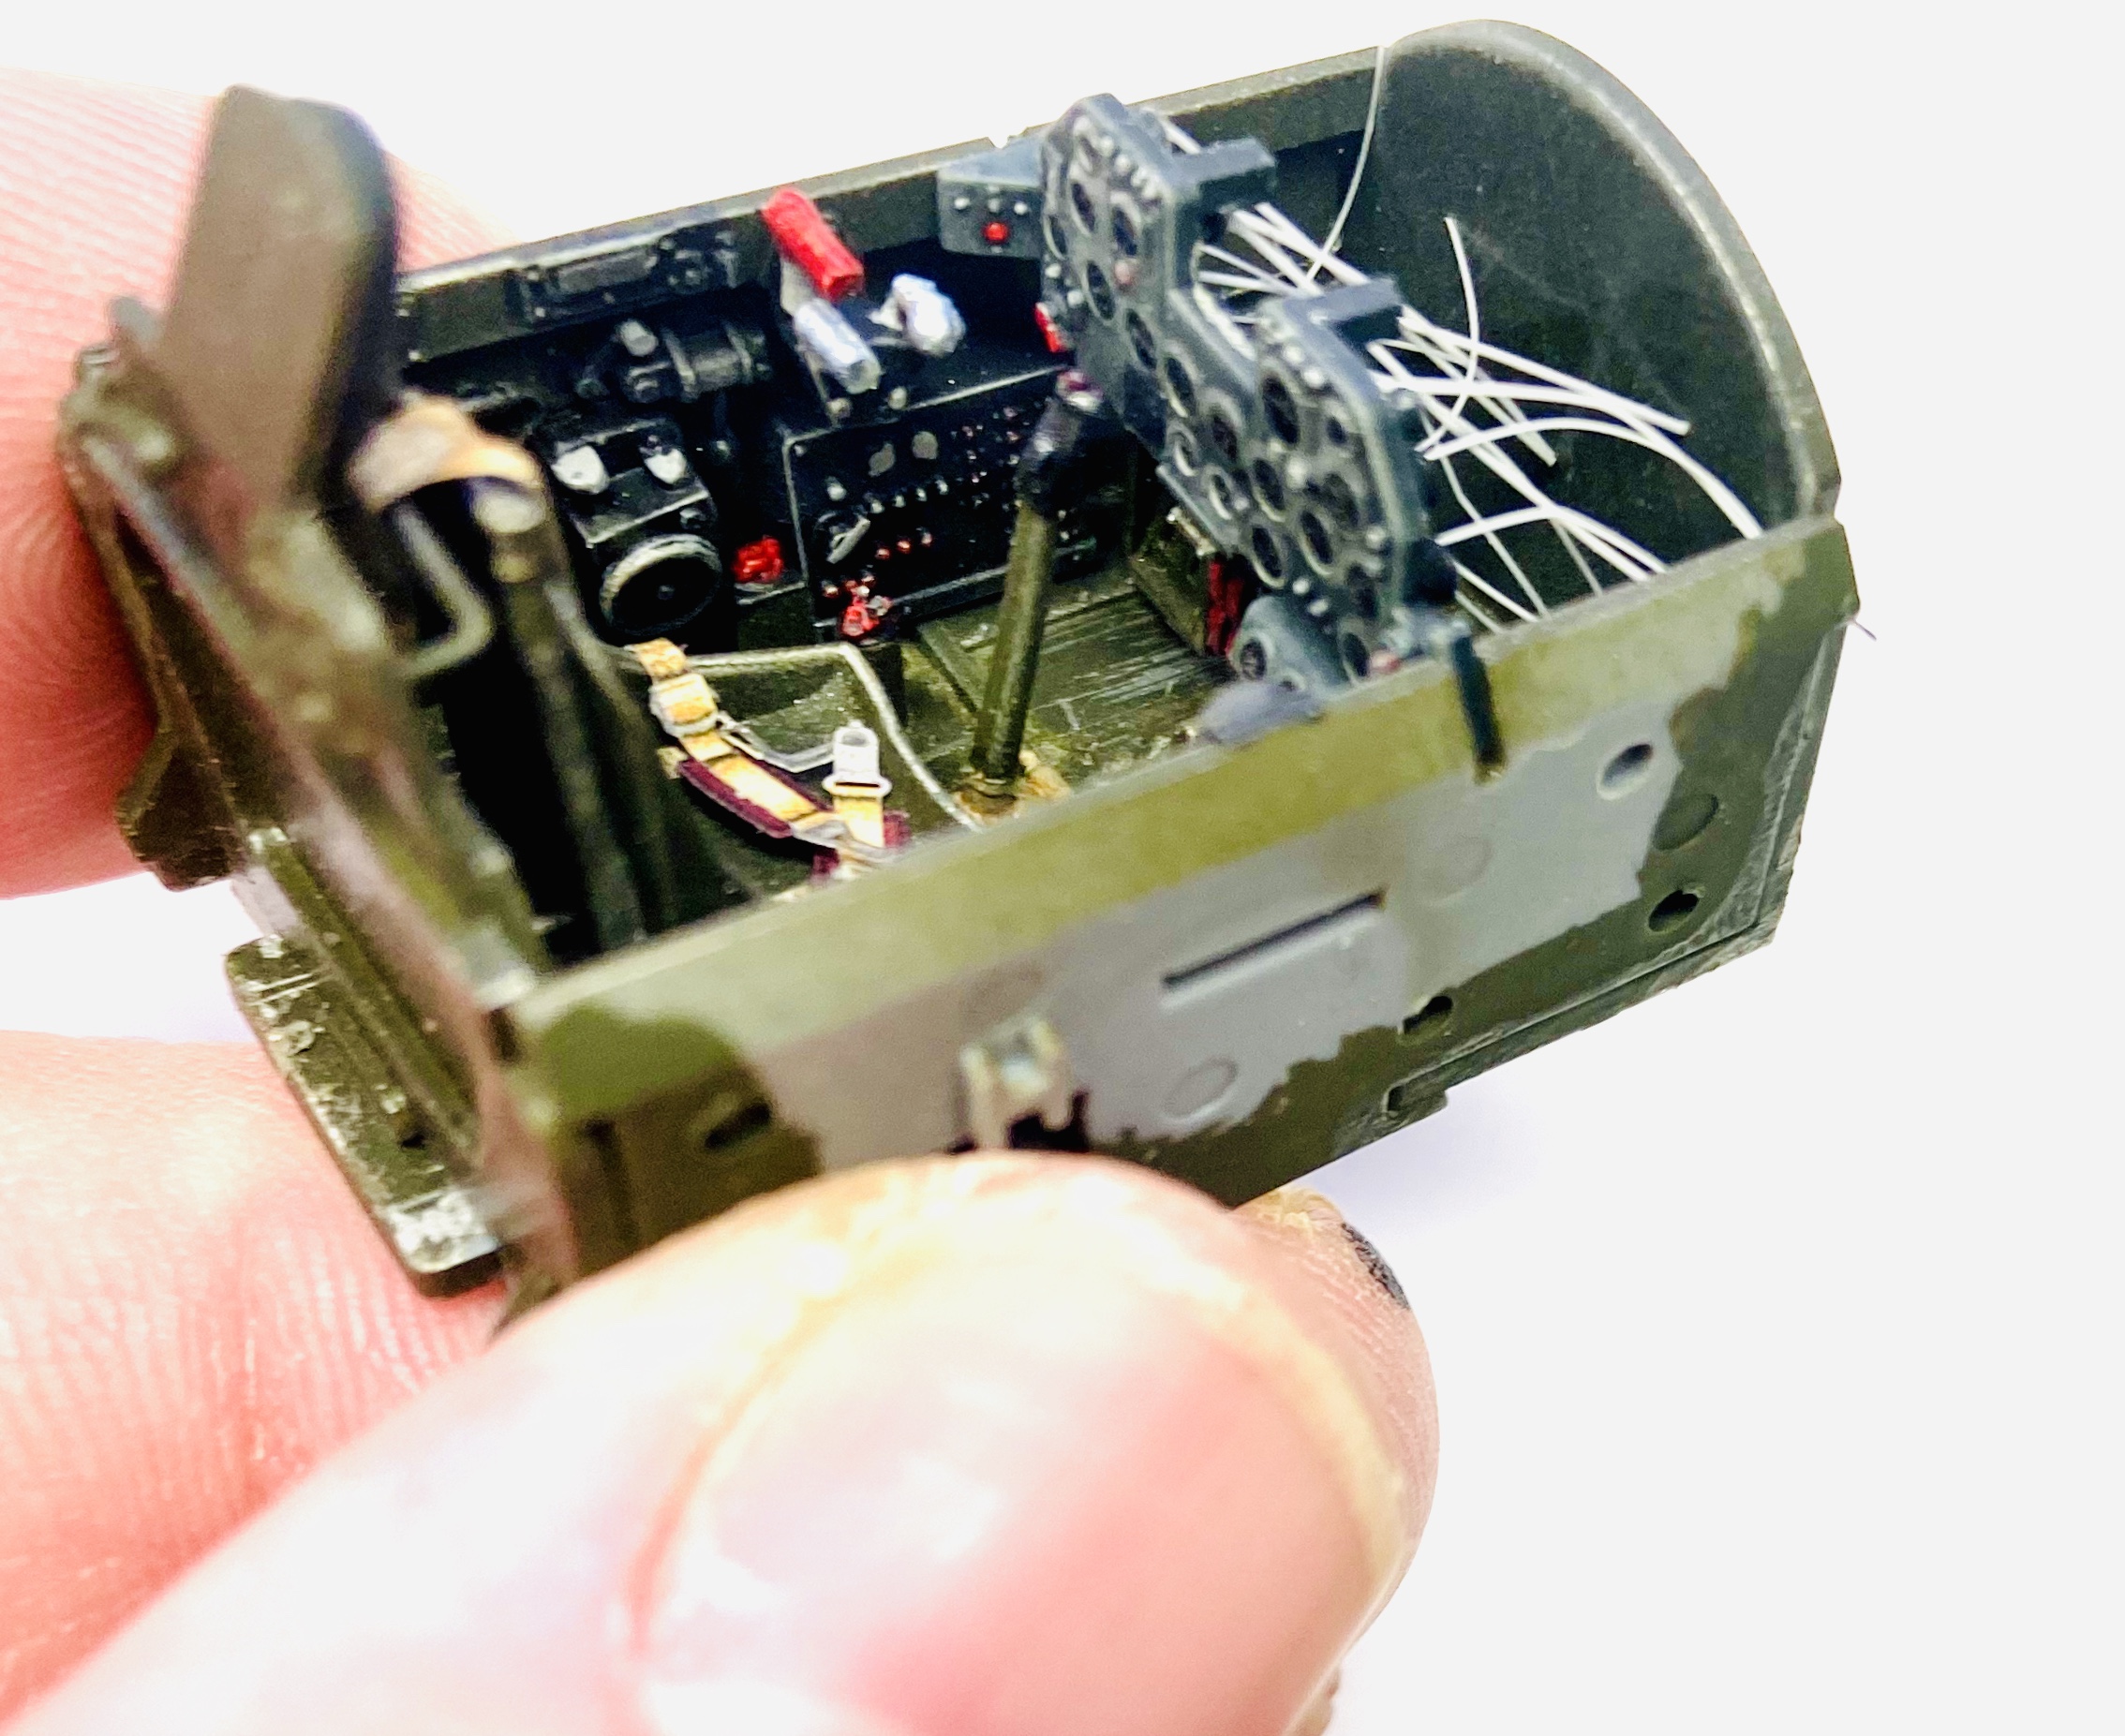
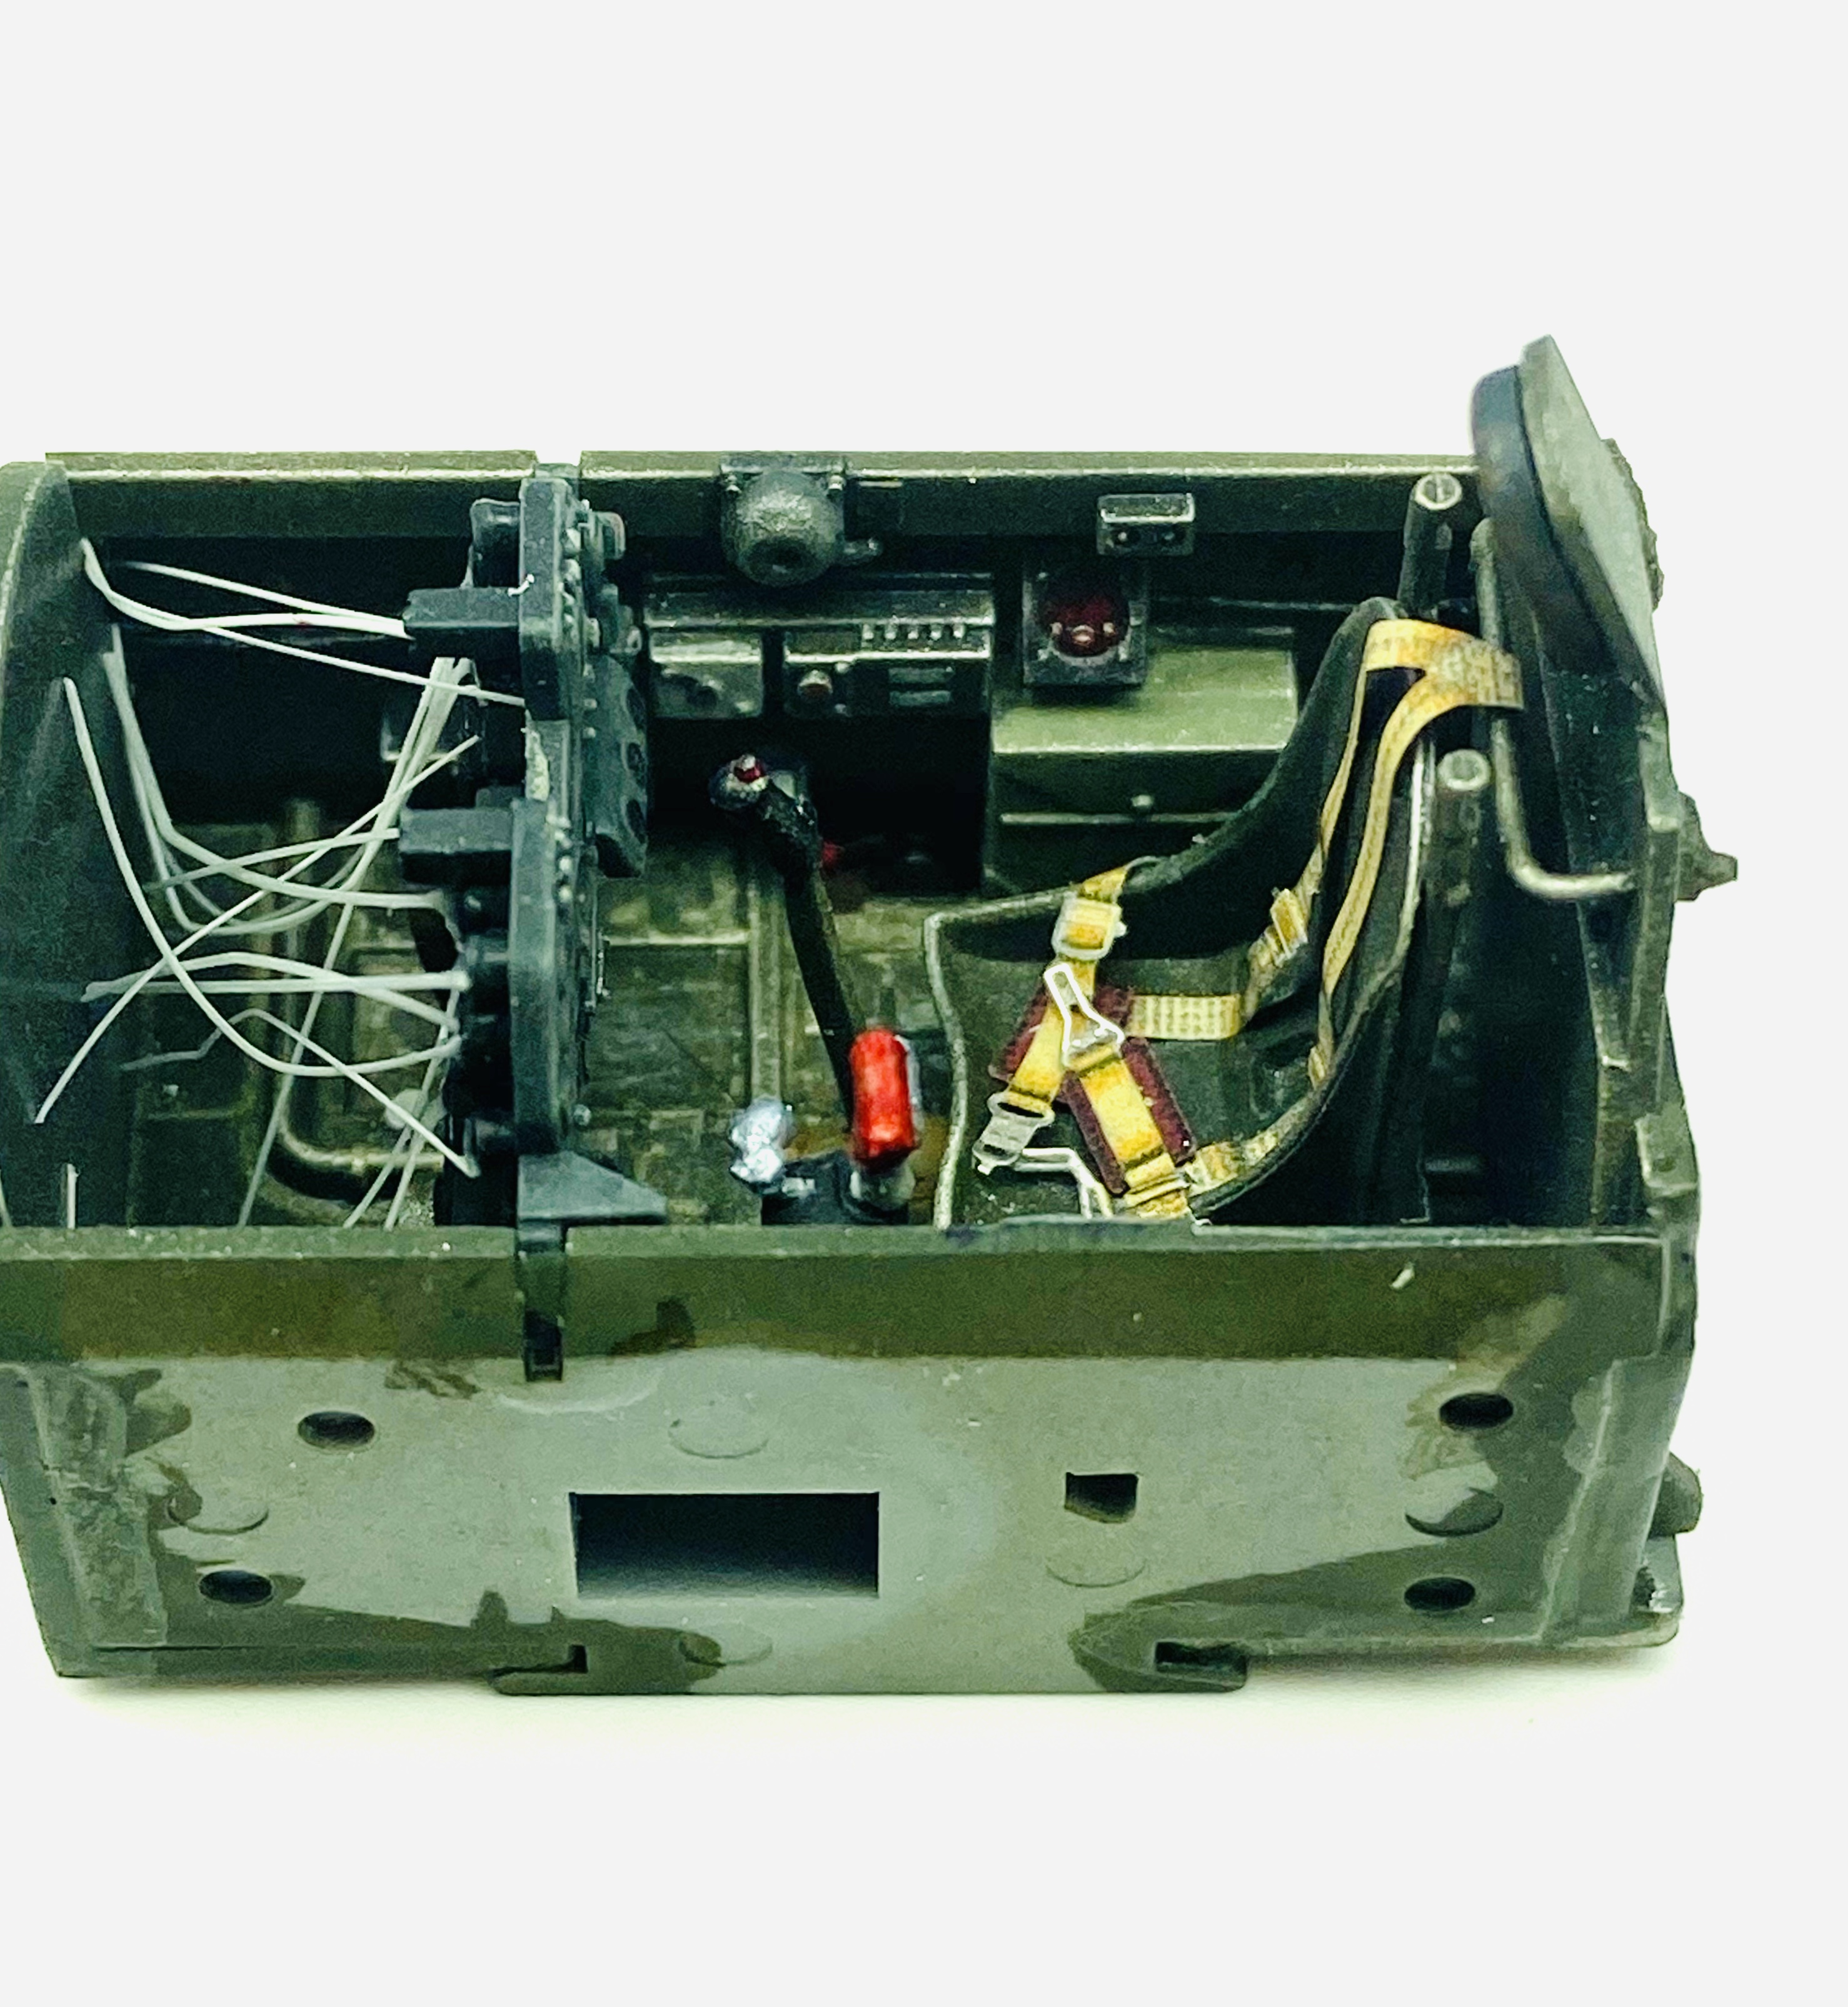
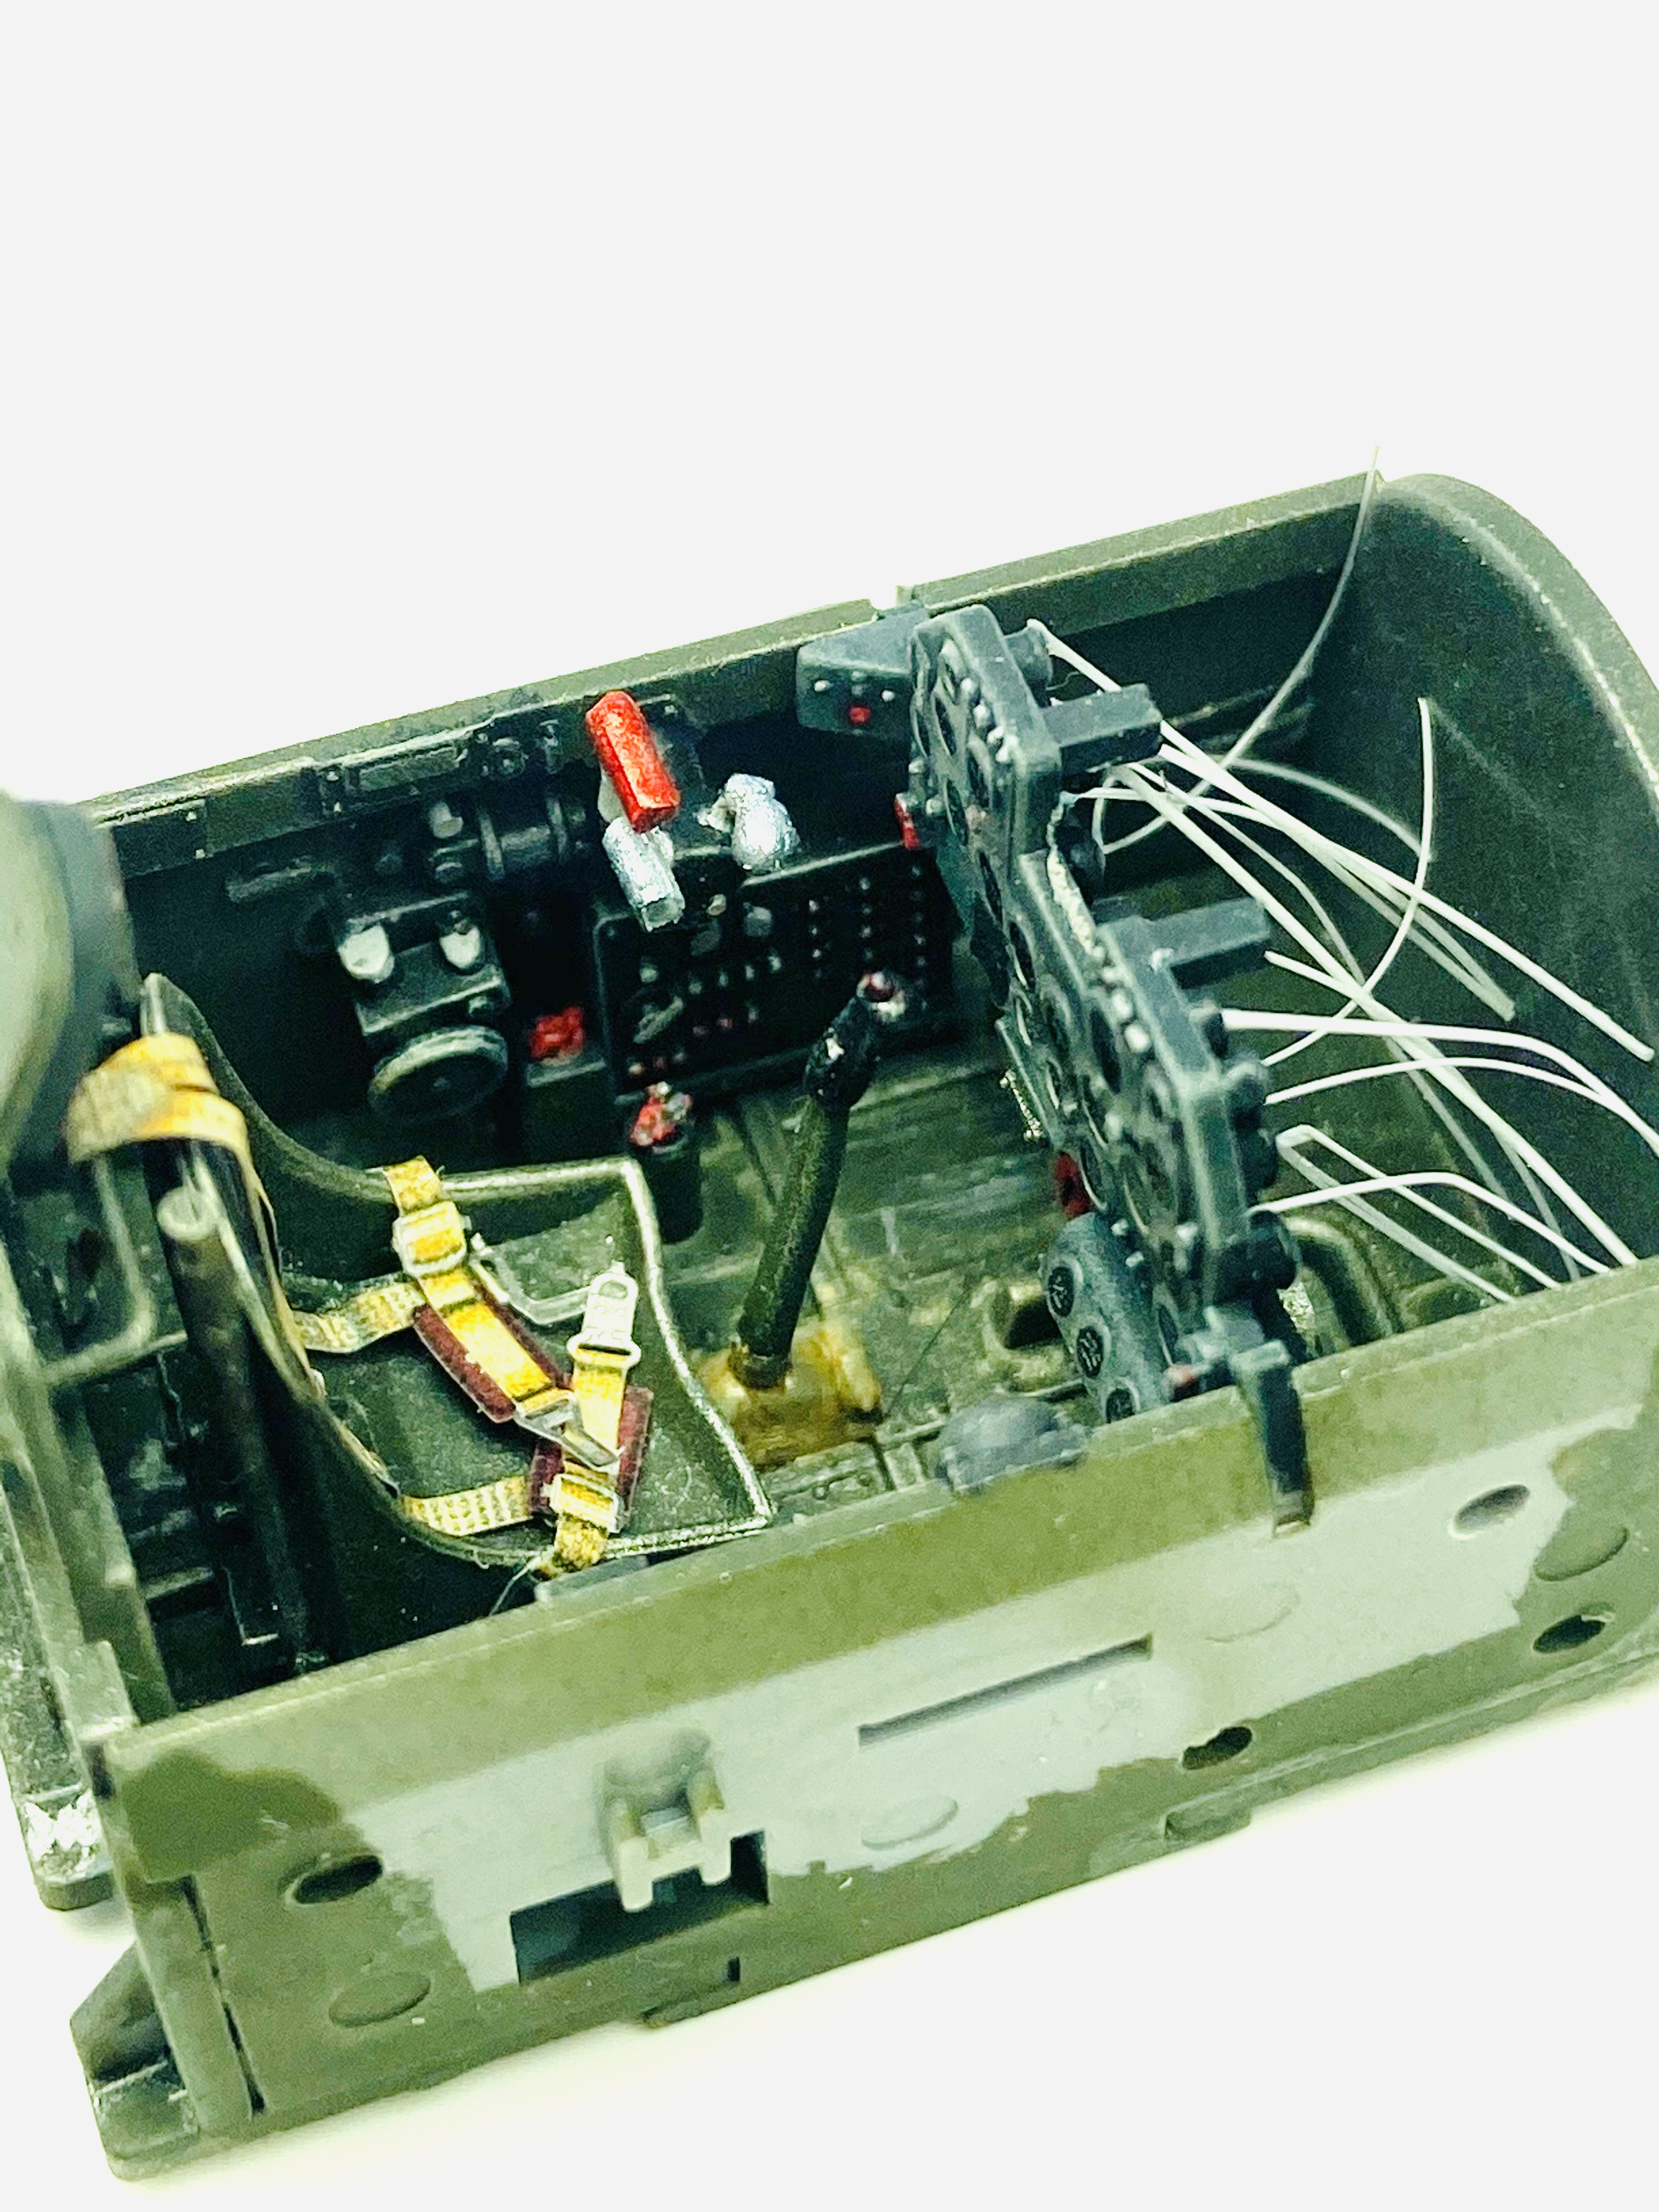
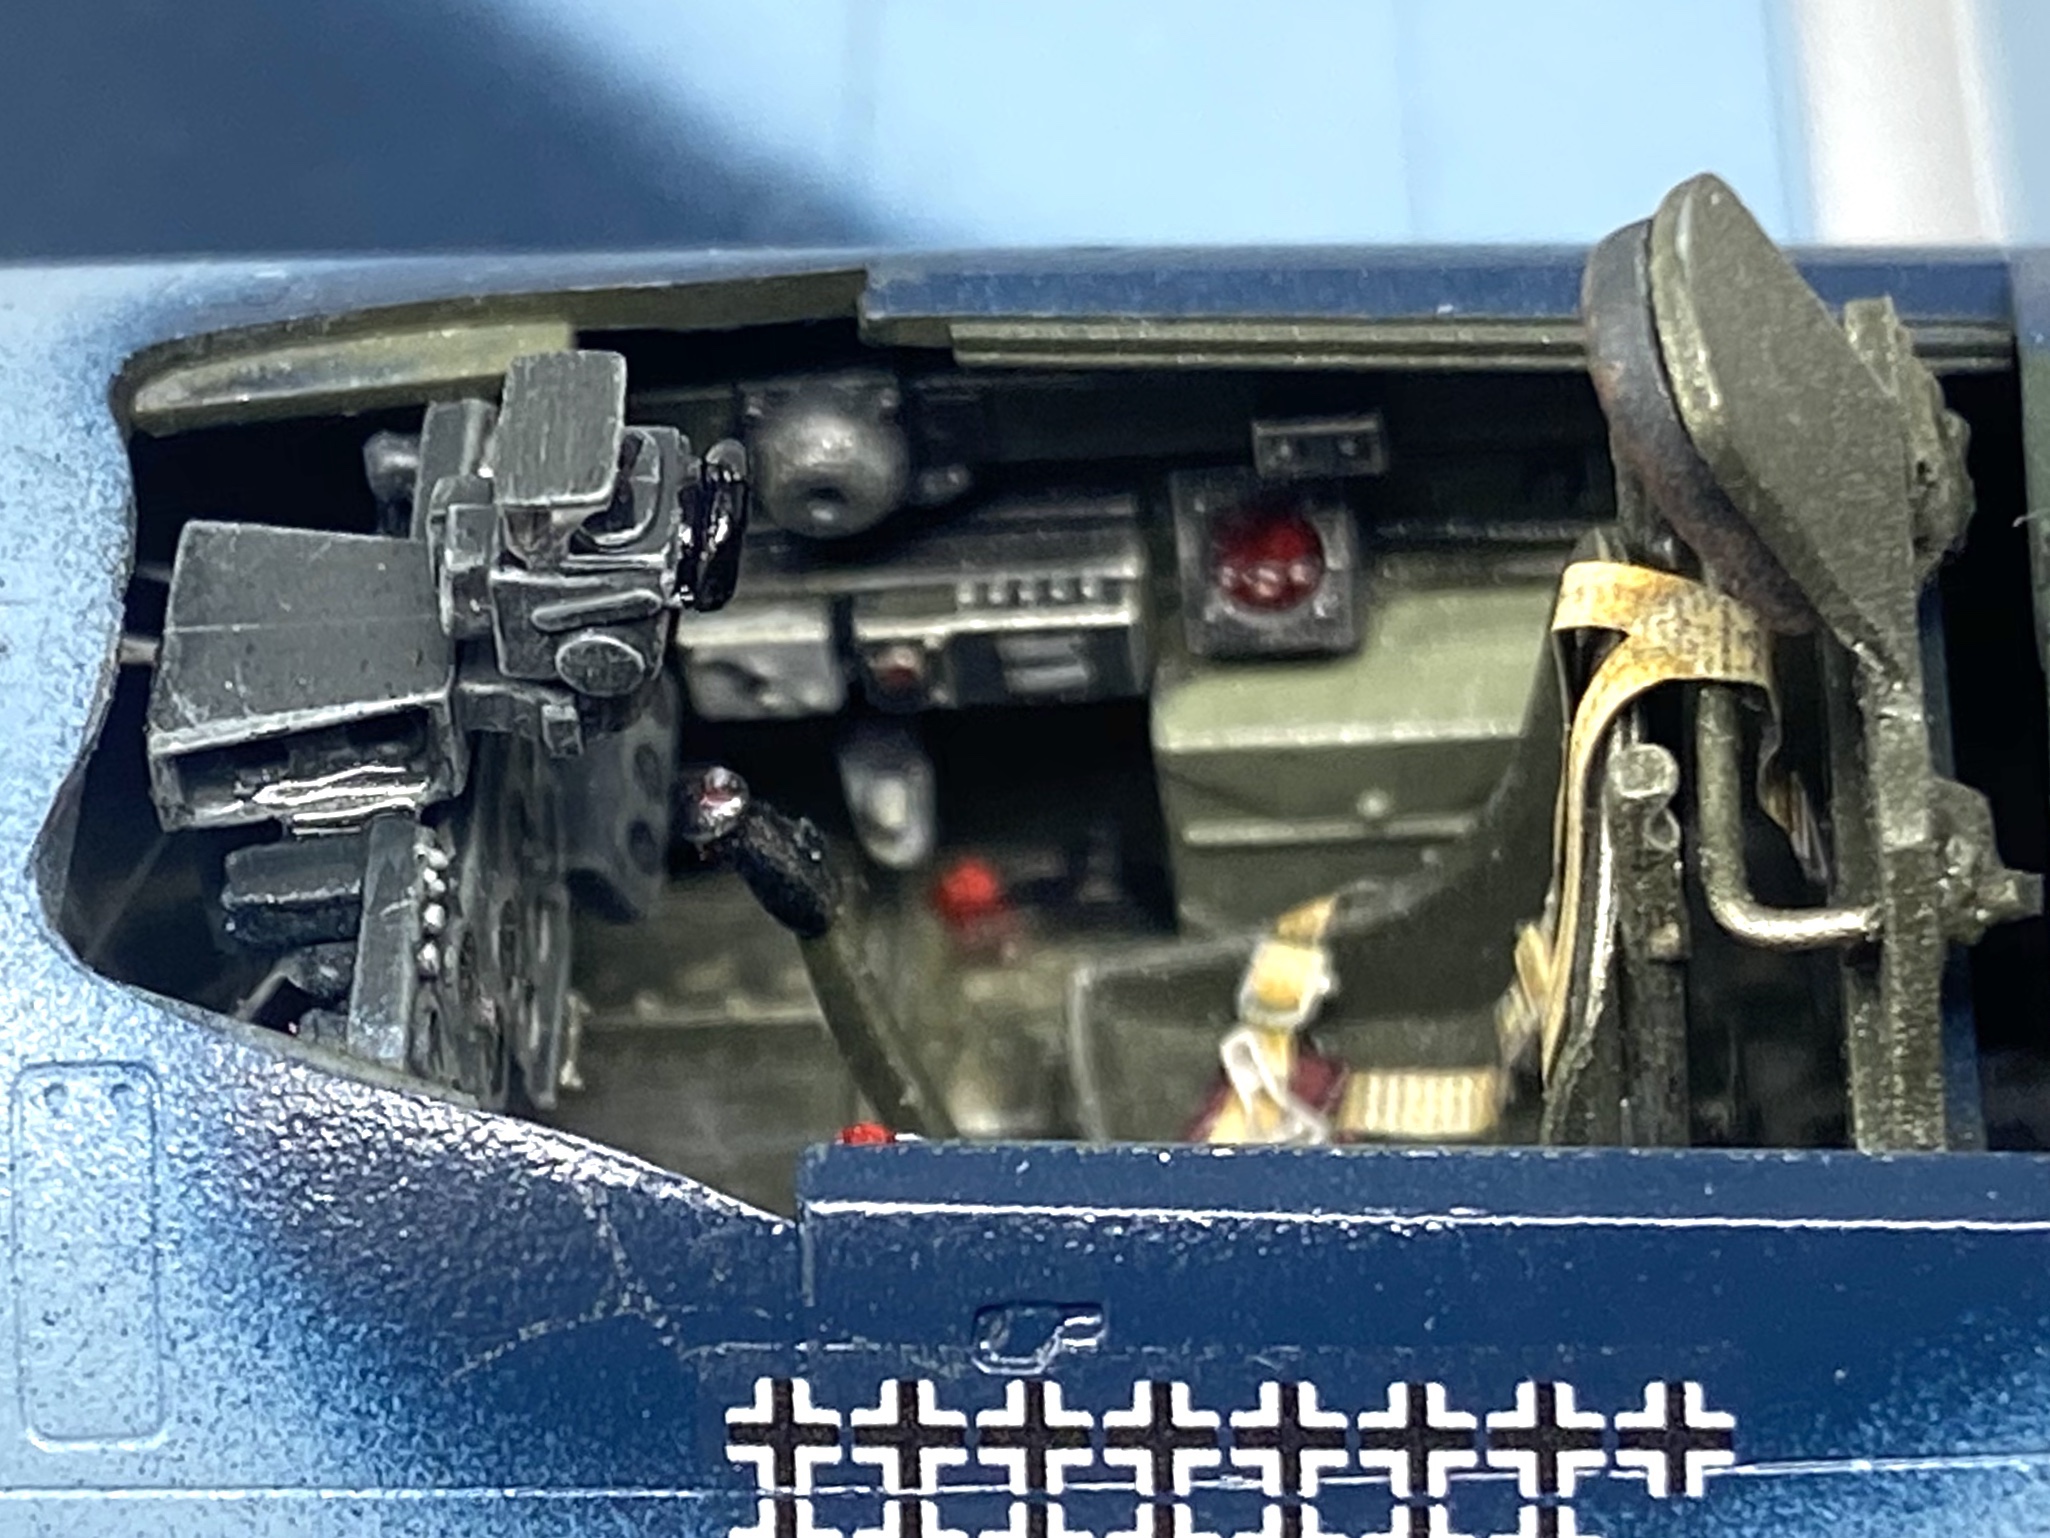
Below, the cockpit sidewalls with some added wiring and levers.
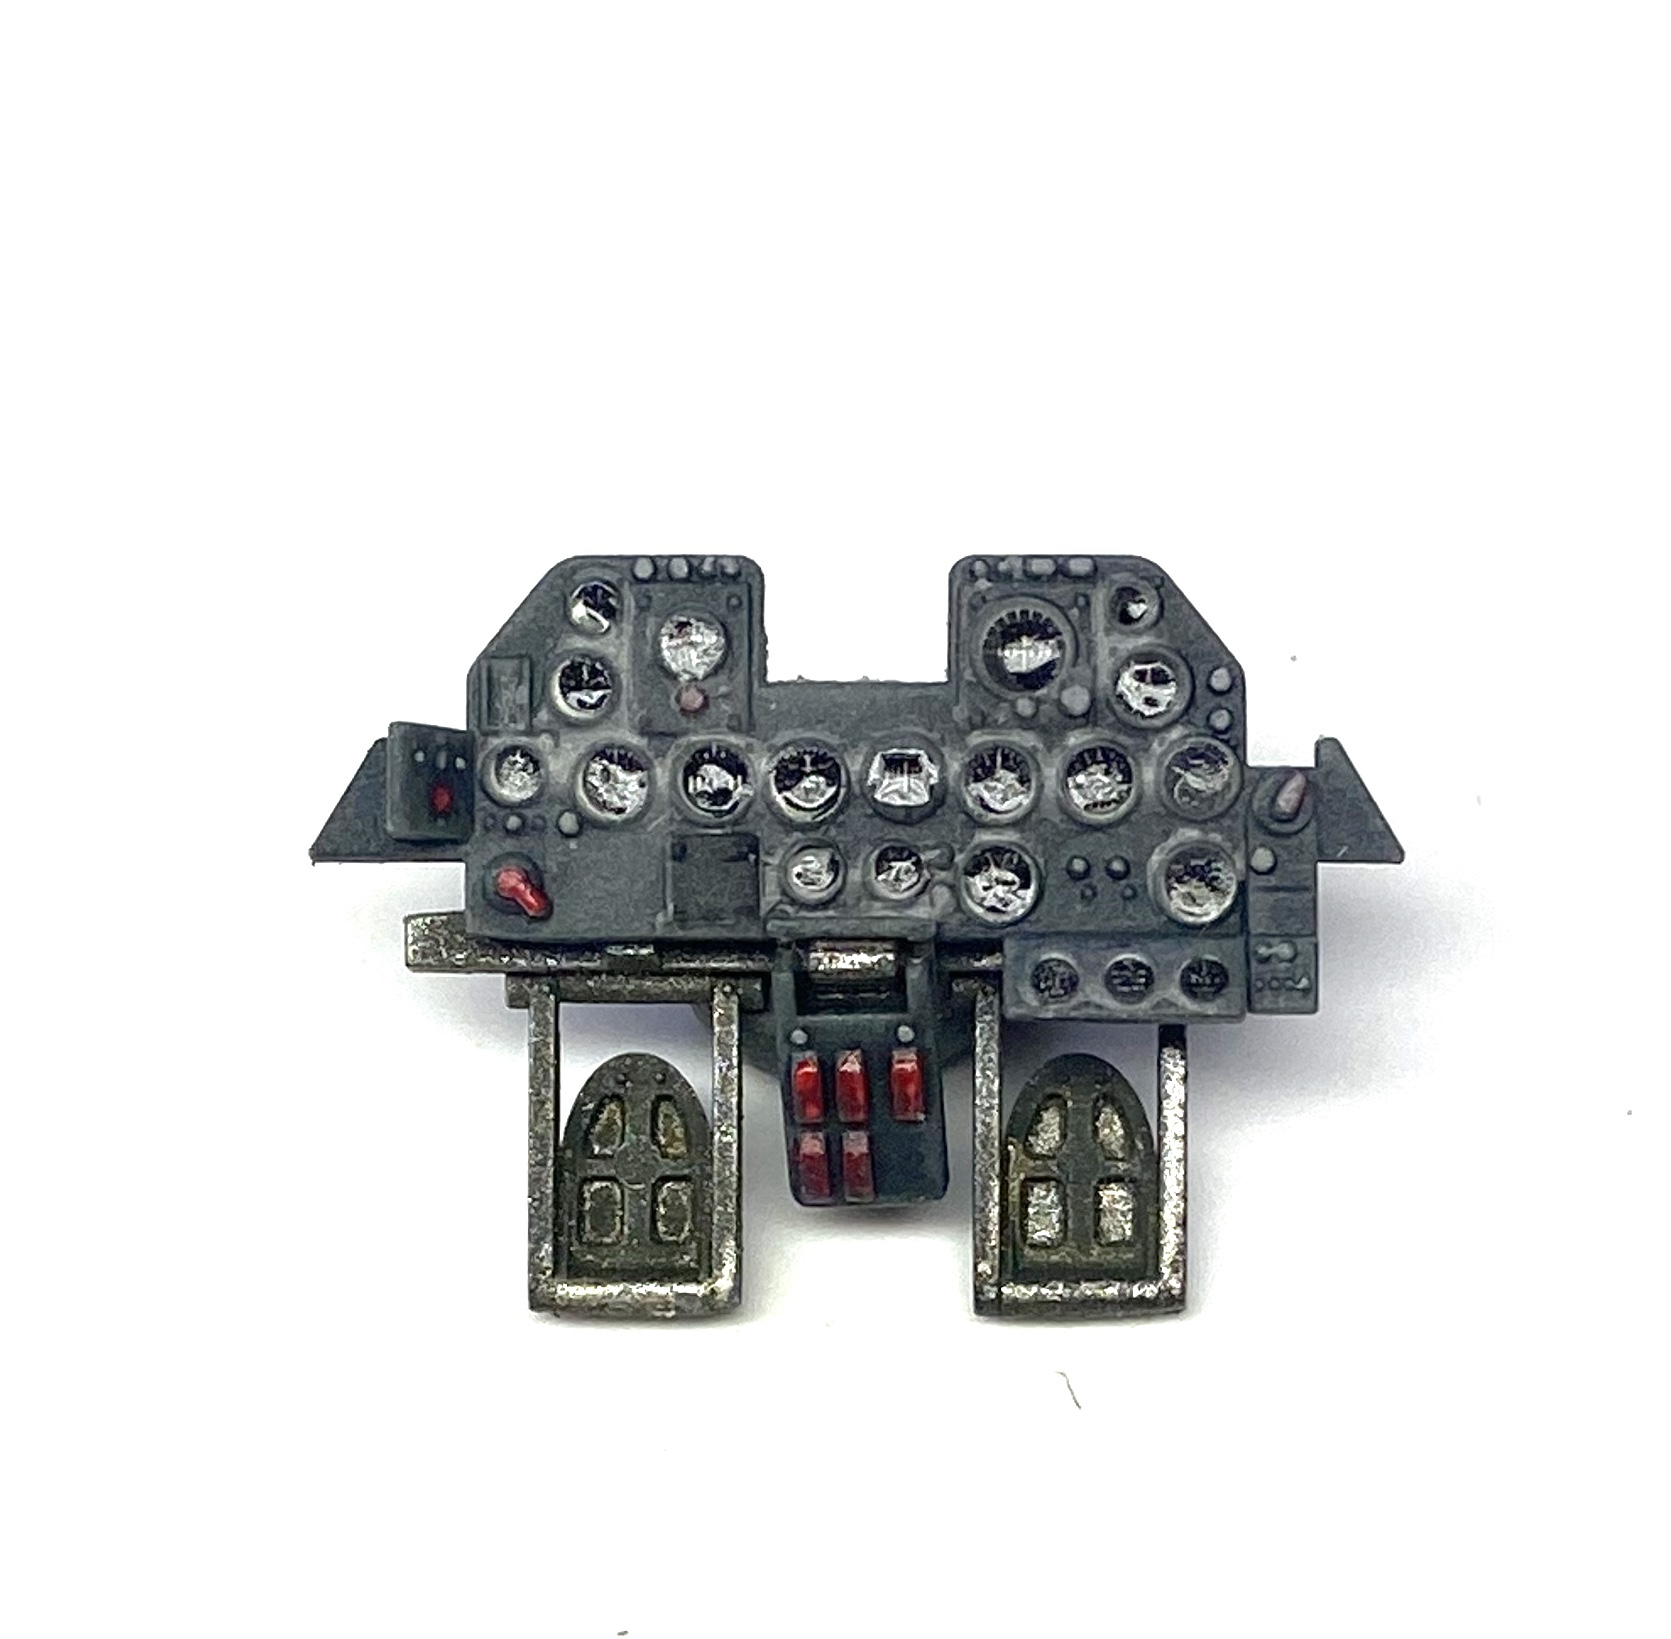
The kit instrument panel with the kit decals for the instruments, with some careful painting a realistic result can be achieved.
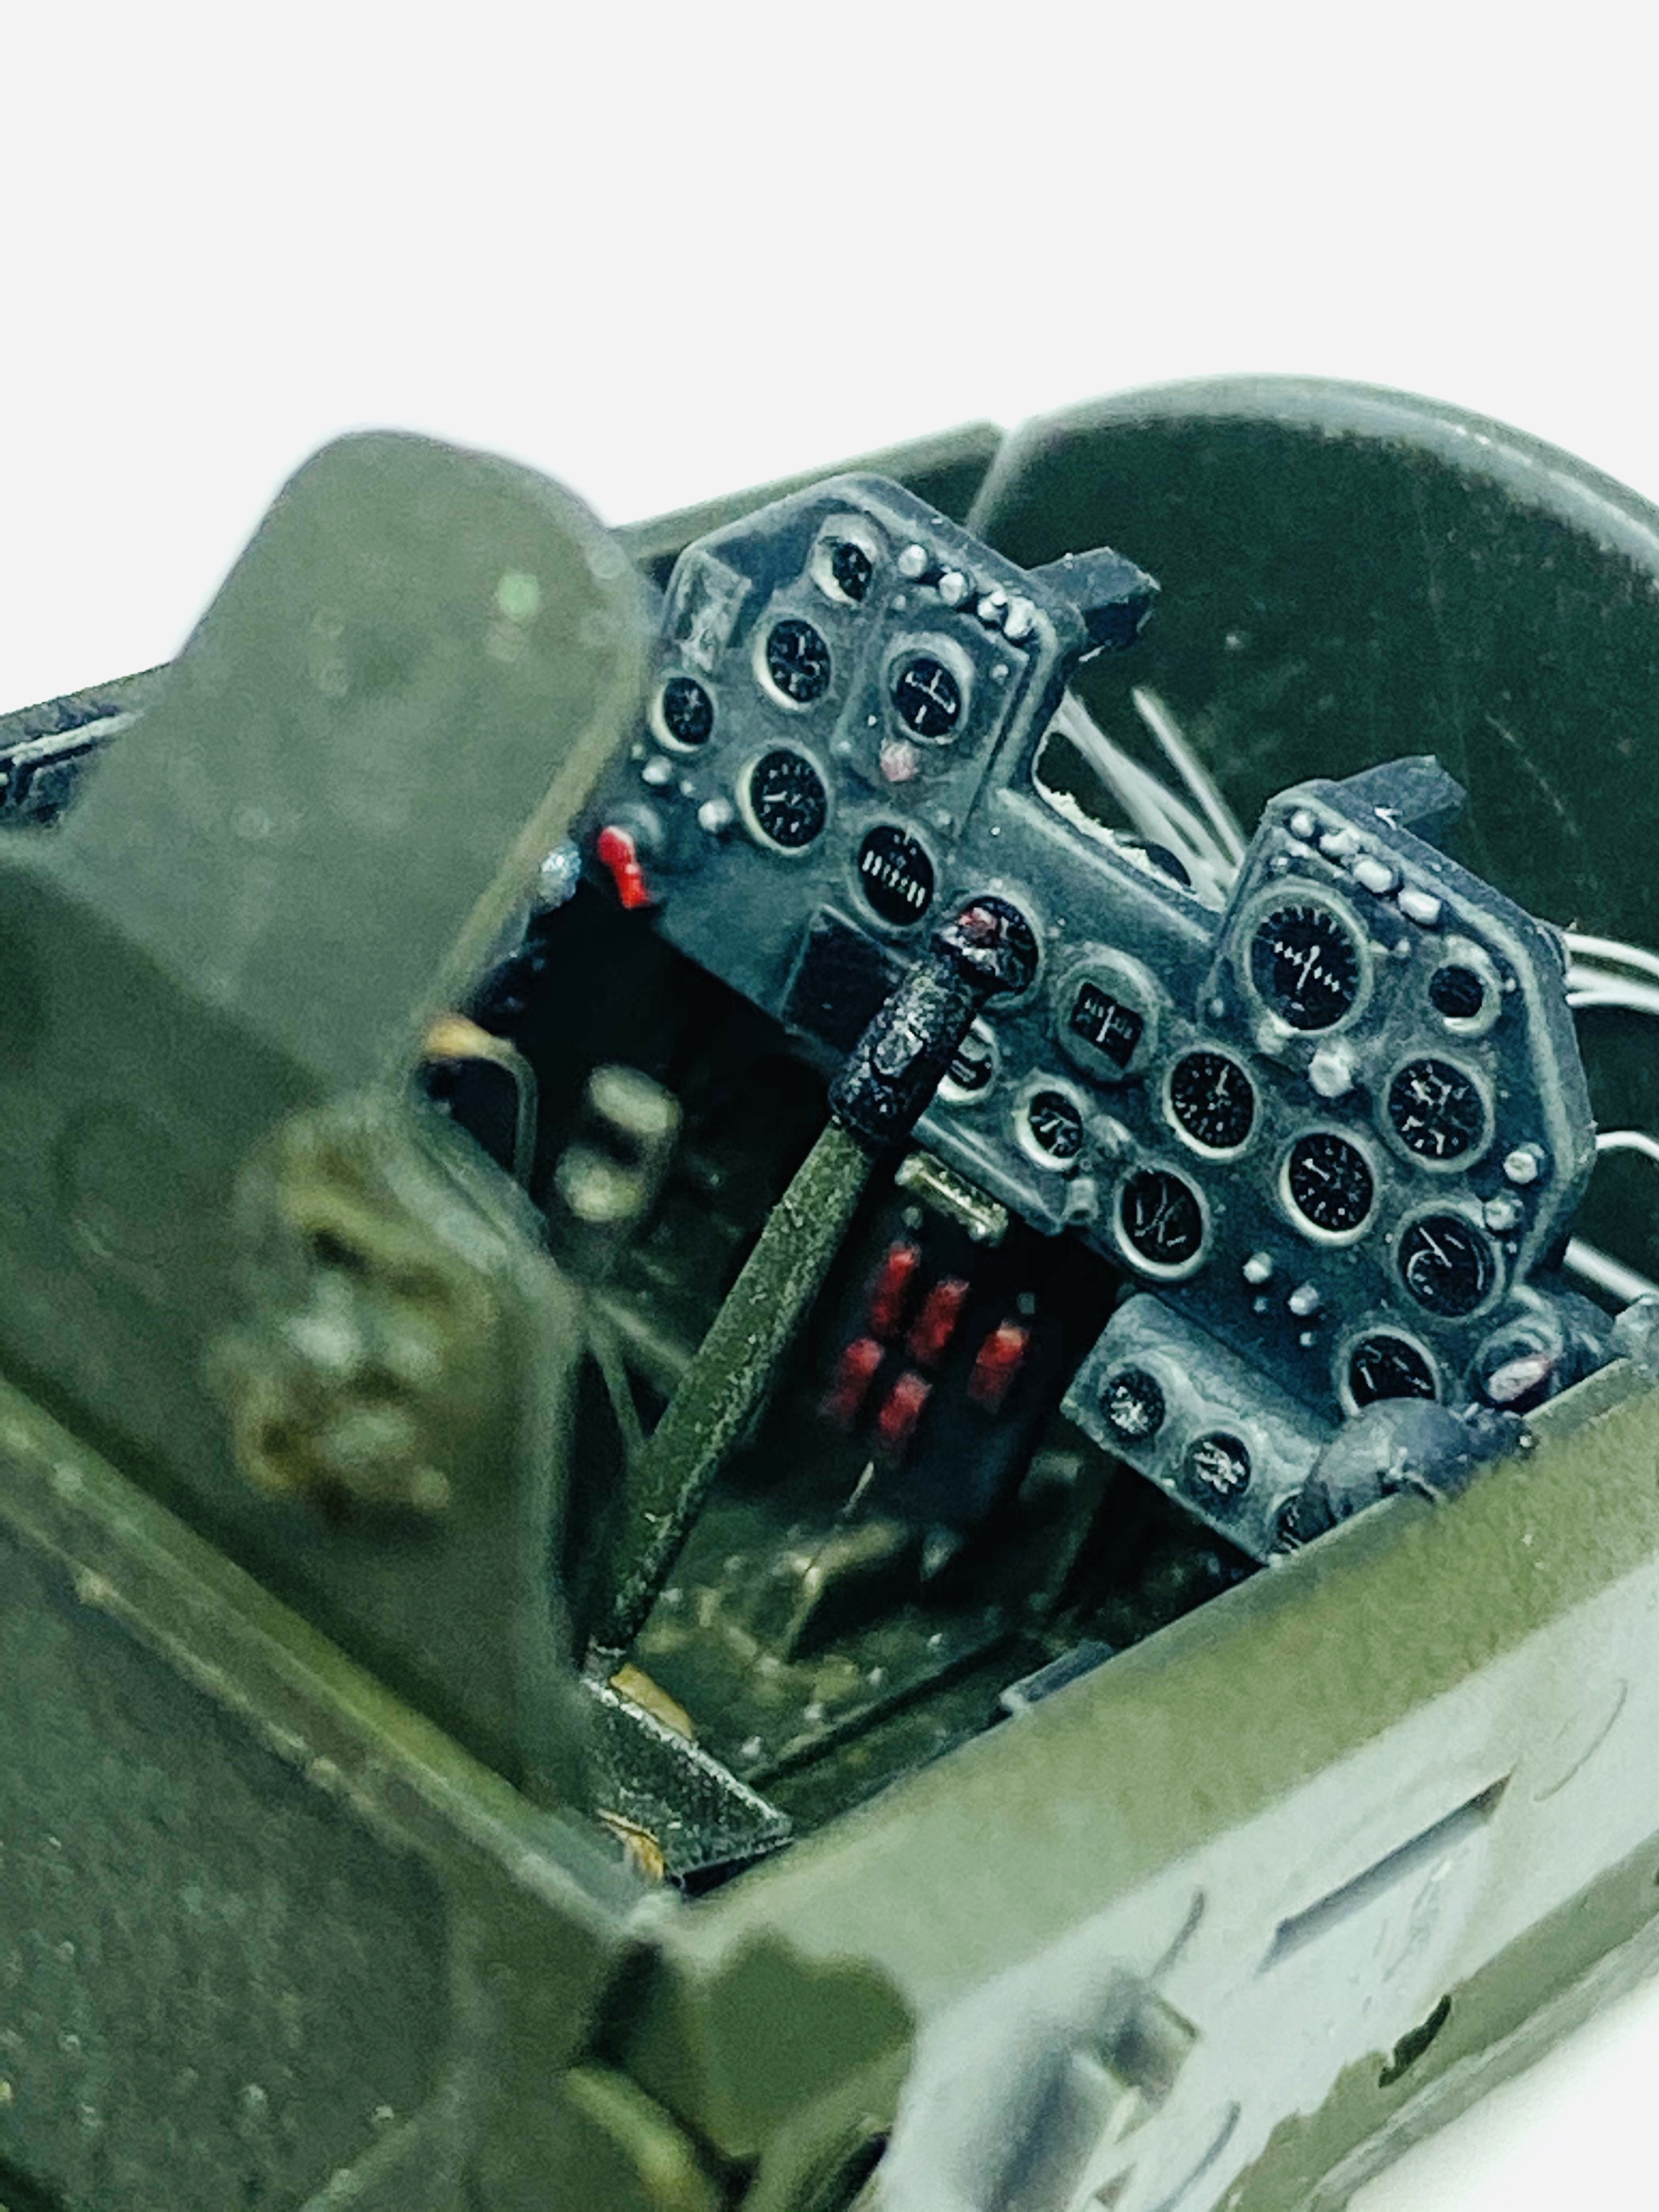
Here is the finished cockpit tub……
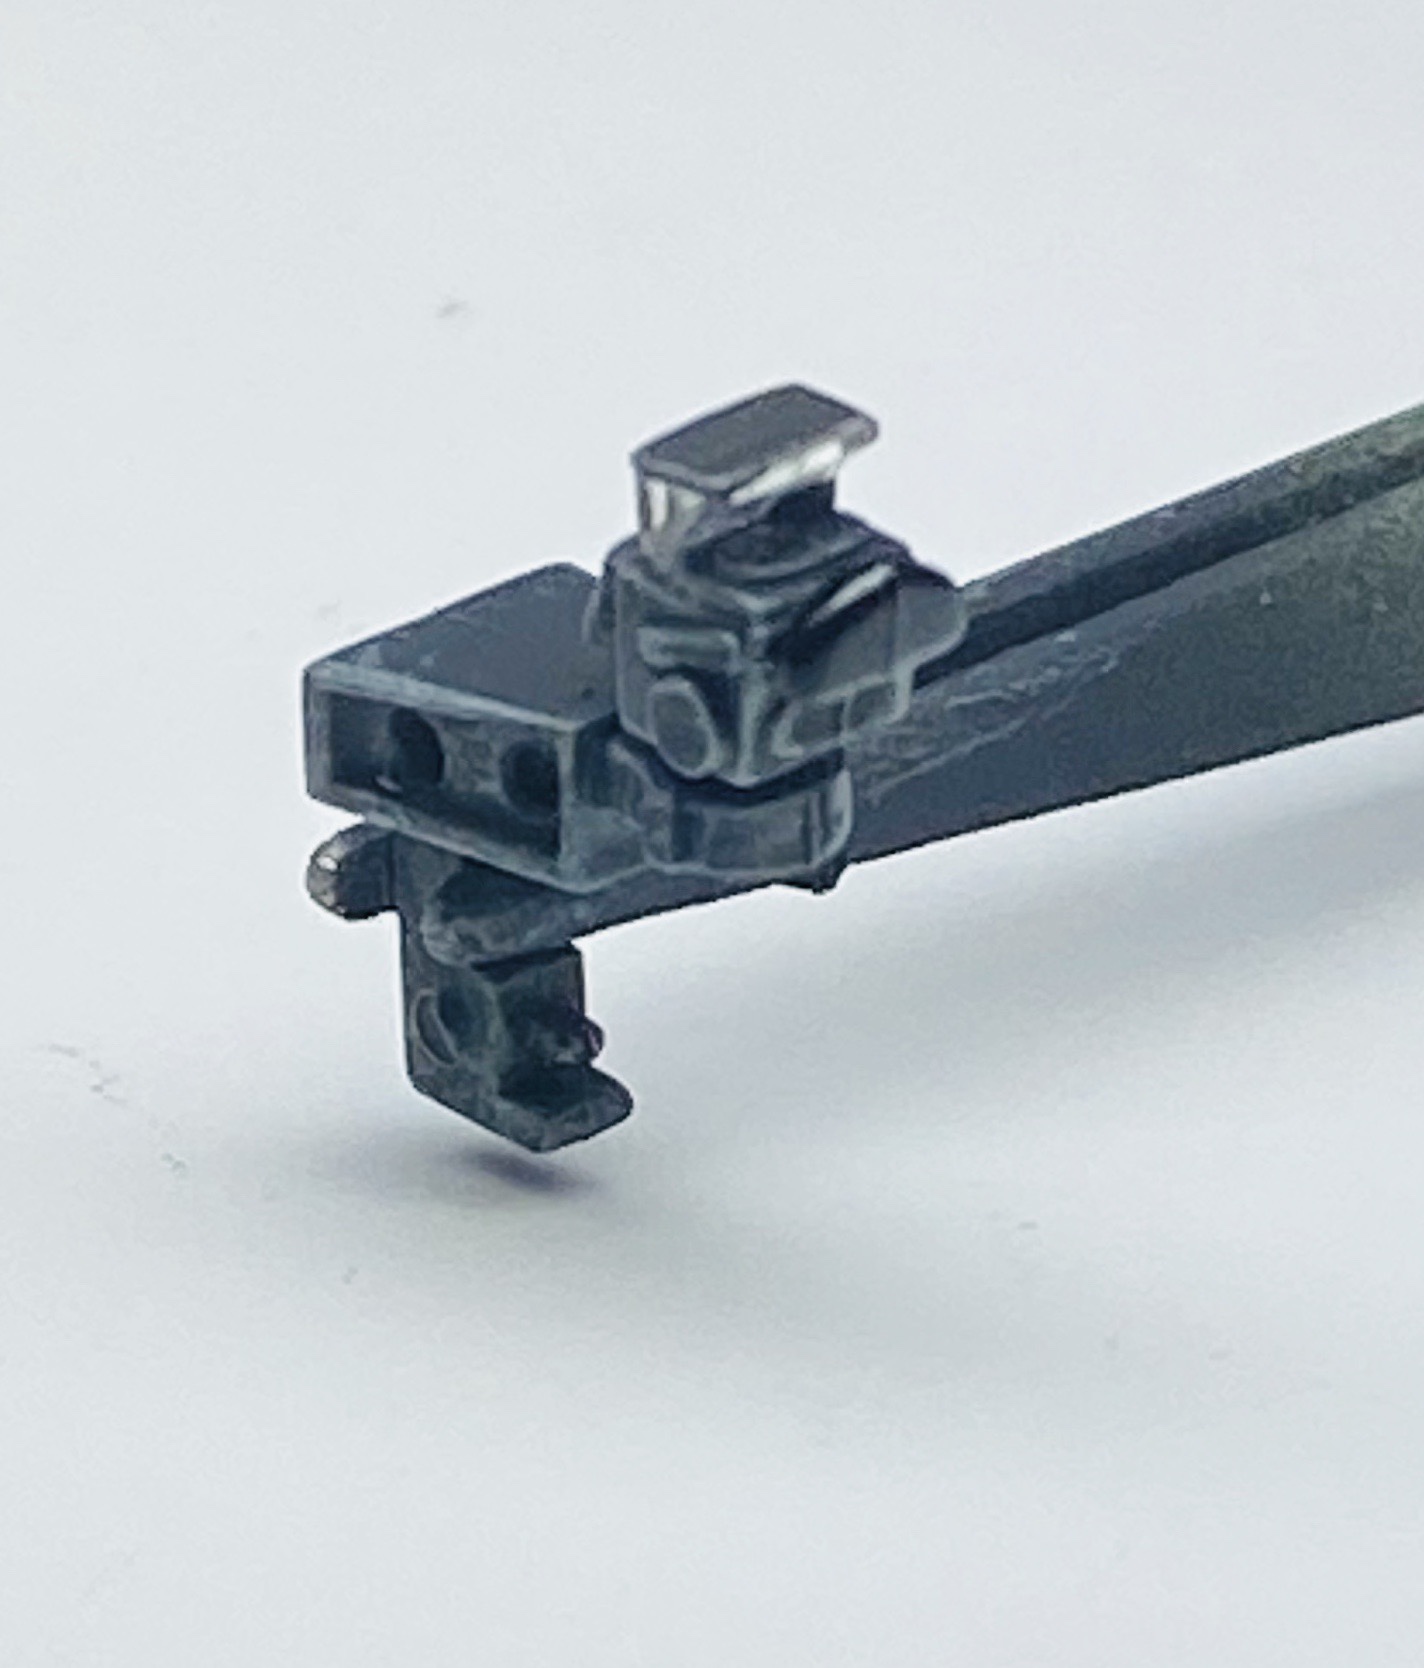
This is the kit gun sight which I felt was adequate once painted and drybrushed to bring out the moulded detail.
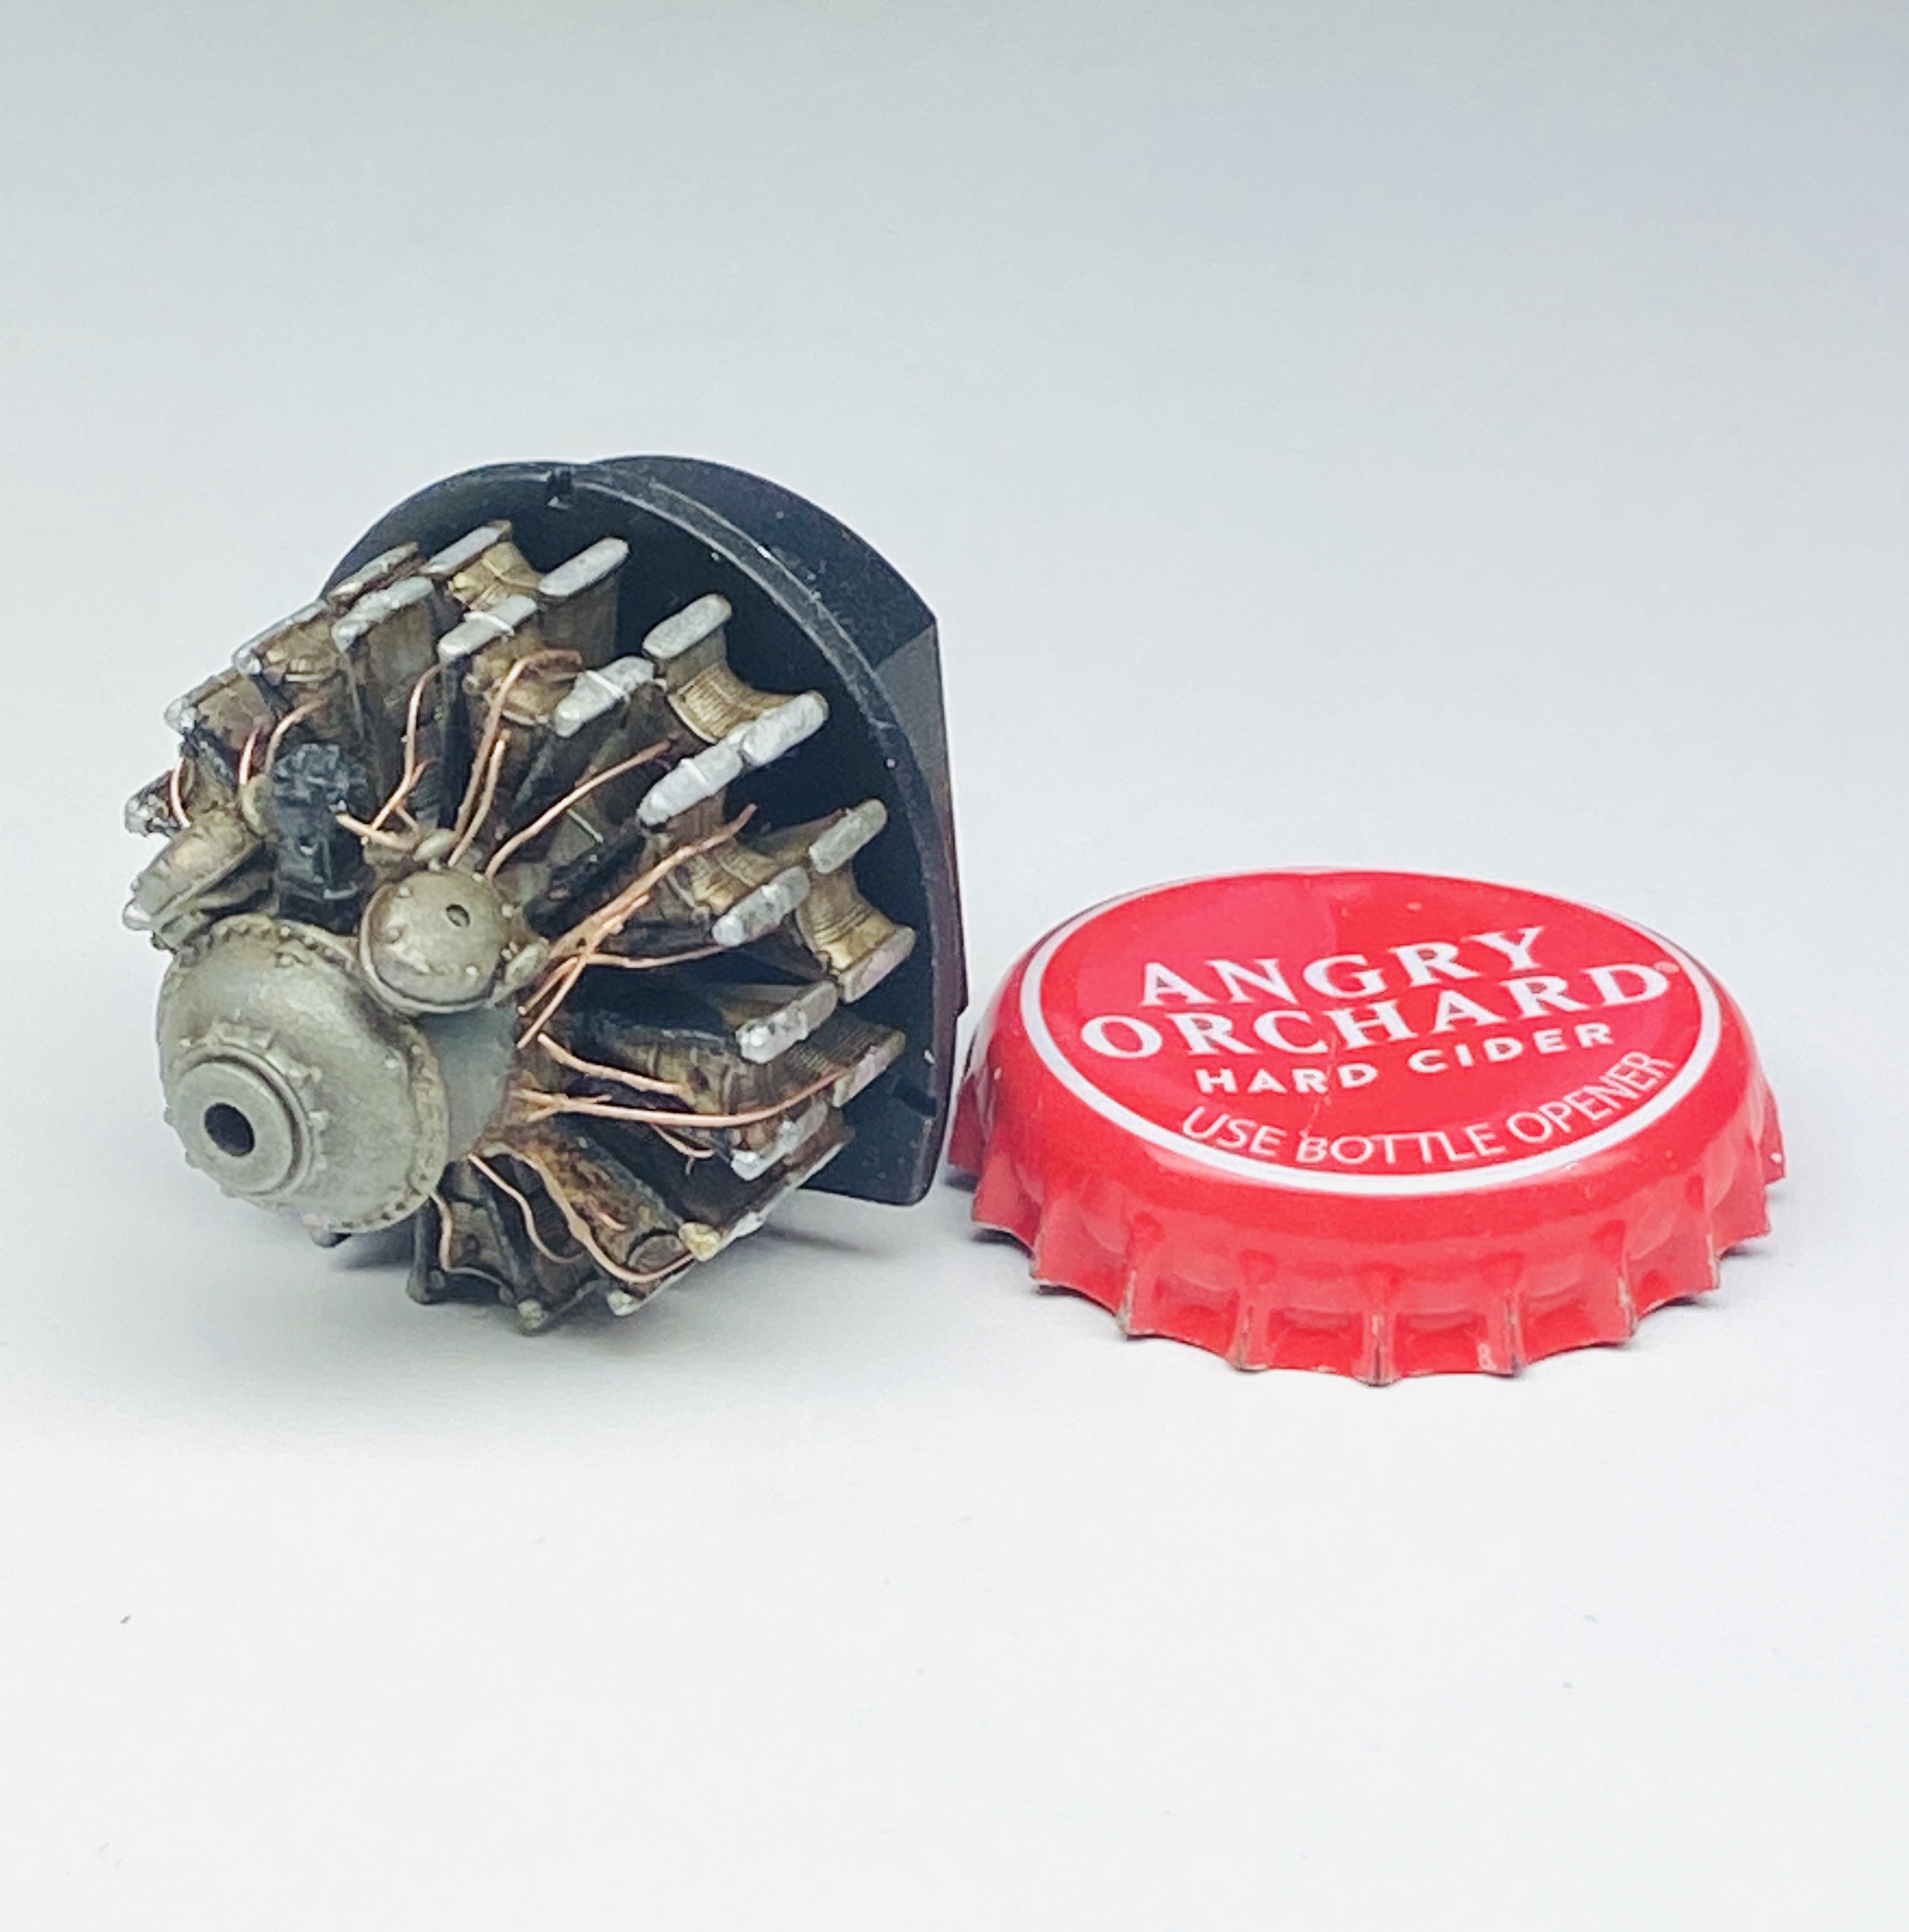
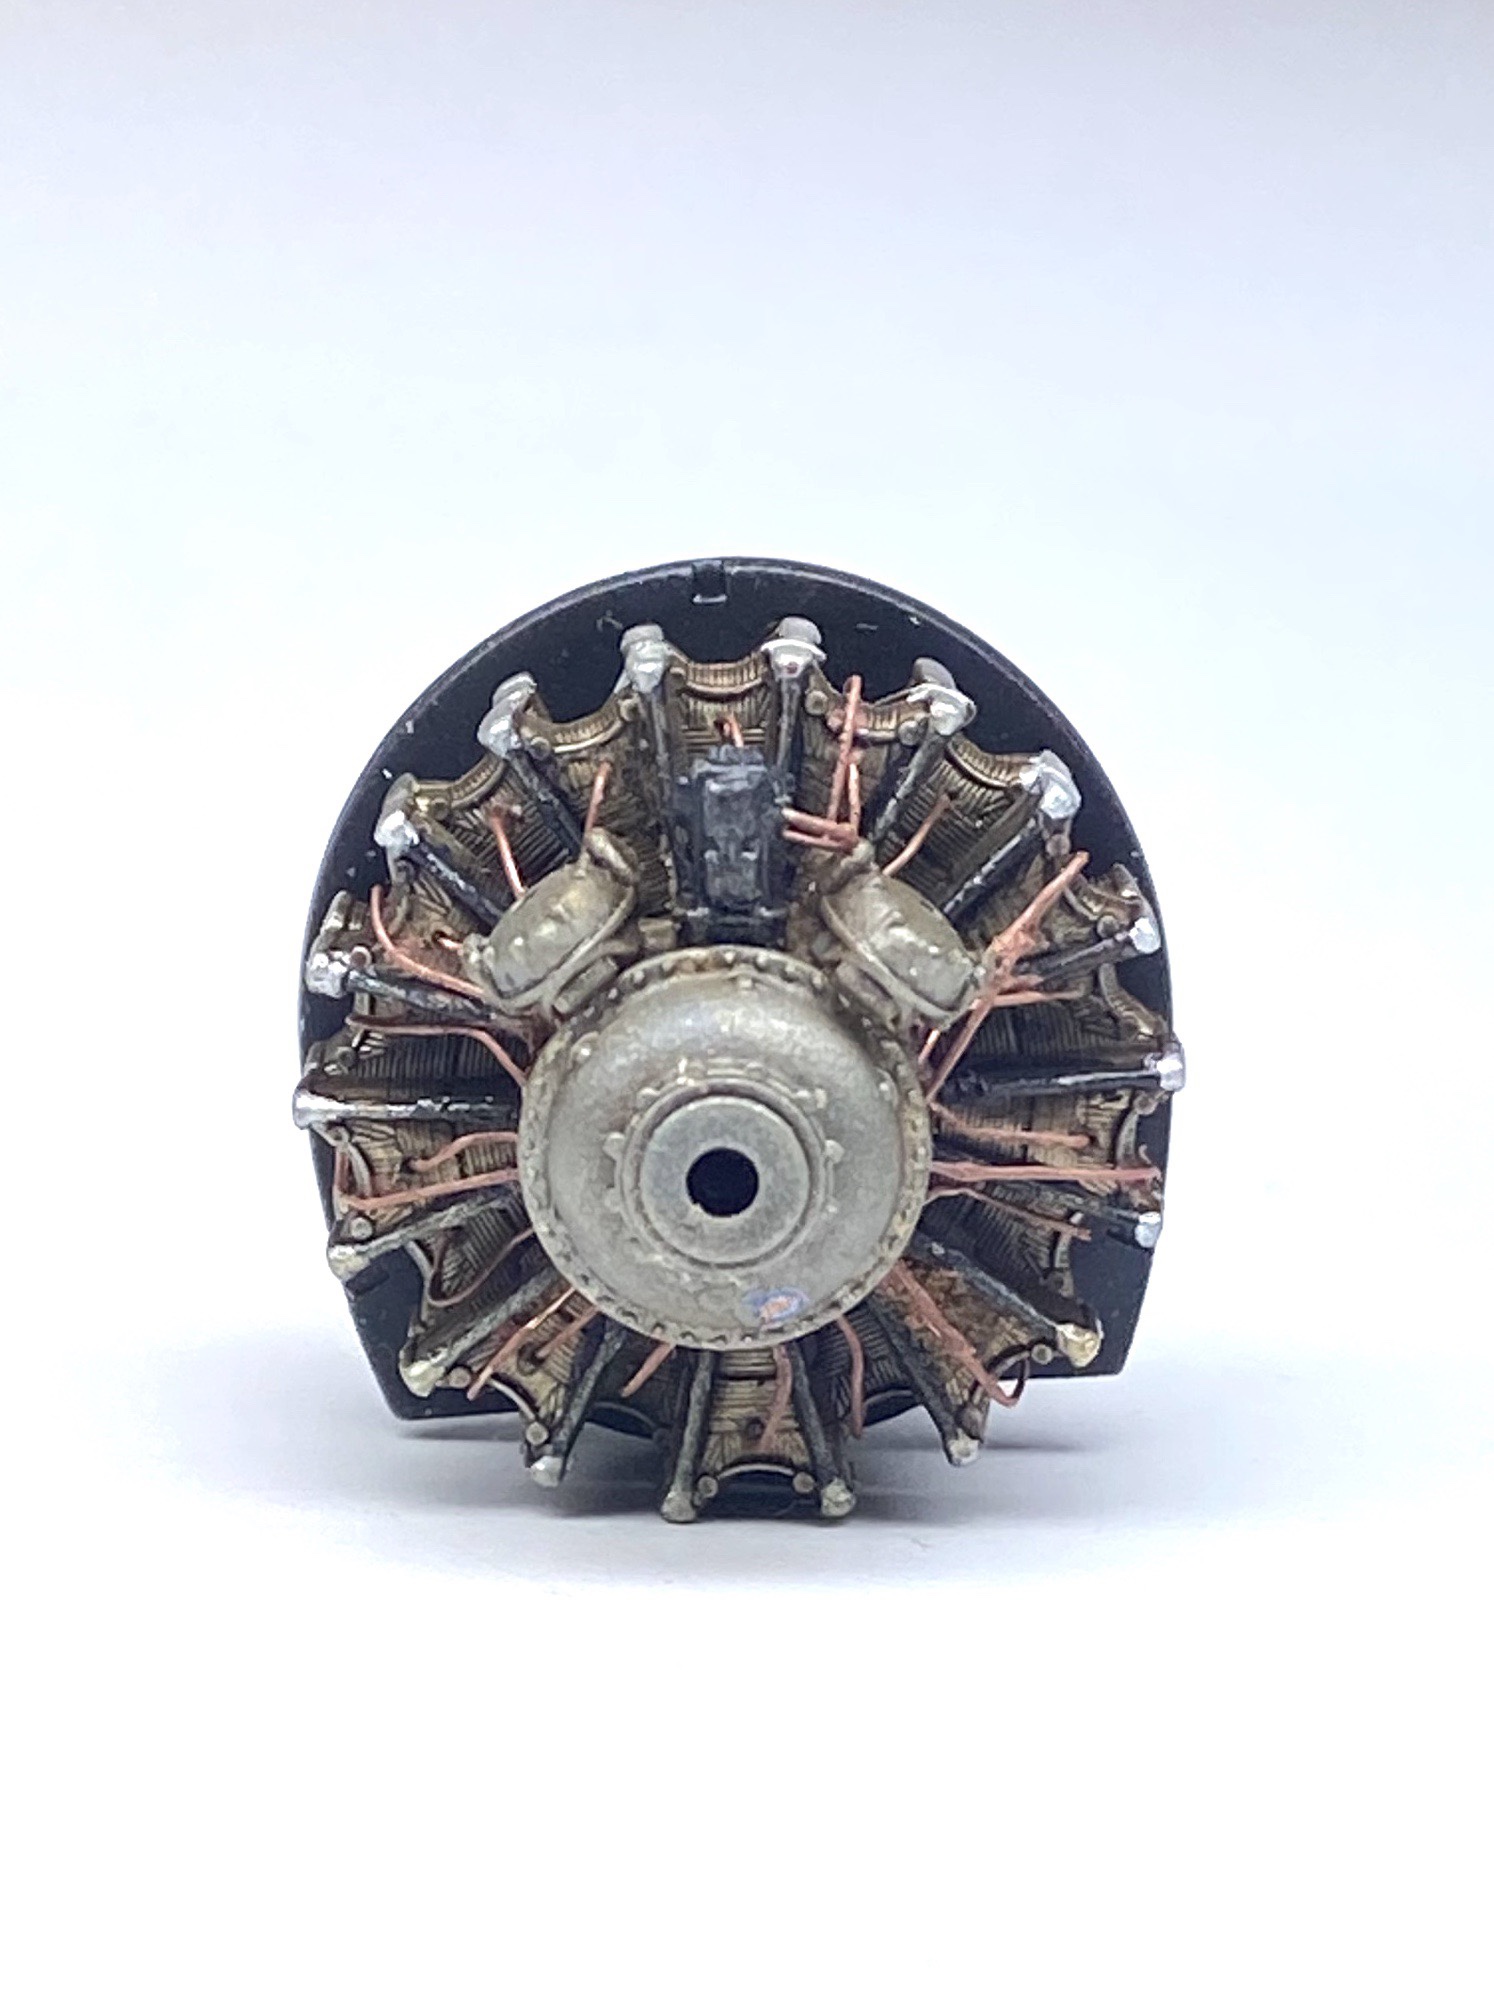
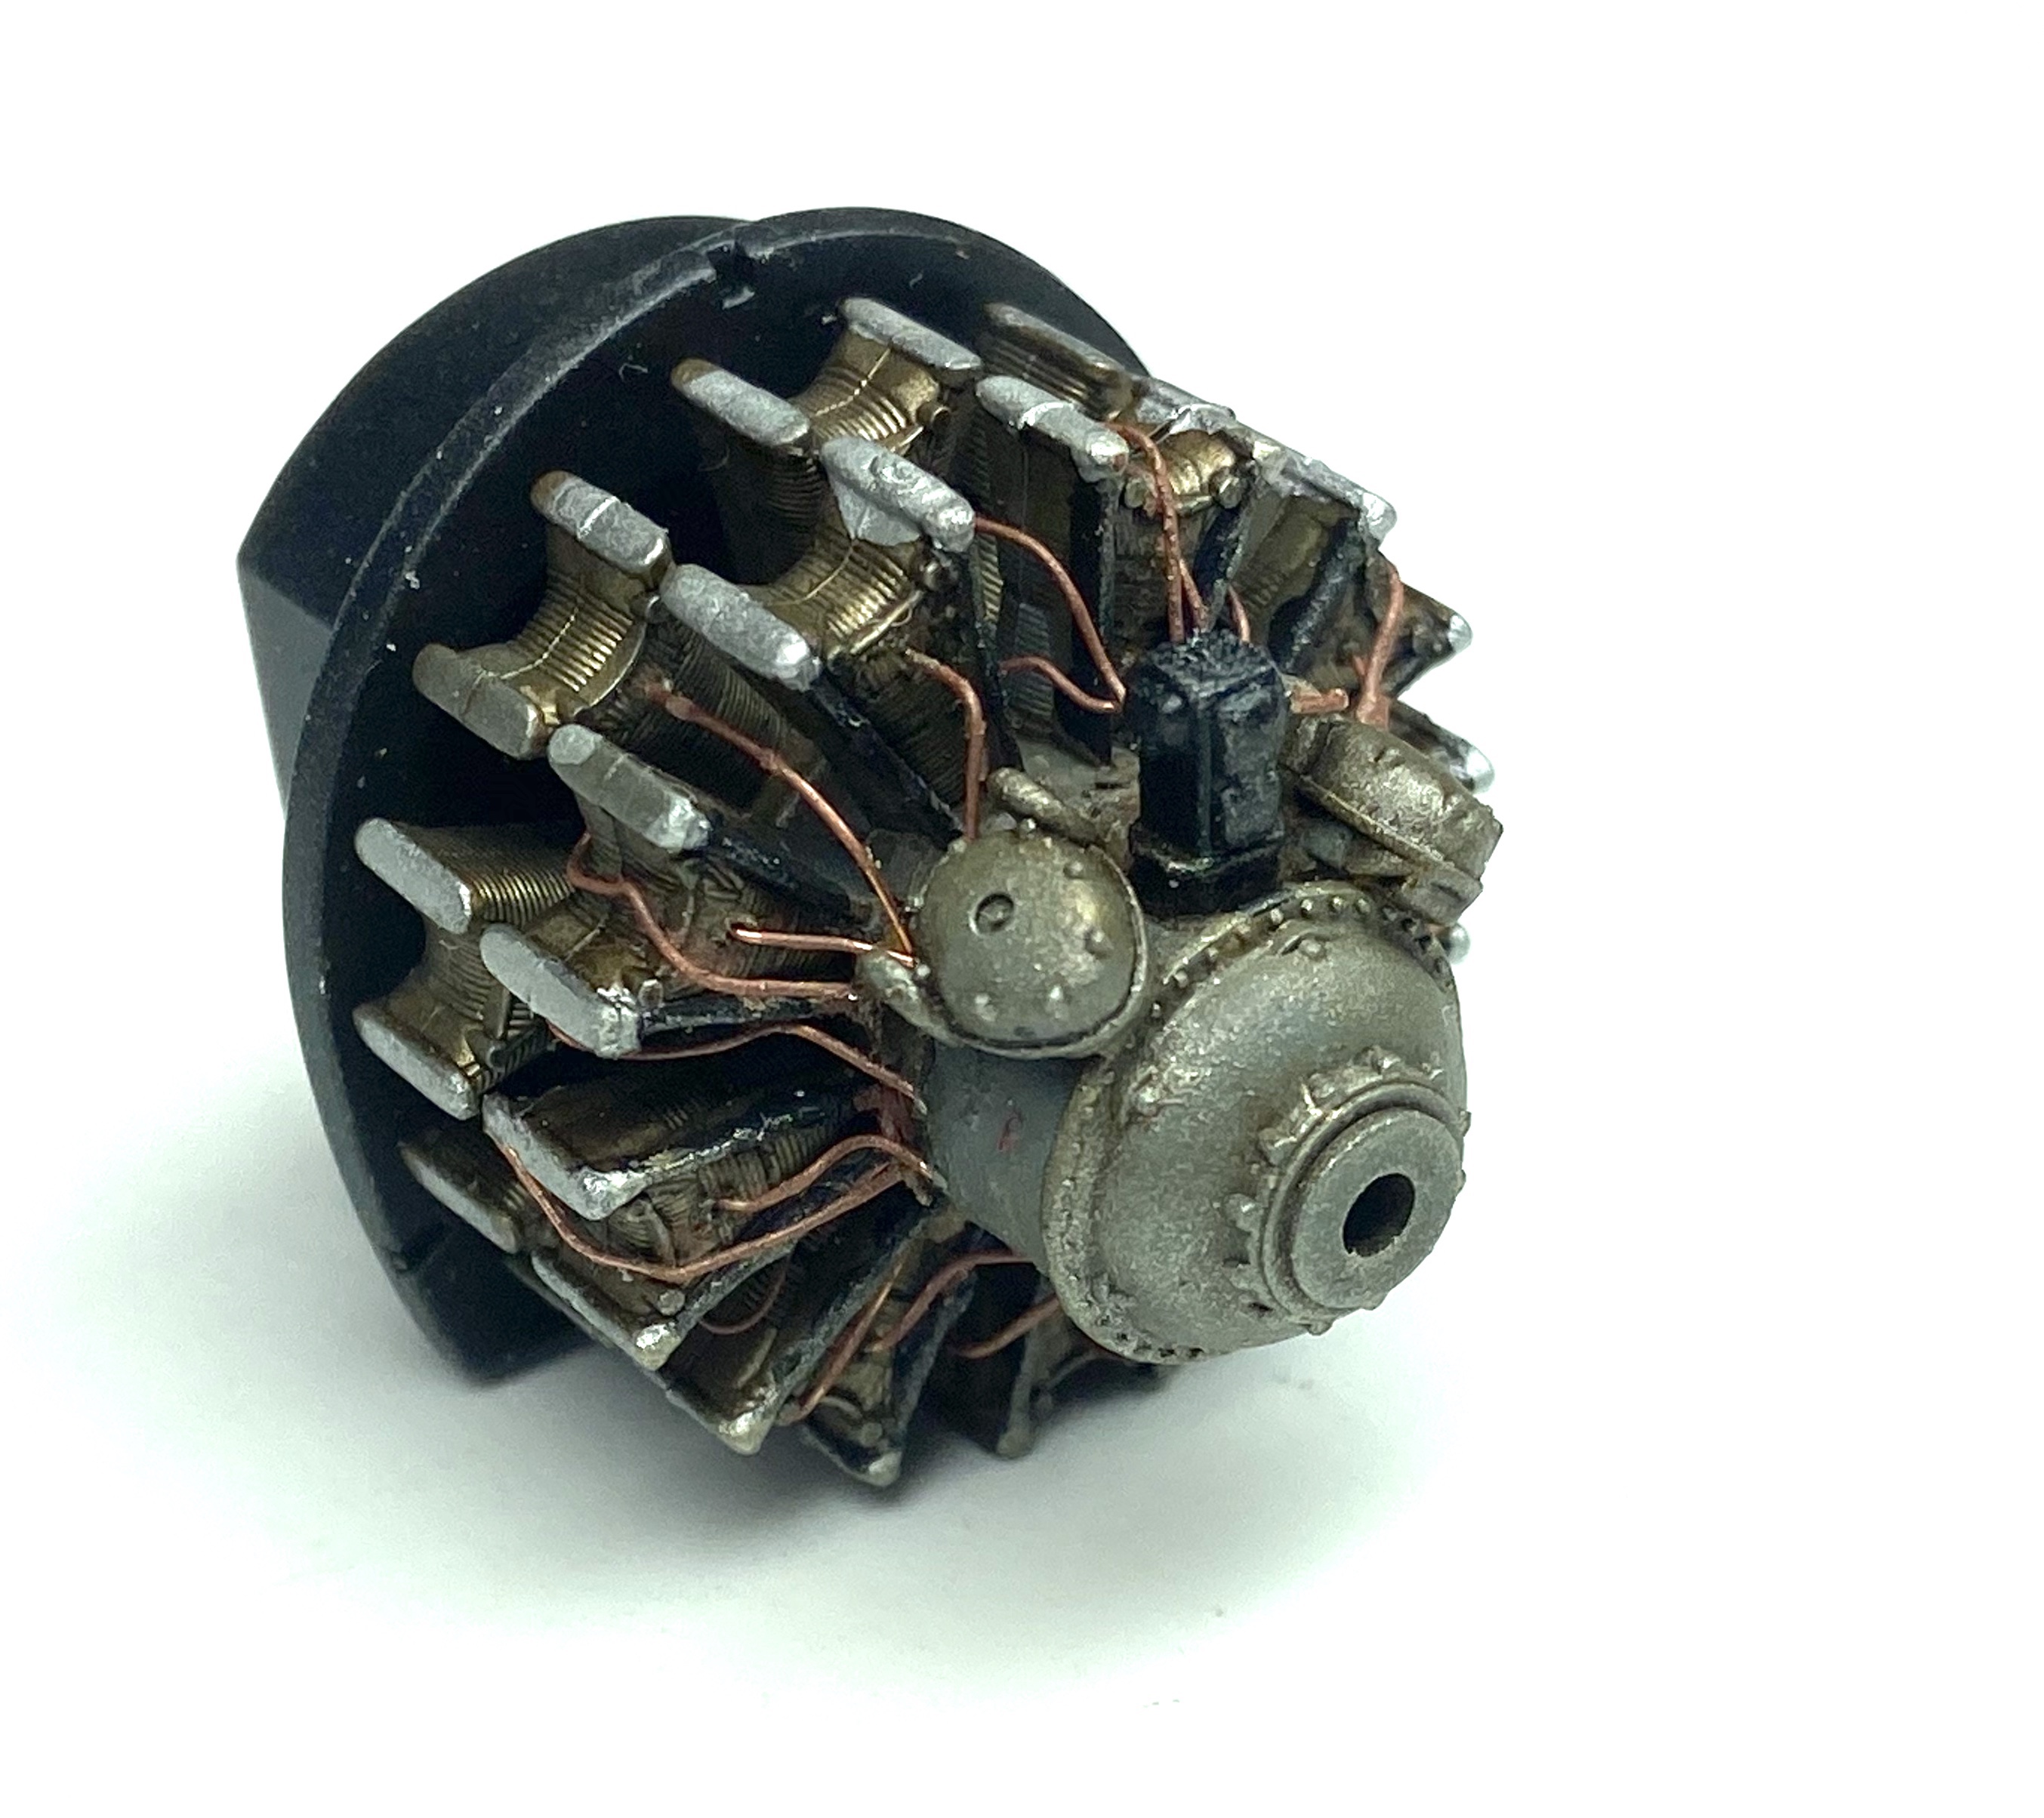
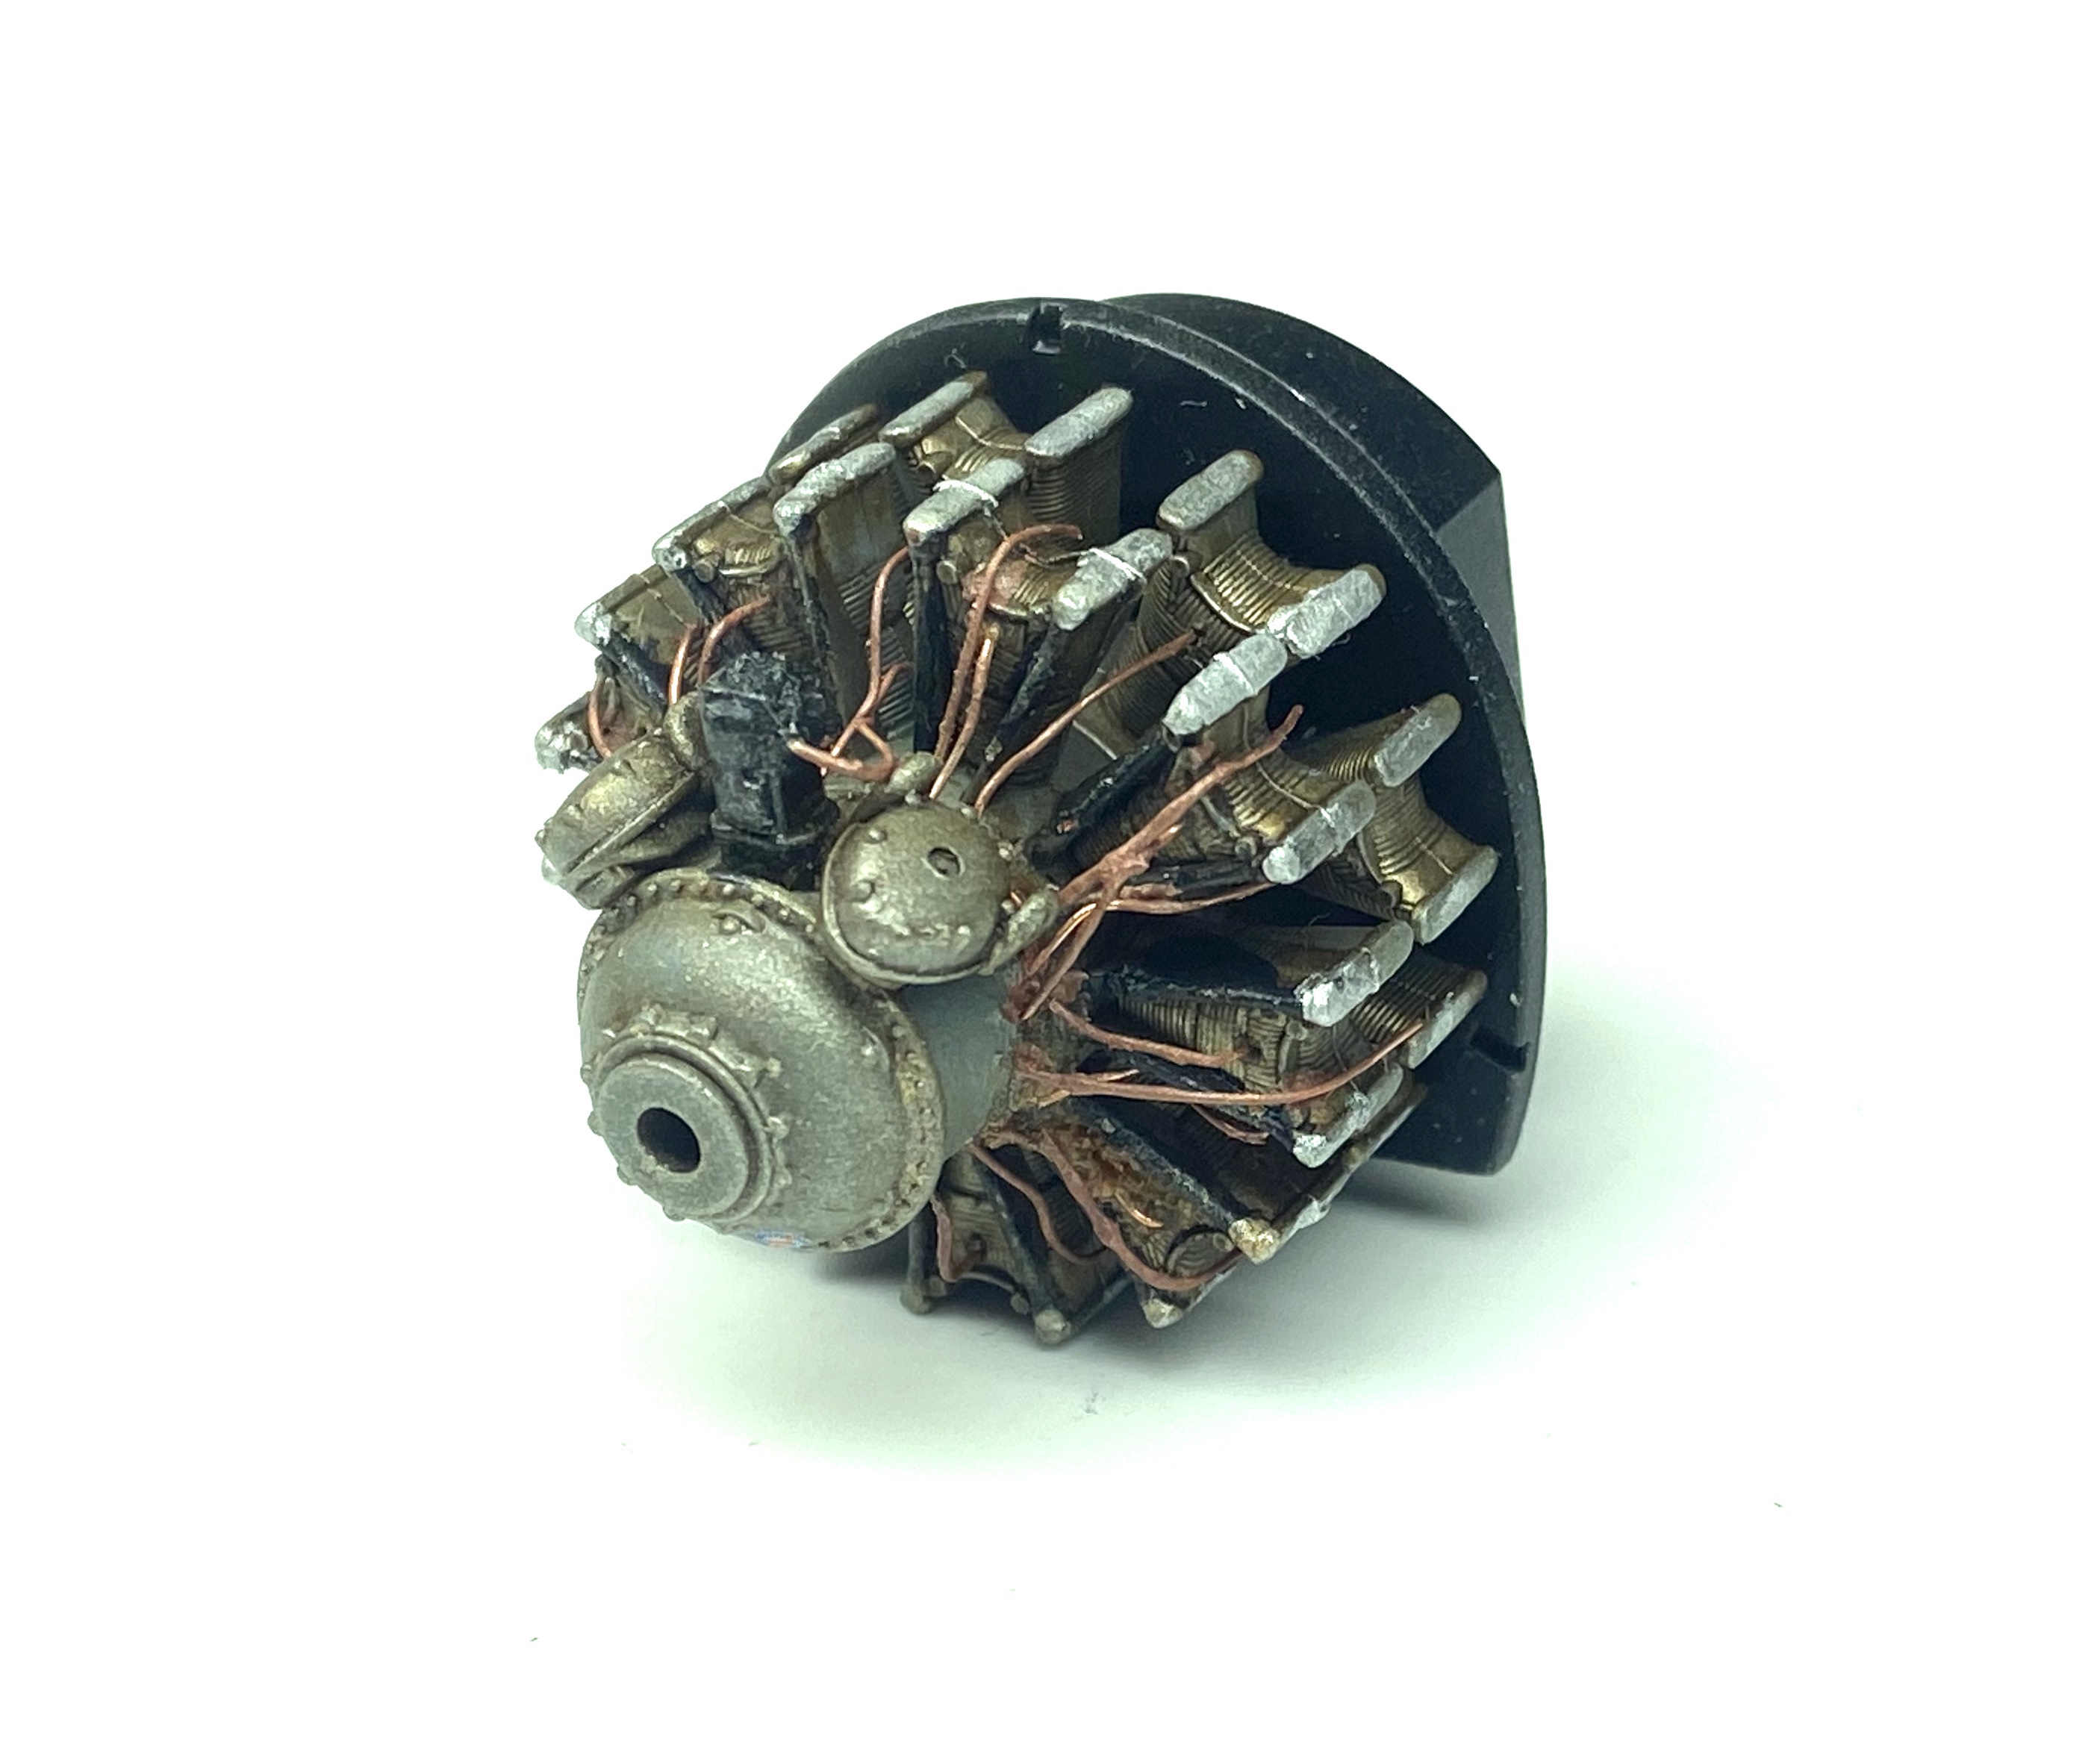
Here’s the kit R-2800-57 engine built from the box, I only added copper wire to add some detail.
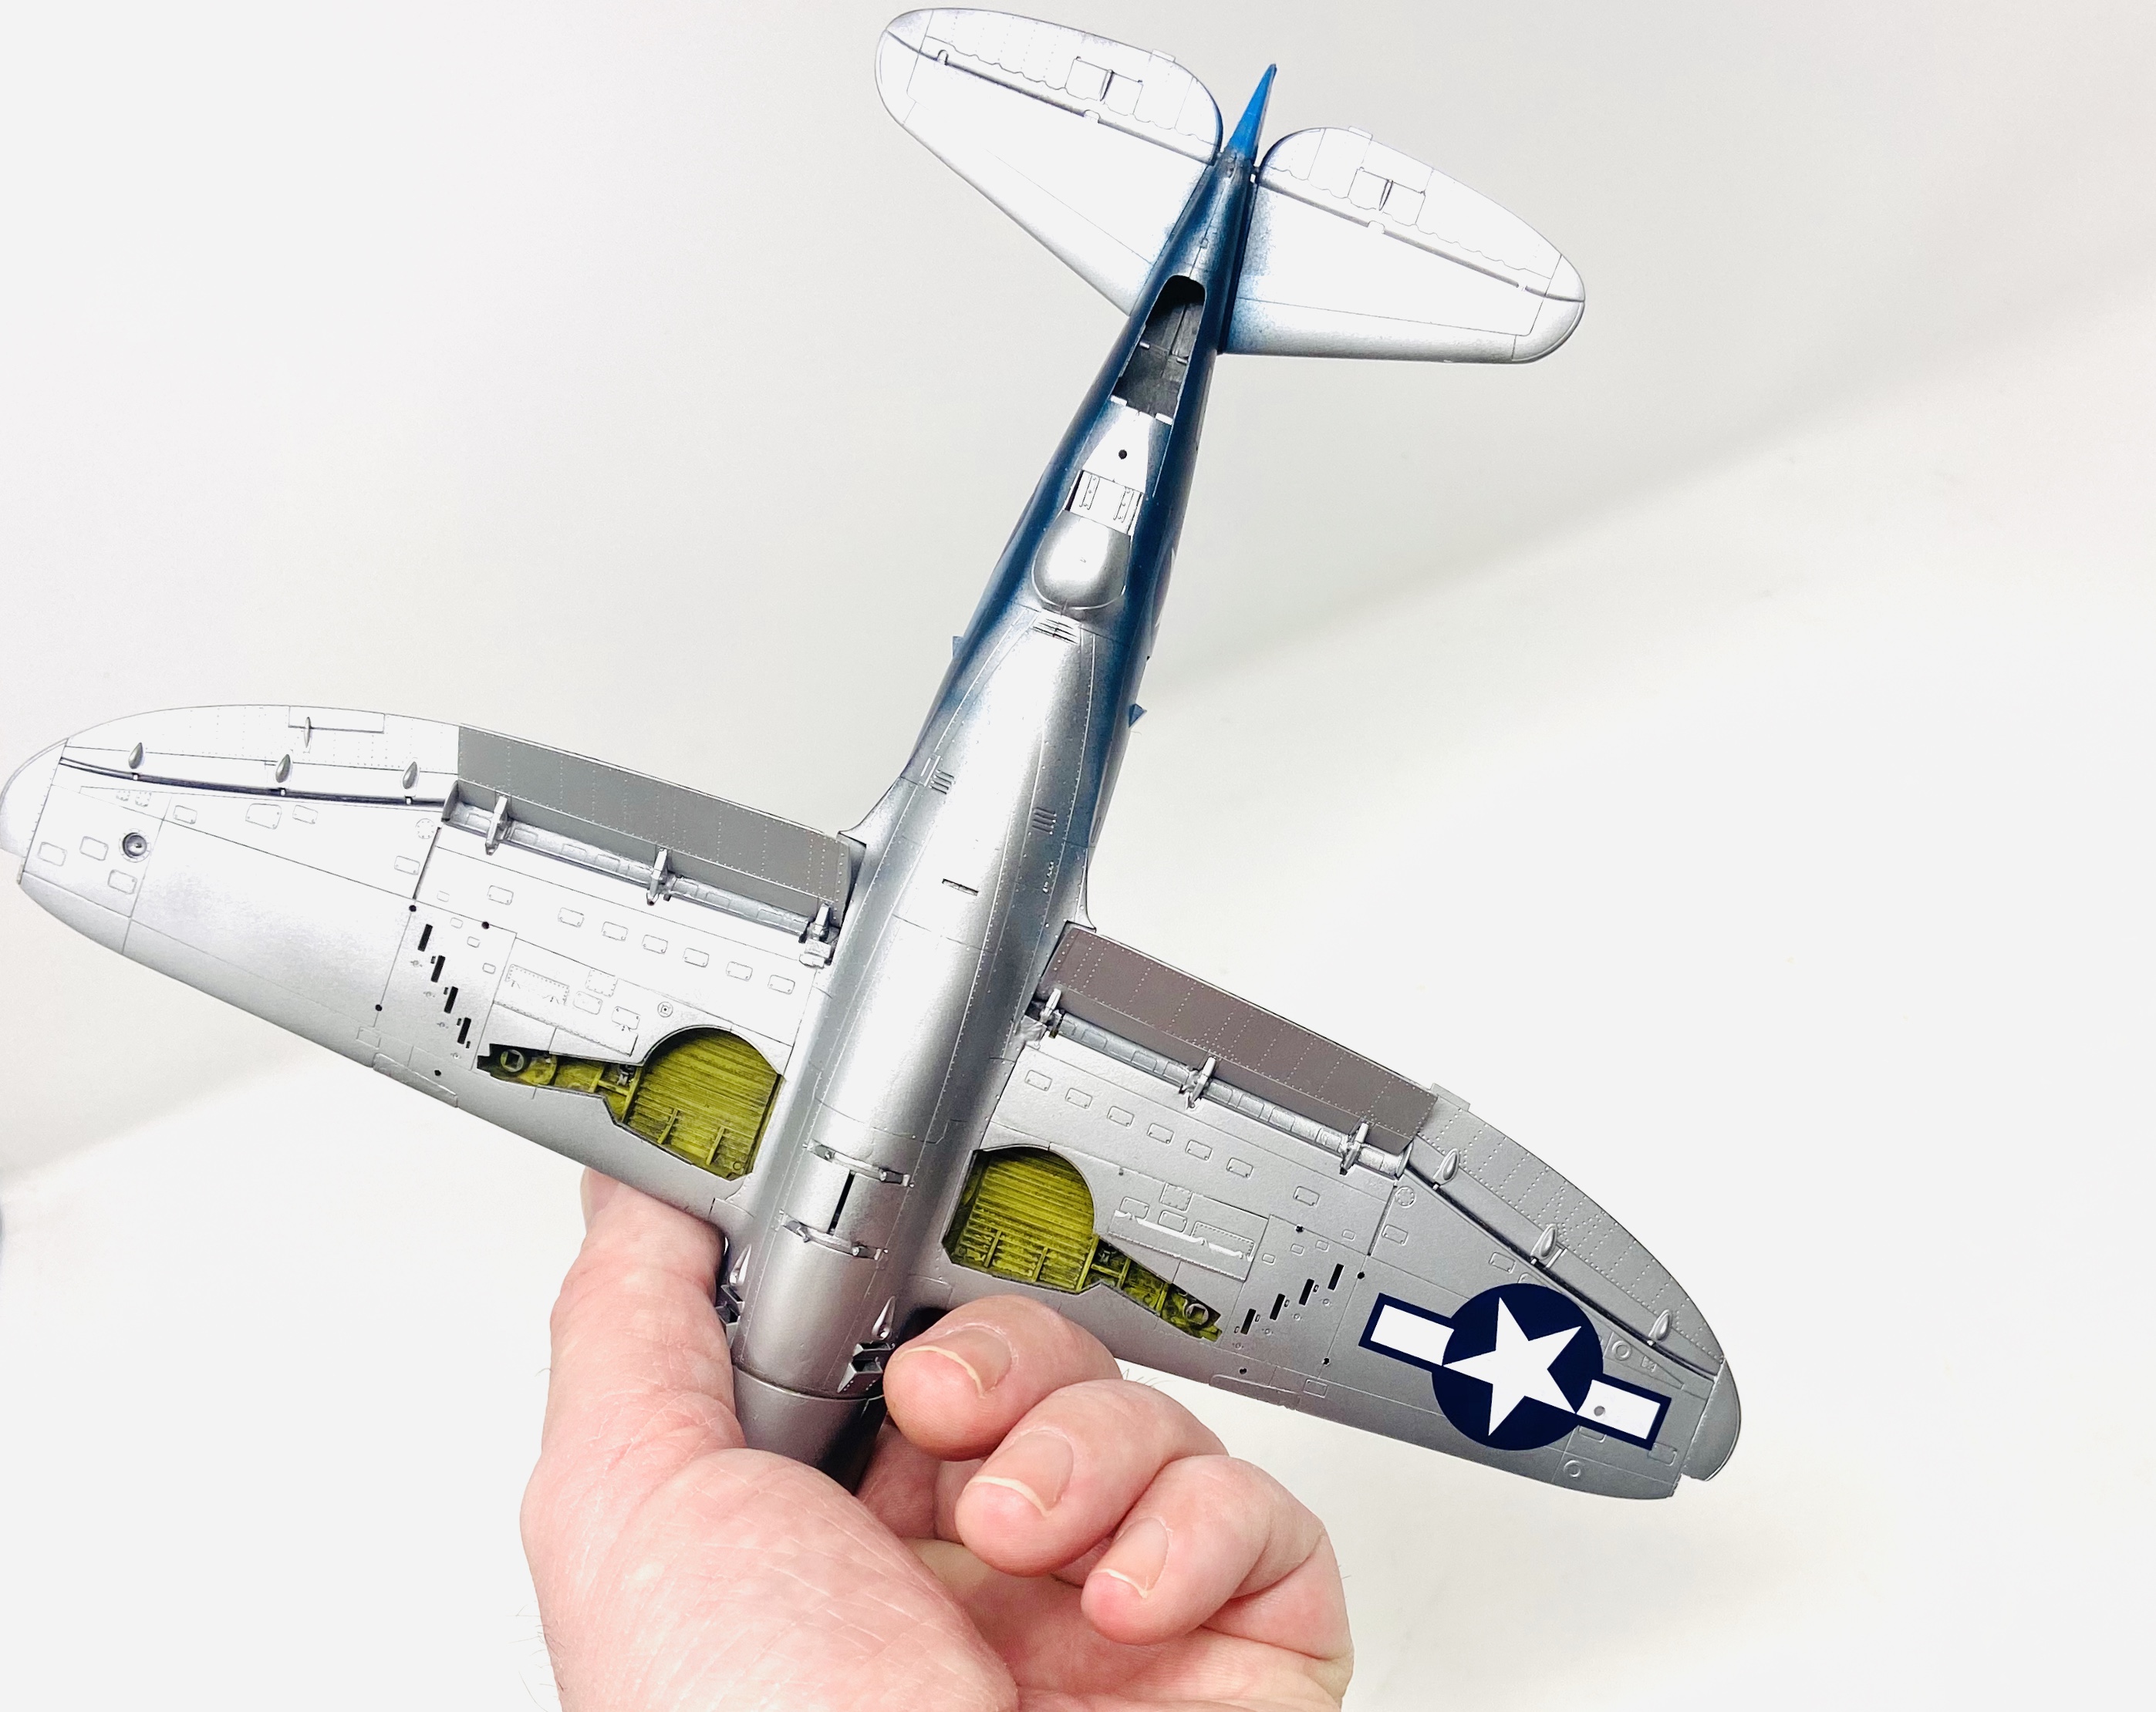
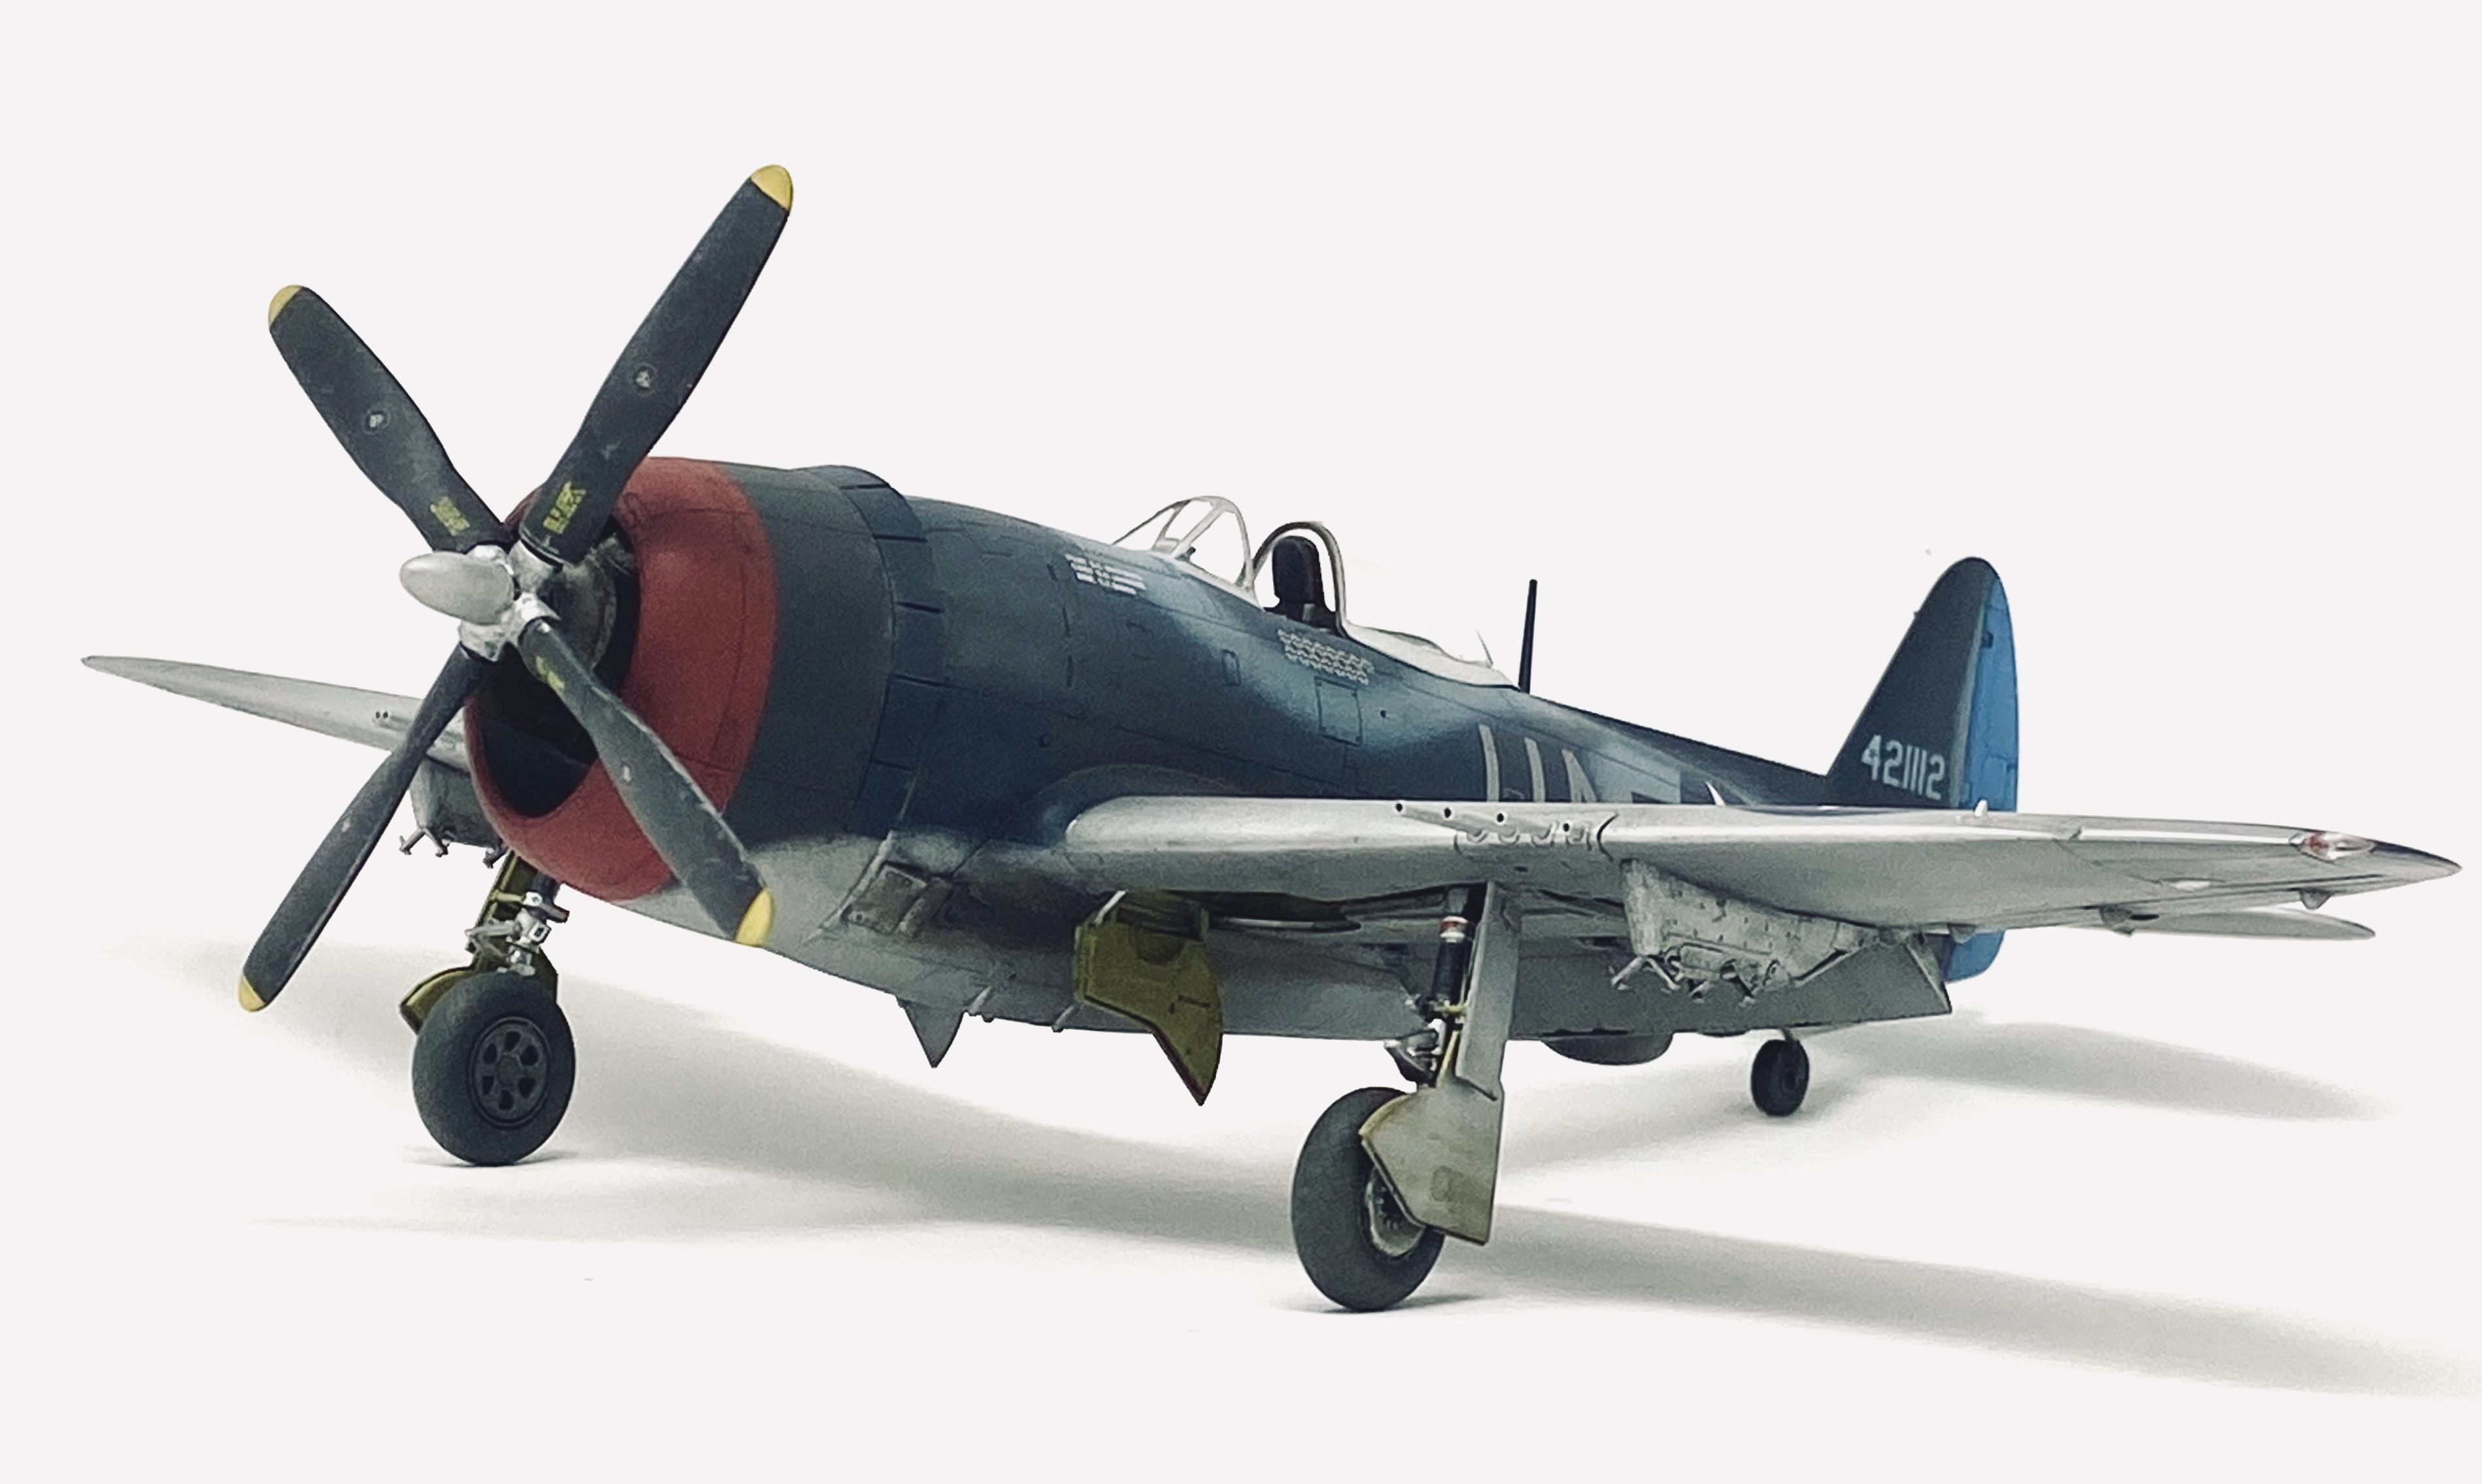
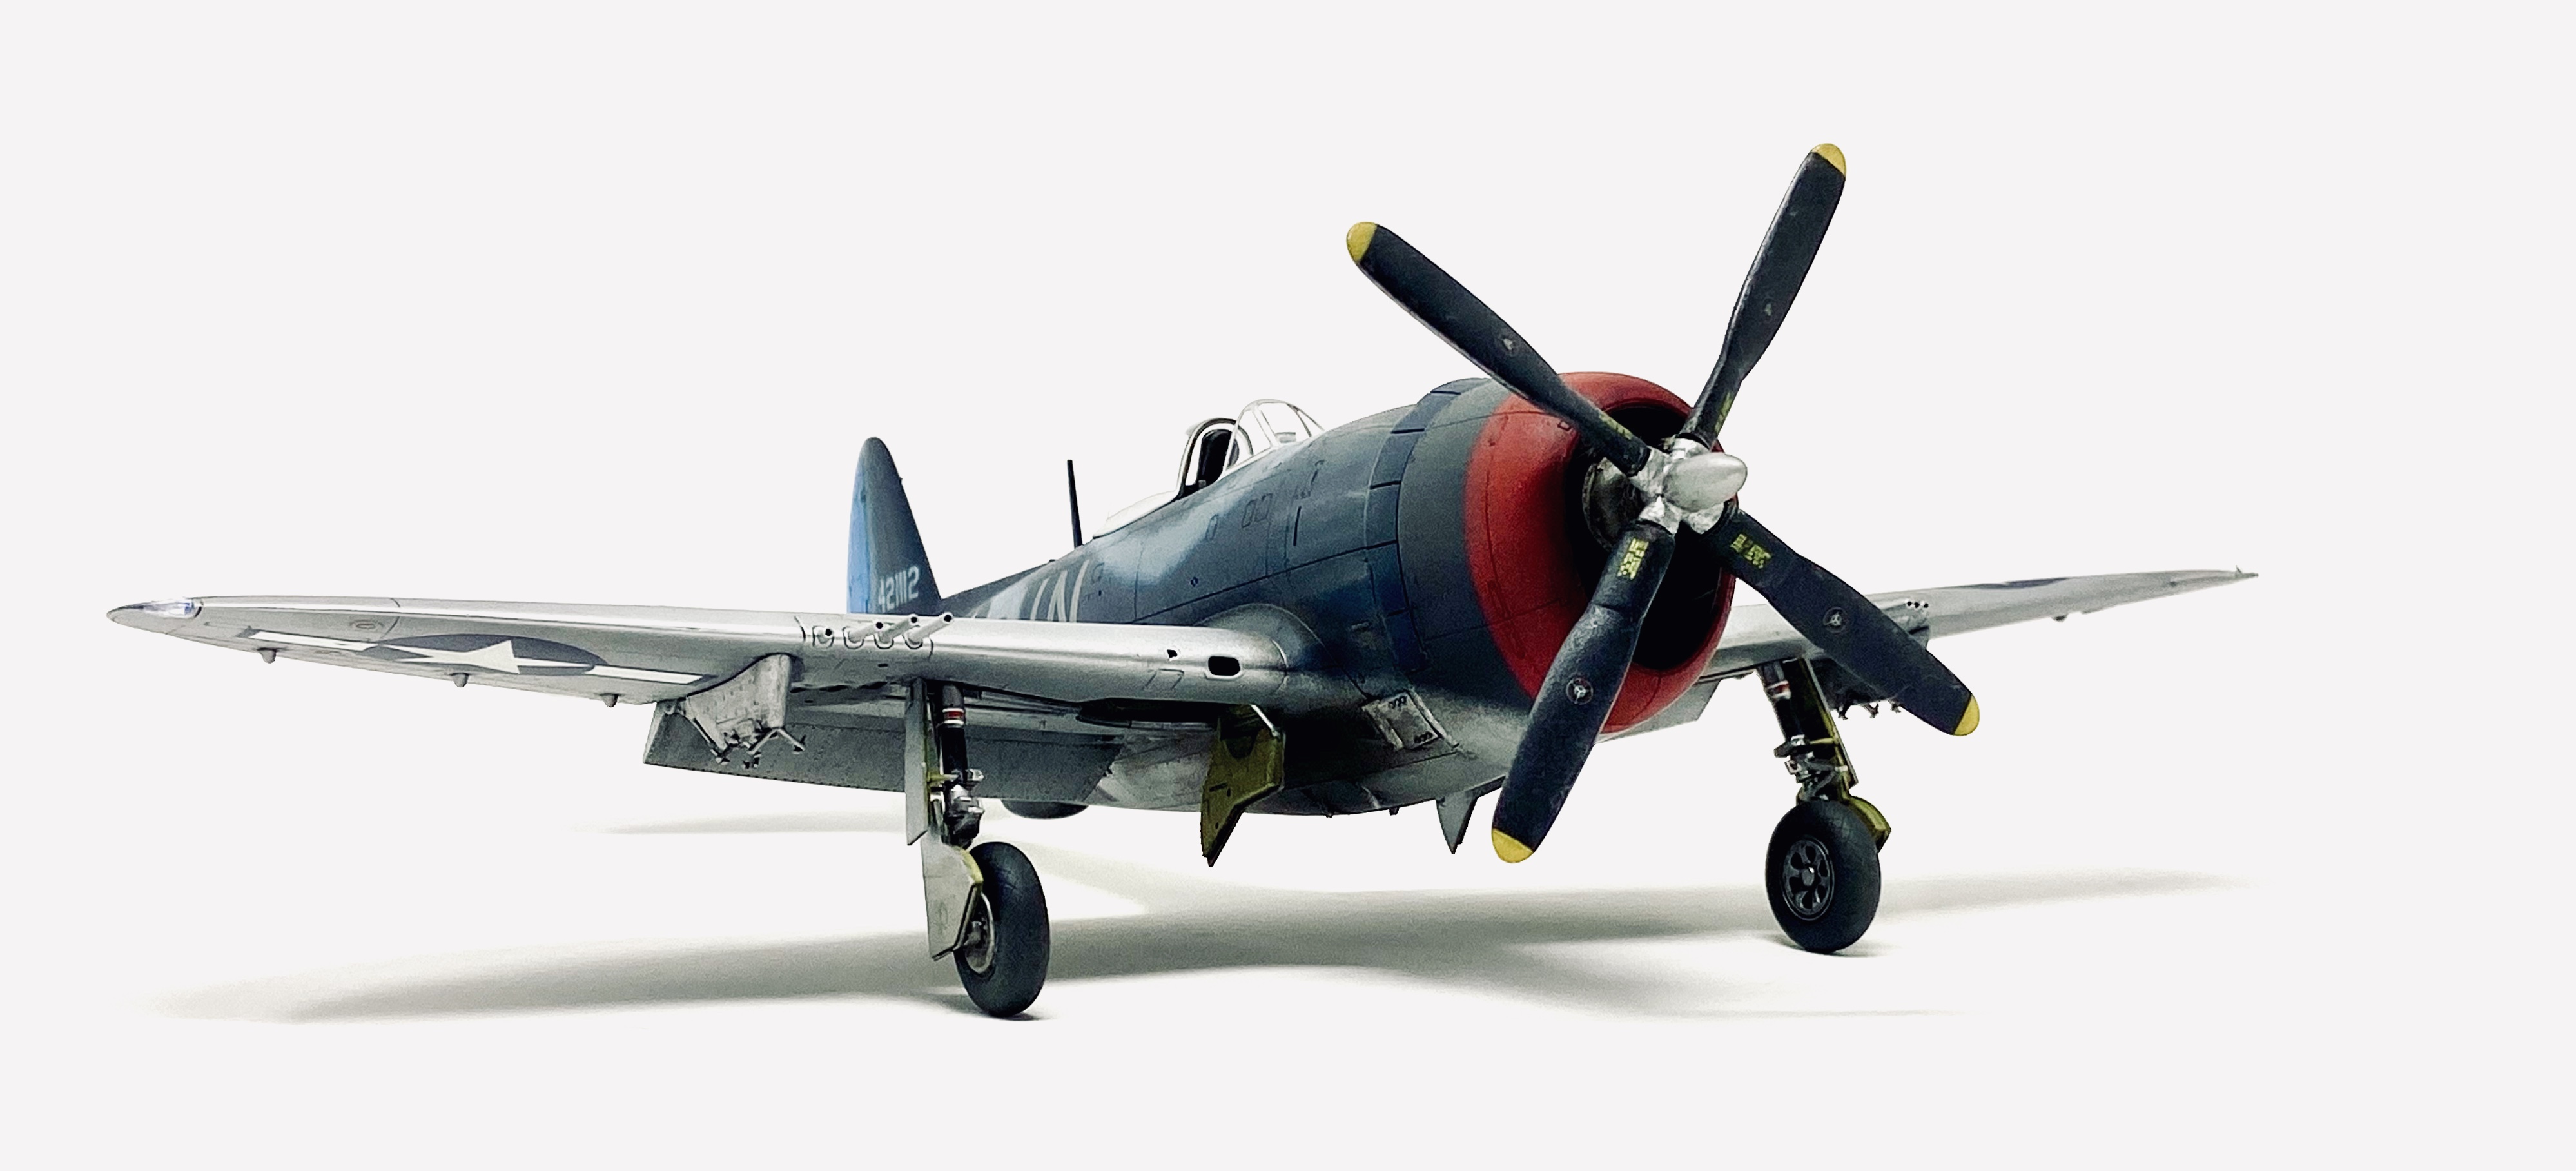
The bare metal underside:
Here the kit gunsight has been fitted to the model.
Painting and weathering:
Blue camouflage on WWII aircraft is a minefield when it comes to references and there is little colour evidence in the form of photography from the 1940’s. So rather than explore various theories I shall instead explain what I did and how I came to my own conclusions.

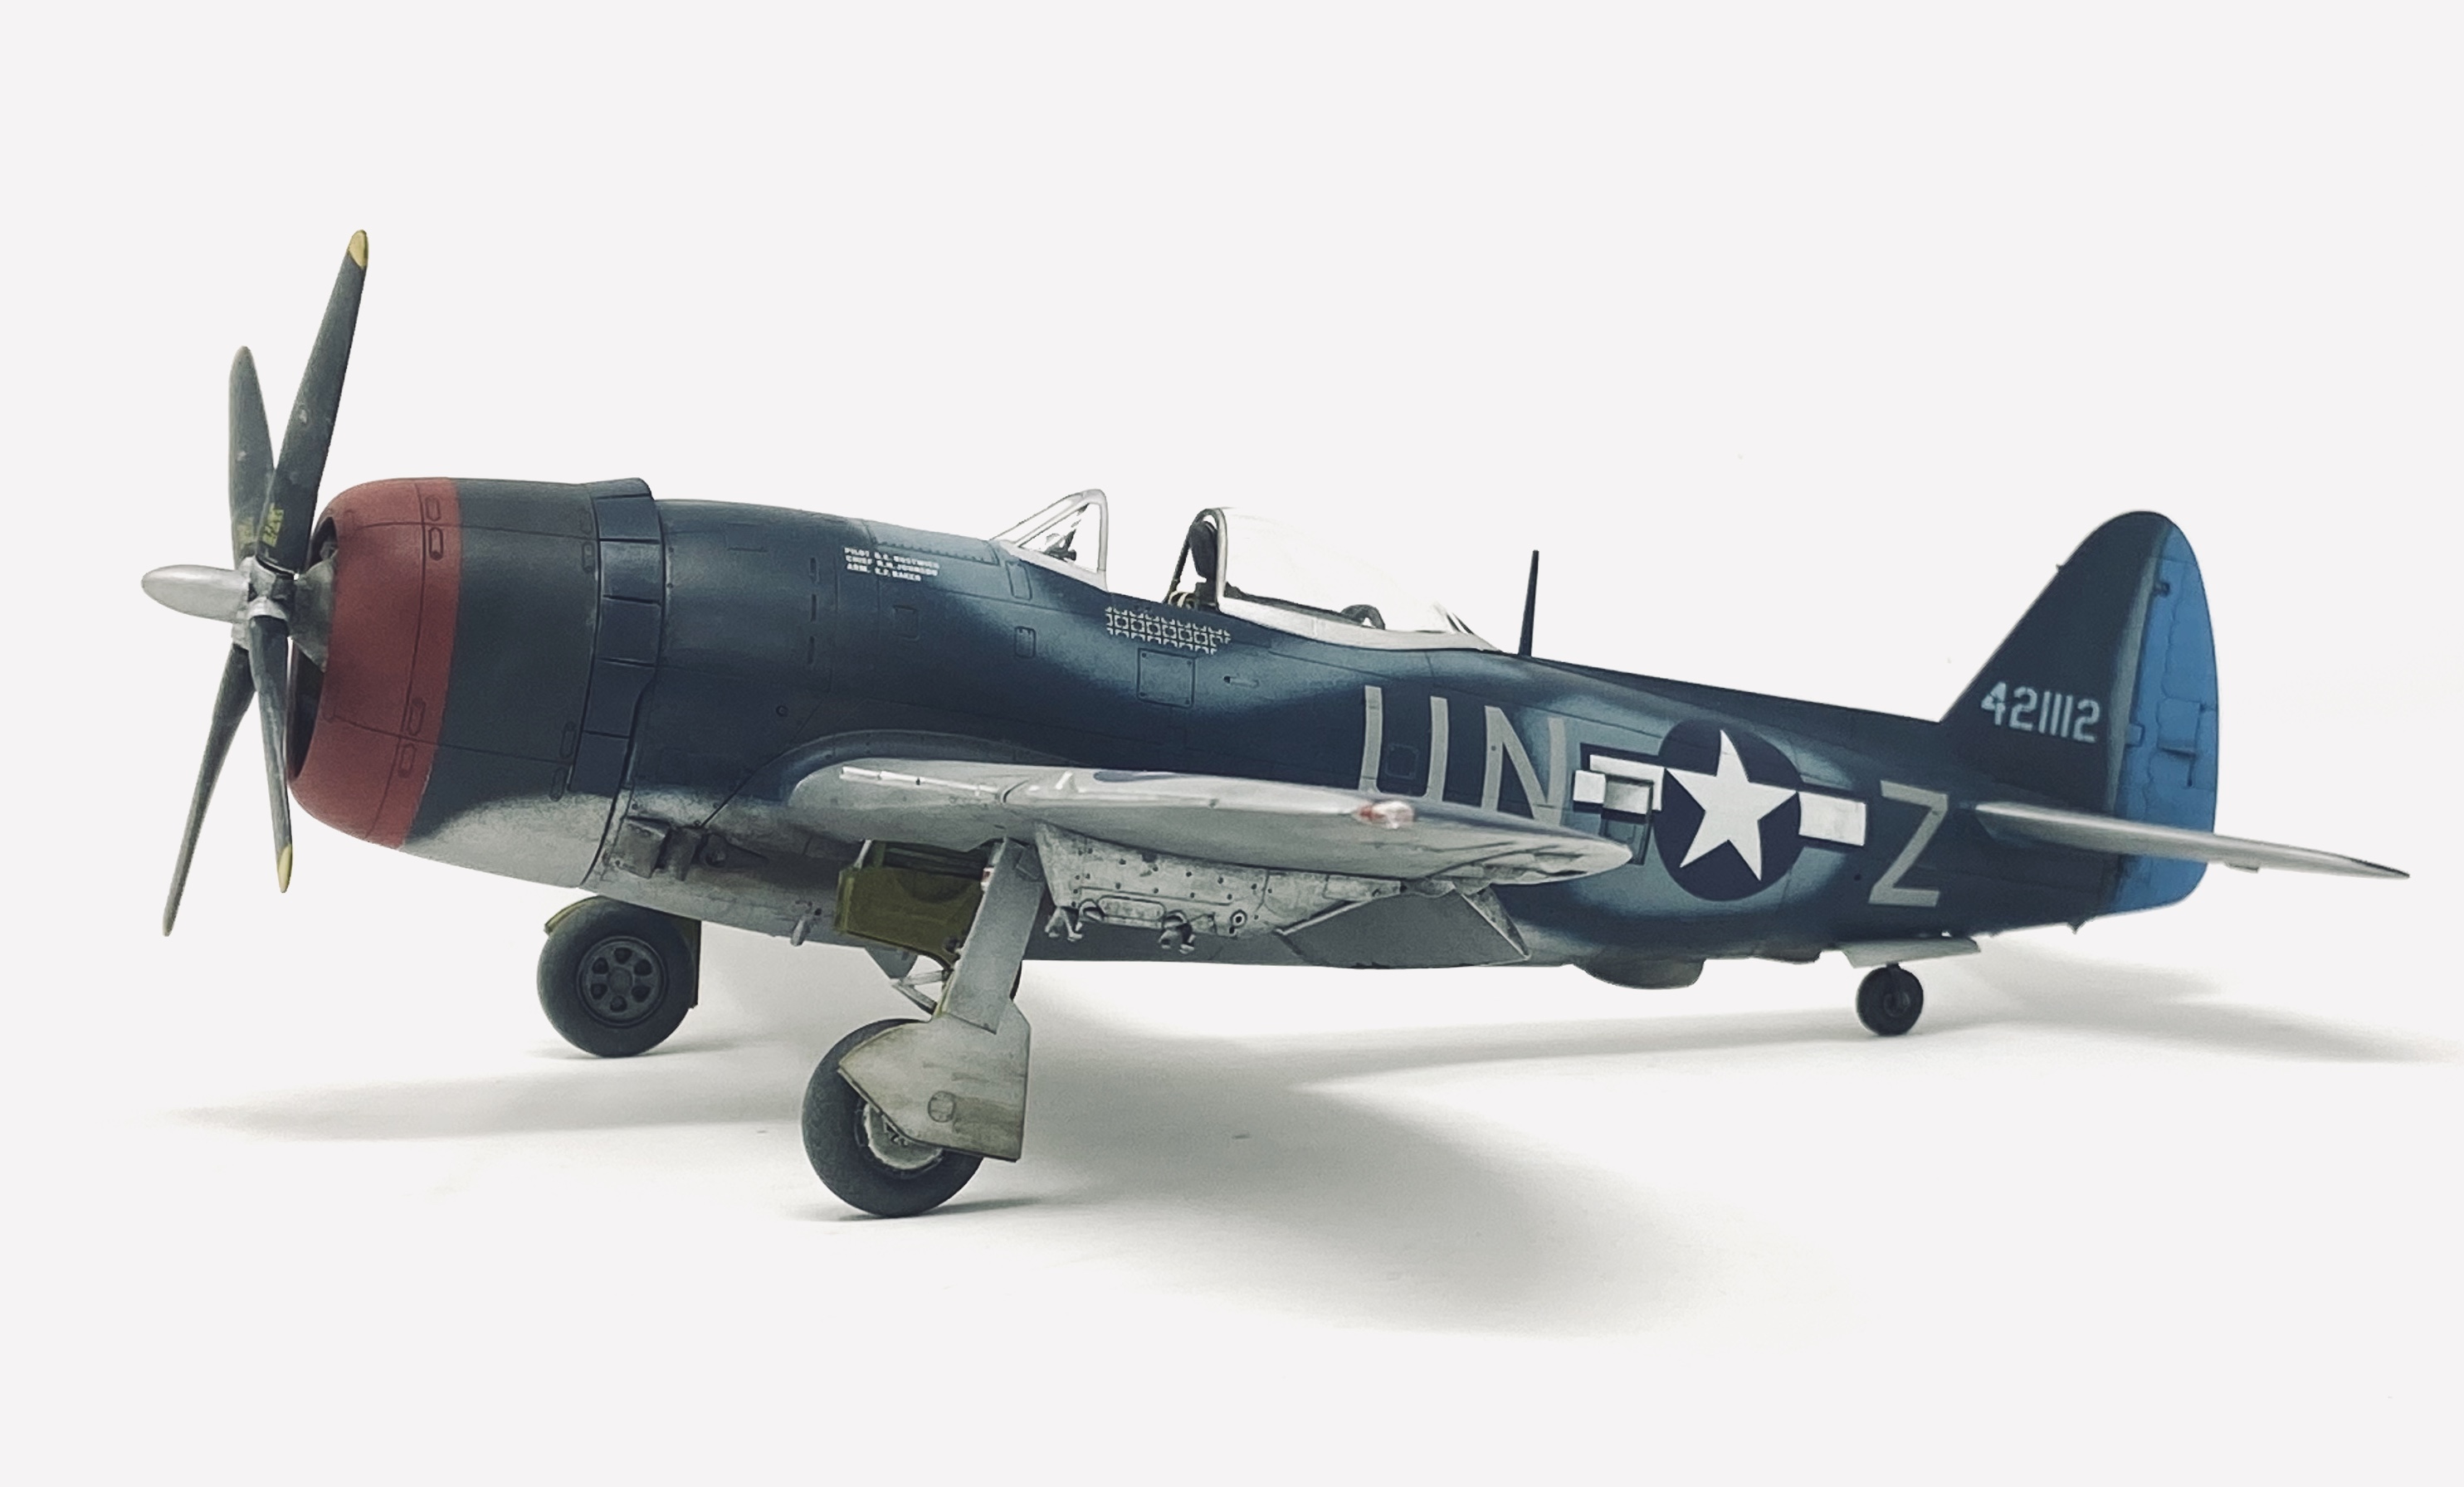
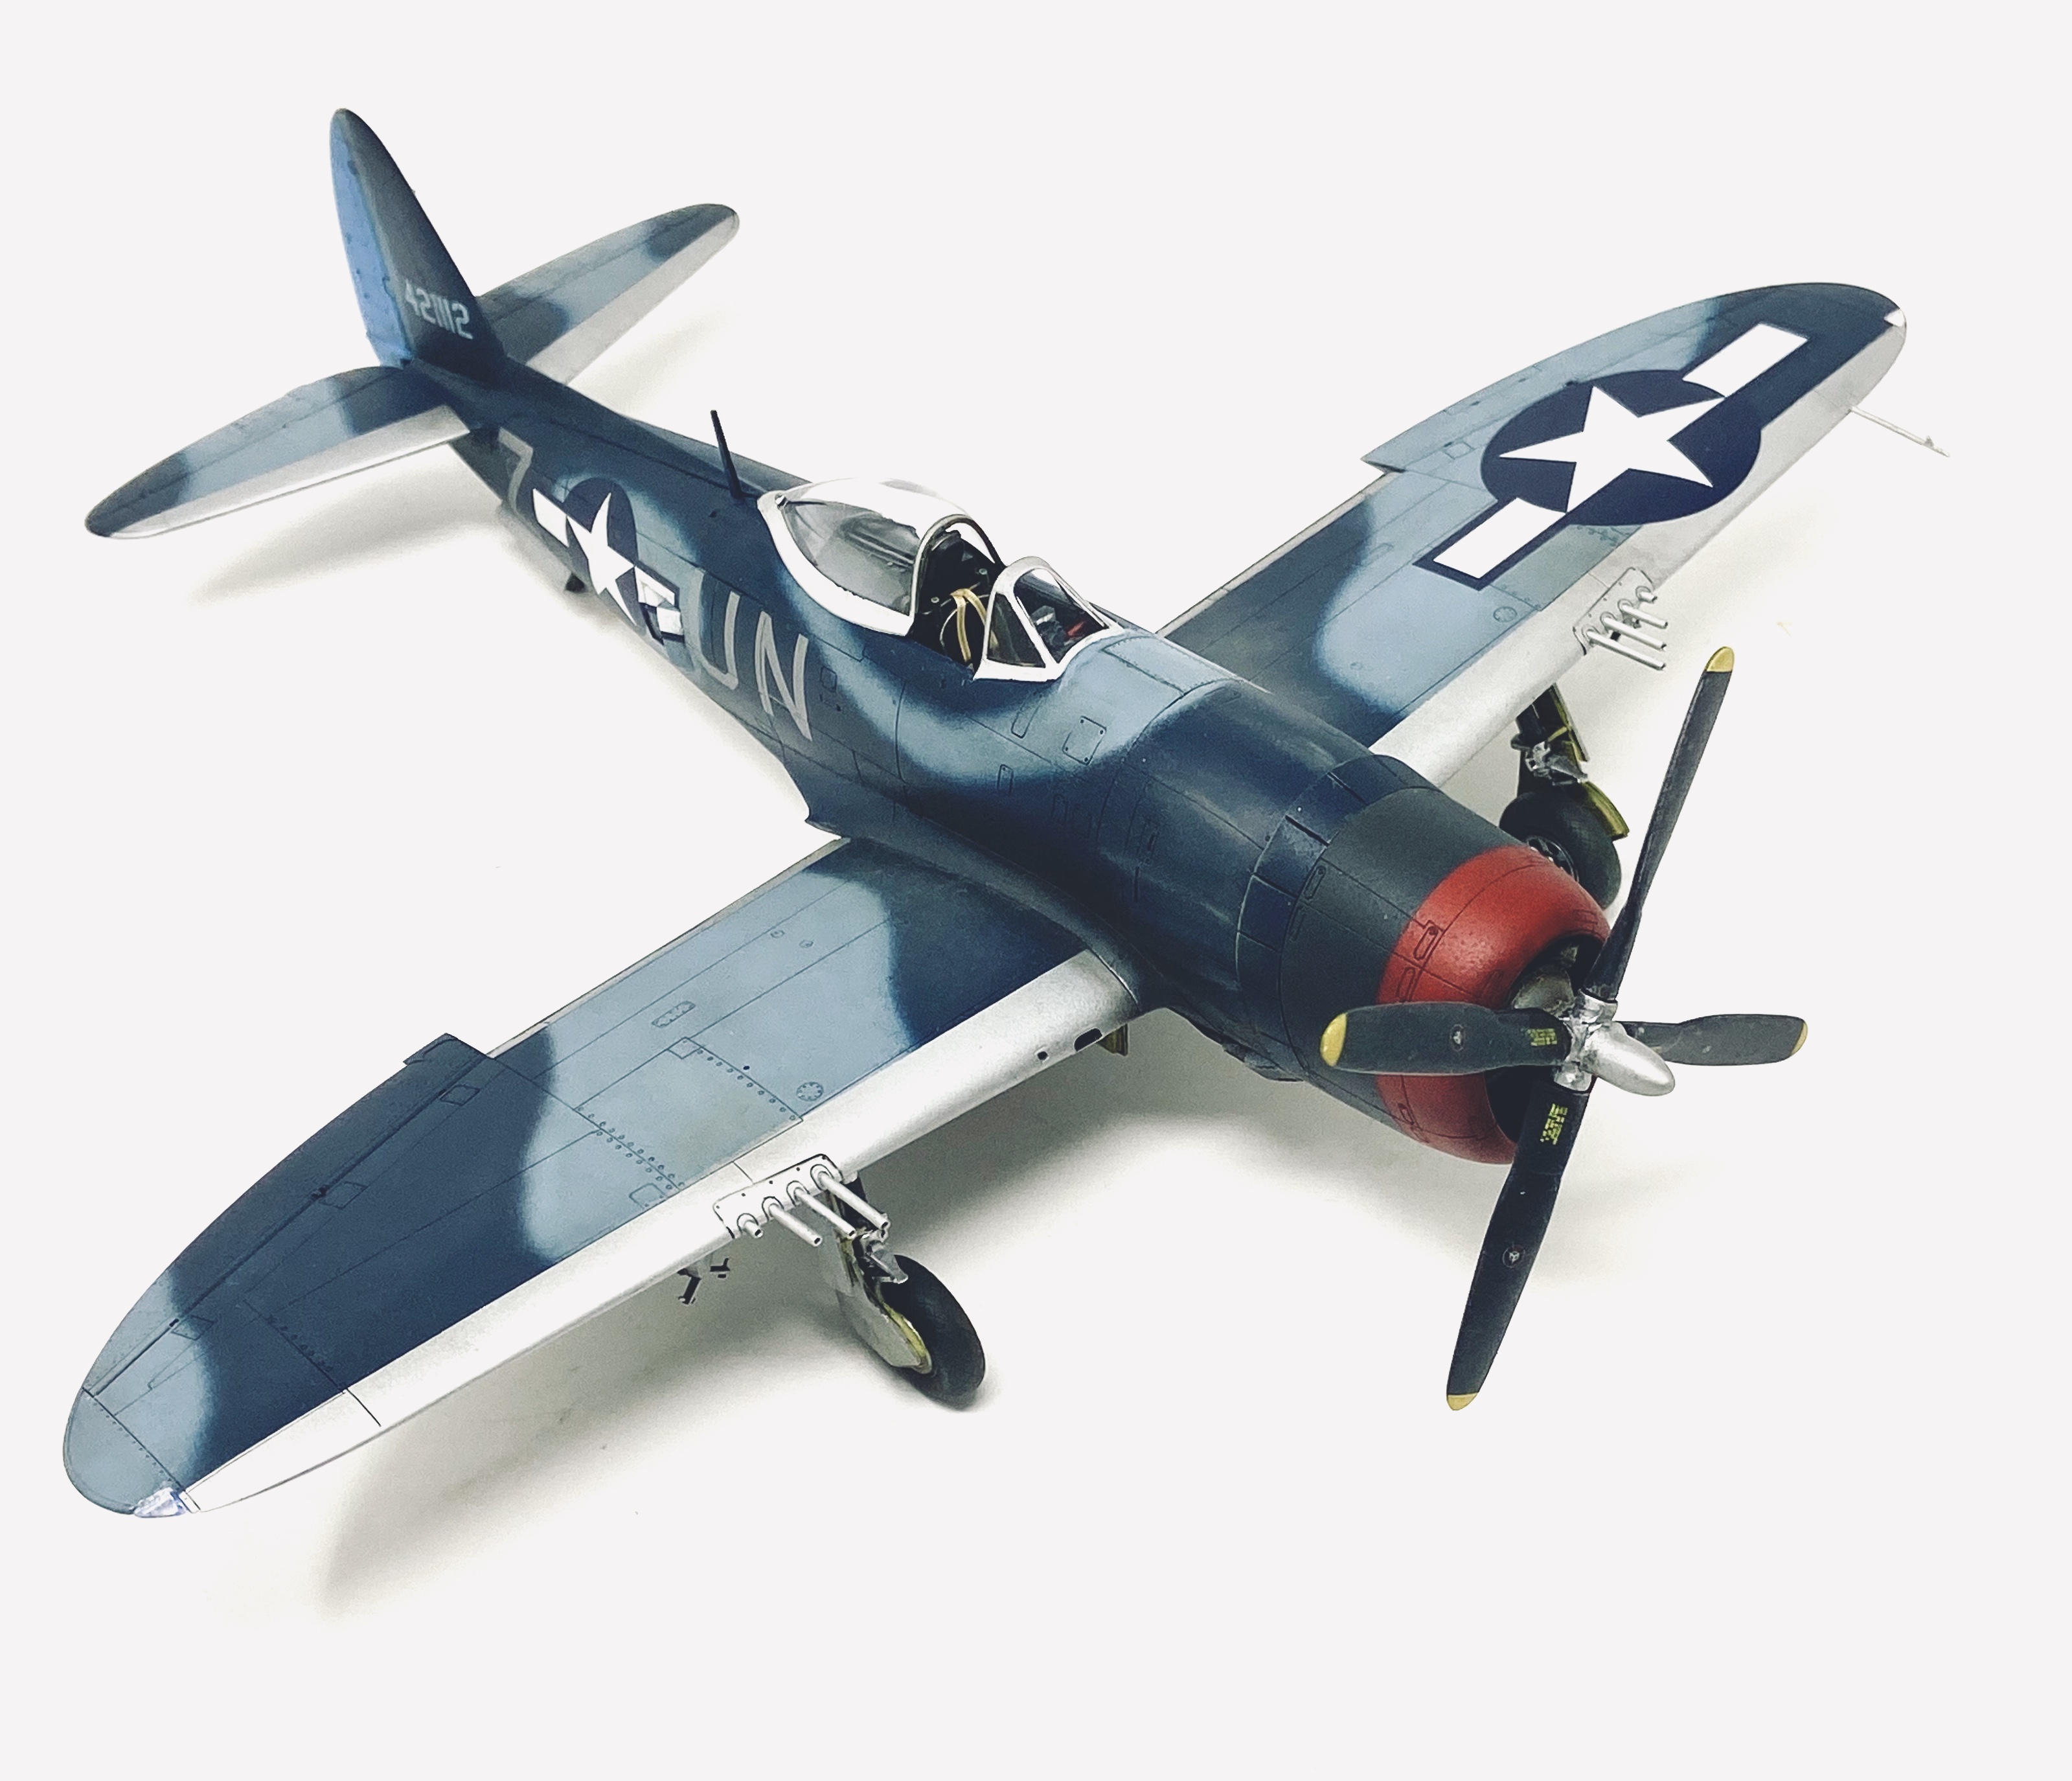
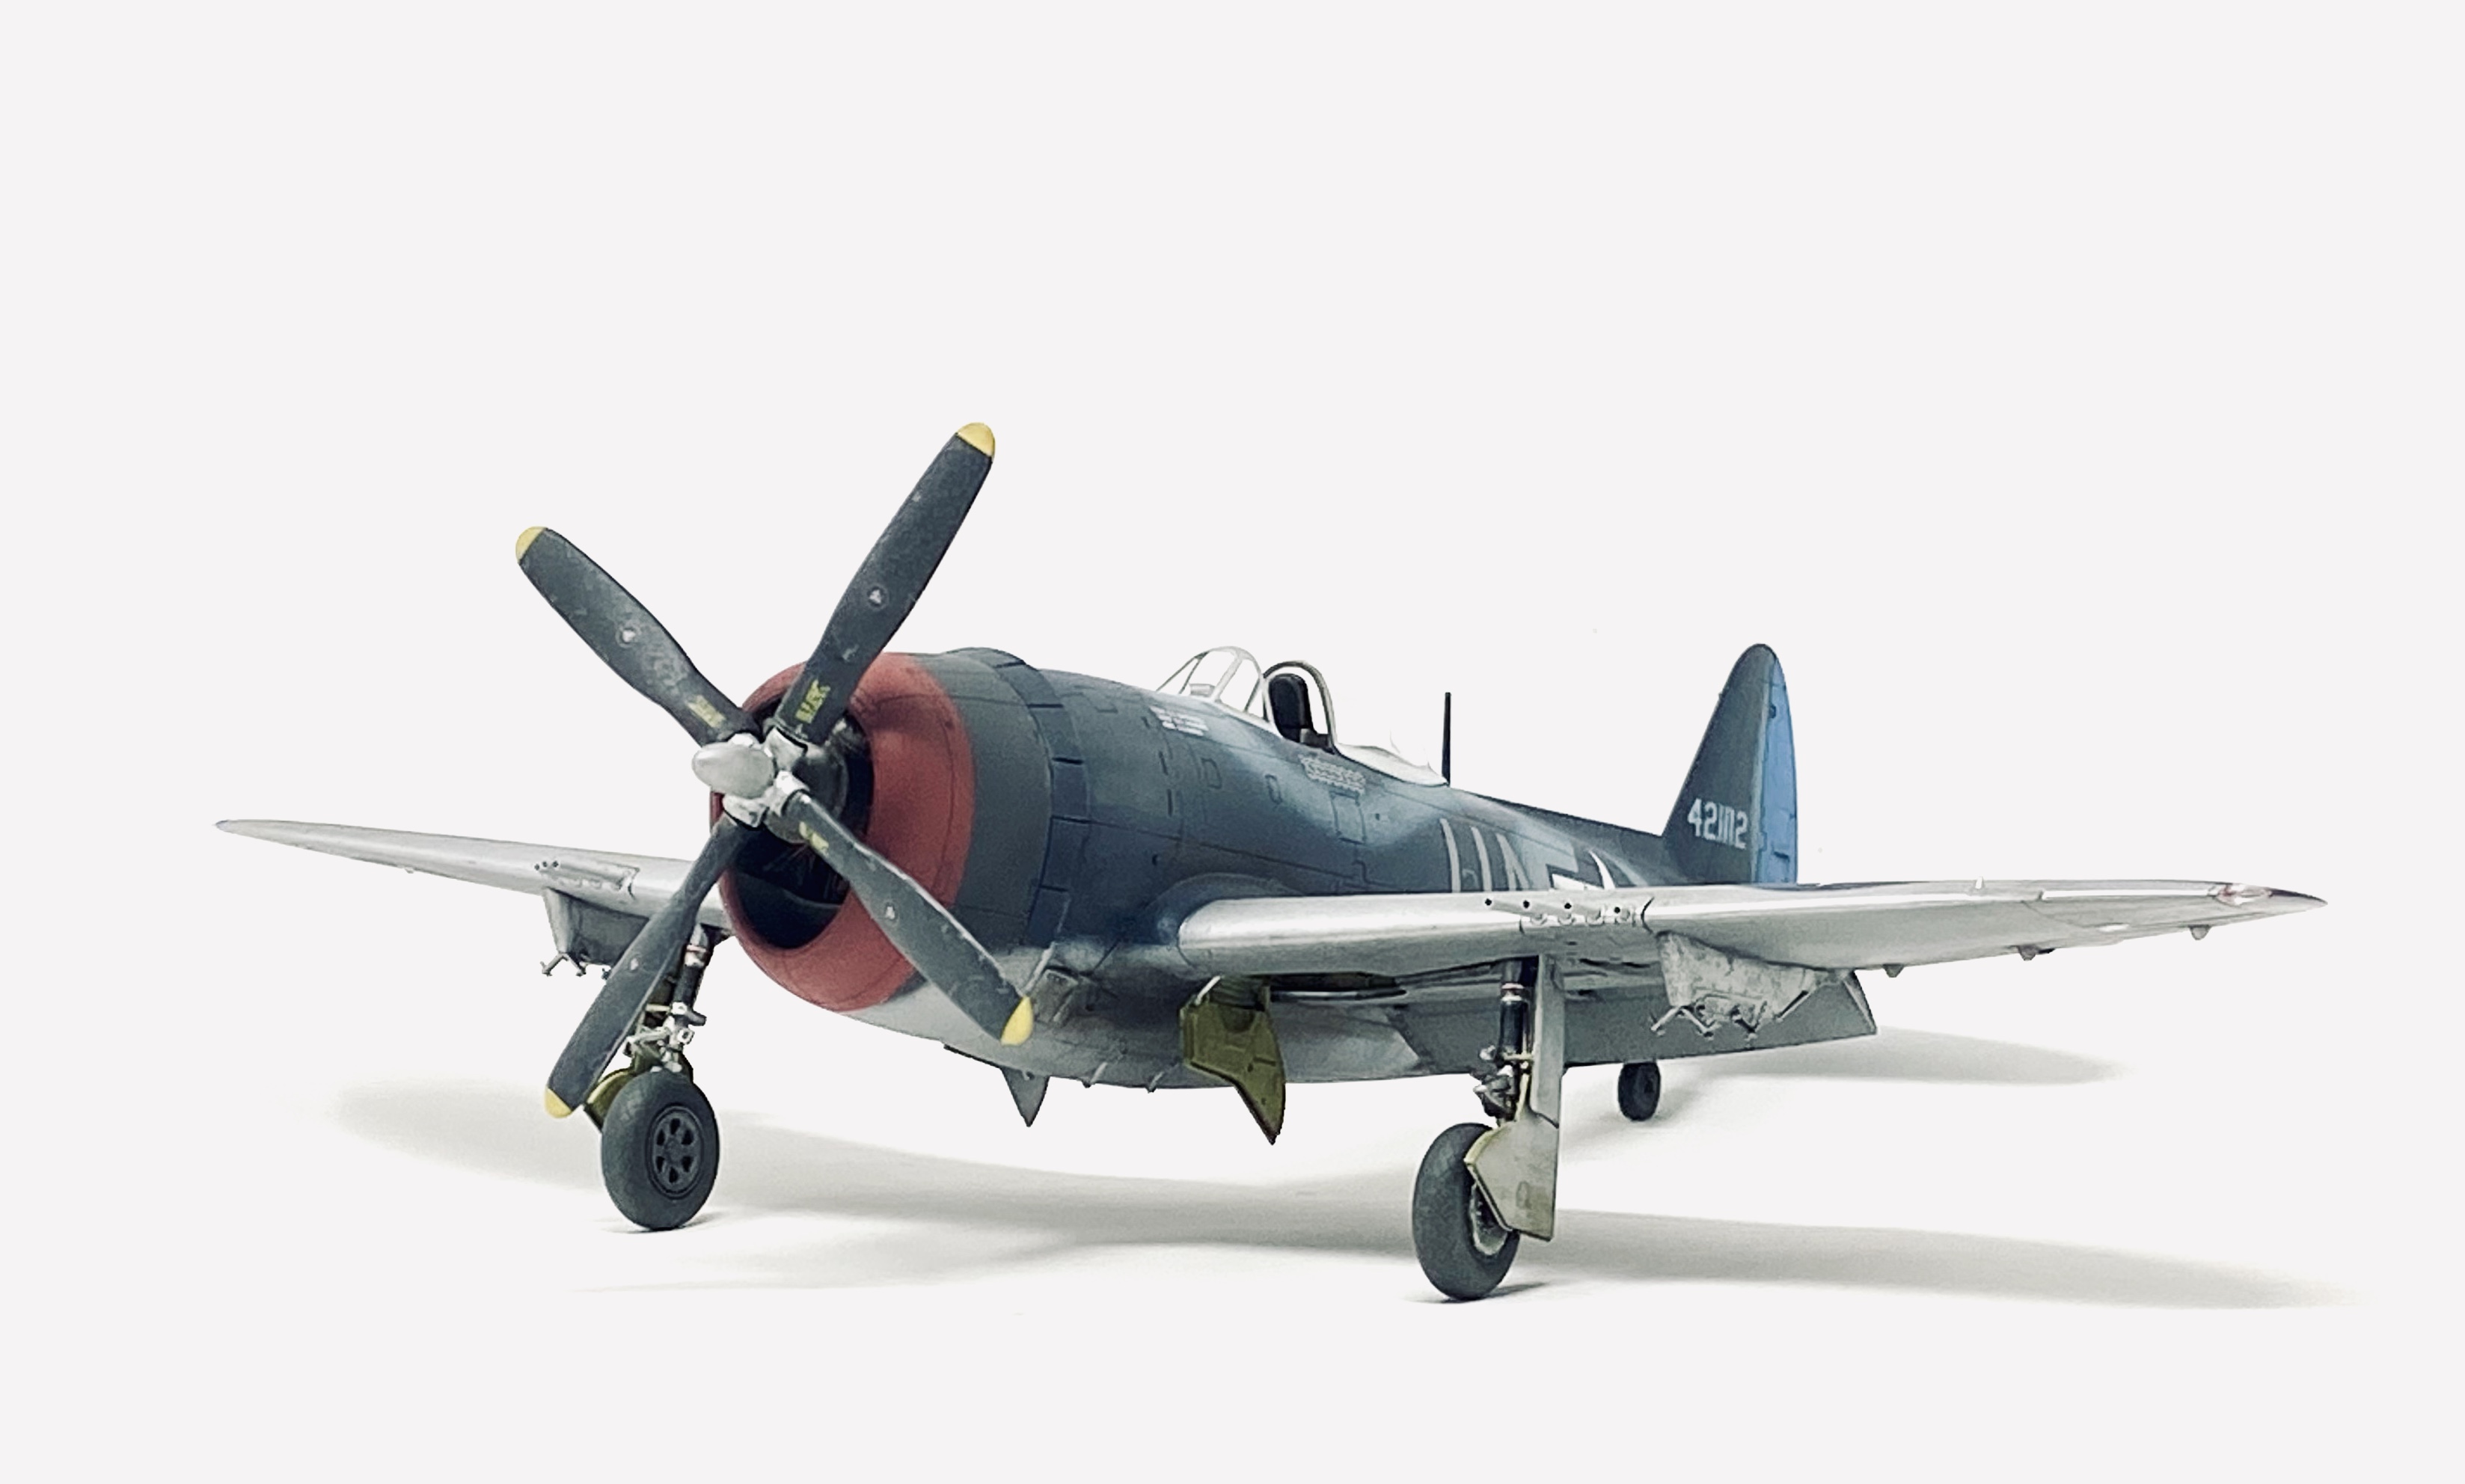
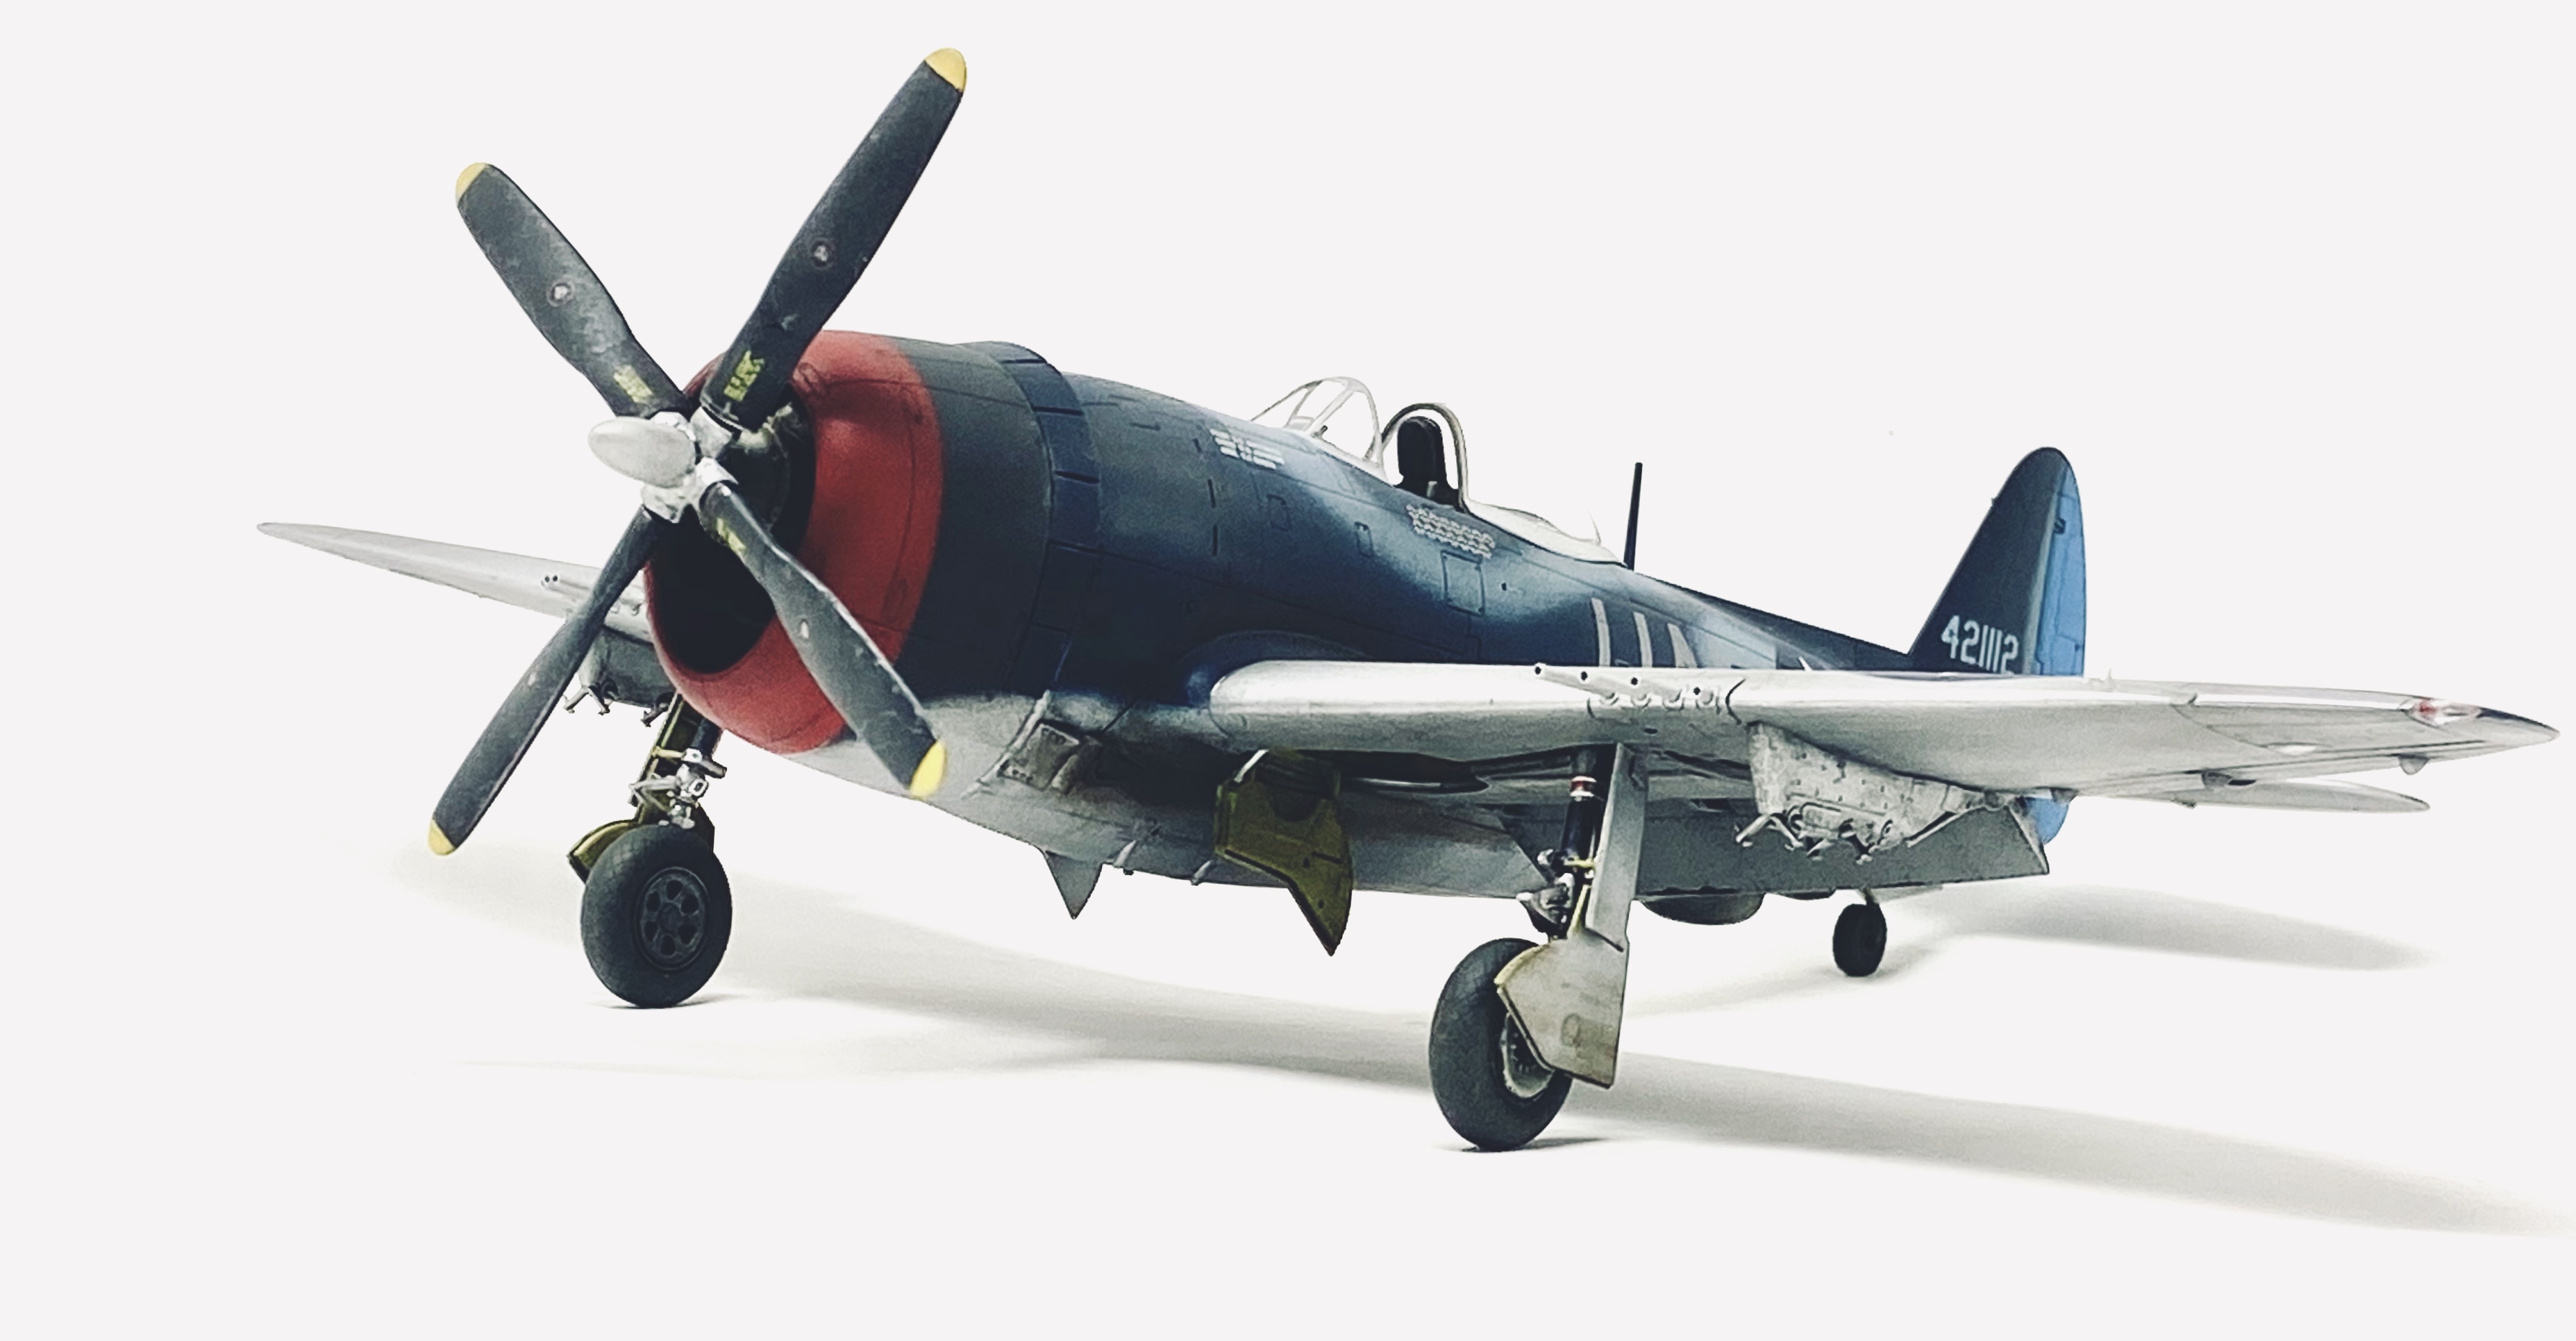
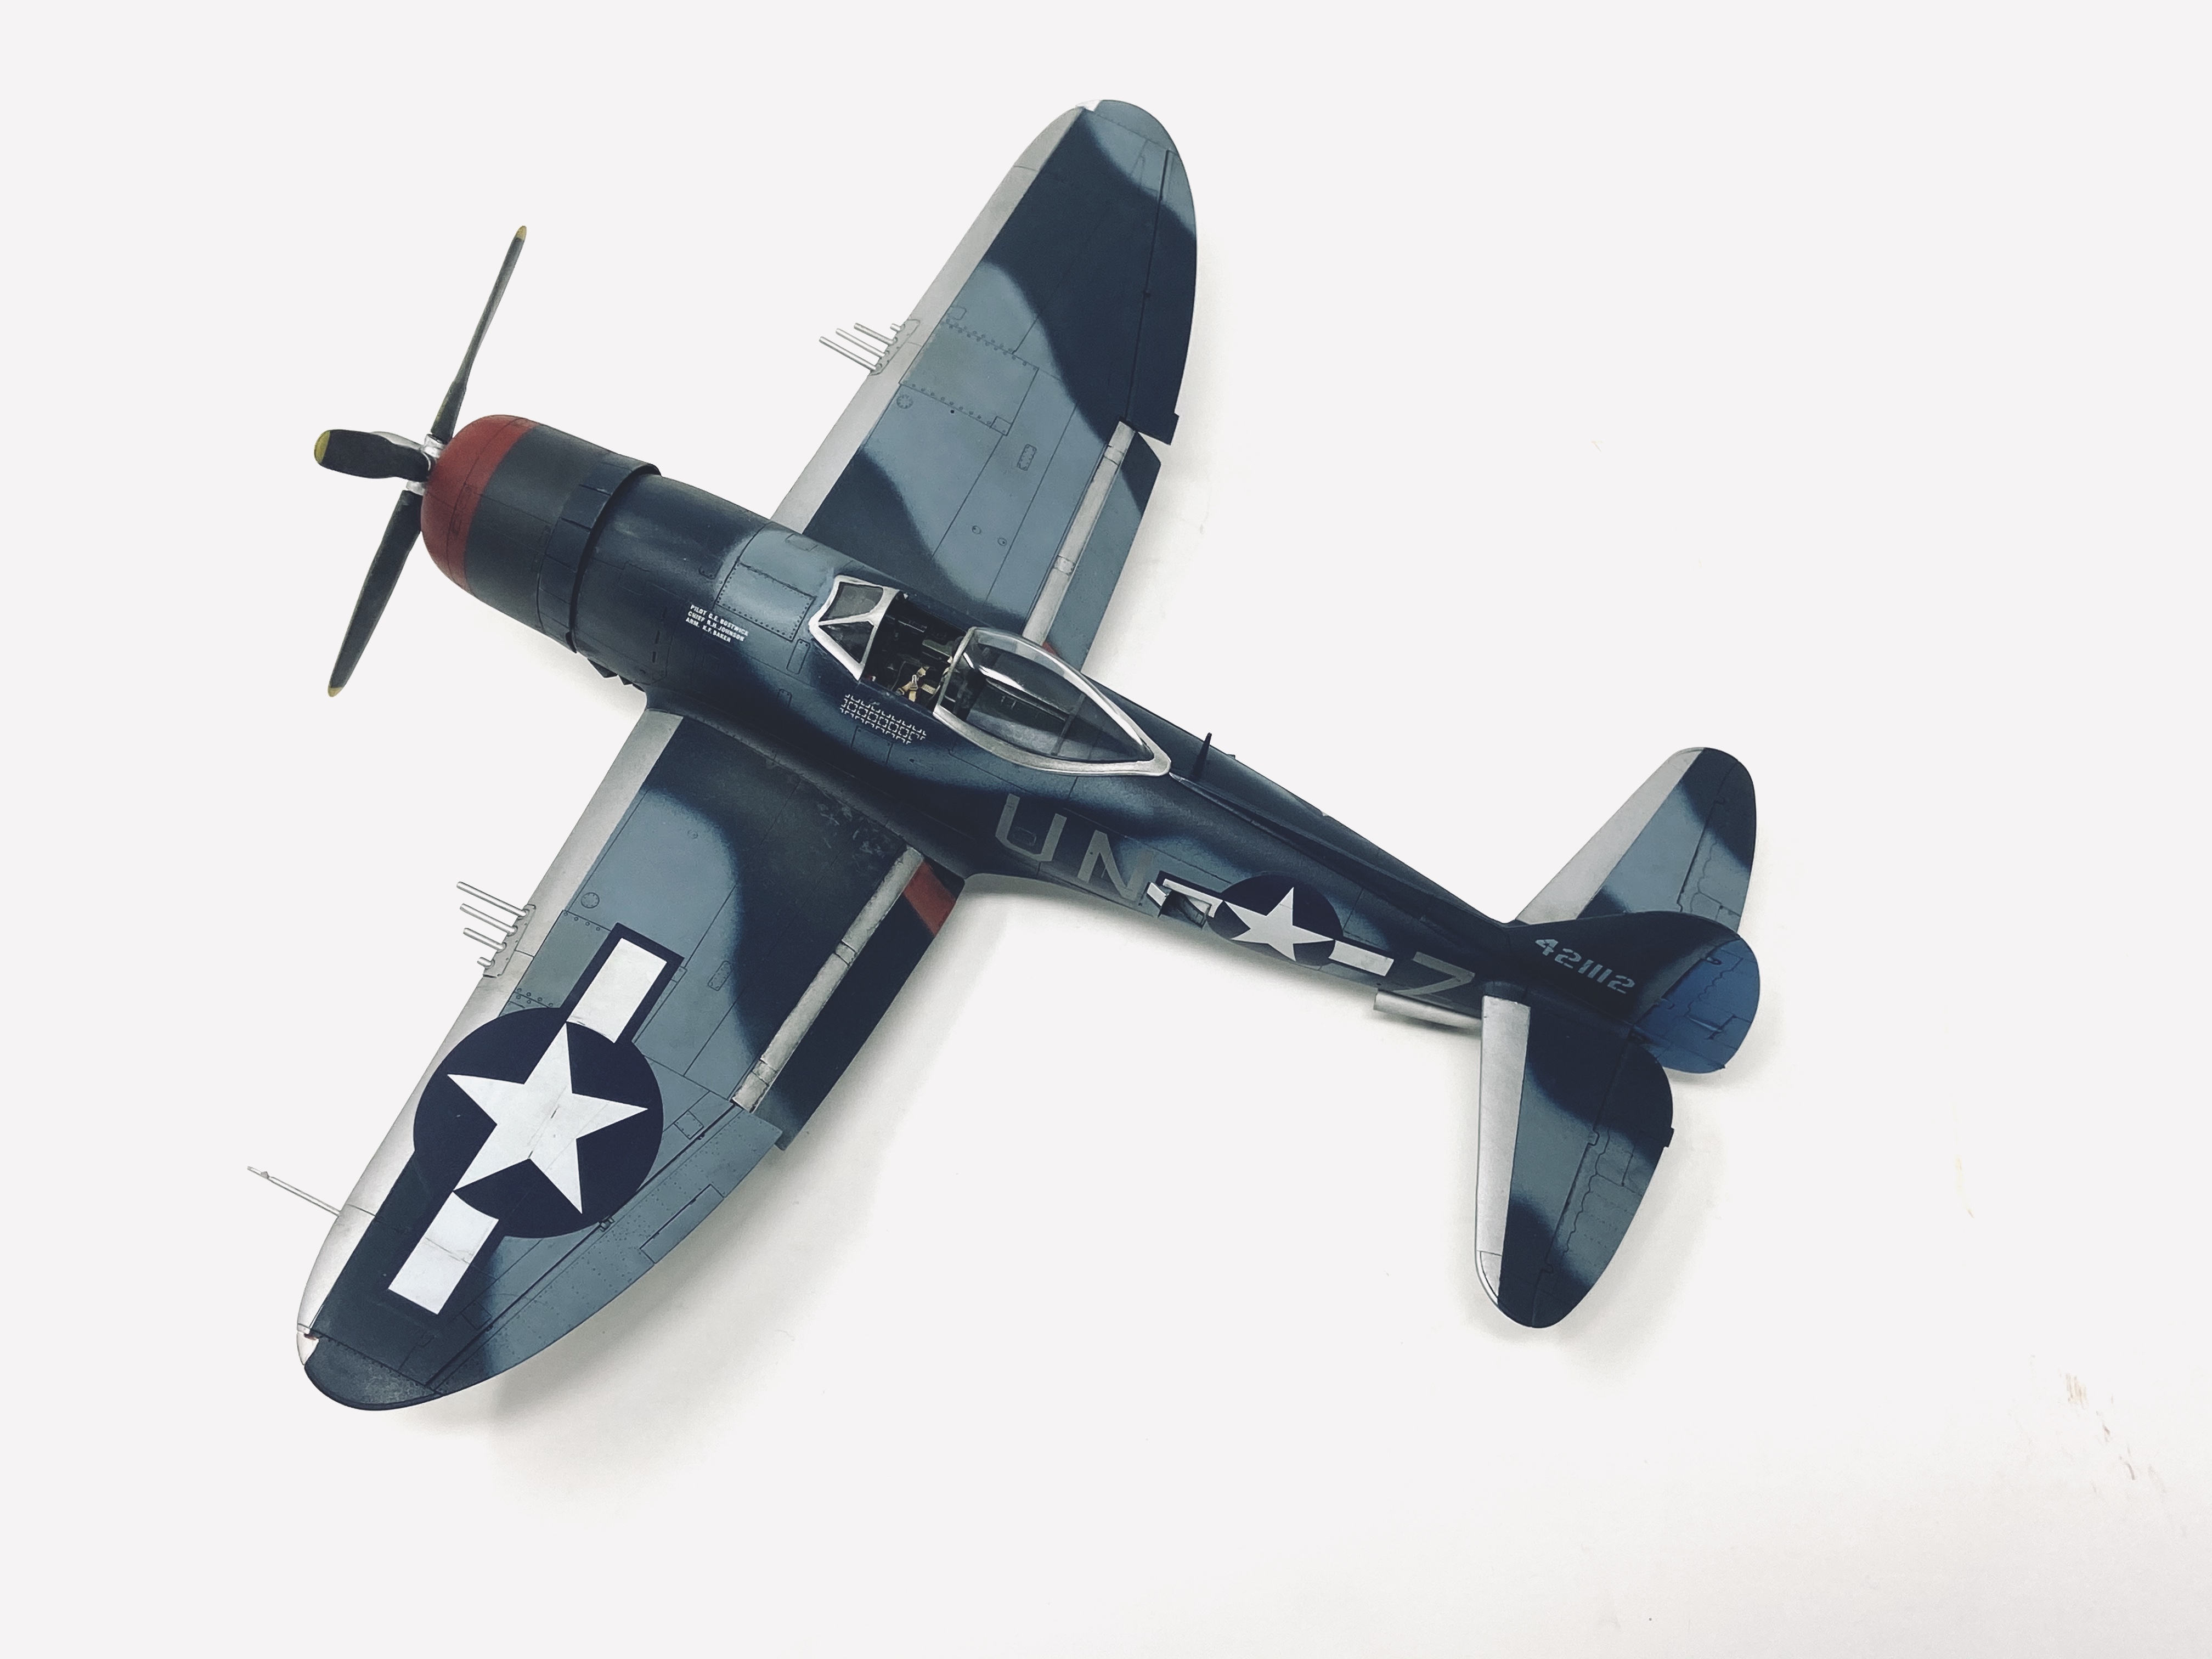
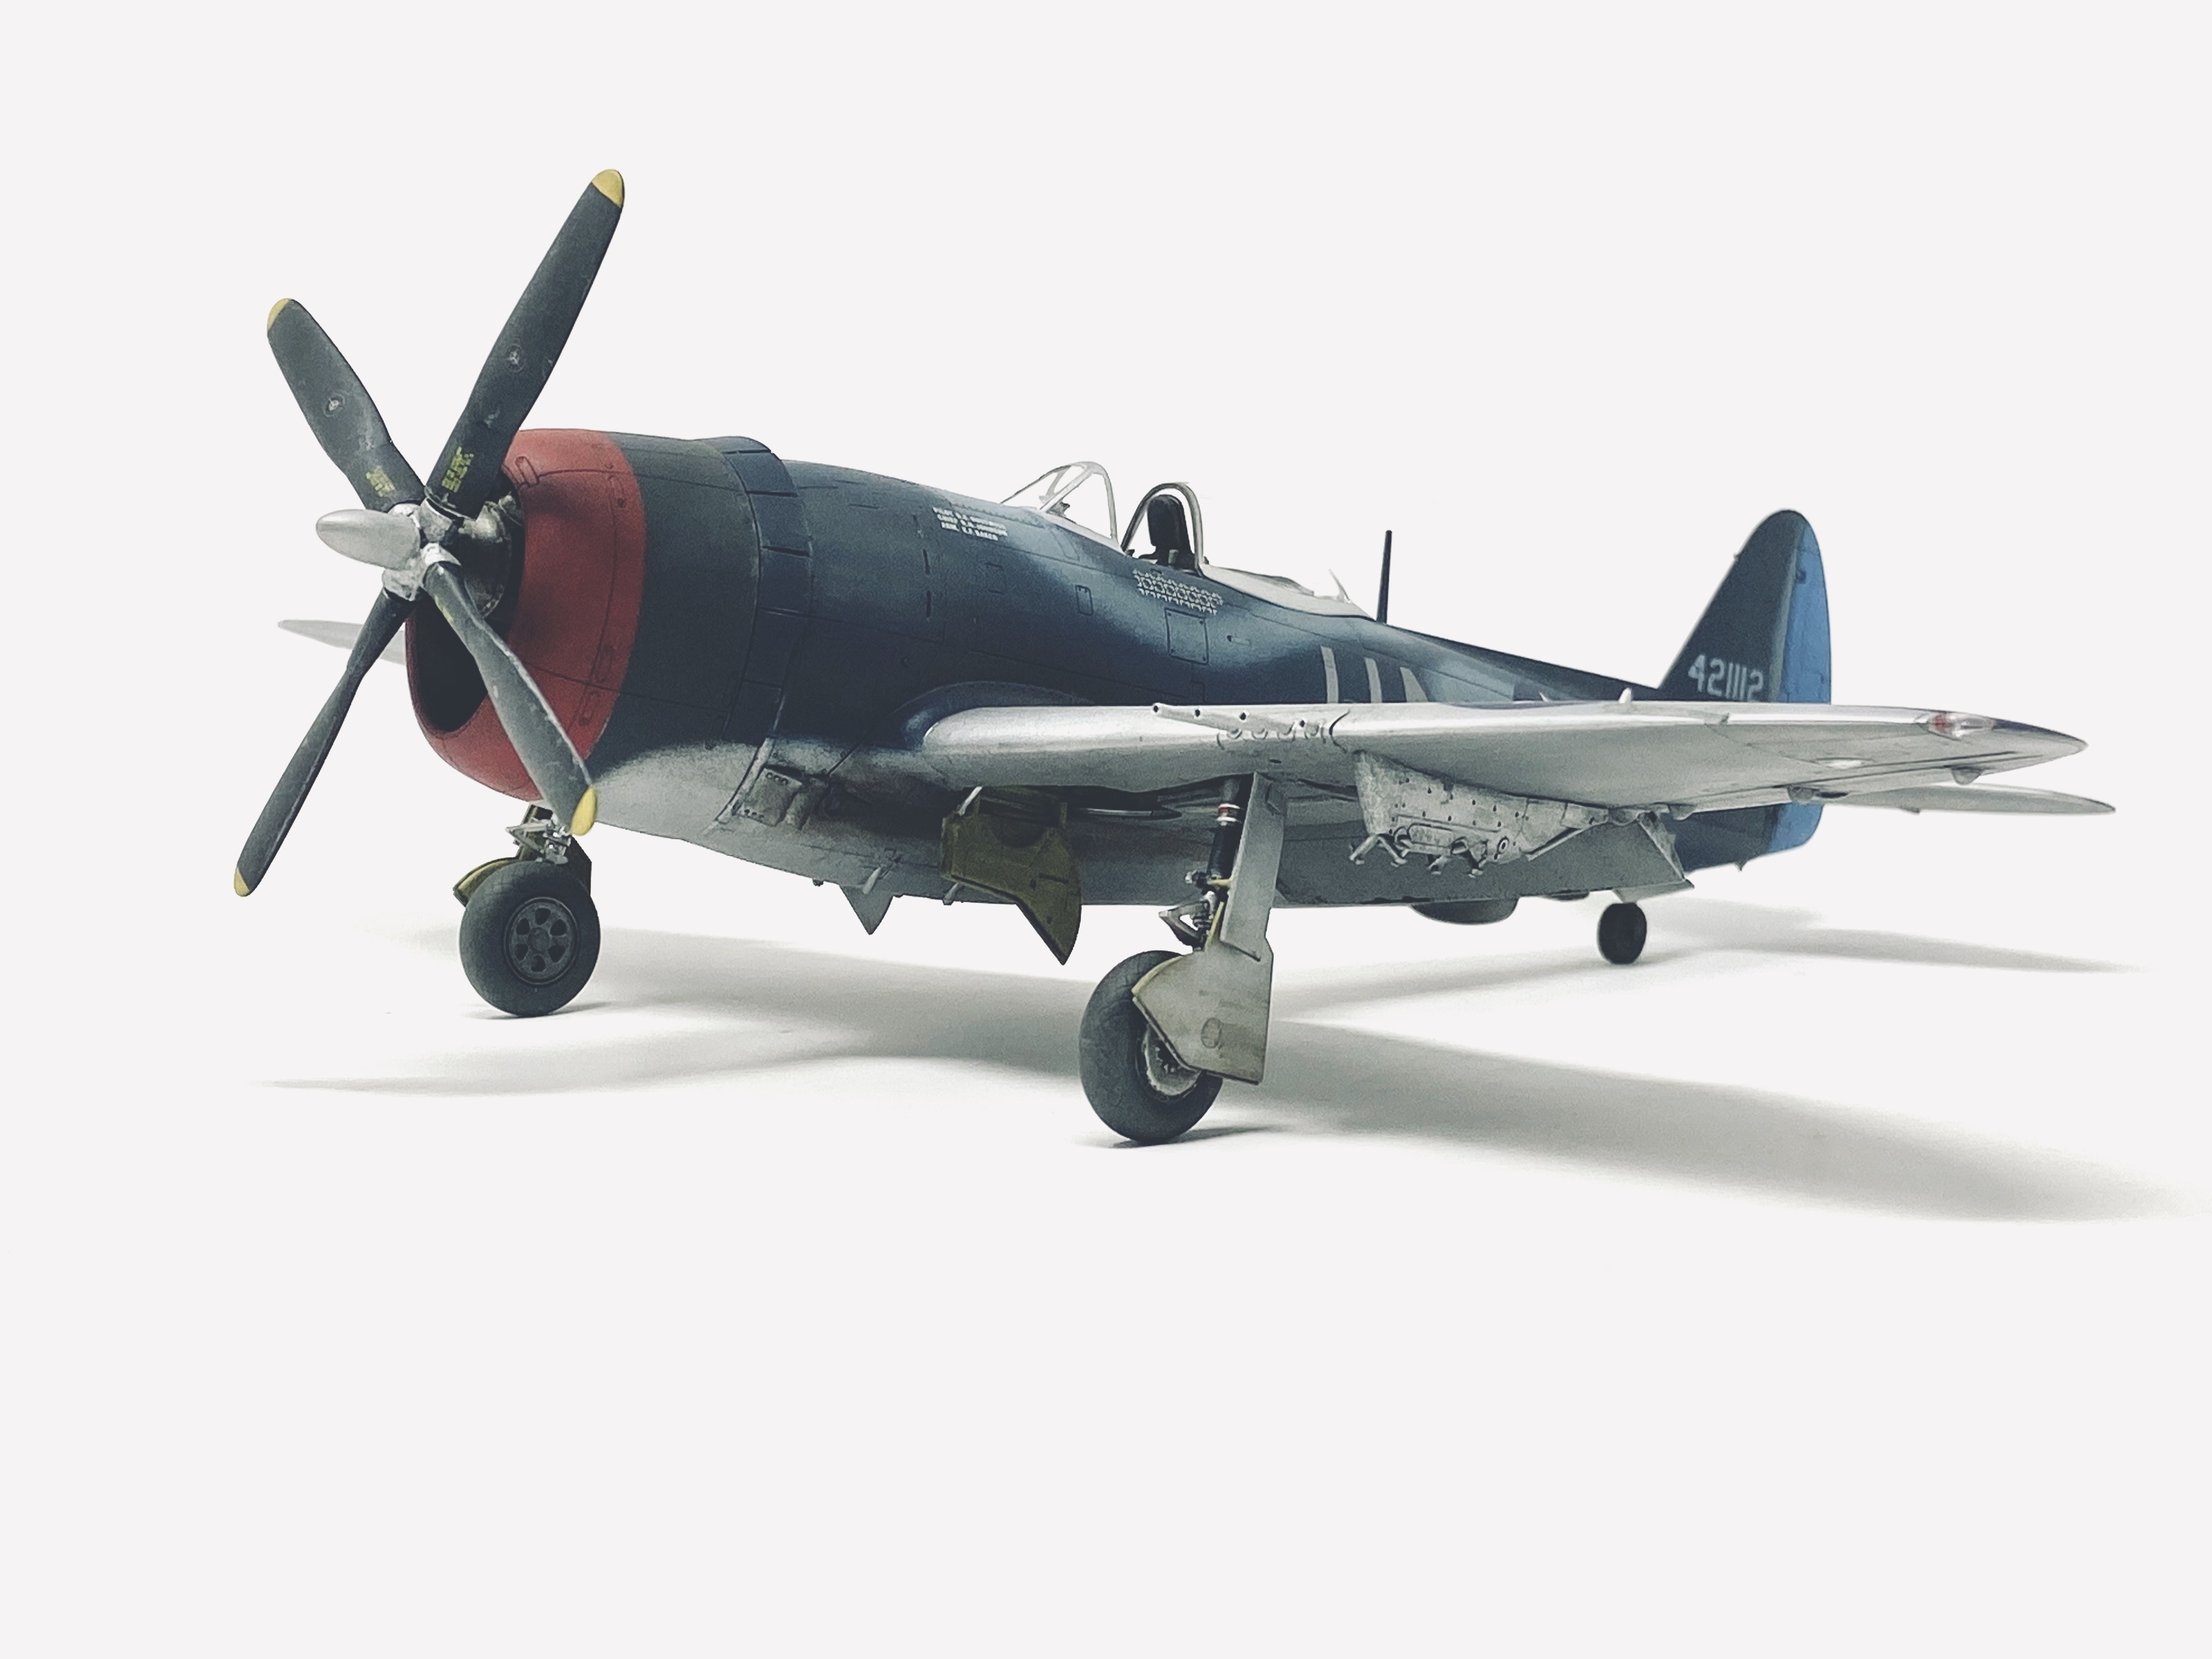
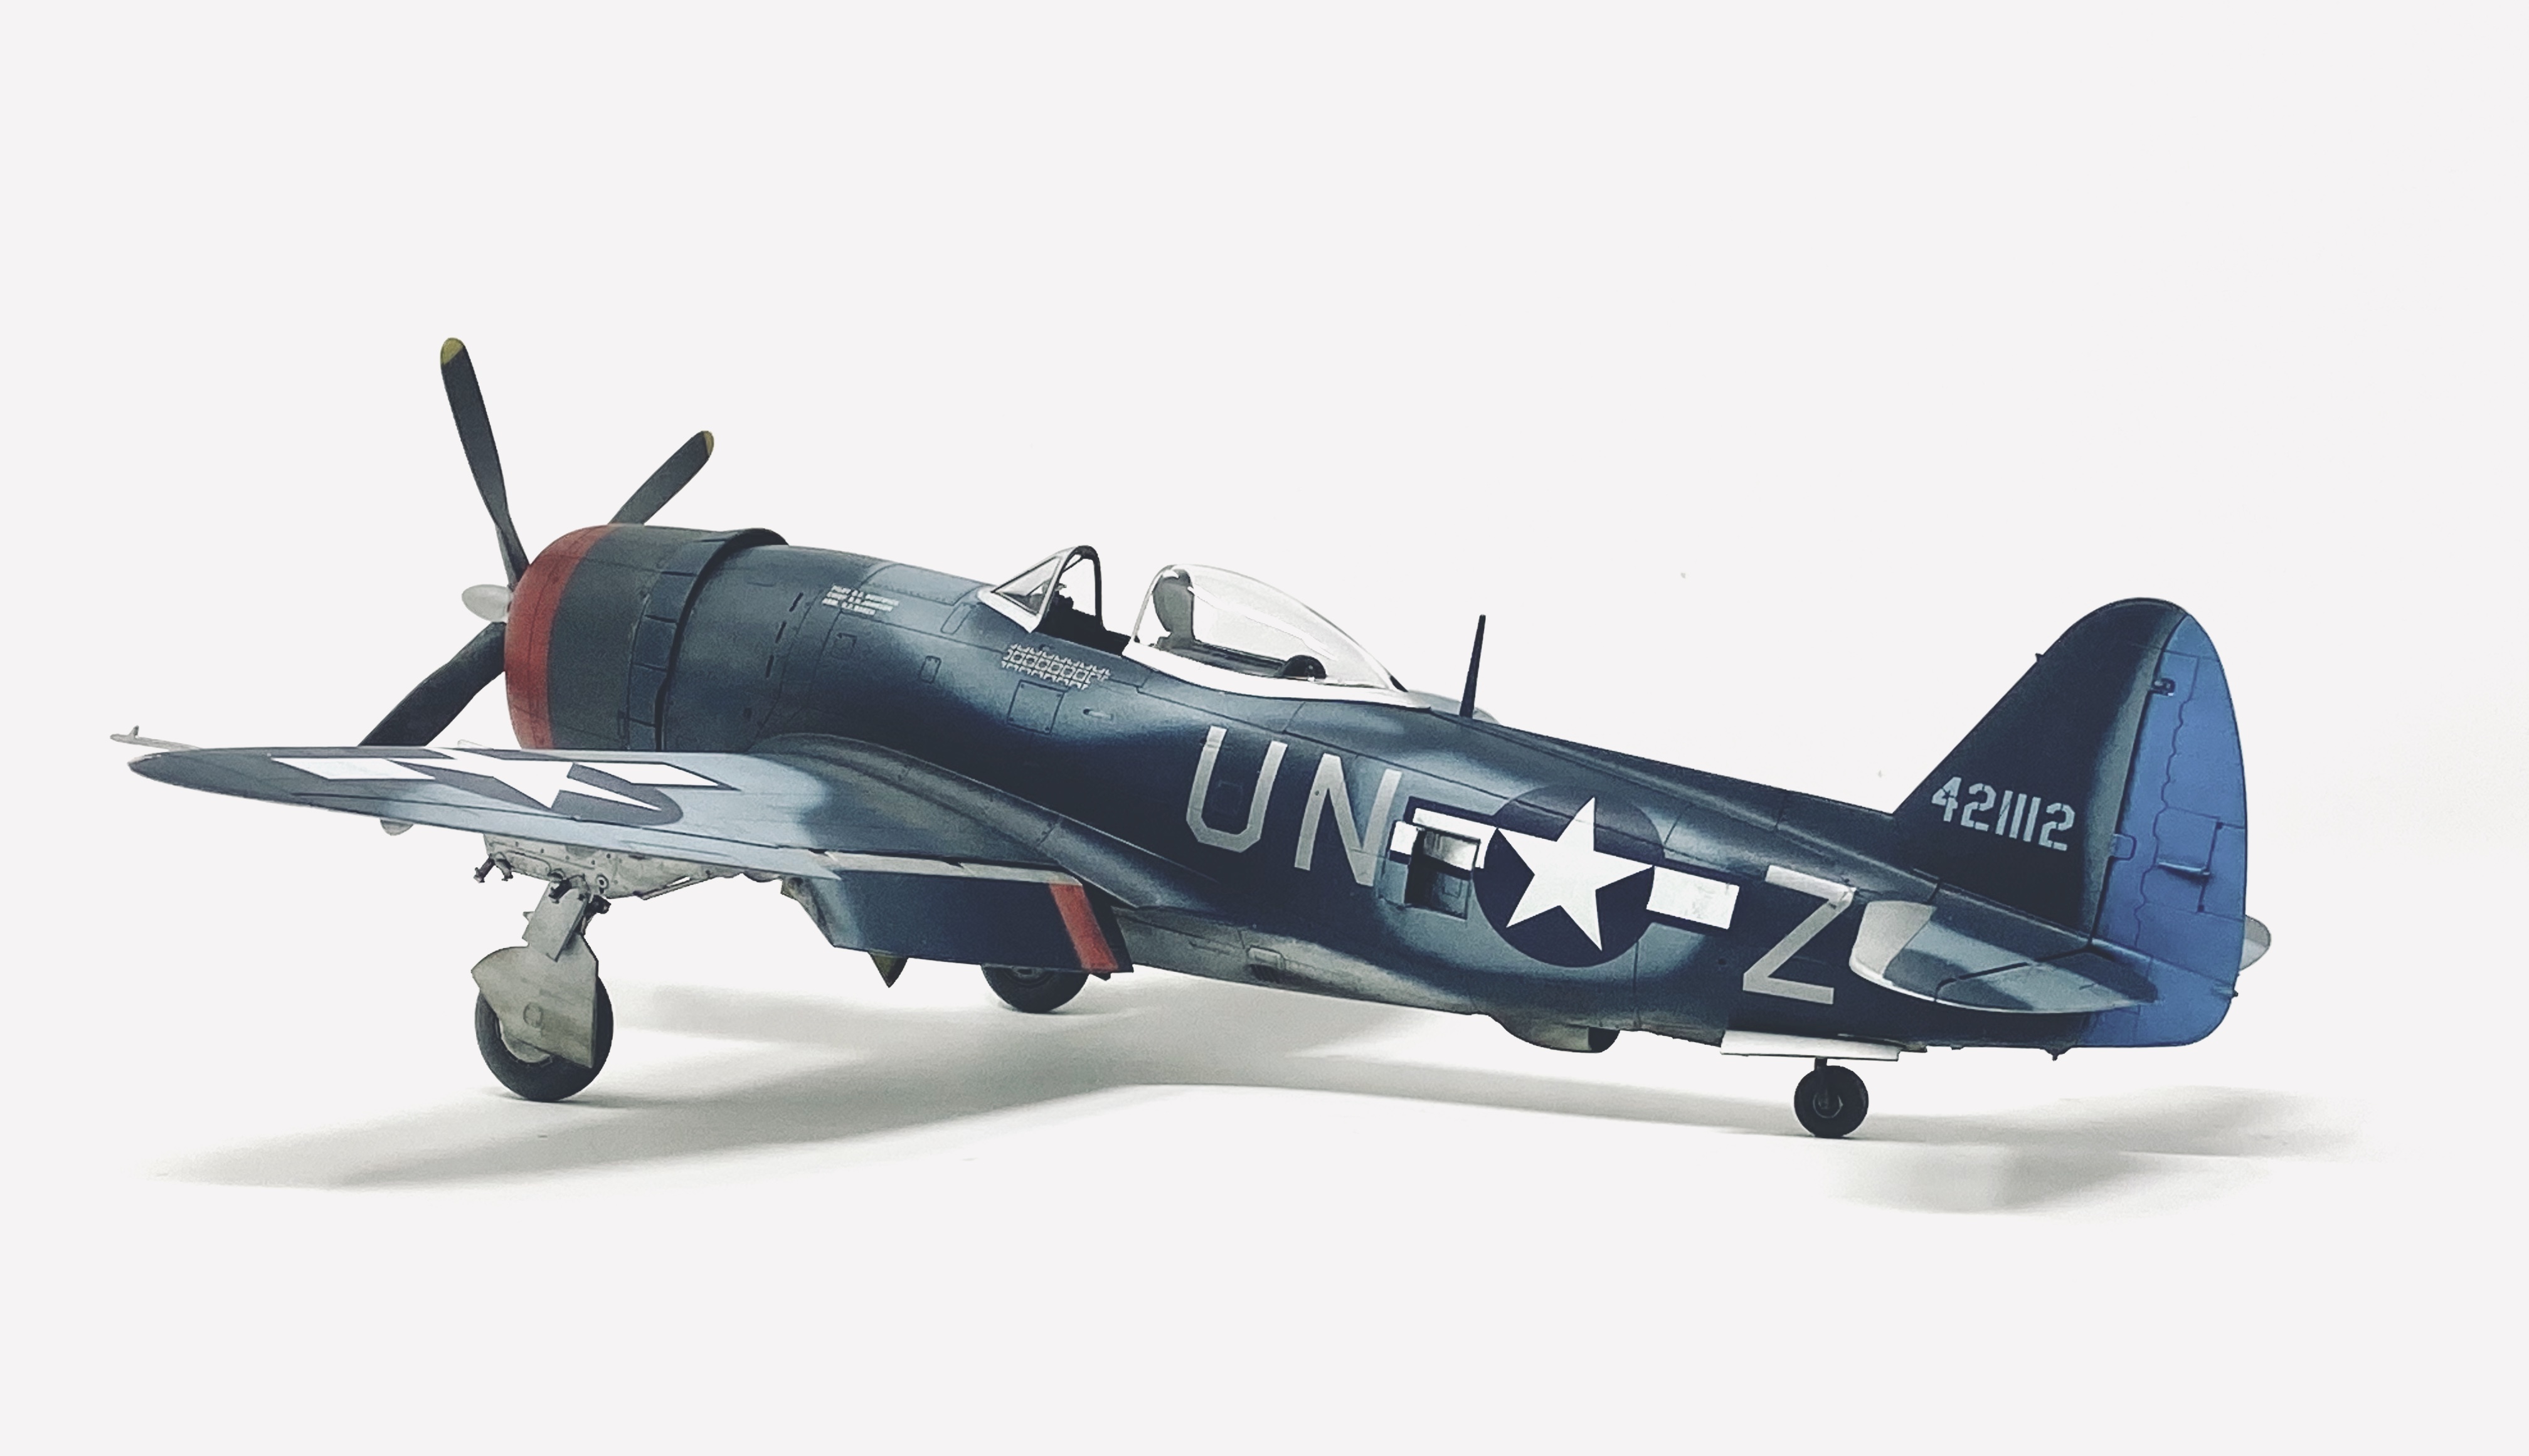
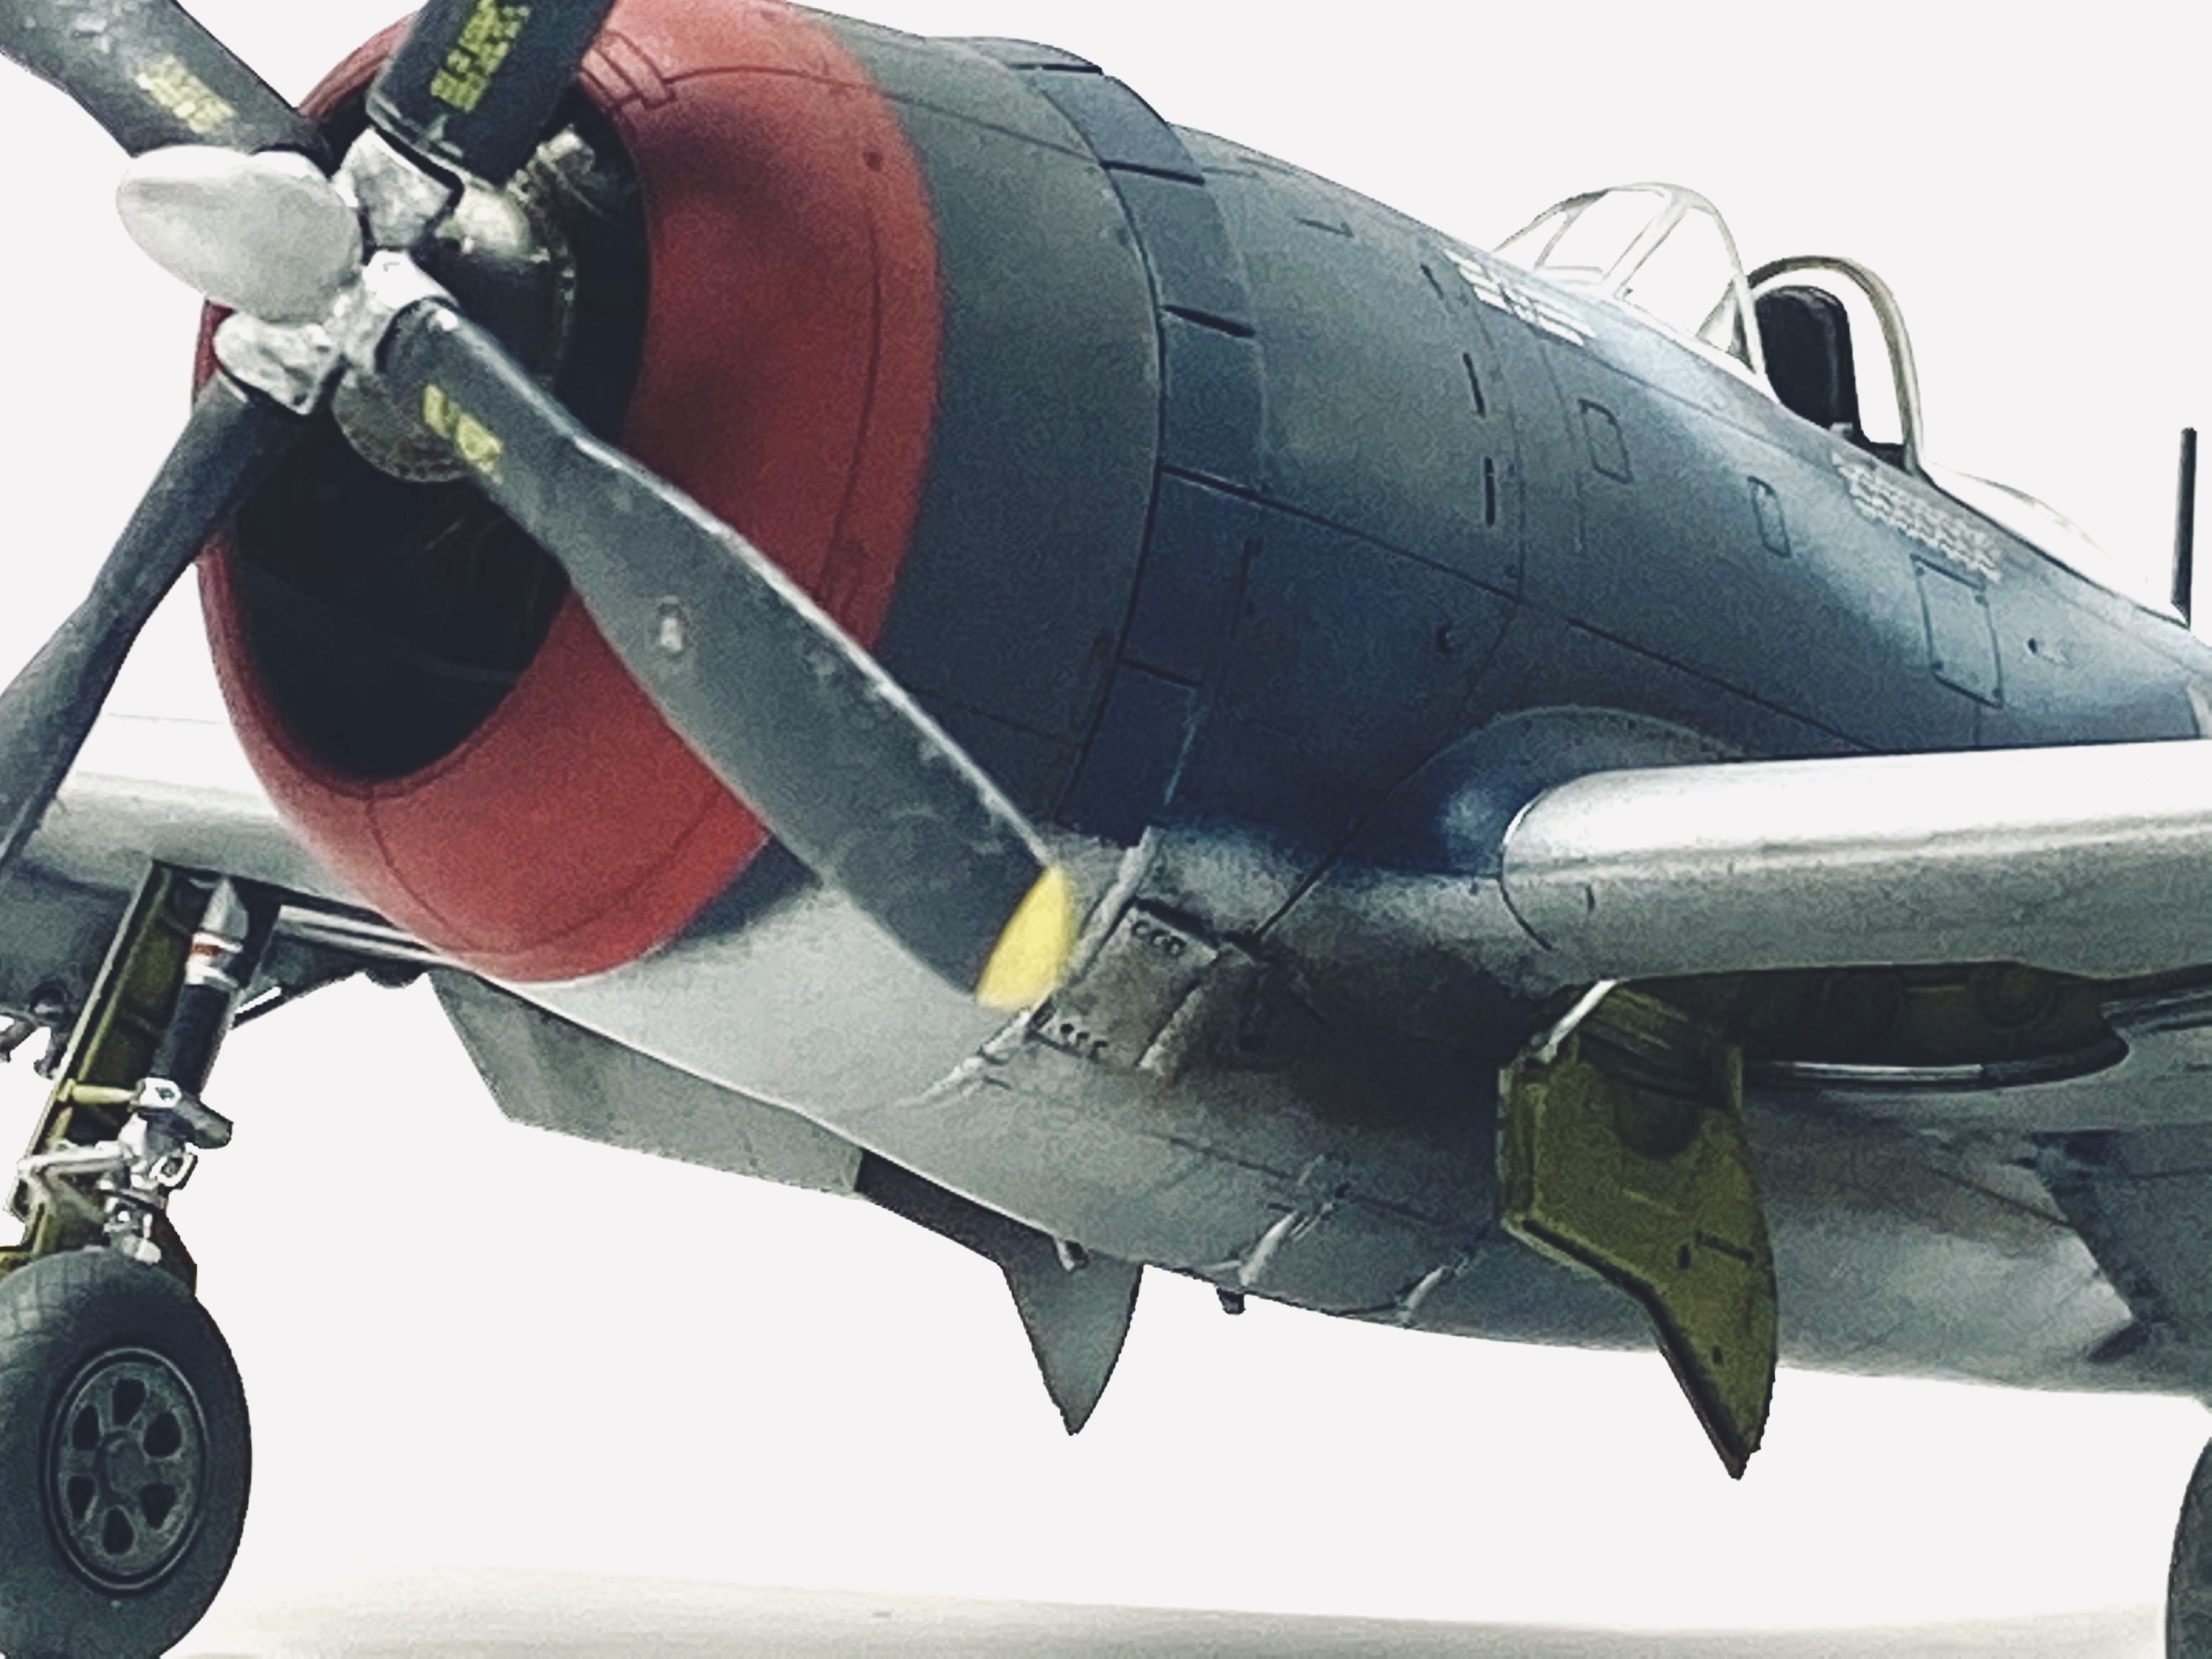
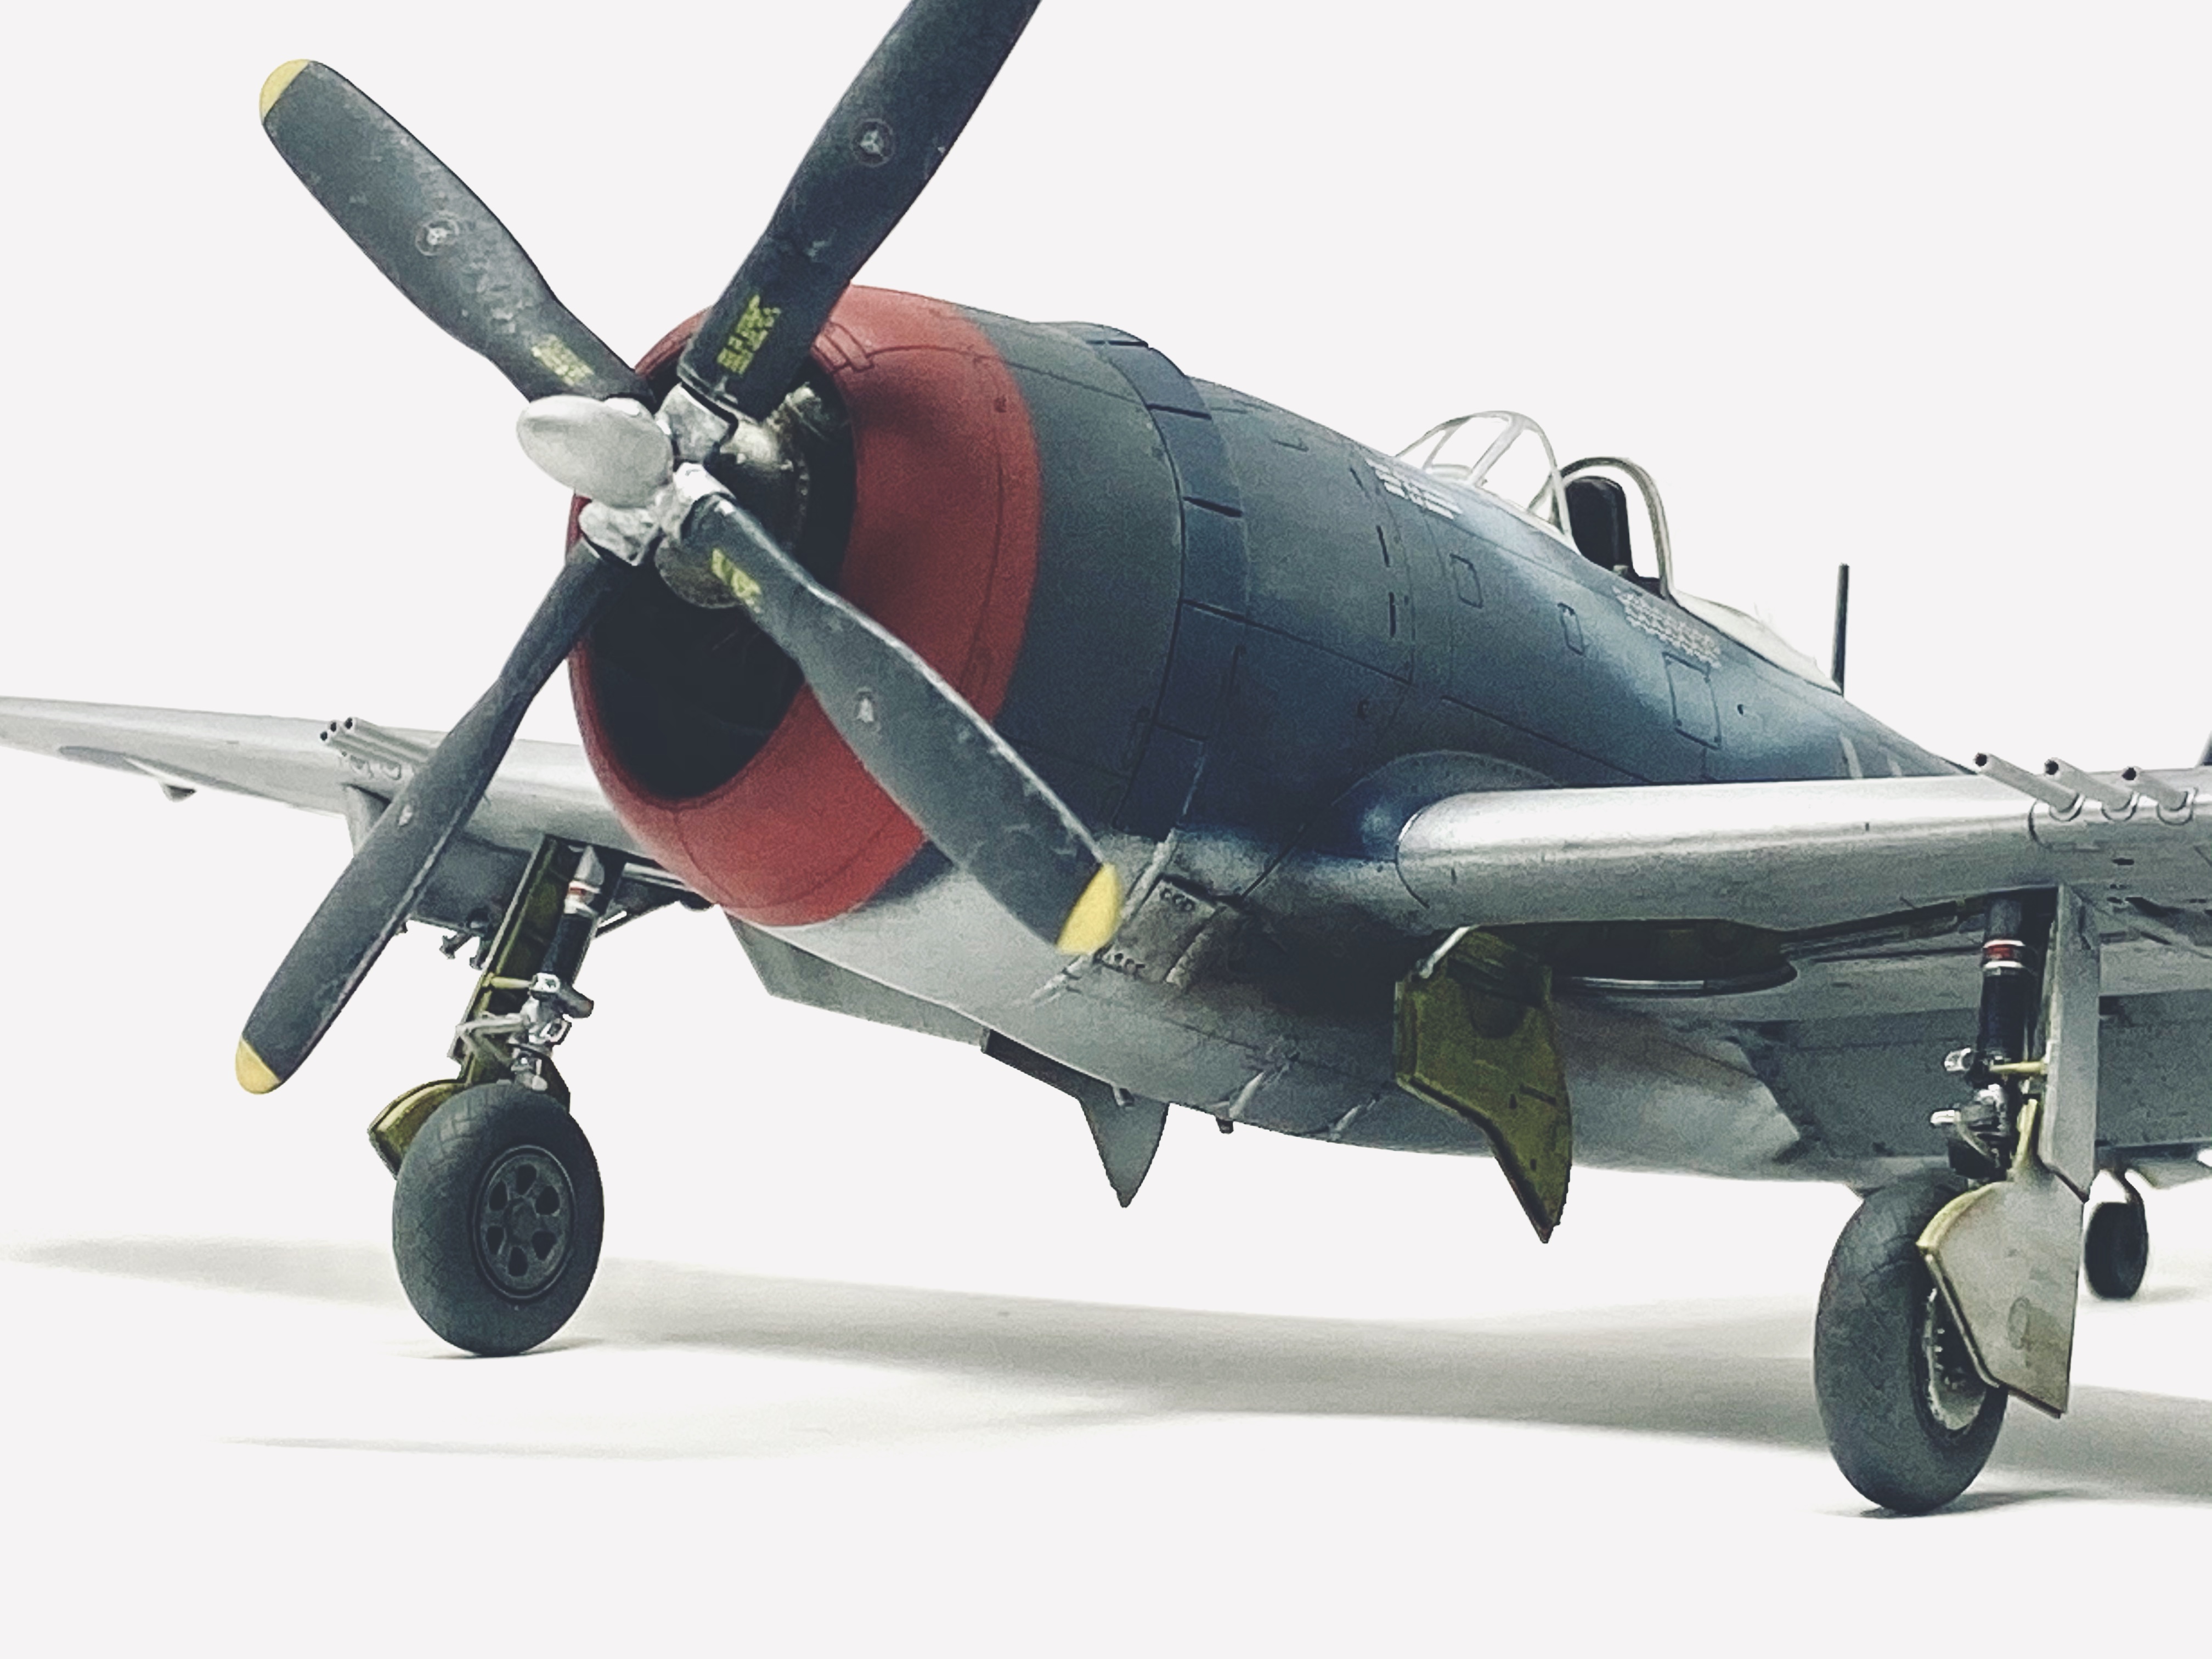
It was 1944 and the USAAF based in England would have make do with whatever paints they found. We will never know for sure which paint was actually used, but we can make a best guess with the photographic evidence we have to hand and a modest dose of deductive reasoning. If we look at the photo of UN-Z we can clearly see the front portion of the engine cowling was red. We can see the area behind just before cowl flaps is black. The underside is clearly bare metal. So that just leaves us to figure out the three shades of blue used to paint the upper camouflage pattern.
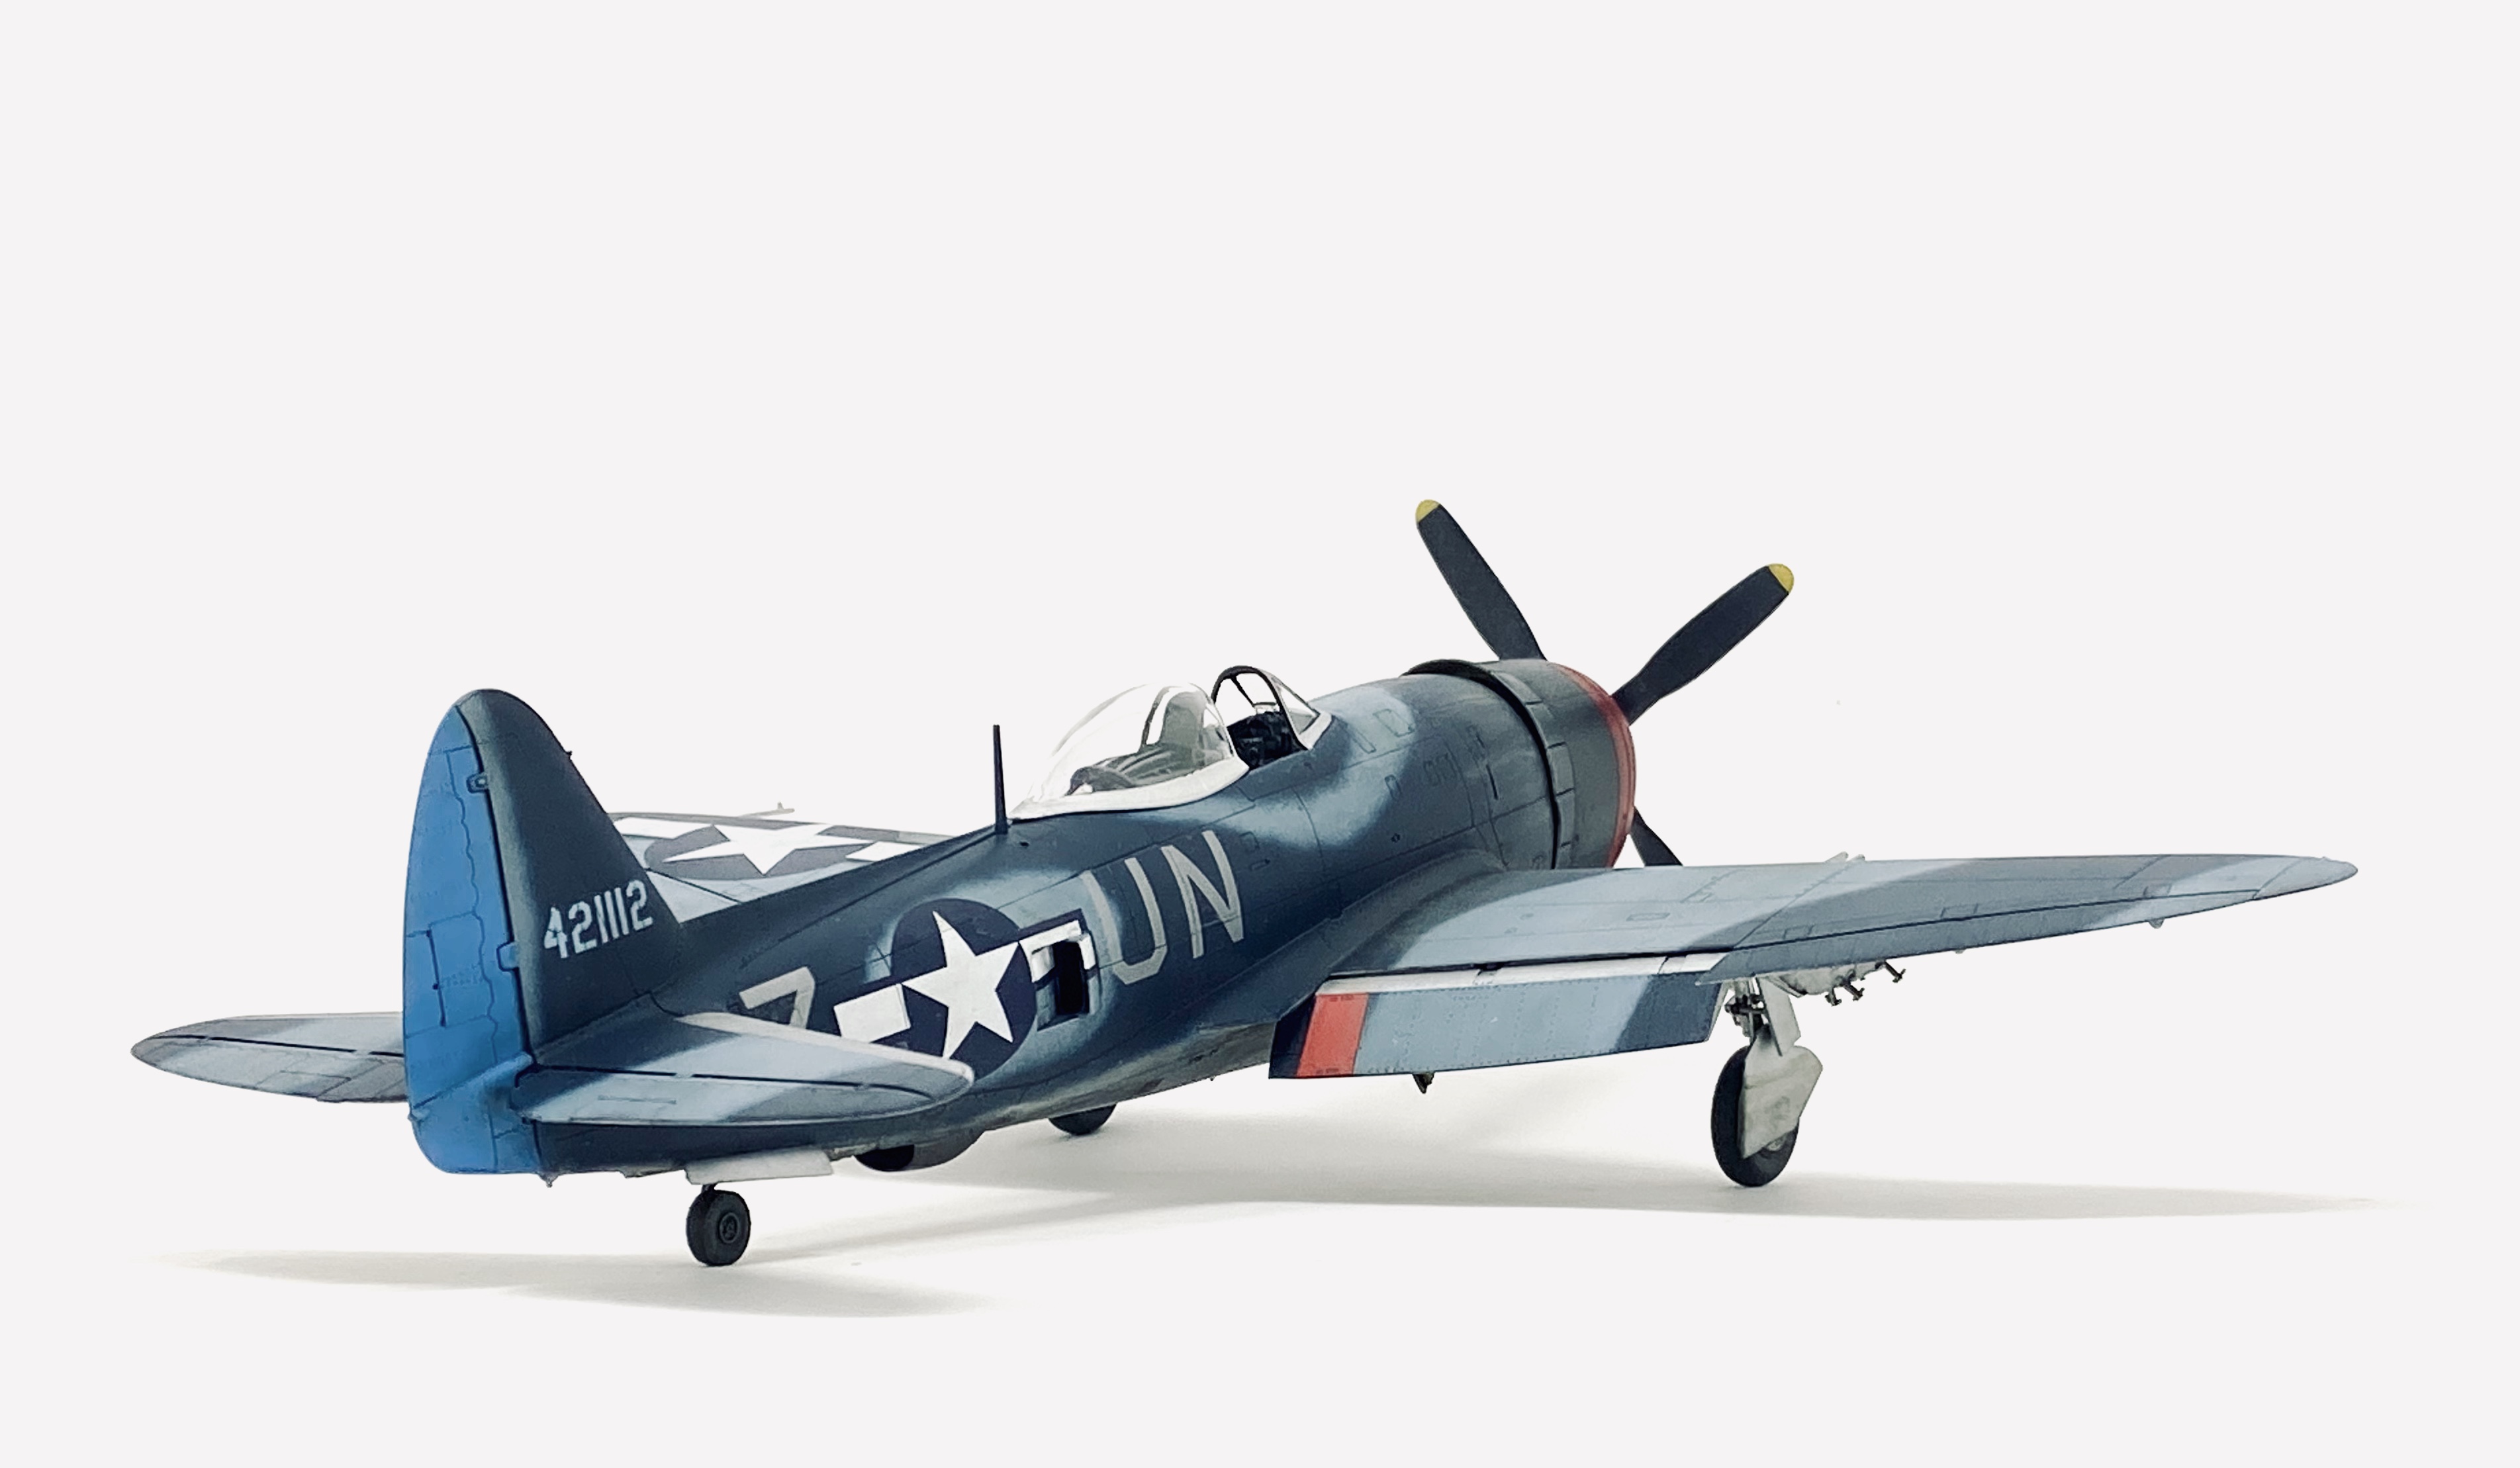
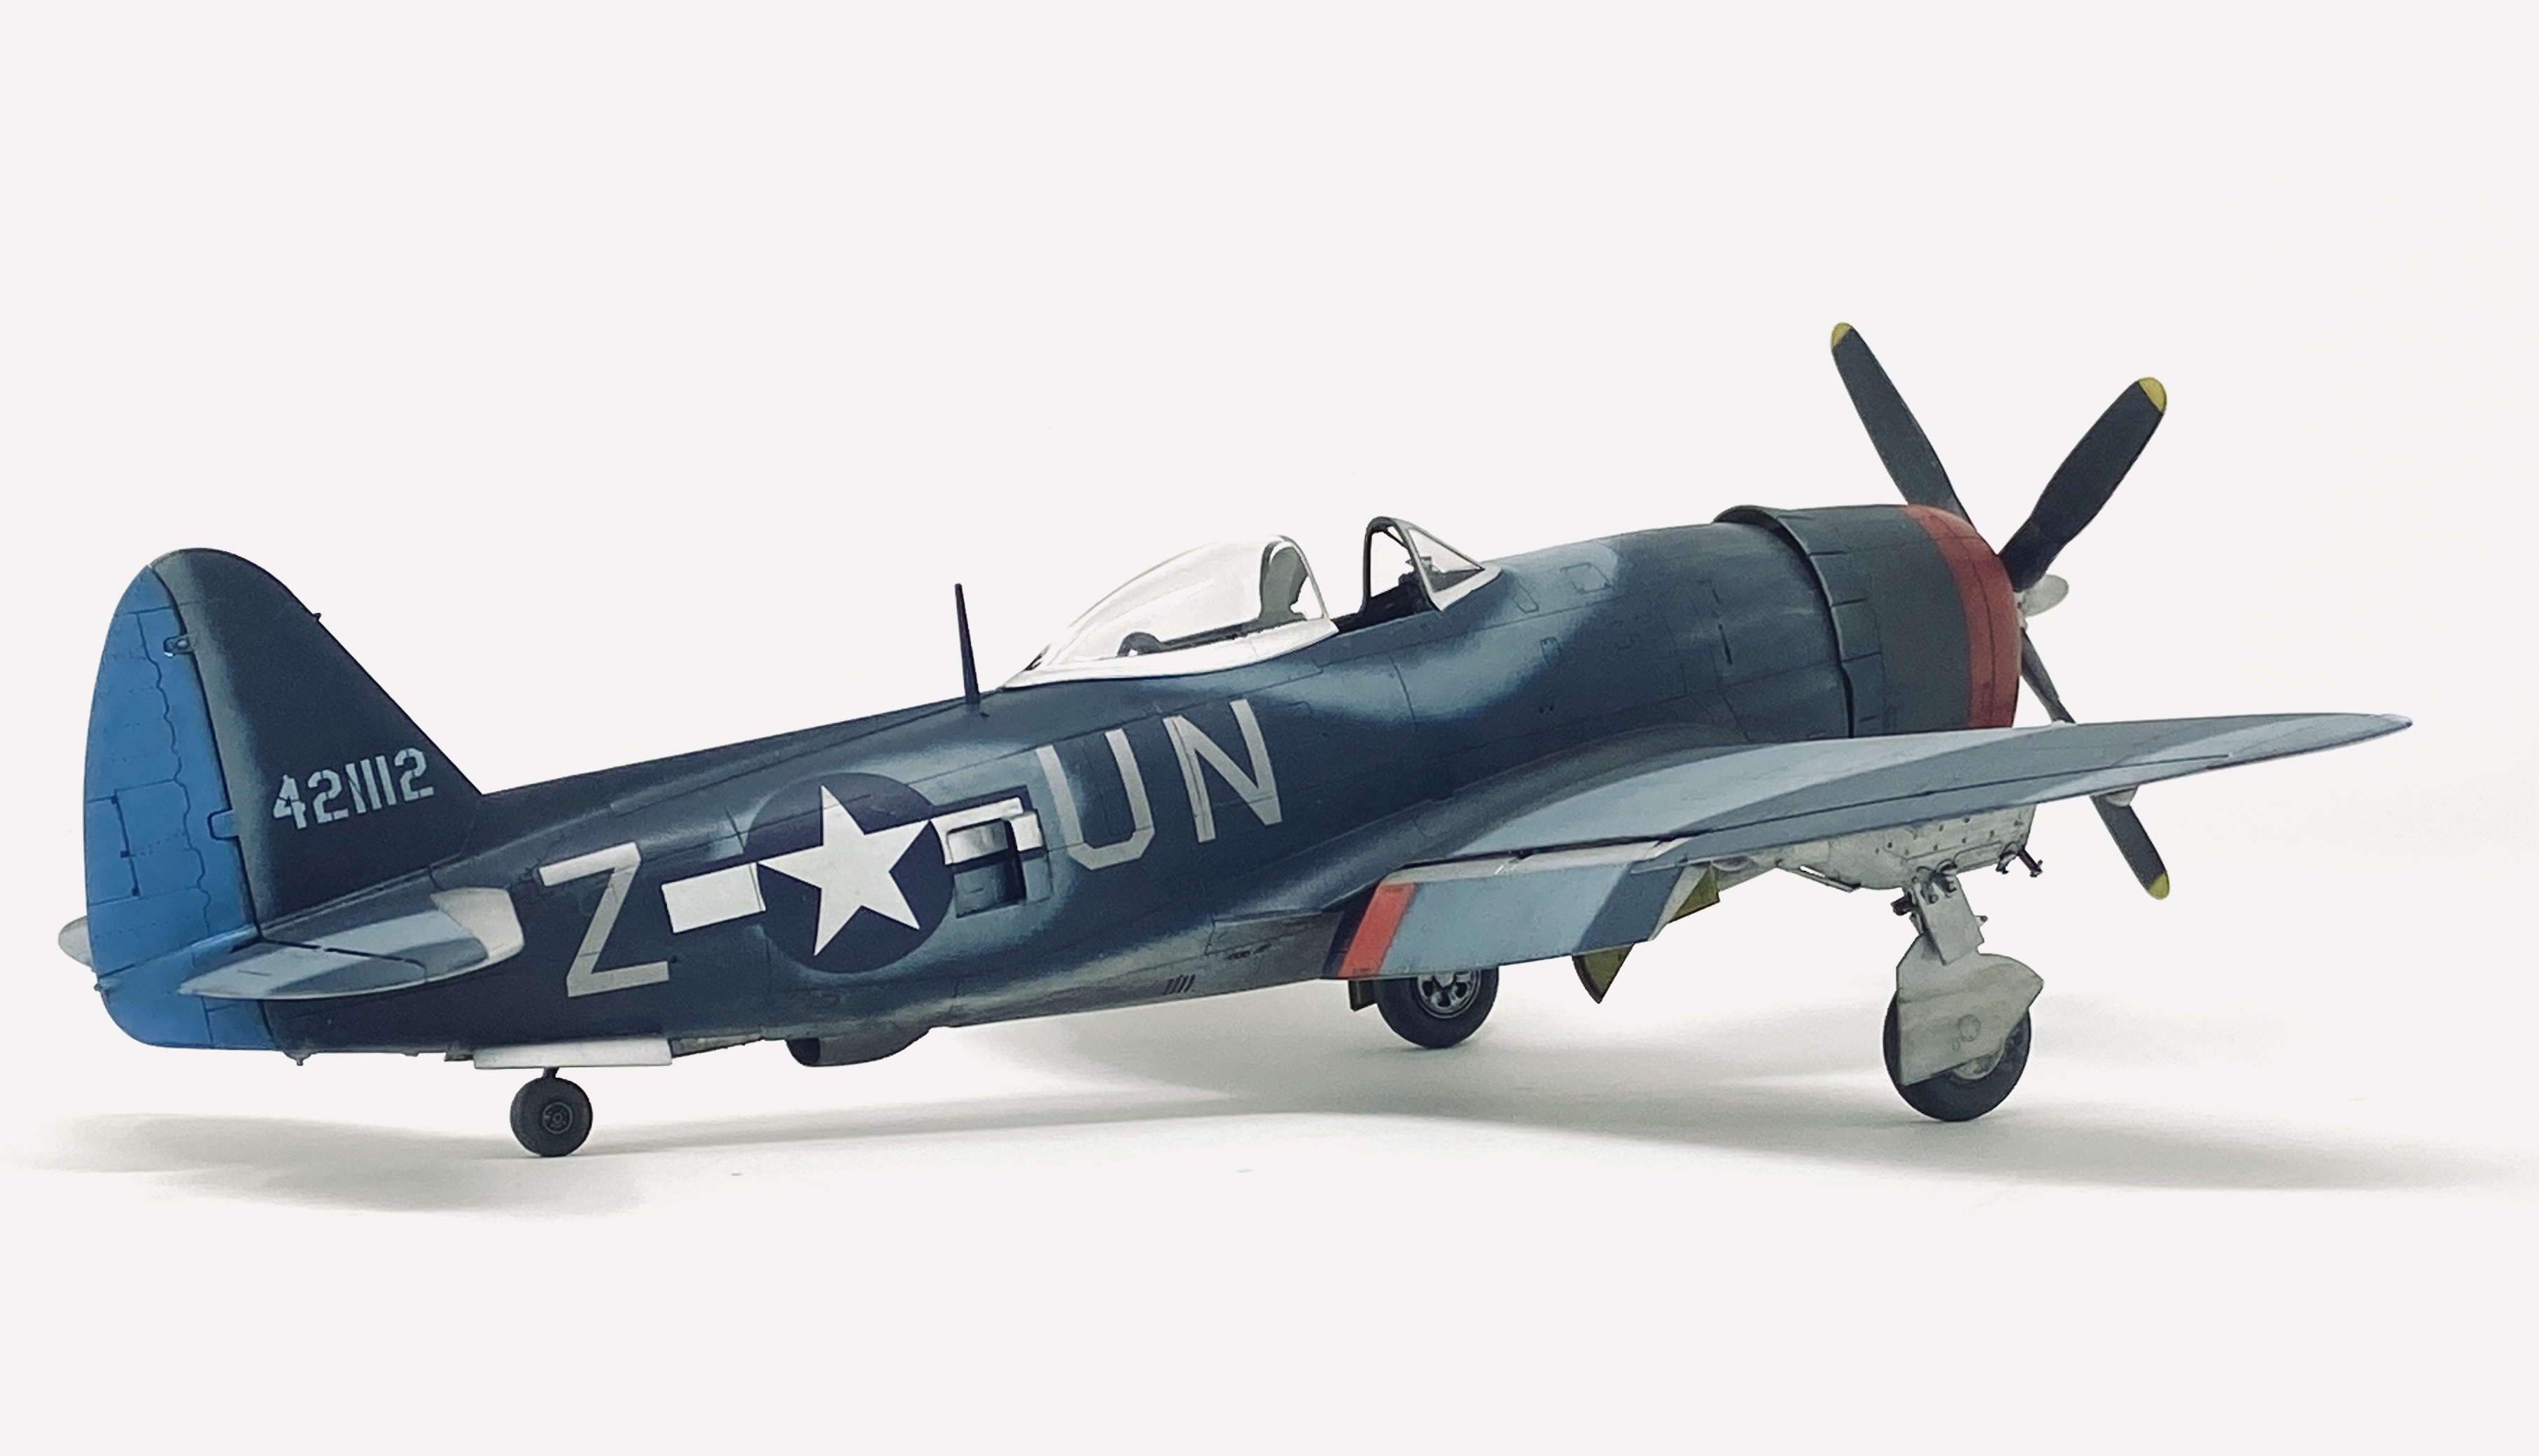
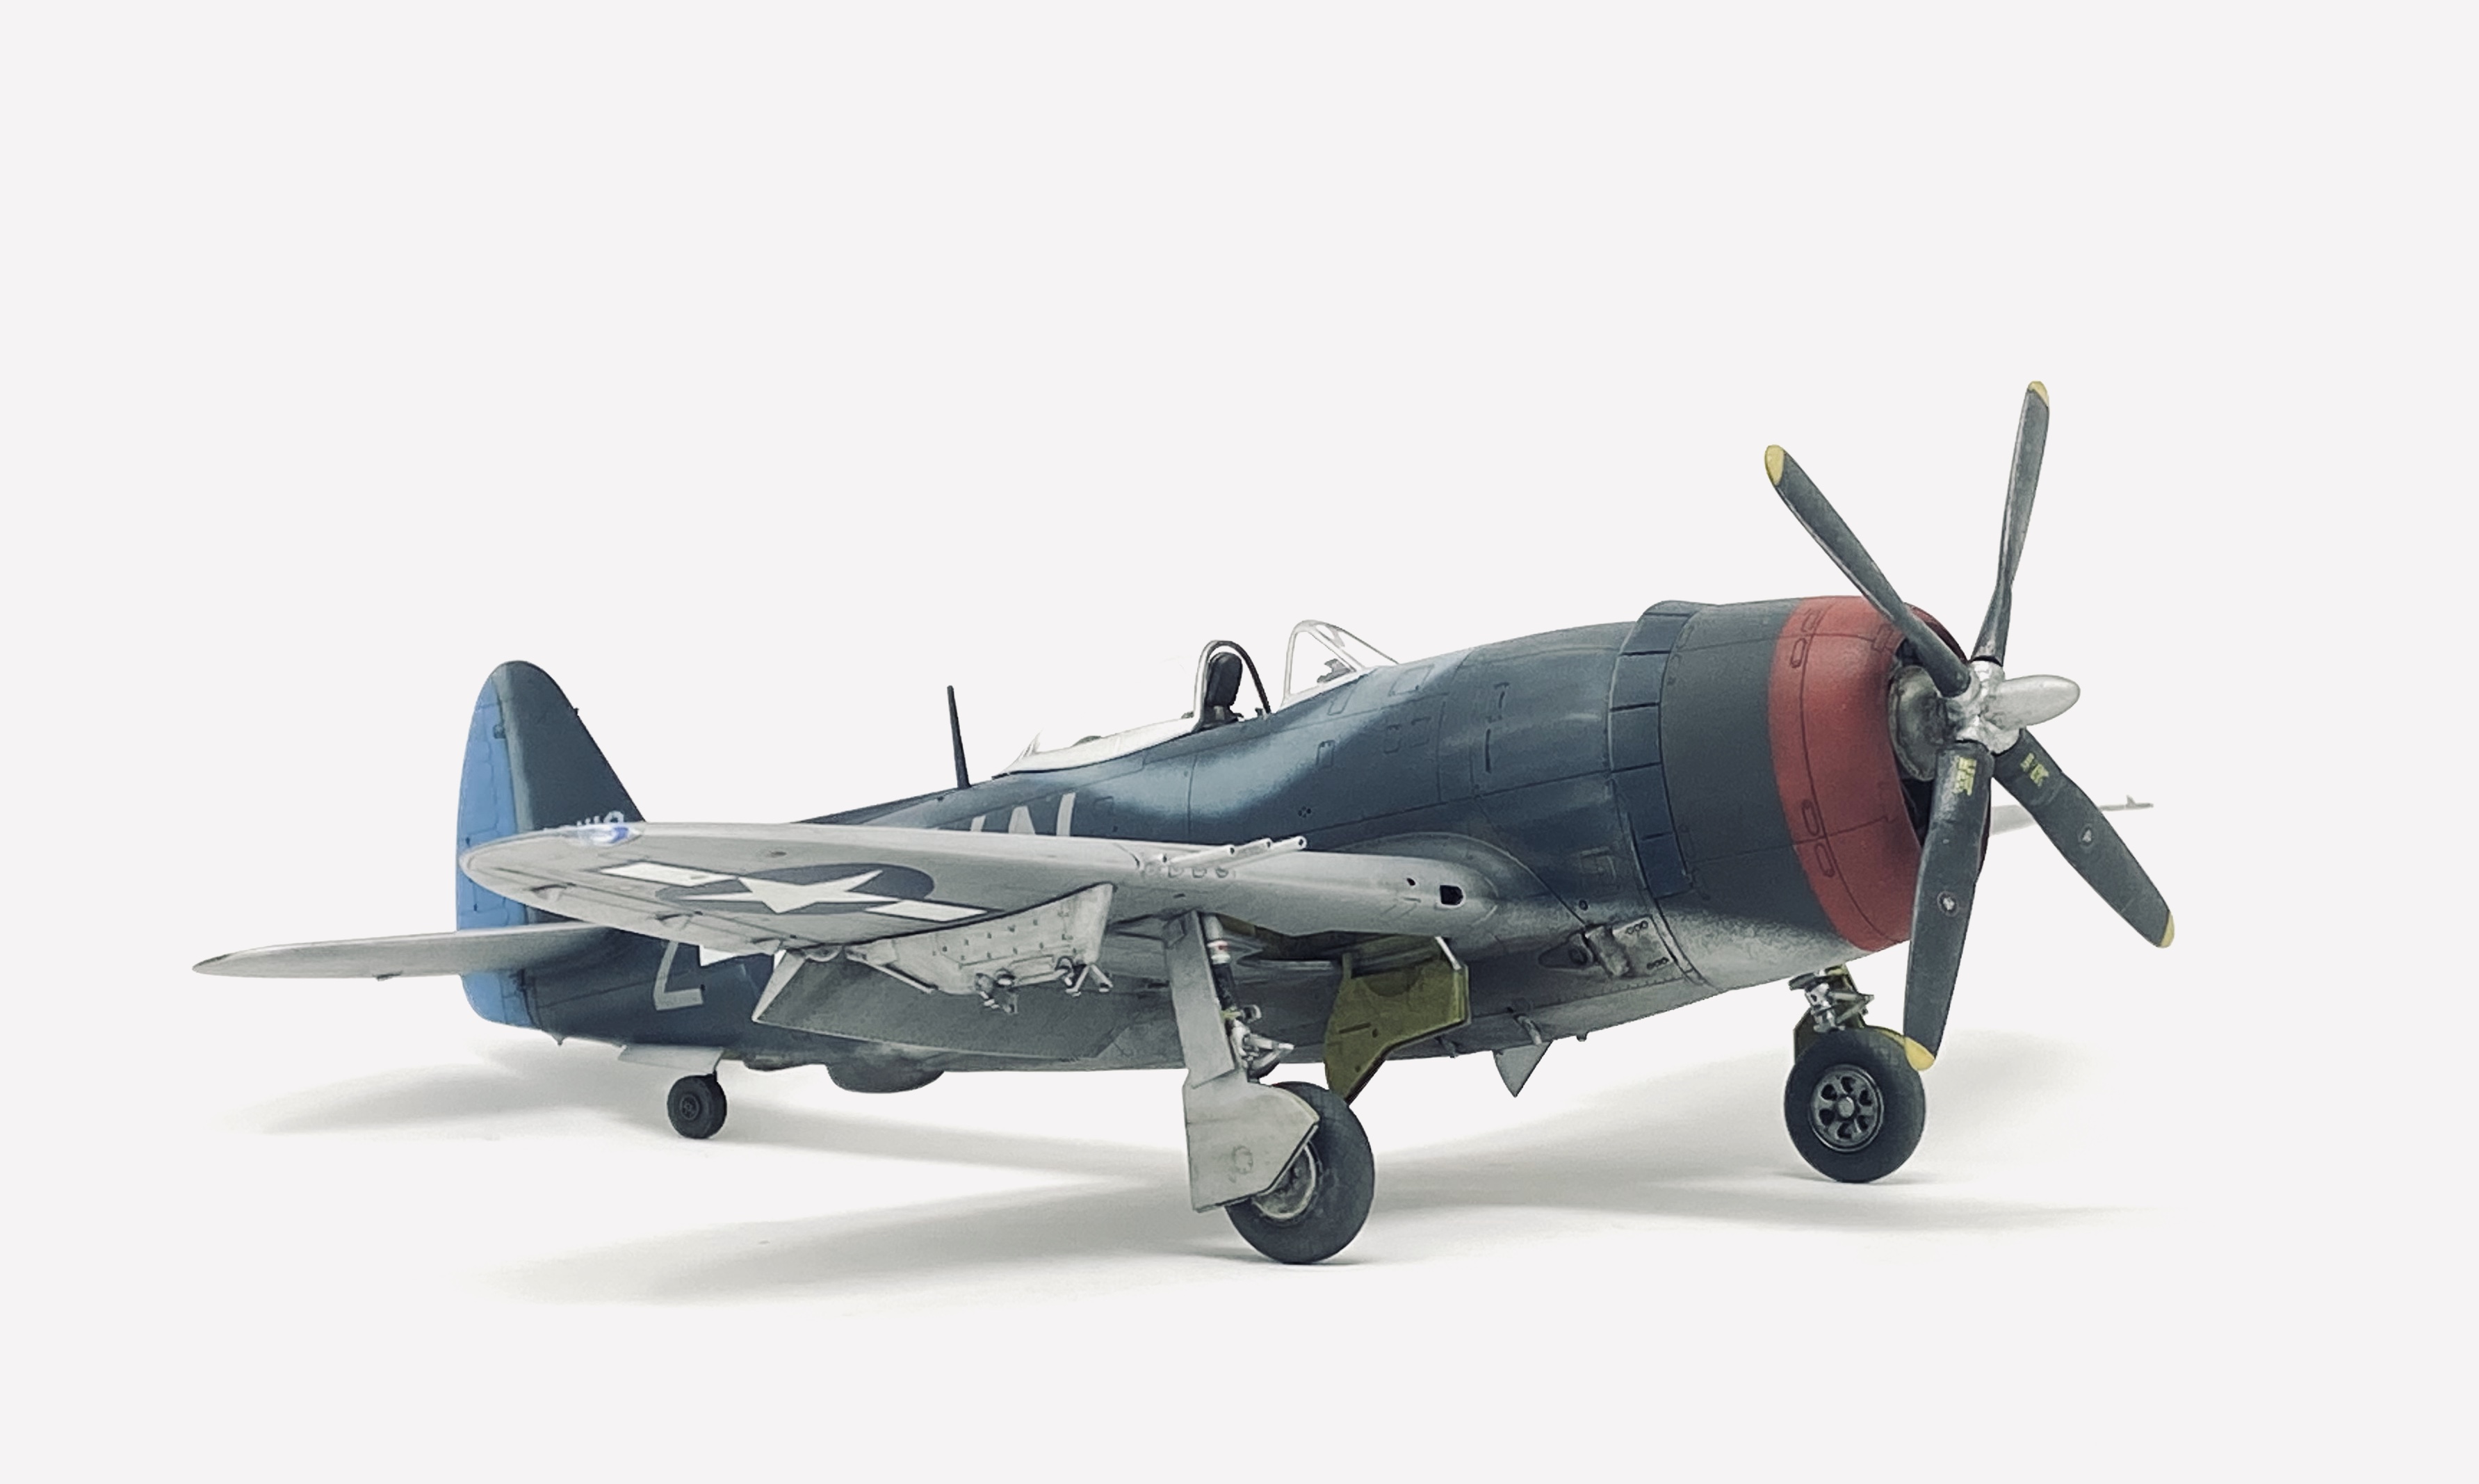
The bright blue on the rudder, was easy enough to figure out. This is obviously the bright sky blue used on USAAF P-51D Mustangs. Not much argument there. As for the Dark and Light blue camouflage I reasoned that the dark shade was a darkened shade of US Insignia Blue as used on the stars and bars on nation insignia. They are very close! I mixed Tamiya Royal Blue and NATO Black for this paint mix.
For the light blue, some say it was RAF Azure Blue. I strongly disagree with this, it doesn’t match and it was highly lightly that it would not have been used in the European theatre in 1944. These were American fighters based in England, to that end I believe that the 63rd FS were more likely to mix their own shade of blue from lightened RAF PRU blue, which would have been readily available in England at that time.
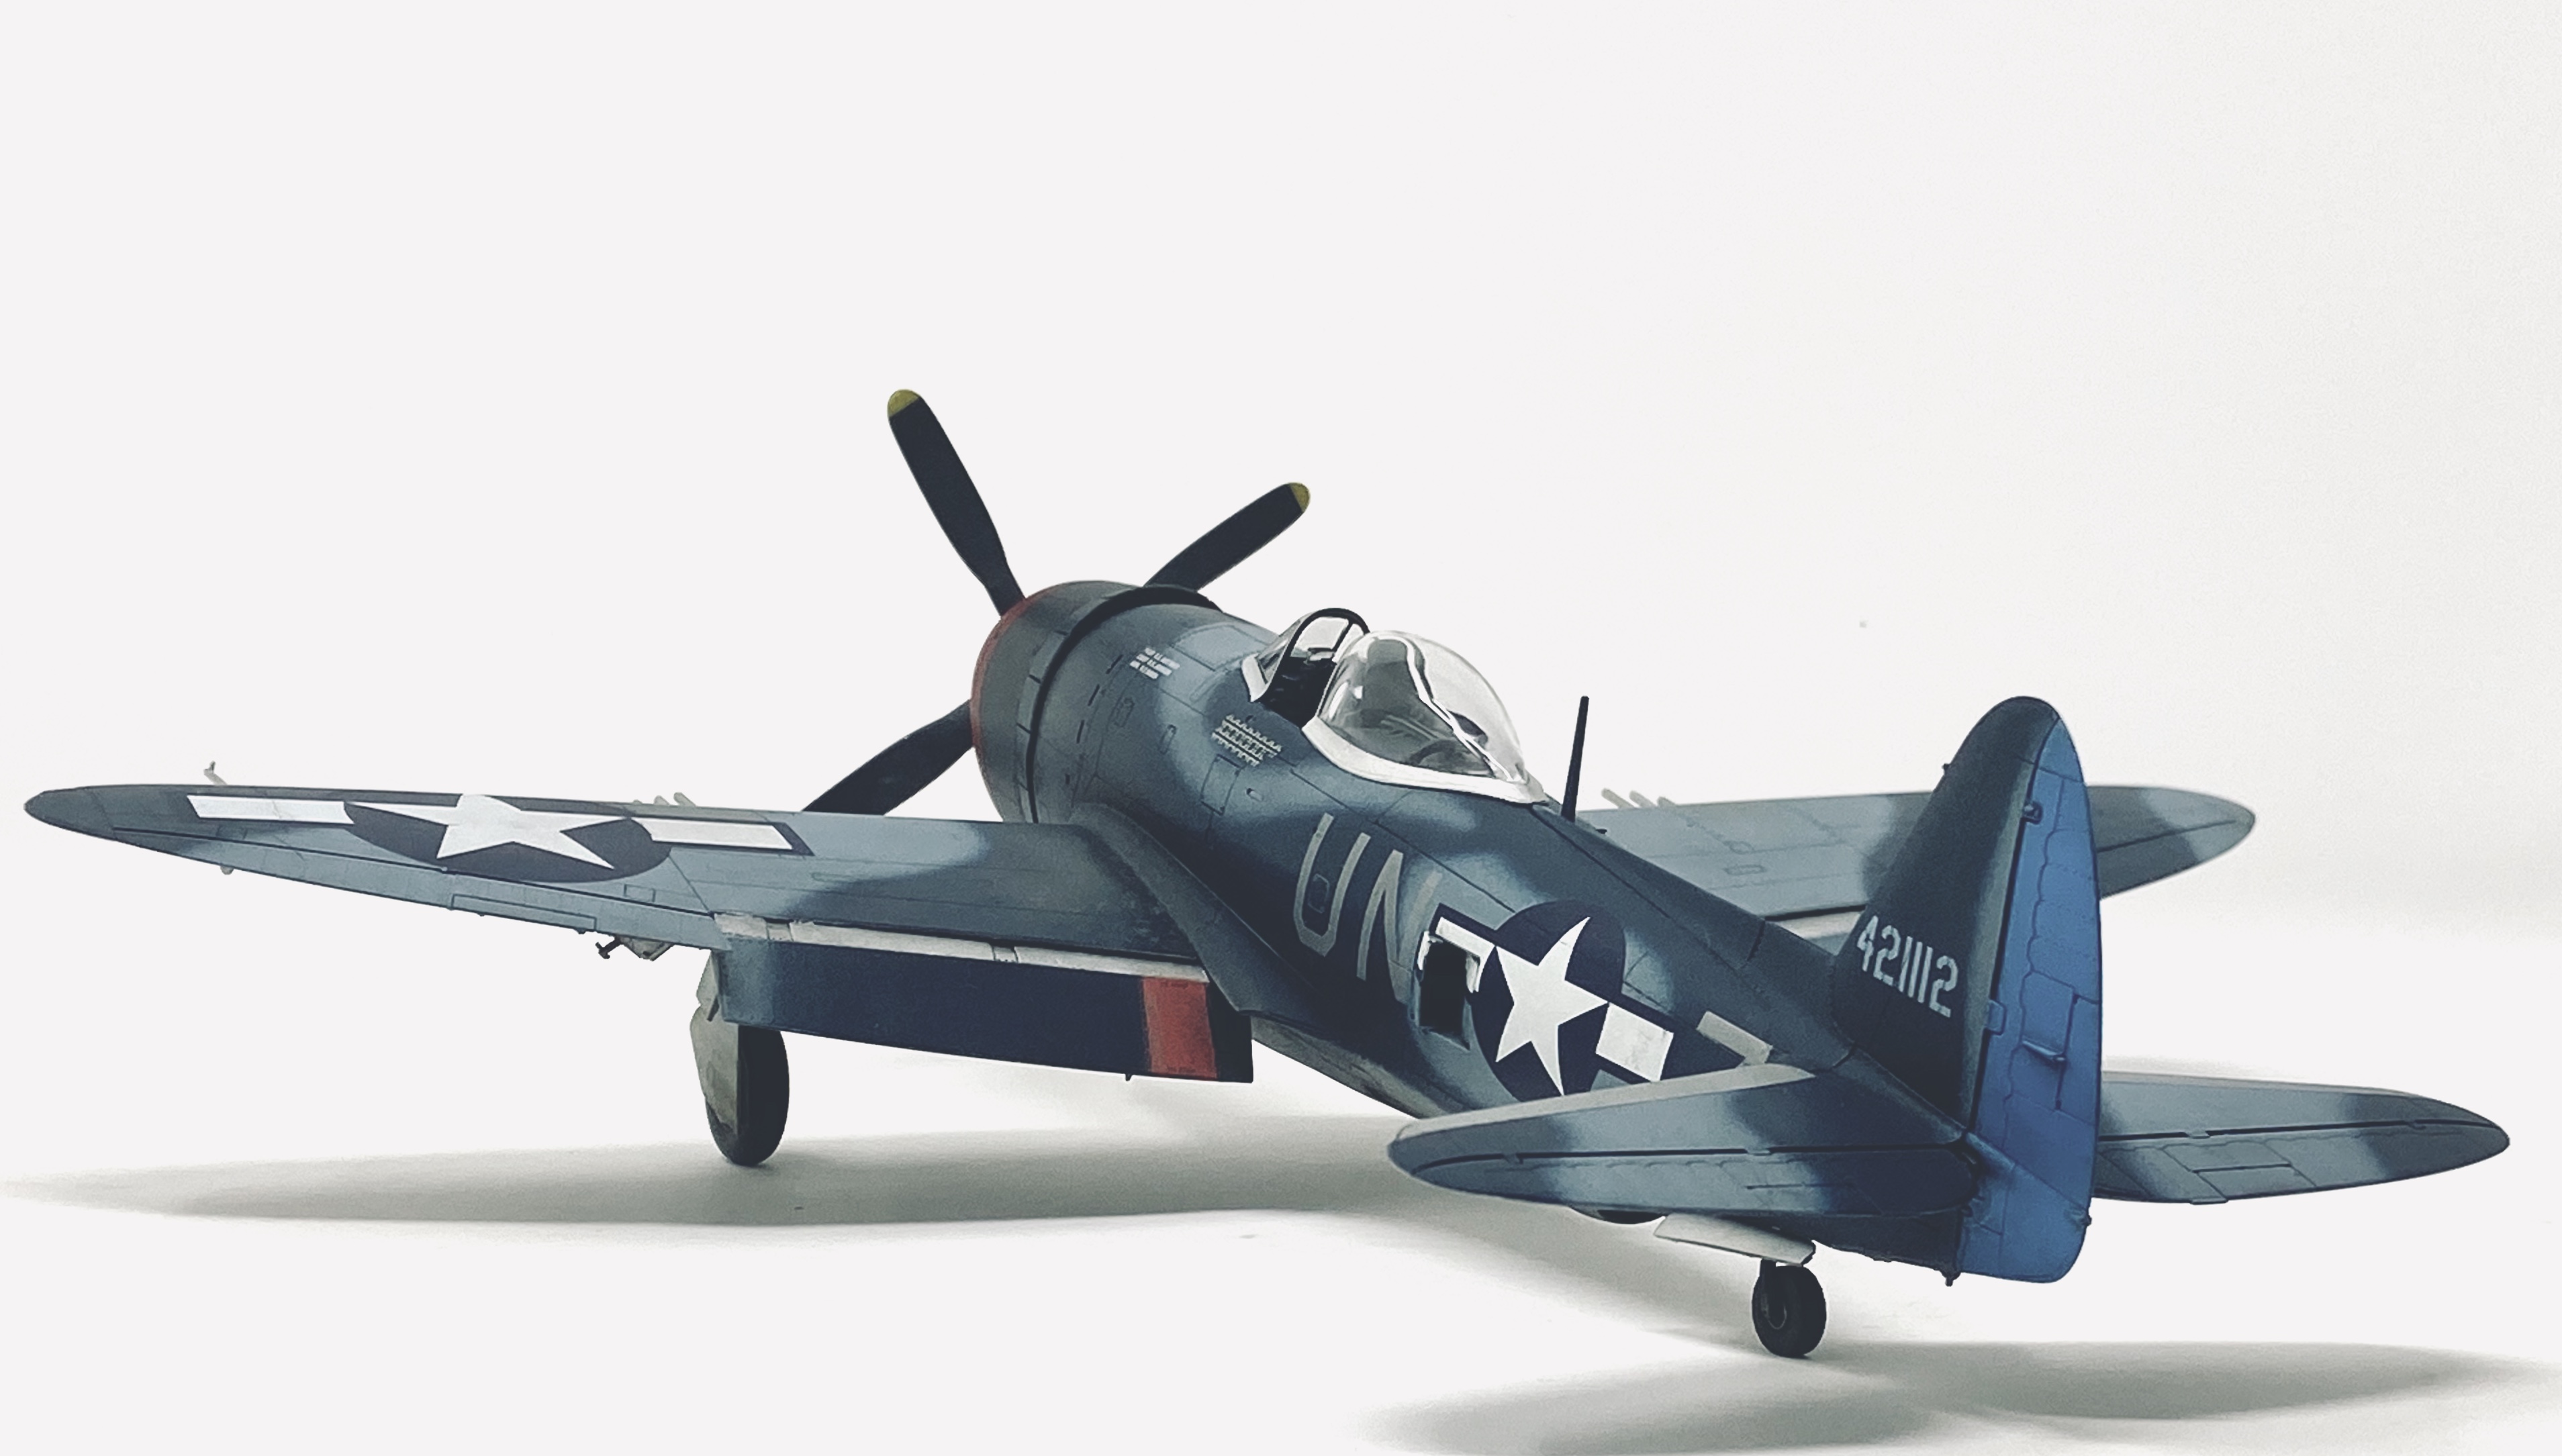
So that’s my choice of colours explained. The weathering was quite simple, these warbirds only came into service in 1944. They would have been in good condition with less airframe hours than the older P-47D’s. To this end I highlighted the panel lines with Mig Ammo Midnight Black panel wash, added scratches to the high wear area’s such as the wing routes with AK Interactive metallic weathering pencils and exhaust stains were added using a combination of Tamiya weathering master pigments.
So the model is complete. I thoroughly enjoyed this build, the subject was an interesting, challenging paint scheme, the assembly was effortless and despite what folks say about Tamiya decals, mine went down well and to my eye, look pretty good.
If you are looking for a mojo restoring build, one that falls together and puts a smile on your face, look no further!
P-47M 63rd FS, Boxted, England, 1944.


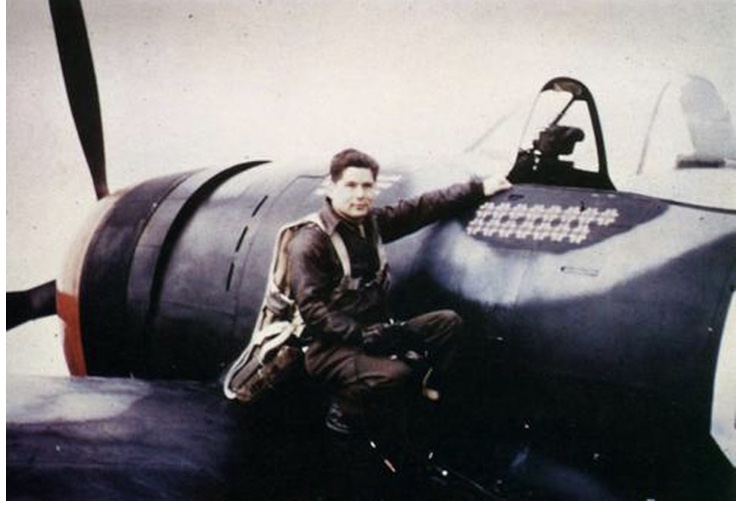
Here is the original UN-Z with my model underneath.

I hope you have enjoyed my thoughts on the P-47M and the finished model. Thanks for visiting!
Take care and as always,
HAPPY MODELLING!
Darren.

Pingback: The original American Hotrod: Republic P-47M Thunderbolt — THE SCALE MODEL HANGAR – My Forgotten Hobby III
Reblogged this on ausevor.
LikeLike