As regular readers will already know, my favourite aircraft of all time is the Supermarine Spitfire. I have built many models of the legendary fighter over the years but one variant has eluded me-The PR Mk.XI. Until now that is!
Due to no manufacturer producing any Spitfire PR Mk.XI’s in 1/48 or 1/32 scale one has to resort to cobbling together a base kit and conversion parts to build the desired airframe. In my case the objective was to produce a PR Mk.XI in 1/48 scale. There had been a good 1/32 conversion set available previously, but its as rare as hens teeth now!
So why the PR Mk.XI ? I have wanted to build a particular version of this Spitfire, years ago my friend Frank emailed photo’s of a PR Mk.XI build to me and I was amazed at what I saw! Renowned modeller Daniel Zamarbide had carried out his own scratch built conversion in 1/32 scale and it was absolutely gorgeous! From that day on I felt inspired to build my own!
And so here we are- years later with my own Spitfire PR Mk.XI
Just what is a PR Mk.XI?
The PR stands for Photographic Reconnaissance. These Spitfire’s had all of their guns removed and camera’s were mounted in the fuselage. Their mission was exceptionally dangerous: Fly right into enemy territory, take photo’s of their positions and fly like hell for home! The brave men who flew PR Spitfire’s brought back vital intelligence for the Allied war effort.
The Mk.XI Spitfire was designed to operate at altitudes of over 30,000 ft and fly faster than 400 mph. As such the Mk.XI became the fastest of all the Merlin engined Spitfire’s as was ideally suited to the Photographic Reconnaissance mission.
THE PARTS ROUNDUP!
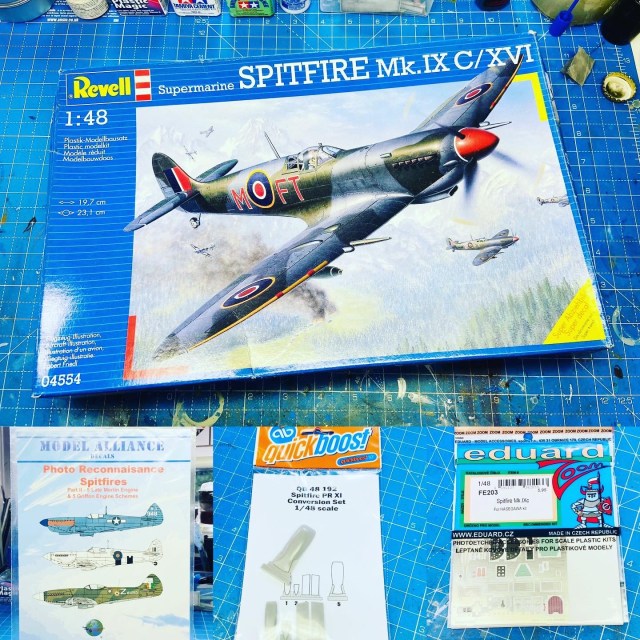
Here is what I came up with so get the project started:
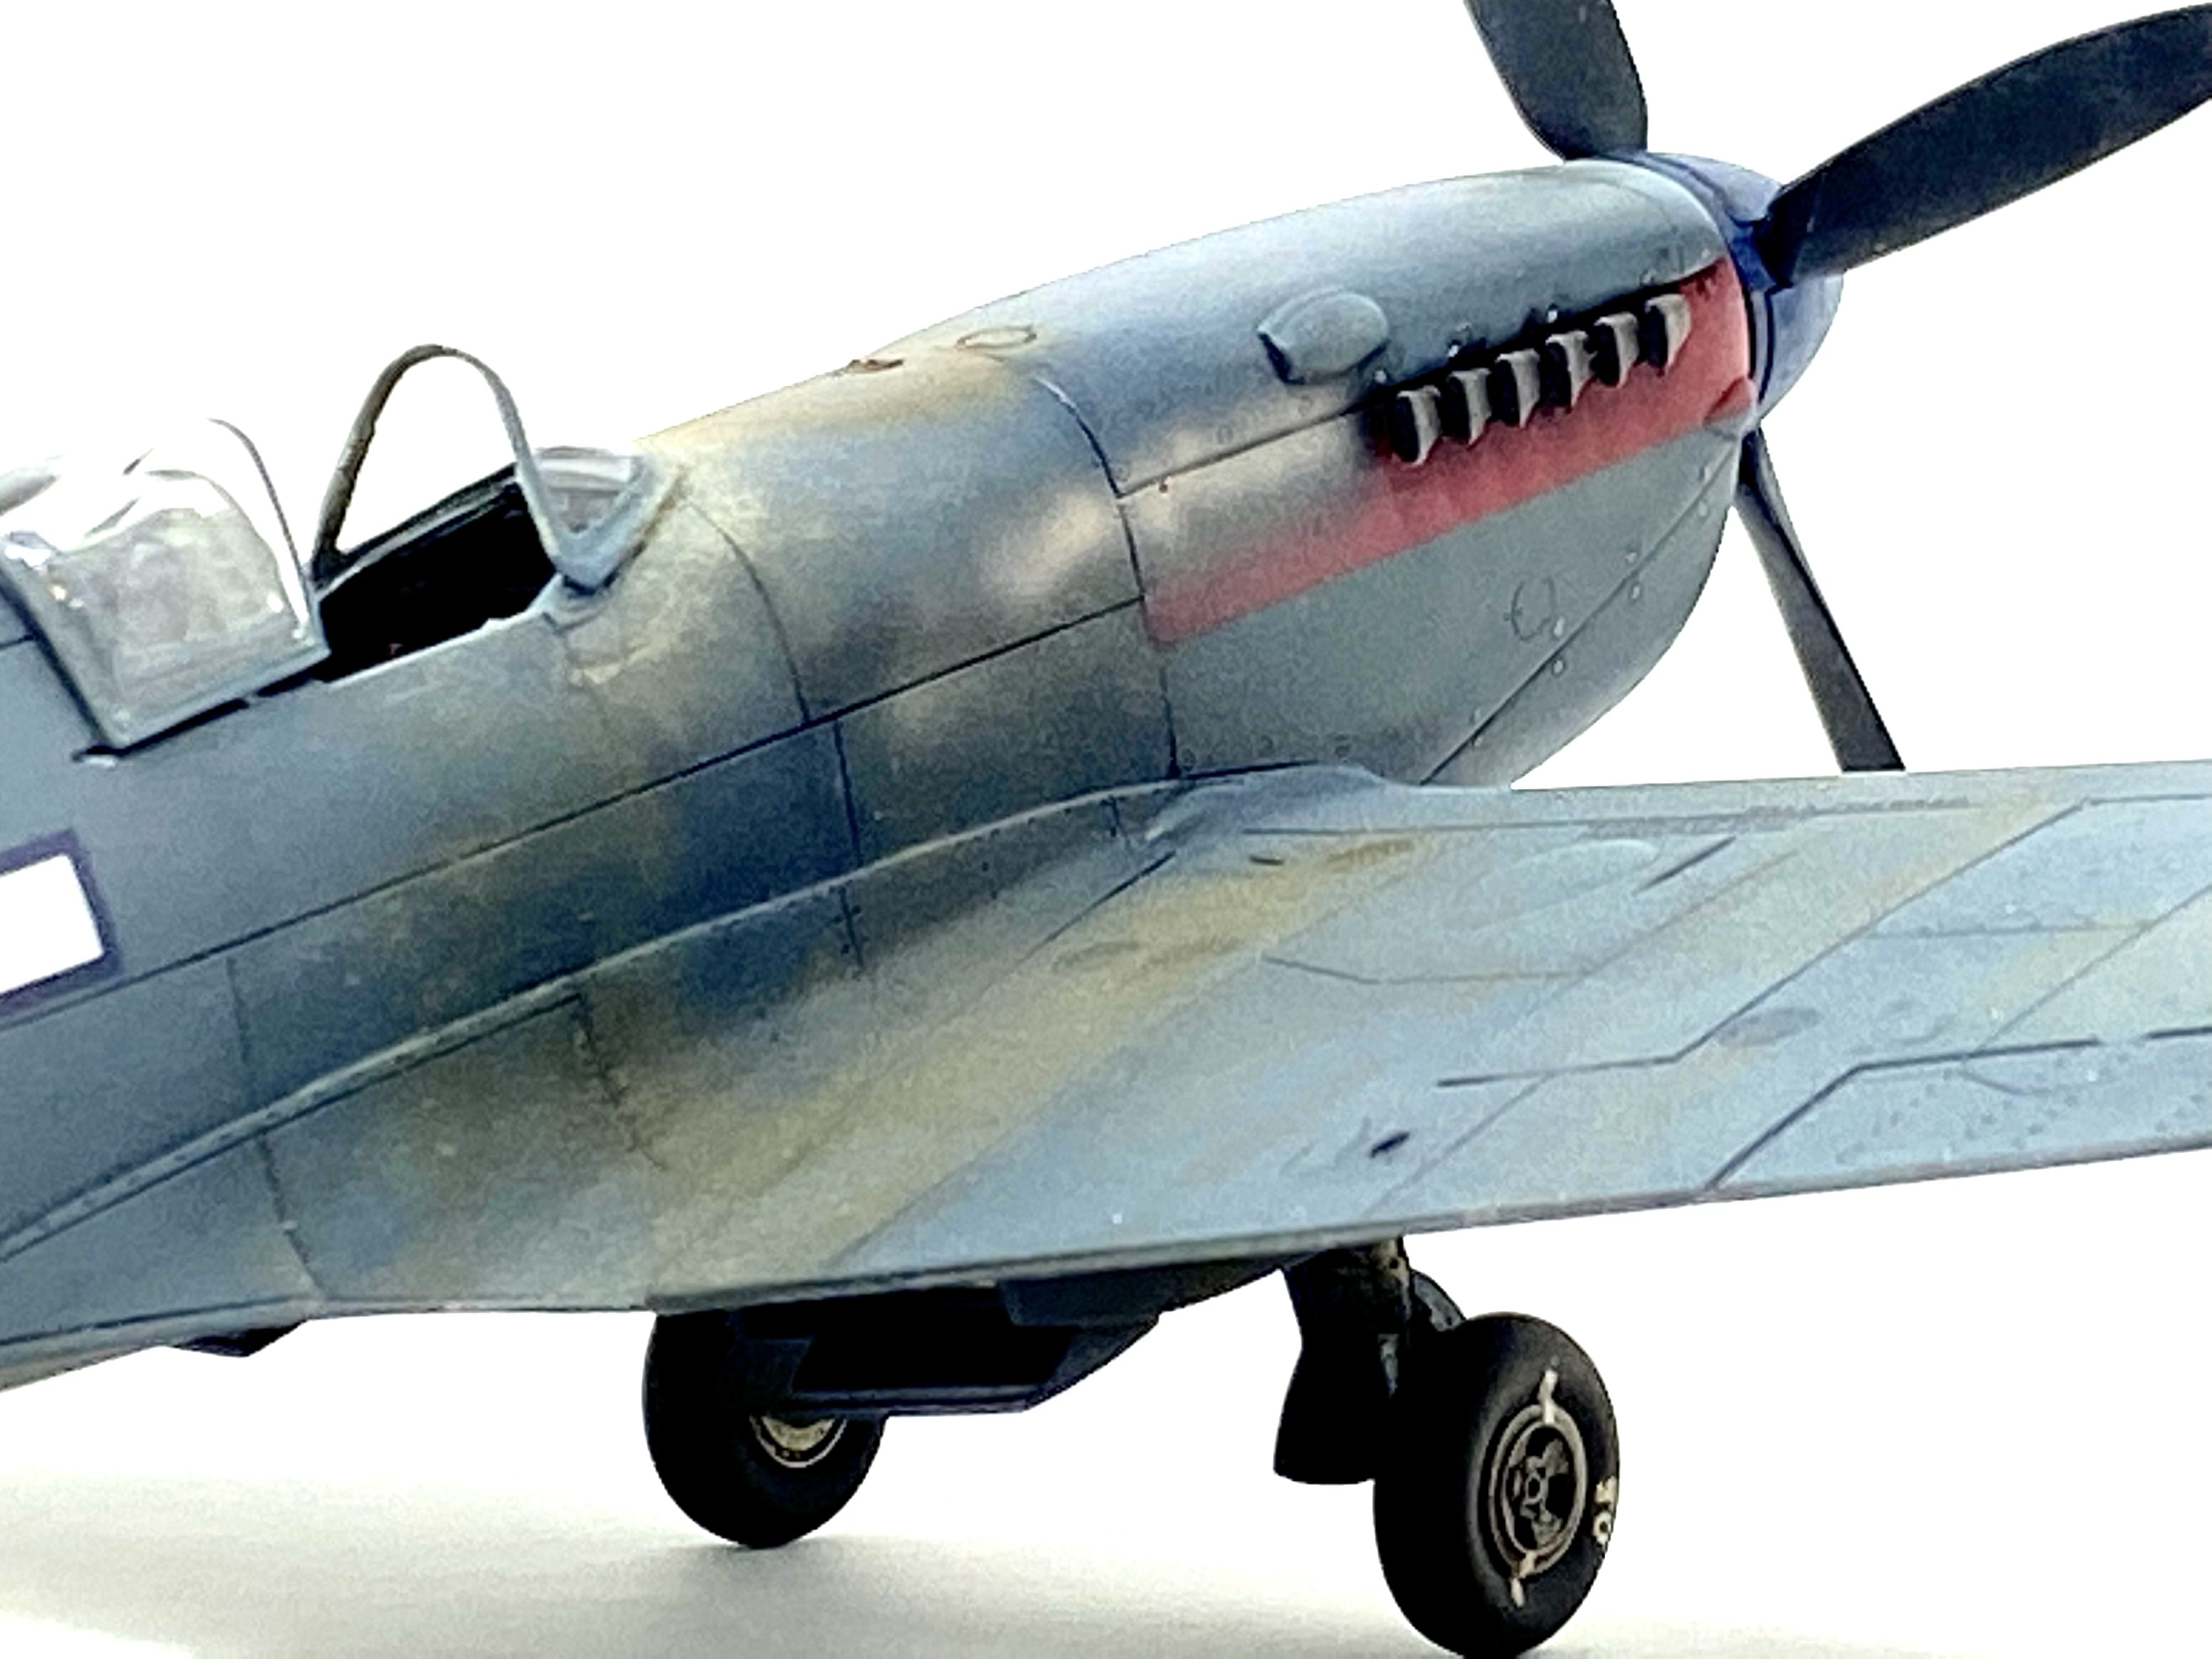
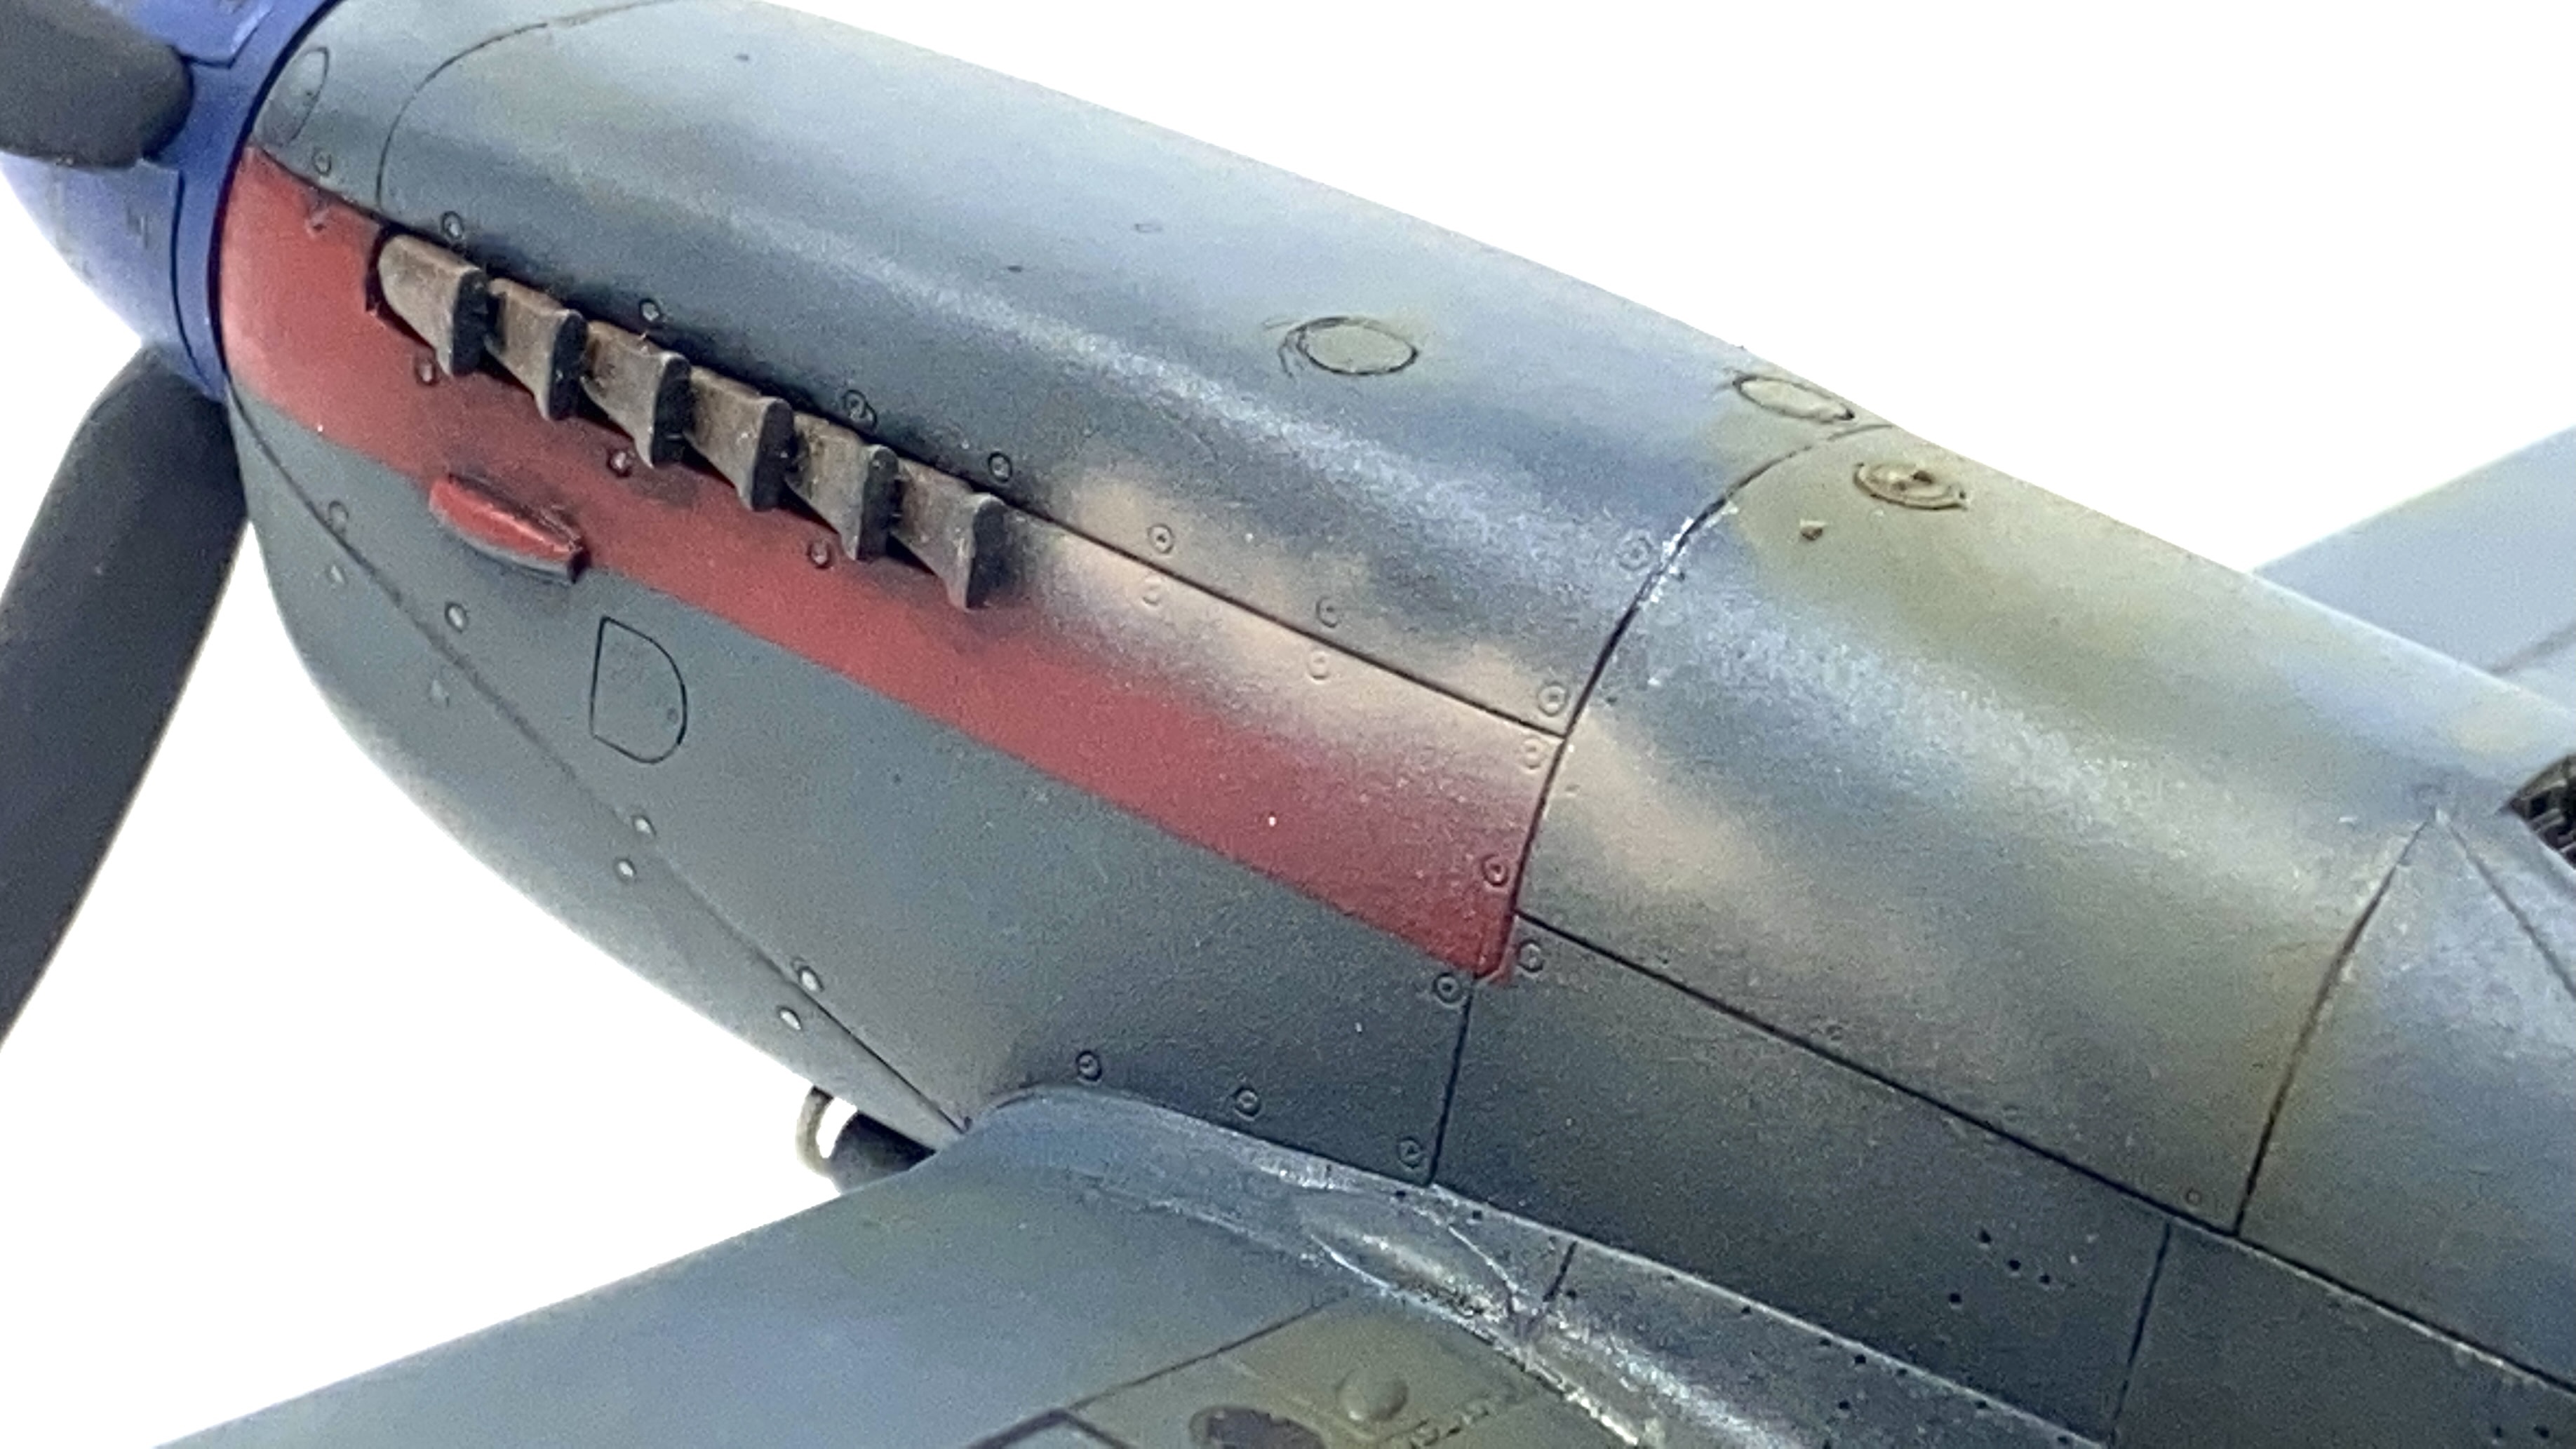
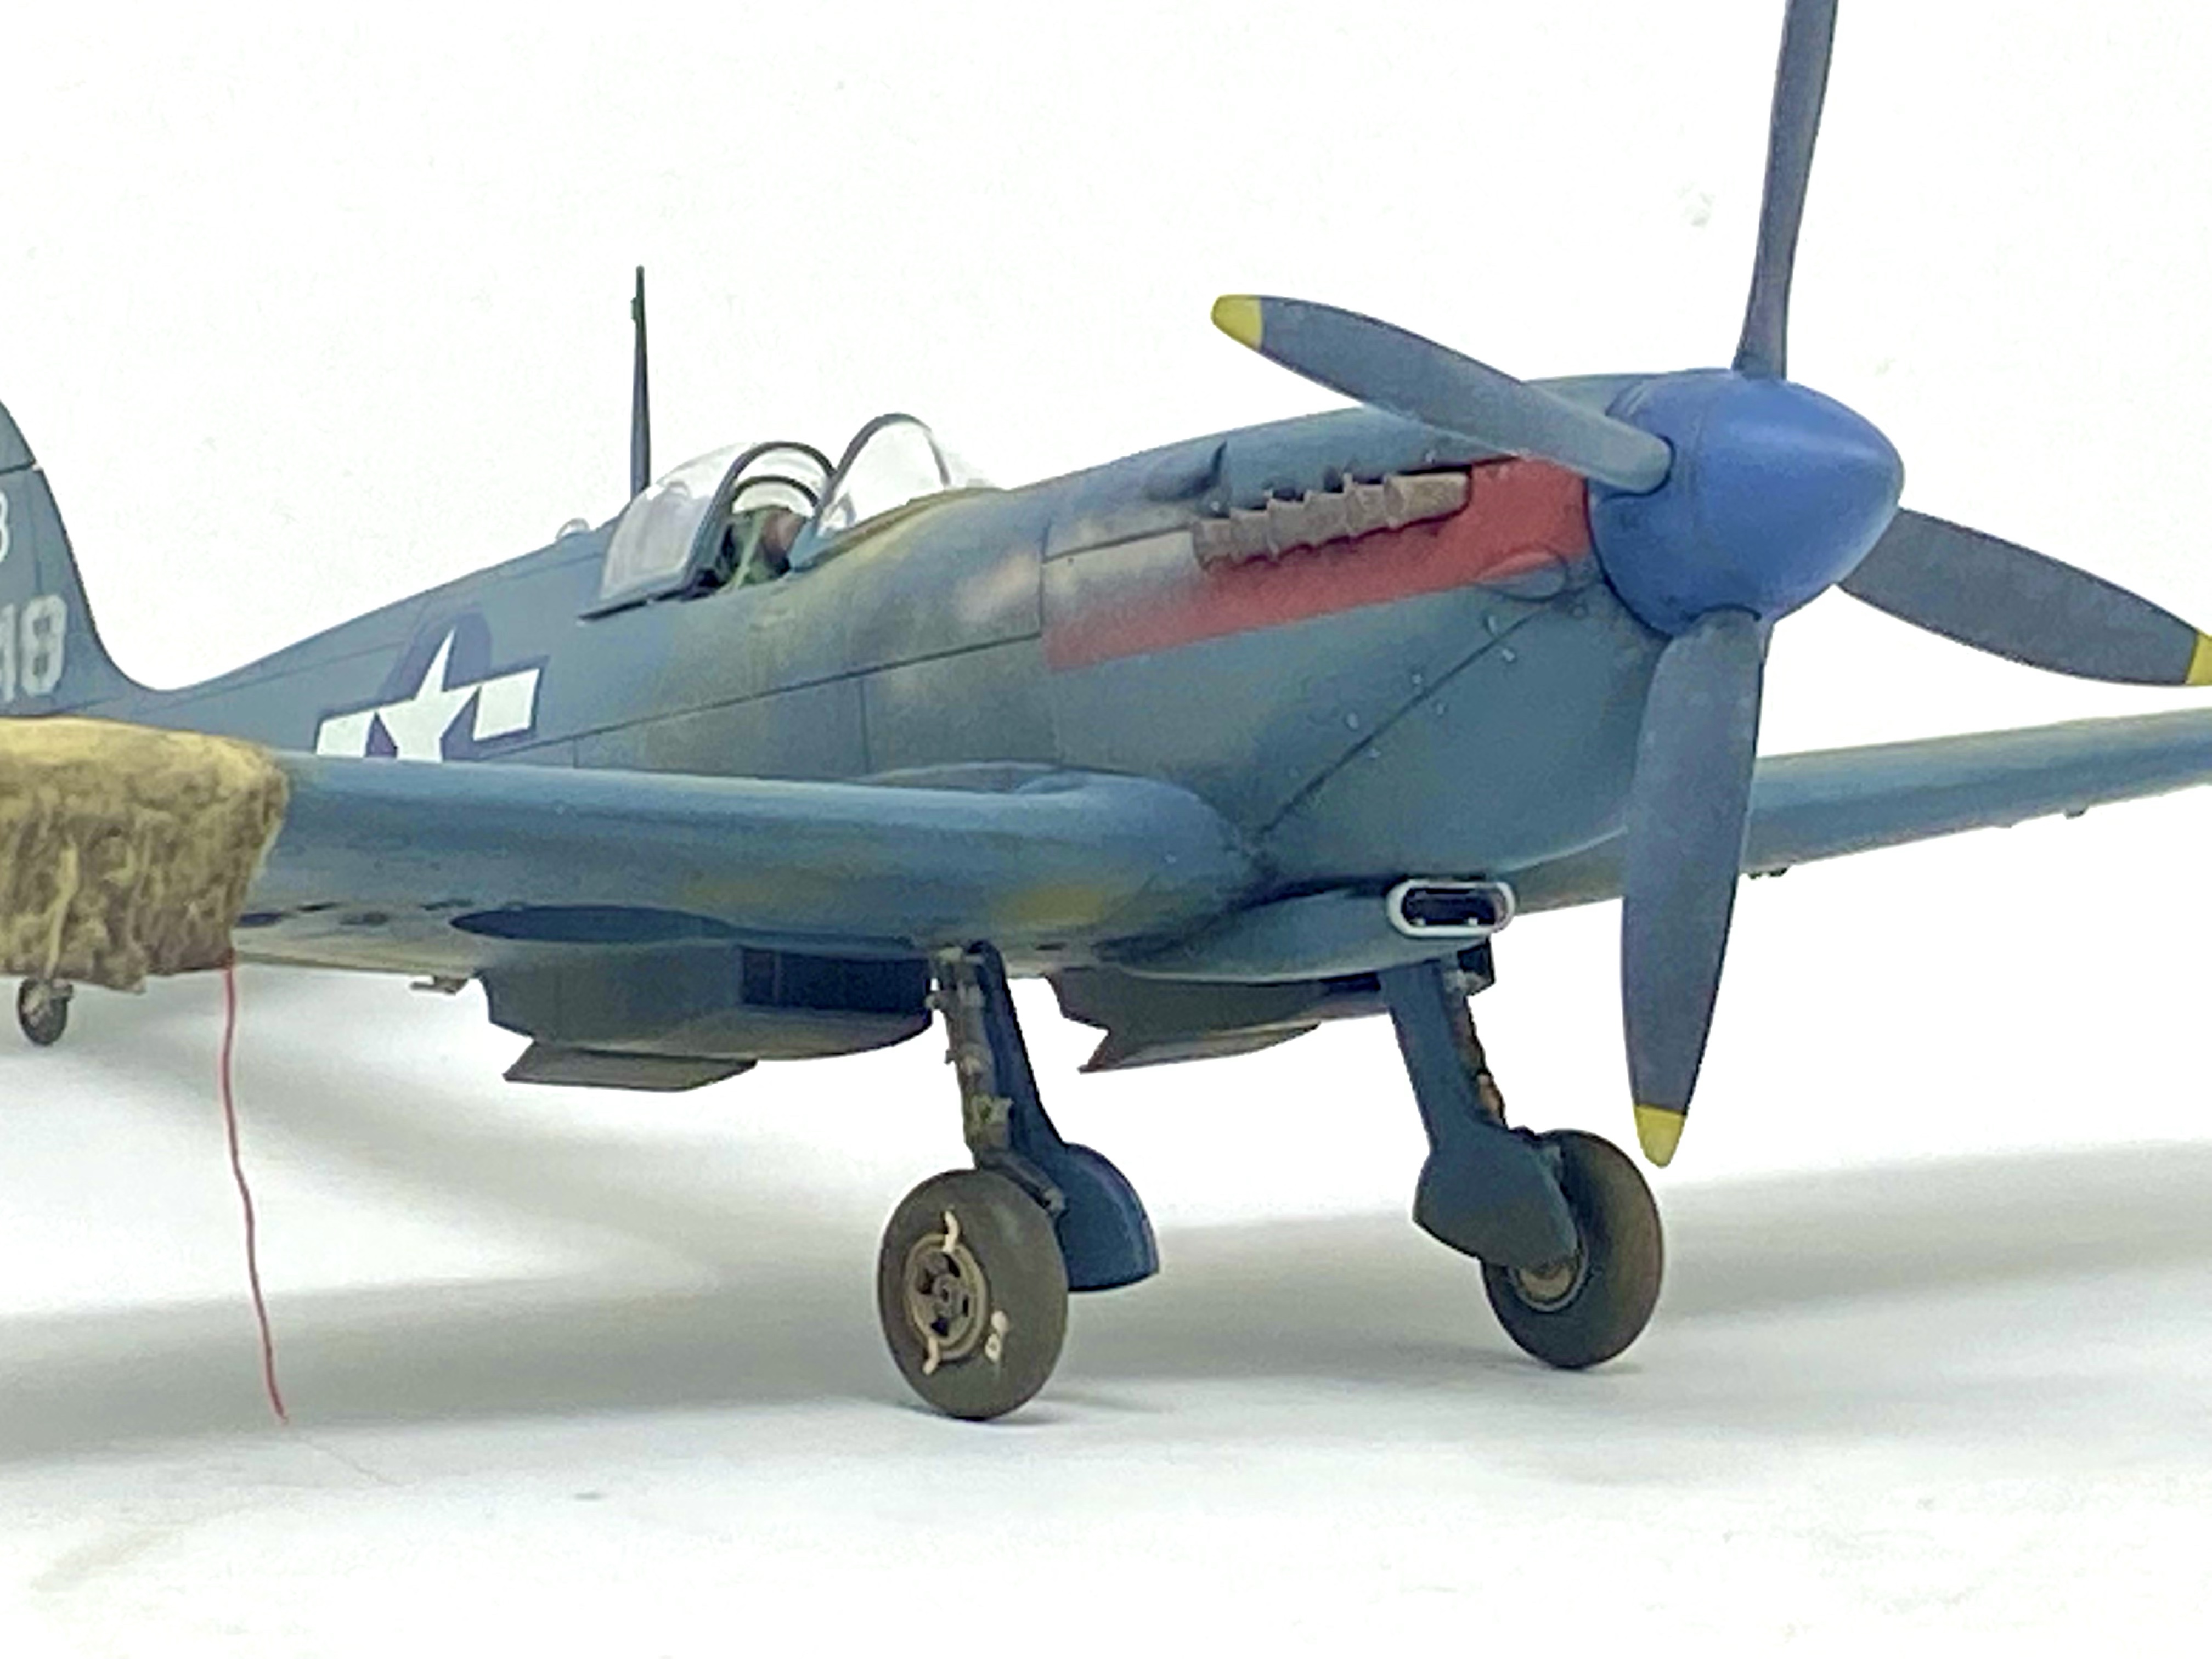
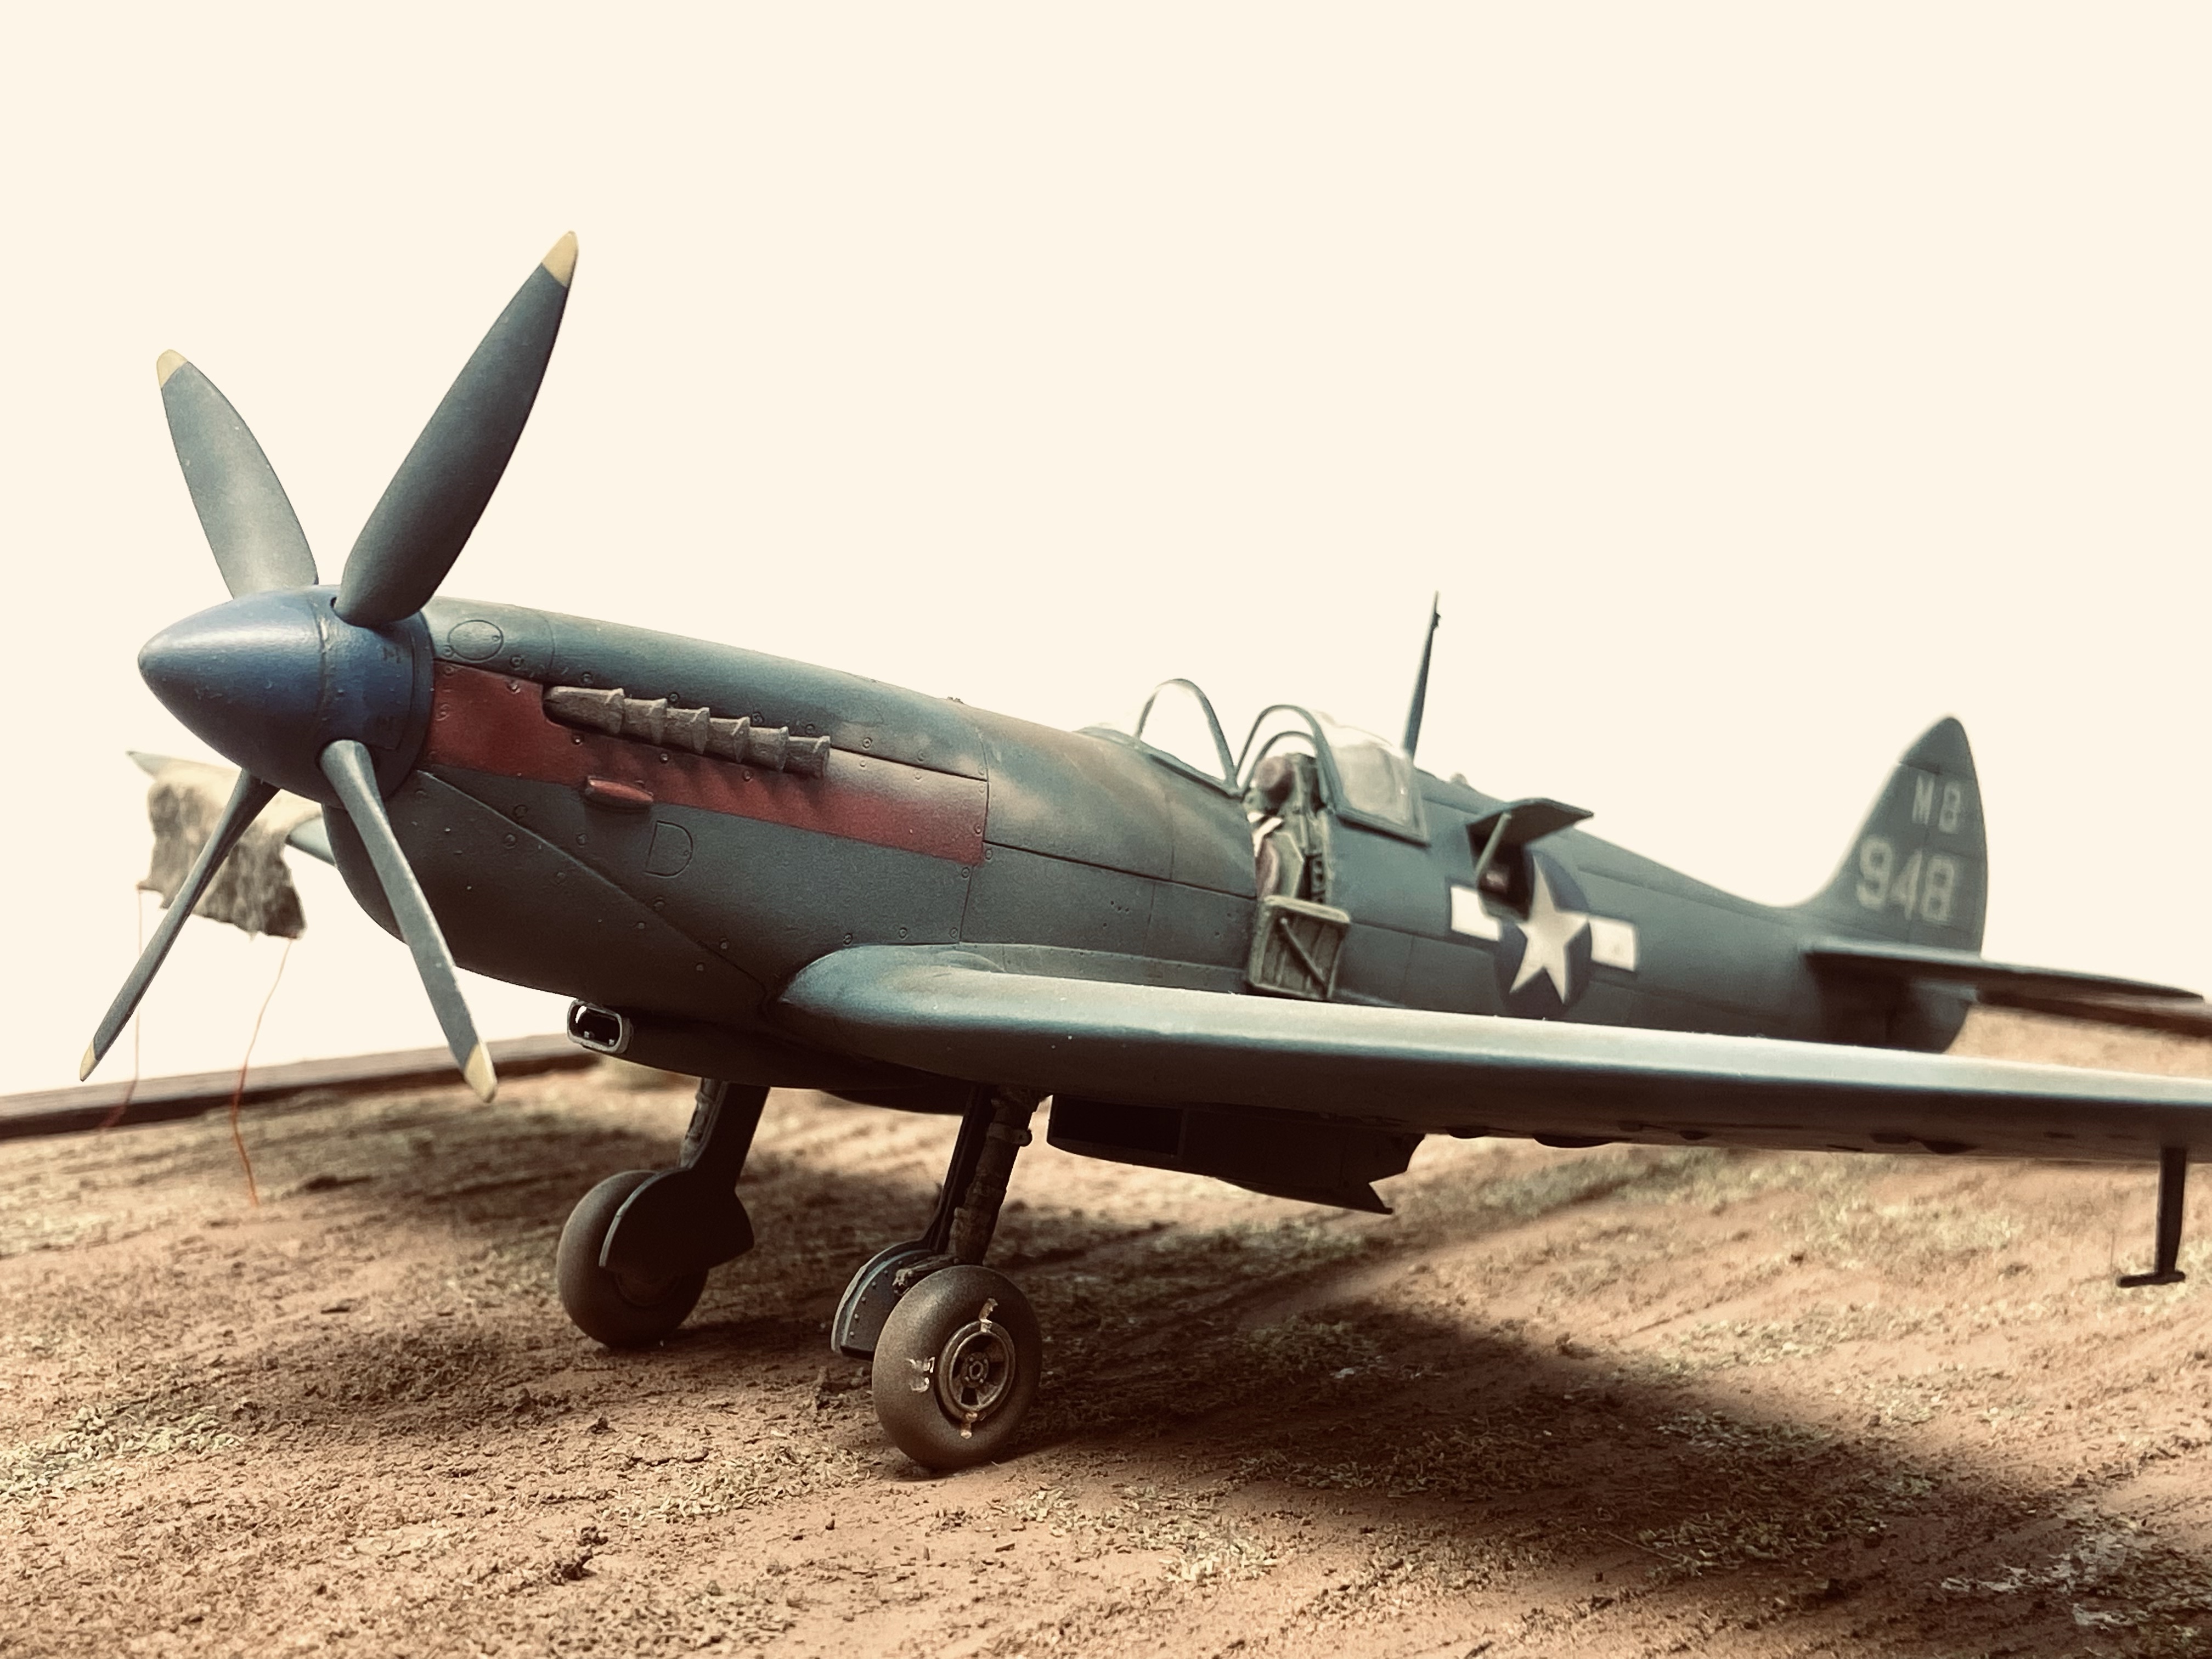
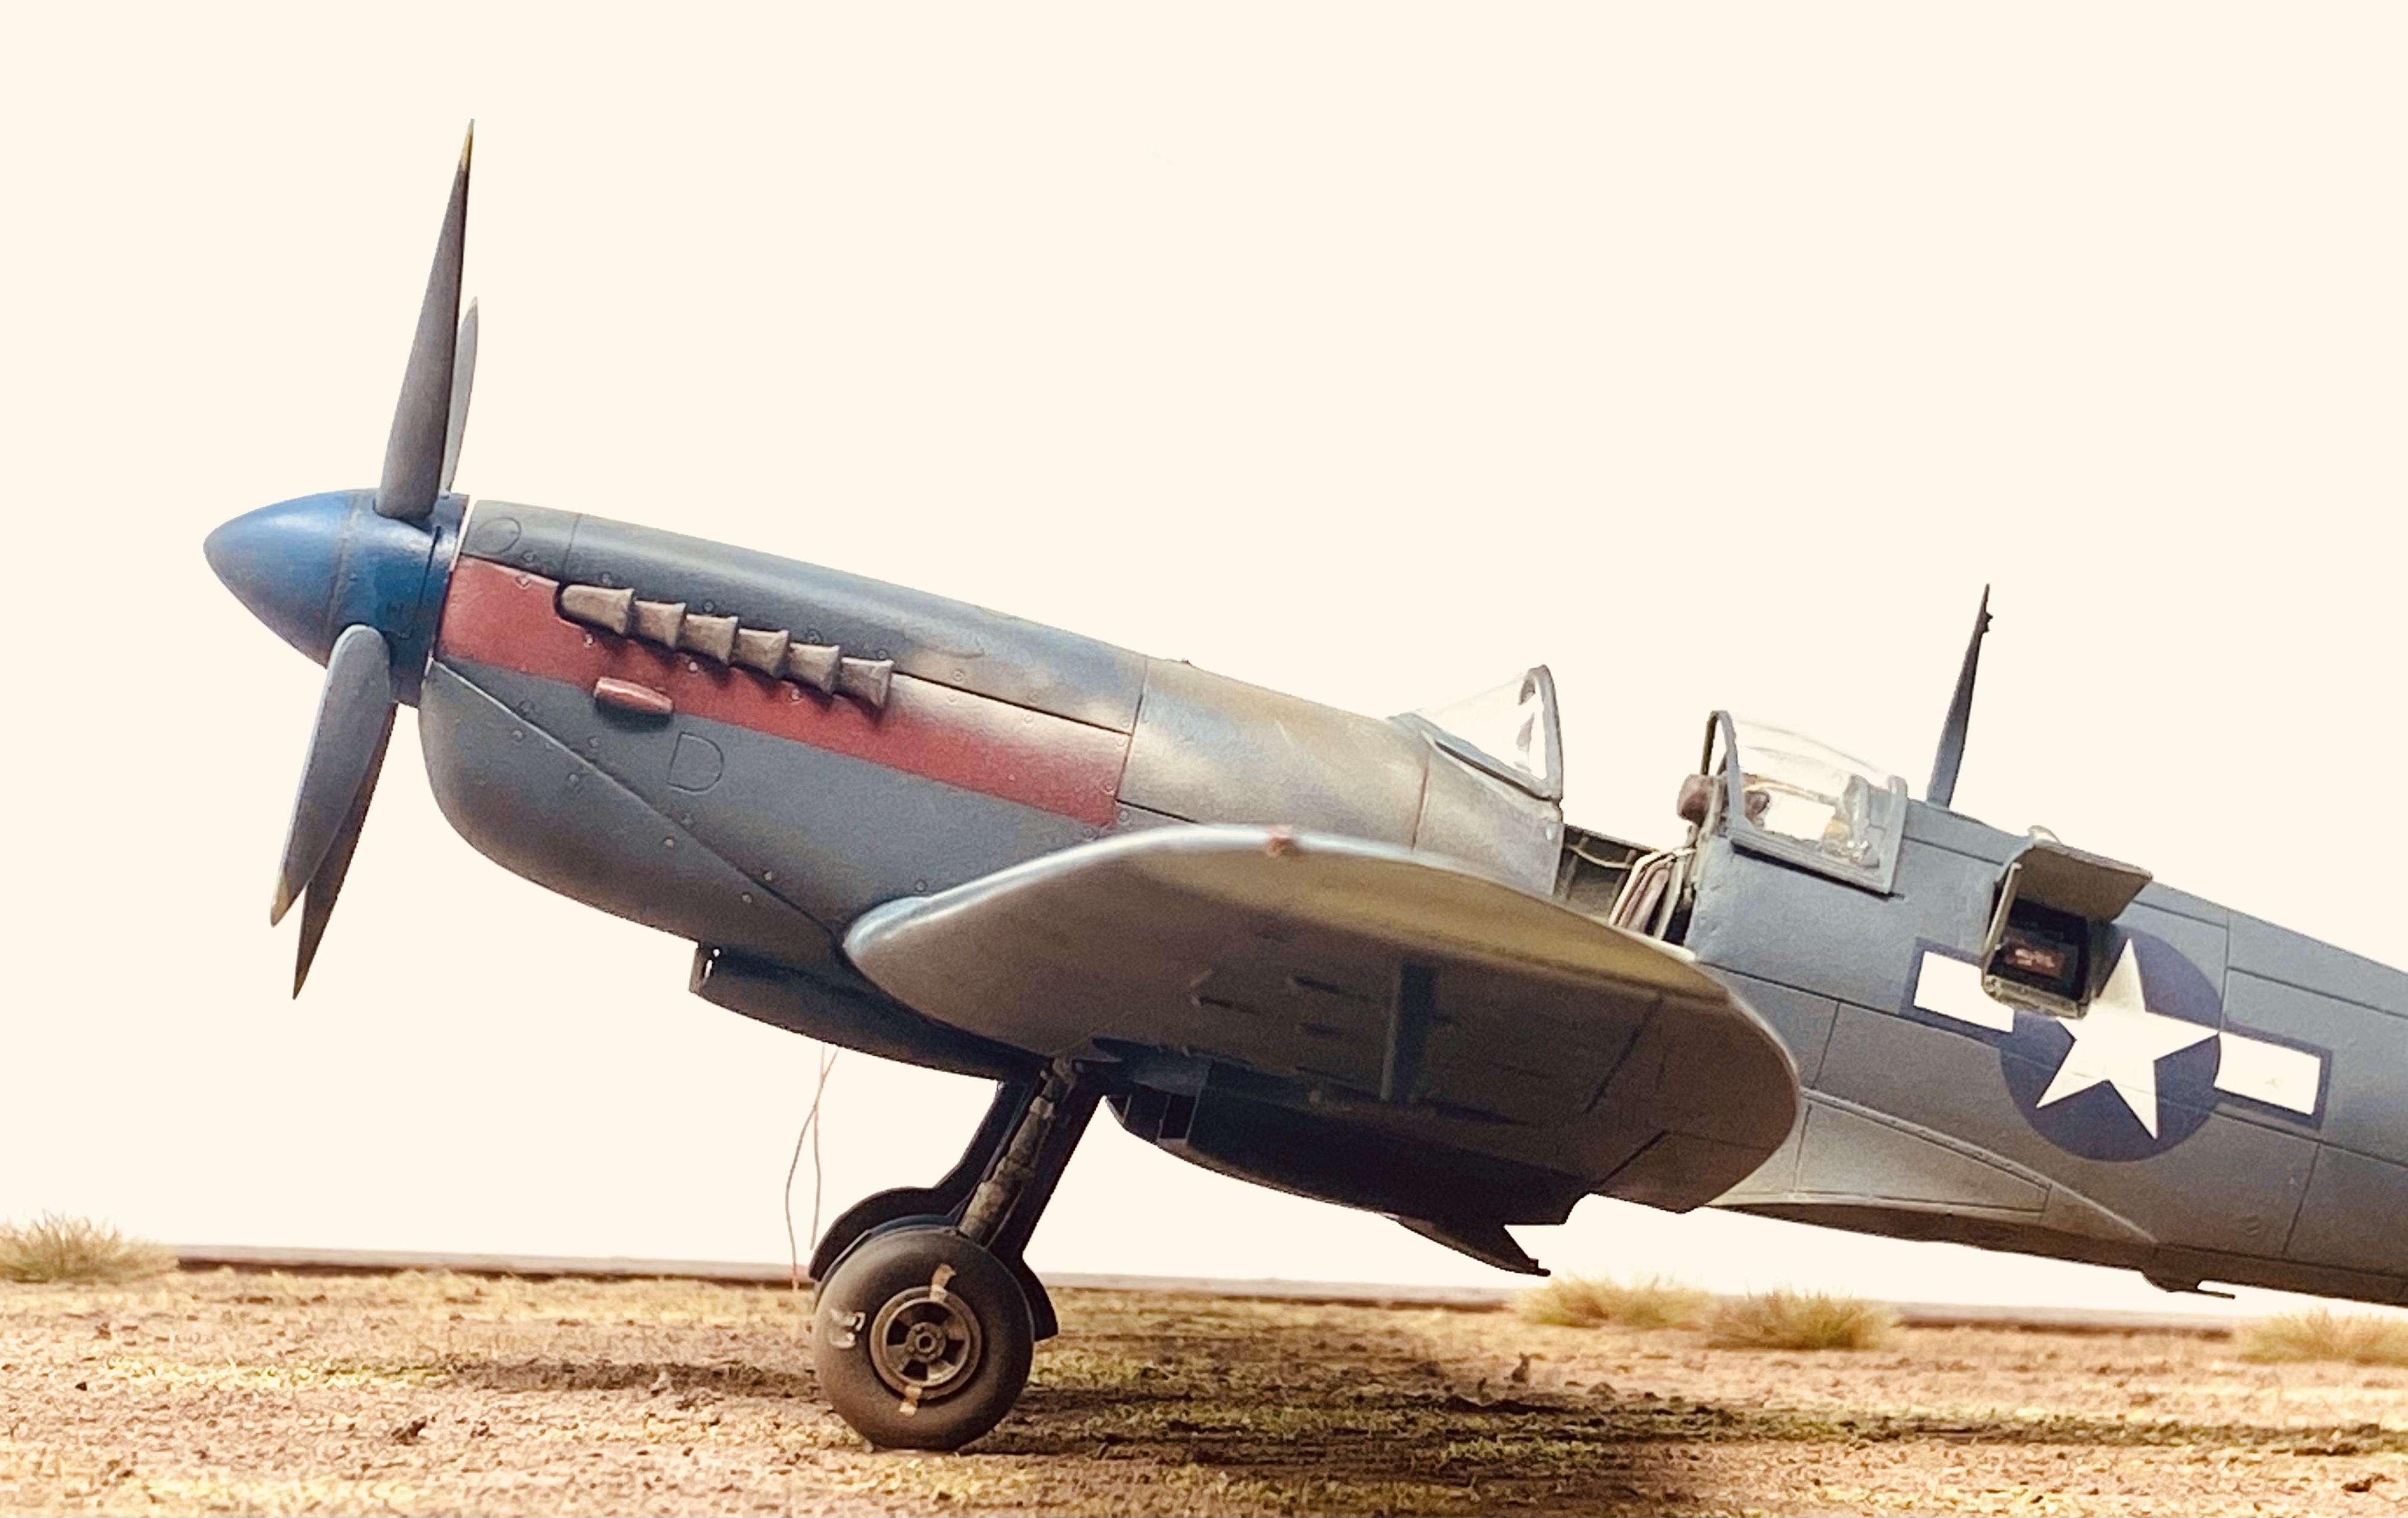
I picked up an old Revell re-boxing of the Hasegawa Spitfire Mk.IX kit, which was an excellent base kit for the build. To this added an Eduard colour Photo-Etch detail set for the cockpit and a resin Mk.XI carburettor and wing panel covers from Quickboost. I also managed to hunt down the decals for the specific machine I wanted to model. MB948 which had a very cool red unit ID flash under the exhaust stacks.
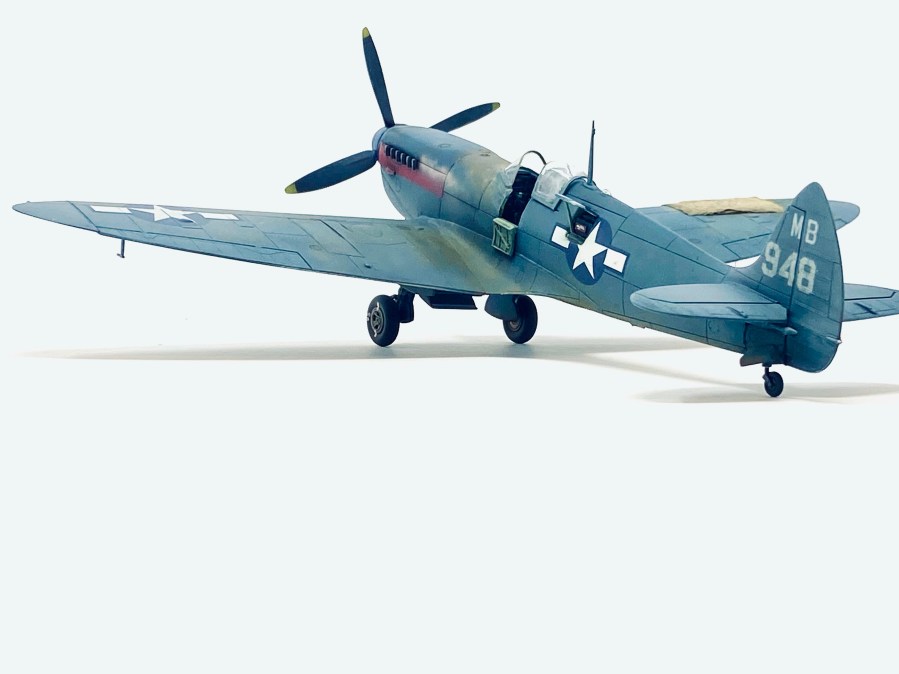
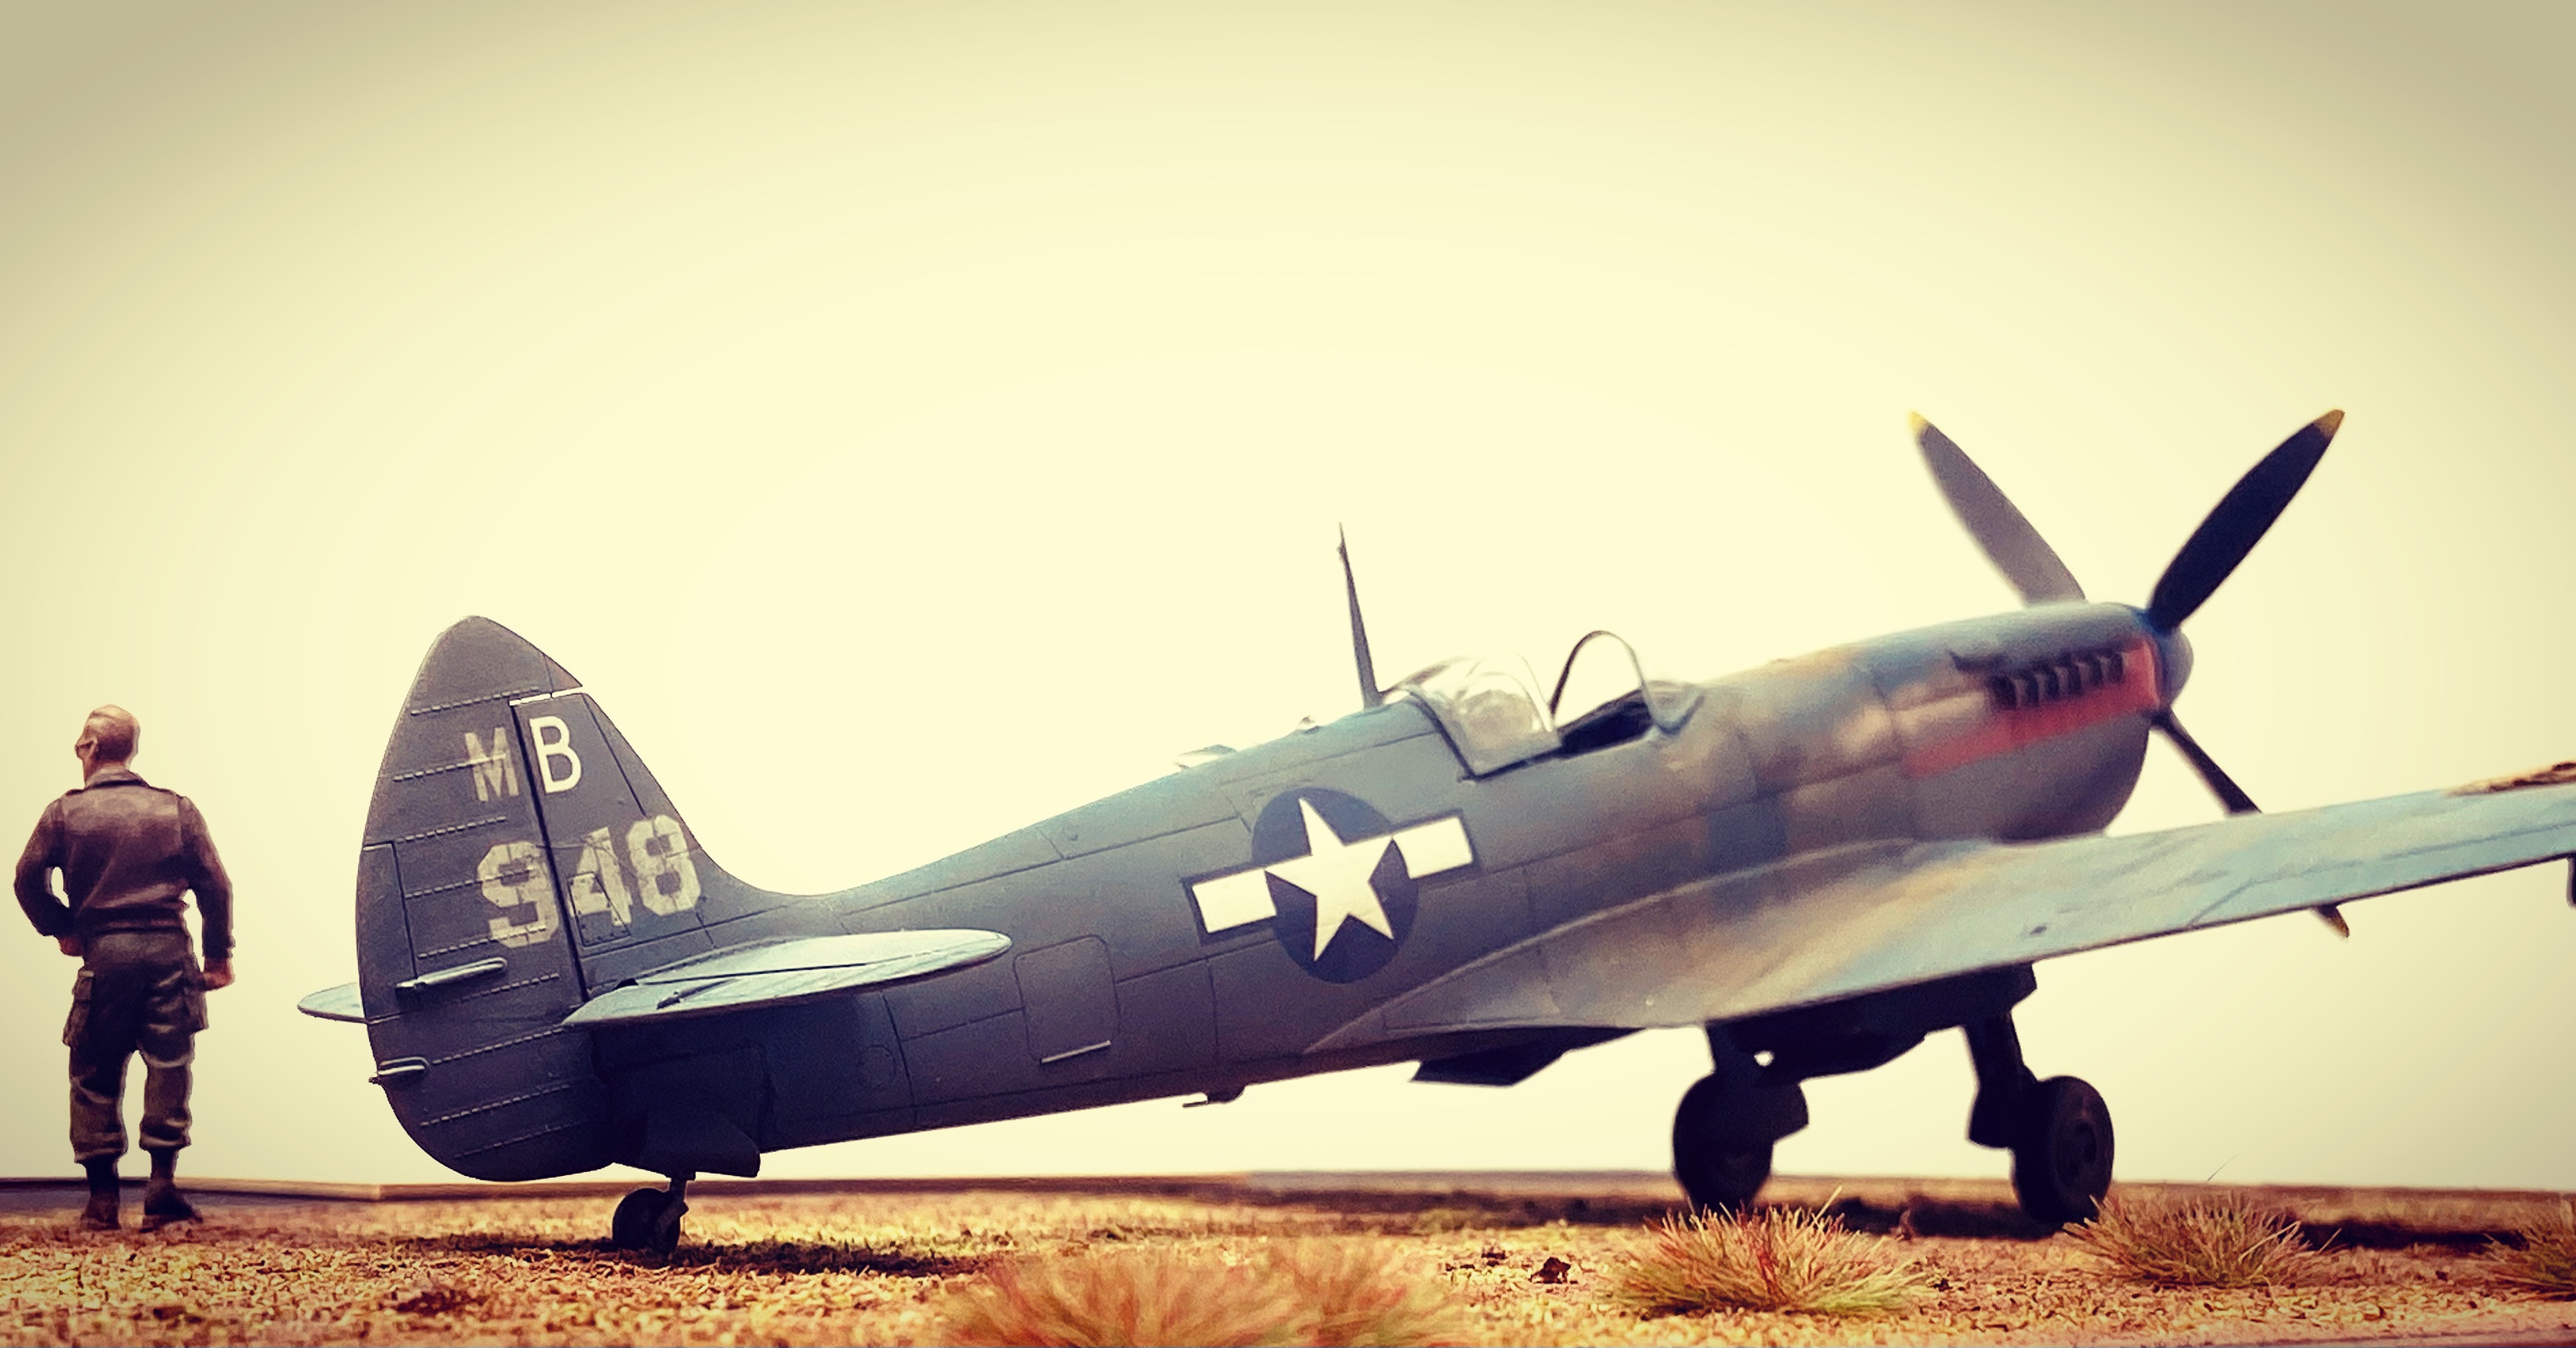
MB948
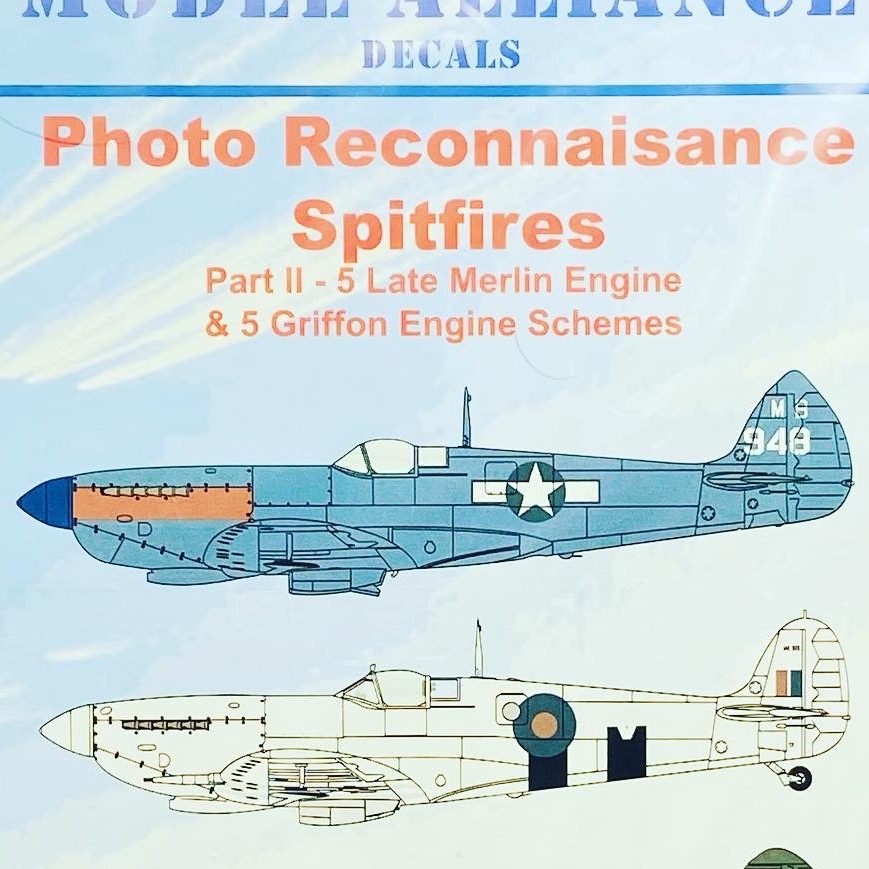
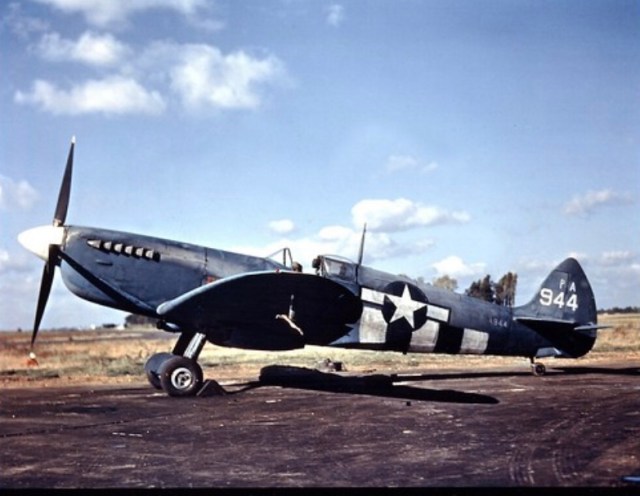
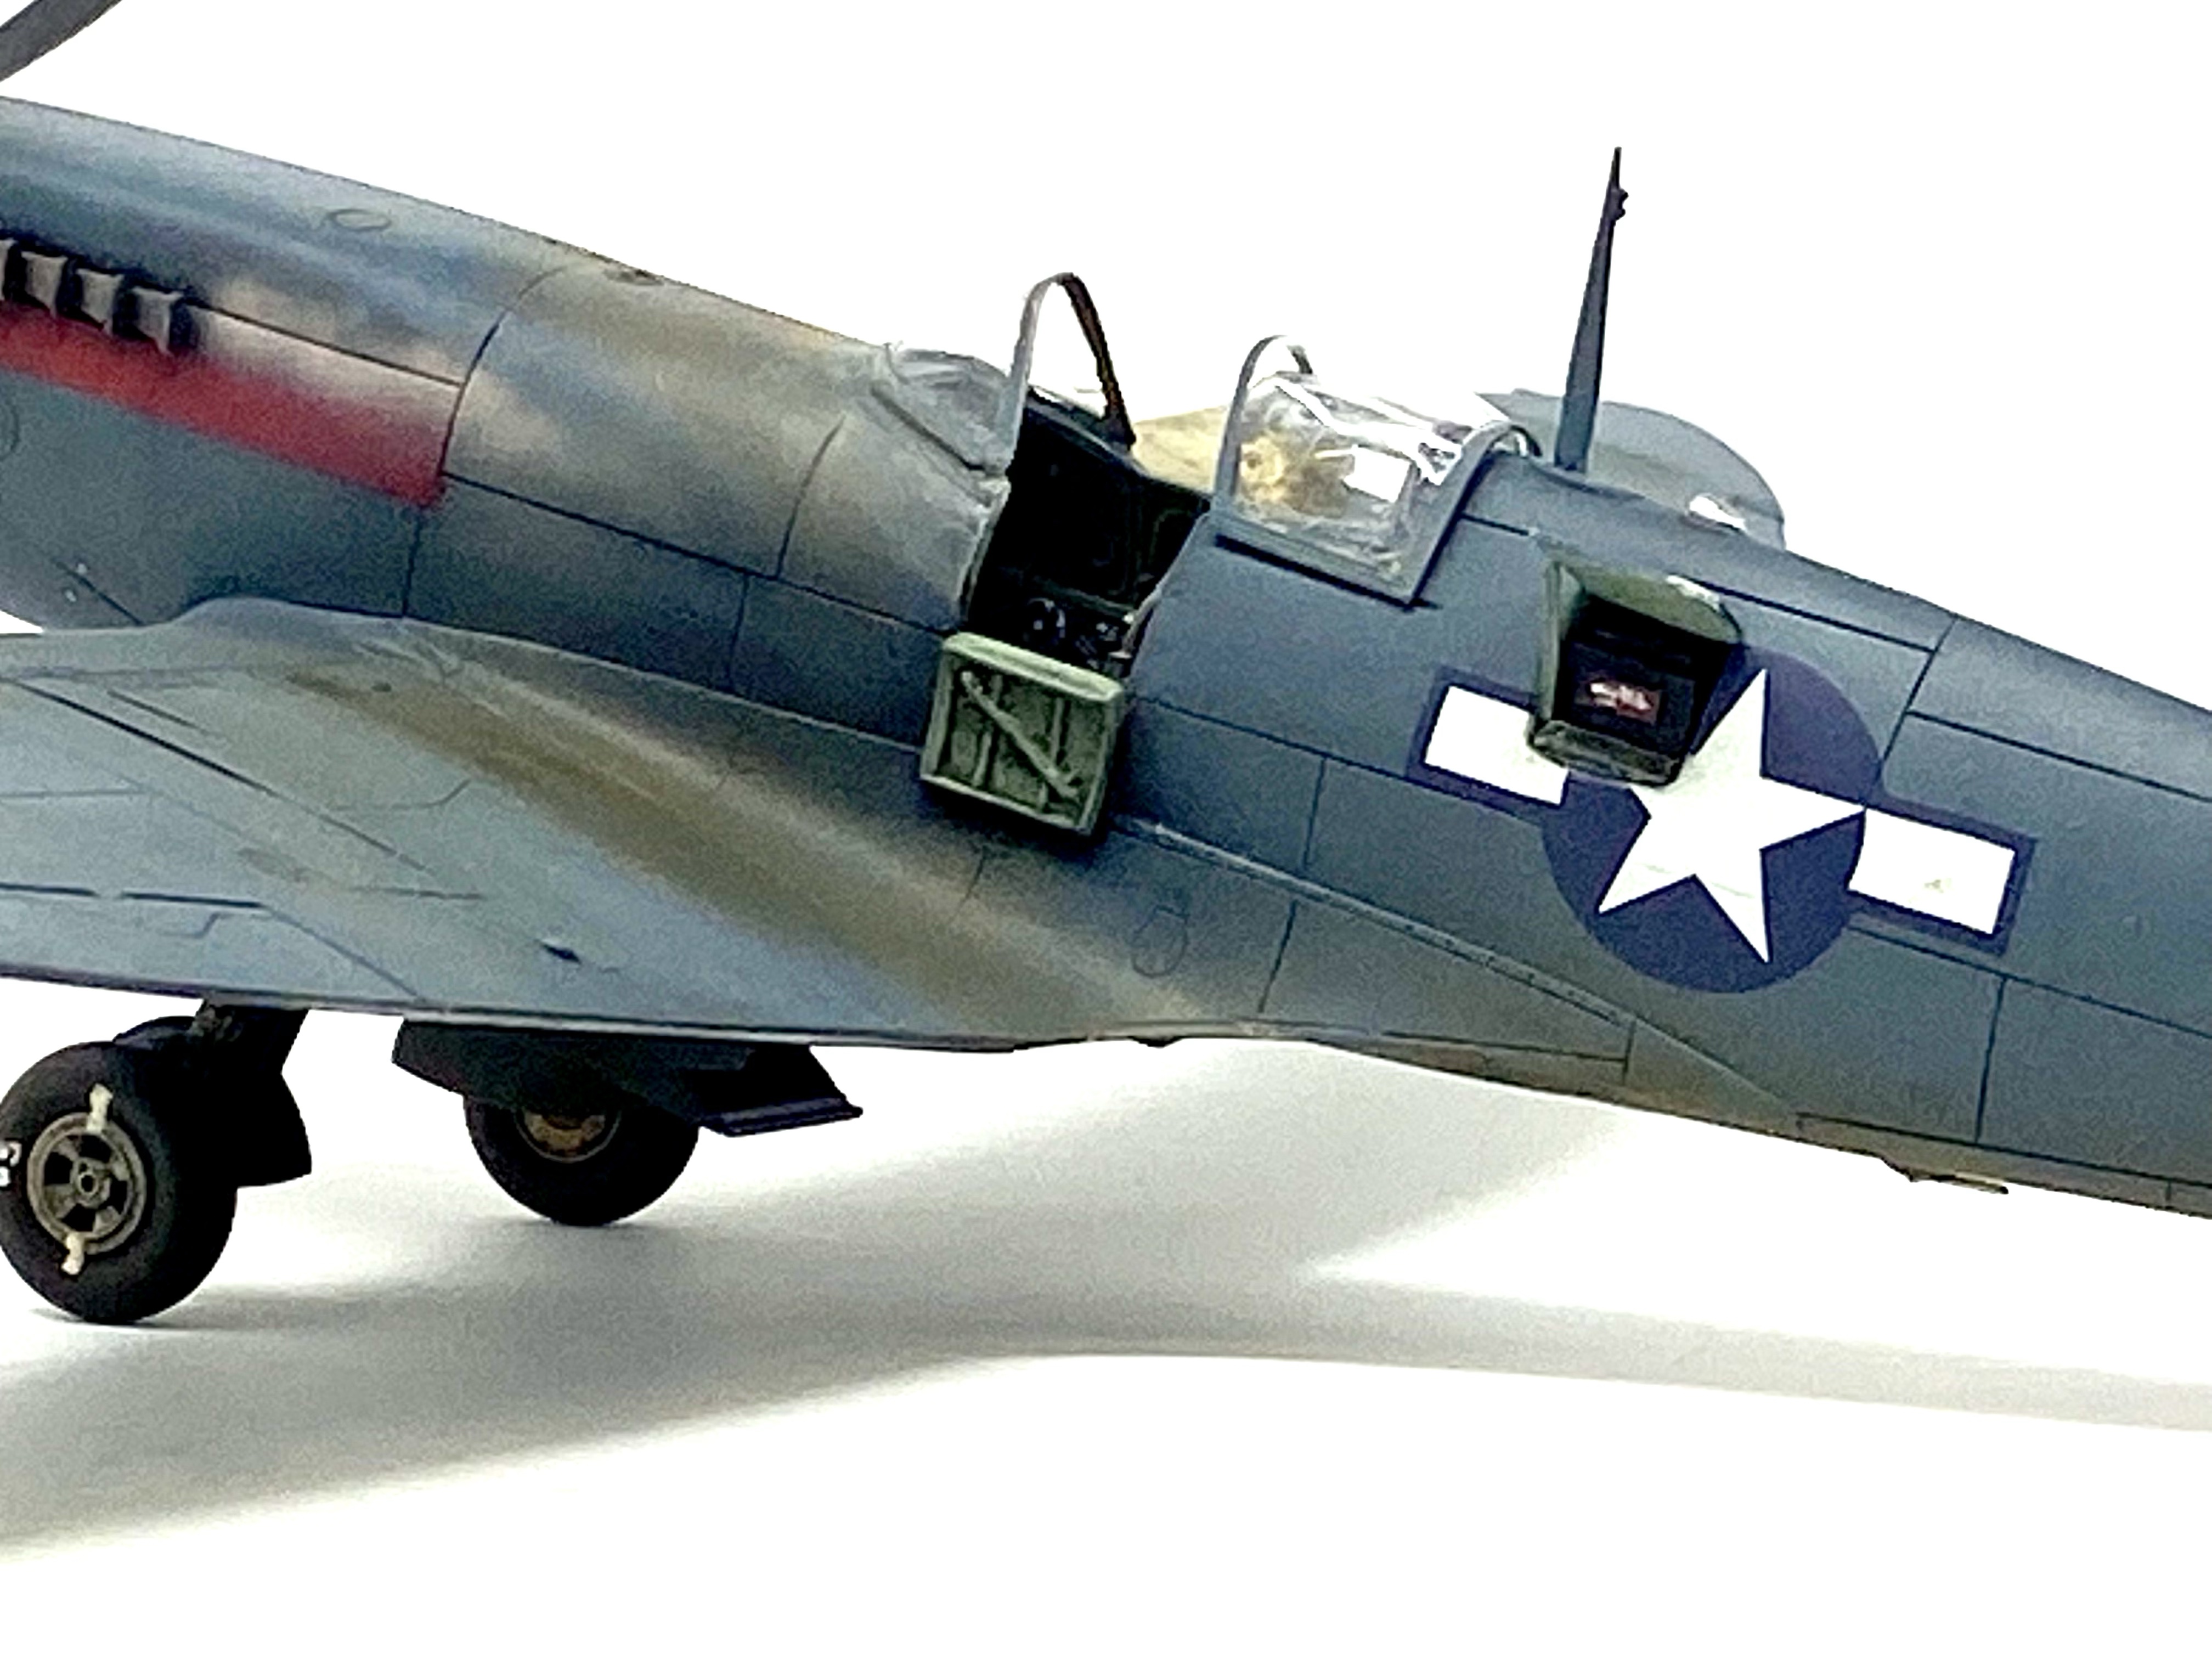
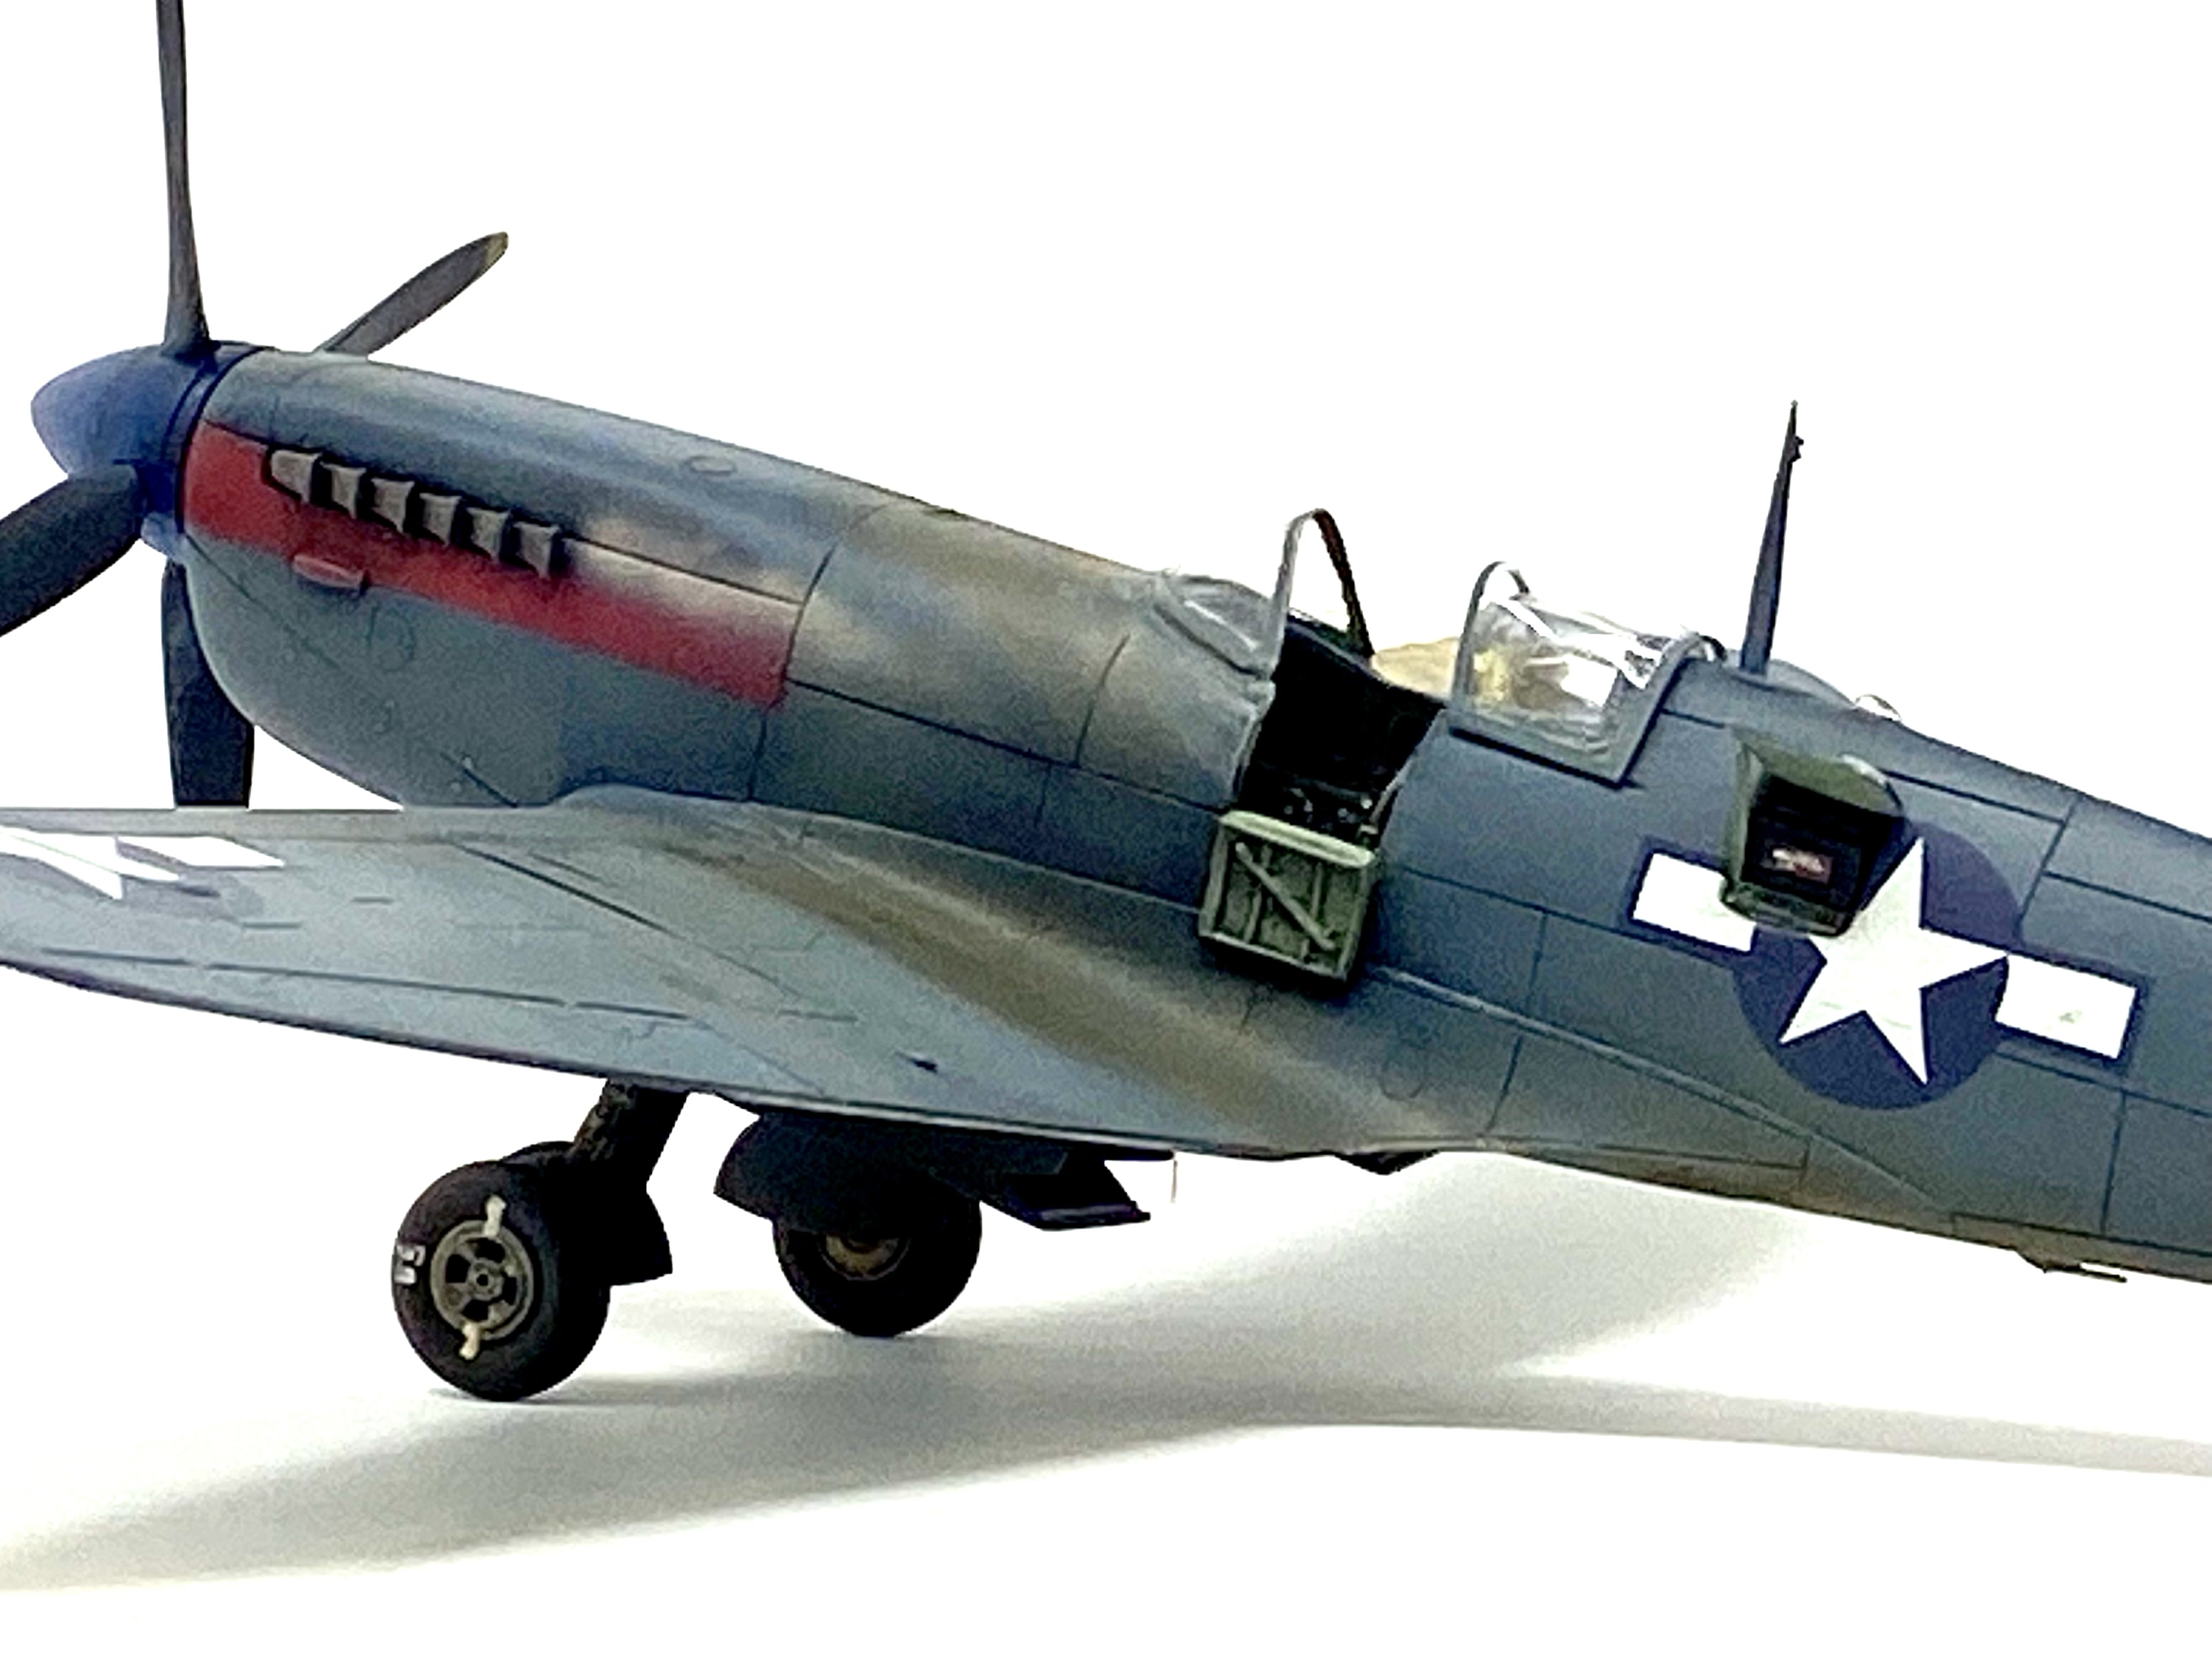
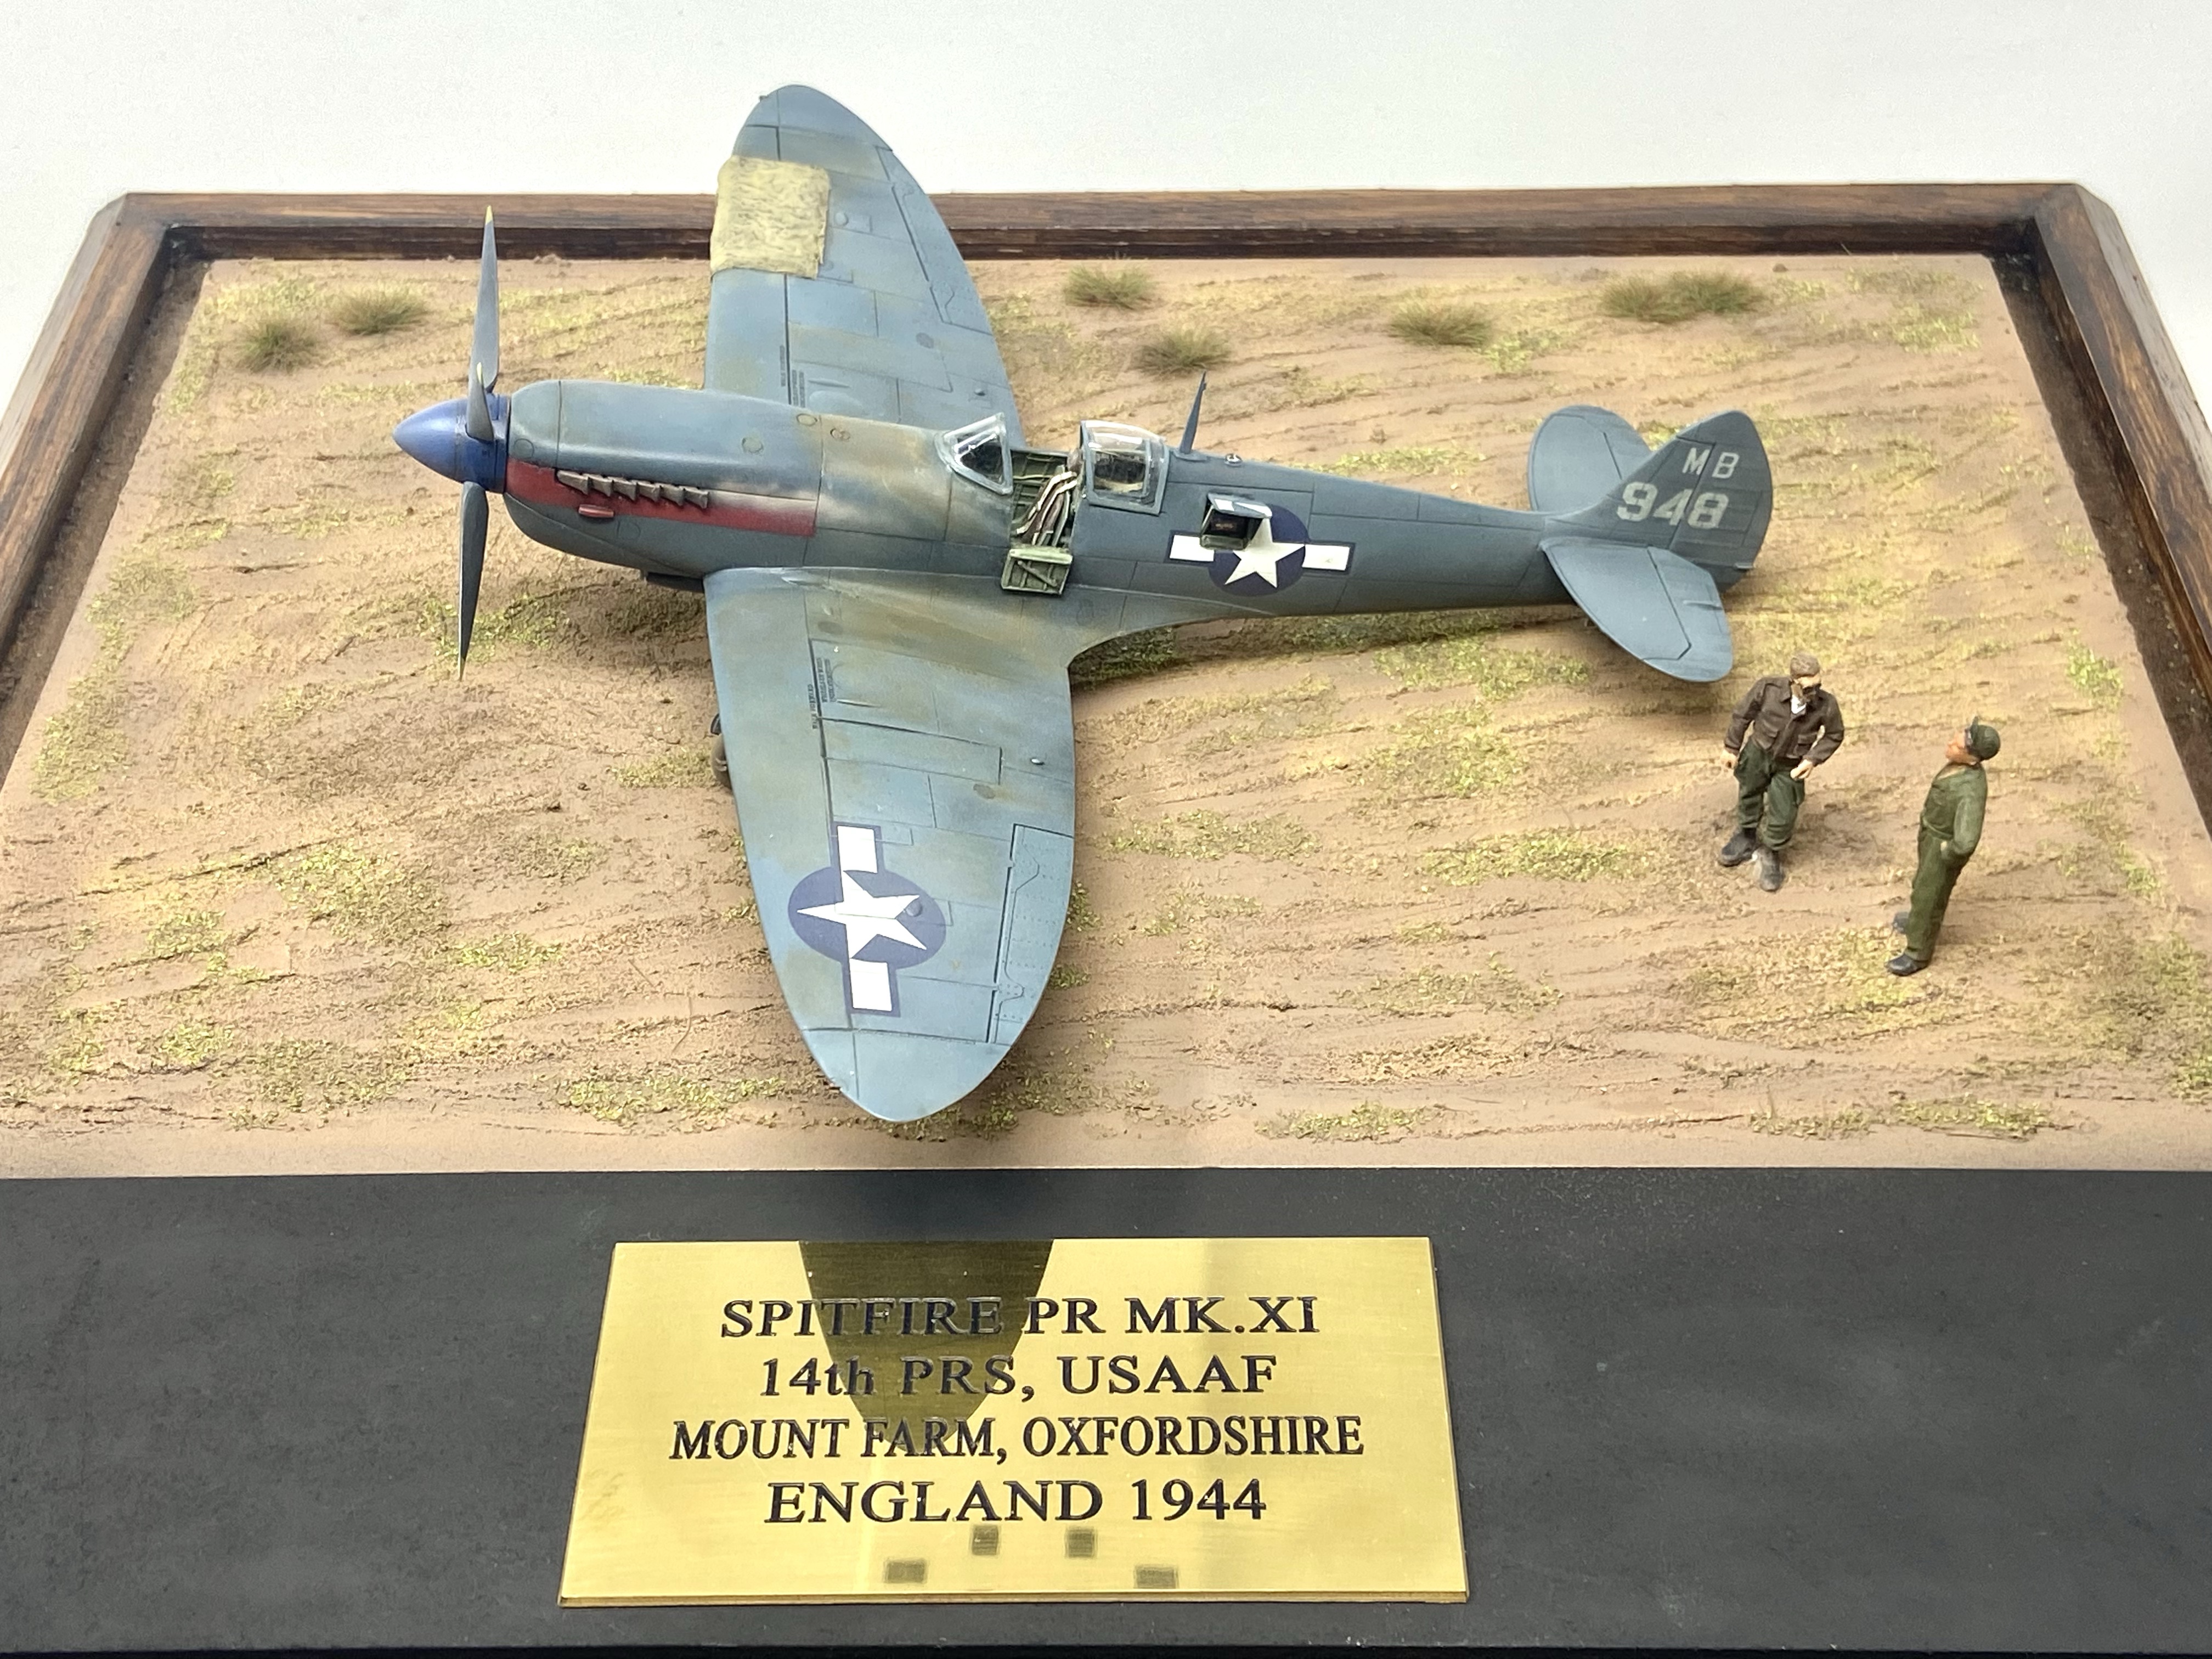
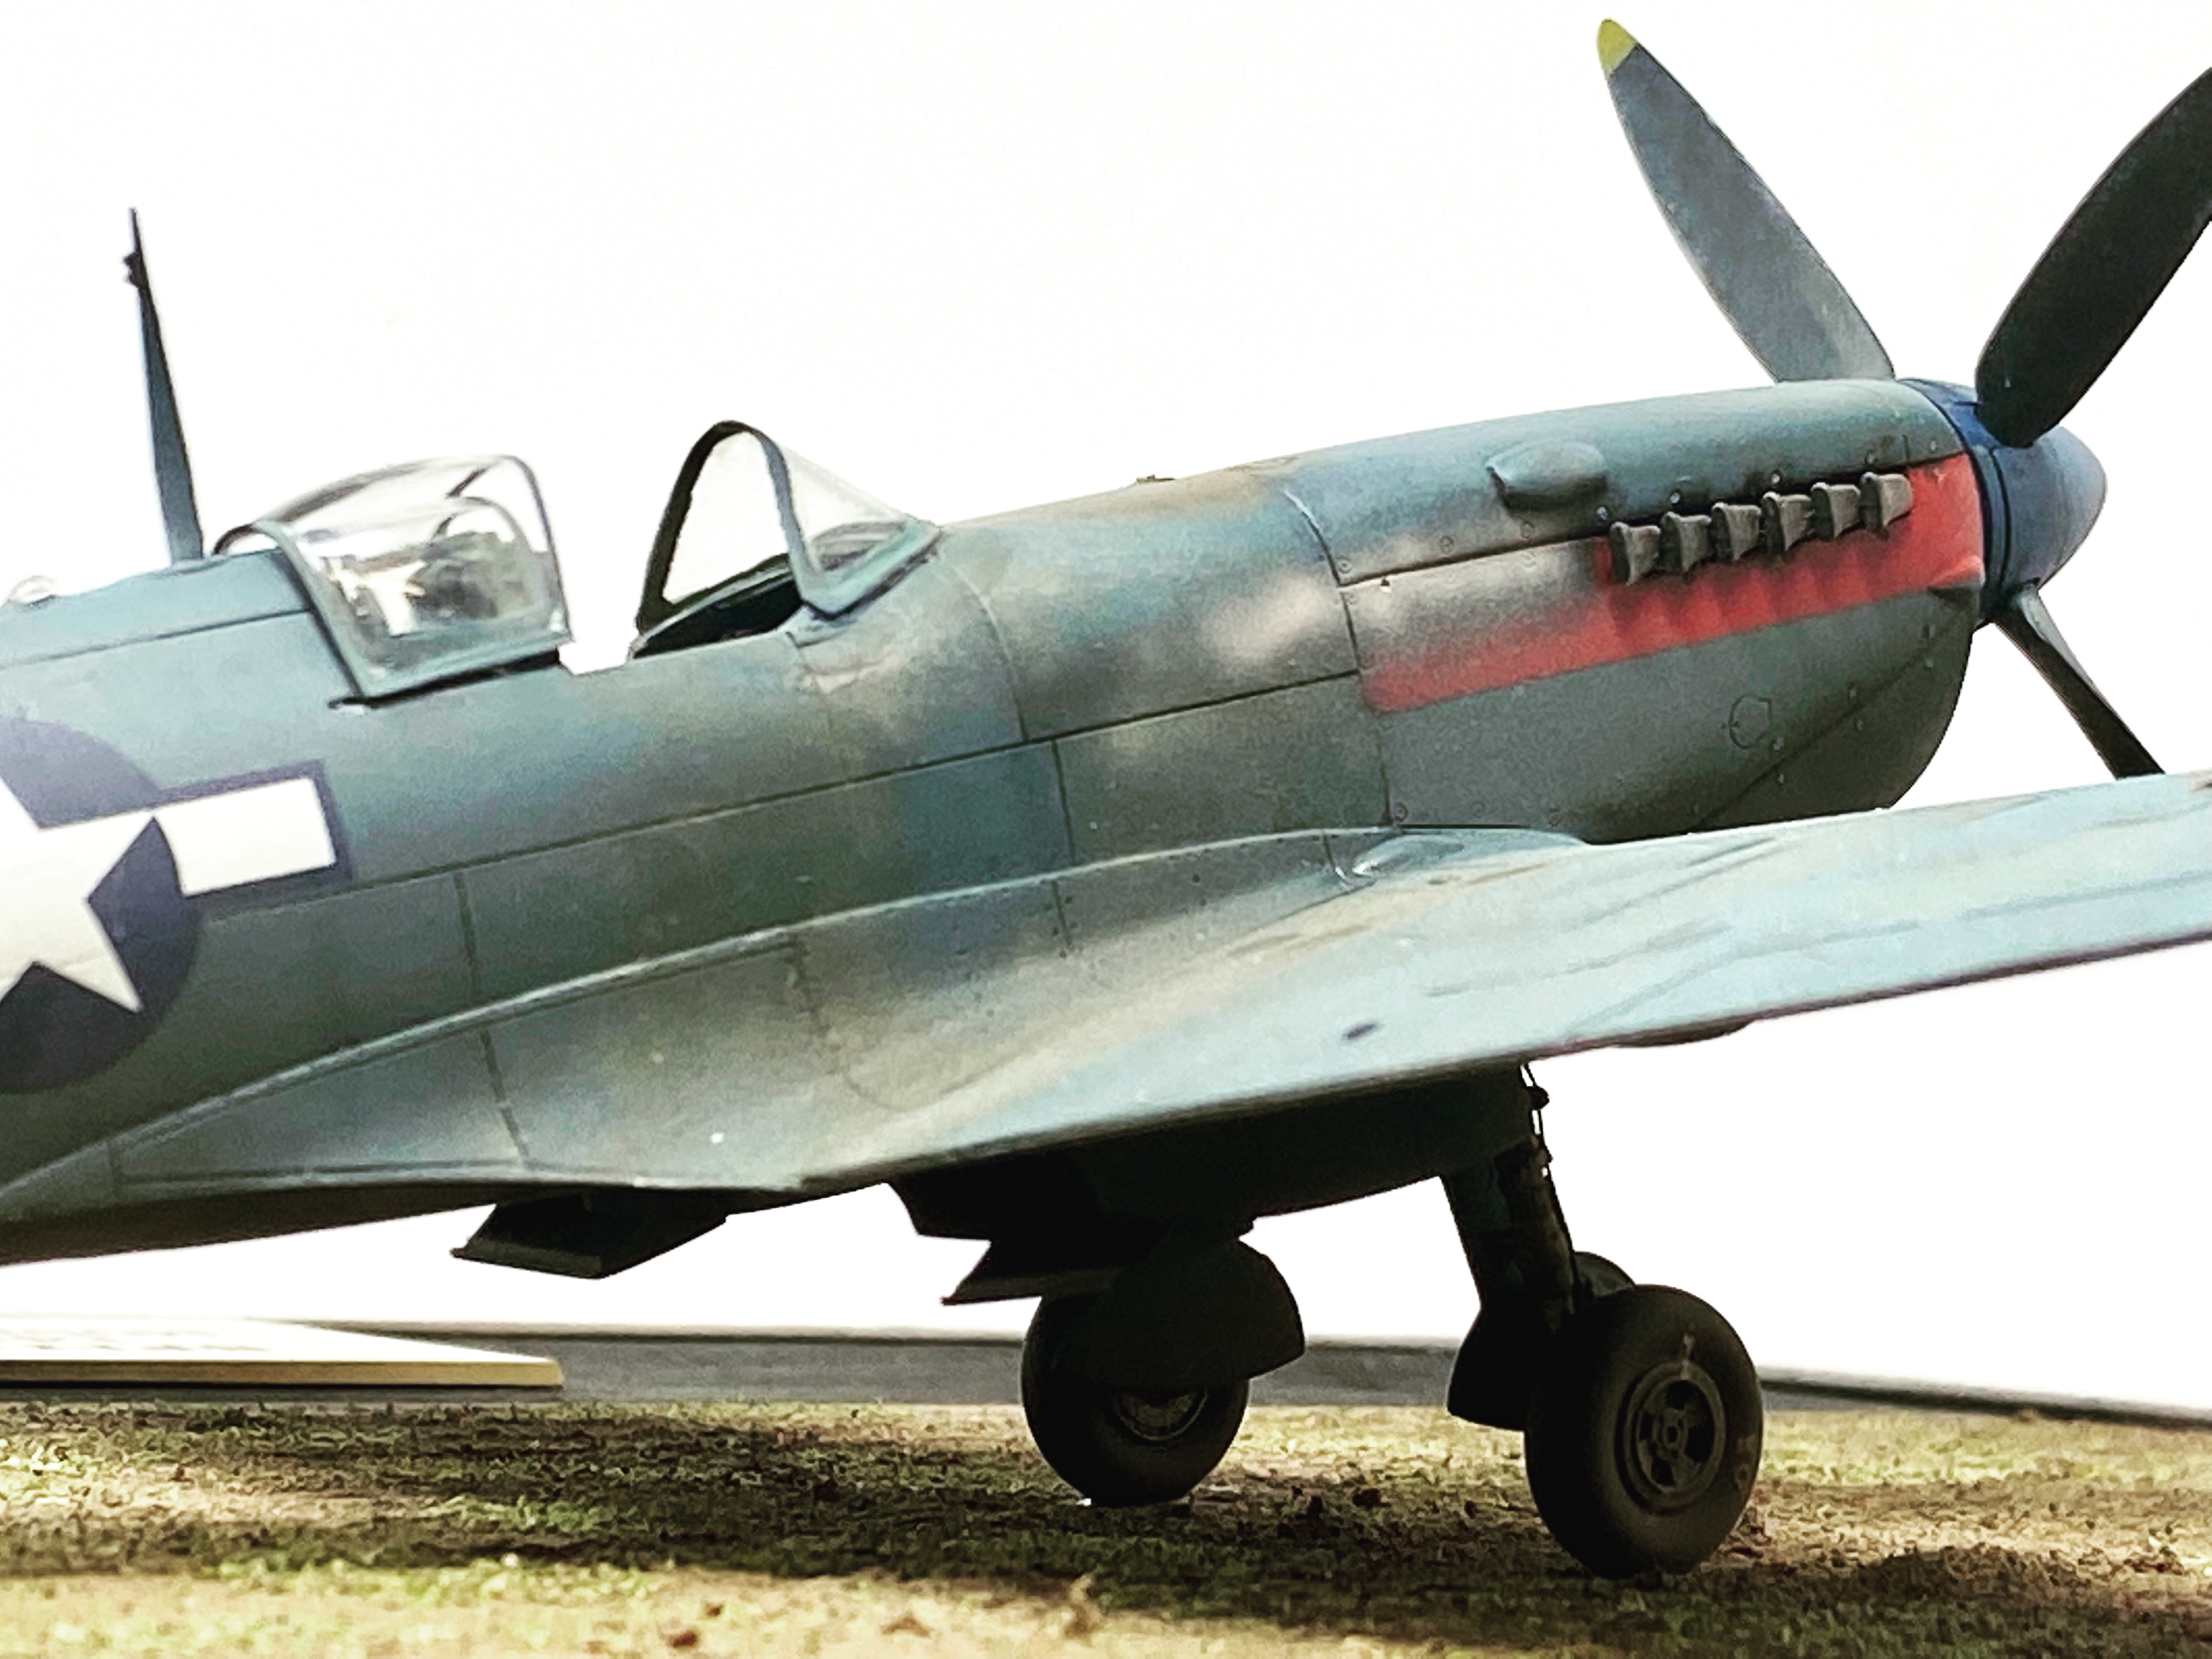
As you can see above MB948 had a very striking scheme that instantly attracted my interest! The combination of a Spitfire in a blue/red scheme with USAAF markings was something I had to have in my collection. The decals form Model Alliance were a collection of unusual Spitfire schemes that I had picked up years ago. Ageing decals are not the best to work with but this was my only option so I just went with it!
USAAF Spitfire’s:
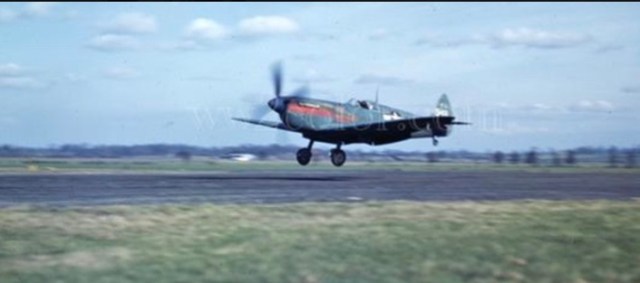
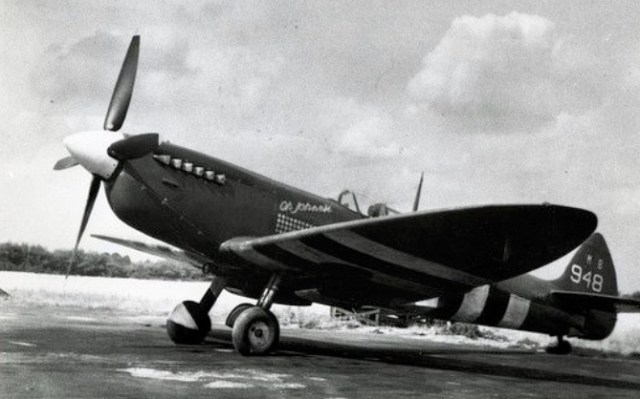
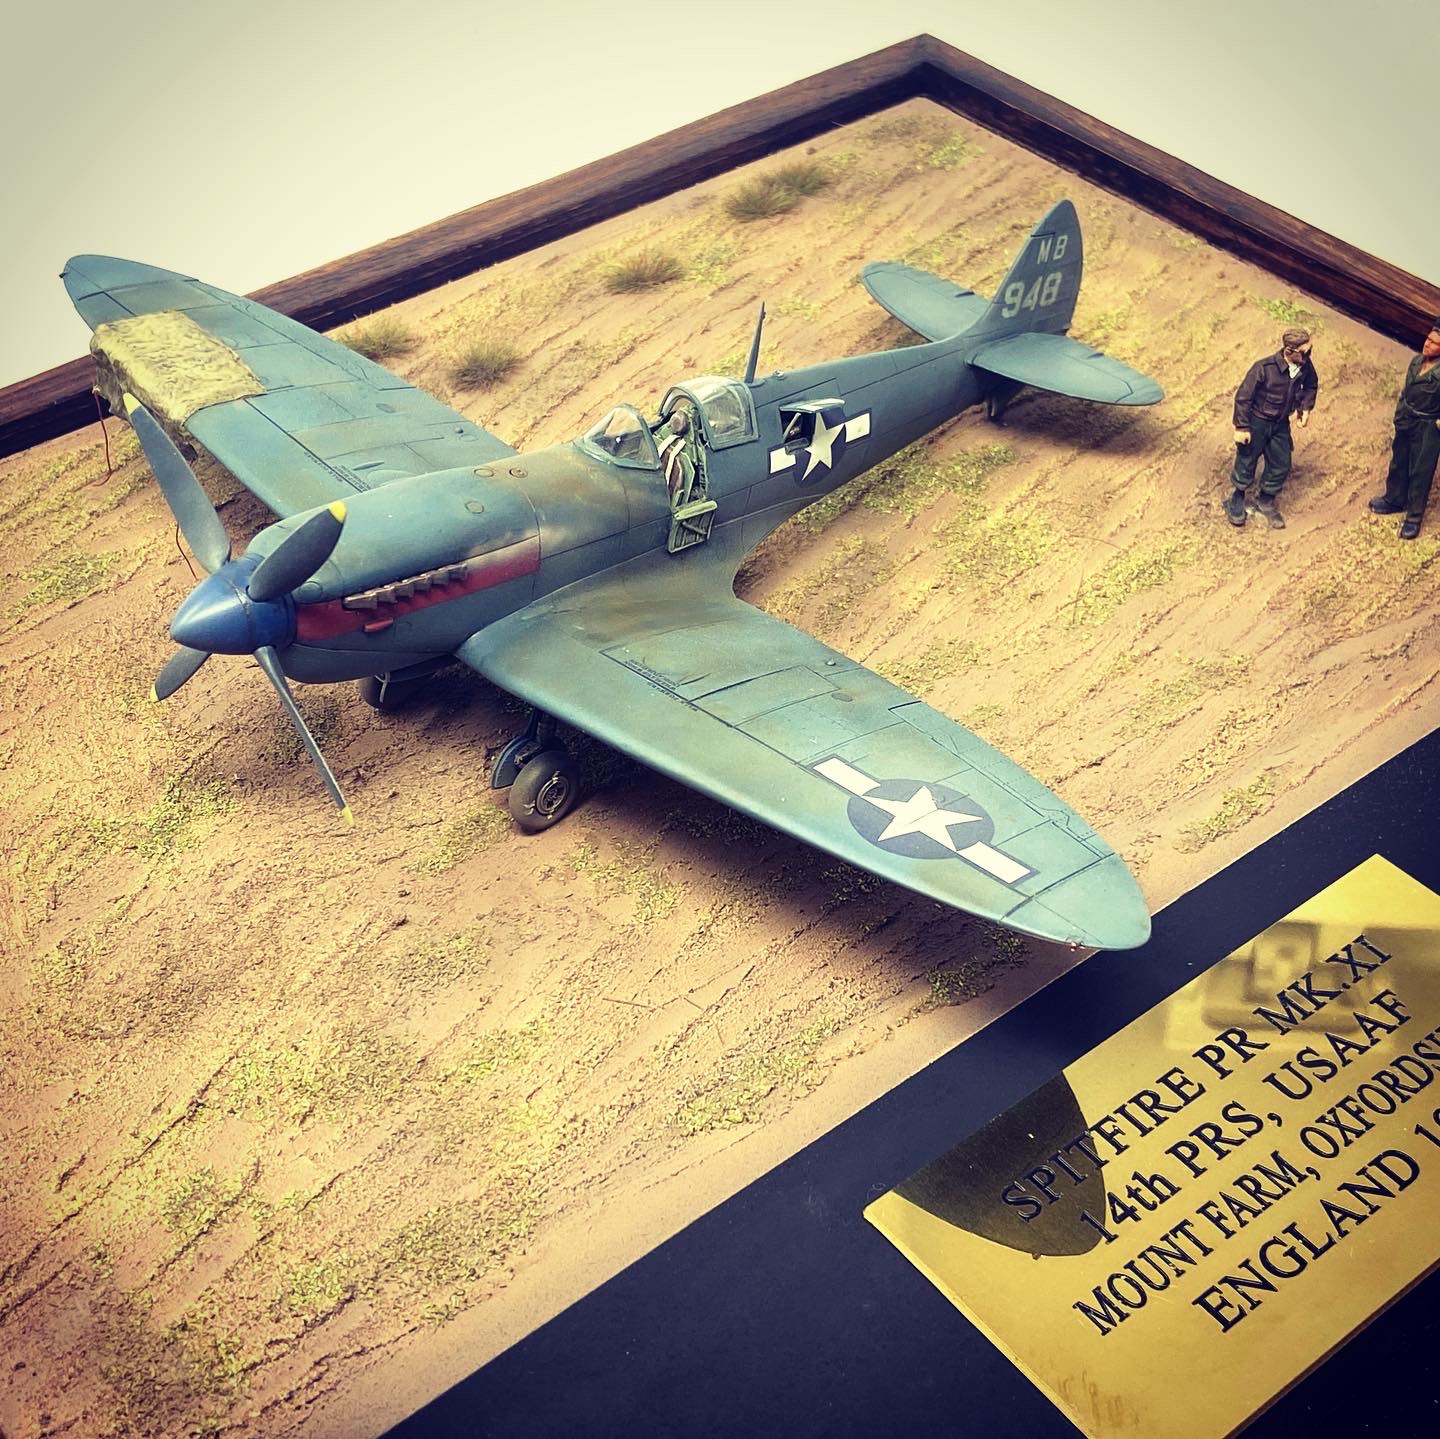
The USAAF used a lot of Spitfire’s during World war II, this particular one was assigned to the 14th Photographic Squadron, 7th Photographic Group, USAAF based at Mount Farm, Oxfordshire. Below are some photo’s of PR Spitfire’s from the 7th Photographic Group including a later photo of MB948 in D-day markings.

THE PROJECT BEGINS!
As with most fighter builds we begin in the cockpit, this was a rather simple process of painting the cockpit sub assemblies in RAF Interior Green and putting them together with the Eduard detail set.
I went for a heavily weathered look here as this aircraft was operating from a farm field and was likely to have been flying a high number of hours.
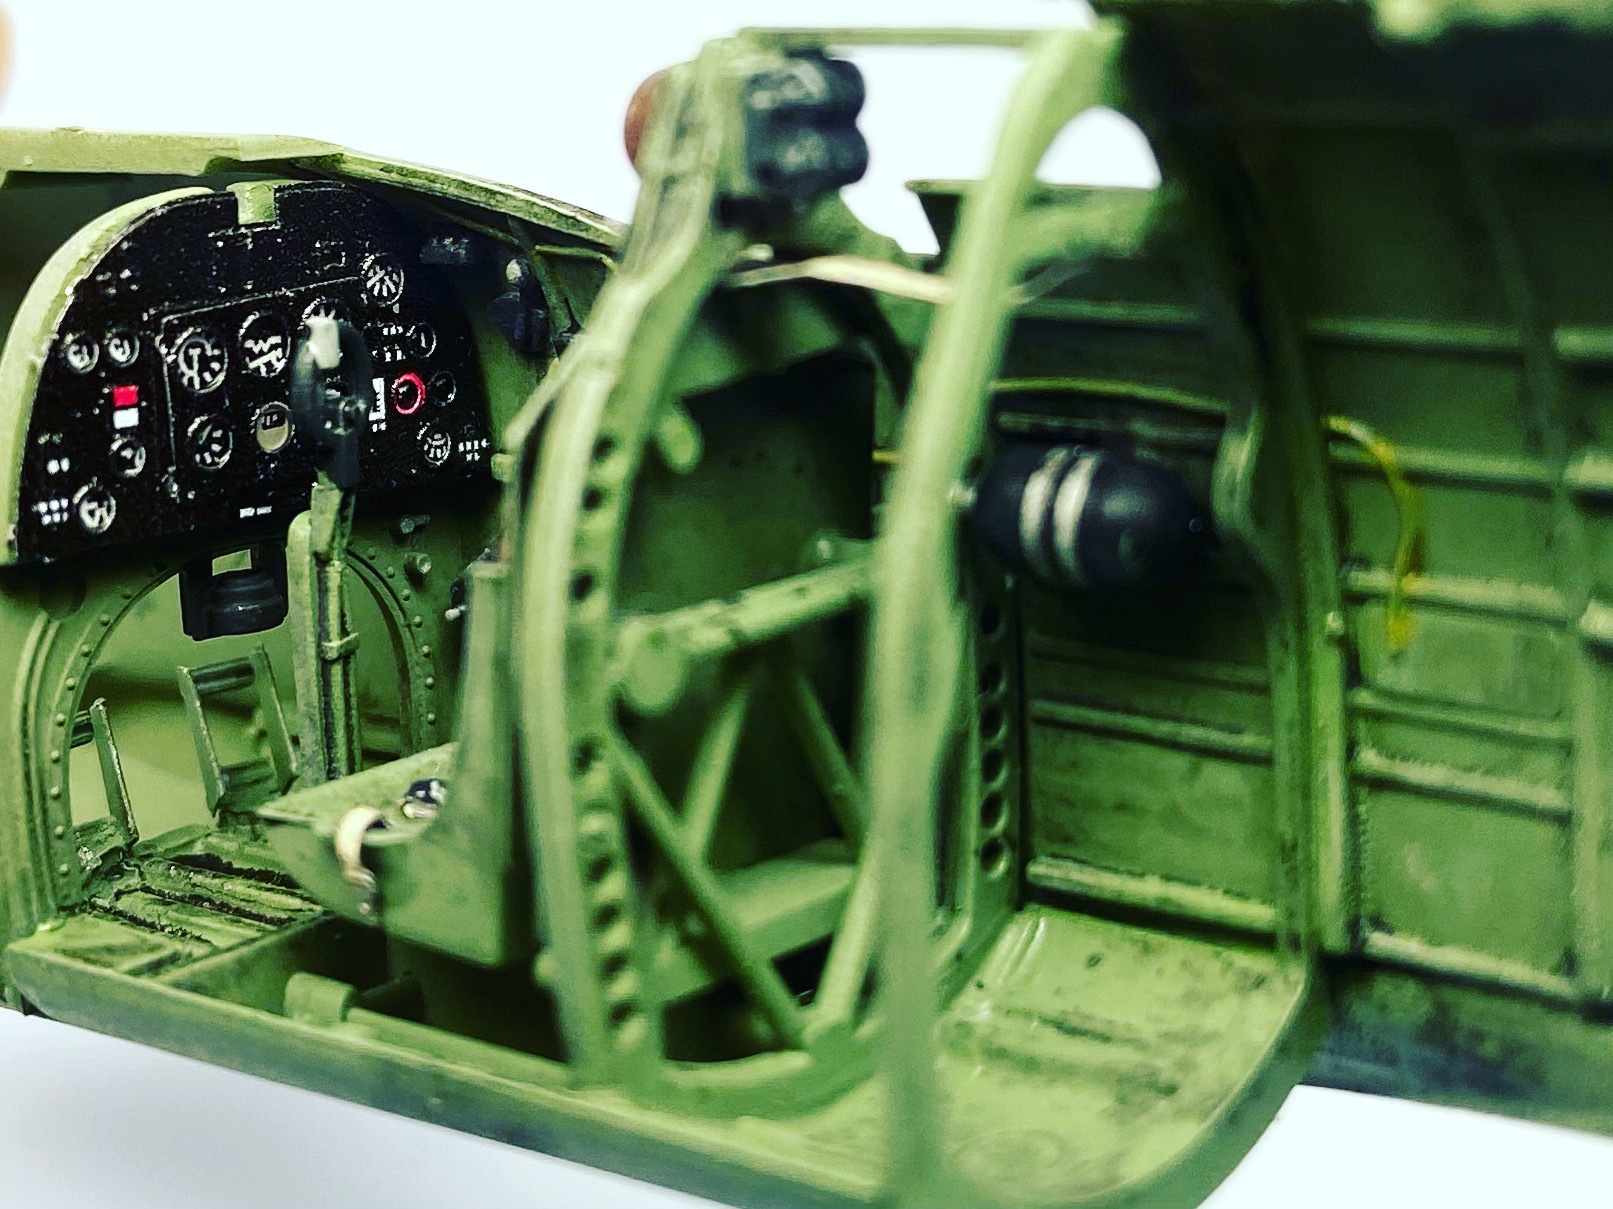
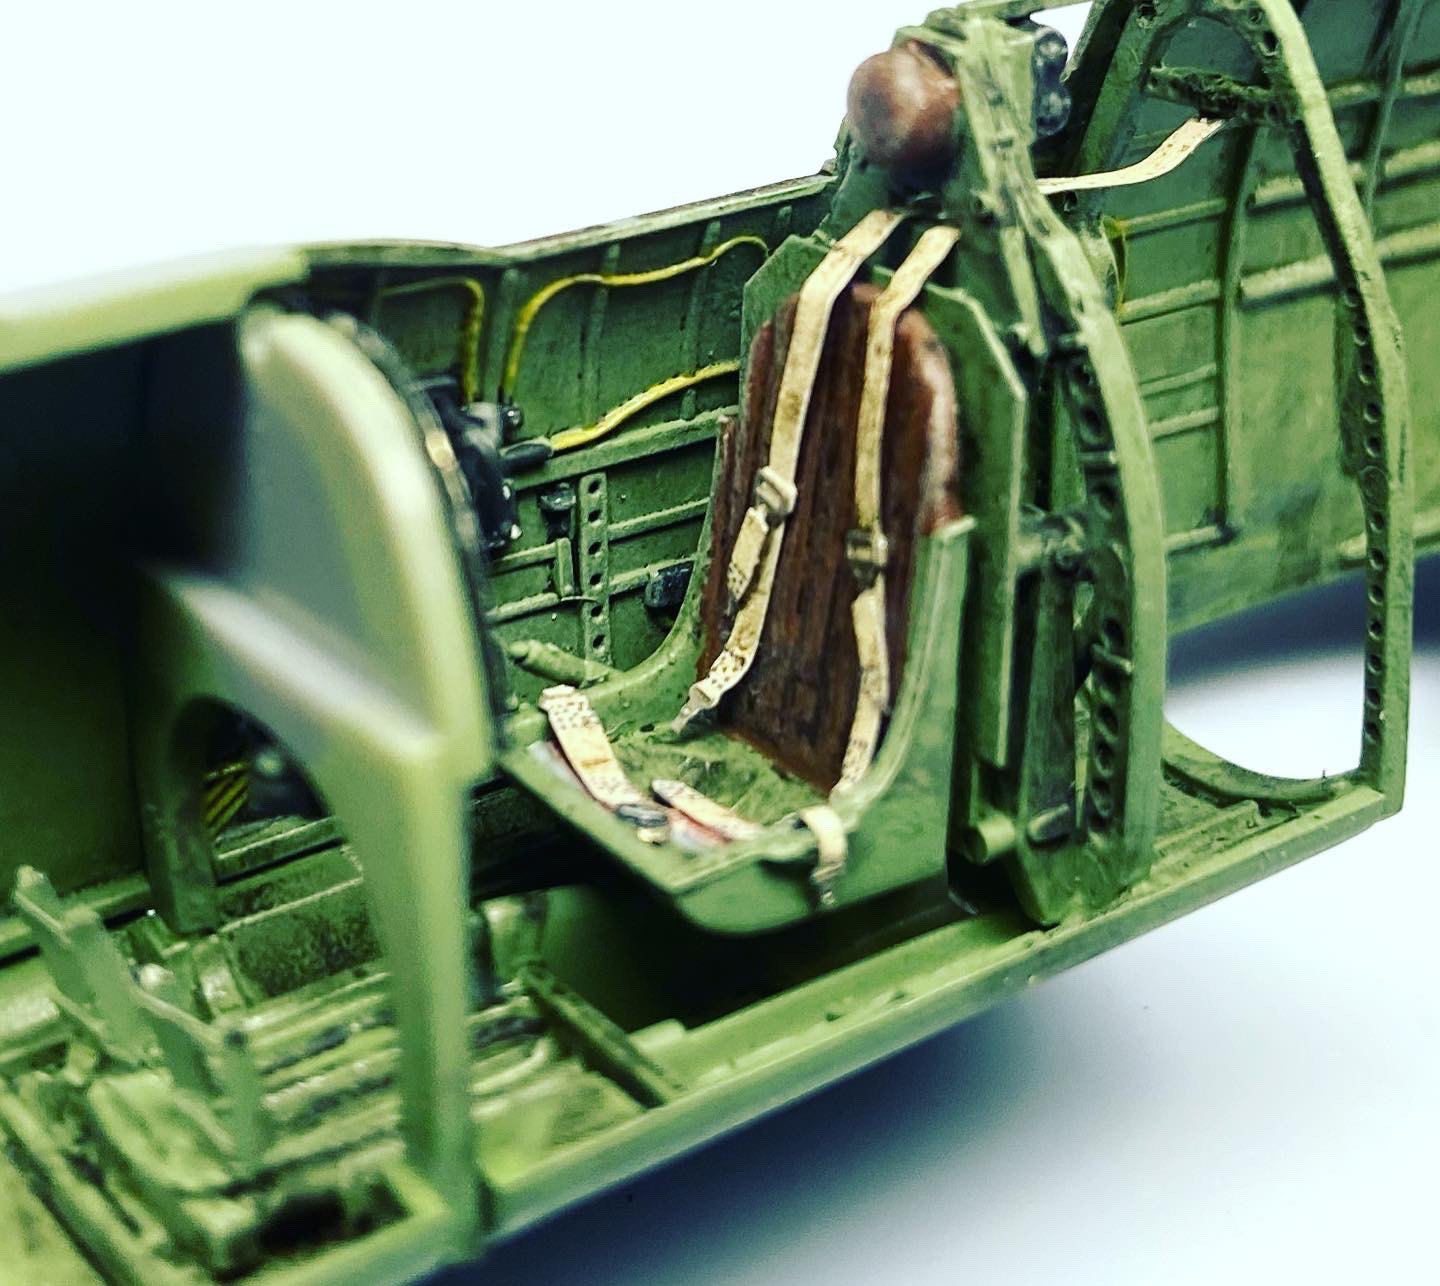

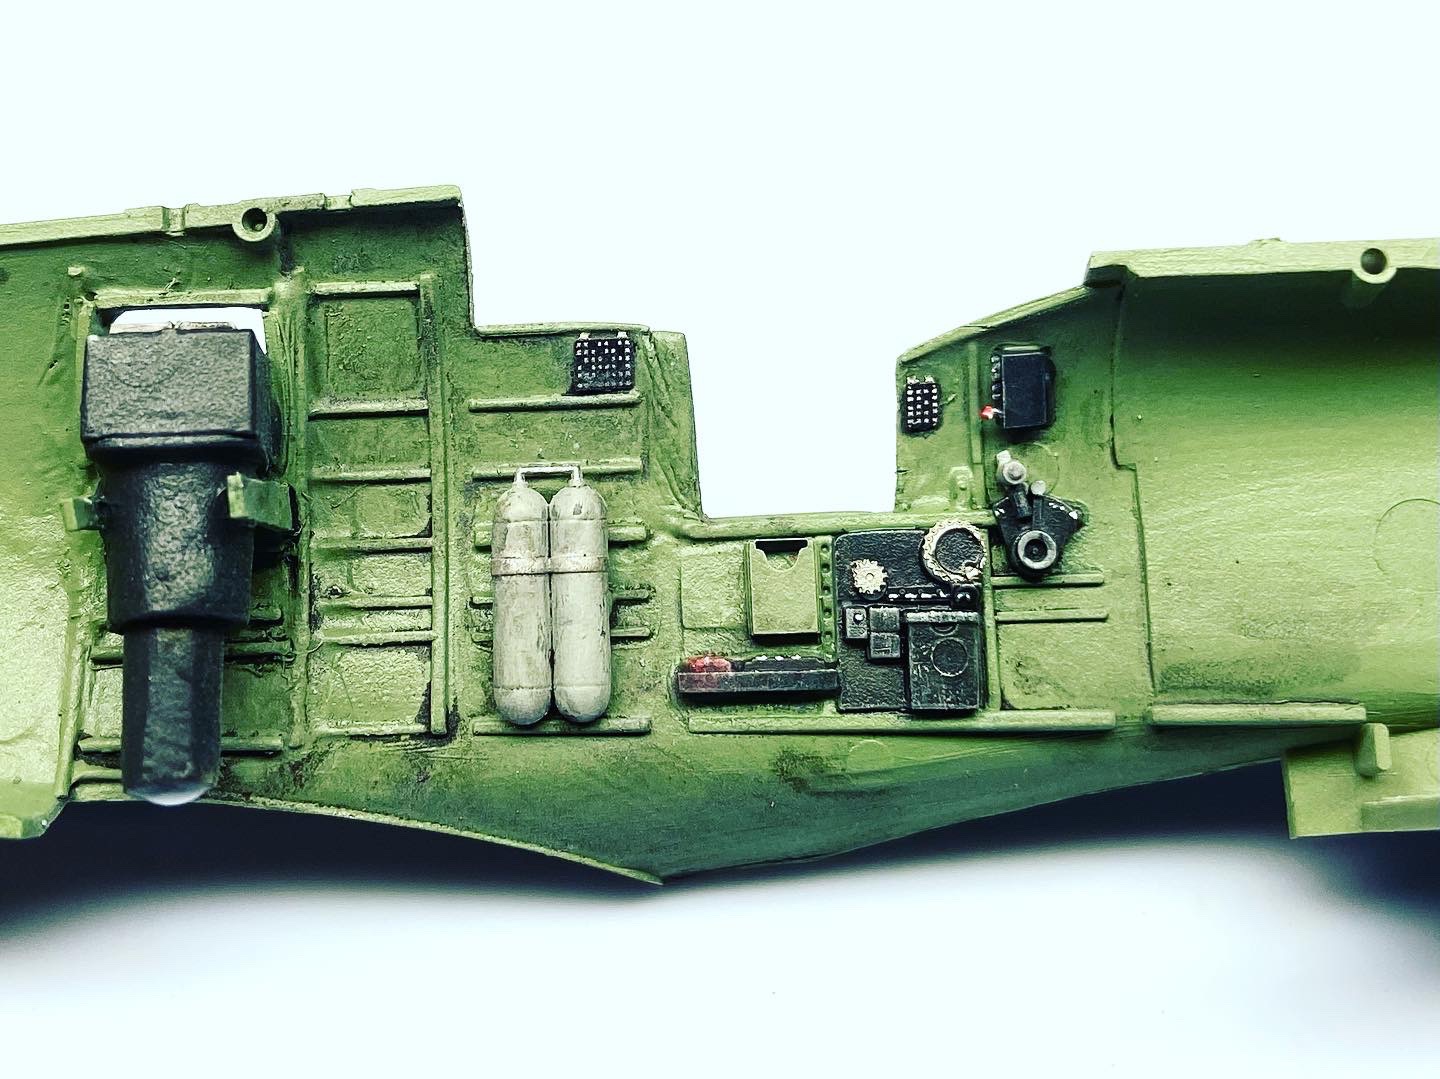
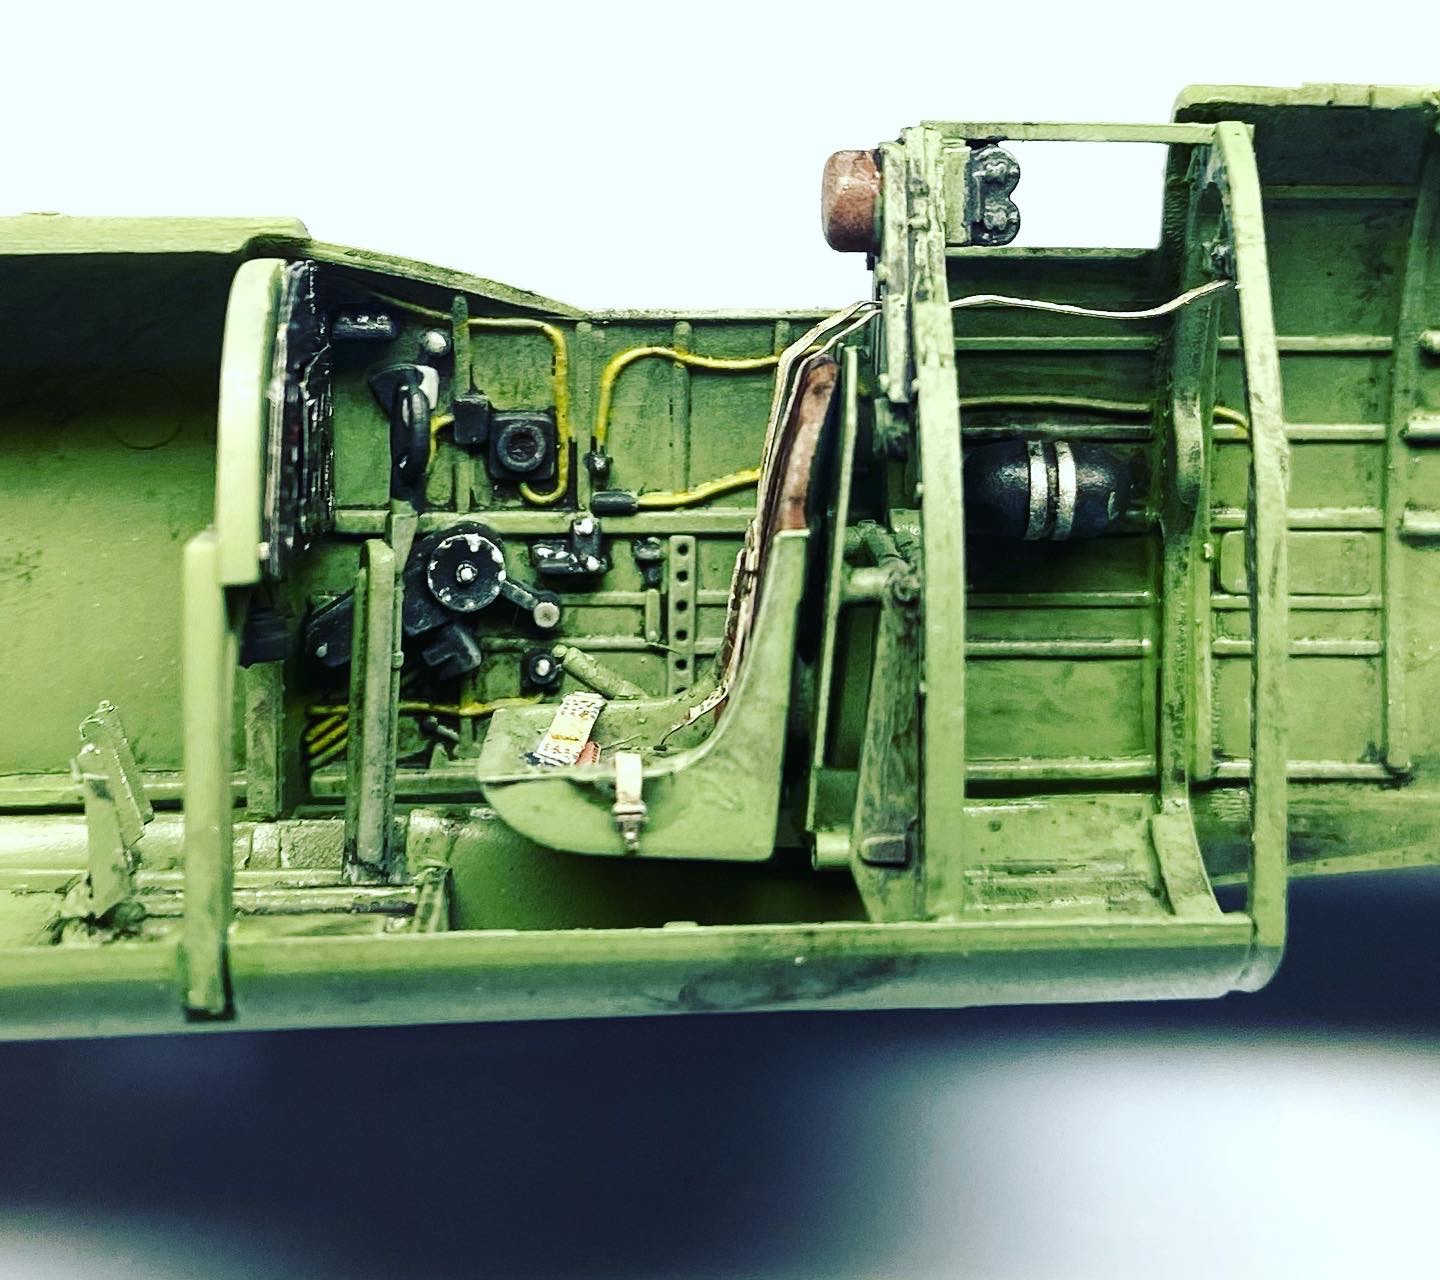
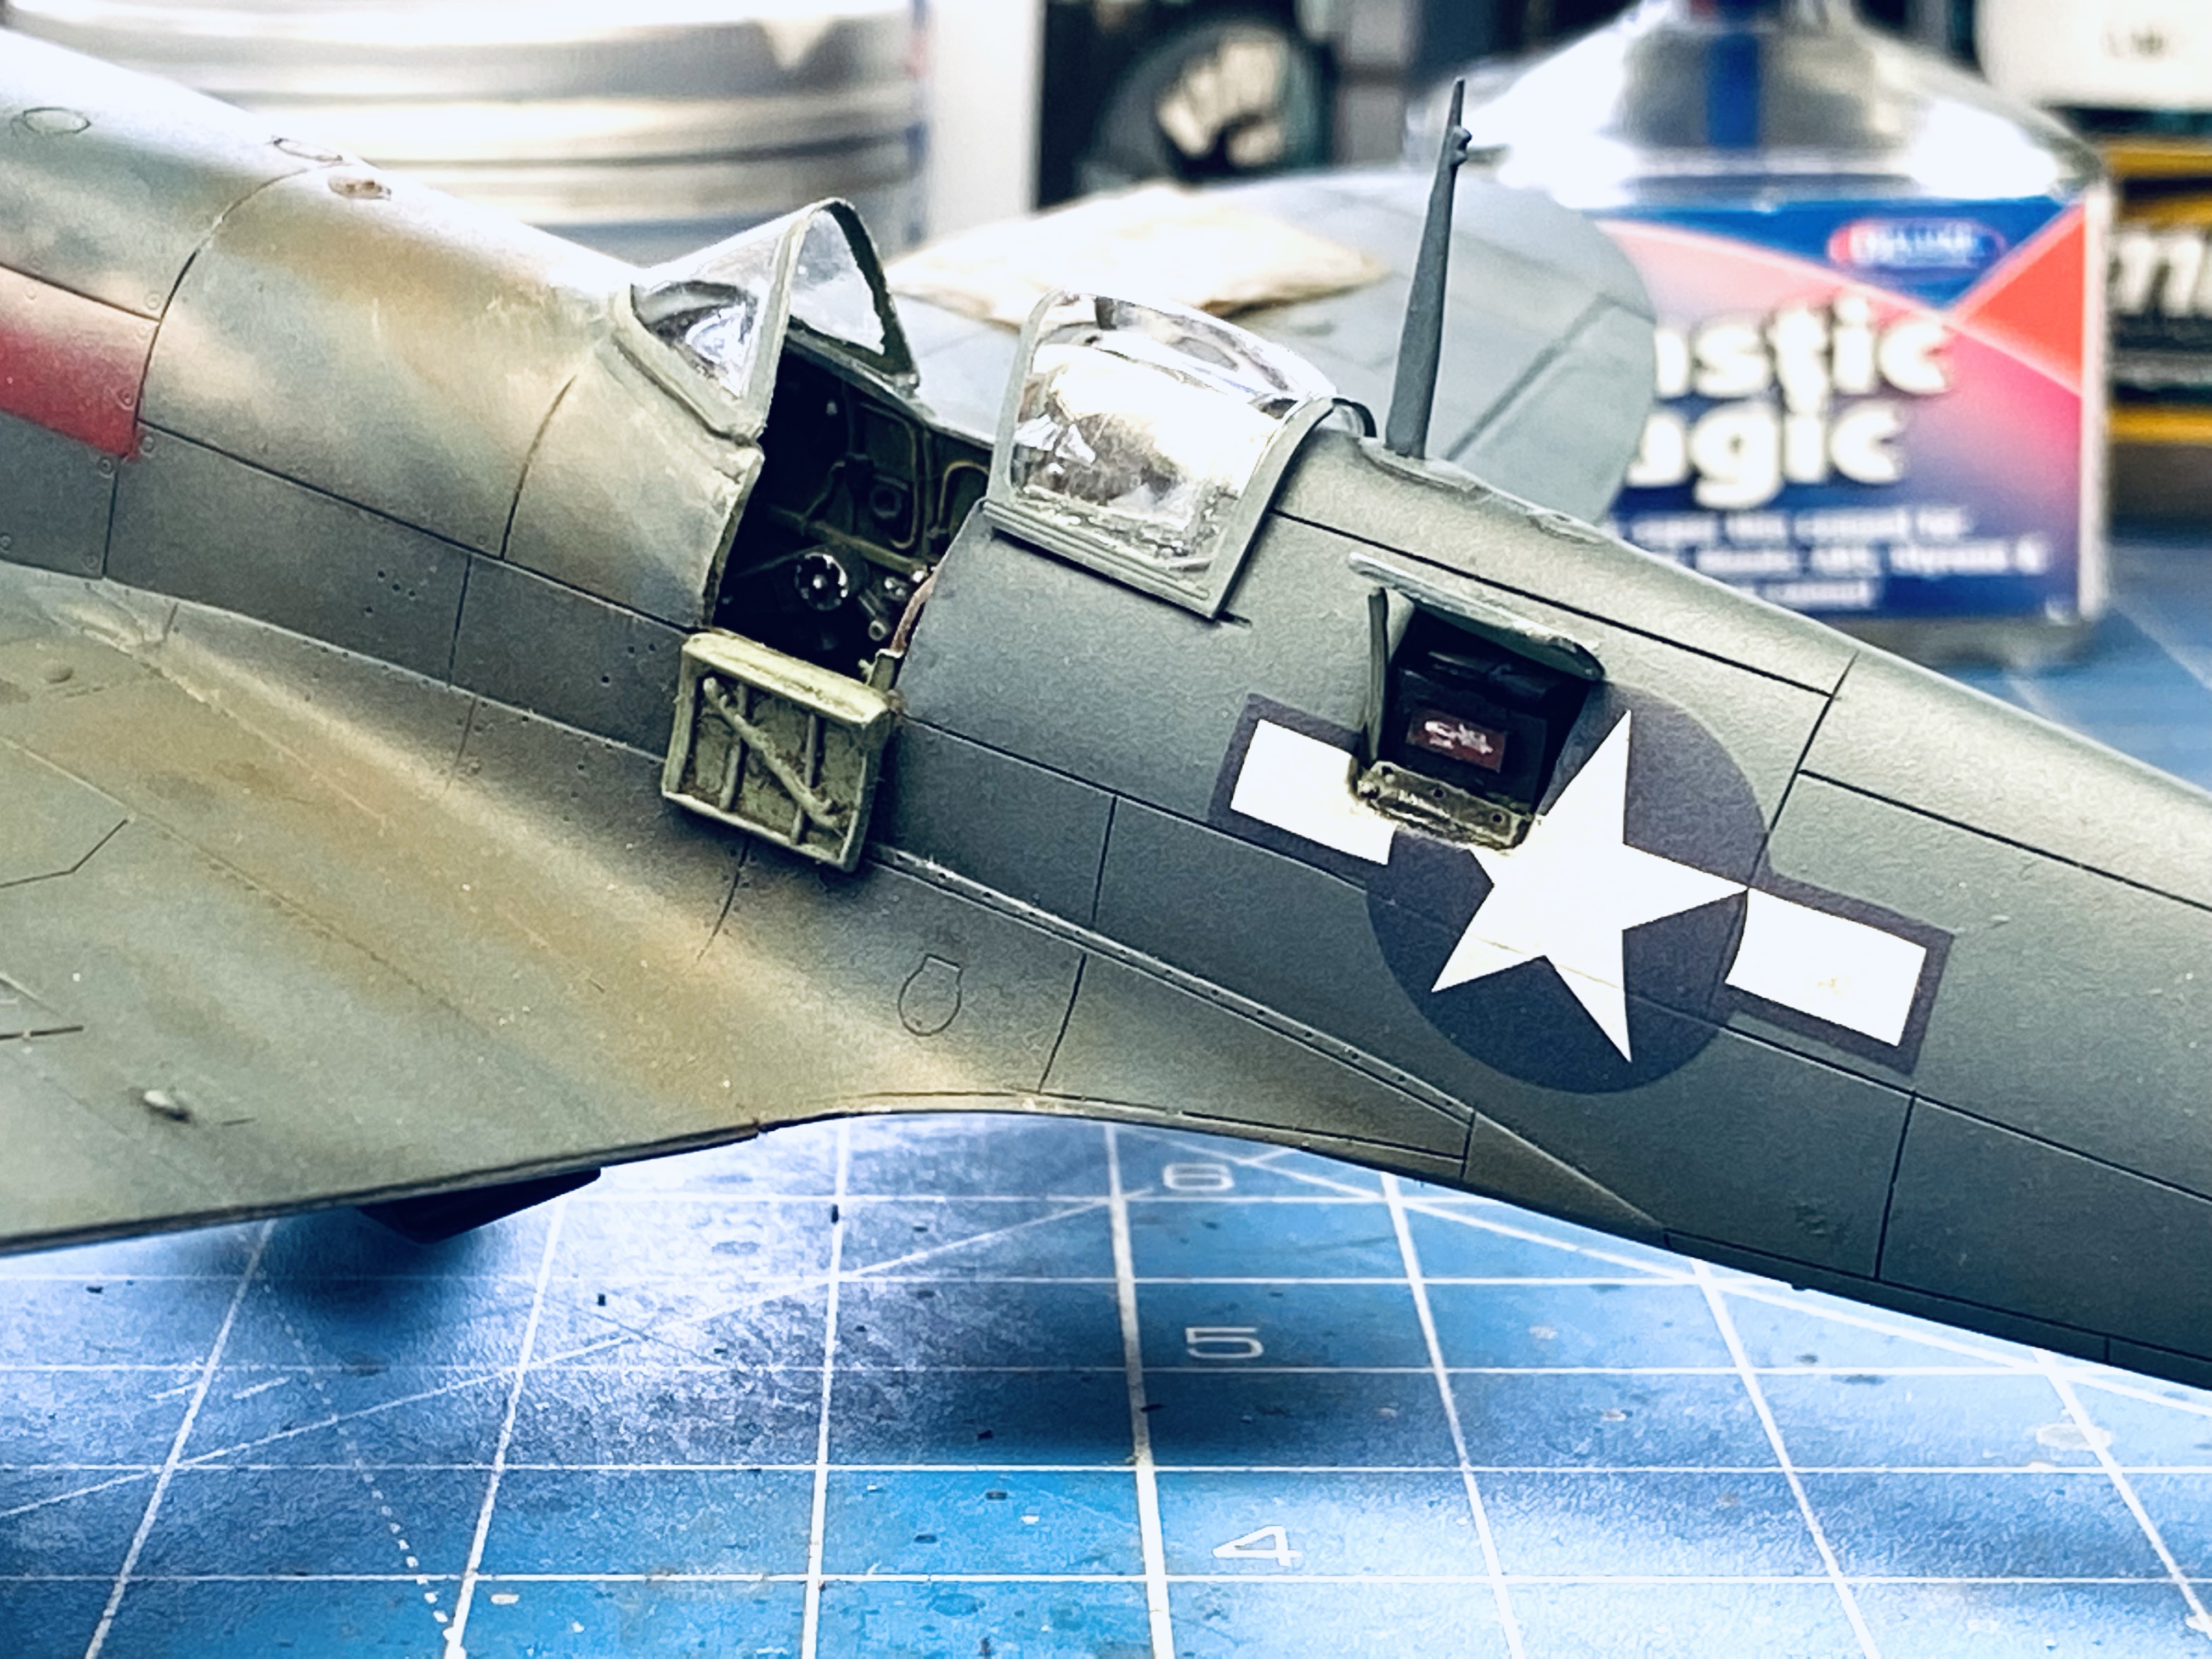
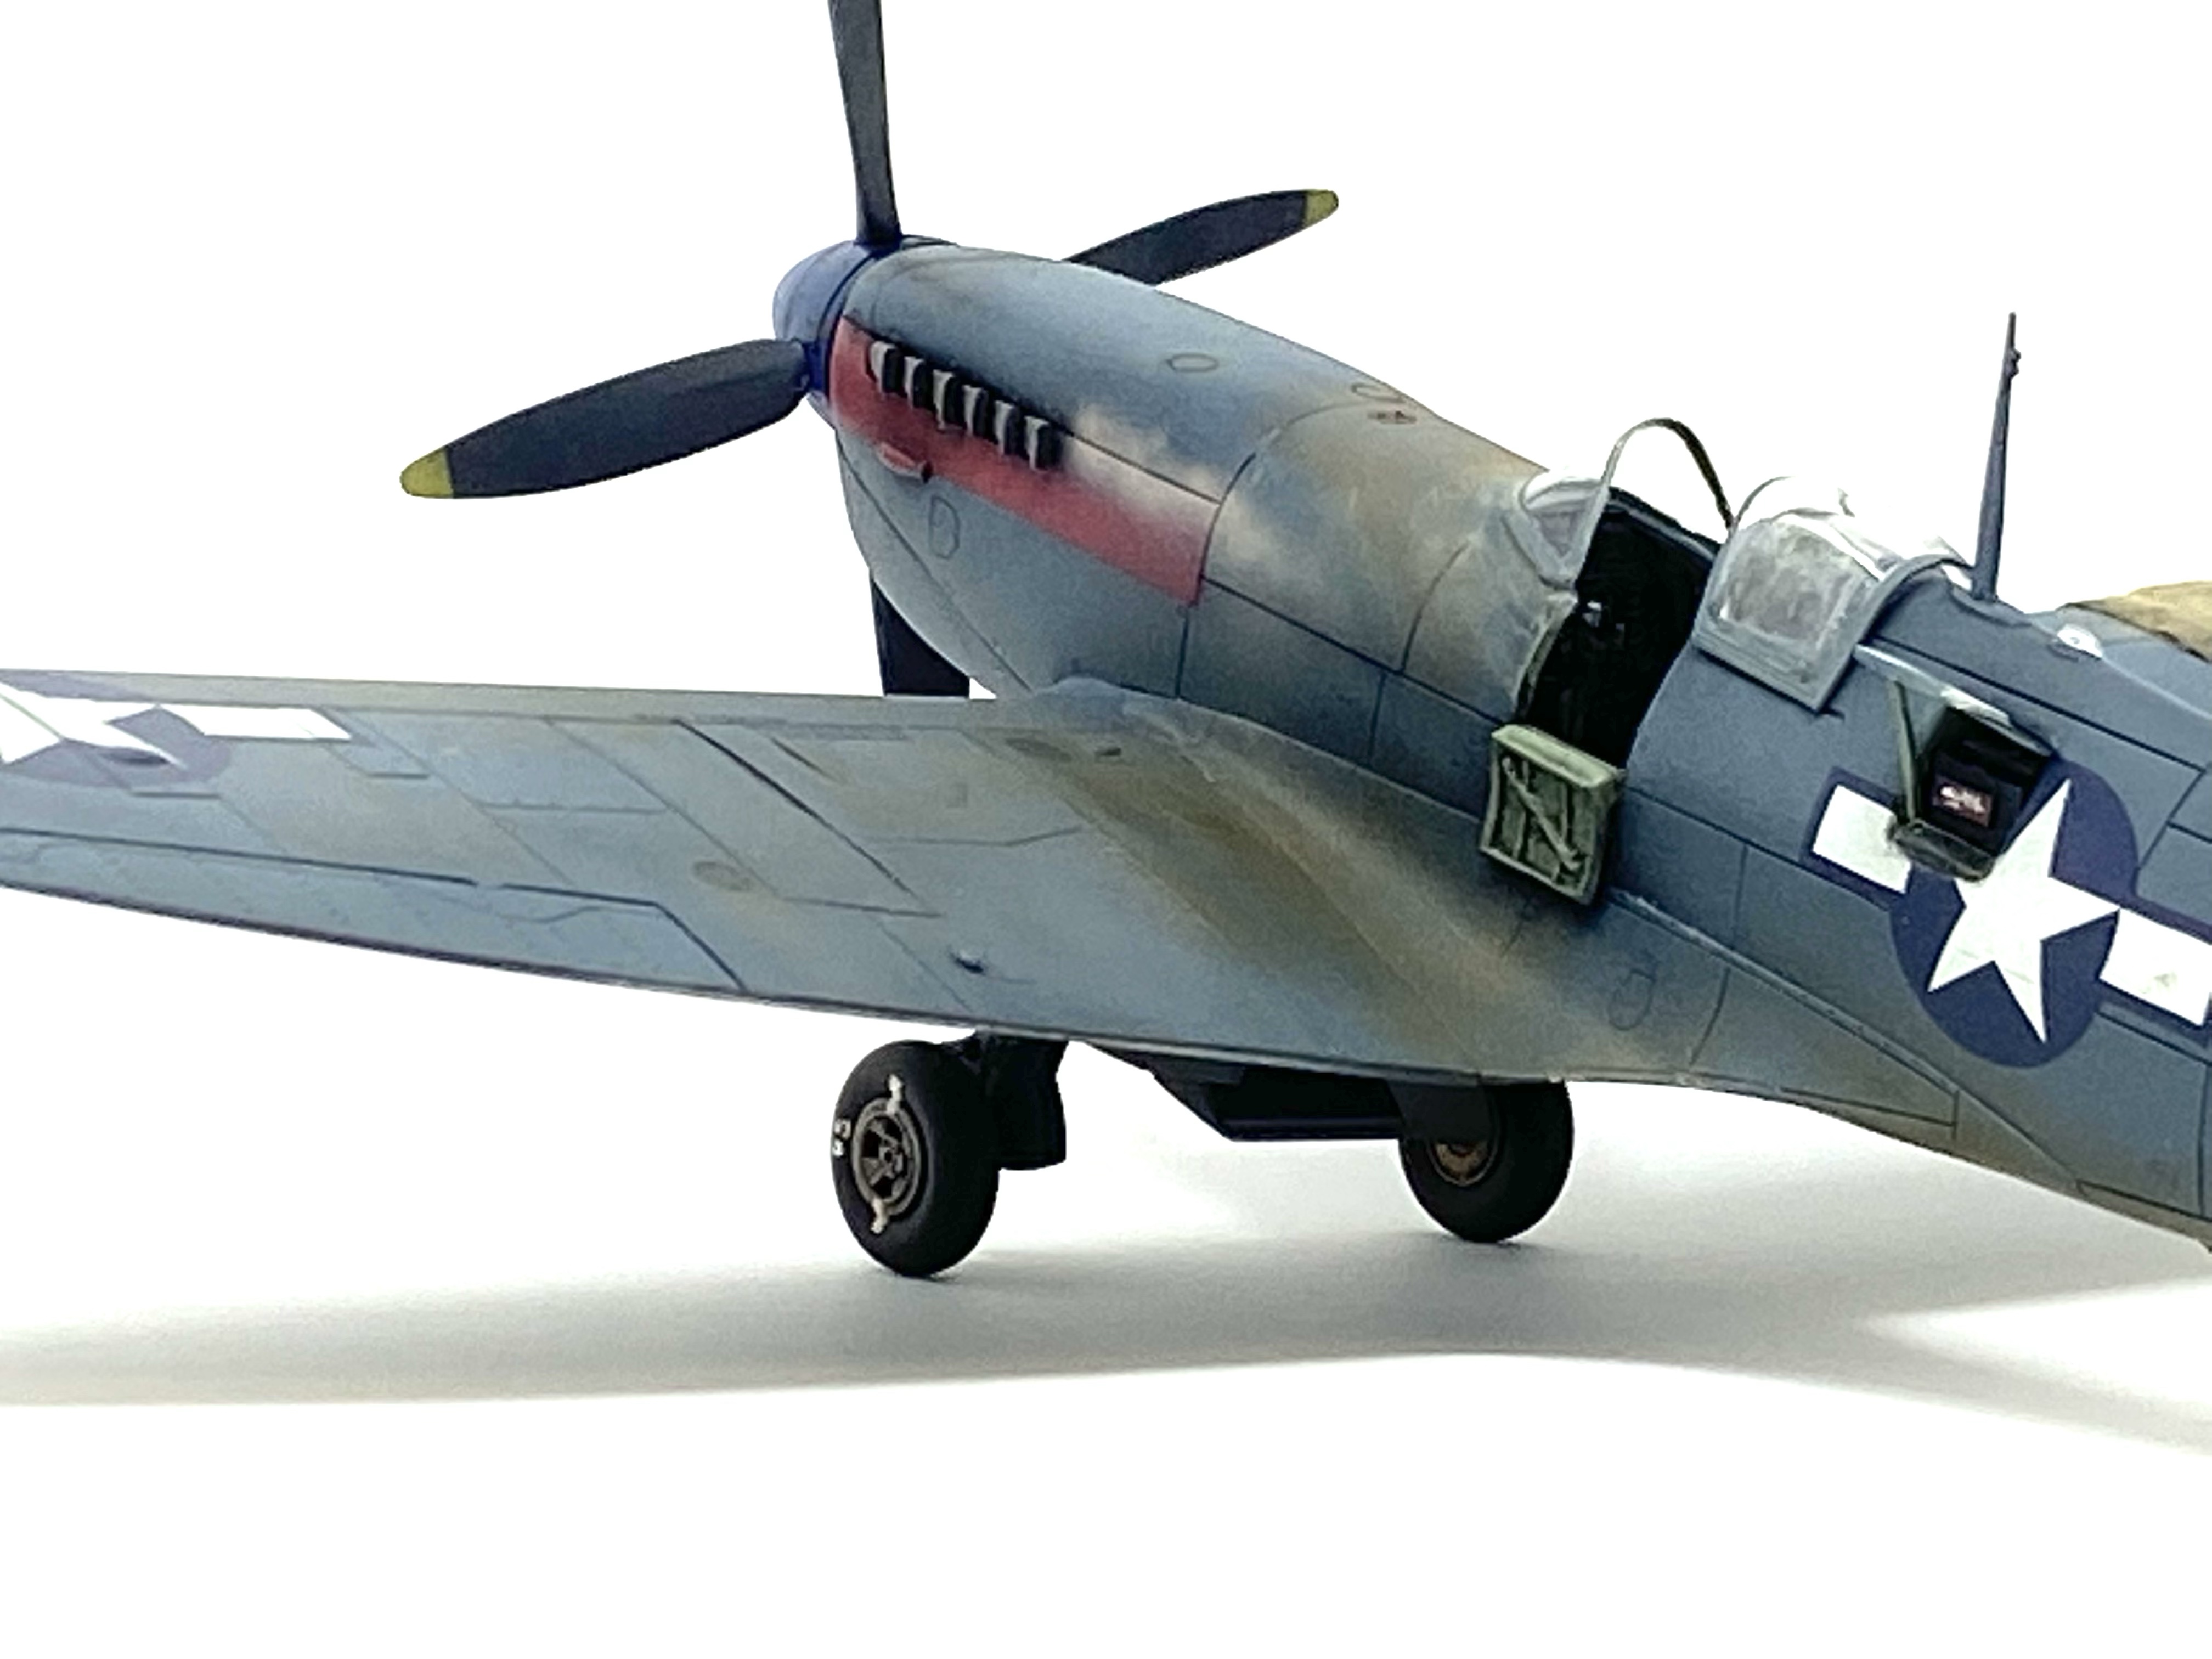
The Photographic Reconnaissance equipment: I did not have anything available to buy off the shelf, so I made my own! I studied photographs and drawings of the camera assembly in the PR Mk.XI and set about forming a frame assembly and camera. I also wanted to pose the finished model with the camera on display so I opened up the fuselage hatch just aft of the cockpit on the port wing side and I cut away the cockpit door so the interior detail could be seen:
The next task ahead of me was the fabrication of the camera and its surrounding frame that would be visible through the open hatch once the model was completed. For this I used strips of Plasticard and Odds and Ends from the spares box:


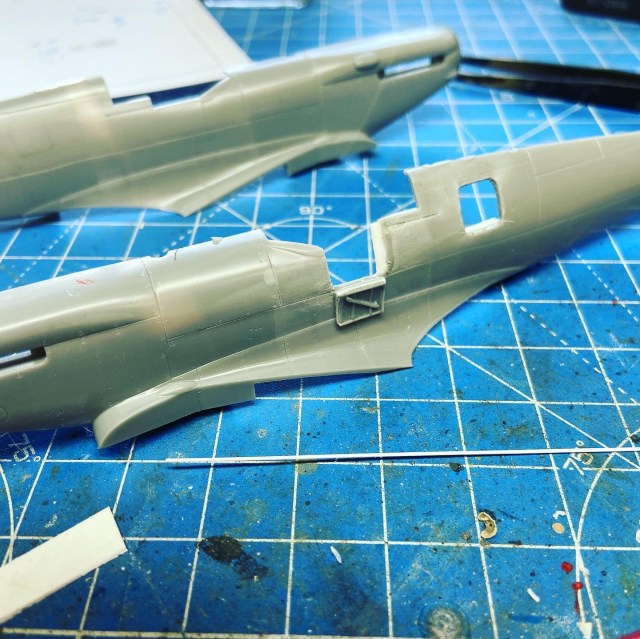
Below you can see the resin carburettor cover being grafted onto the airframe-The Quickboost part was not an exact match so much fettling was required to get a decent fit! I also had to re-scribe a lot of teh details here as well.

Here you can see the basic conversion work carried out, the camera has been fitted, the carburettor and wing panels are also in place. I also filled i the gun ports and sanded them flush to the wings leading edge.
Now I was able to move forward into the painting phase.

PAINT IT BLACK!
One question I get a lot is “Do you use a primer?” or “What primer do you use?” I almost always prime my models in Tamiya NATO Black acrylic. It dries flat and instantly shows any imperfections on the model.
So here is my paint process from Primer to completed paint job:
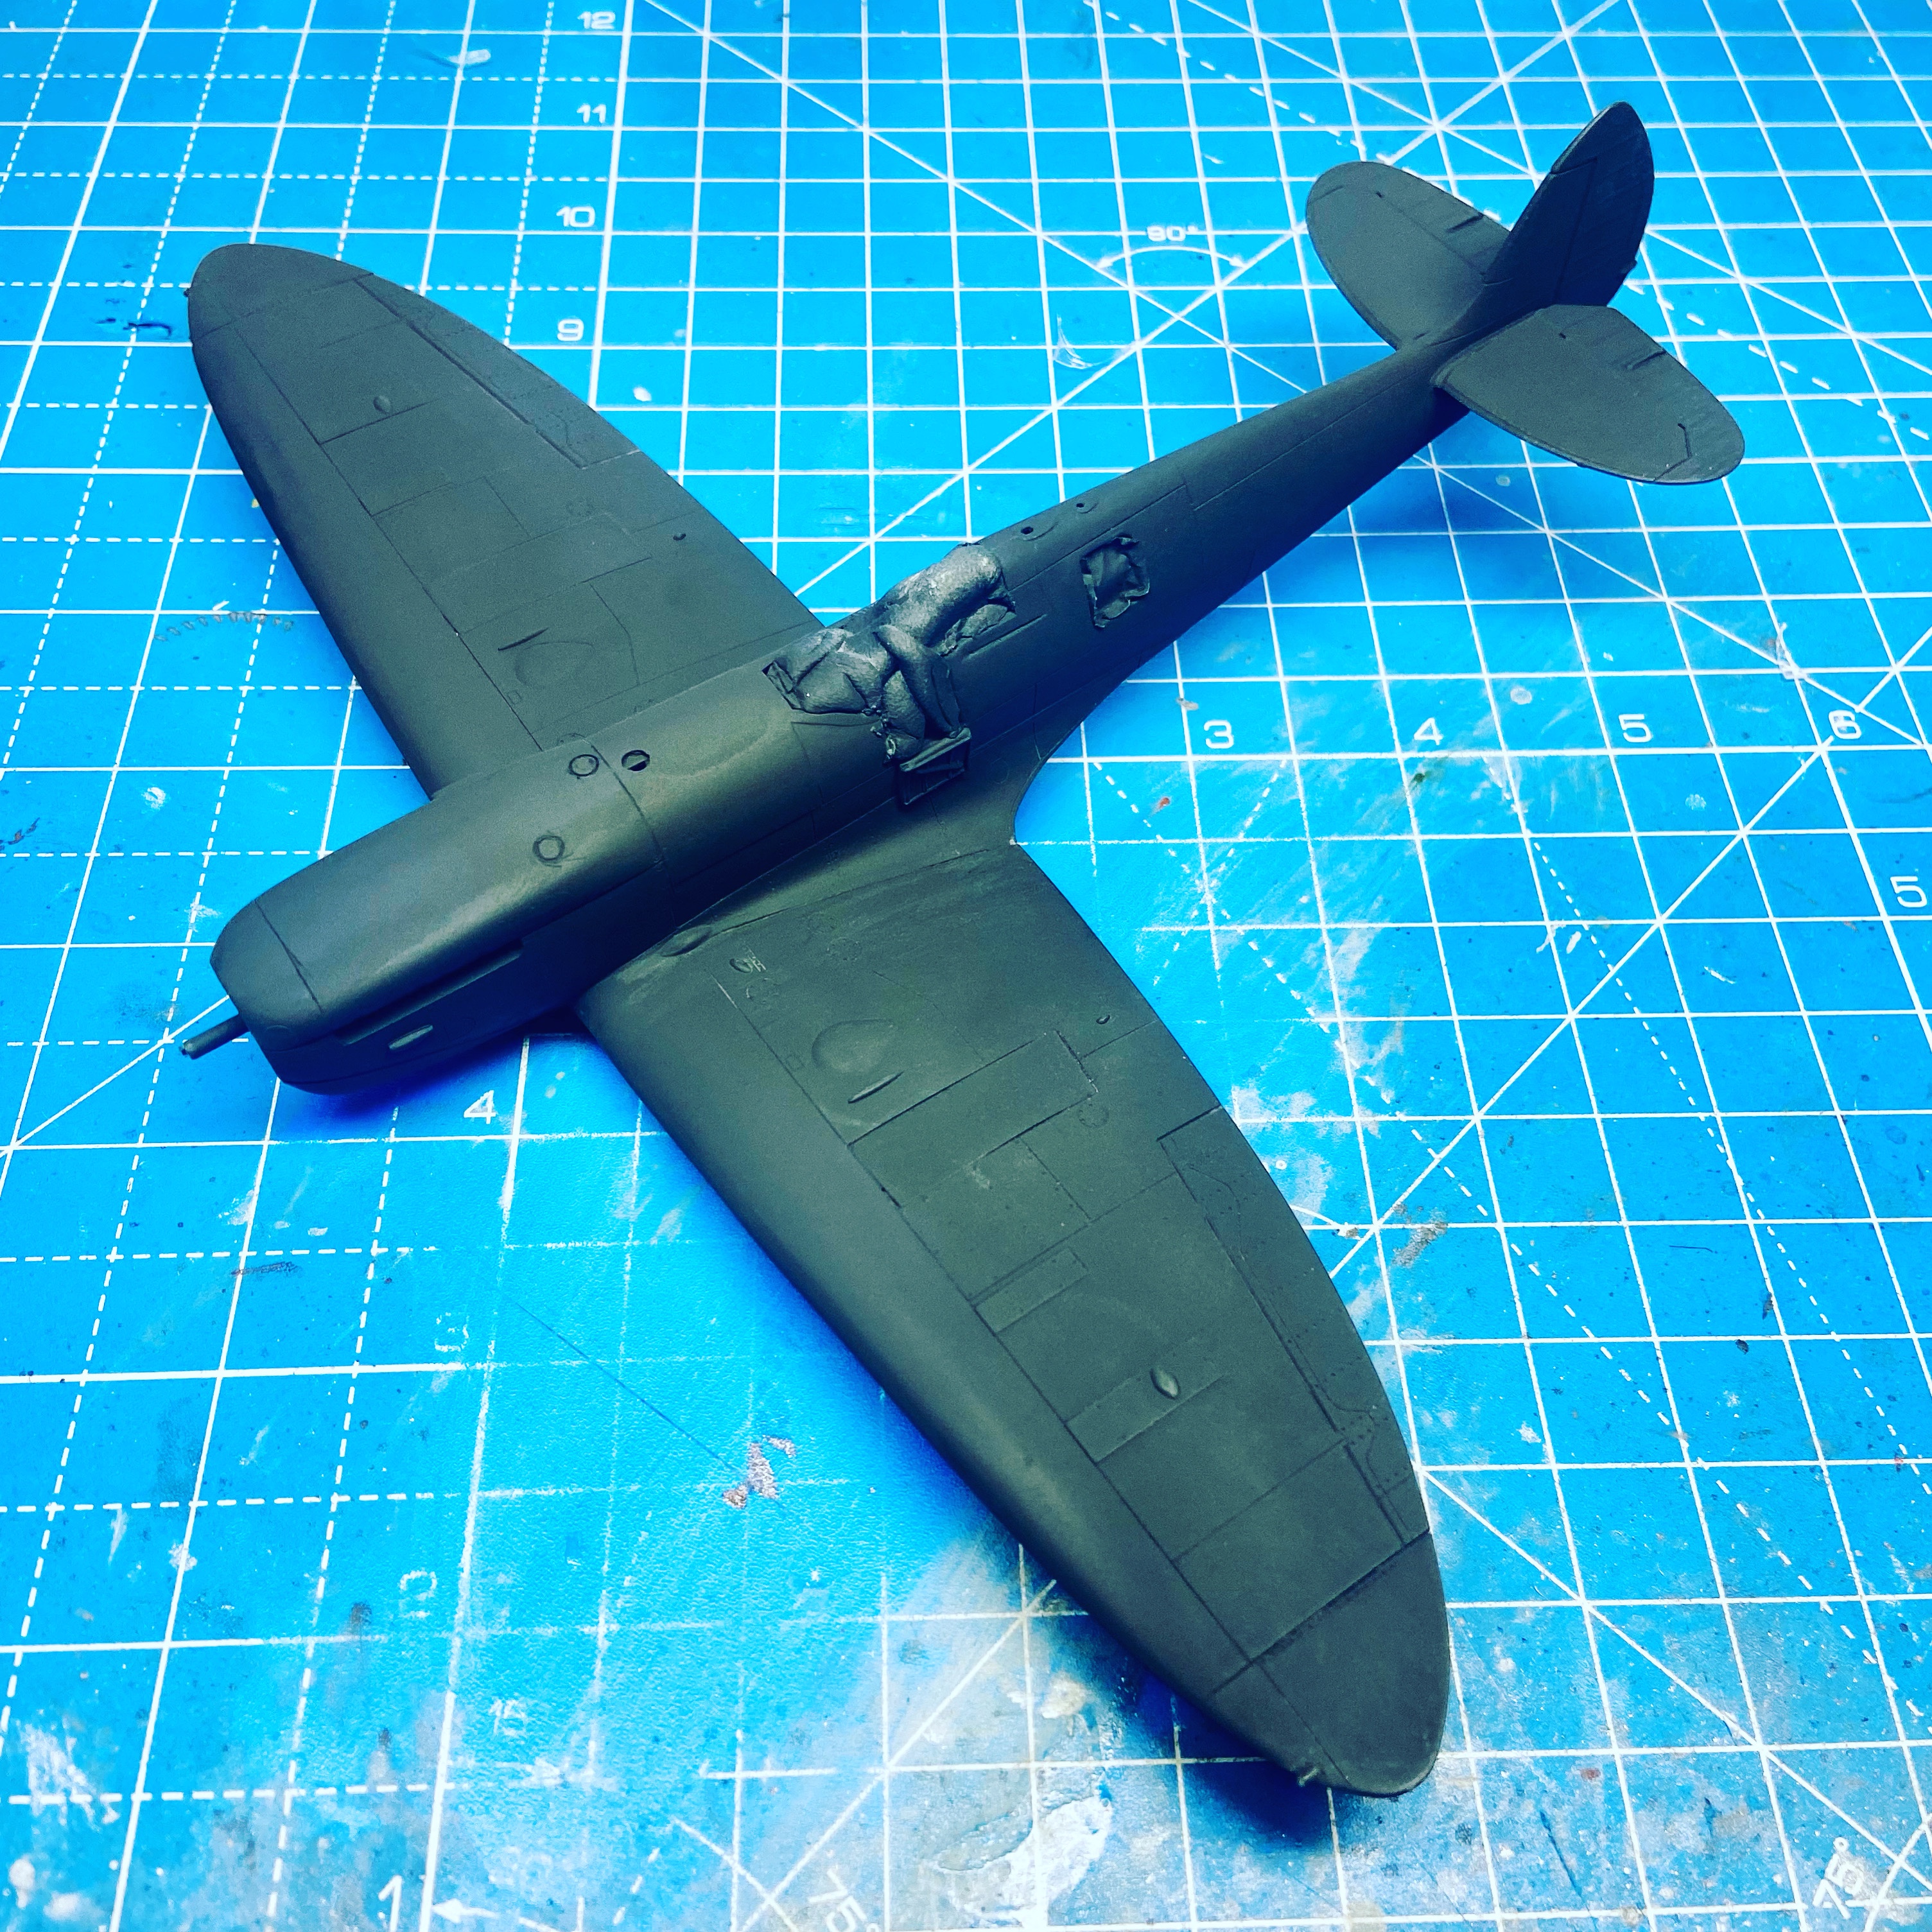


1.Starting with NATO Black as our primer we now ensure the models surface is free of any mistakes or blemishes.
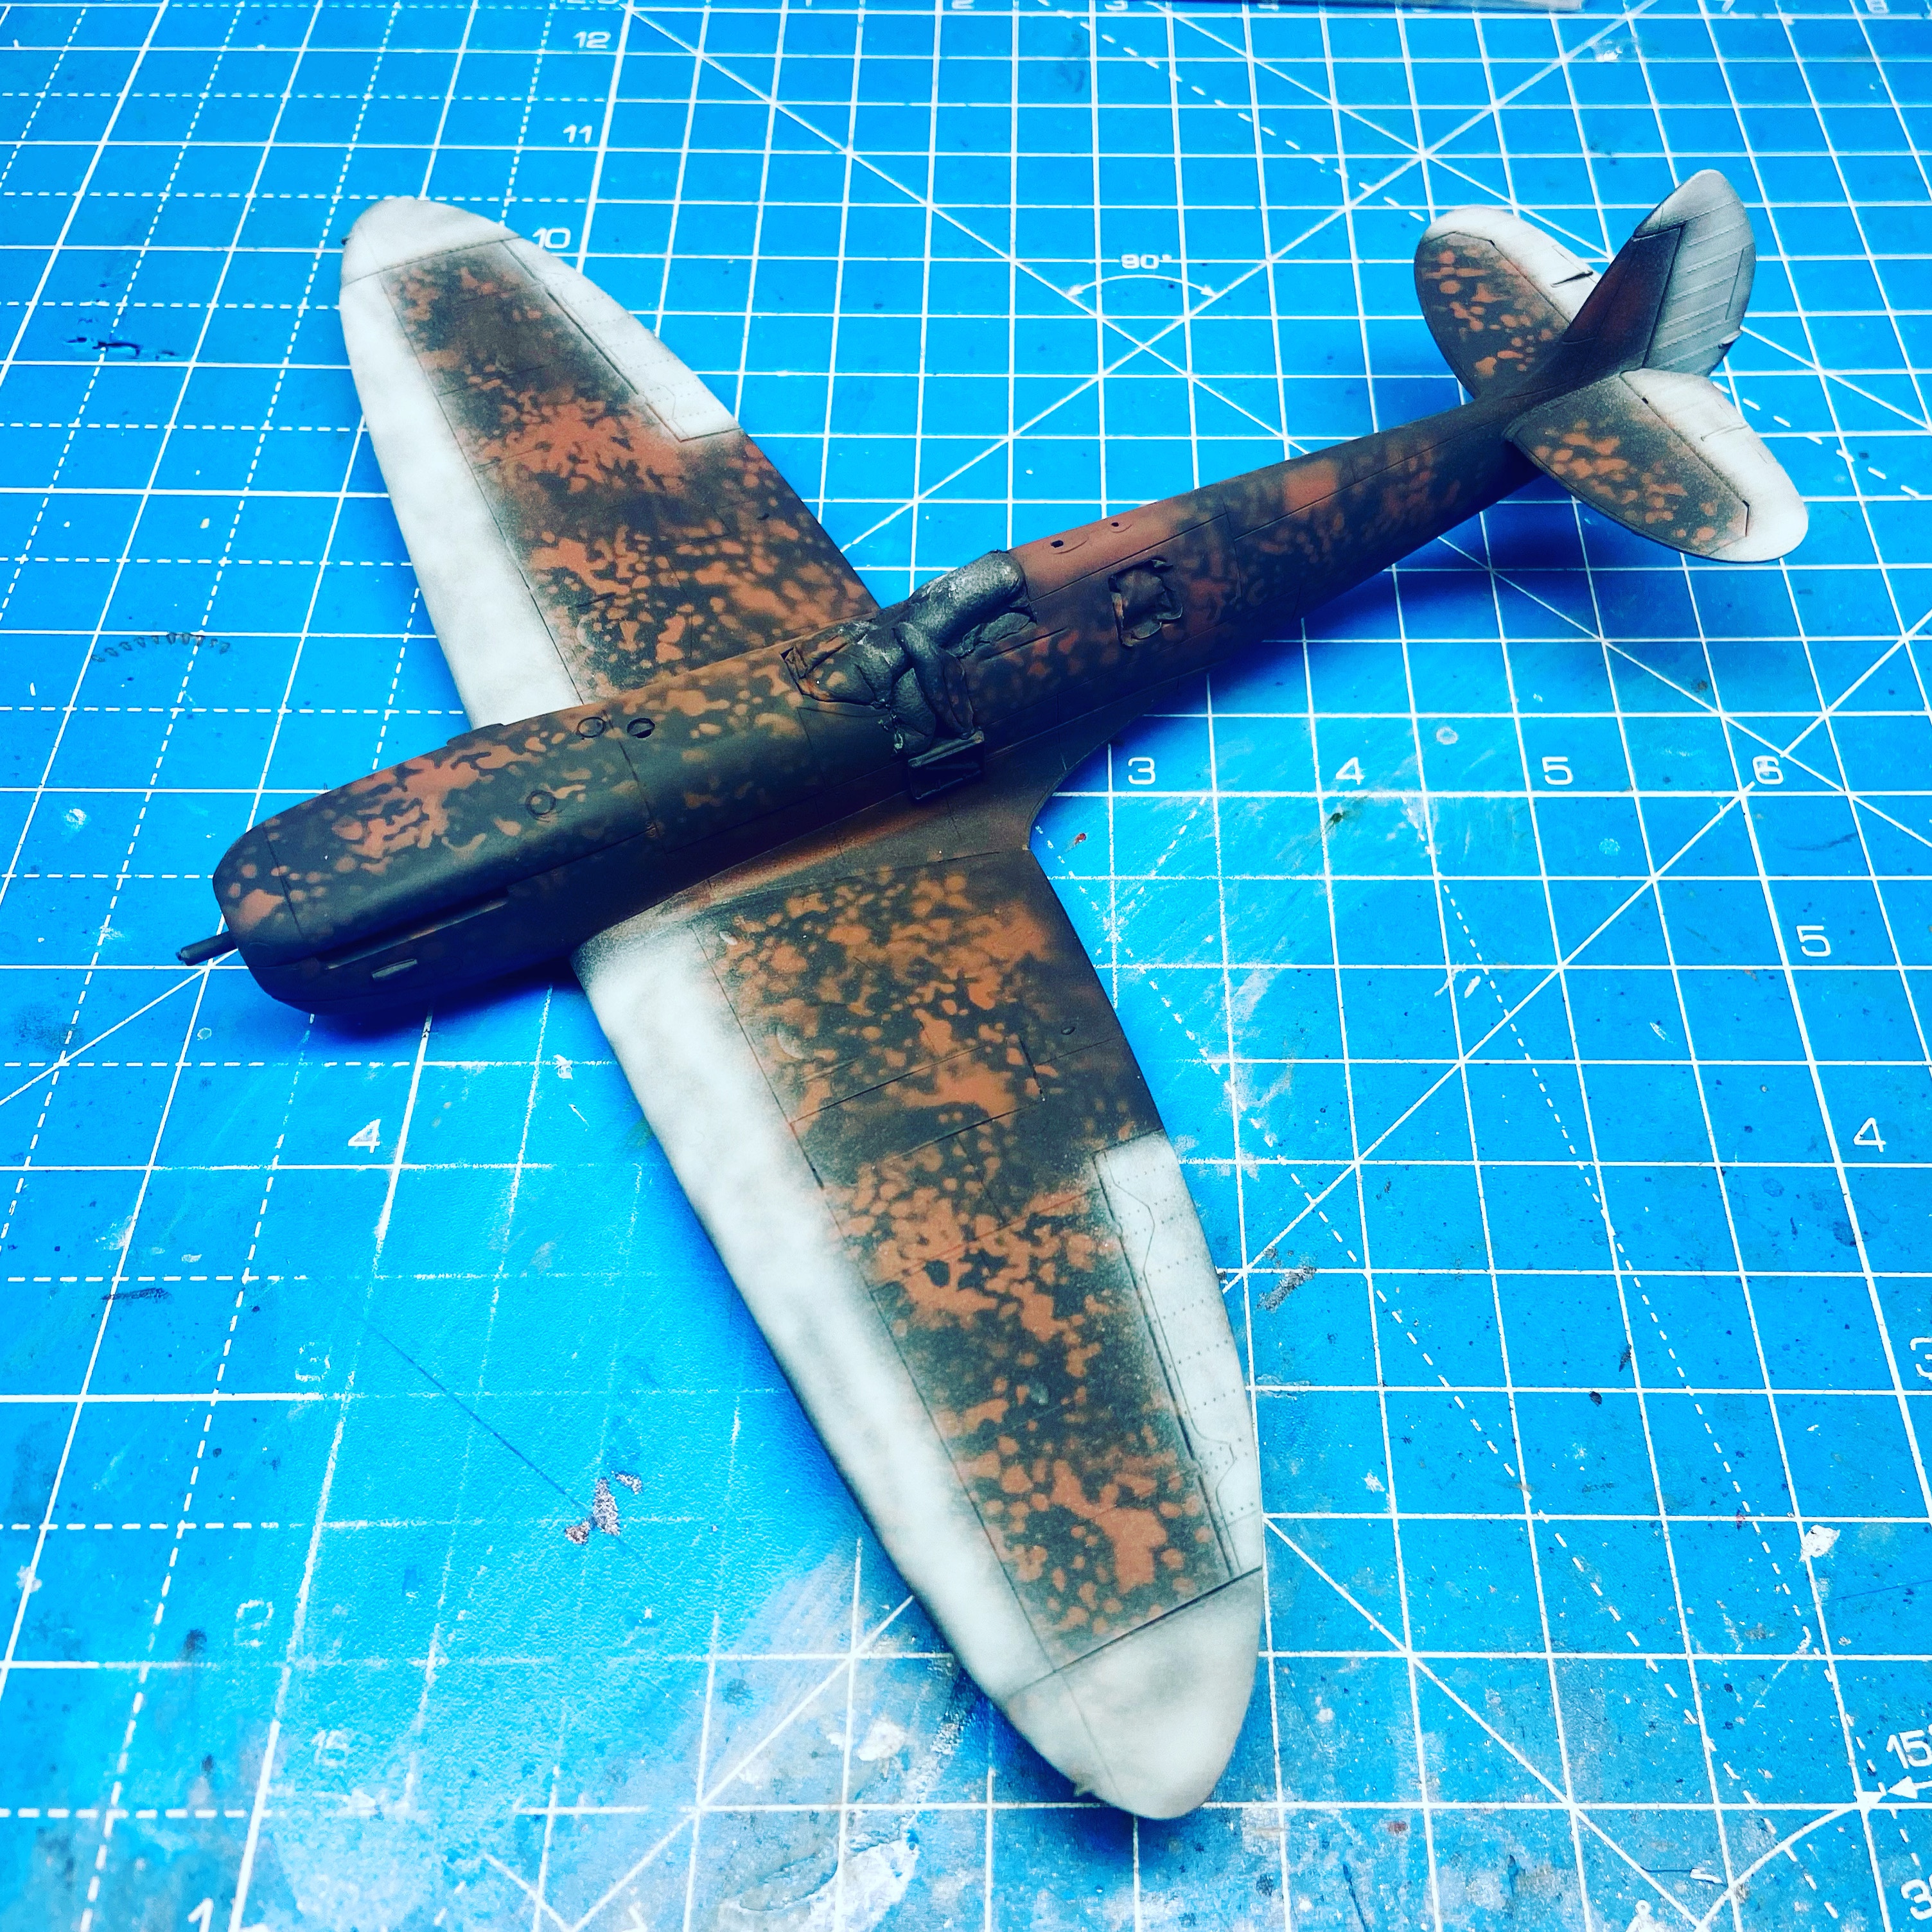
2. A marble coat is airbrushed in a contrasting colour to the camouflahe colour. You can do this by hand or with a stencil. (See my YouTube channel on how to use them)
3. Begin to pick out aircraft panels with another contrasting colour. In this case I used a very Light Blue.
4. Use a slightly darker contrasting Light Blue on some more of the panels.
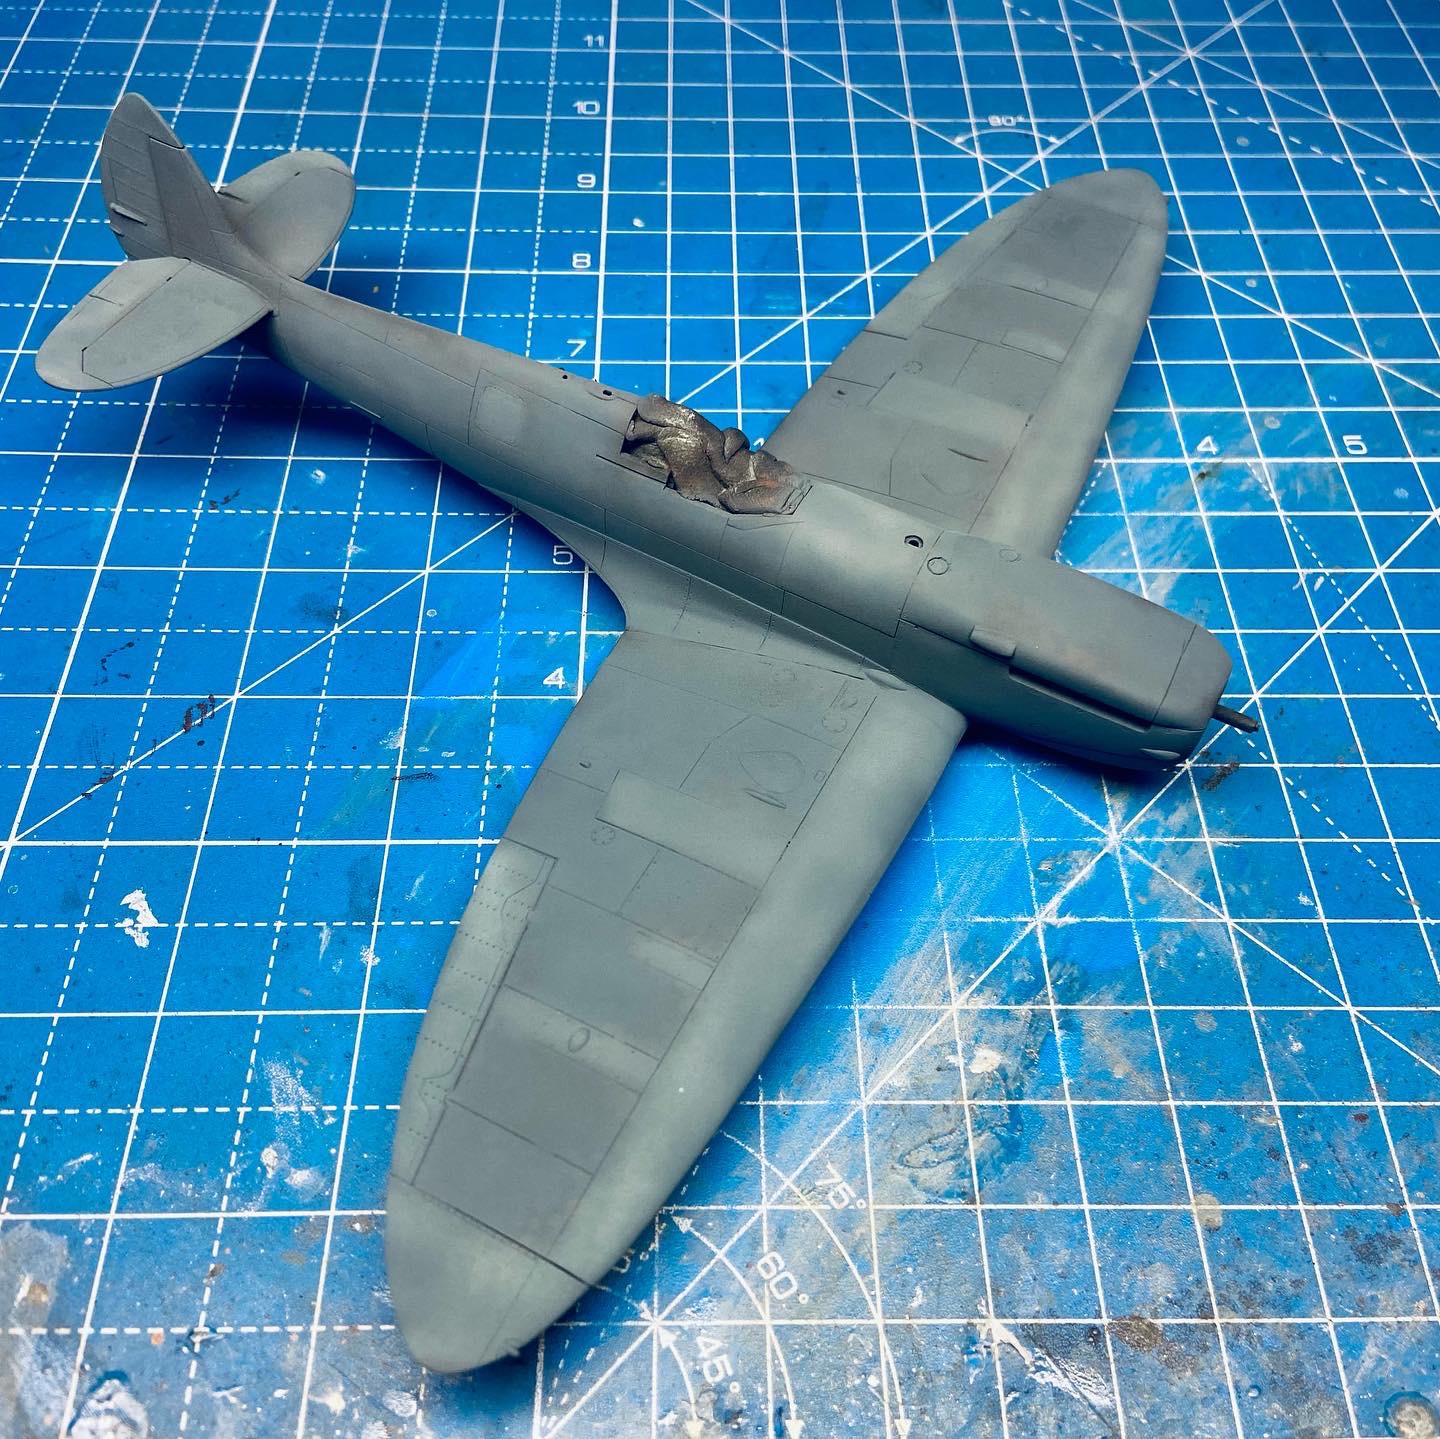
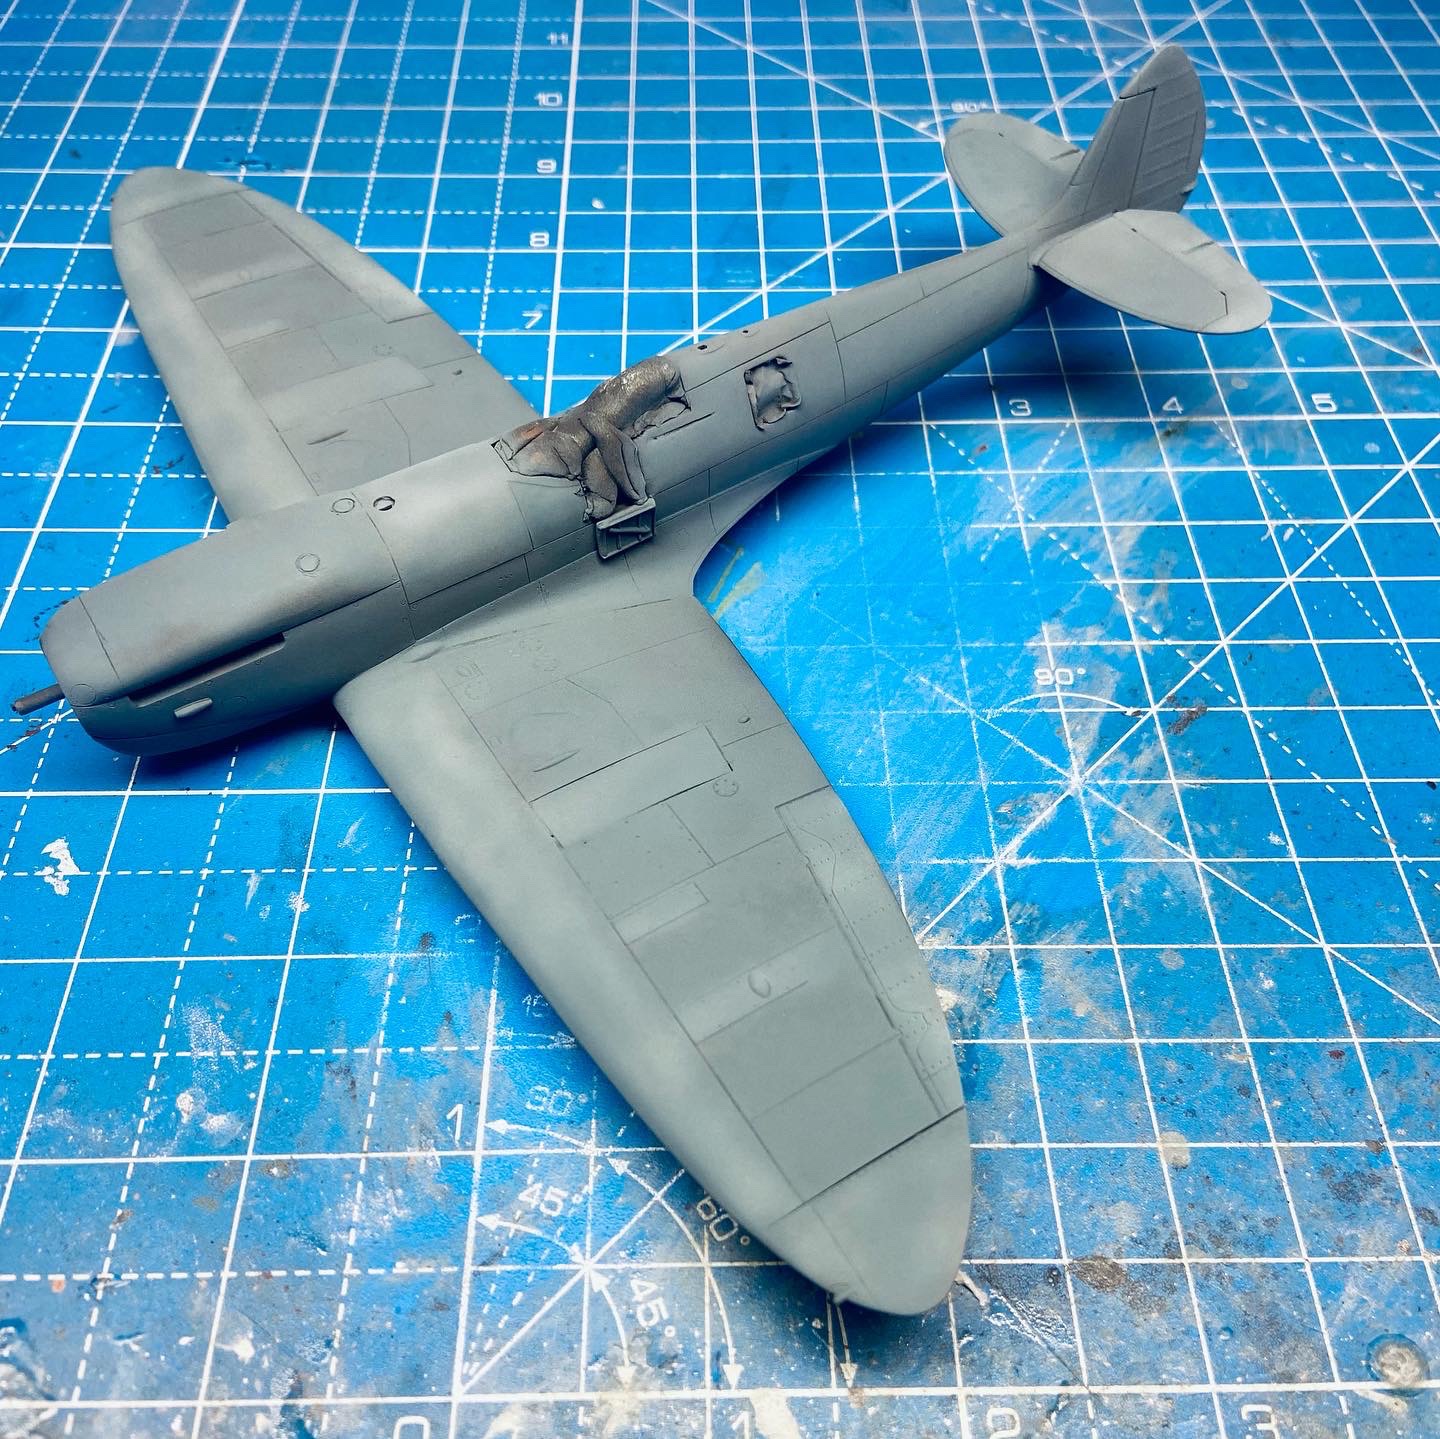
5. Now airbrush the model in its camouflage colour-In this case its RAF PRU BLUE that I mixed by ey from Tamiya acrylics. Mist on several light coats with the airbrush to build up opacity.
6. Take a thinned down, lightened shade of the PRU BLUE and mist it over the model.
7. Below we can see the Flat Red flash and Royal Blue Tamiya acrylics have been airbrushed onto the model.

There, thats it! Painting done! Do not forget that the weathering process will tone down this bright looking paintwork when the model is completed!
WEATHERING!
I wanted my model to have a war weary look to it and I was inspired by Daniel Zamarbide’s weathering on his build so I took my weathering cues from him!
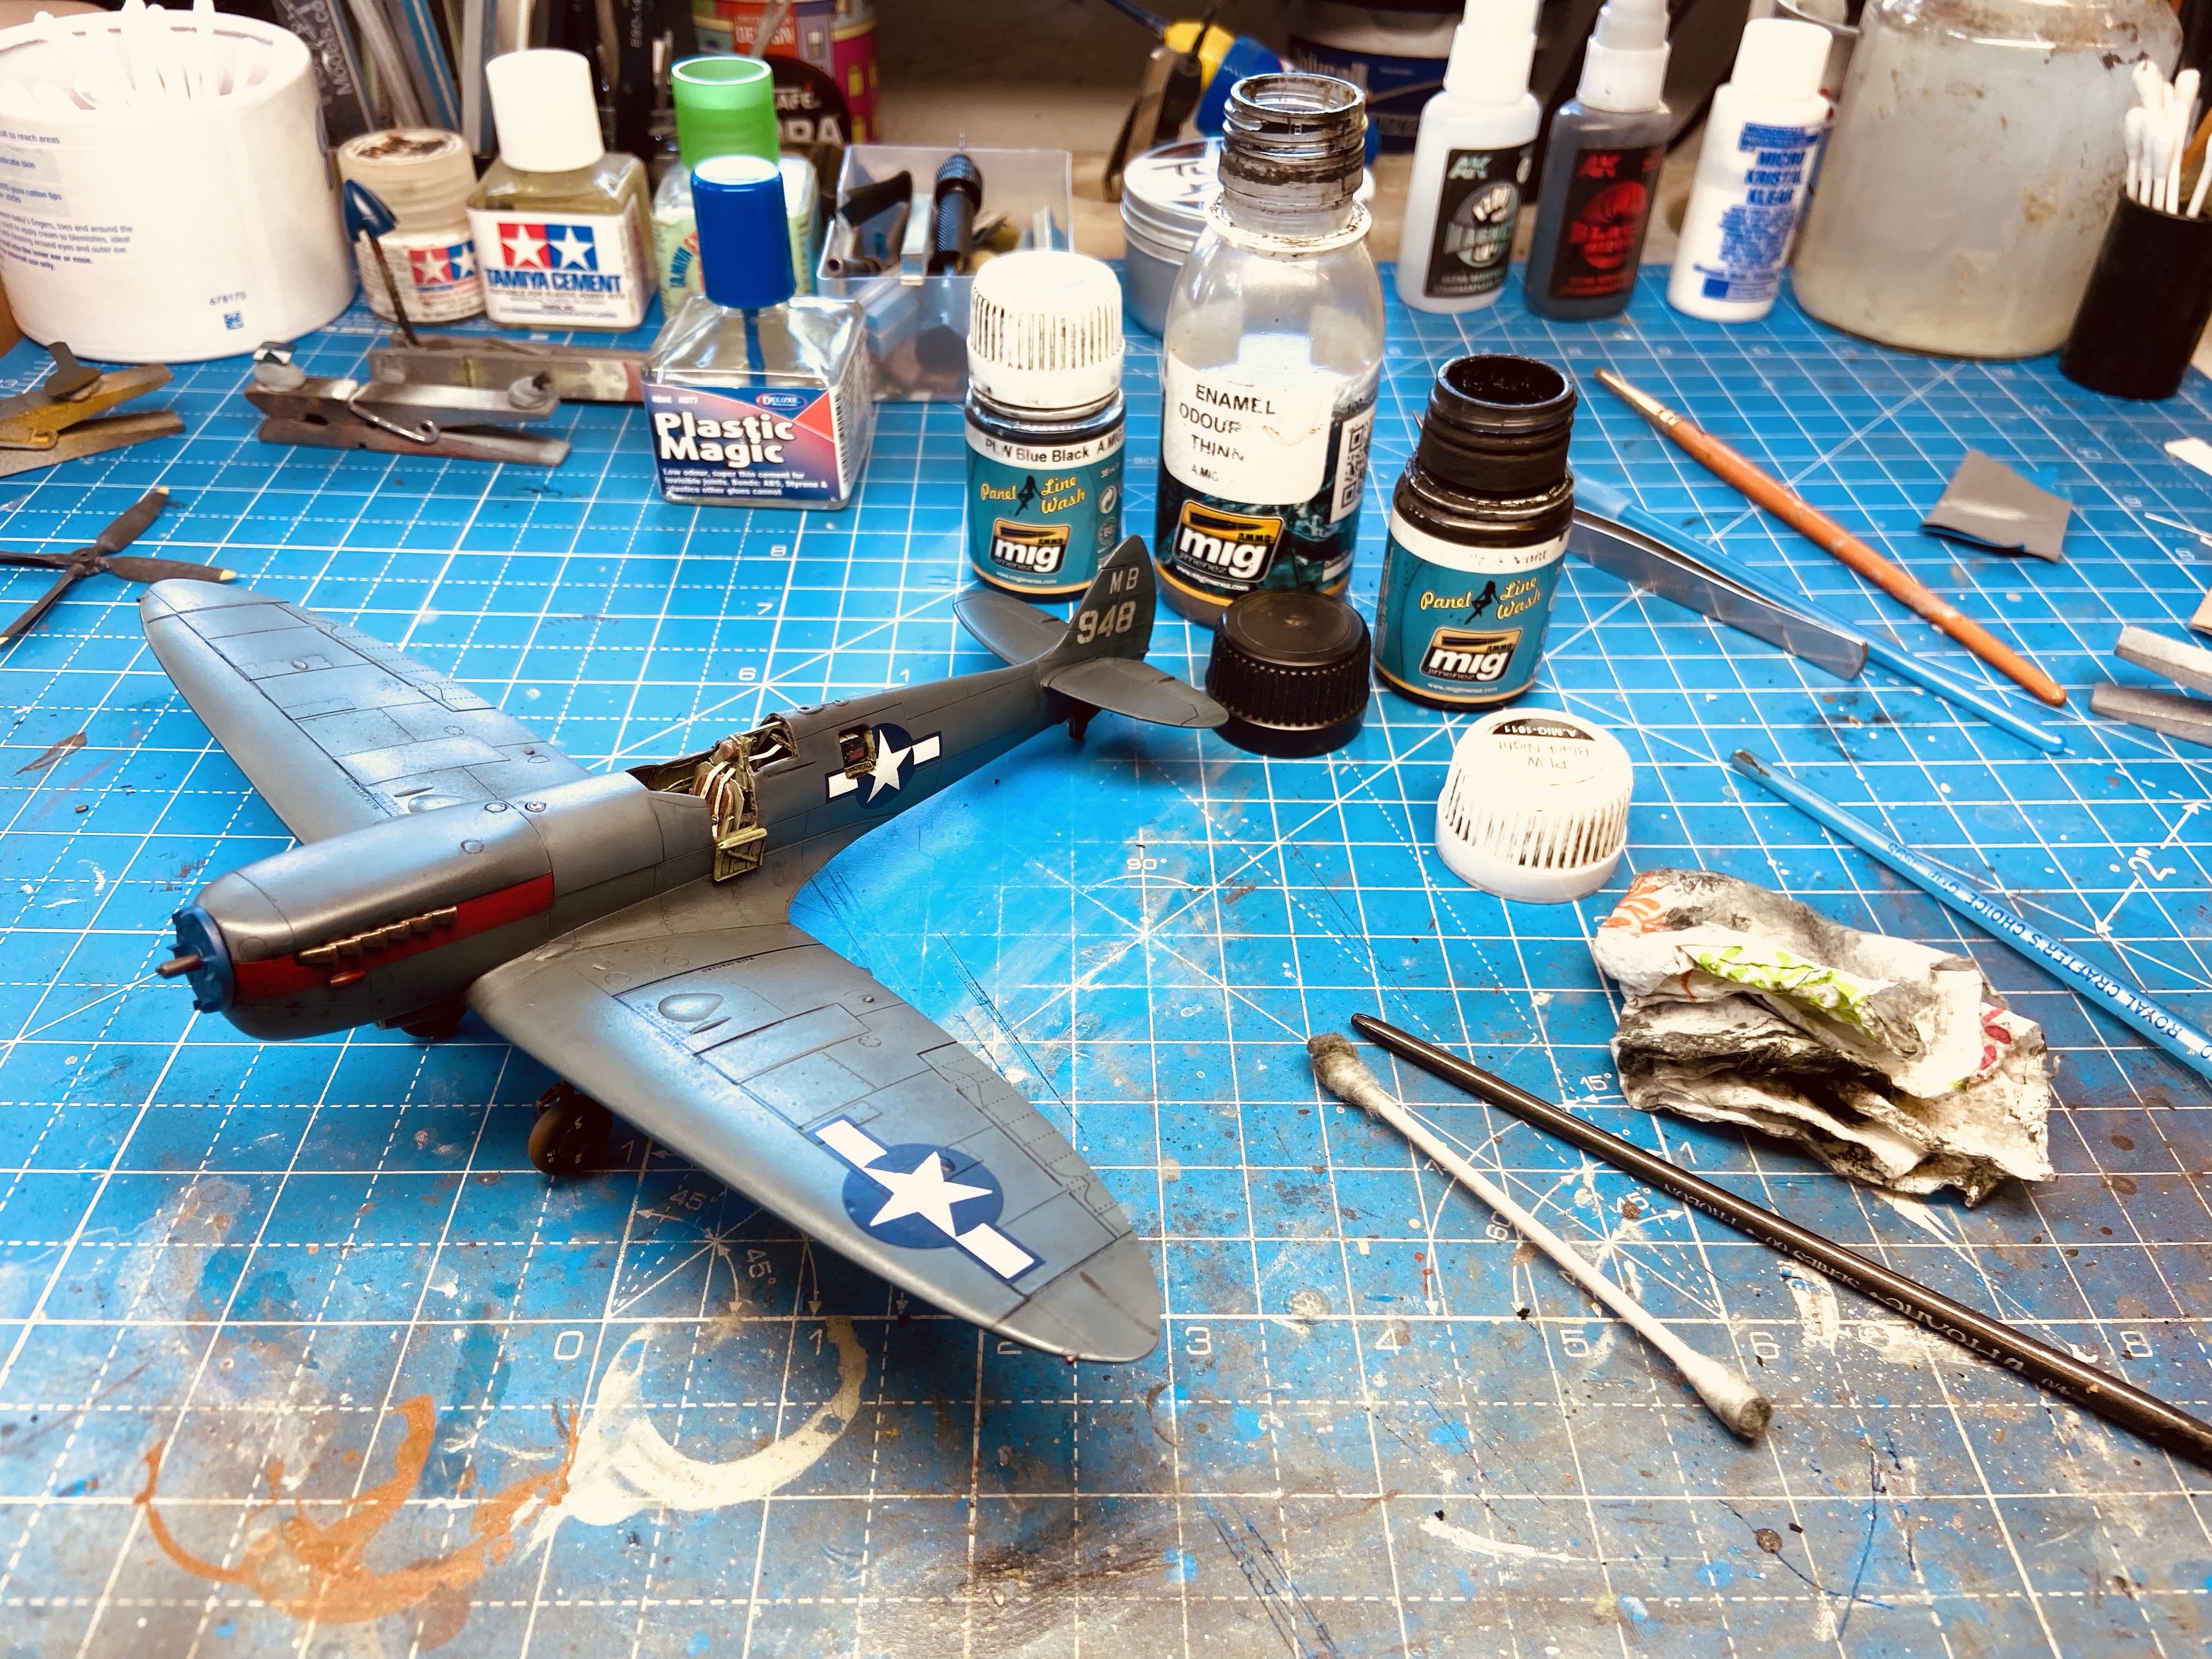


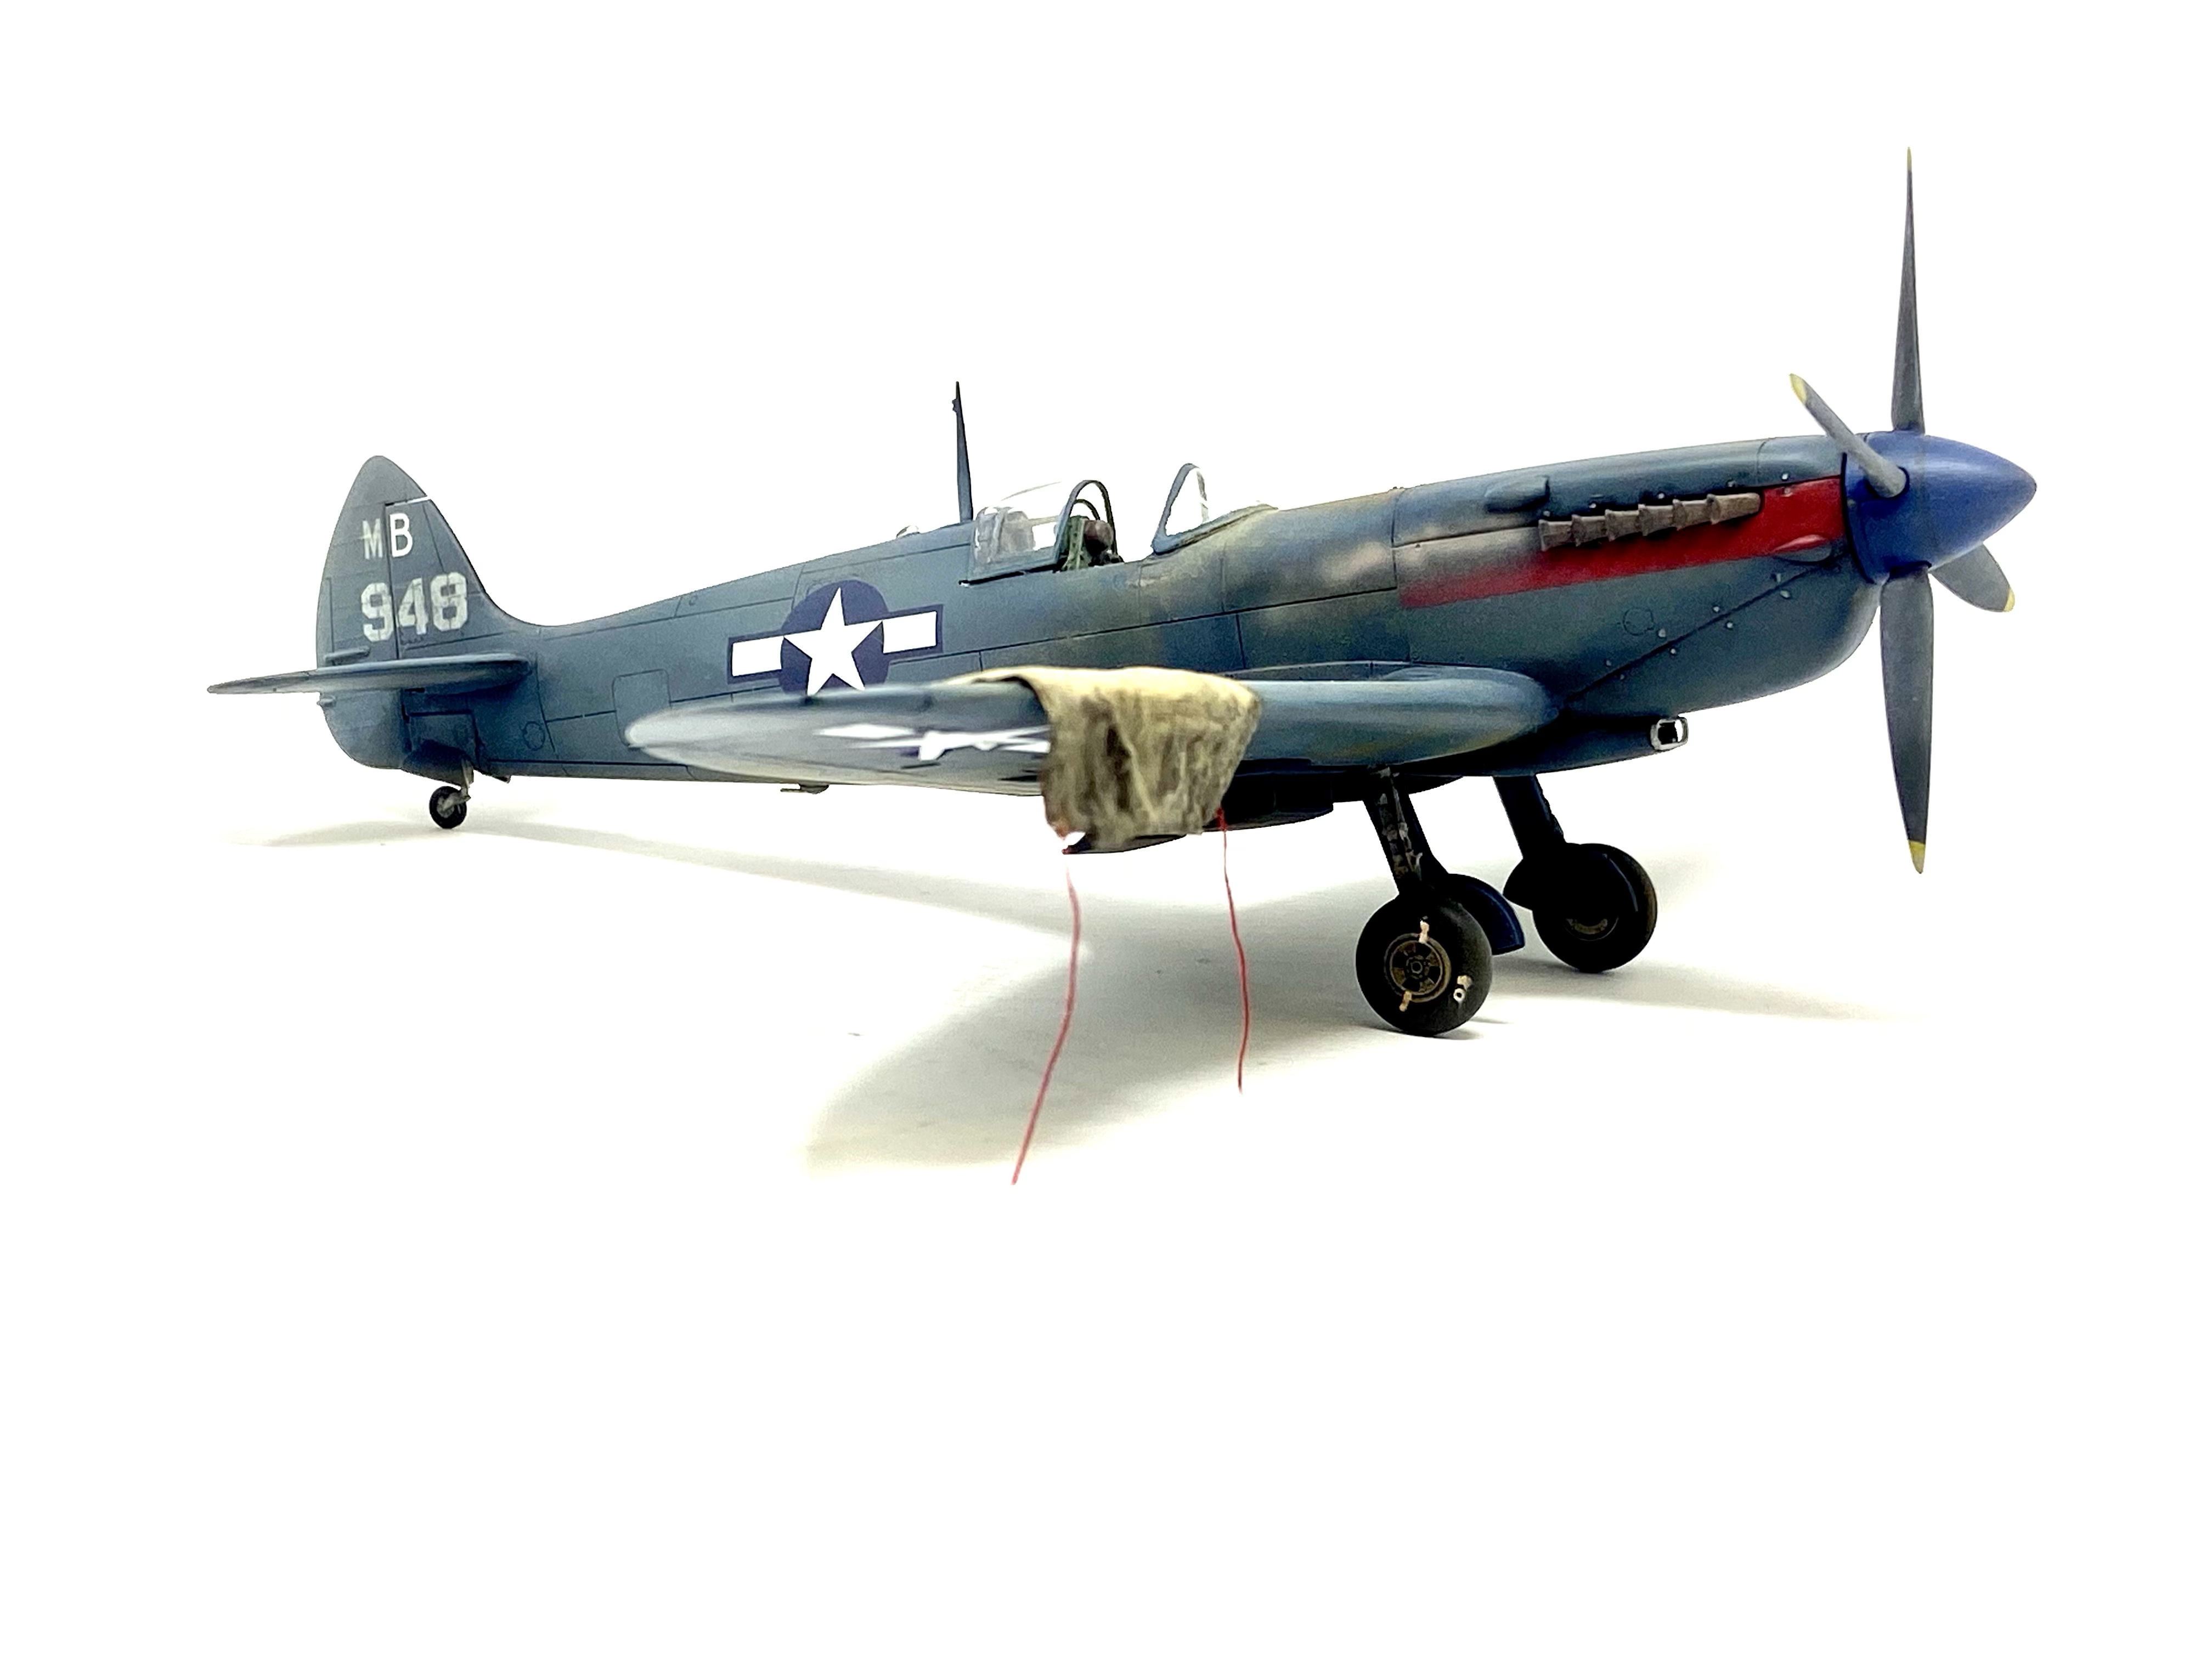
I started off with a Panel Line Wash from Mig Ammo, for this scheme I choose a black wash to stand out against the PRU Blue. I then added a mix of dark and light brown oil paint renders to simulate fuel and oil stains over the airframe. The exhaust staining was airbrushed on with Tamiya Buff acrylic through my Procon detailing airbrush.
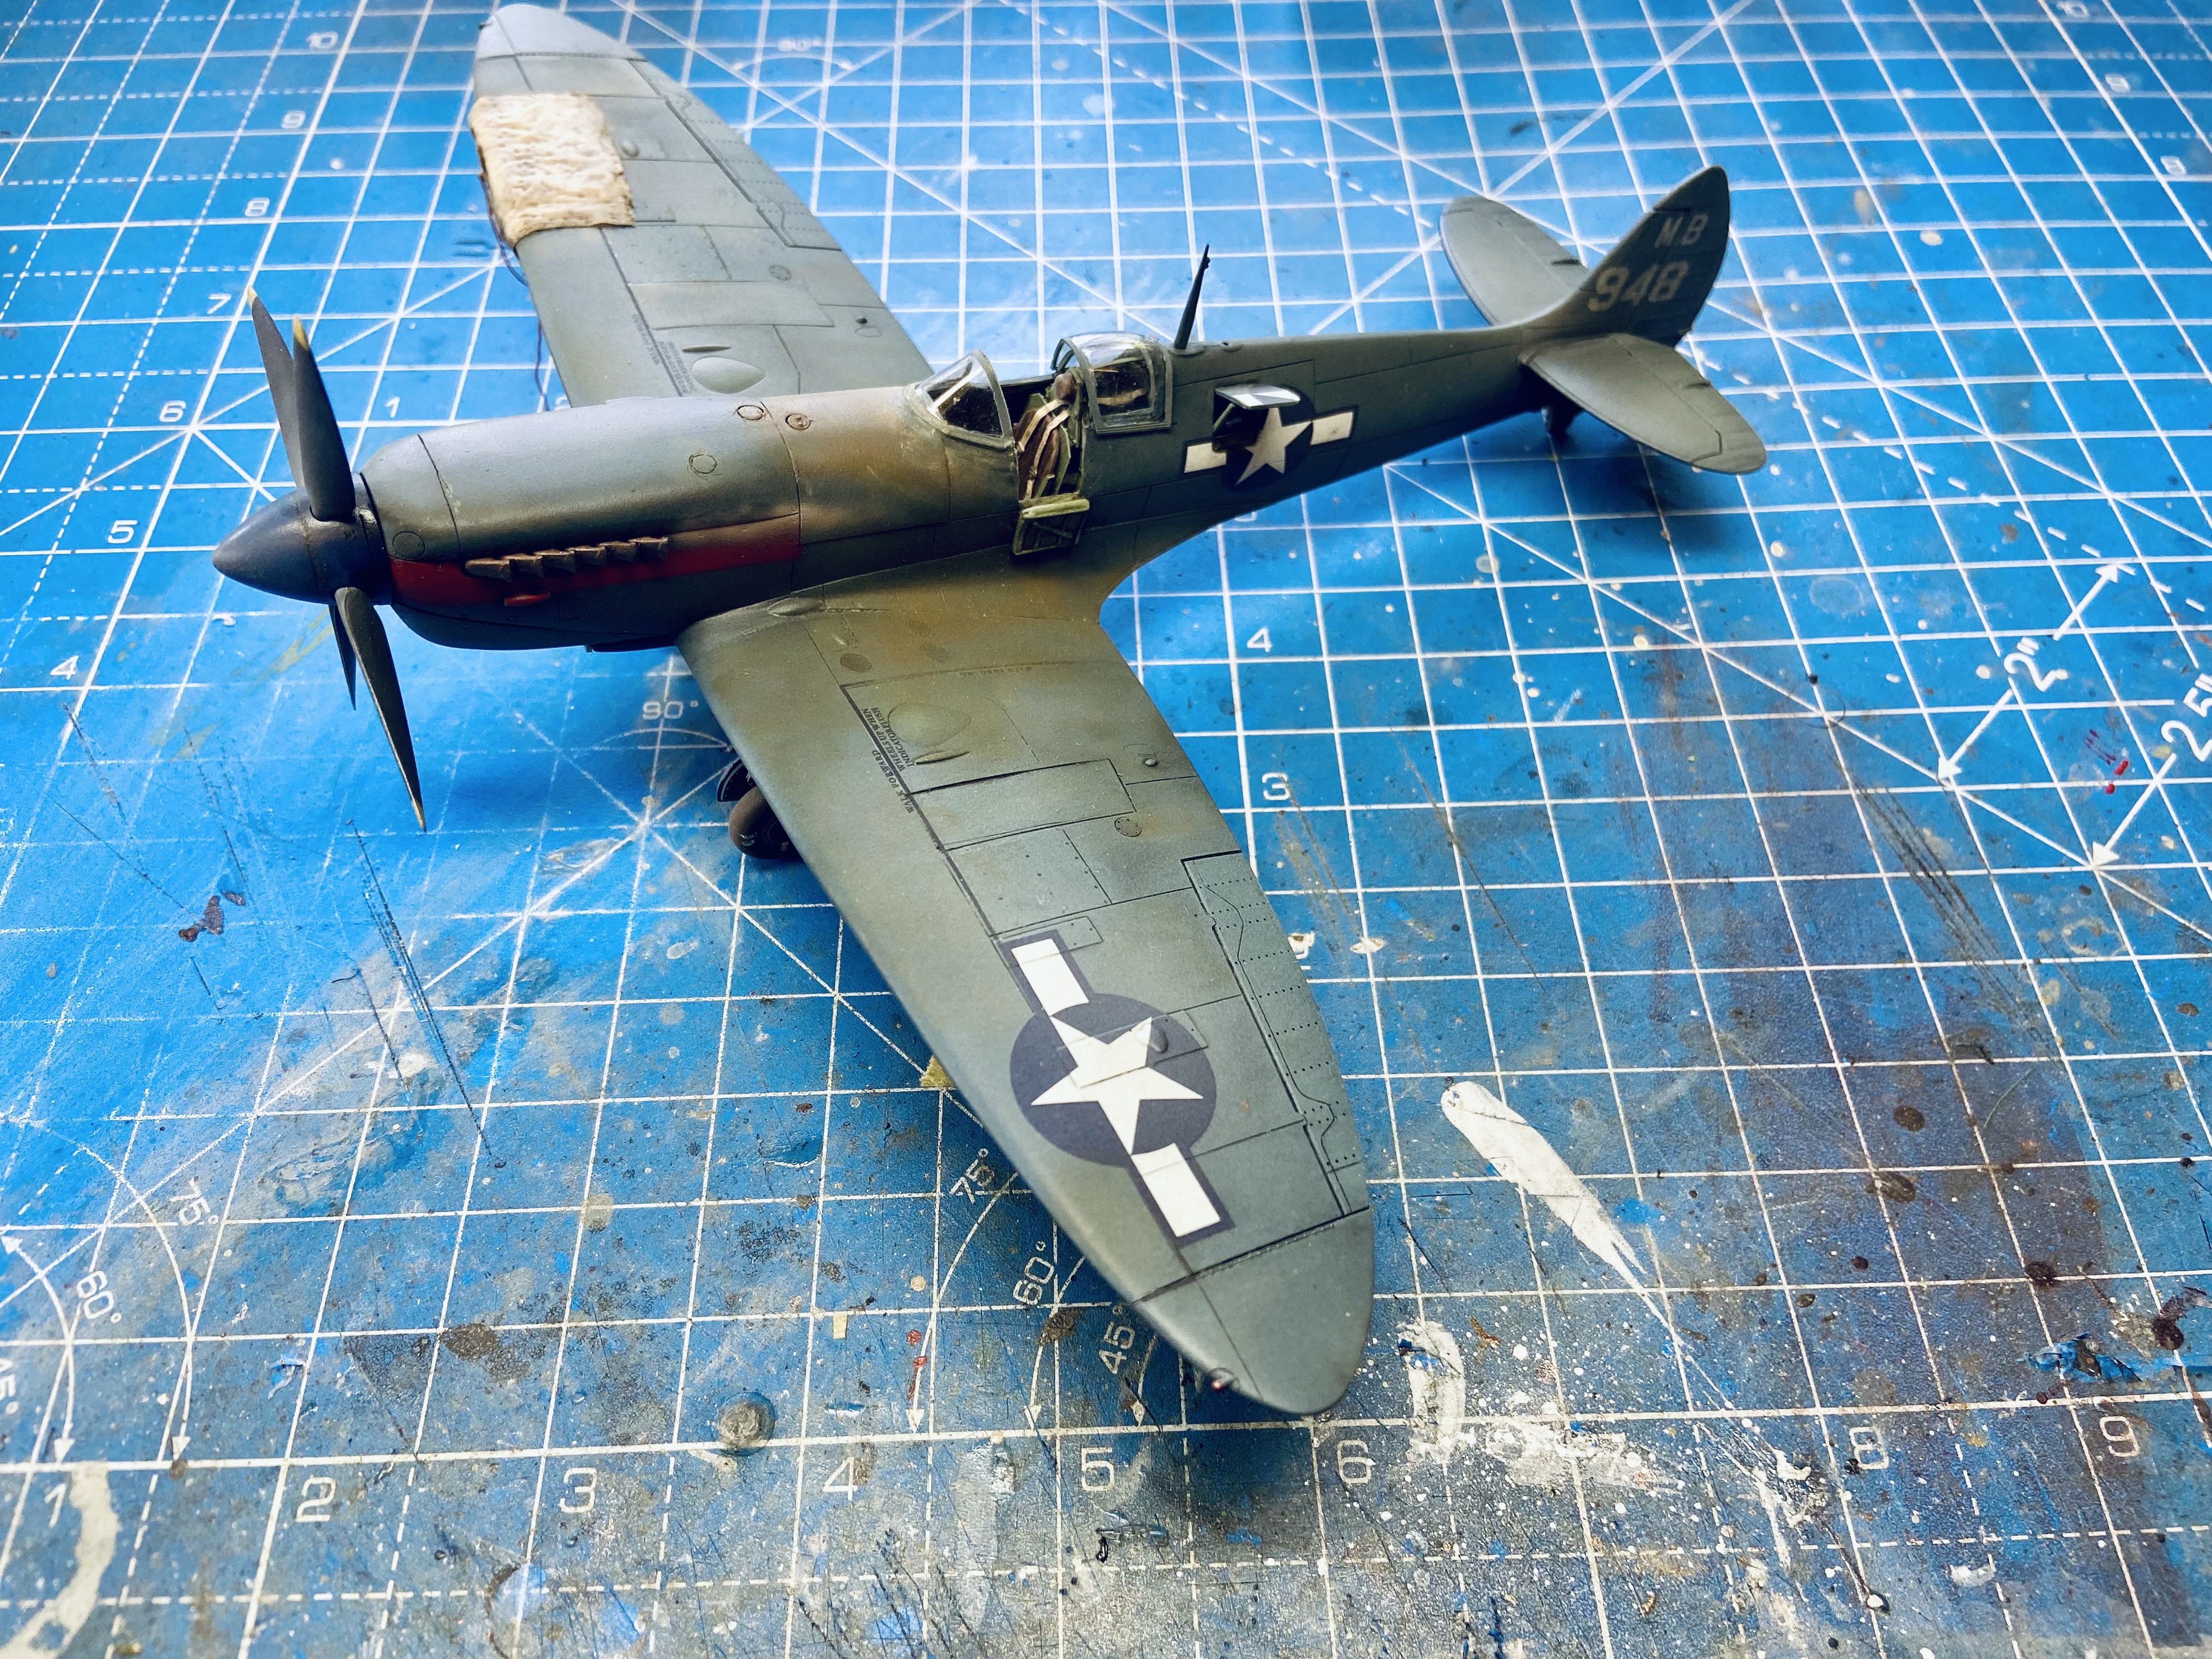
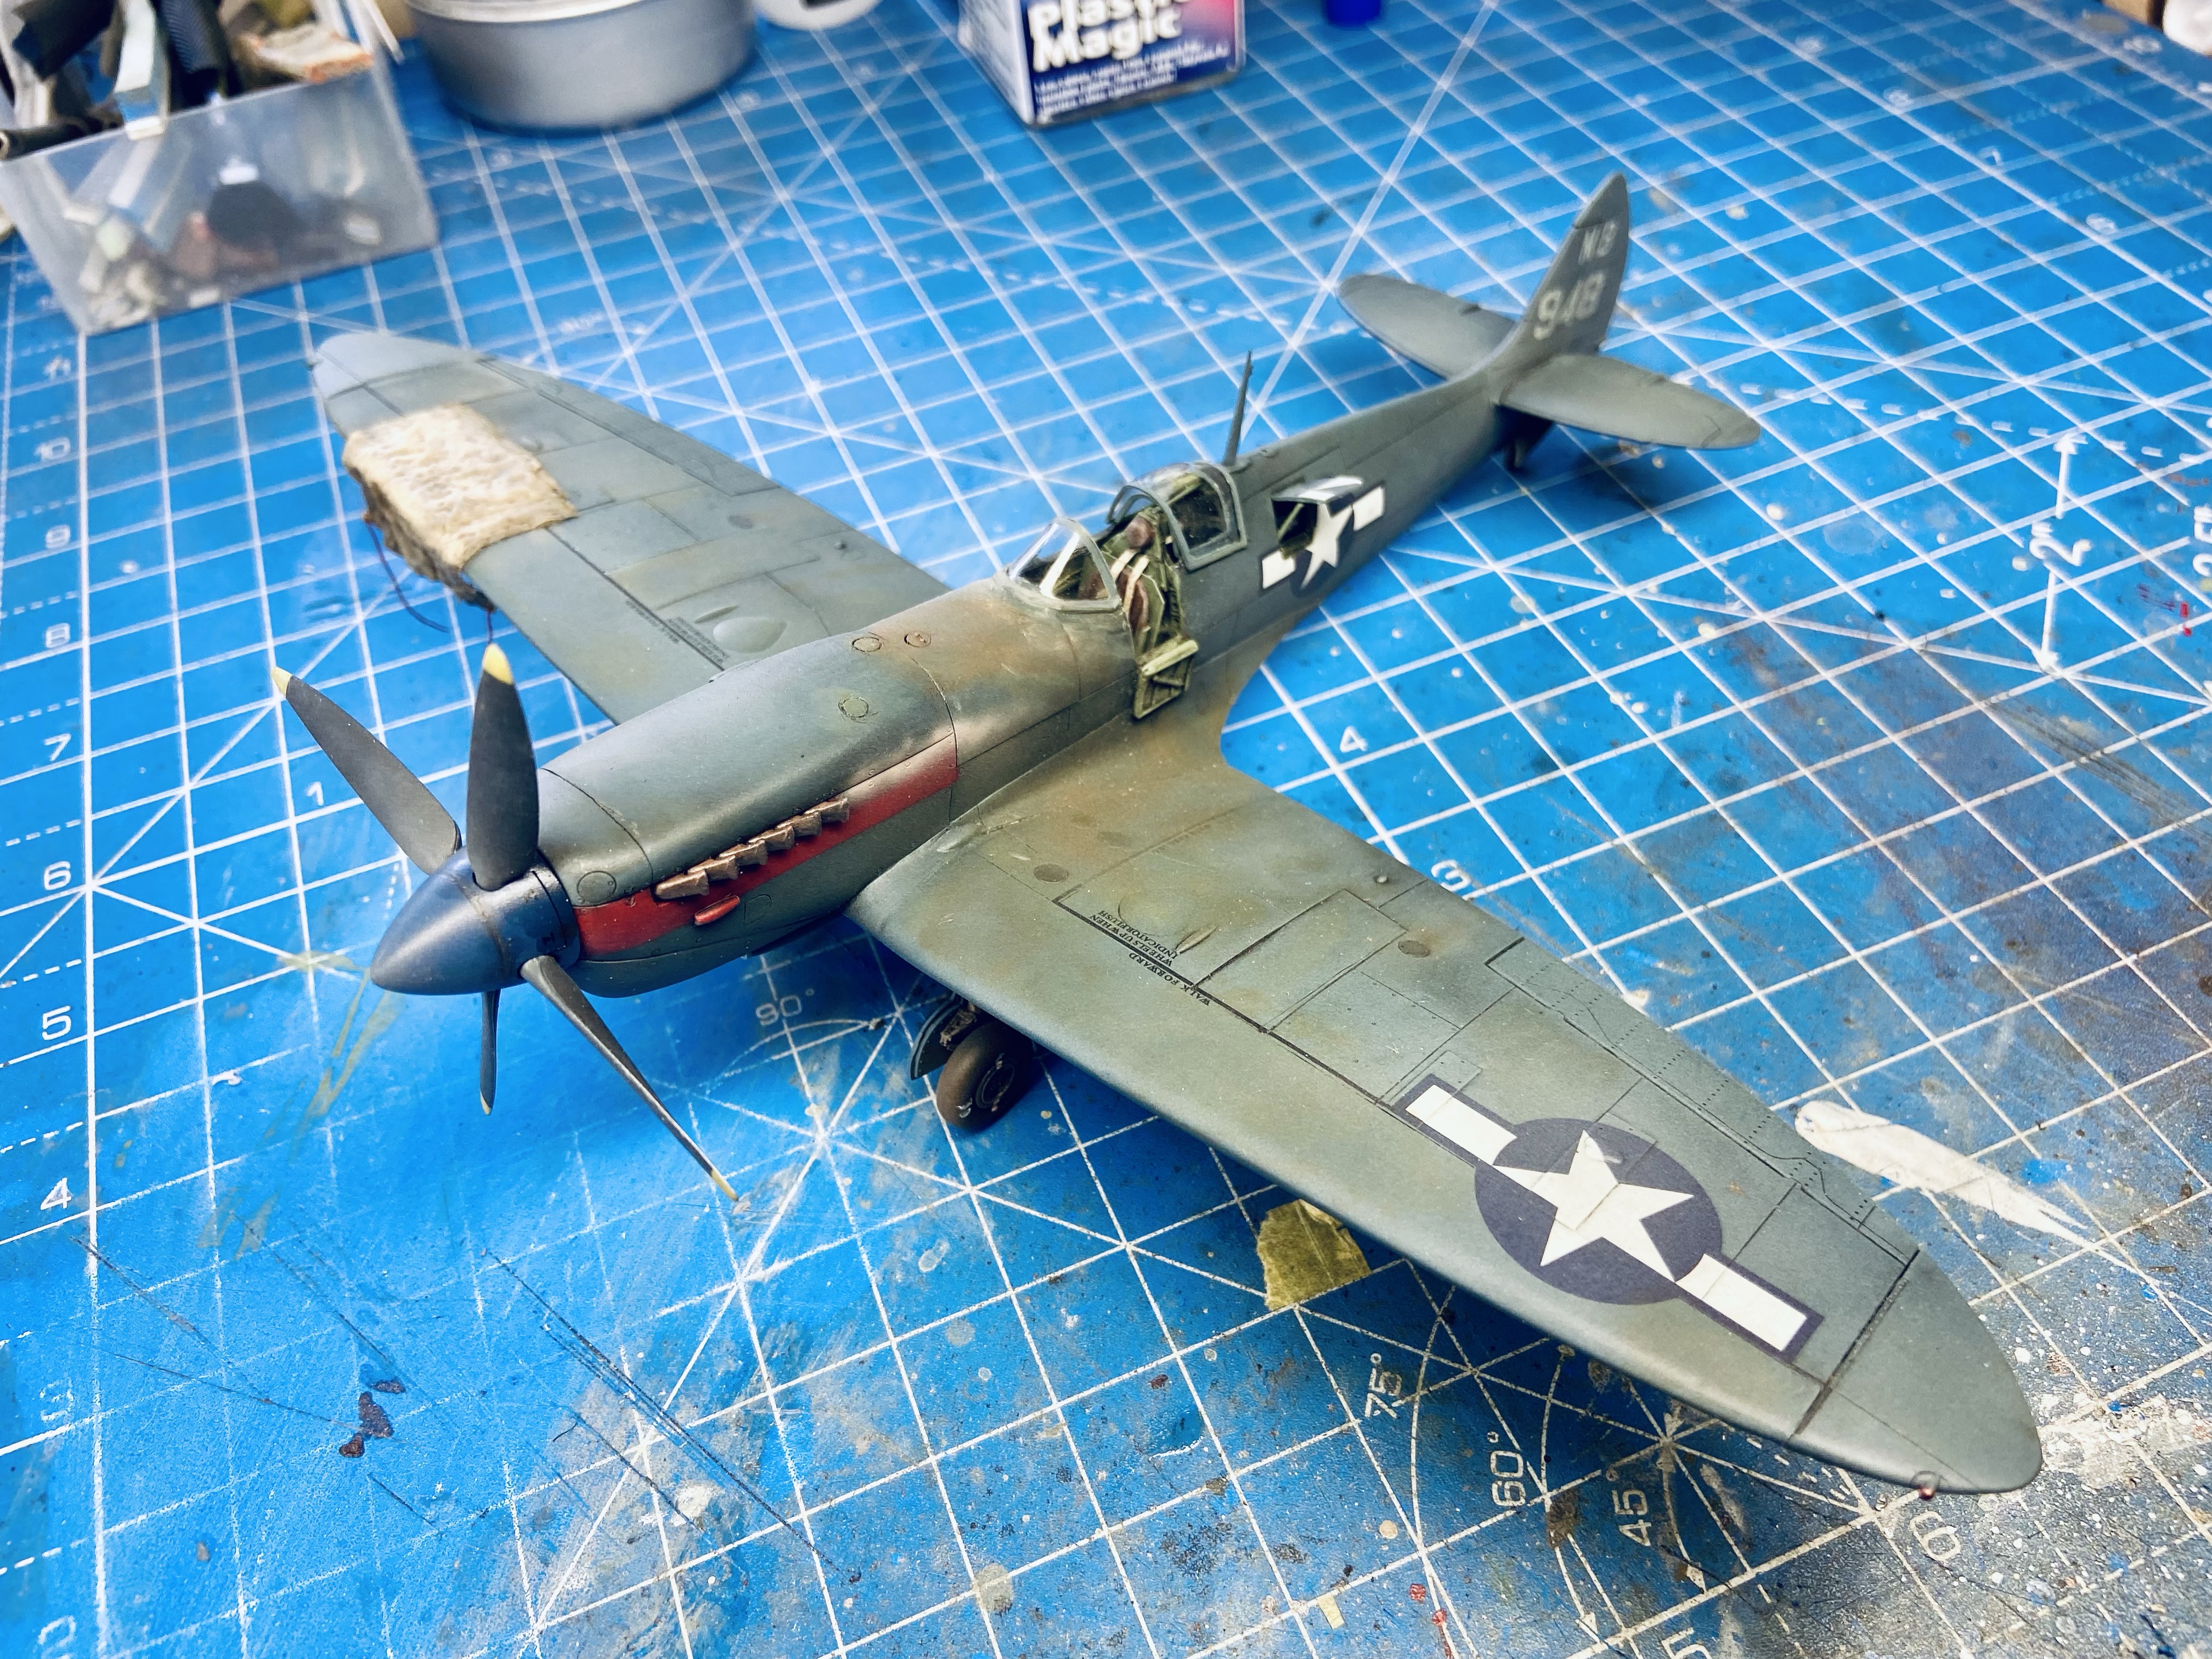
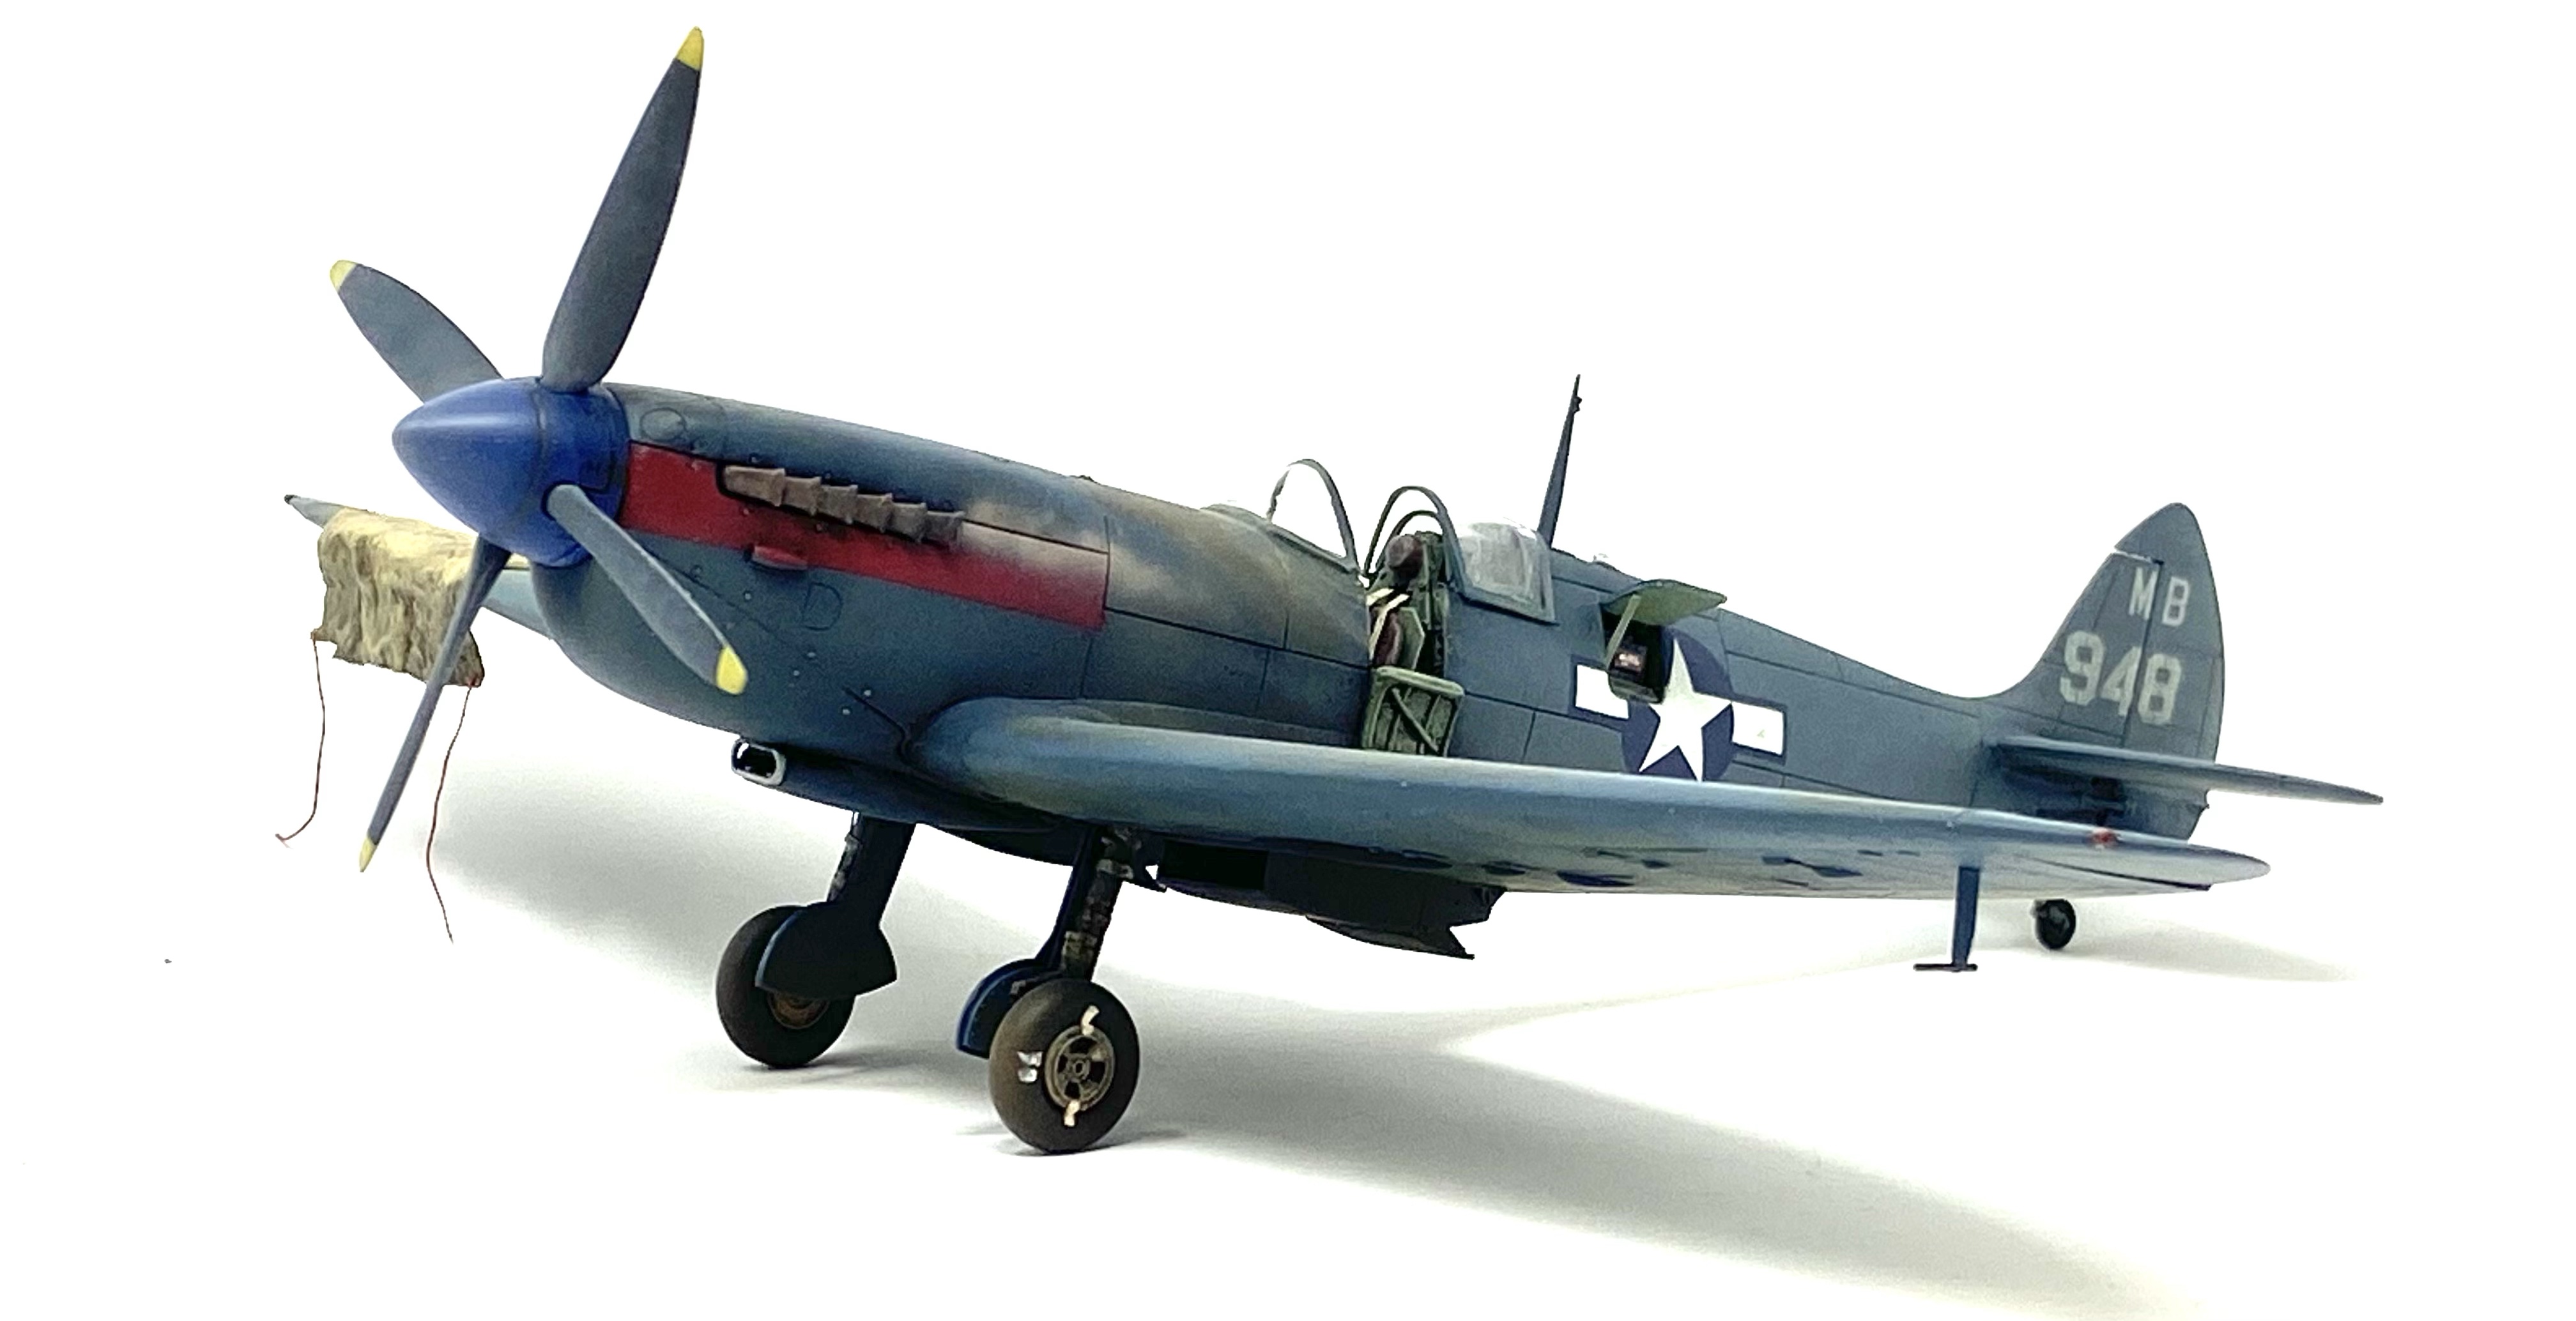
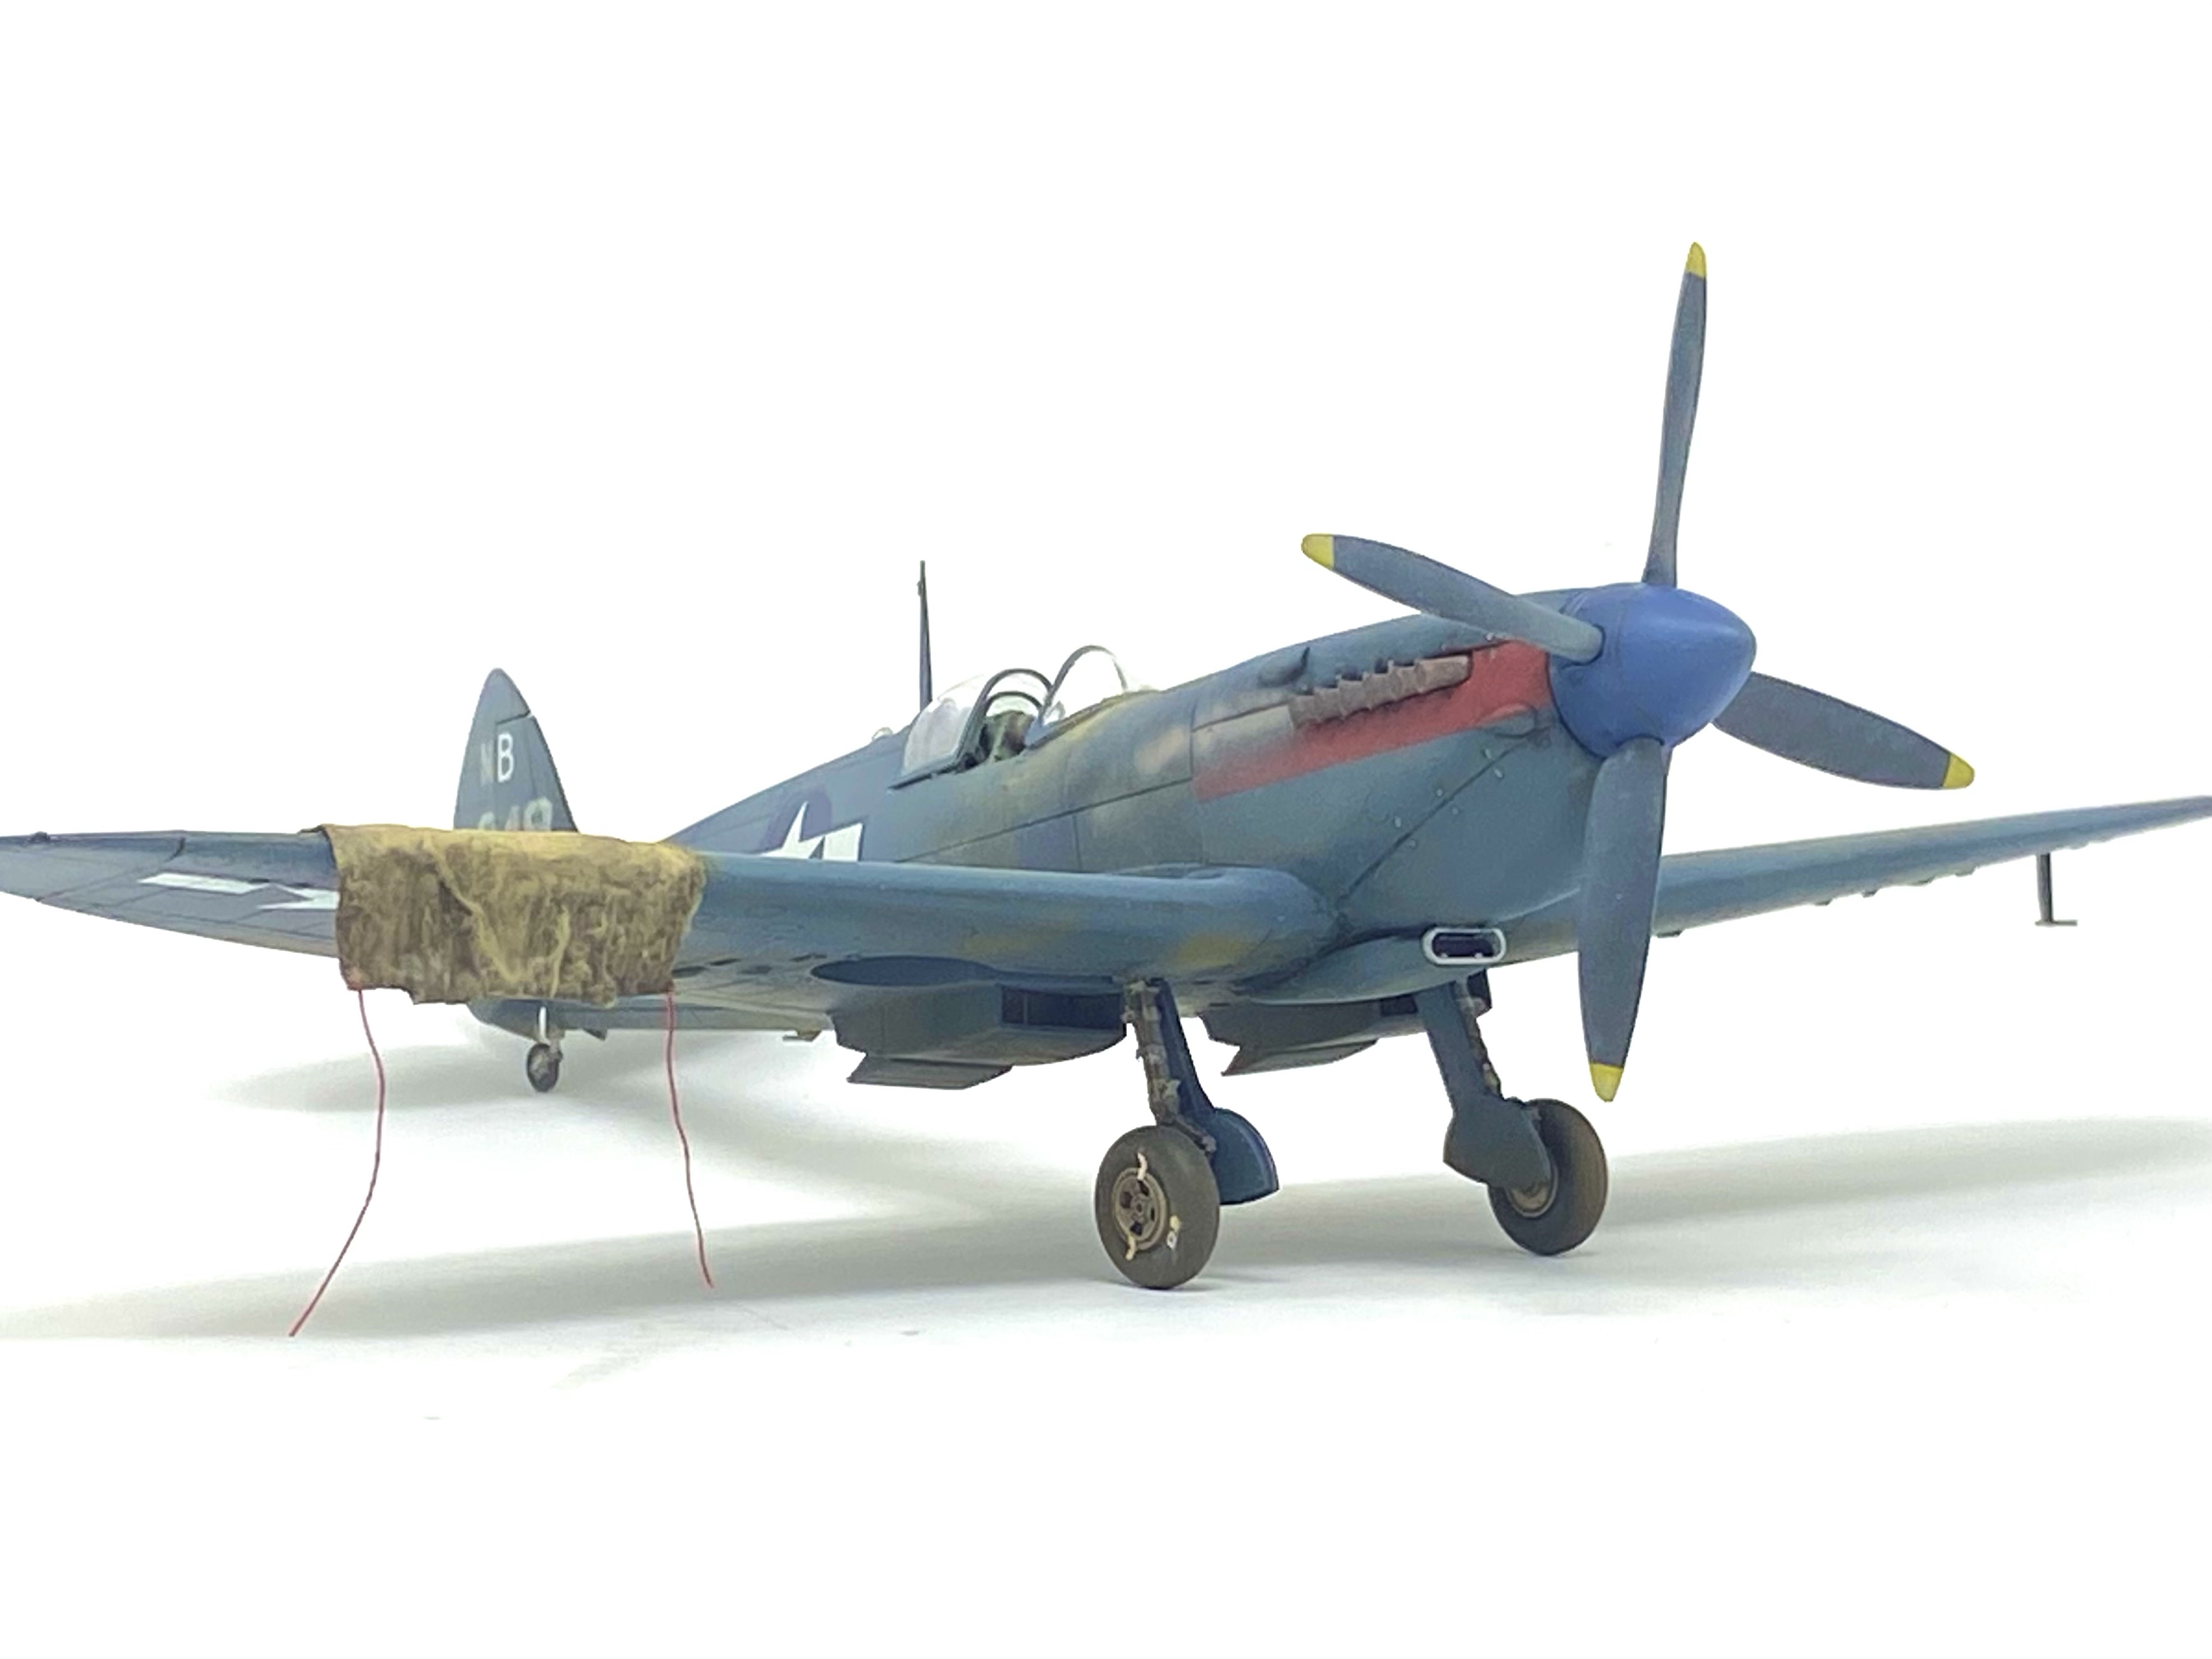
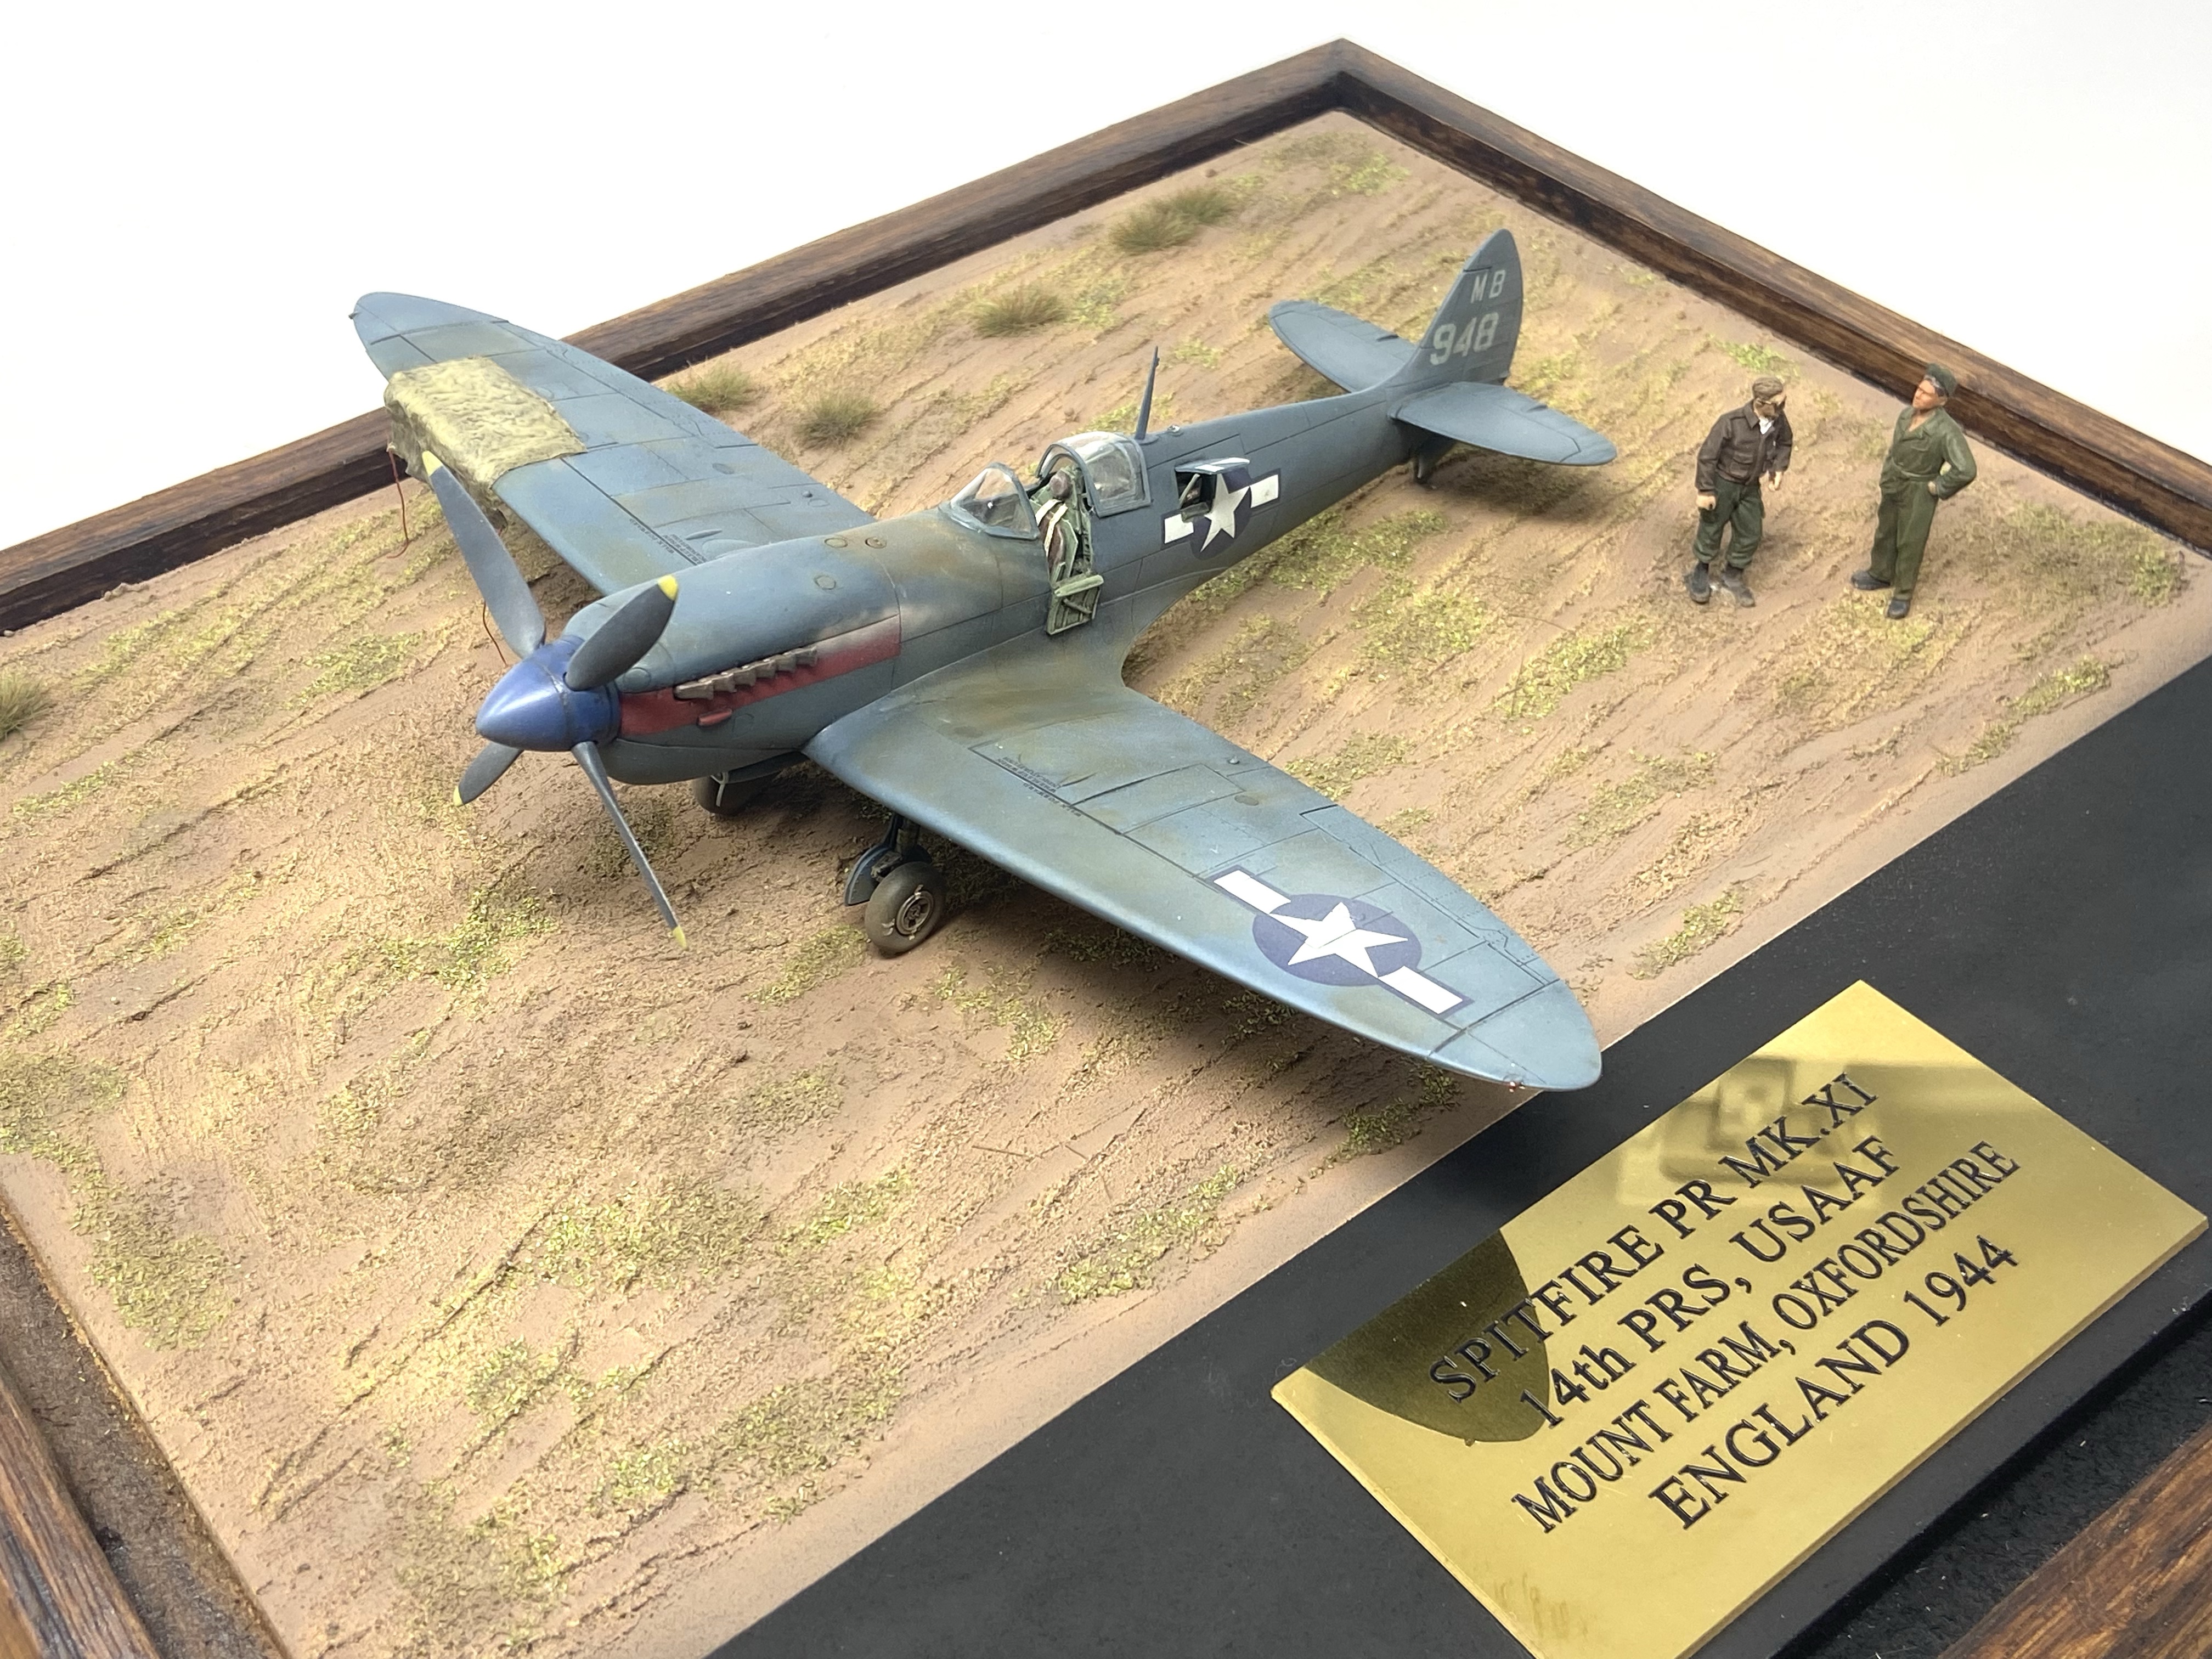
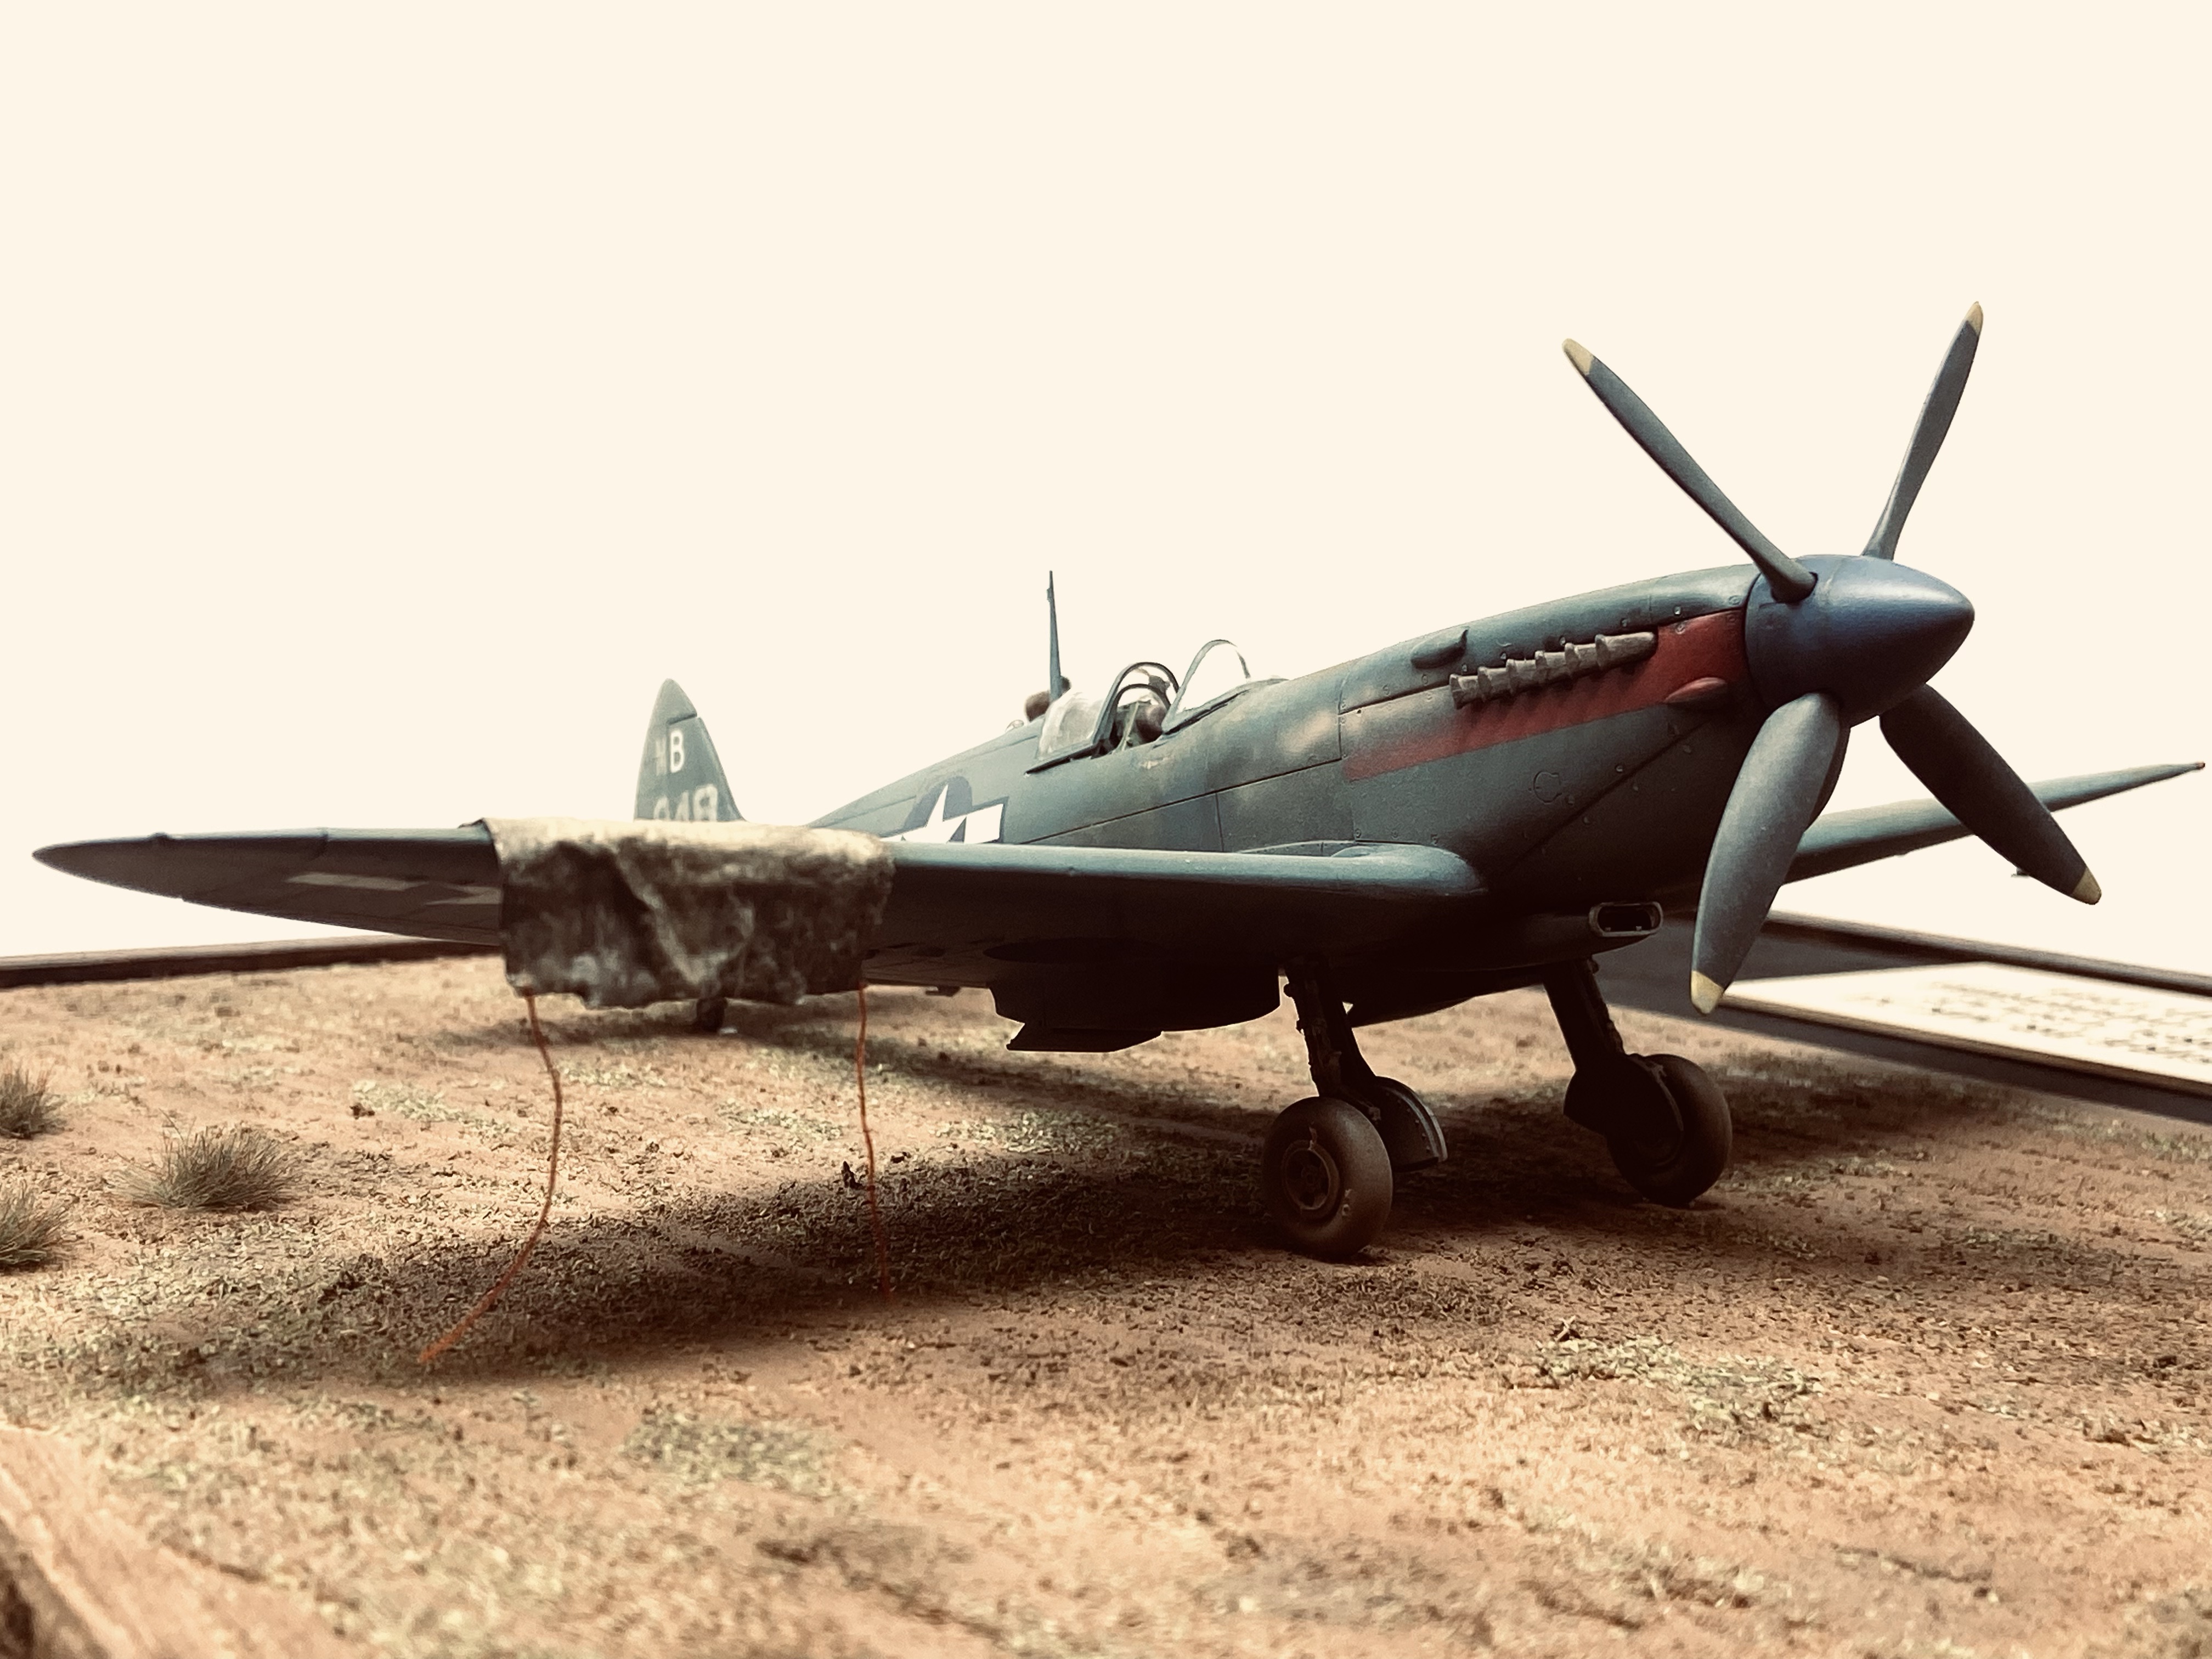
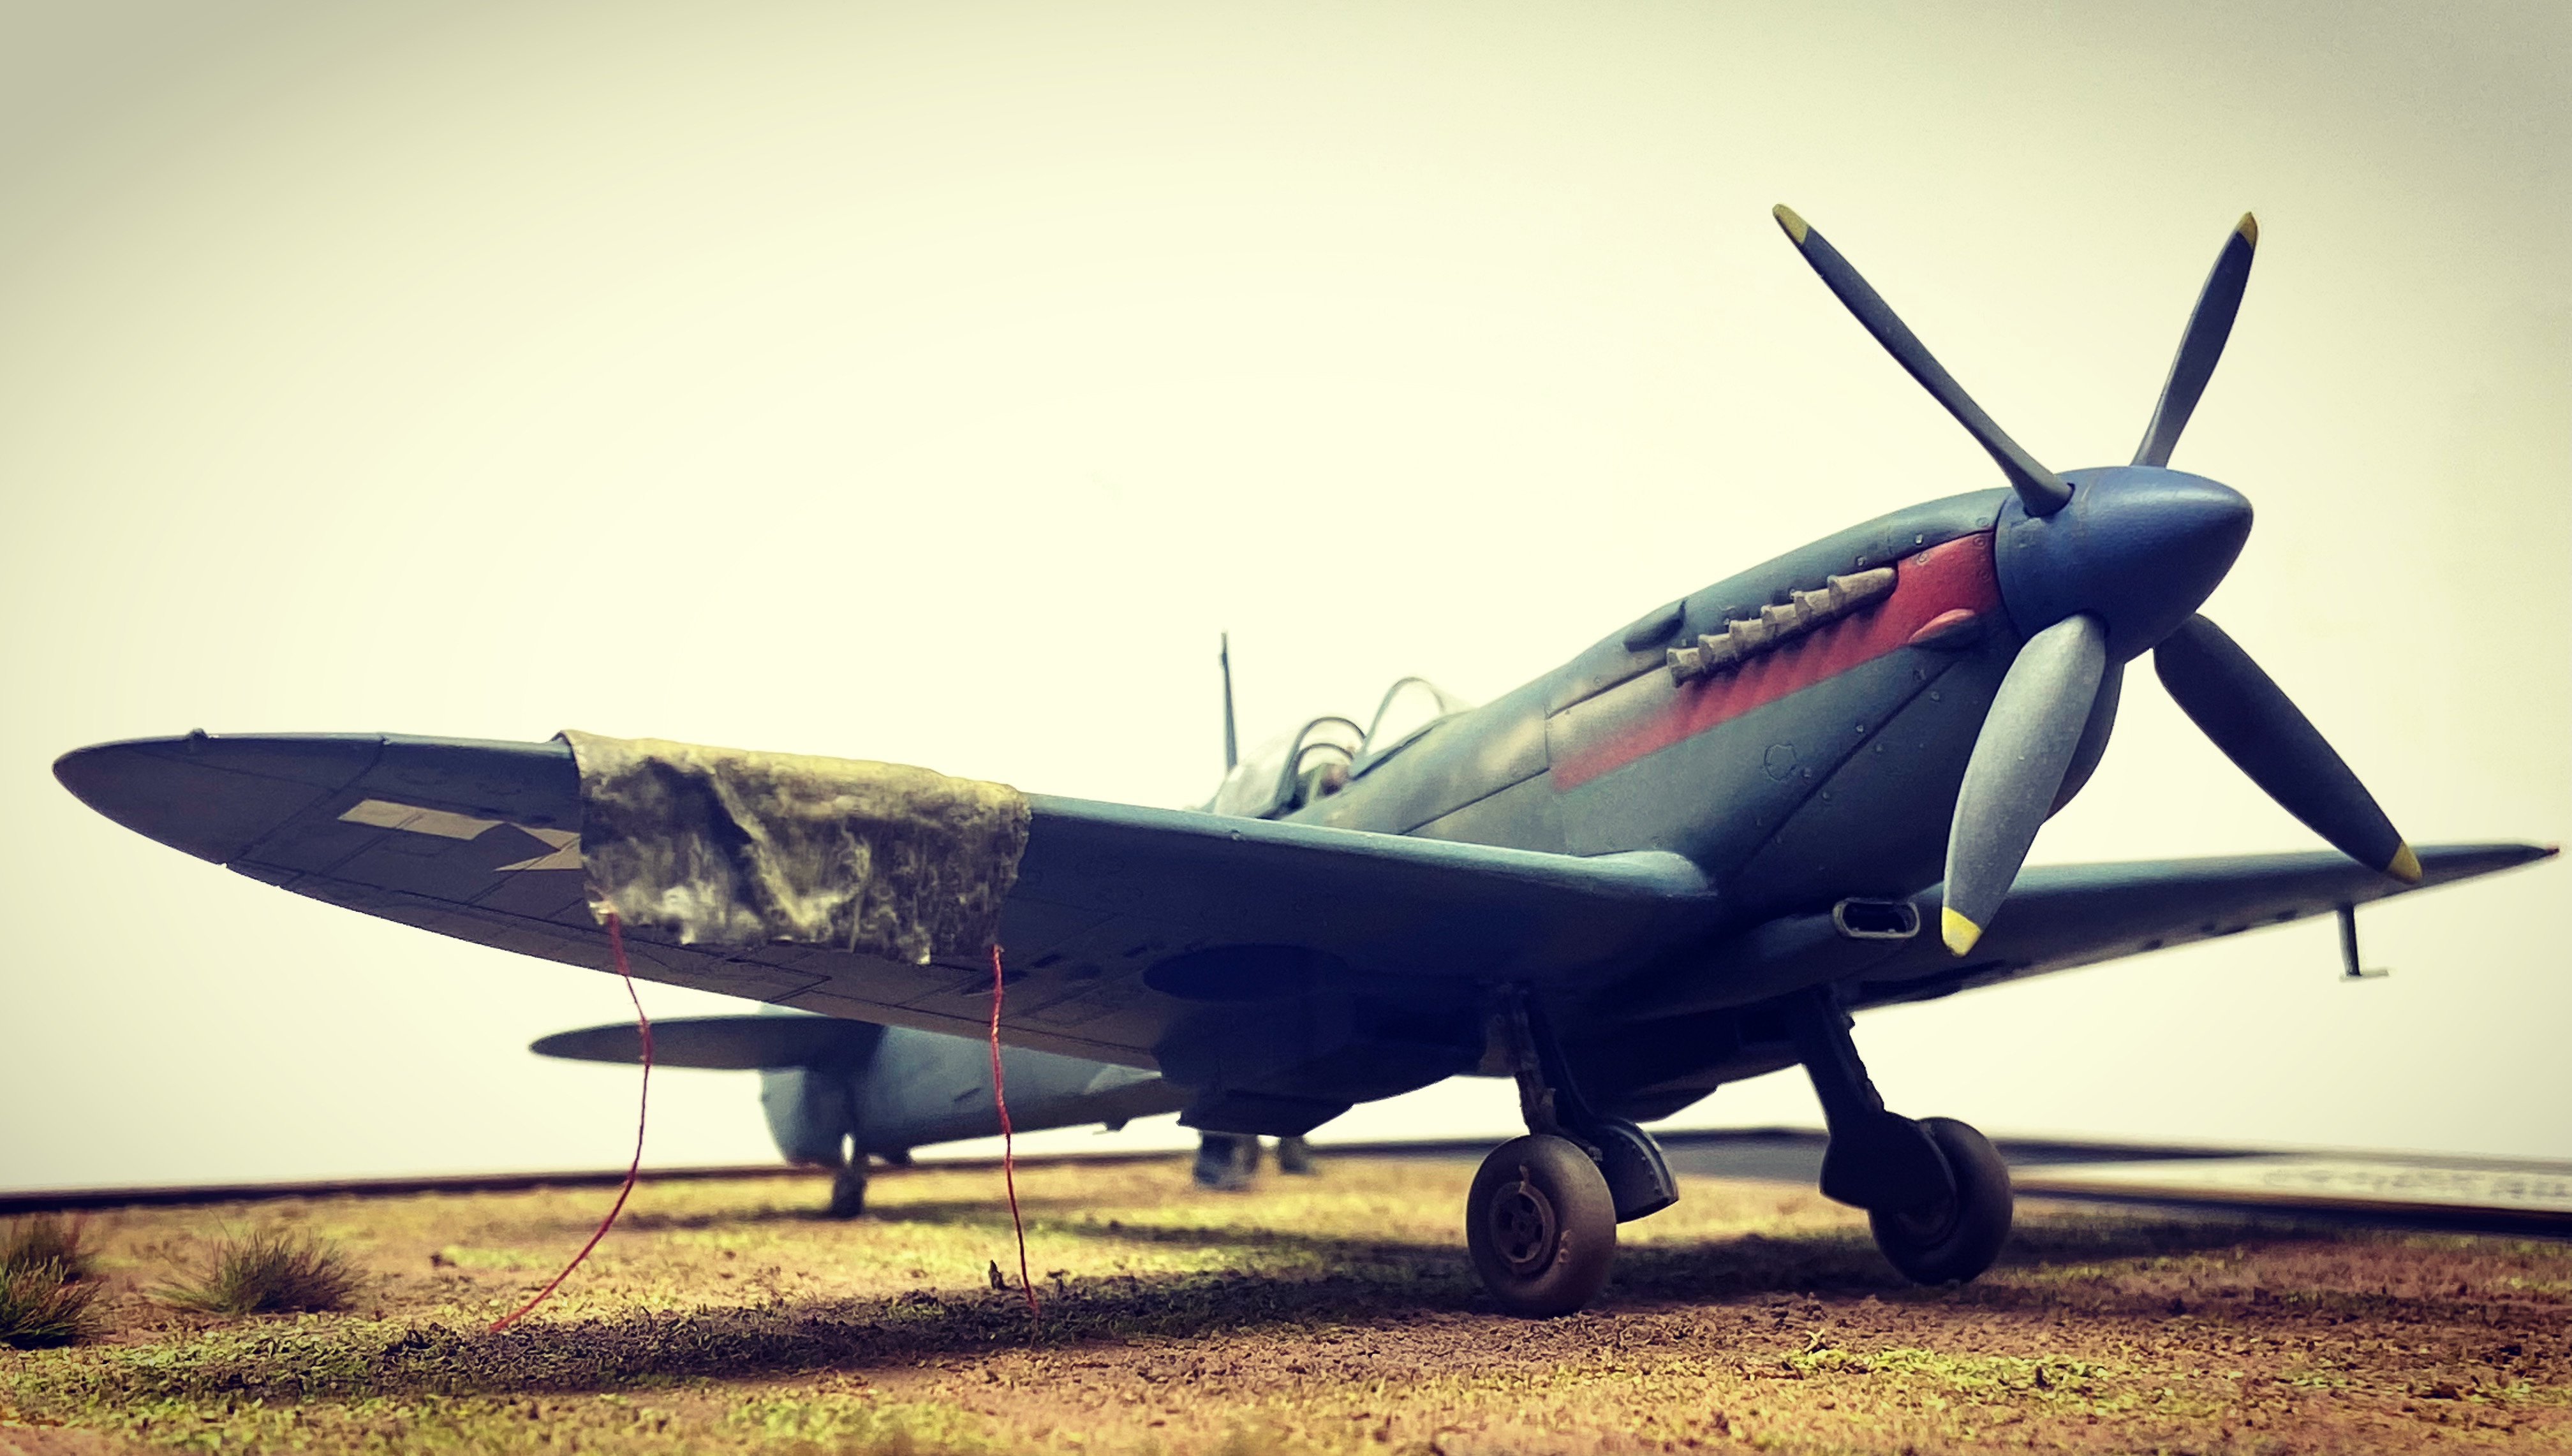
All I needed to do now was source a PR windshield and paint up the landing gear, both of which were painted and assembled in quick succession. In tribute to my inspiration, Daniel Zamarbide, I also placed a tarp on the Starboard wing of my Spitfire just as he did with his. The last job was to seal all the paint and weathering in with an airbrushed coat of acrylic flat clear varnish.
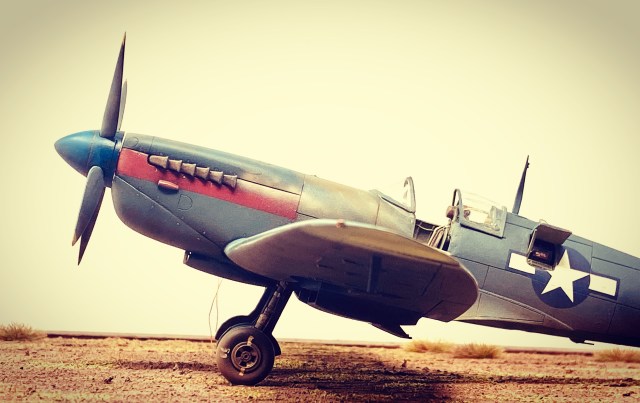
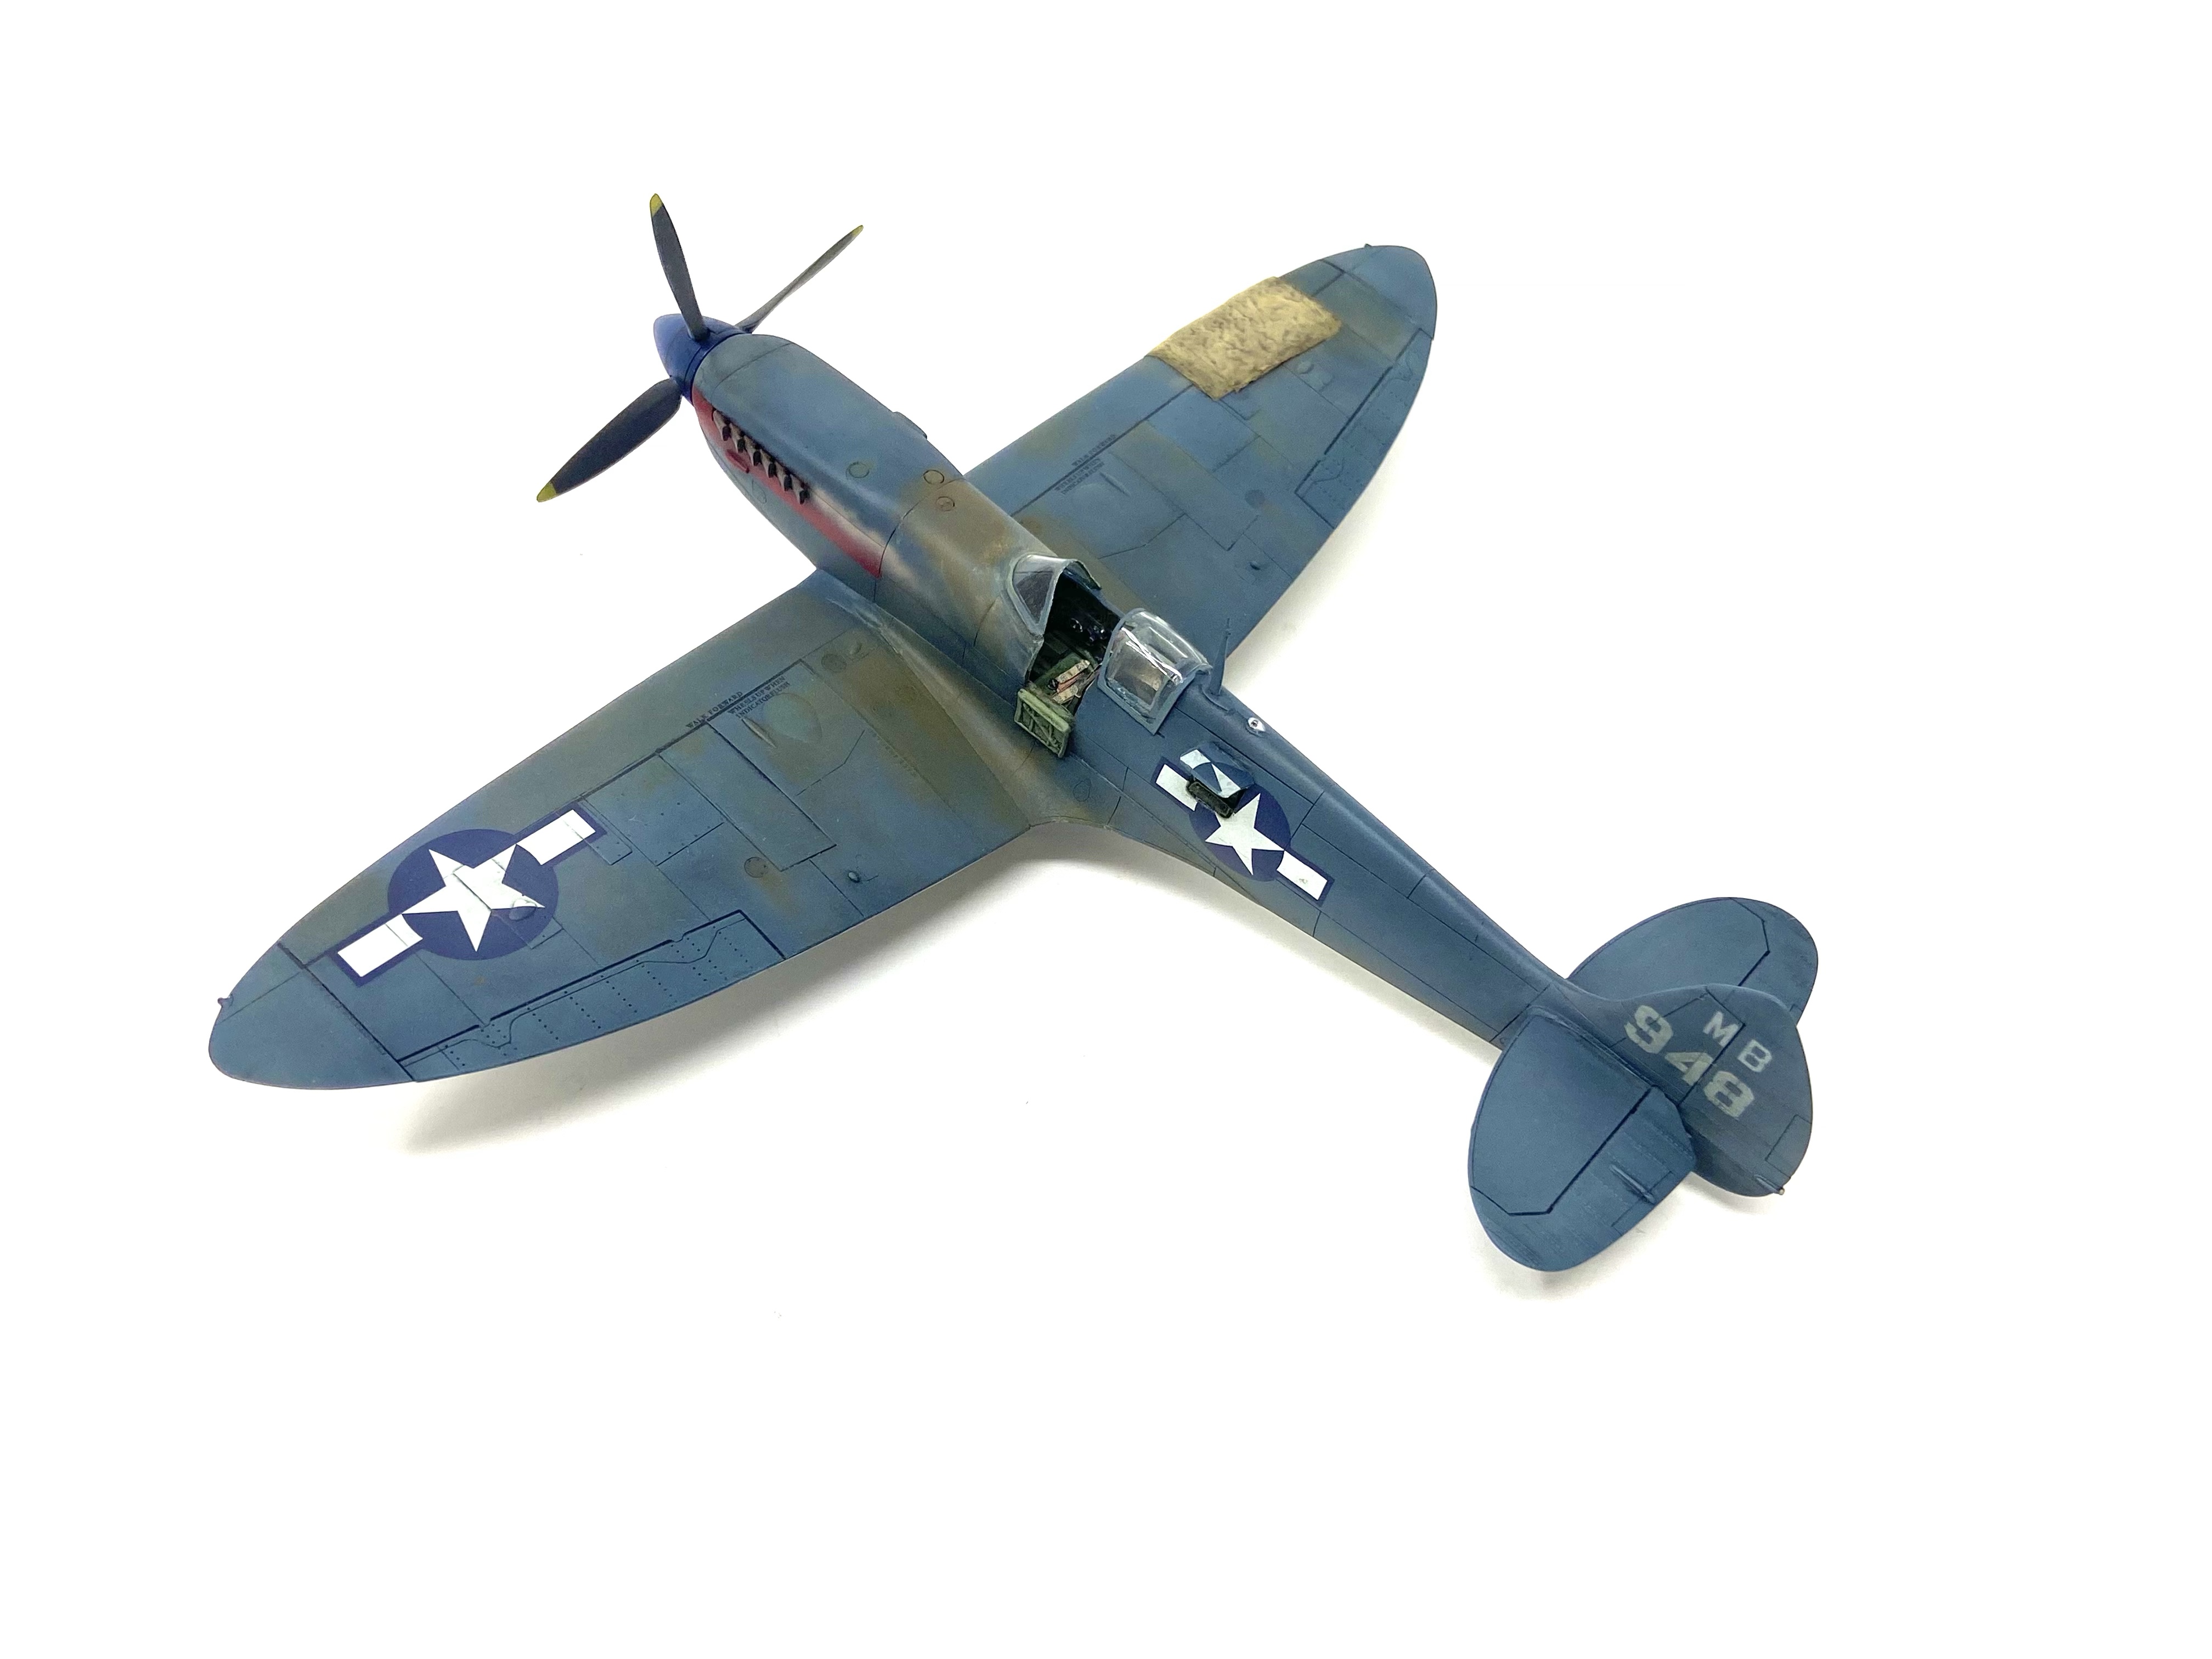
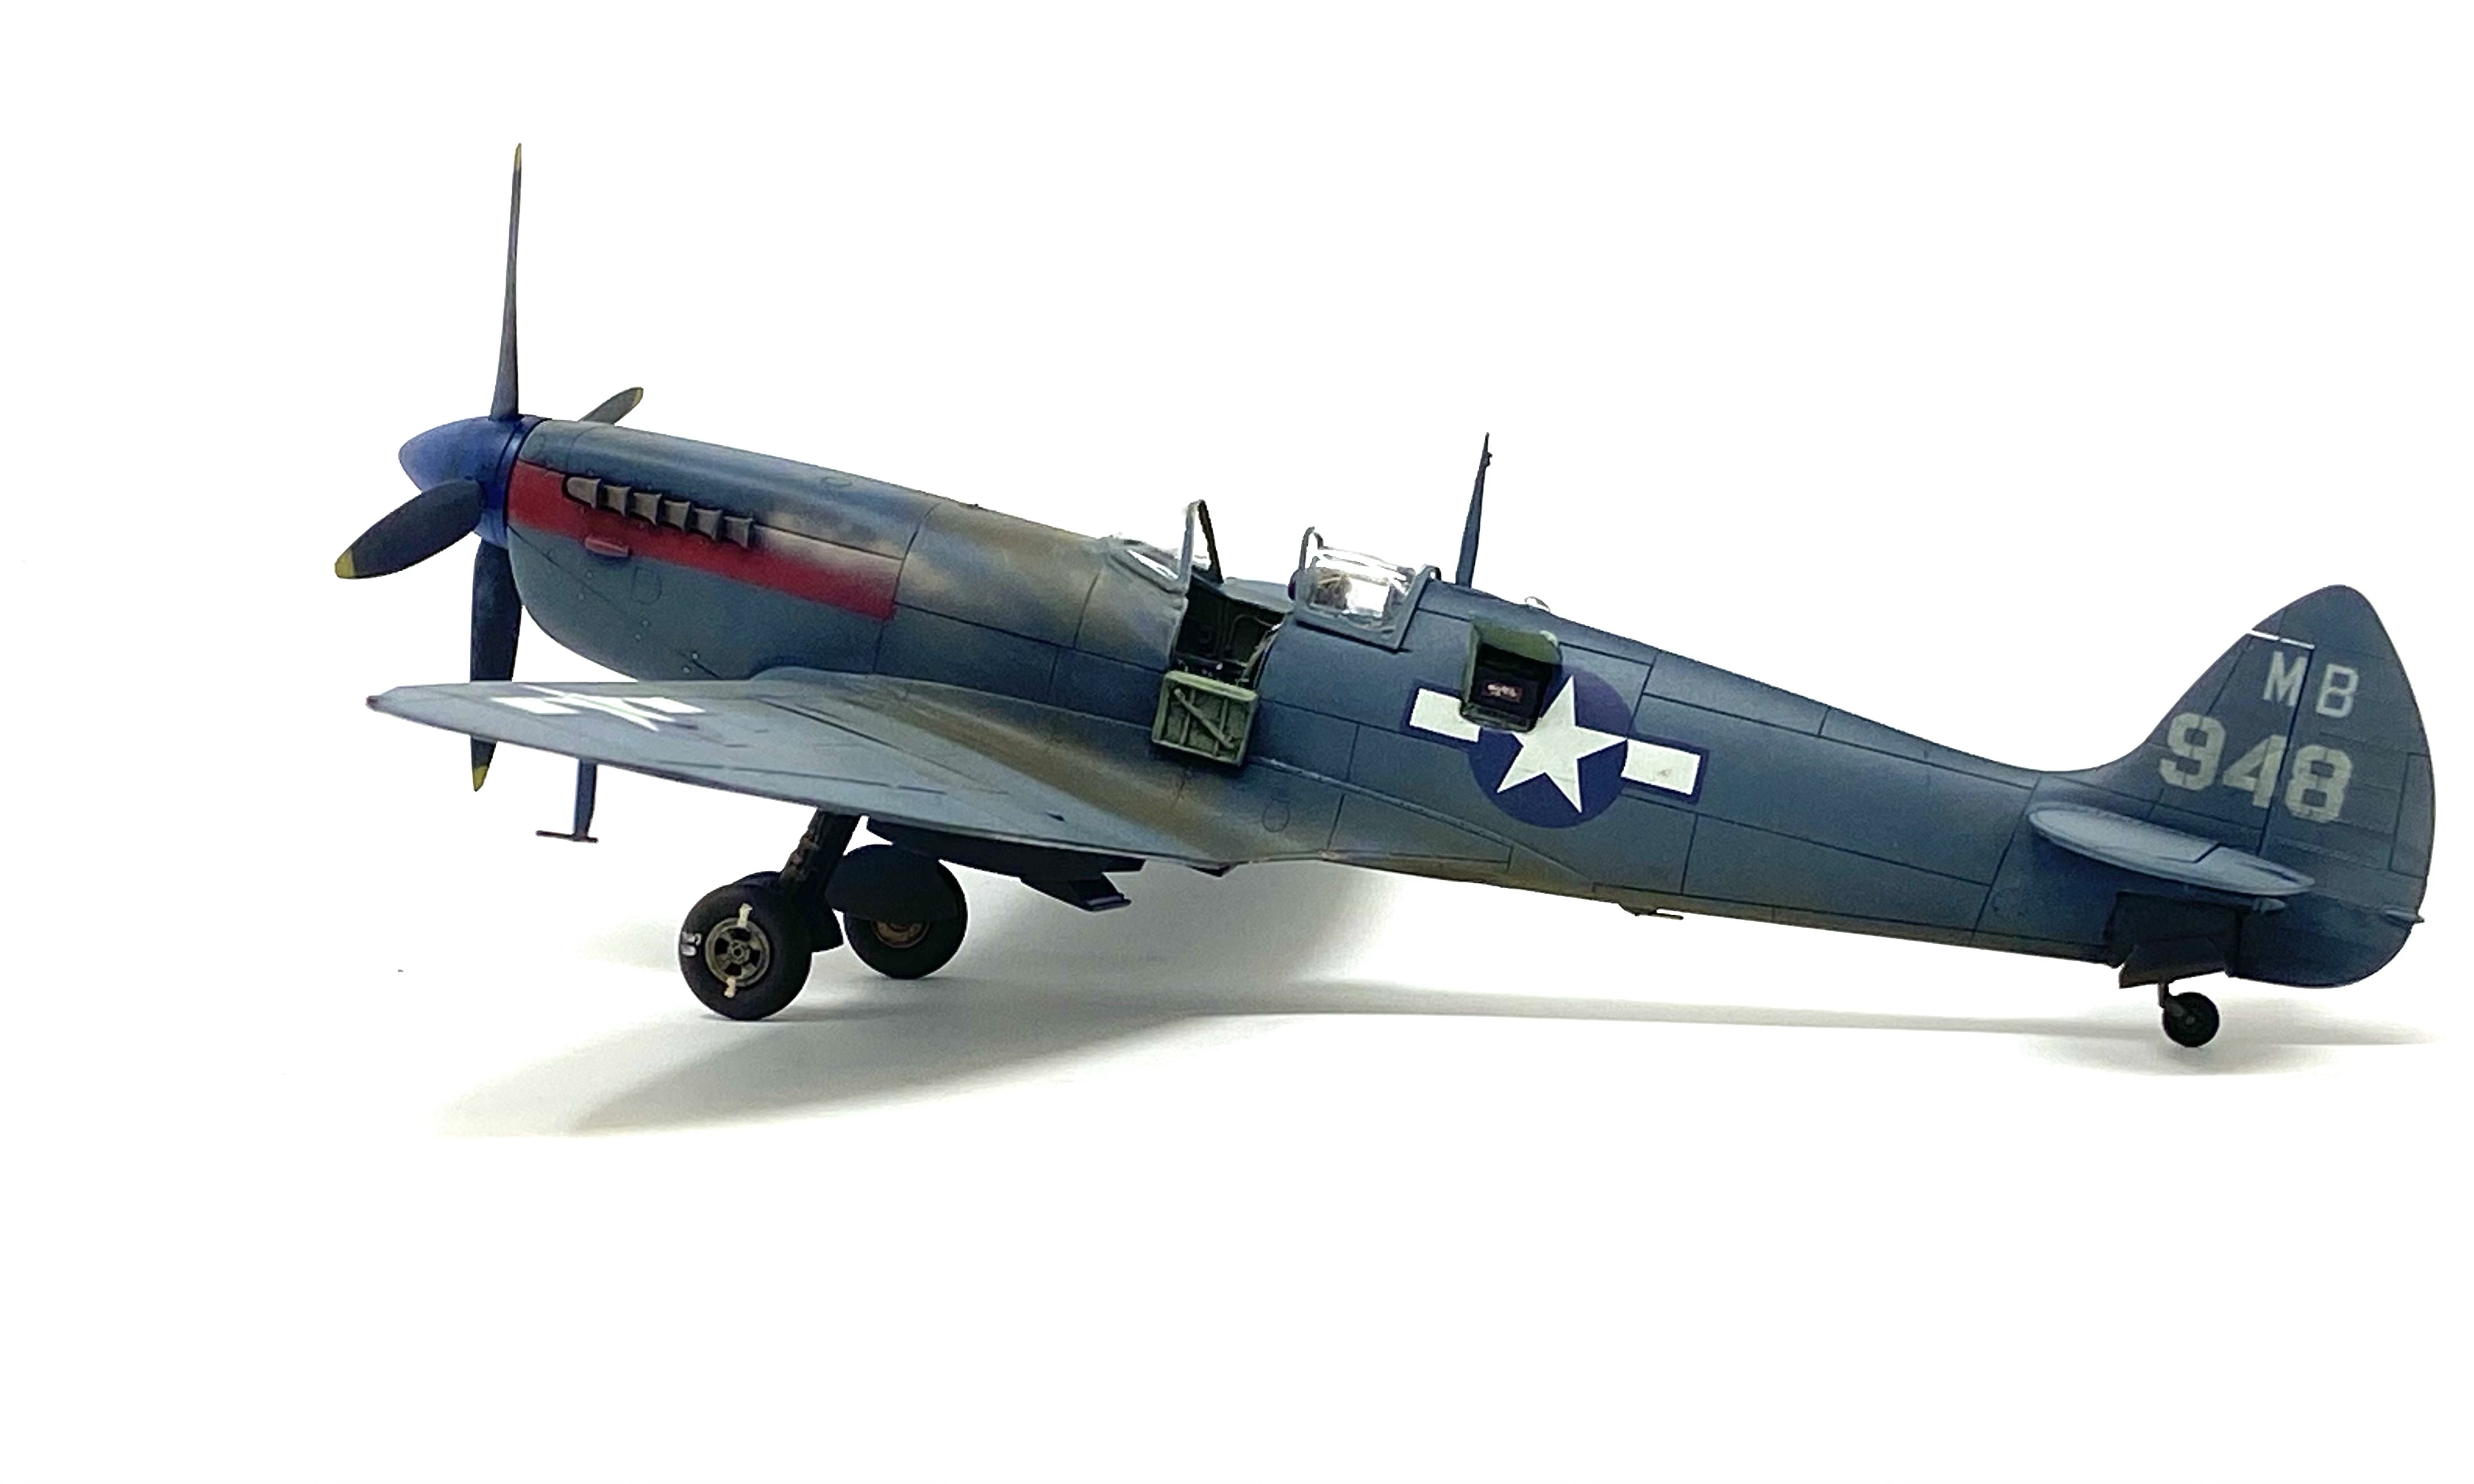
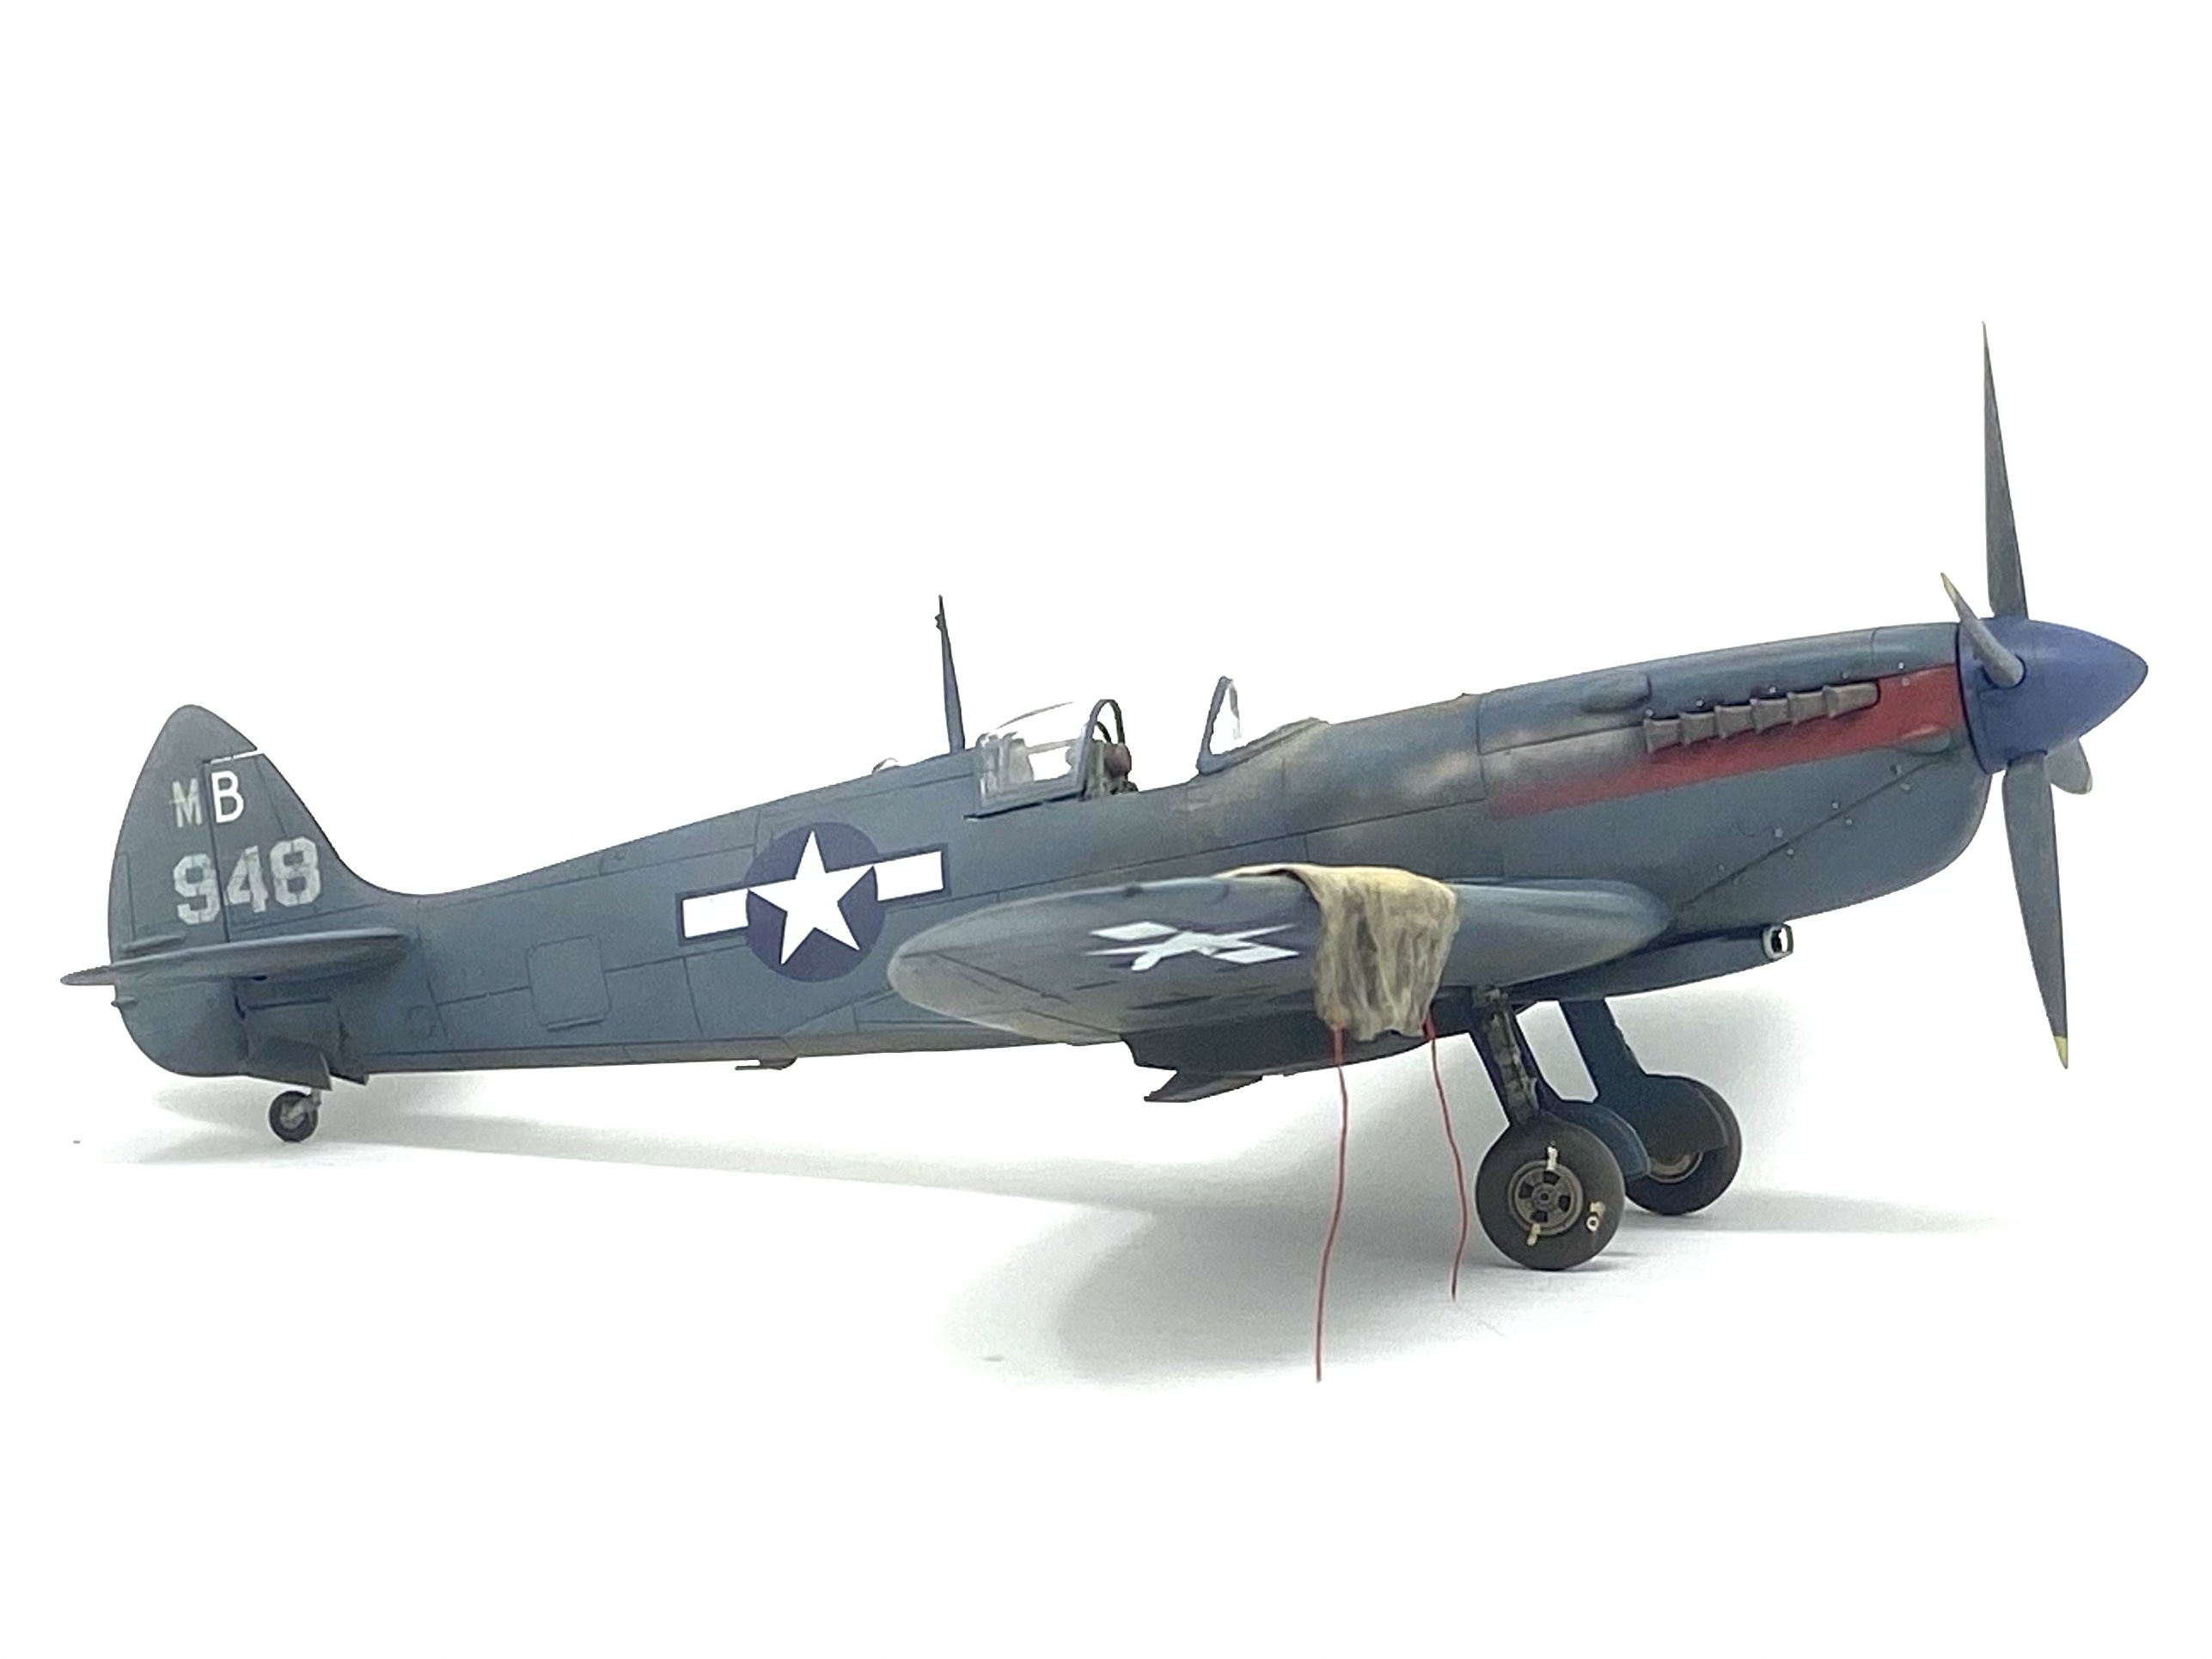
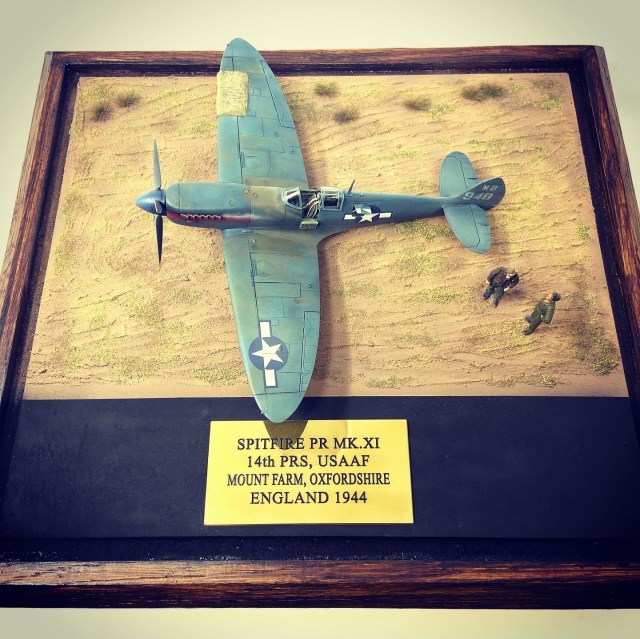
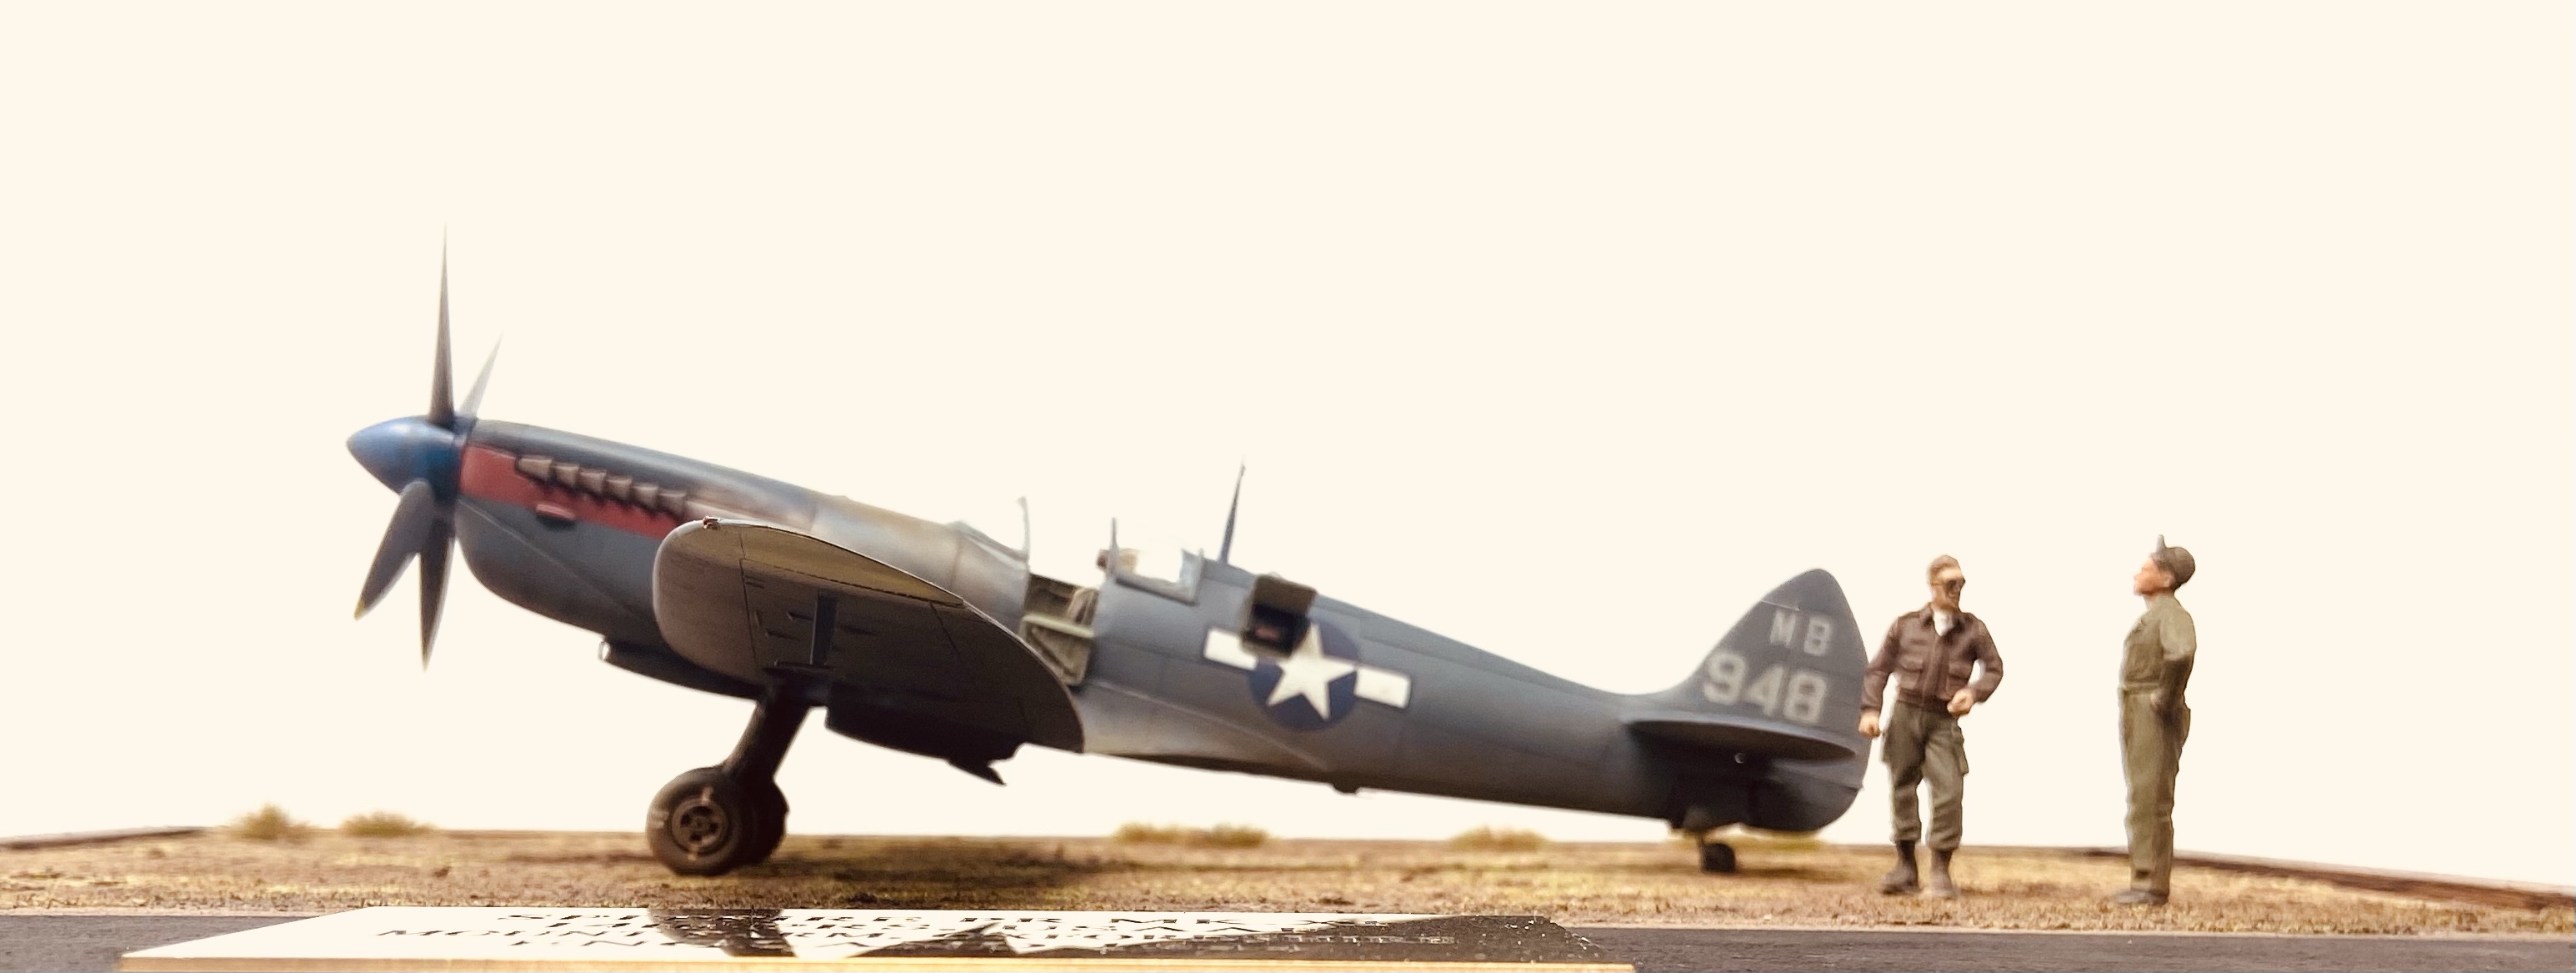
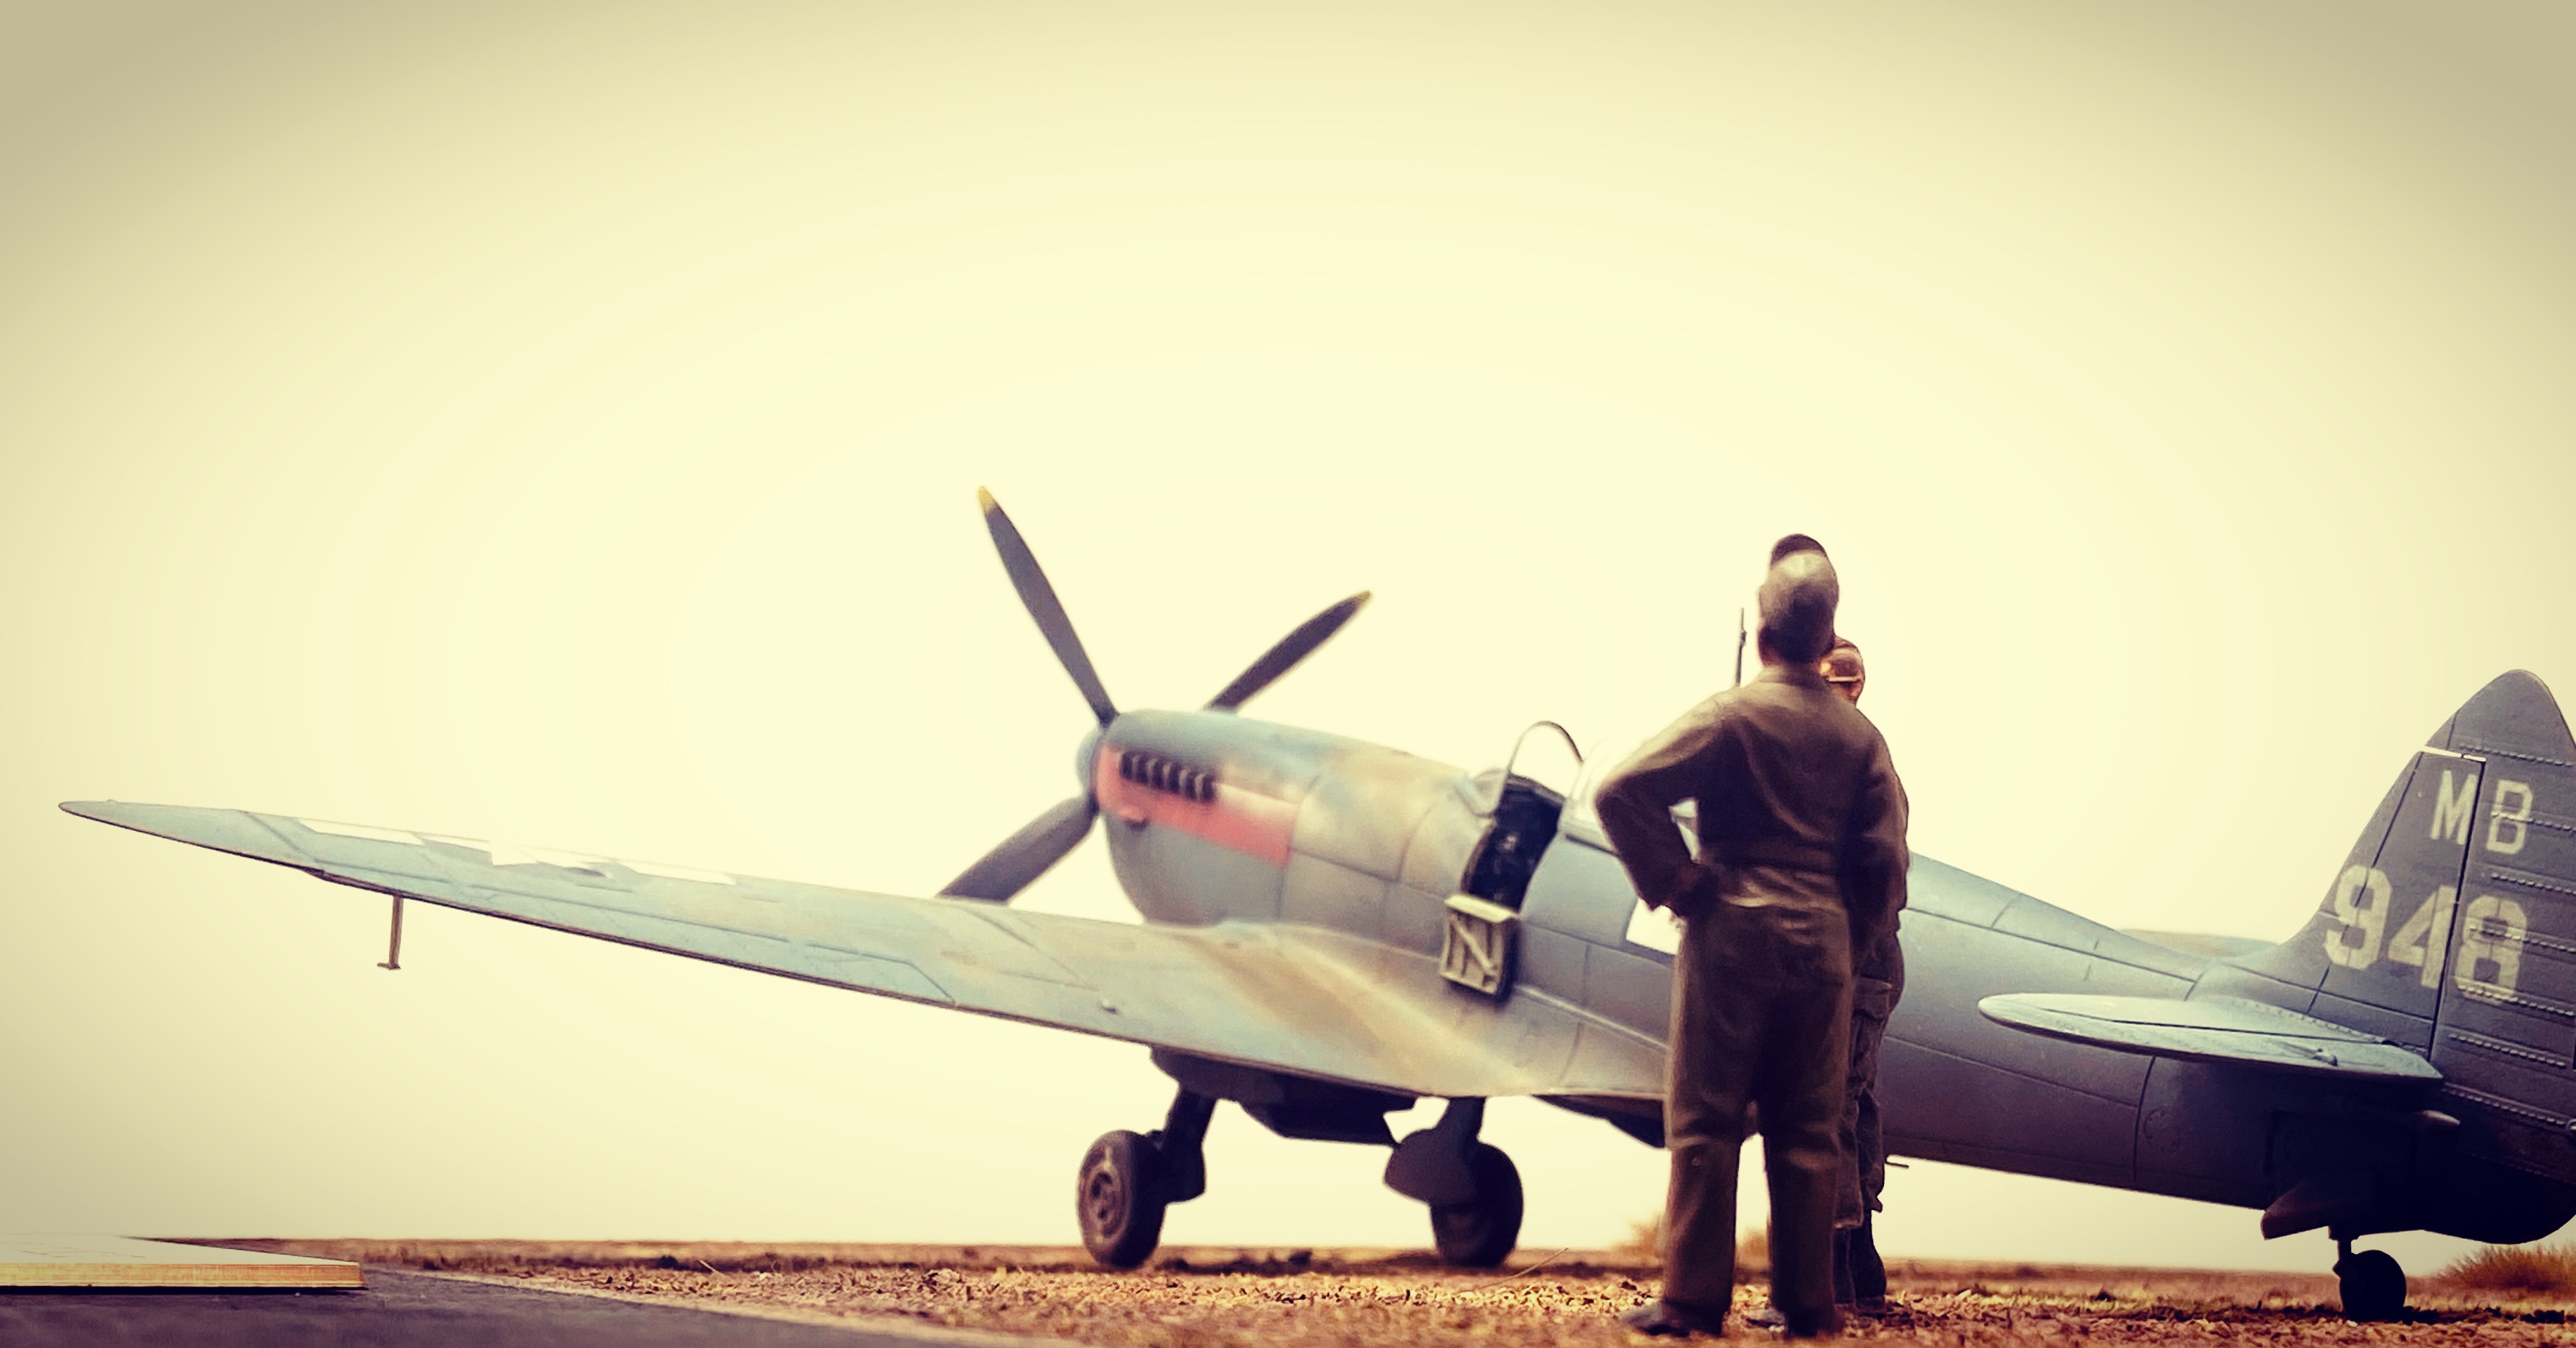
Here is the finished build, I hope you like it!


Incidentally, not long after I completed the model, I wrote to Daniel Zamarbide to show him my tribute to his build. He wrote back and said that he enjoyed seeing my take on his model. He also complemented me on my painting and weathering! What a great great guy!
Now this model resides in my studio and I have my own Spitfire PR Mk.XI to look upon and inspire me to build better models!
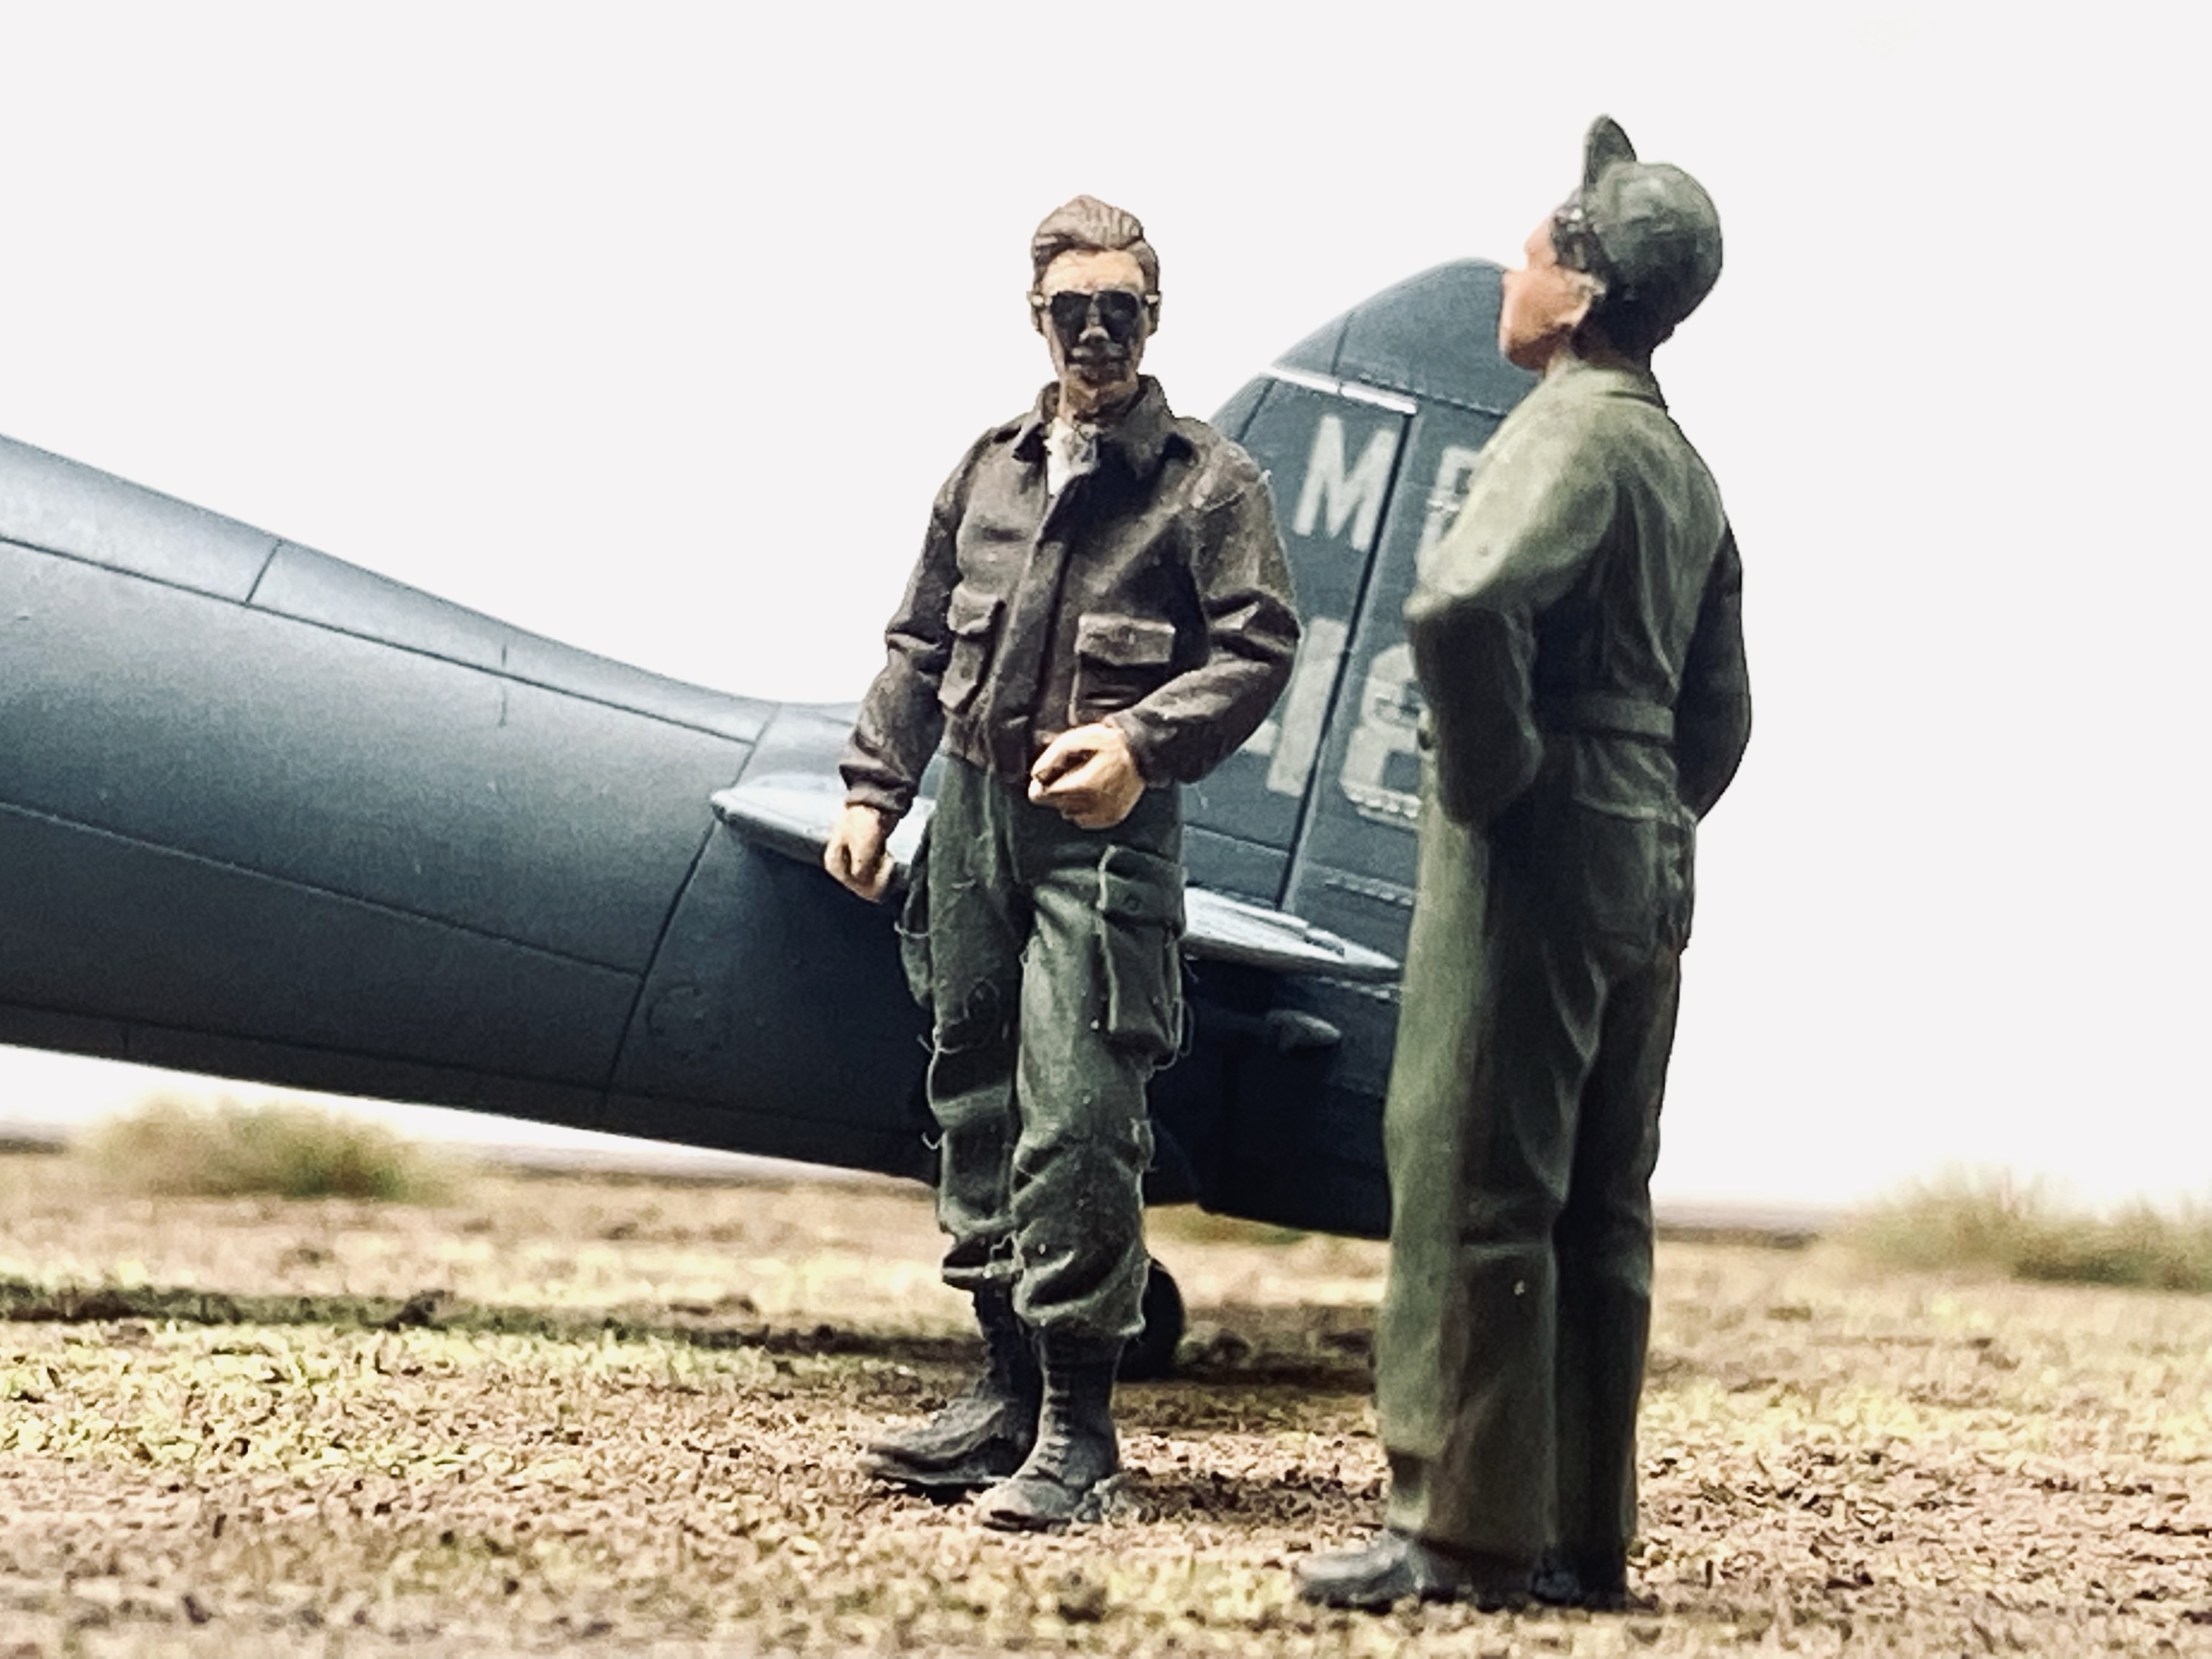
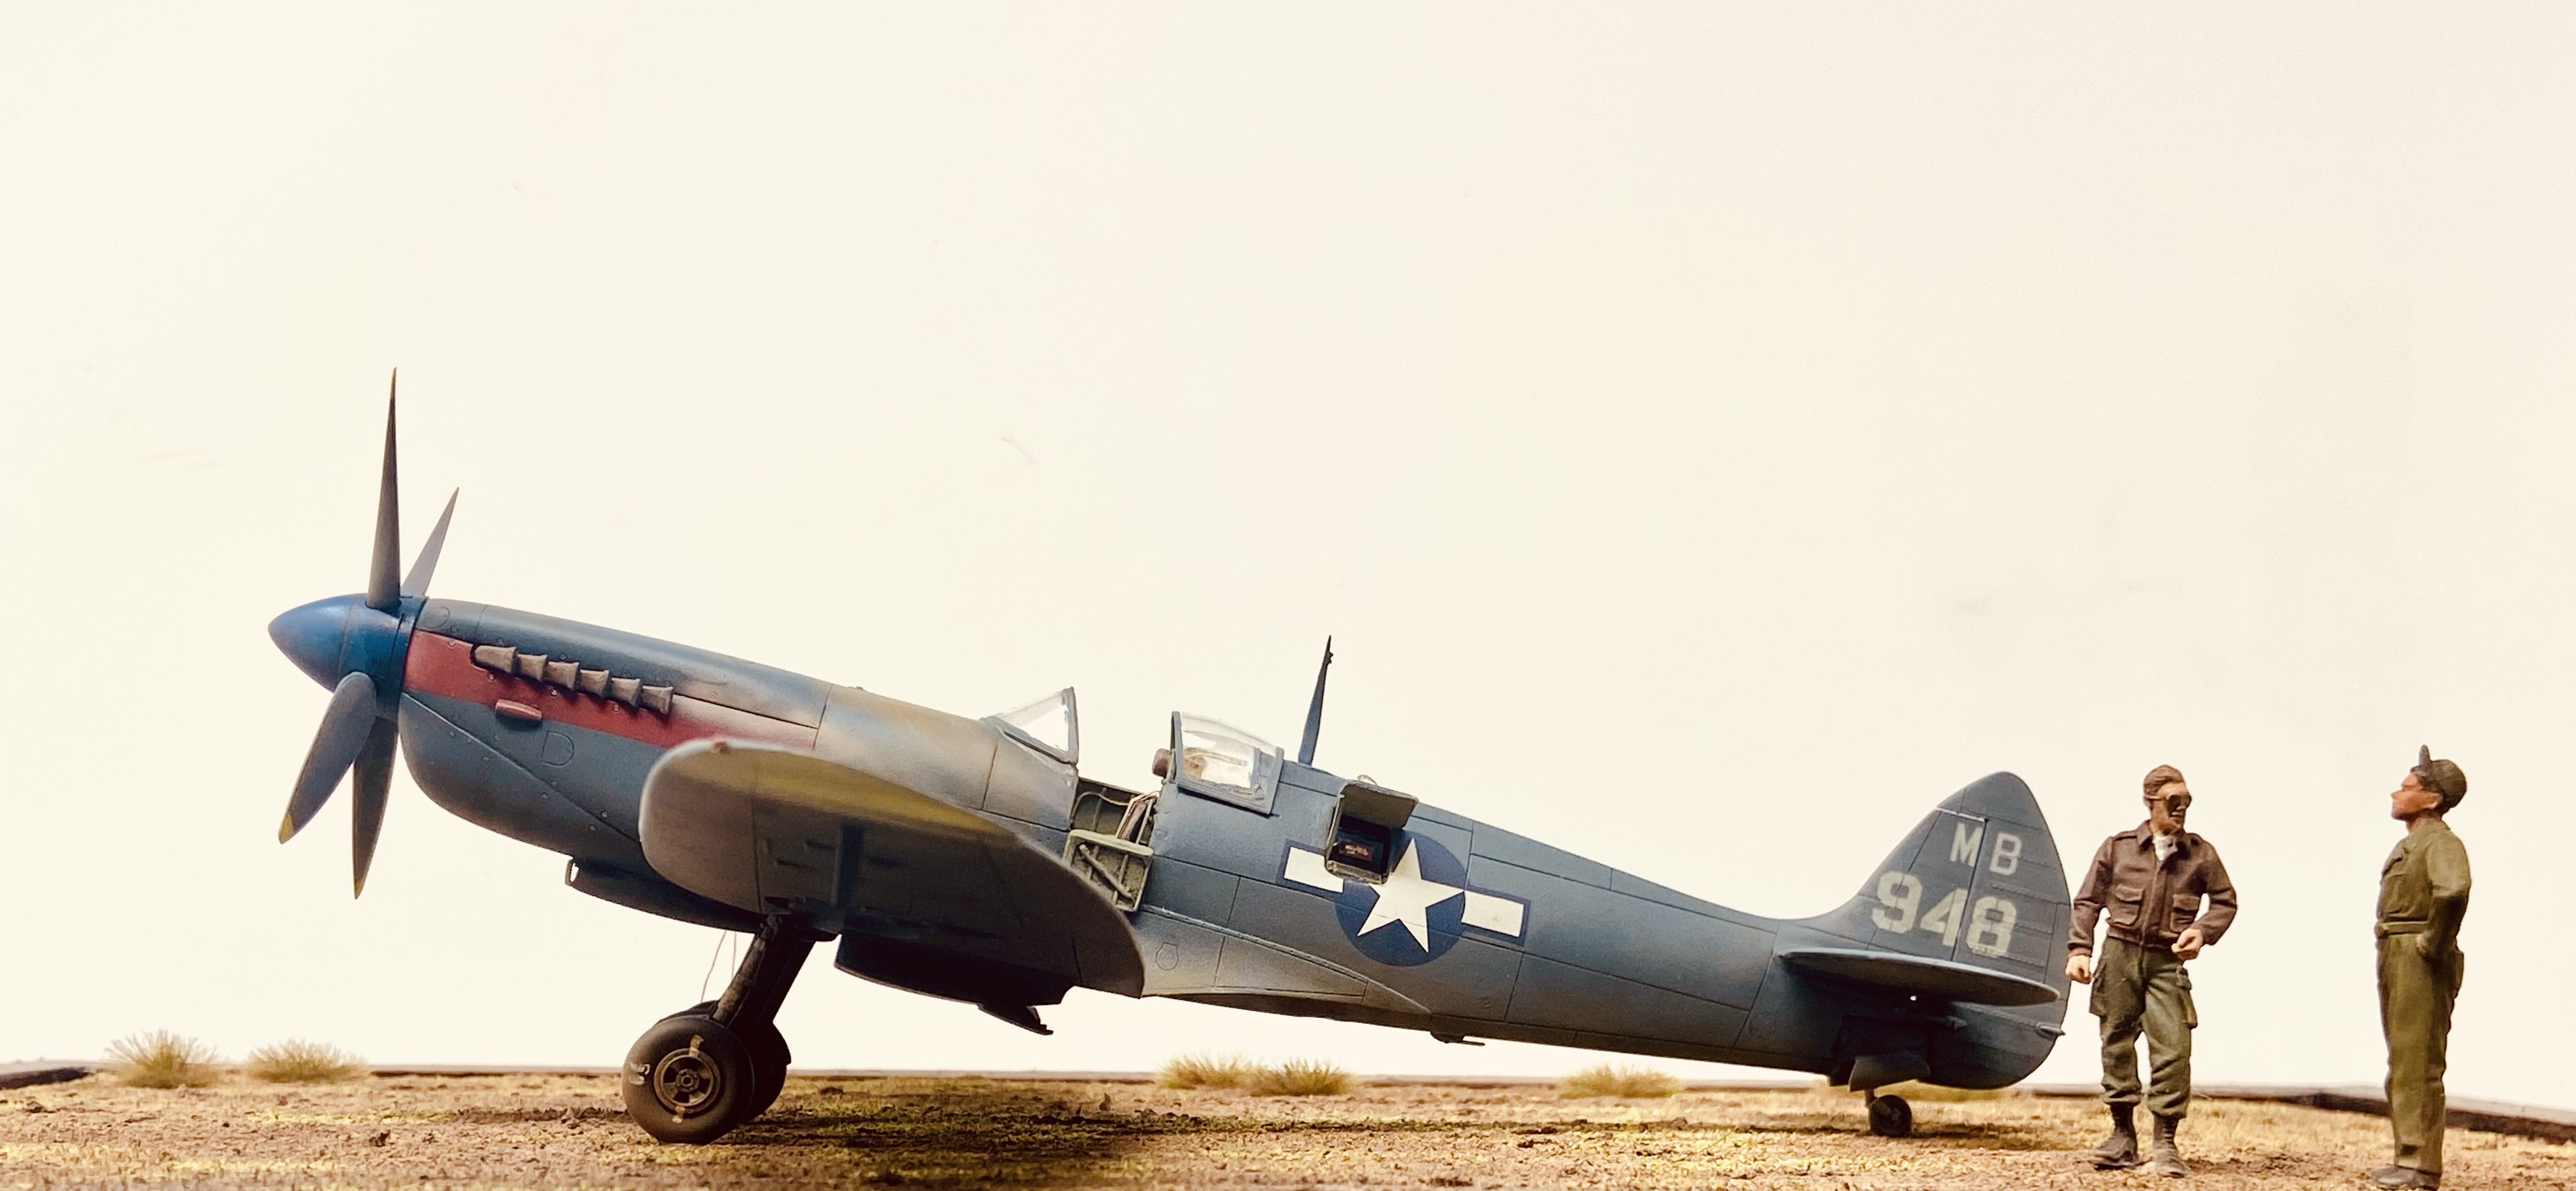
Here is the finished display piece:


Thanks for taking the time to stop by and look at my model. Please follow this blog to see the latest builds coming out of my studio. You can also follow me on FaceBook, Instagram and Twitter @thescalemodelhangar.
Until next time, take care and Happy Modelling!
Darren

Your work is incredibly beautiful, and I feel privileged to be able to view and enjoy it. Thank you for sharing your projects.
LikeLiked by 1 person
Thank you Sir! You are welcome and thank you for your kind words. It’s greatly appreciated.
LikeLike
Darren,
Just about to cobble together a PR Mk XI that served in the CBI theater. I consider single color paint schemes the hardest and the techniques you’ve used on this bird are worth paying attention to. Thanks for sharing your effort.
LikeLiked by 1 person
Thank you!
LikeLike