
Hello again!
This post sees the completion of my 1/48 Academy F-4B Phantom II. I have always loved the phantom, the men who flew it named it “Spook” and in the 1960’s the Spook was the top of the line in fighter avaiation.
Produced by America’s McDonnel-Douglas corporation, the Phantom II’s primary design was to be an interceptor to go up against Soviet long range bombers, this was the cold war and that’s how Washington thought its next war would be fought.
When the USA became invloved in the Vietnam conflict, the US Military was mobilized and US Navy aircraft carriers were postioned on “Yankee Station” a sector of the south China Sea known as the Gulf of Tonkin. On those carriers were the F-4B Phantoms that were about to be tested in combat for the first time.
I’m not going to write about the Vietnam War here-Many wiser men who were there have done that before me. Despite the rights and wrongs of the conflict it was an interesting time in our worlds history. Military subjects from this time are a source of inspiration to many model builders, the colourful Navy jets of the 1960’s are a favourite of mine.
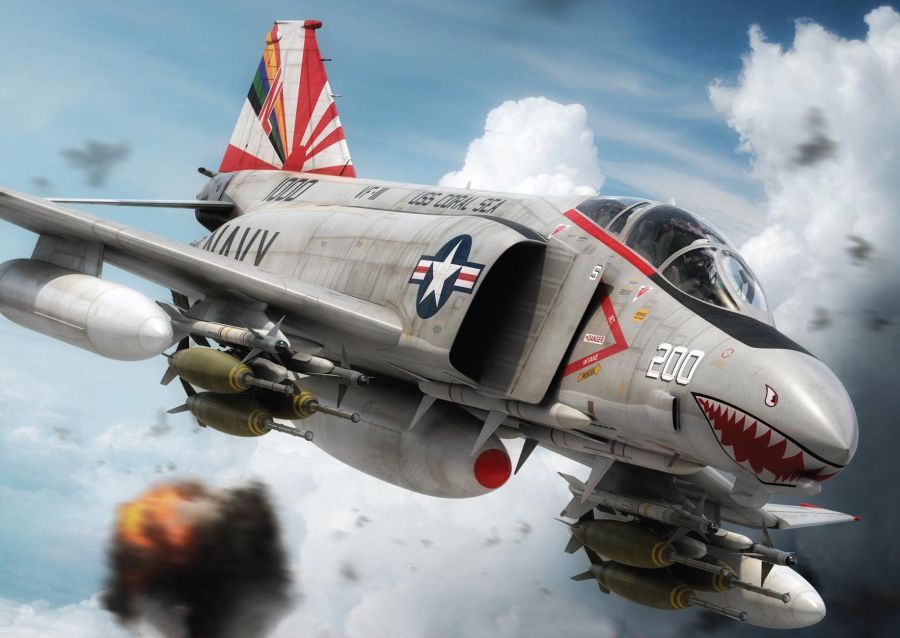
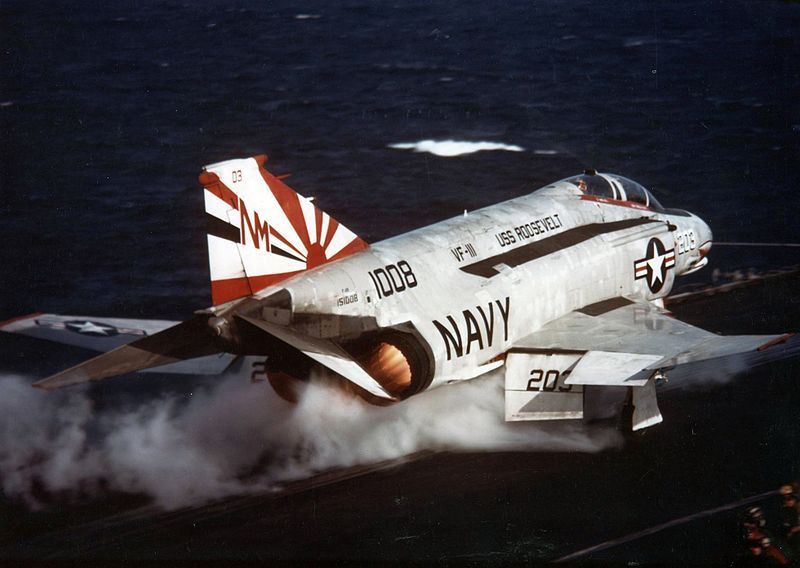
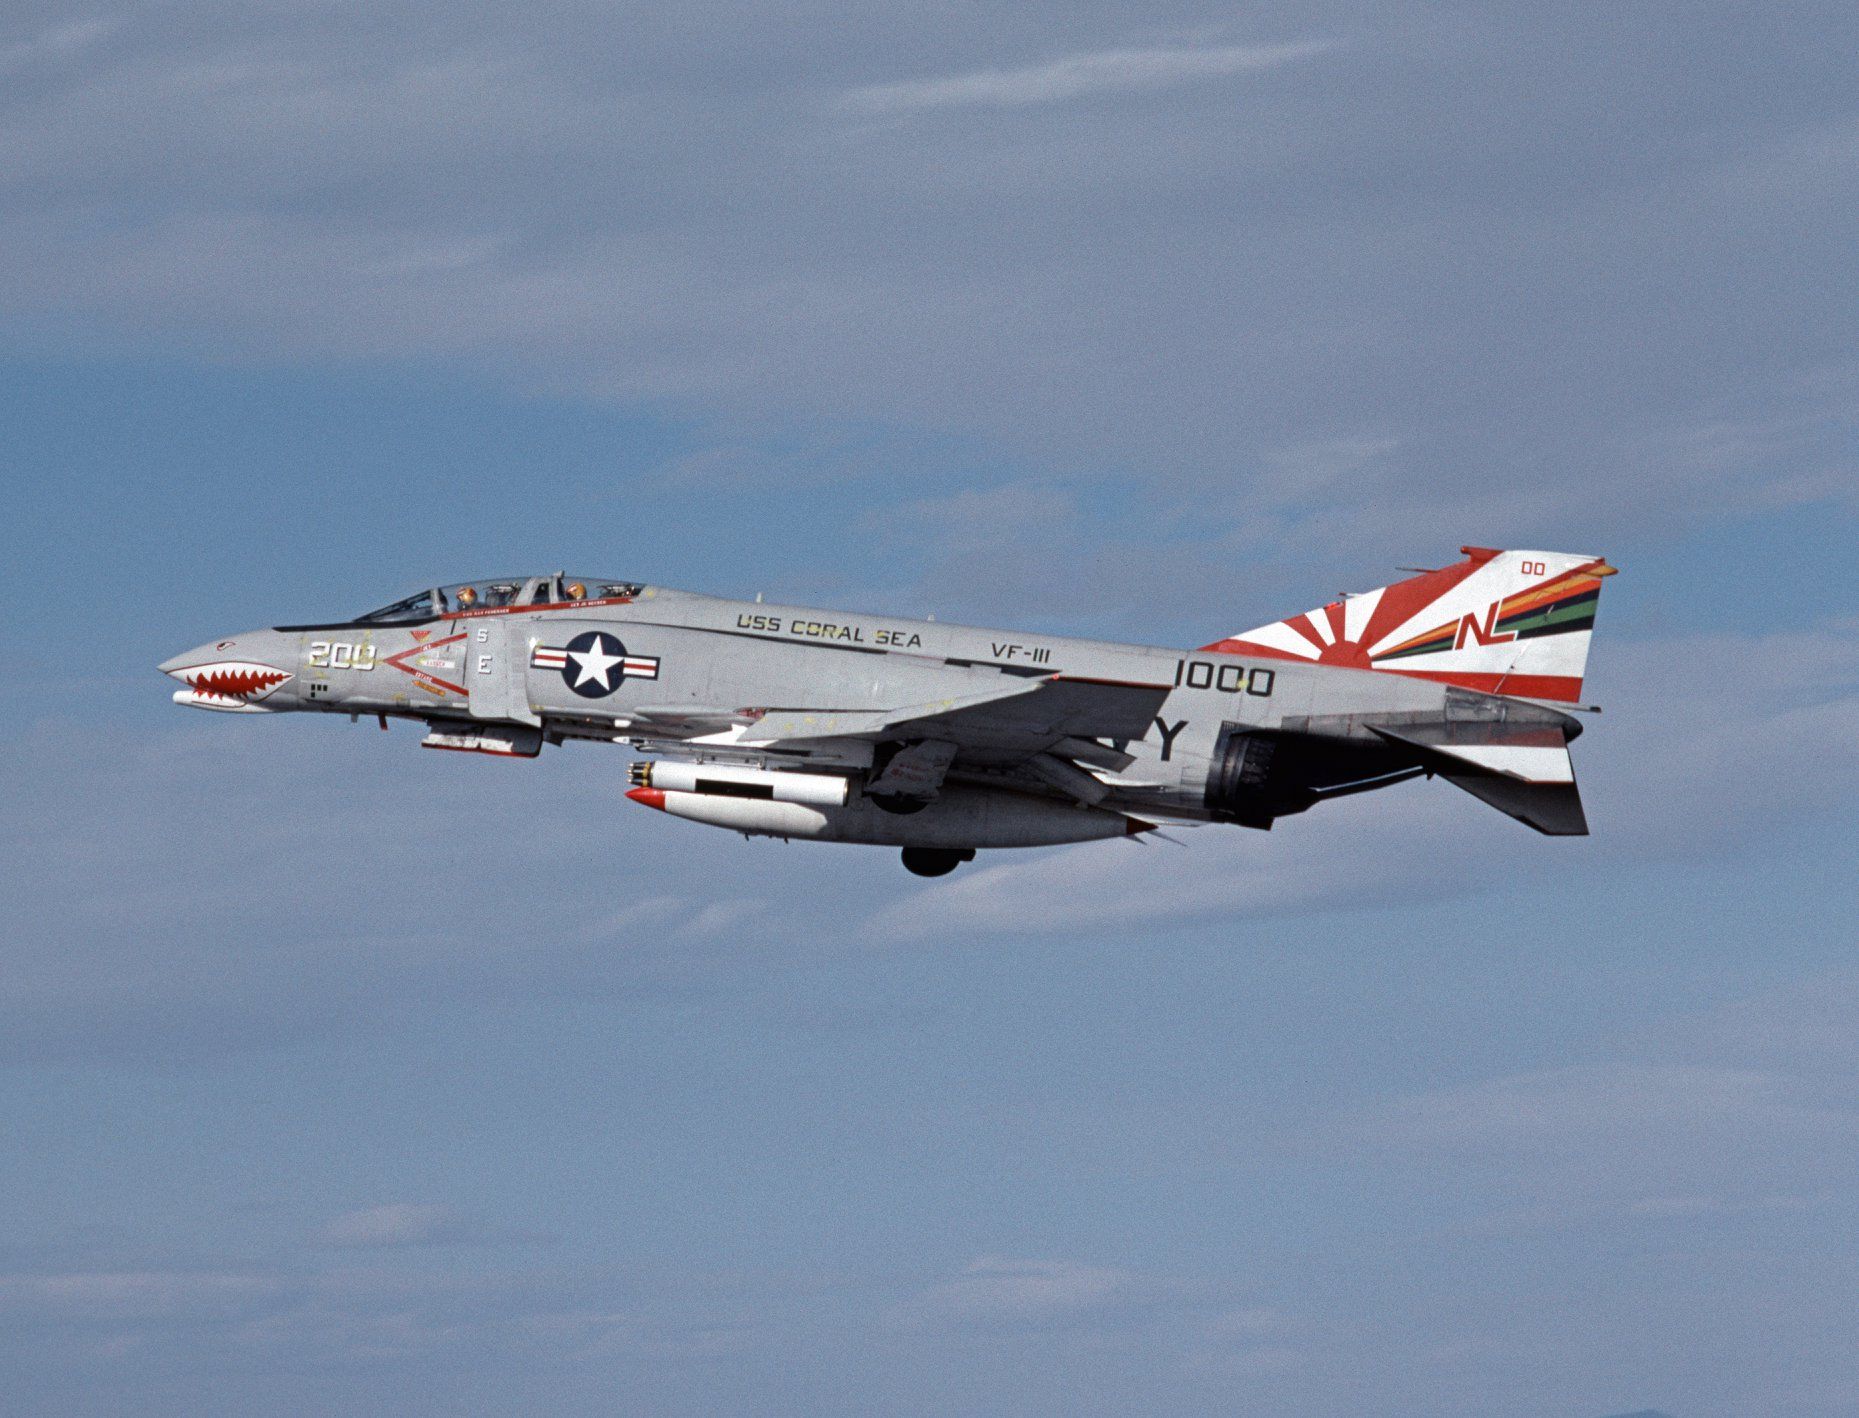
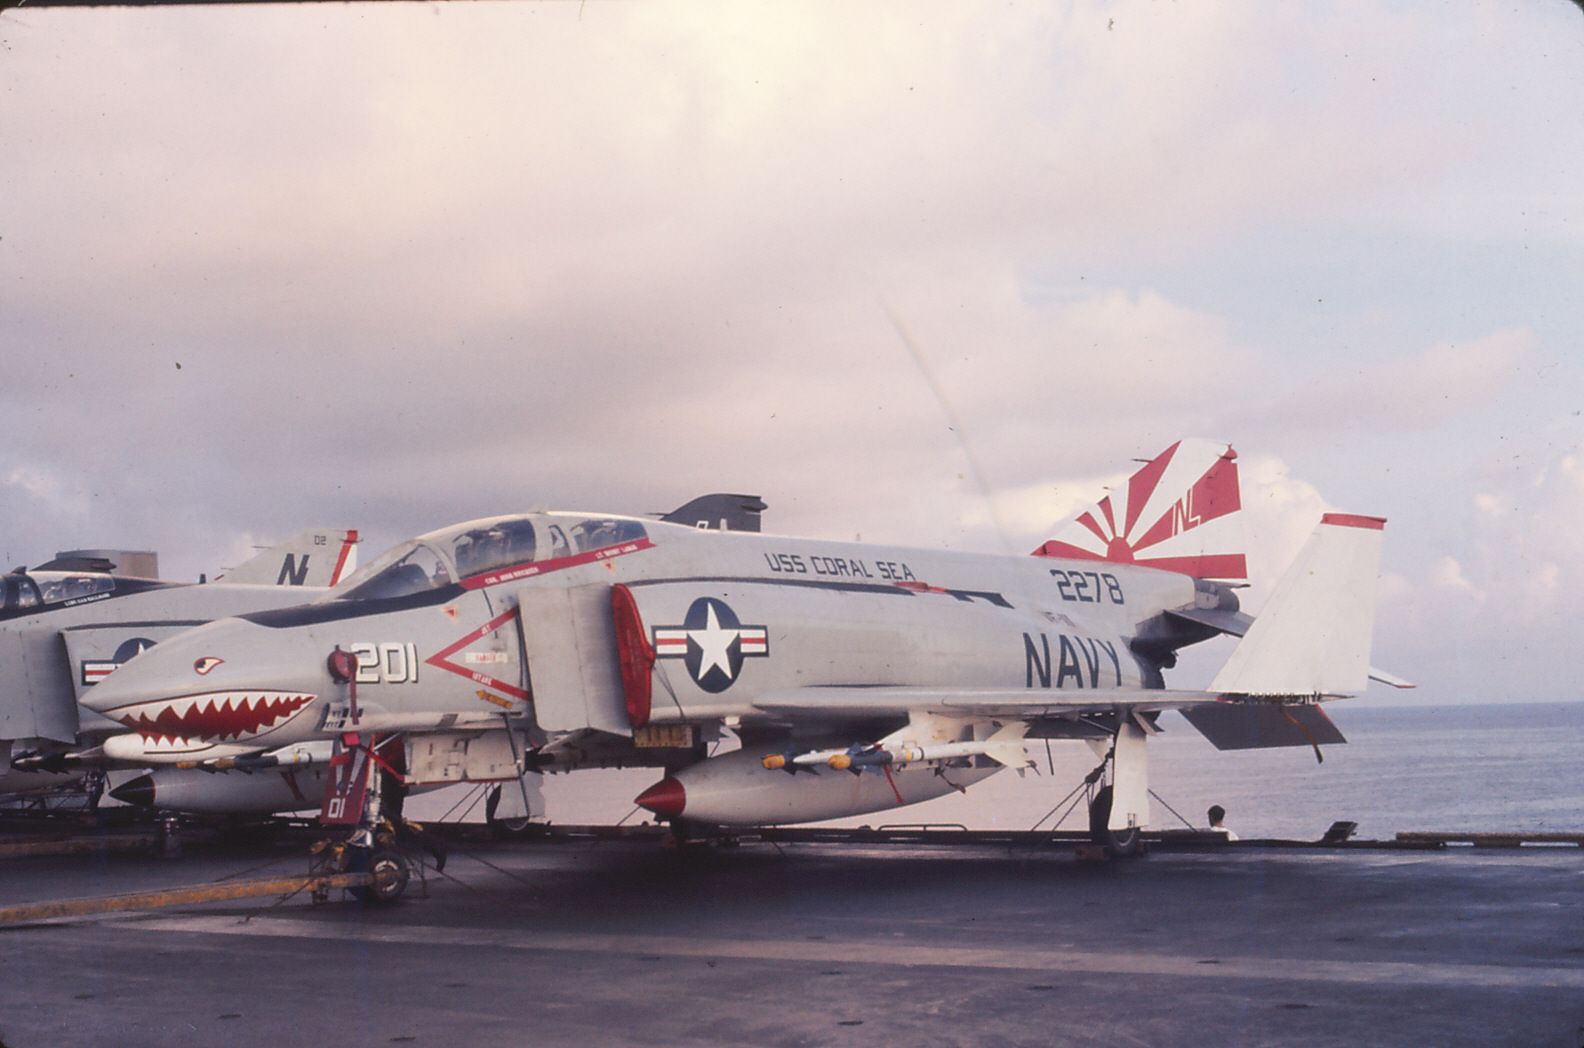
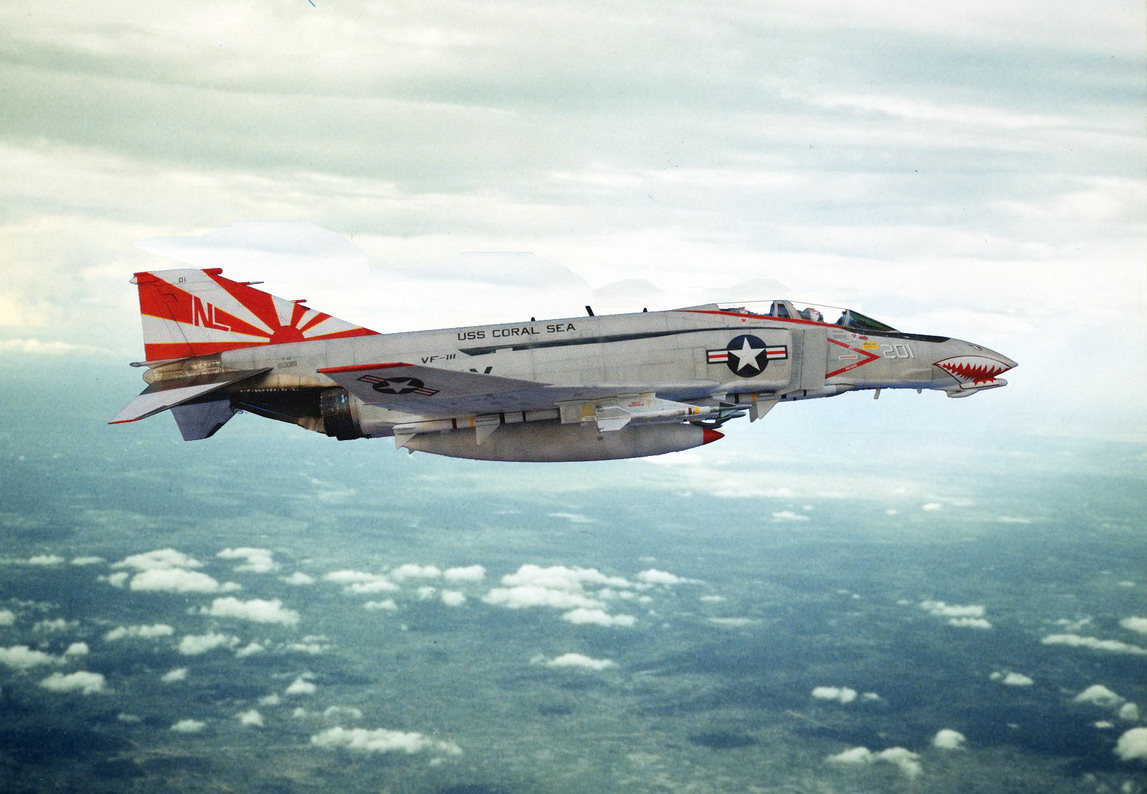
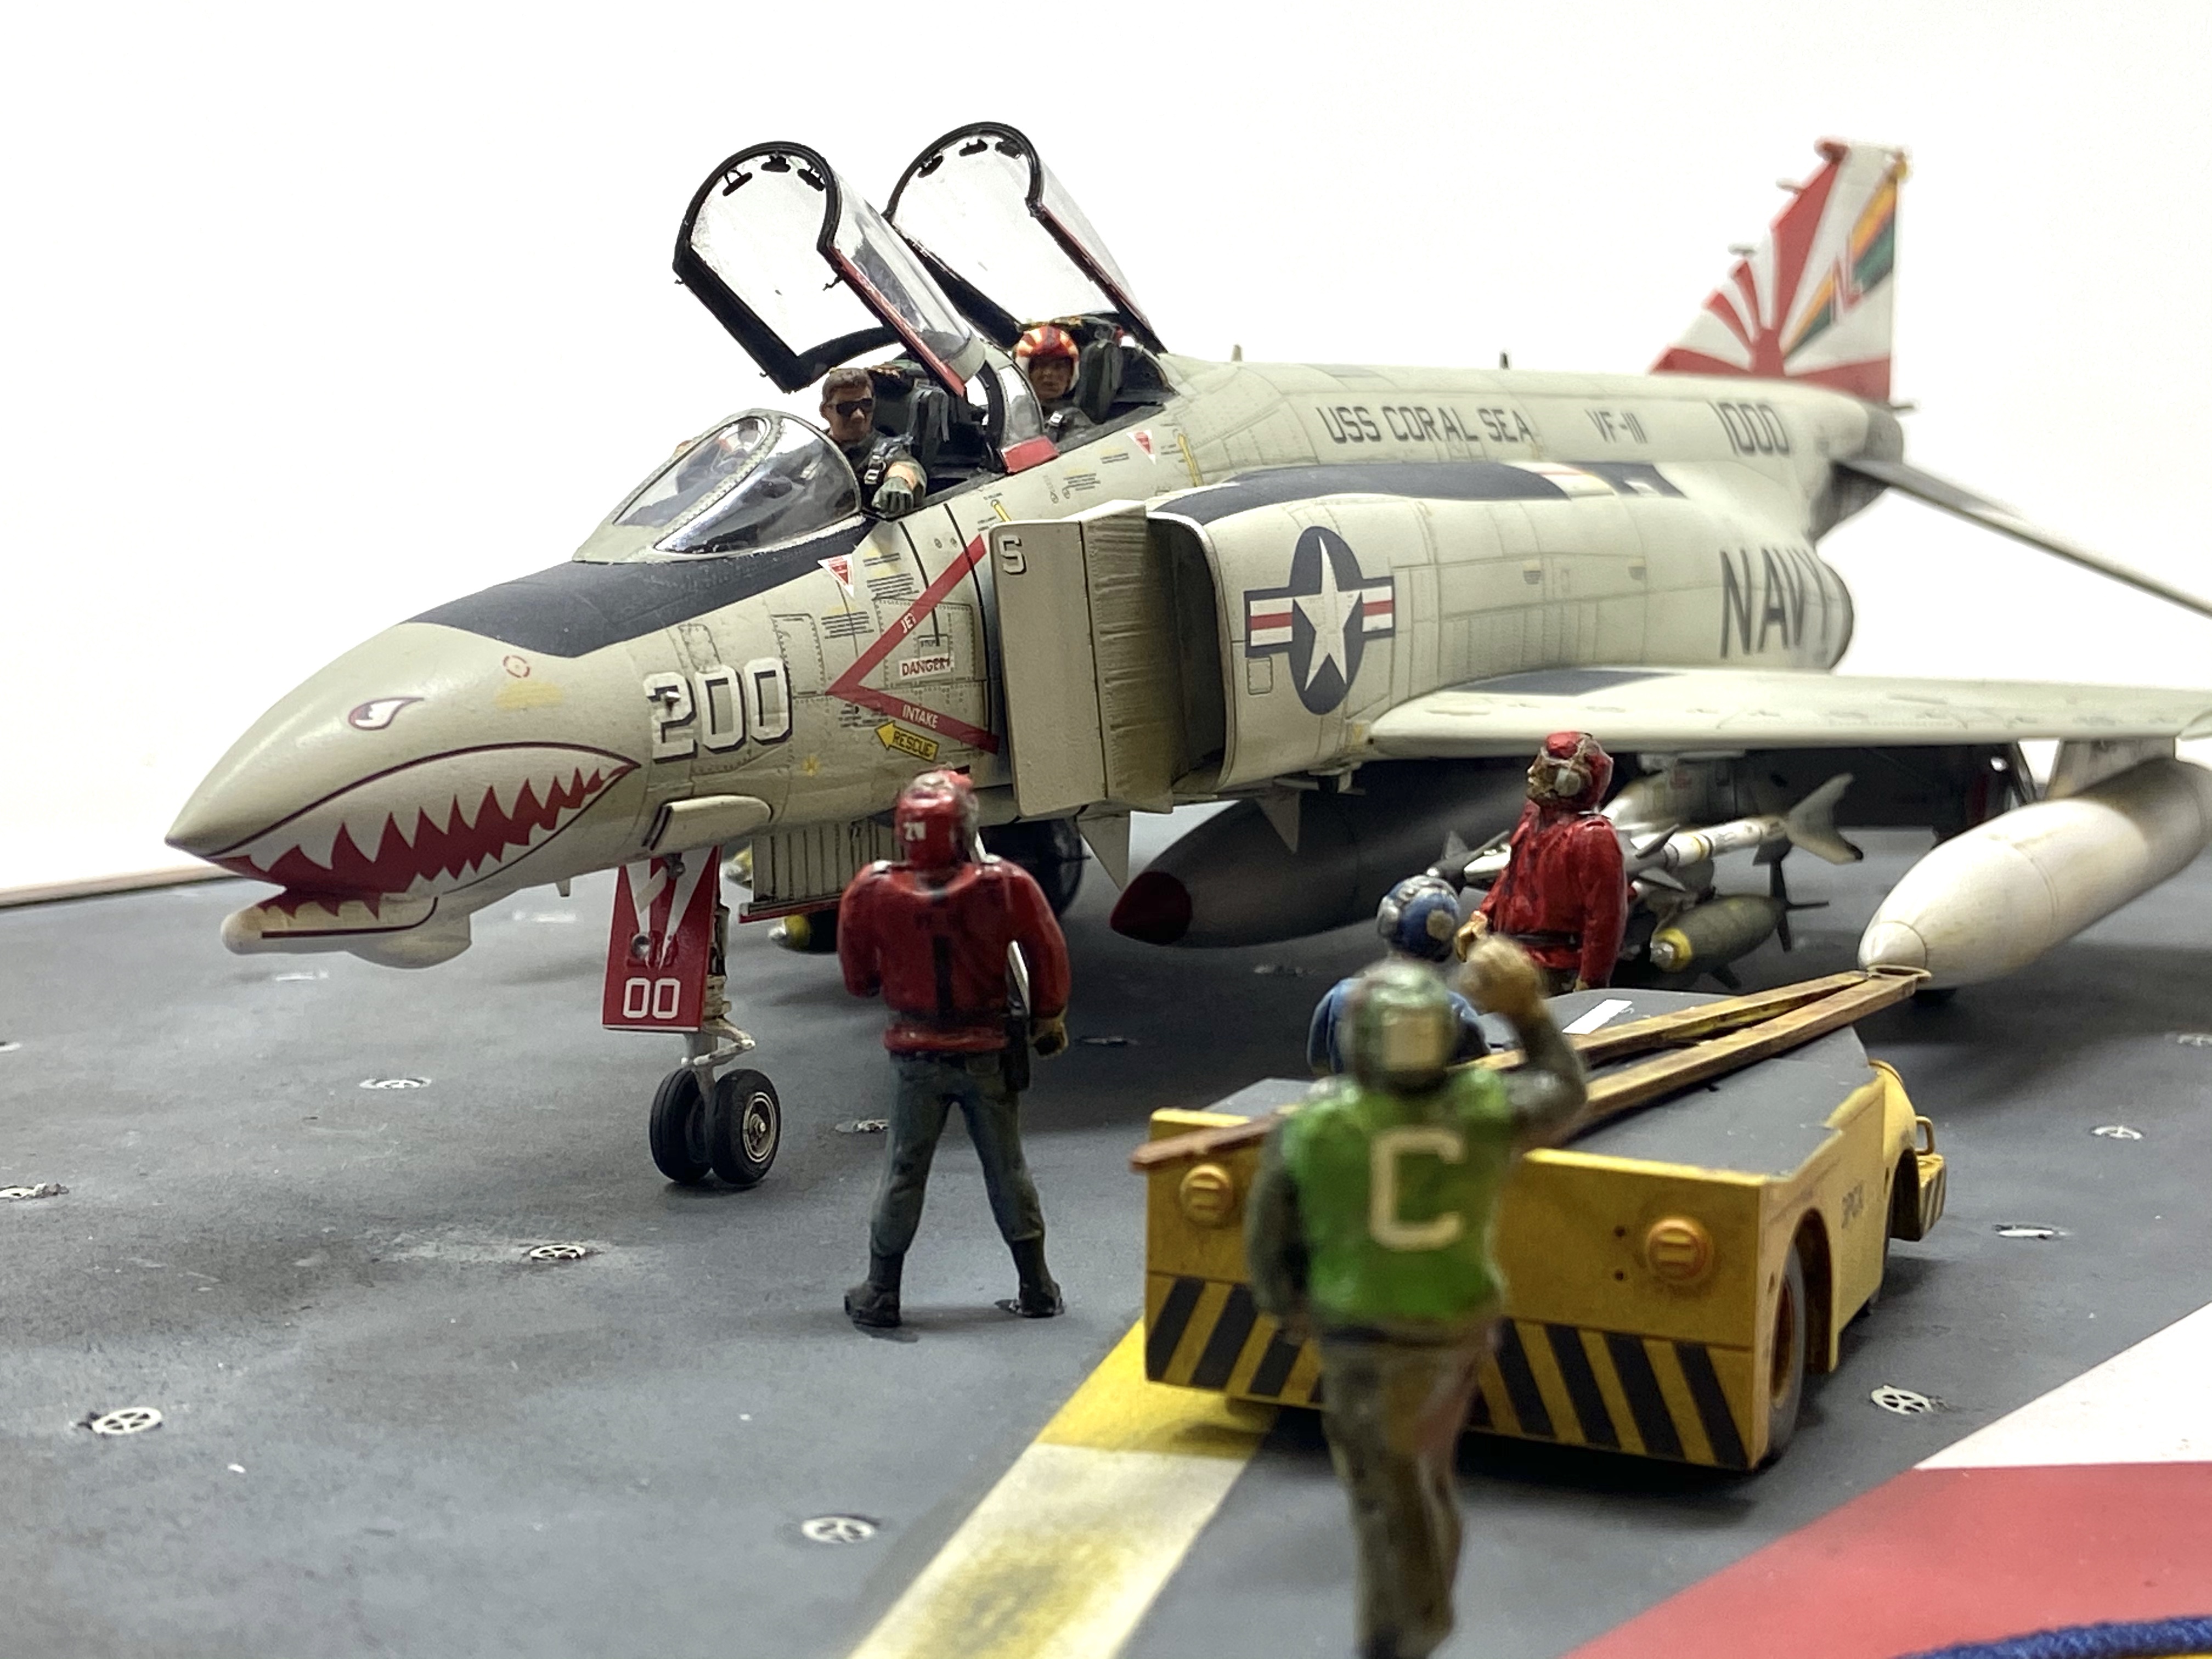
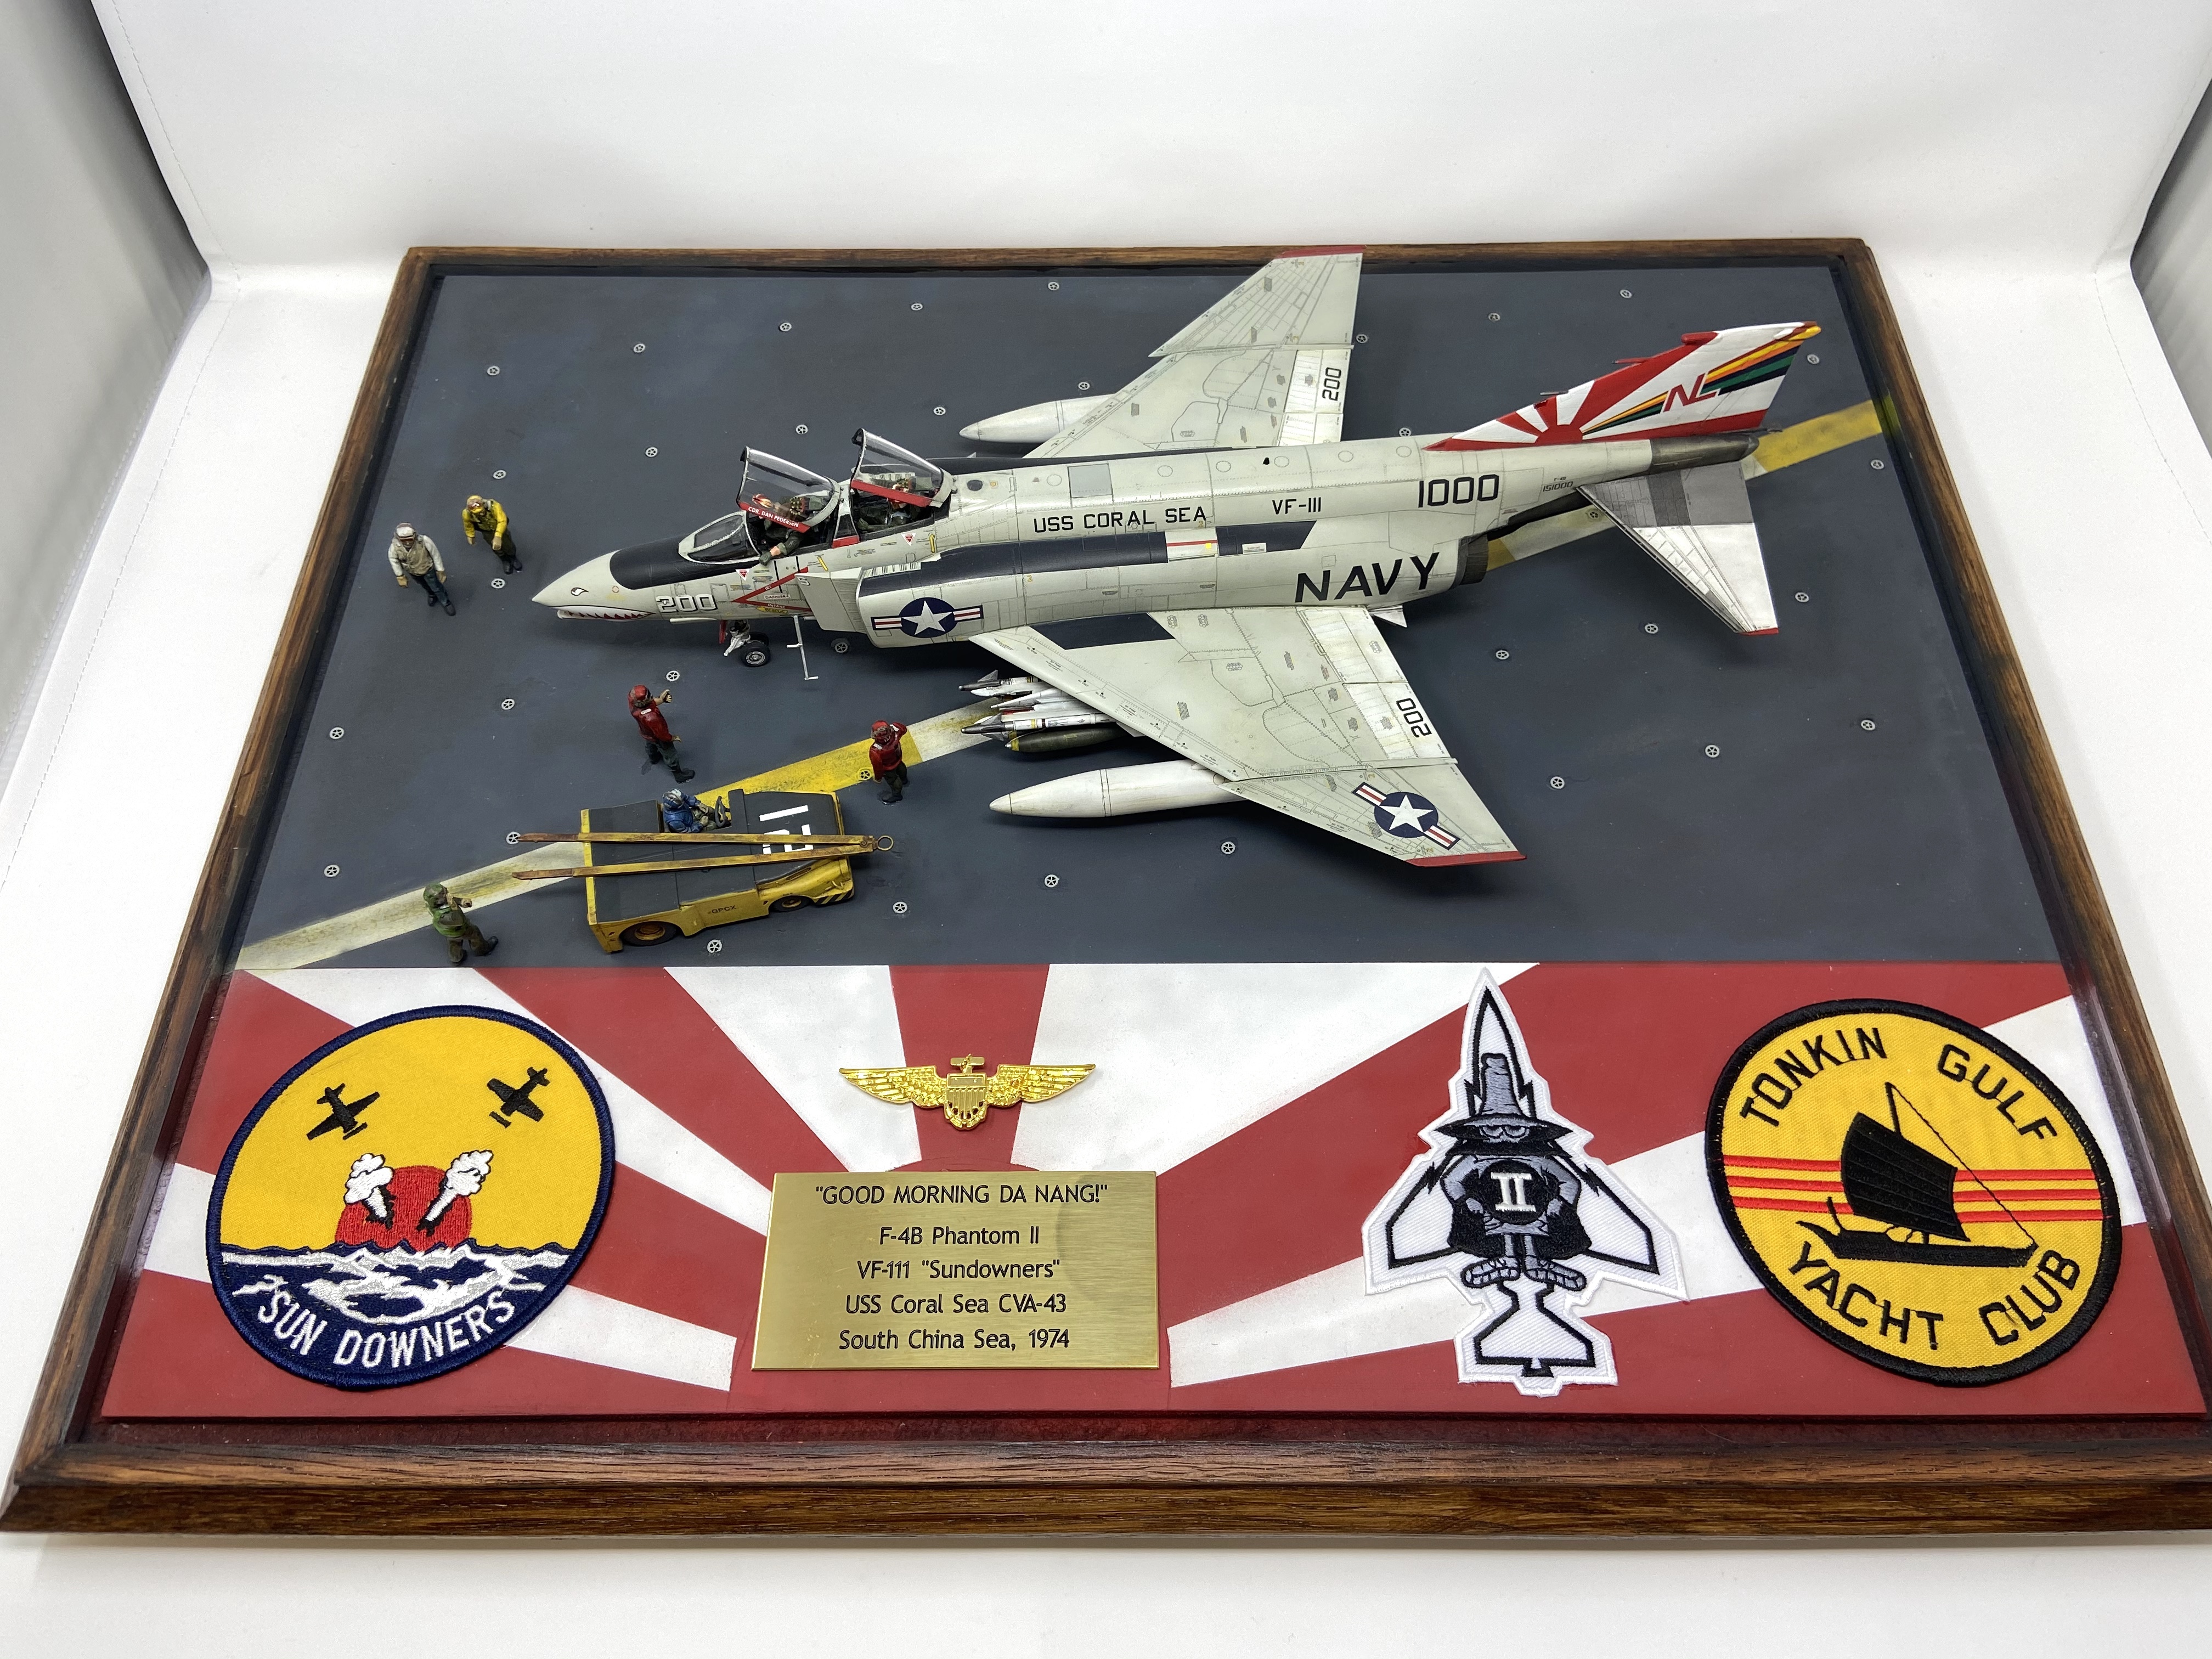
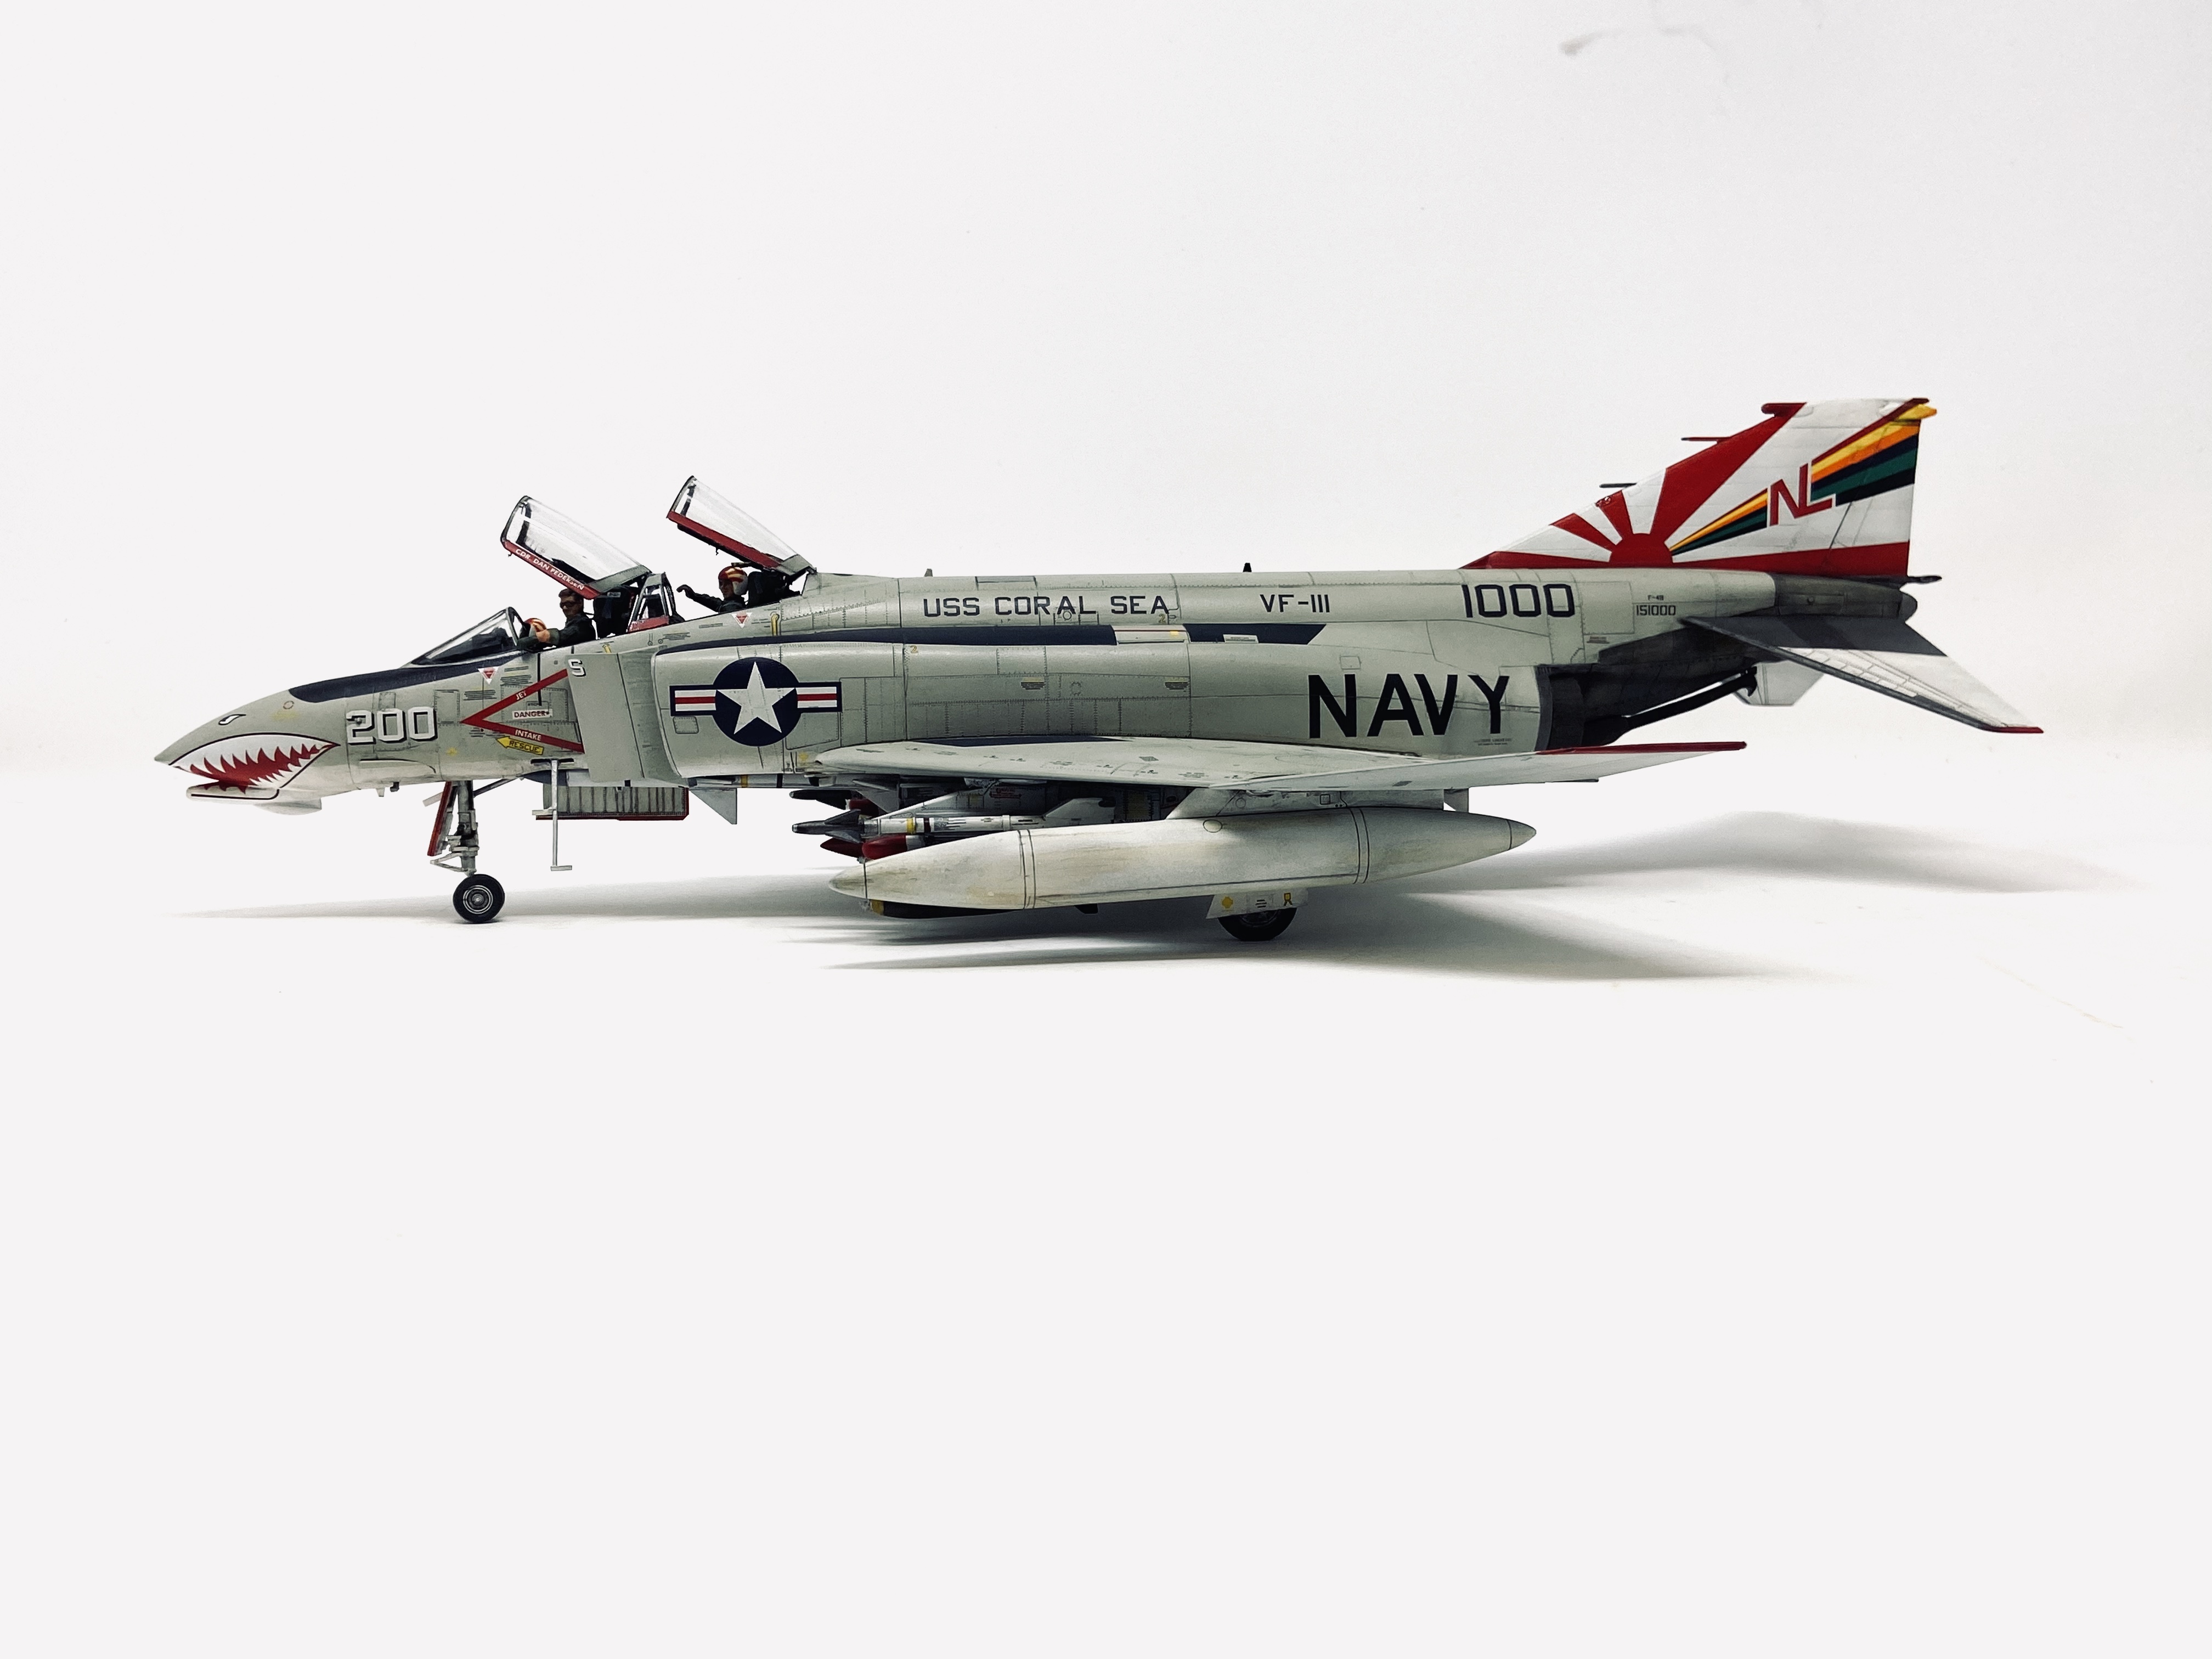
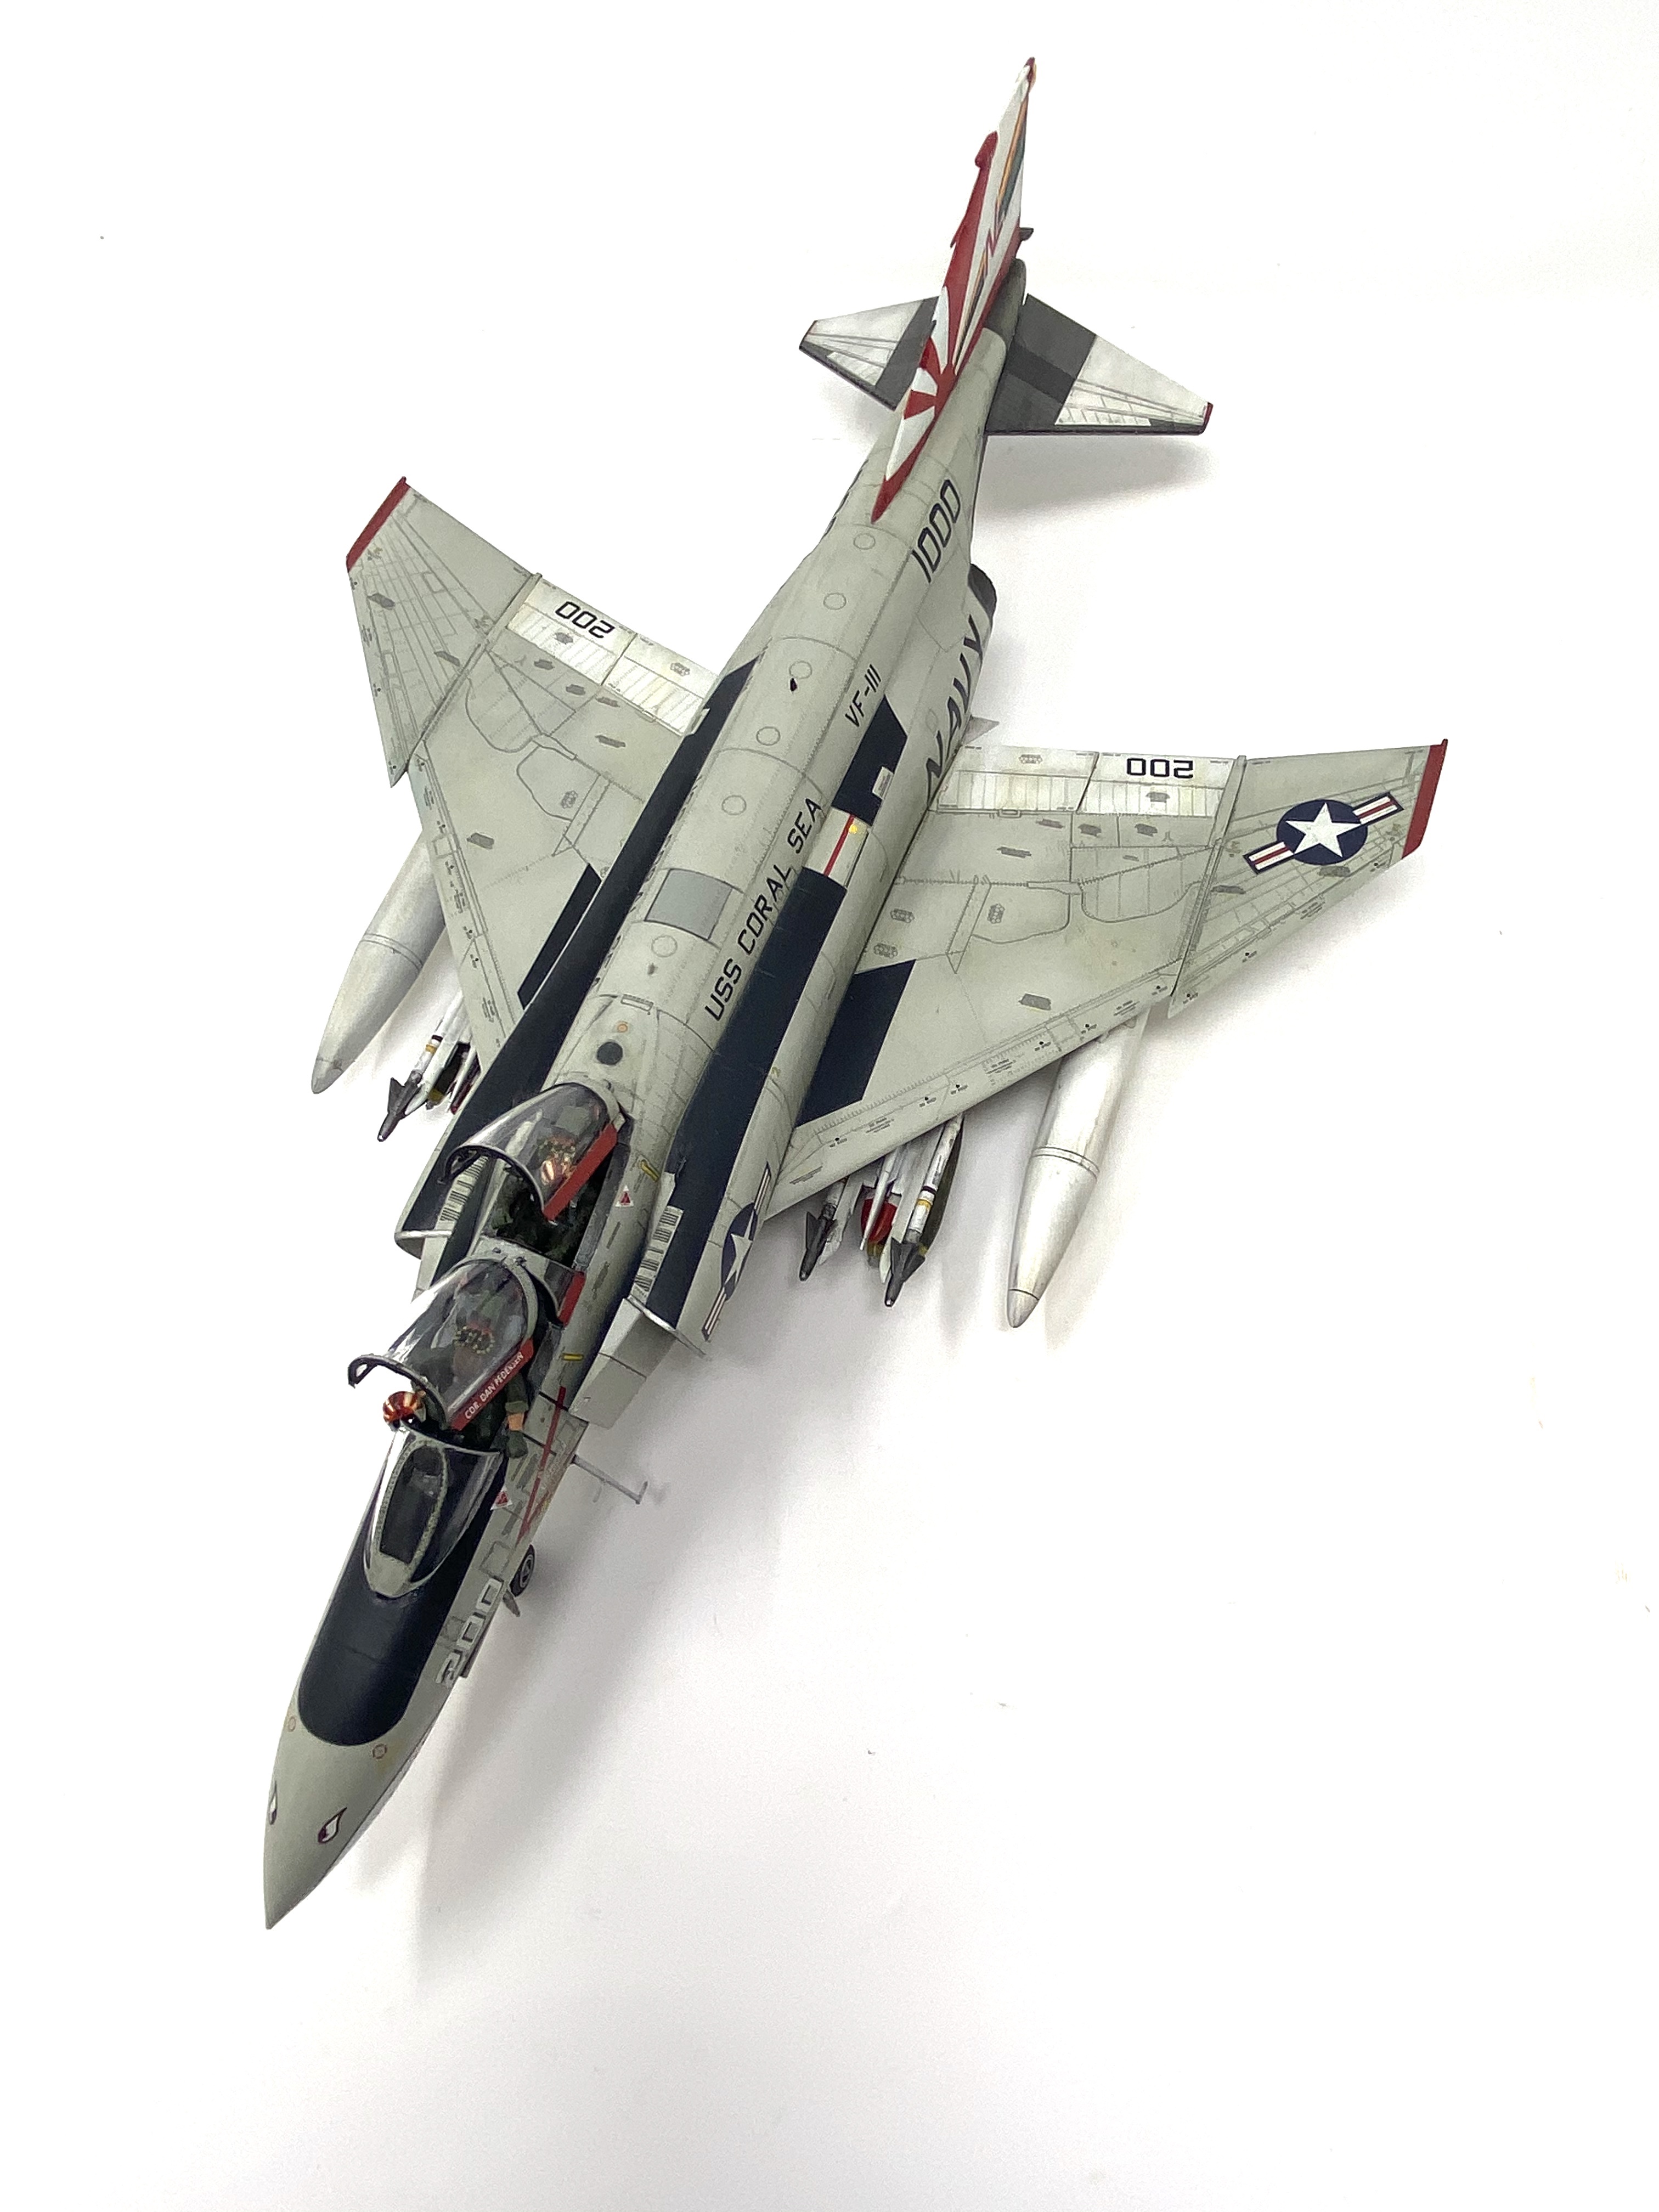
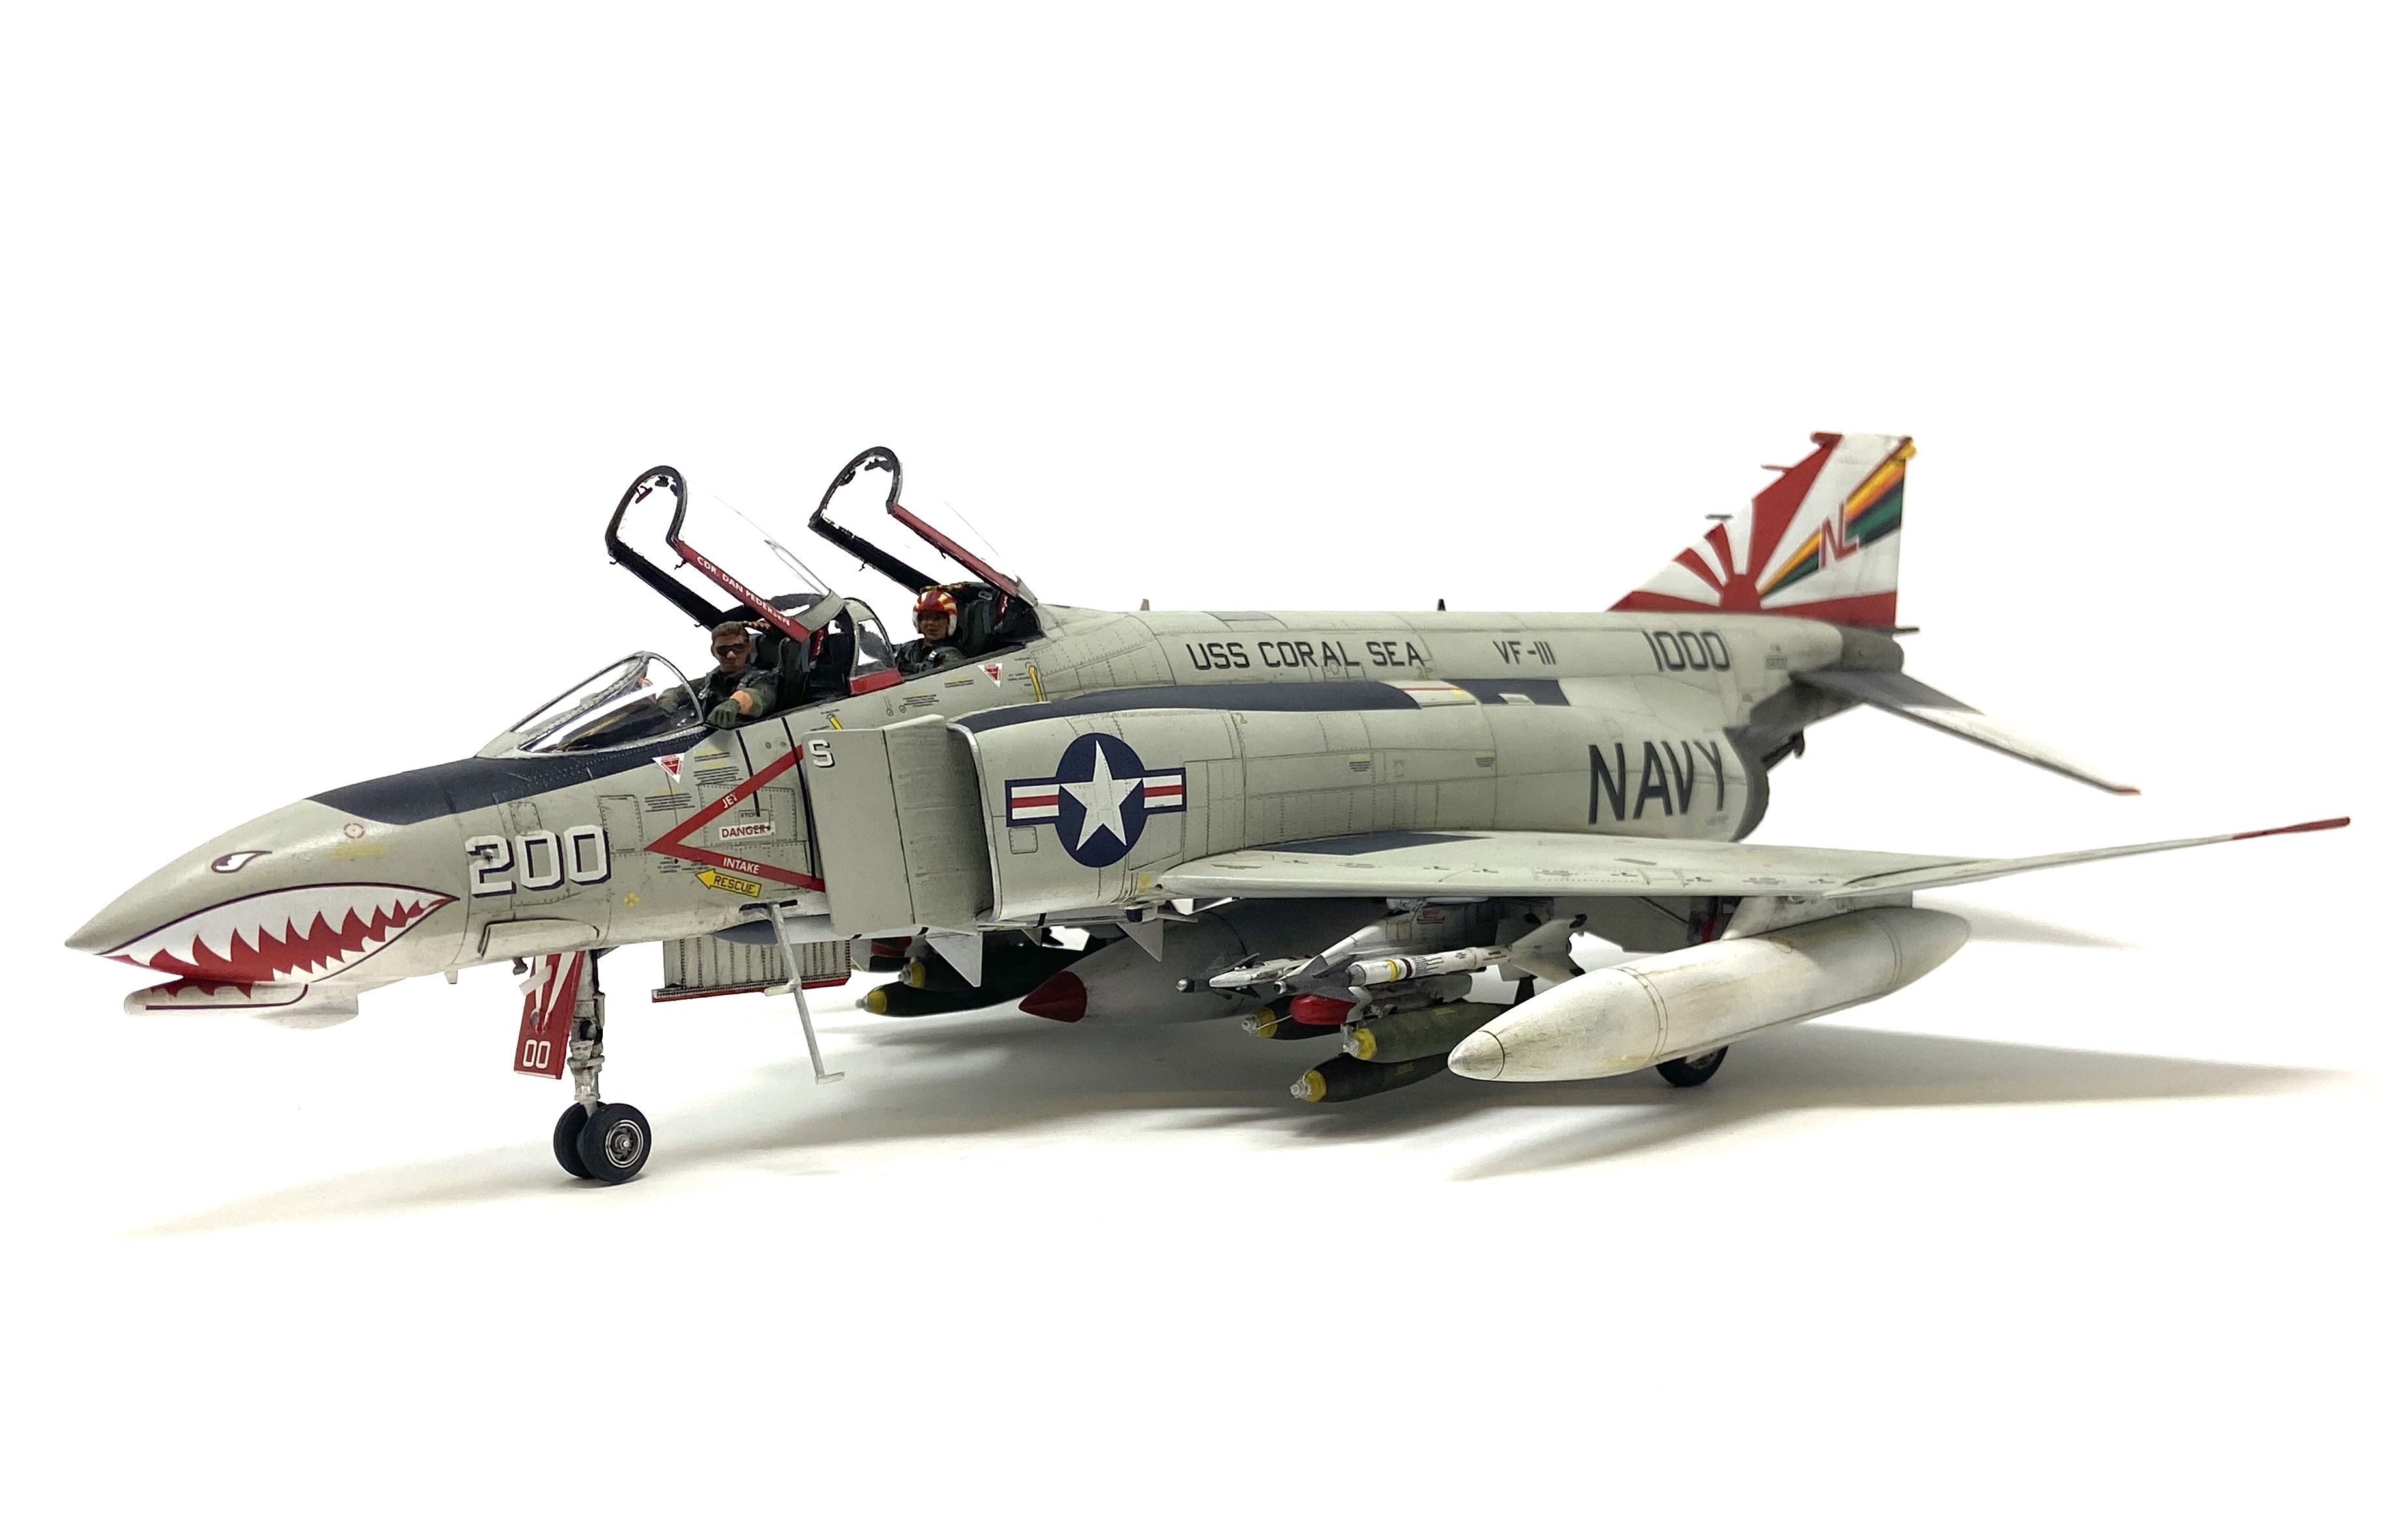
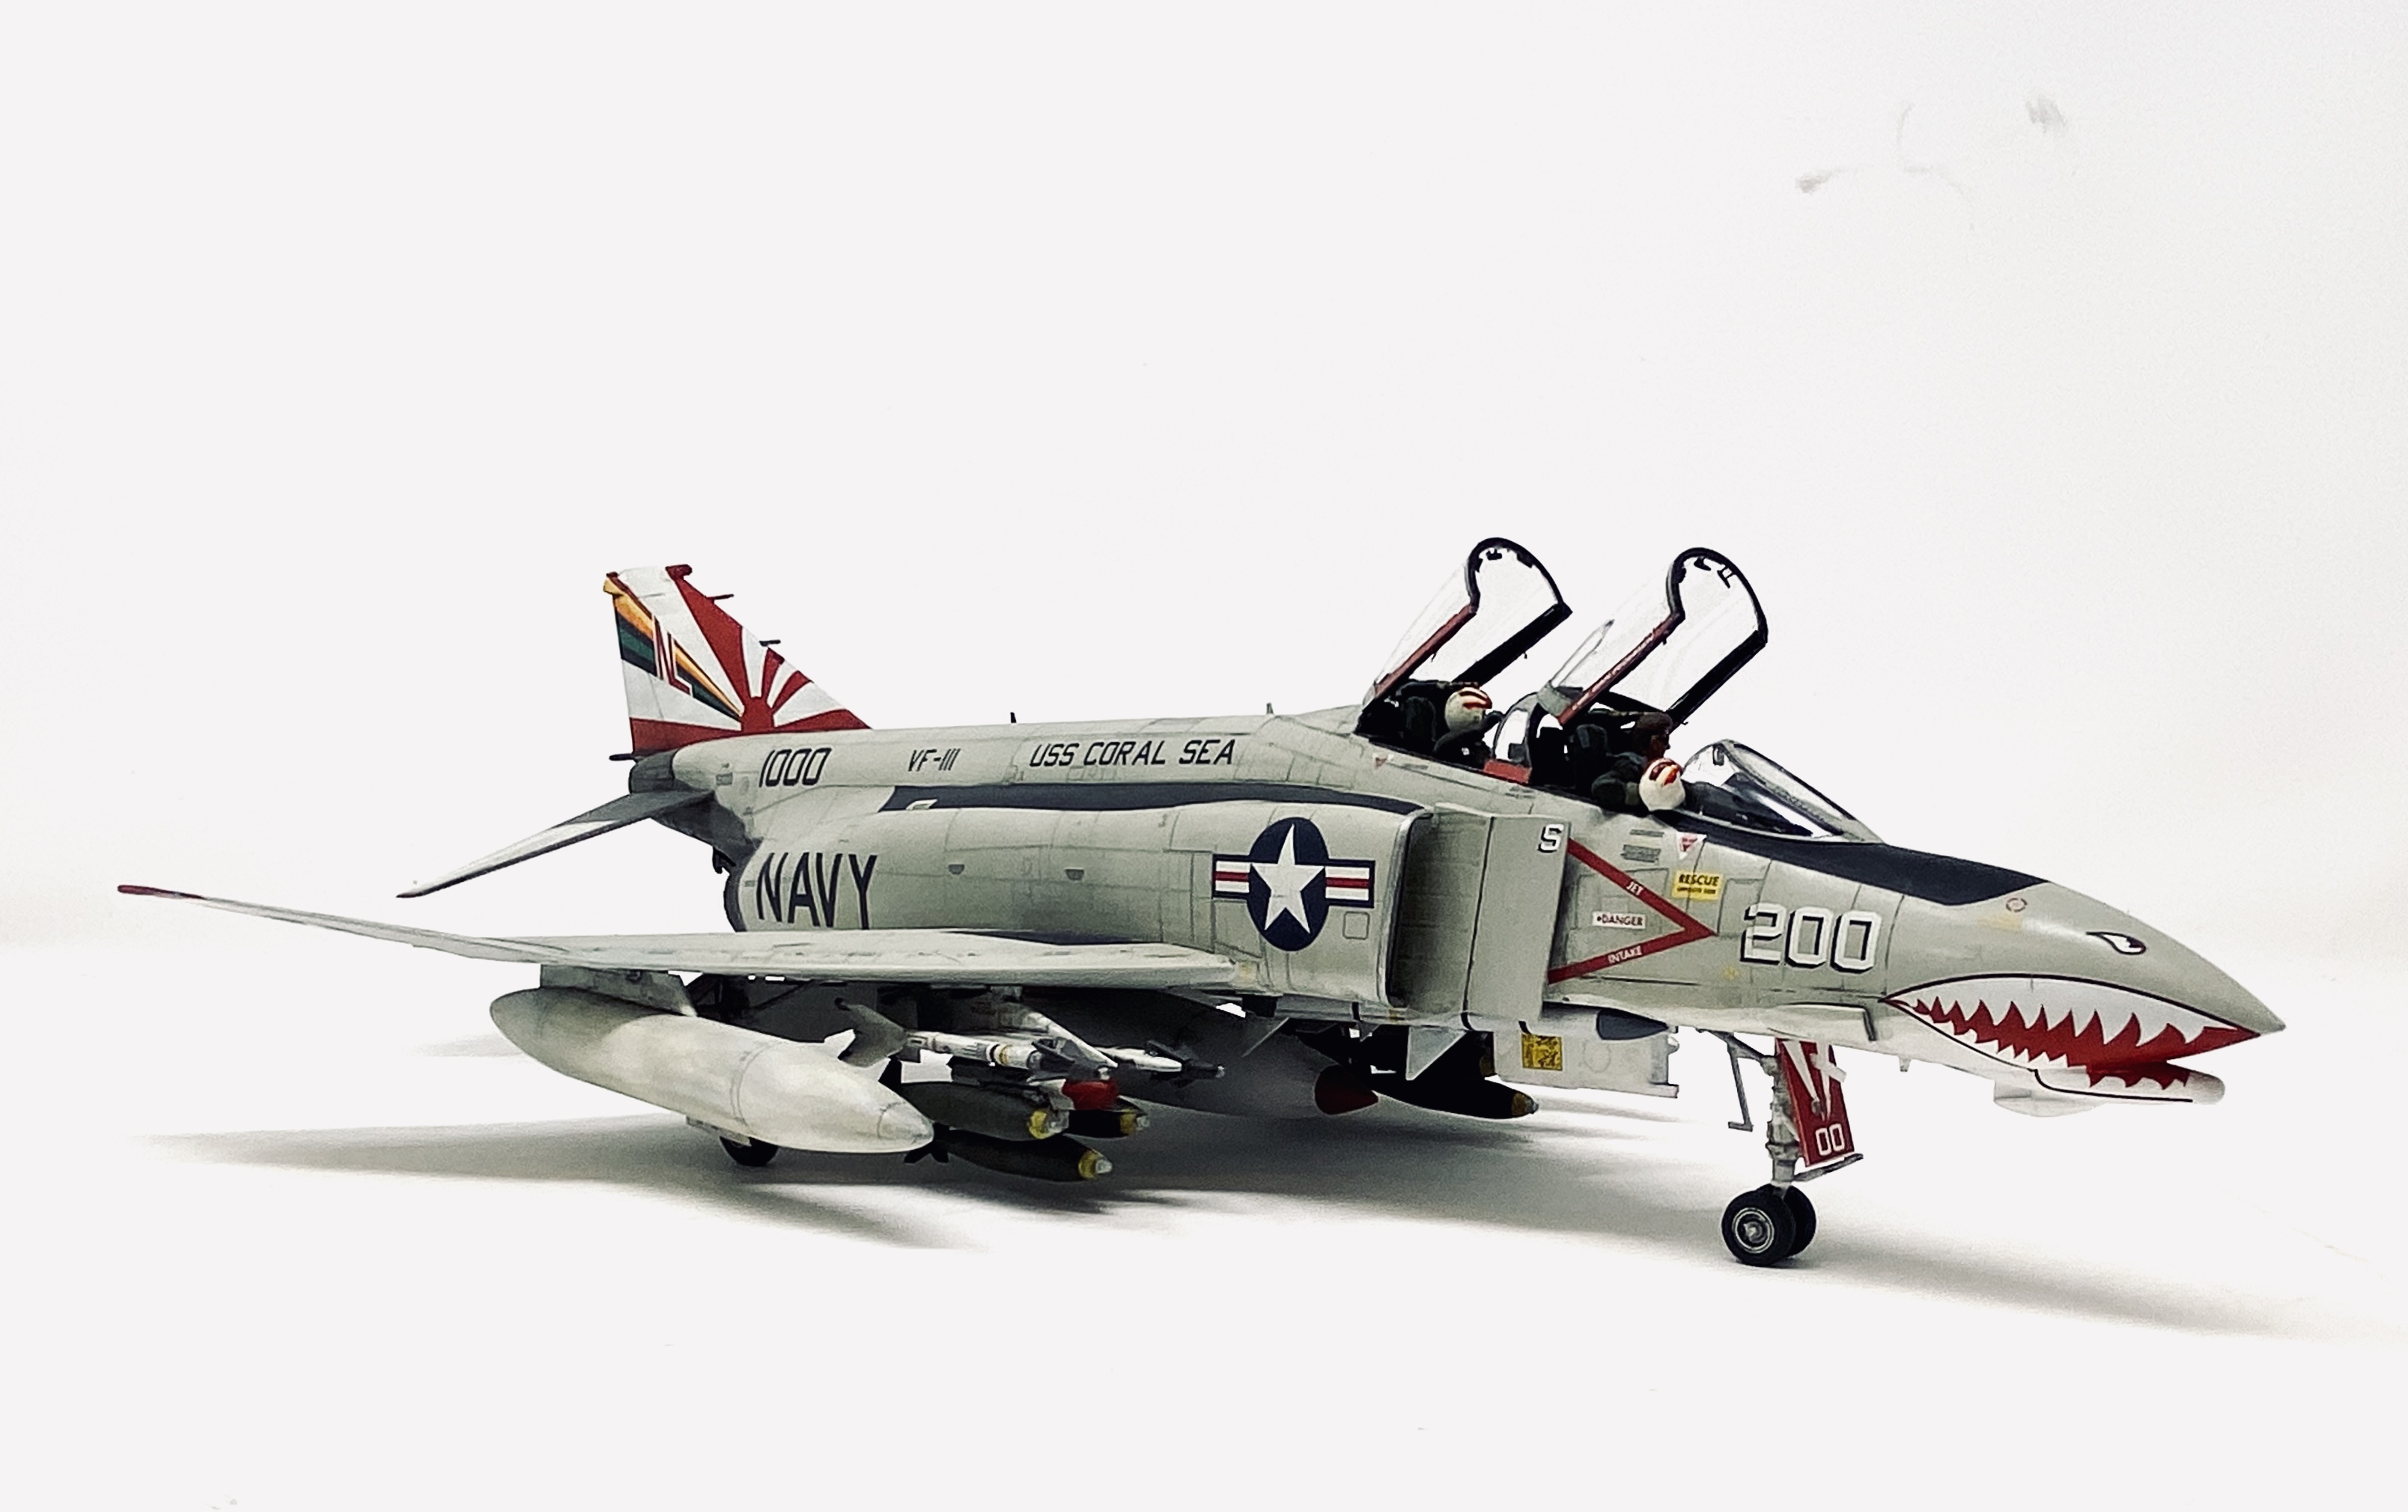
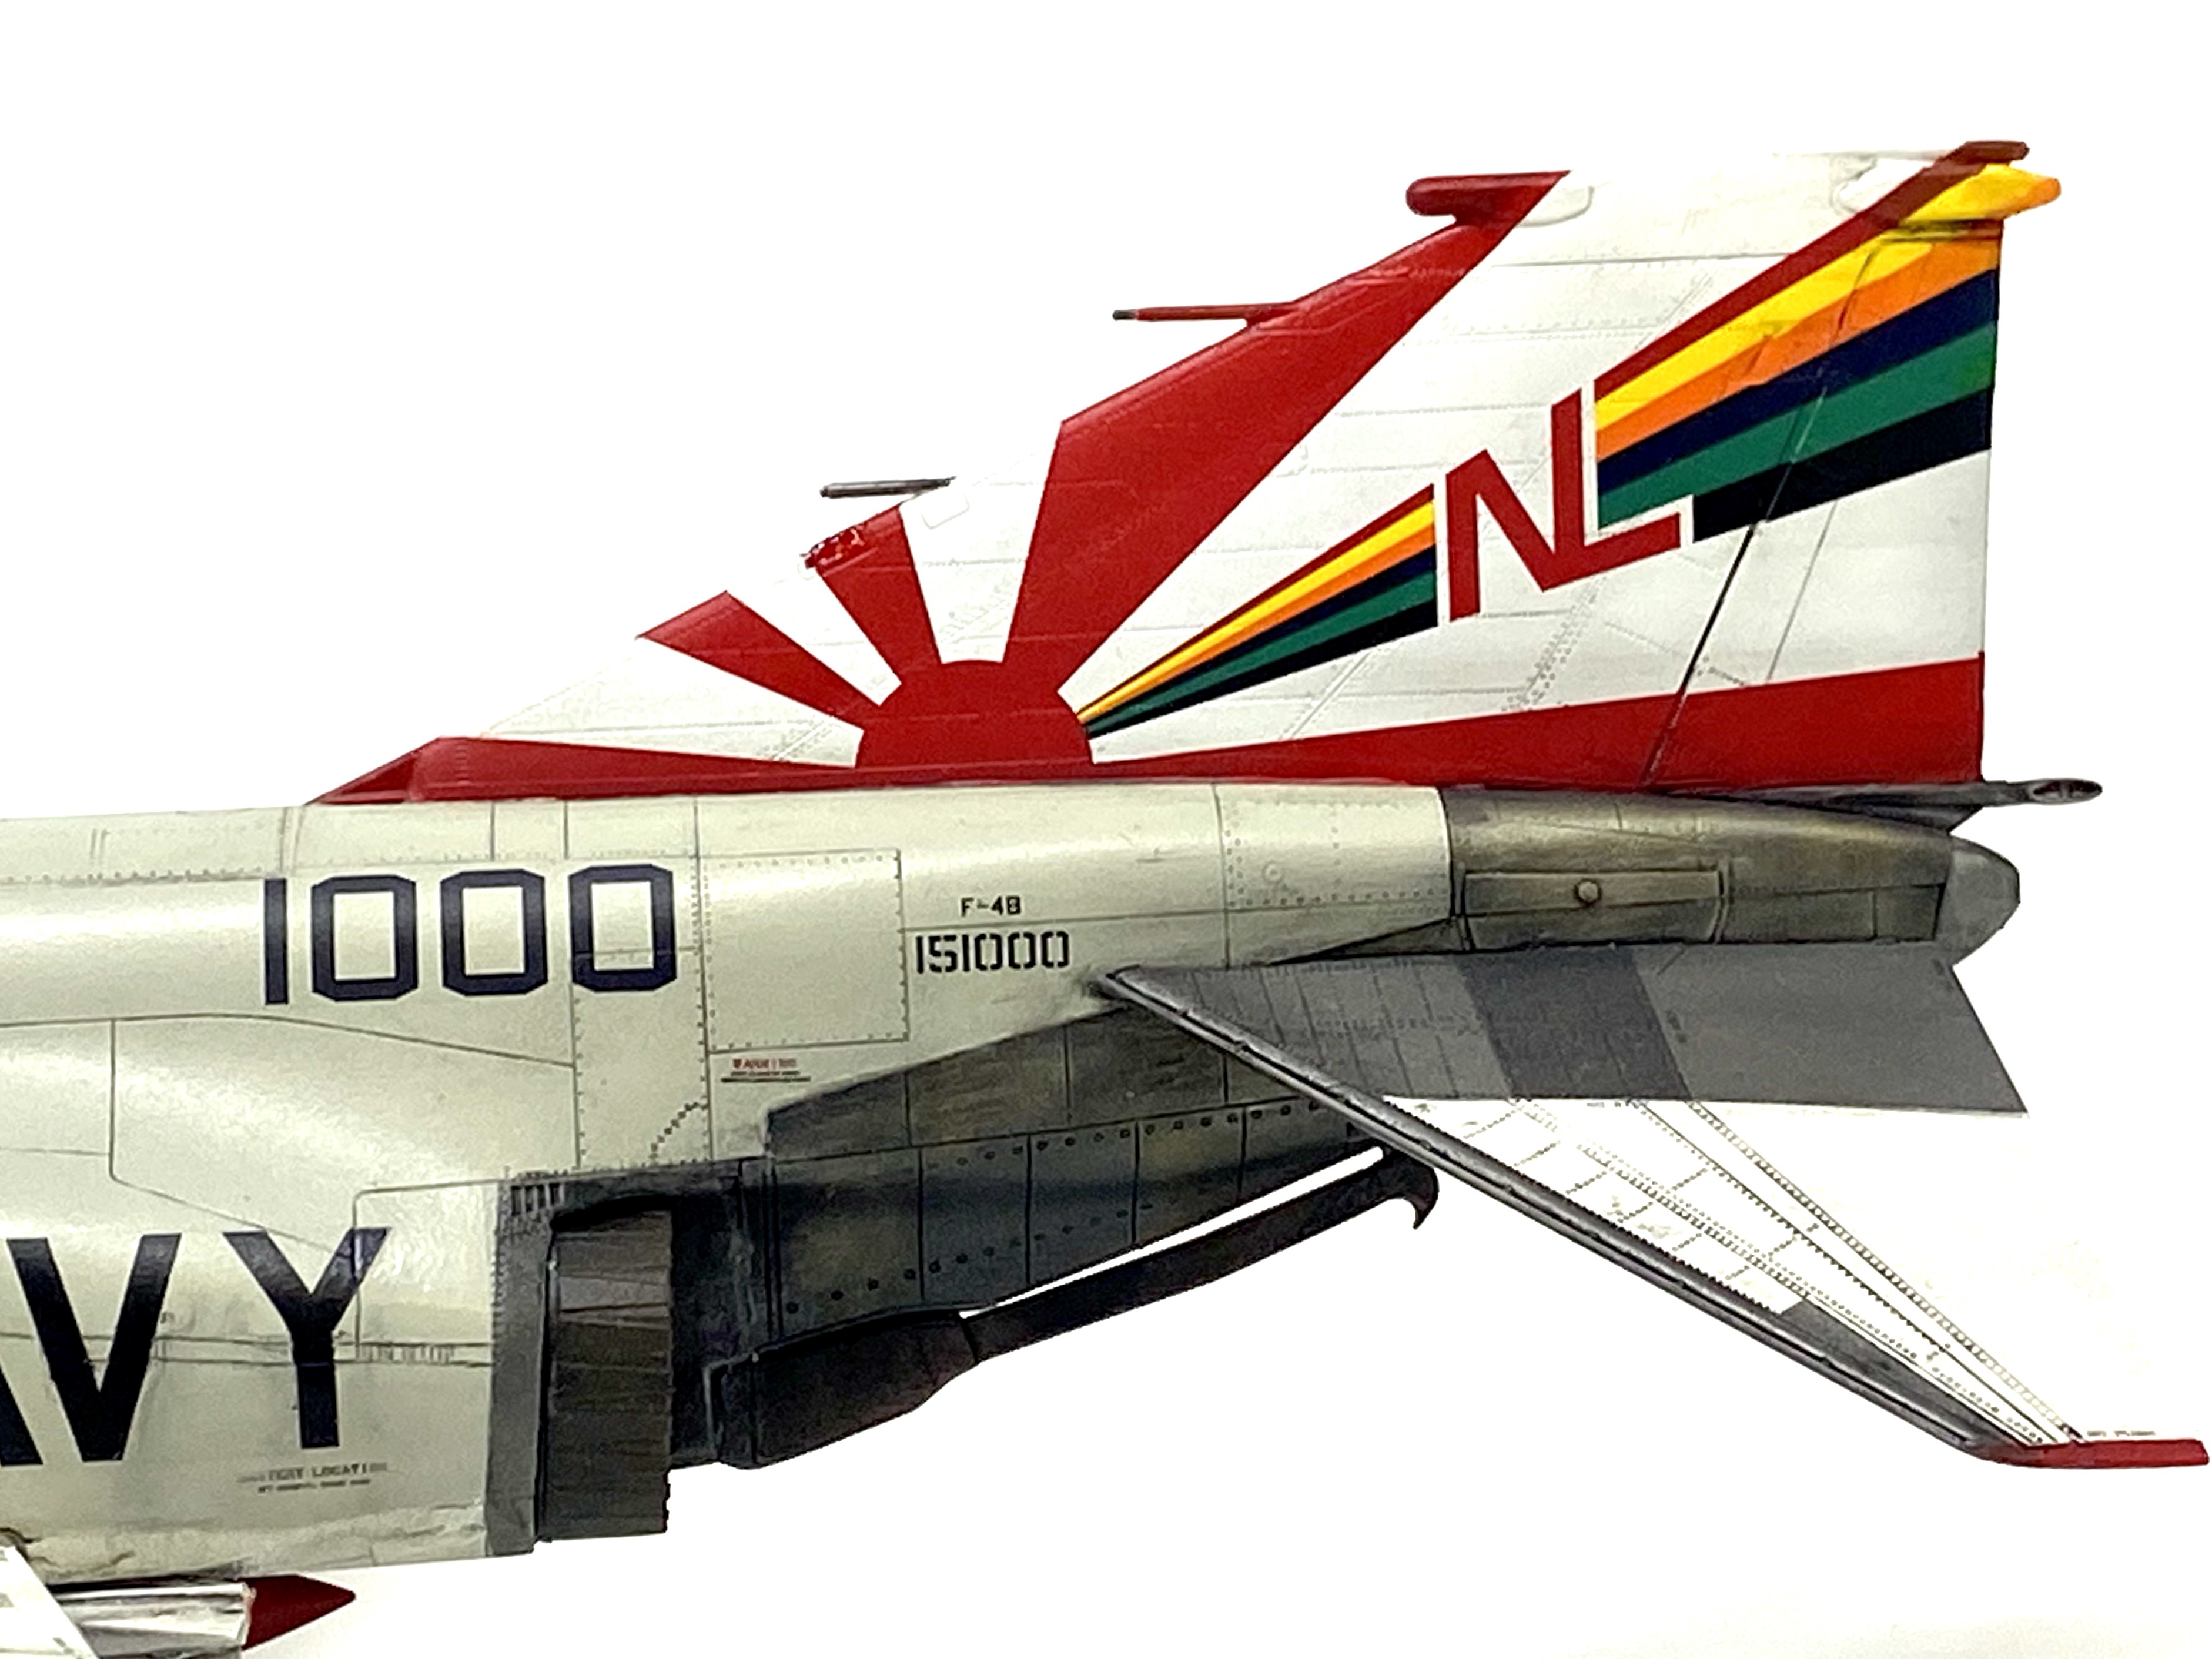
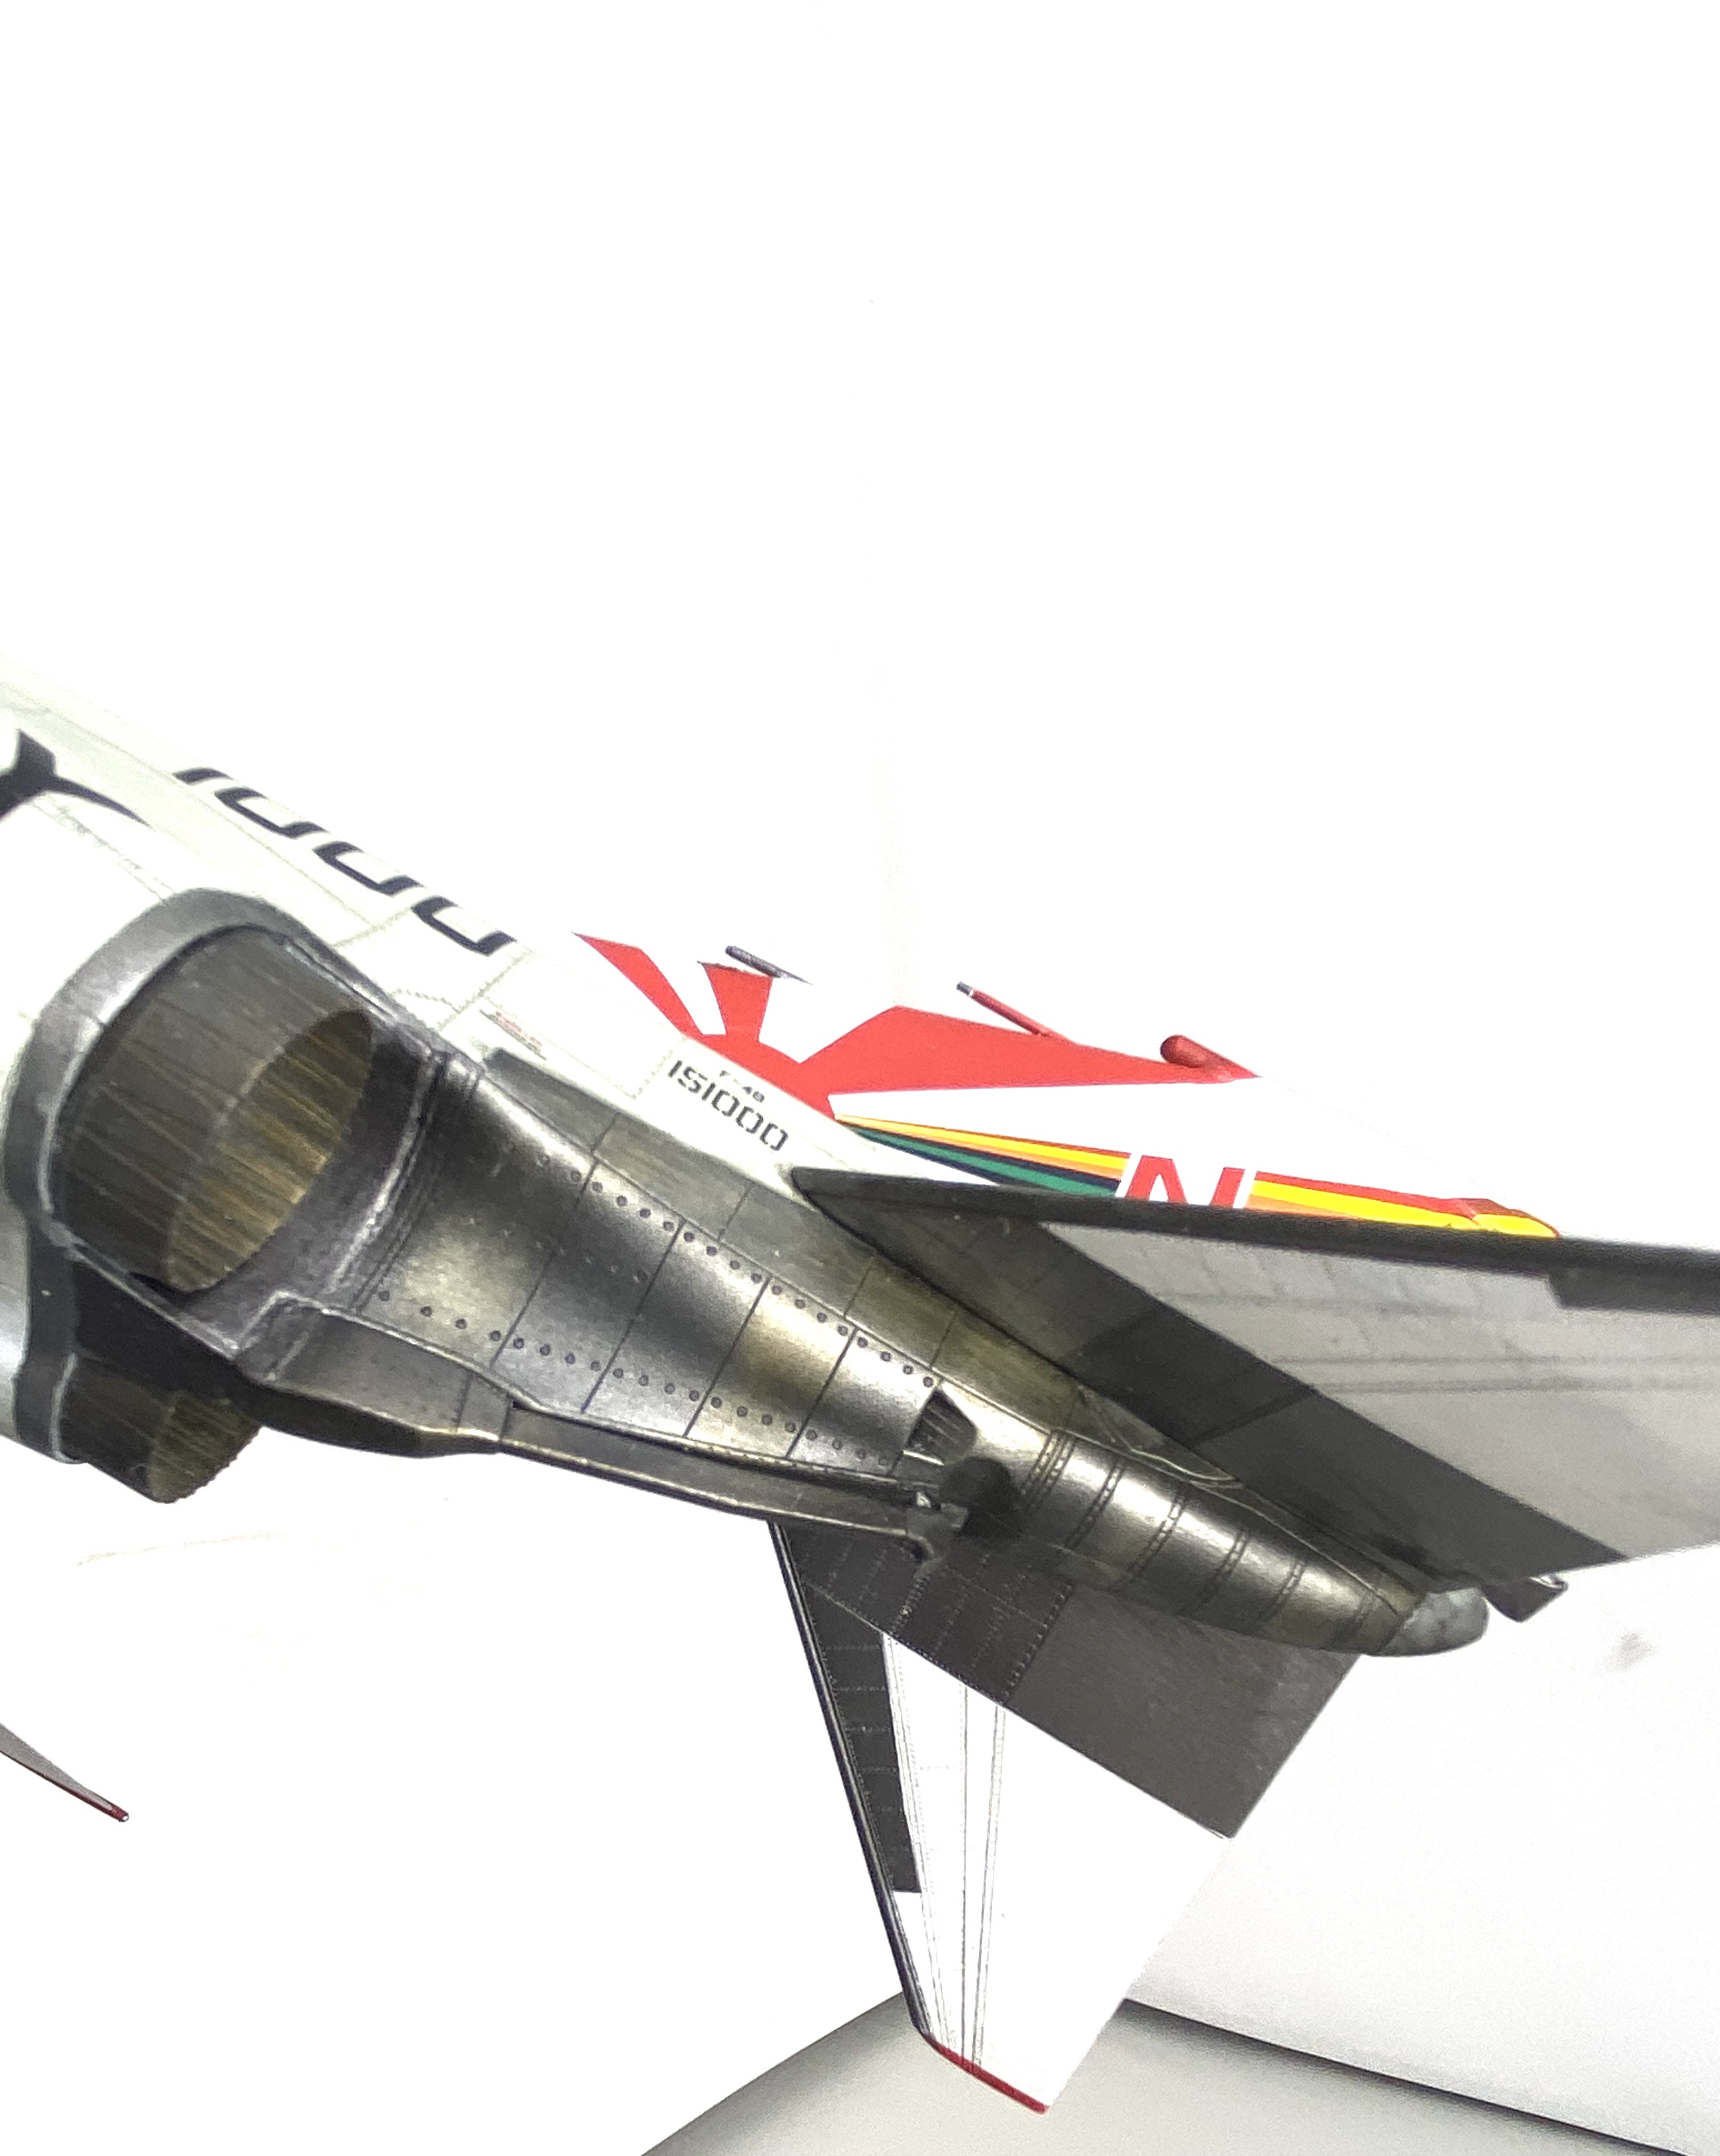
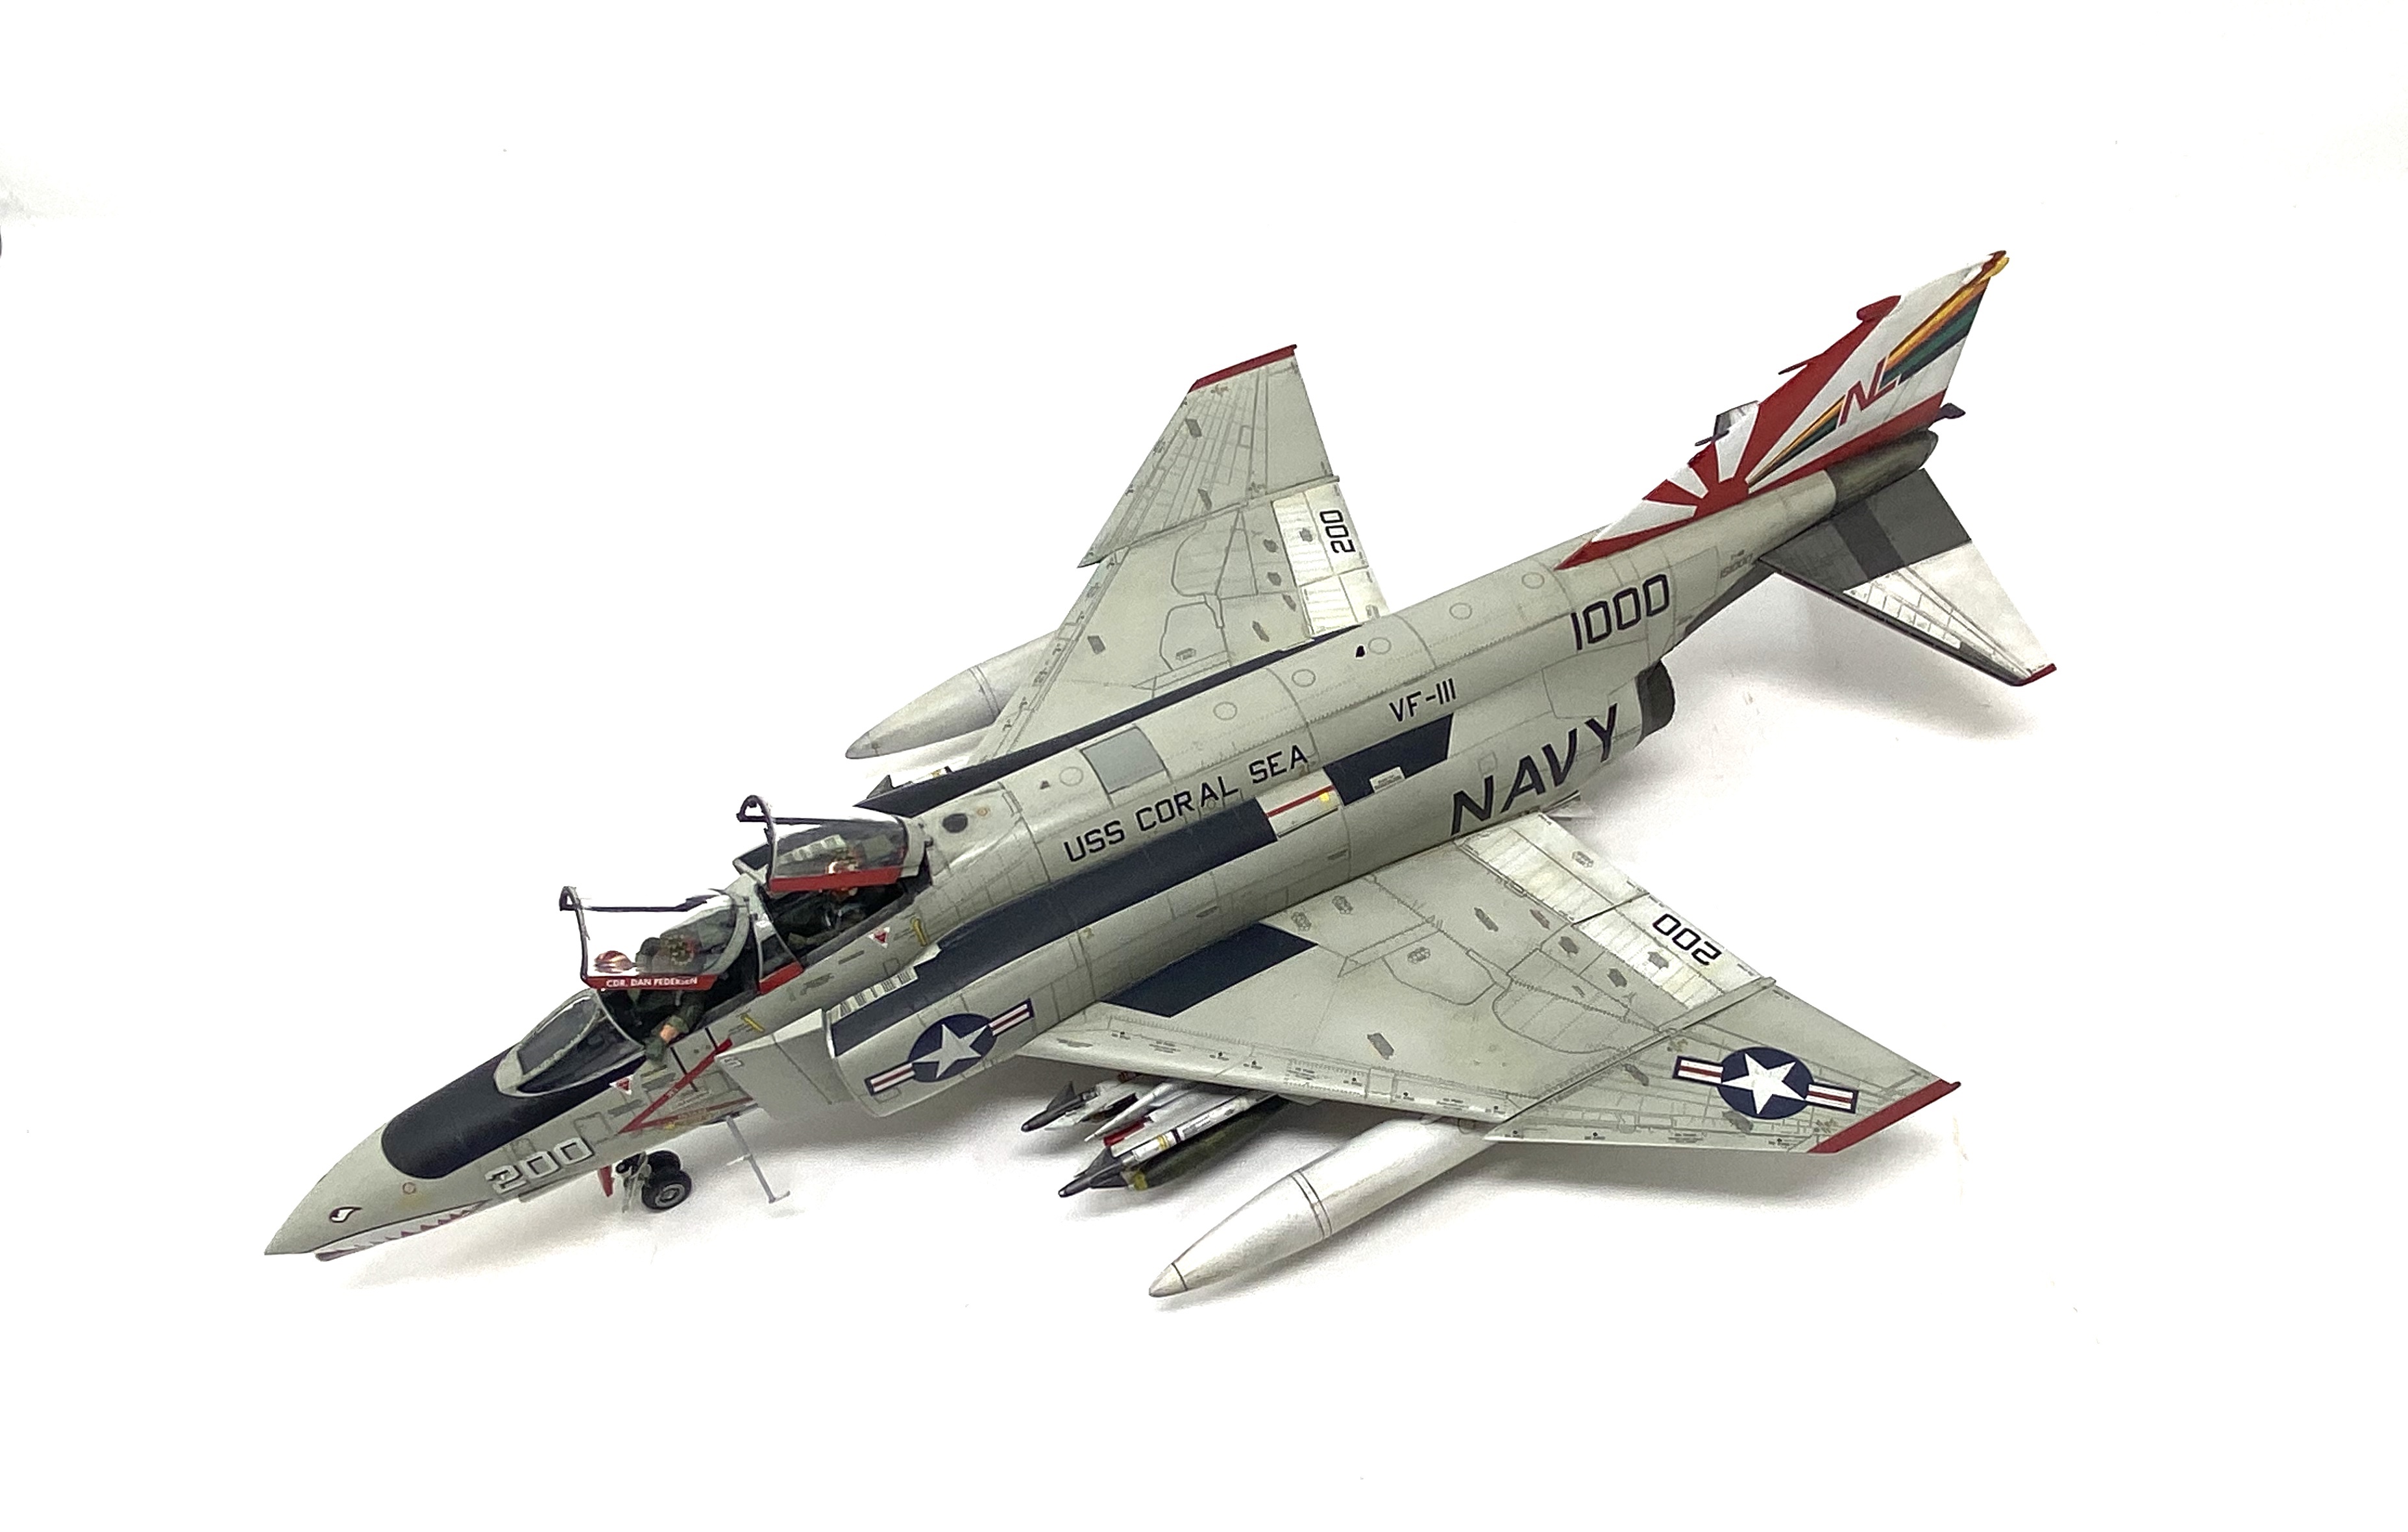
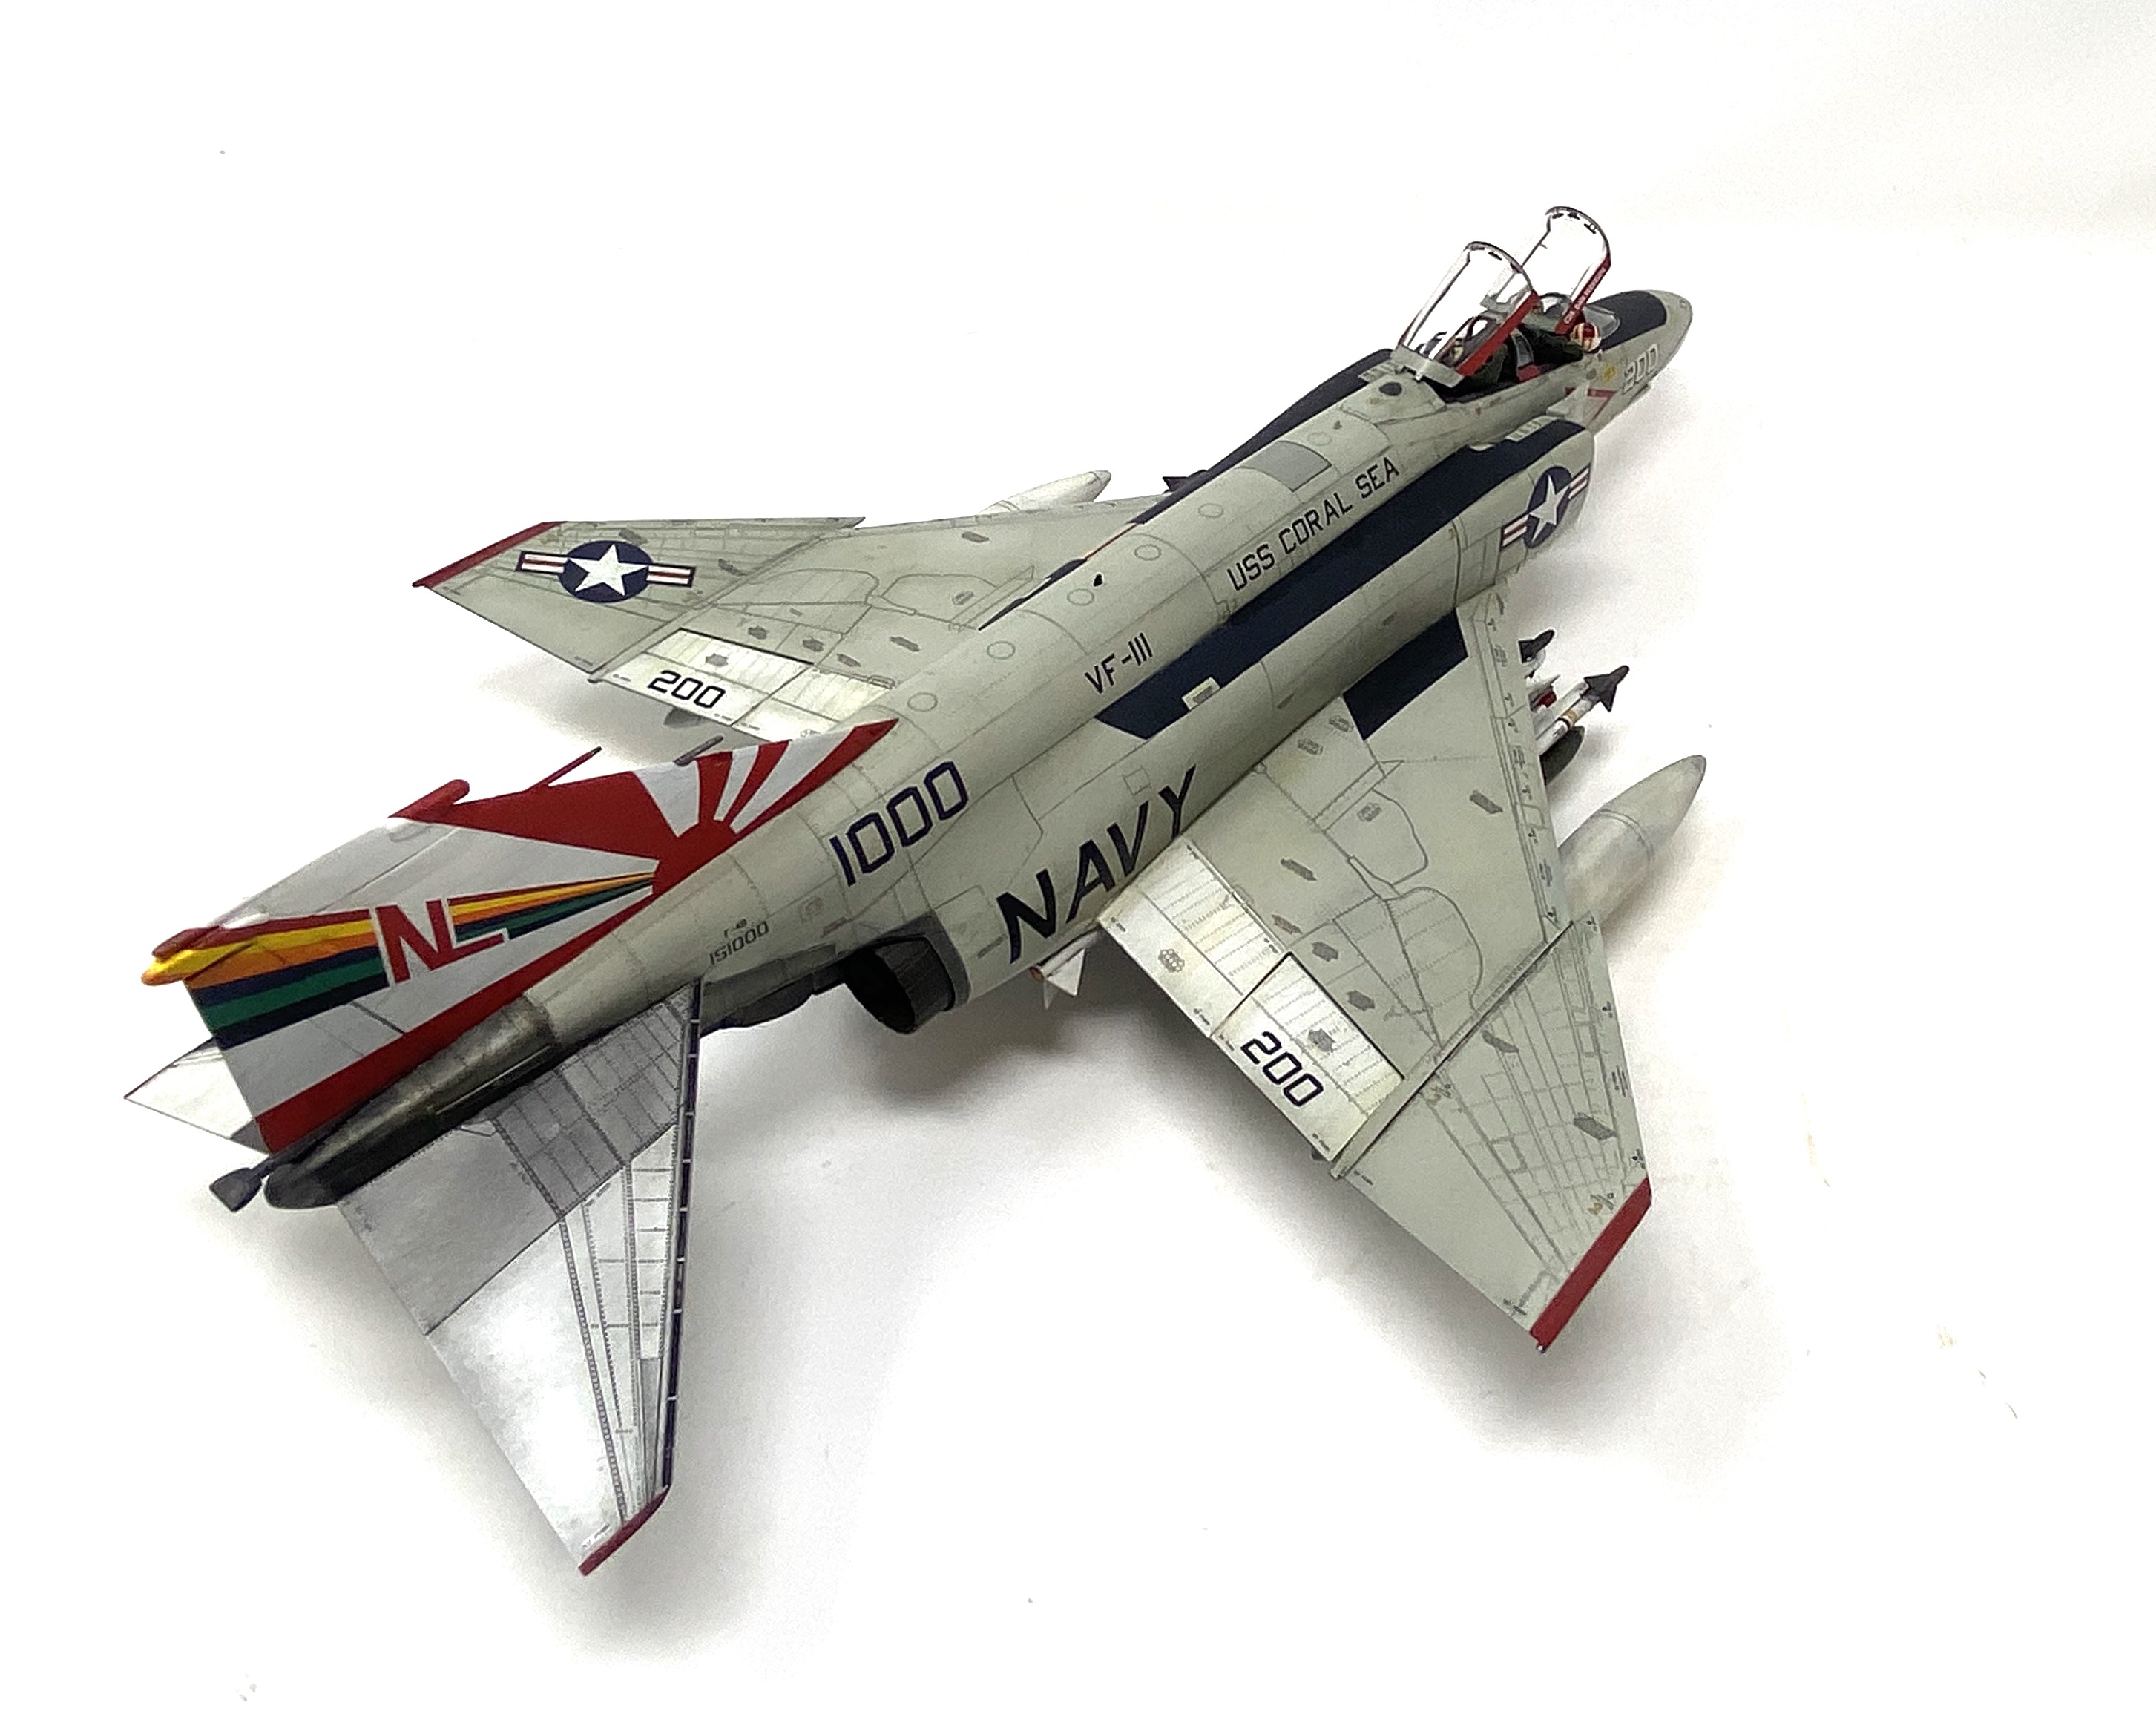
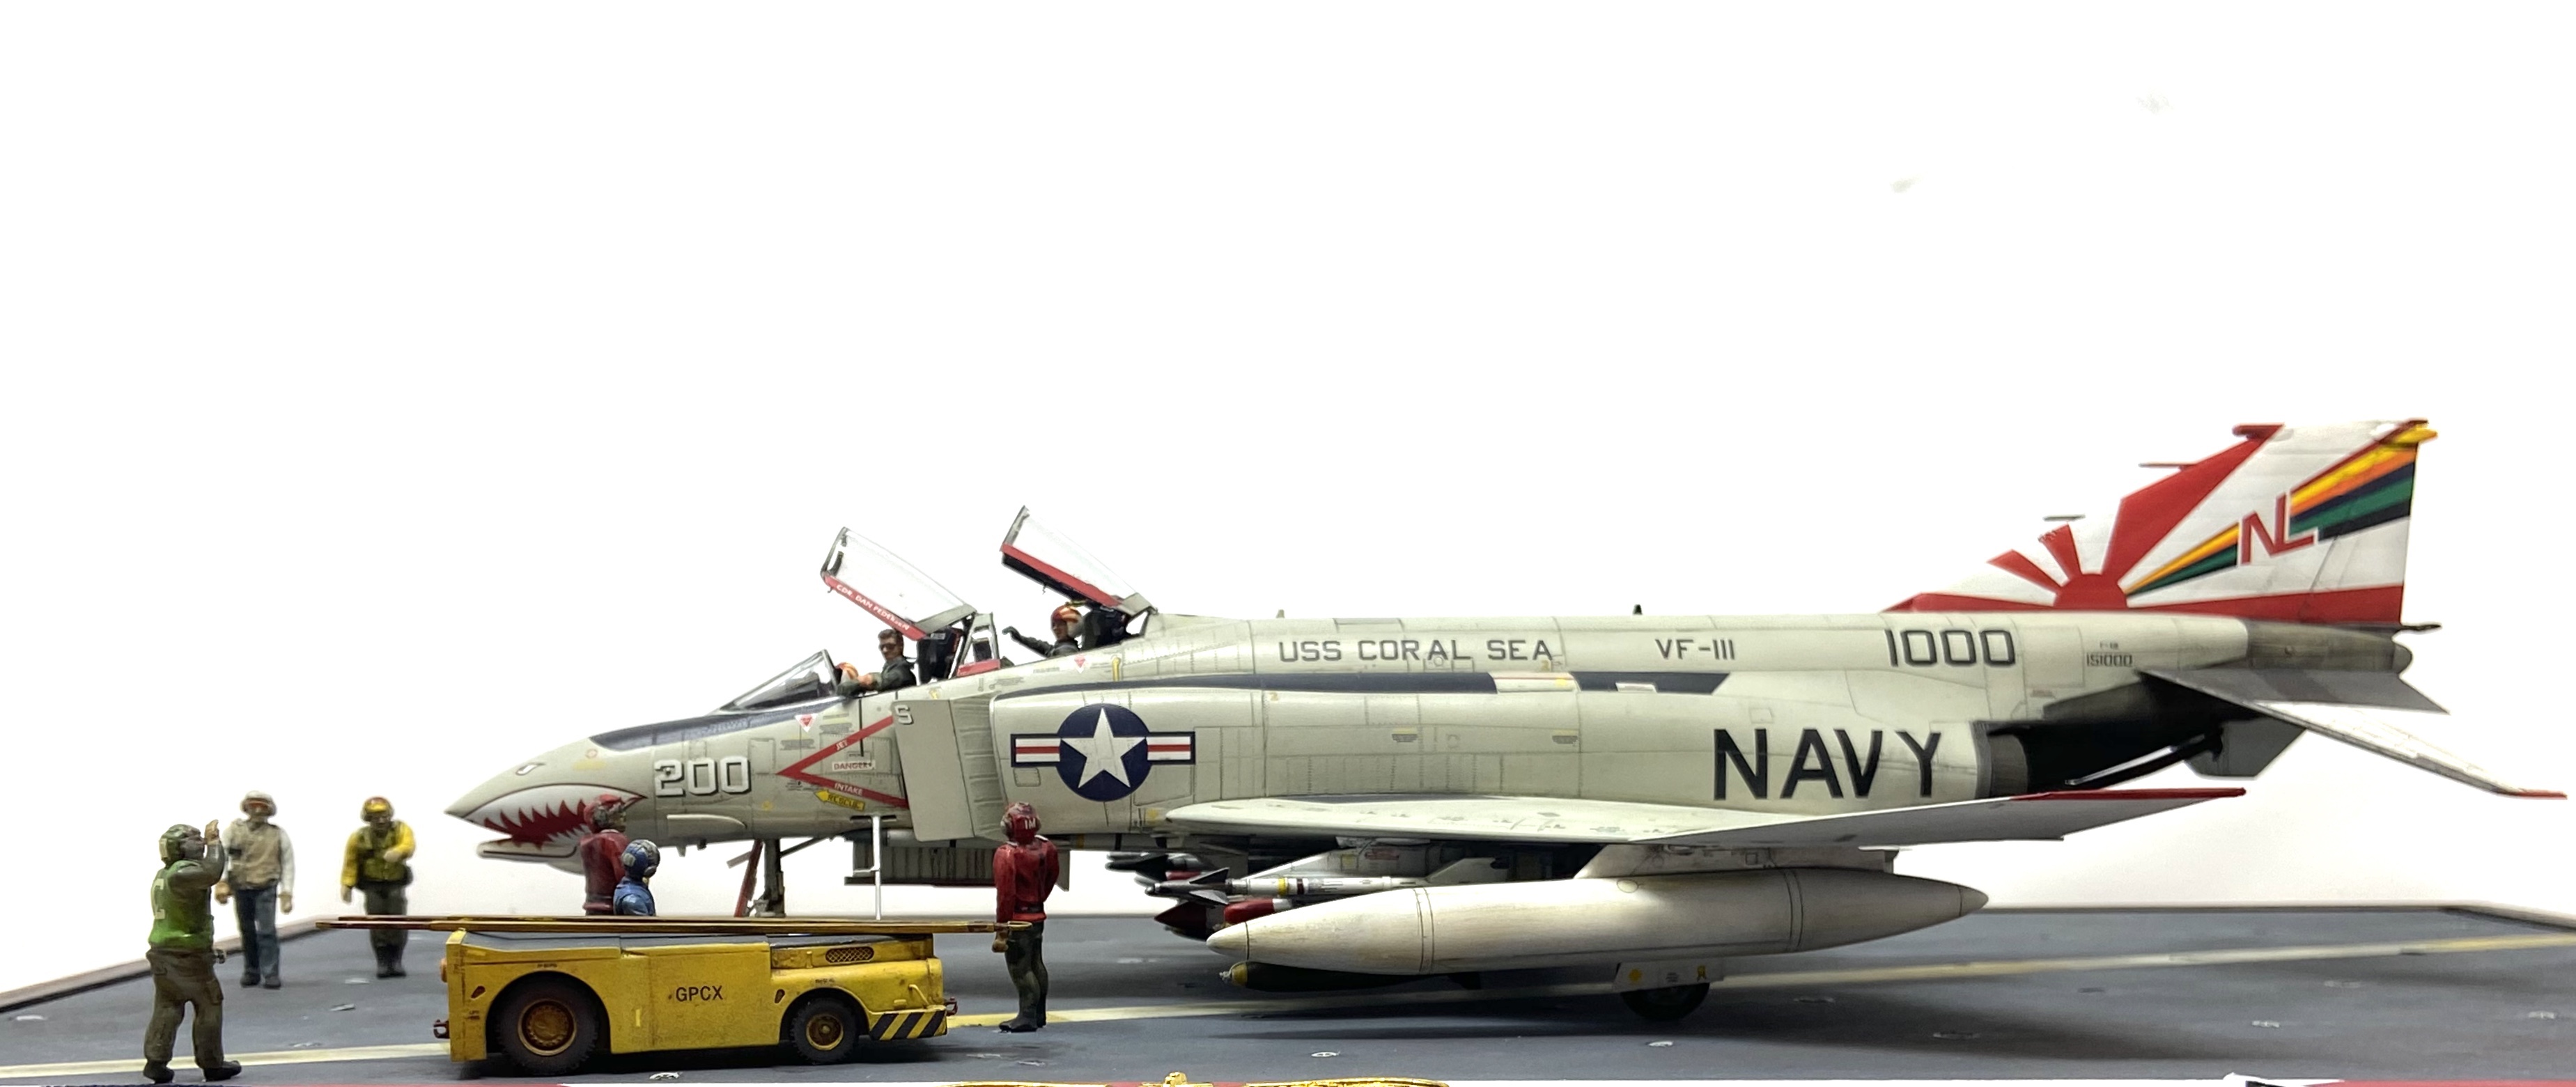
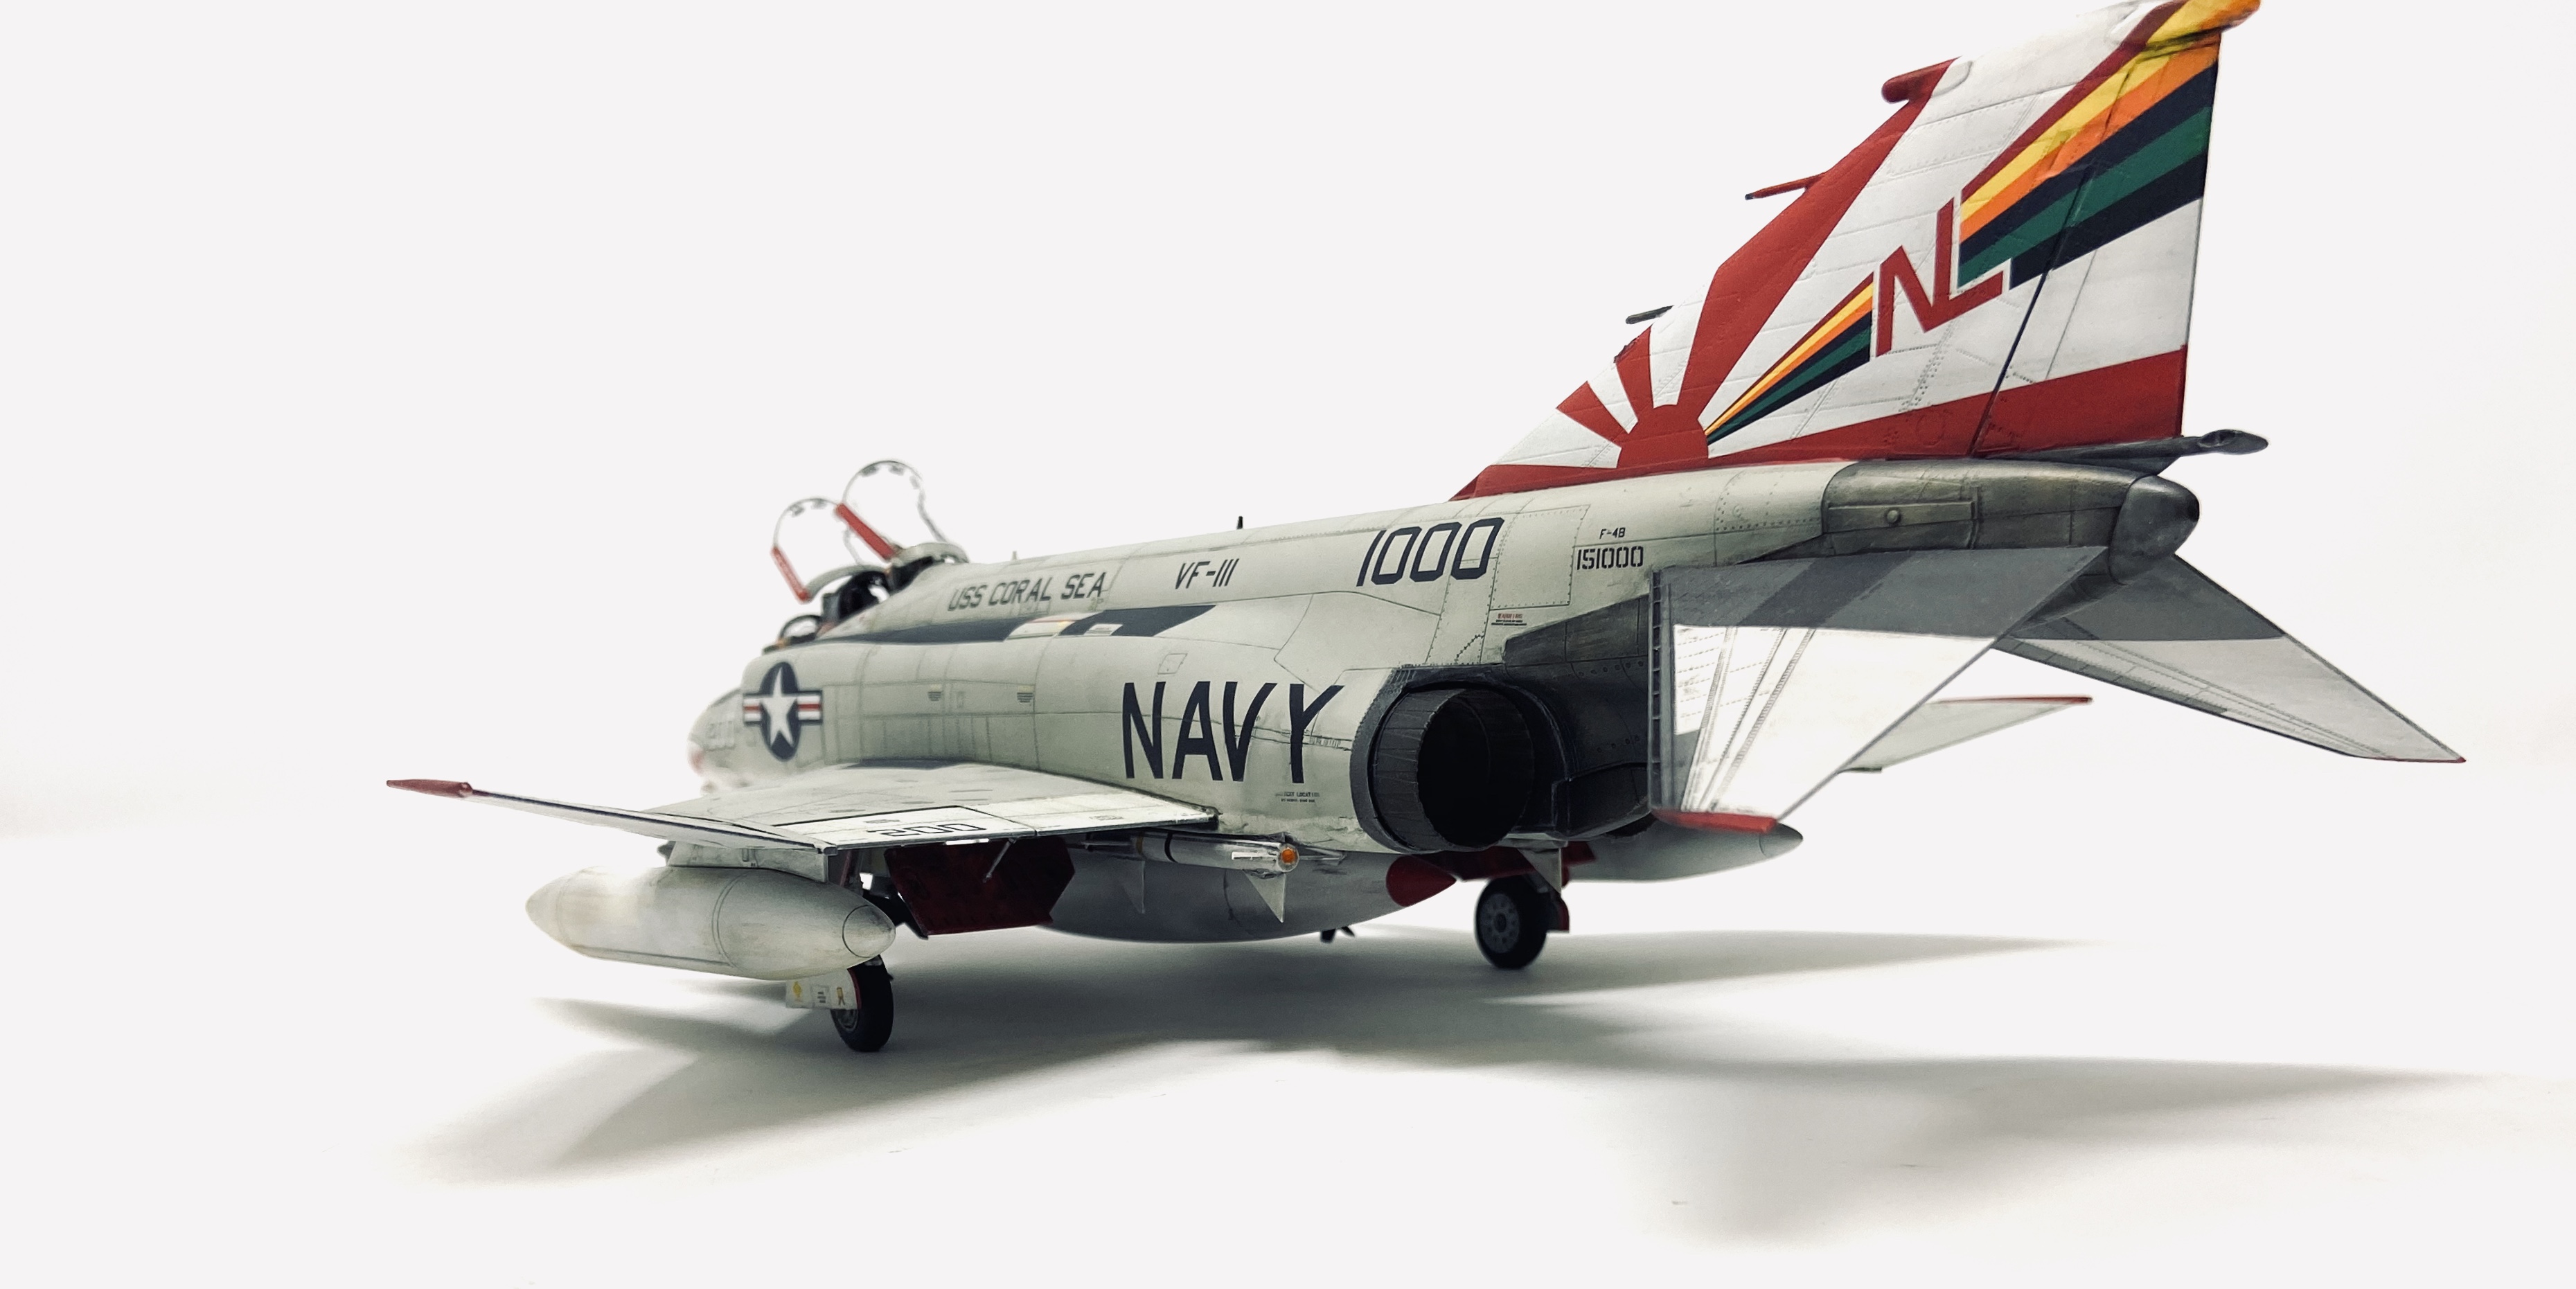
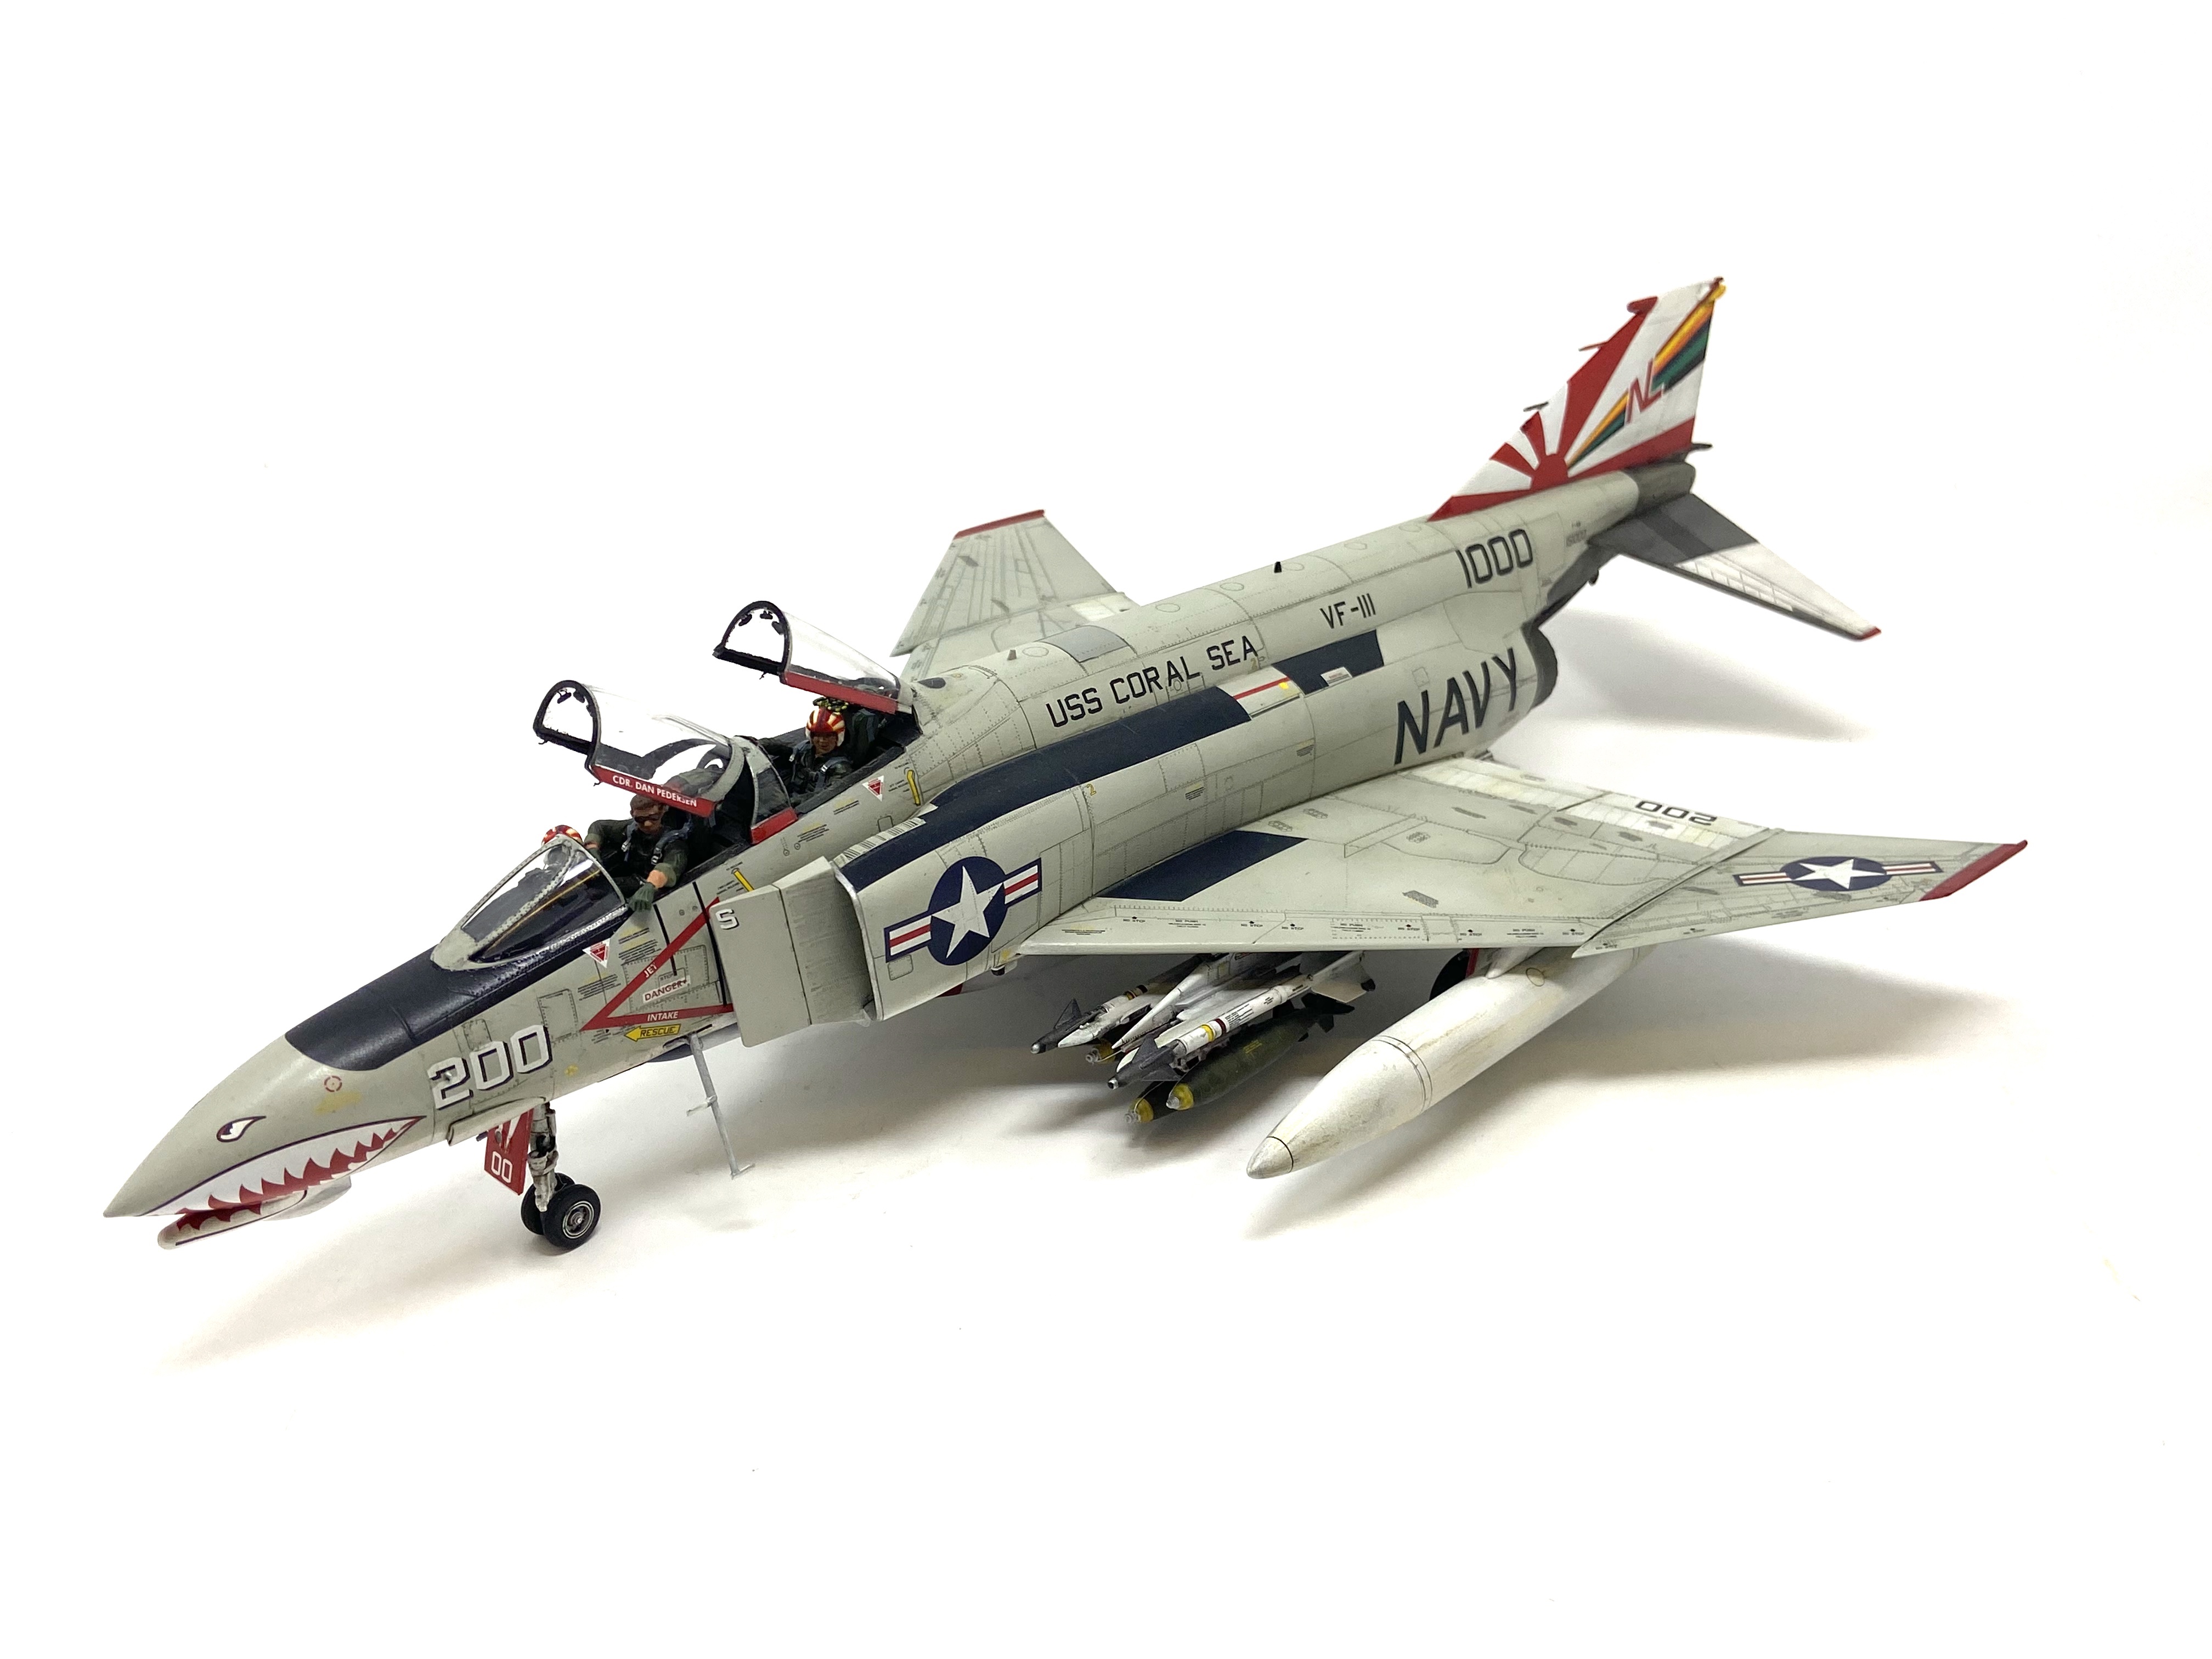
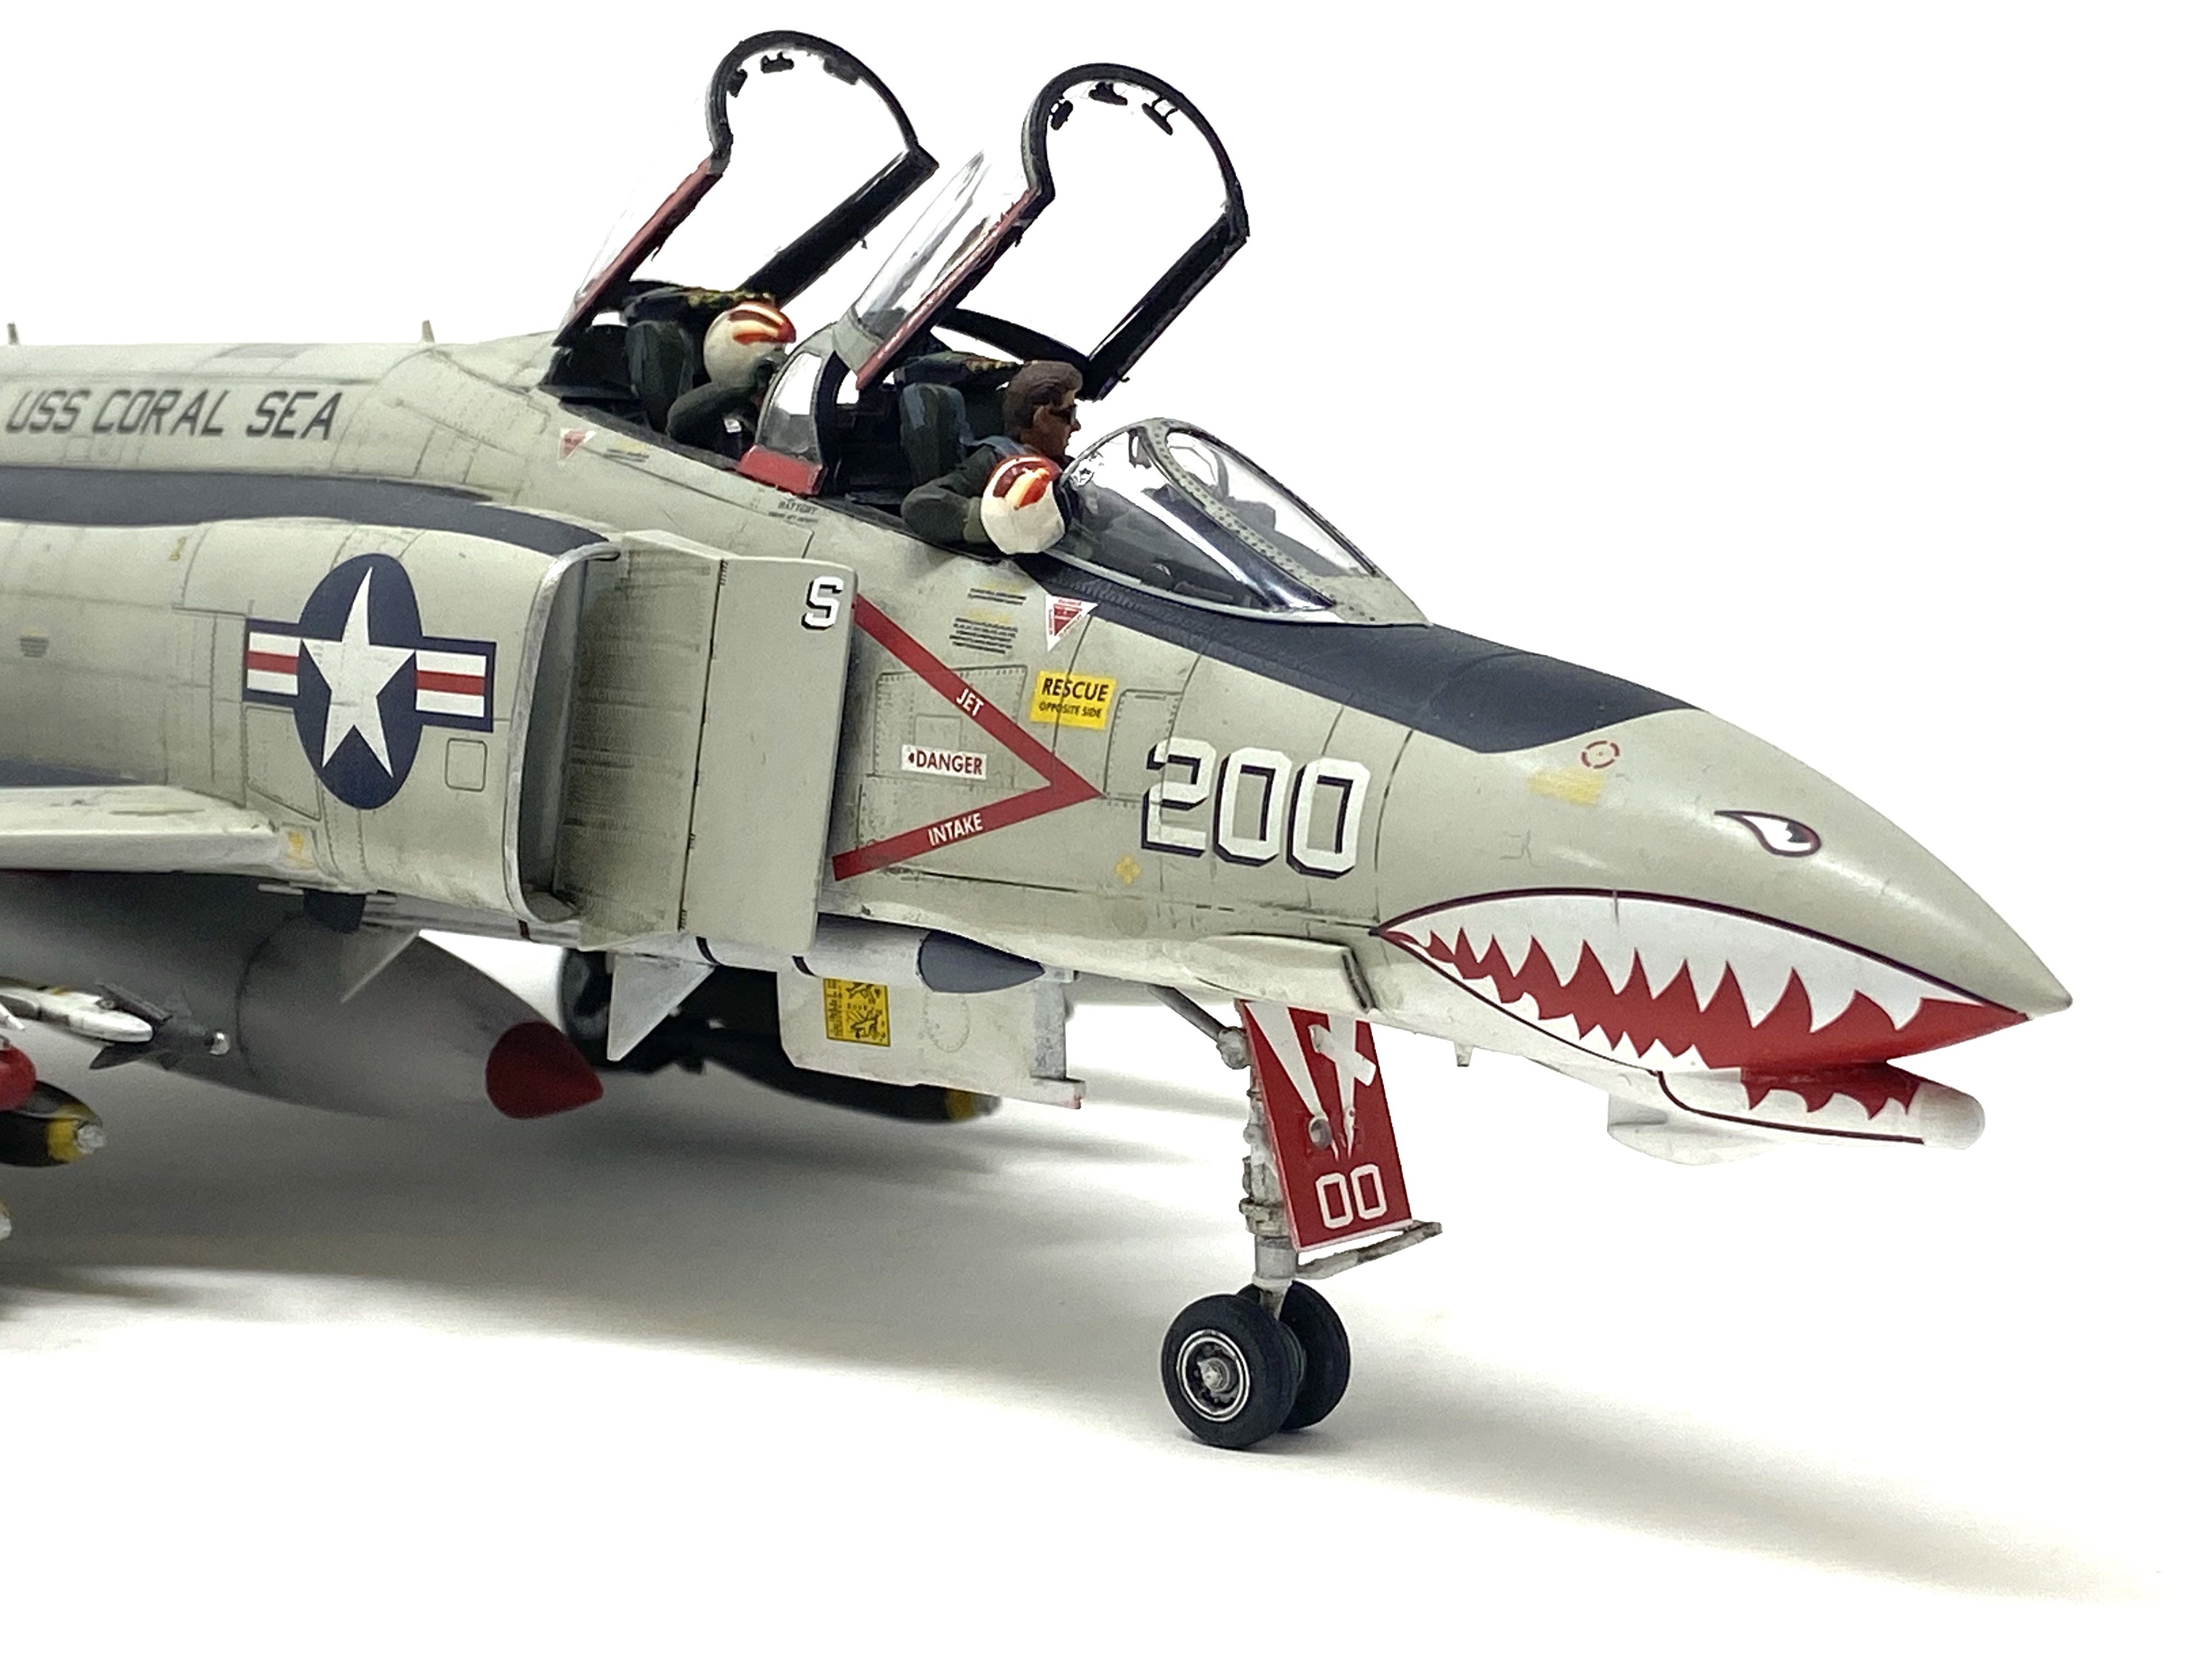
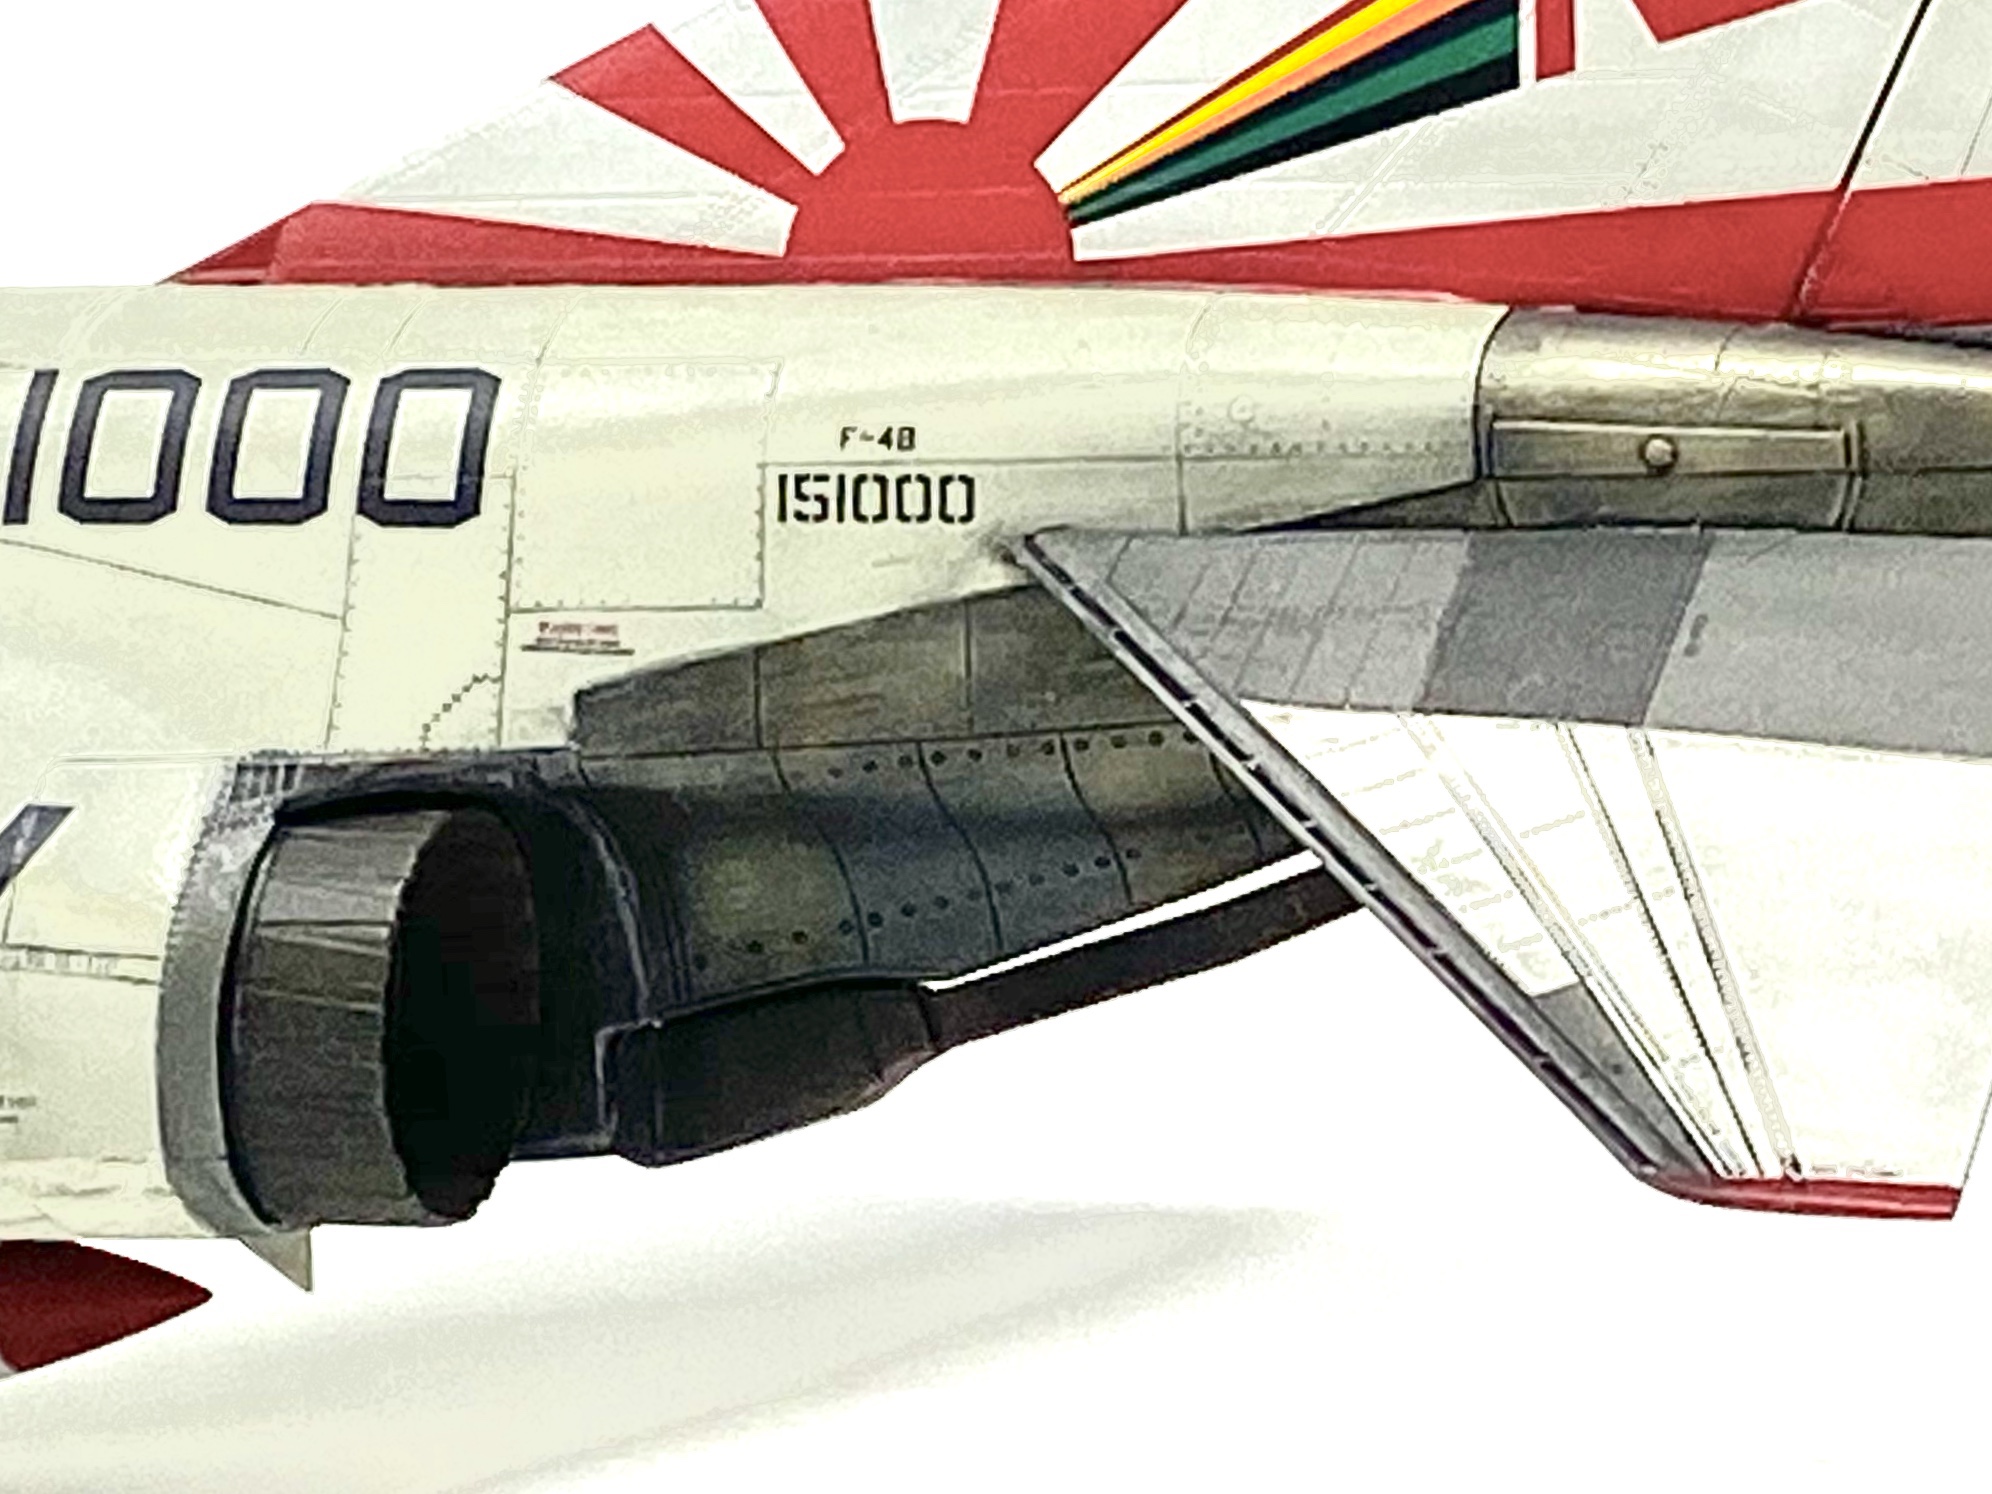
The subject of this post is a F-4B Phantom that flew with Naval Air Squadron VF-111 “Sundowners” One of the oldest USN squadrons with the famous rising sun tail markings and sharks teeth that made their jets look so damn good!
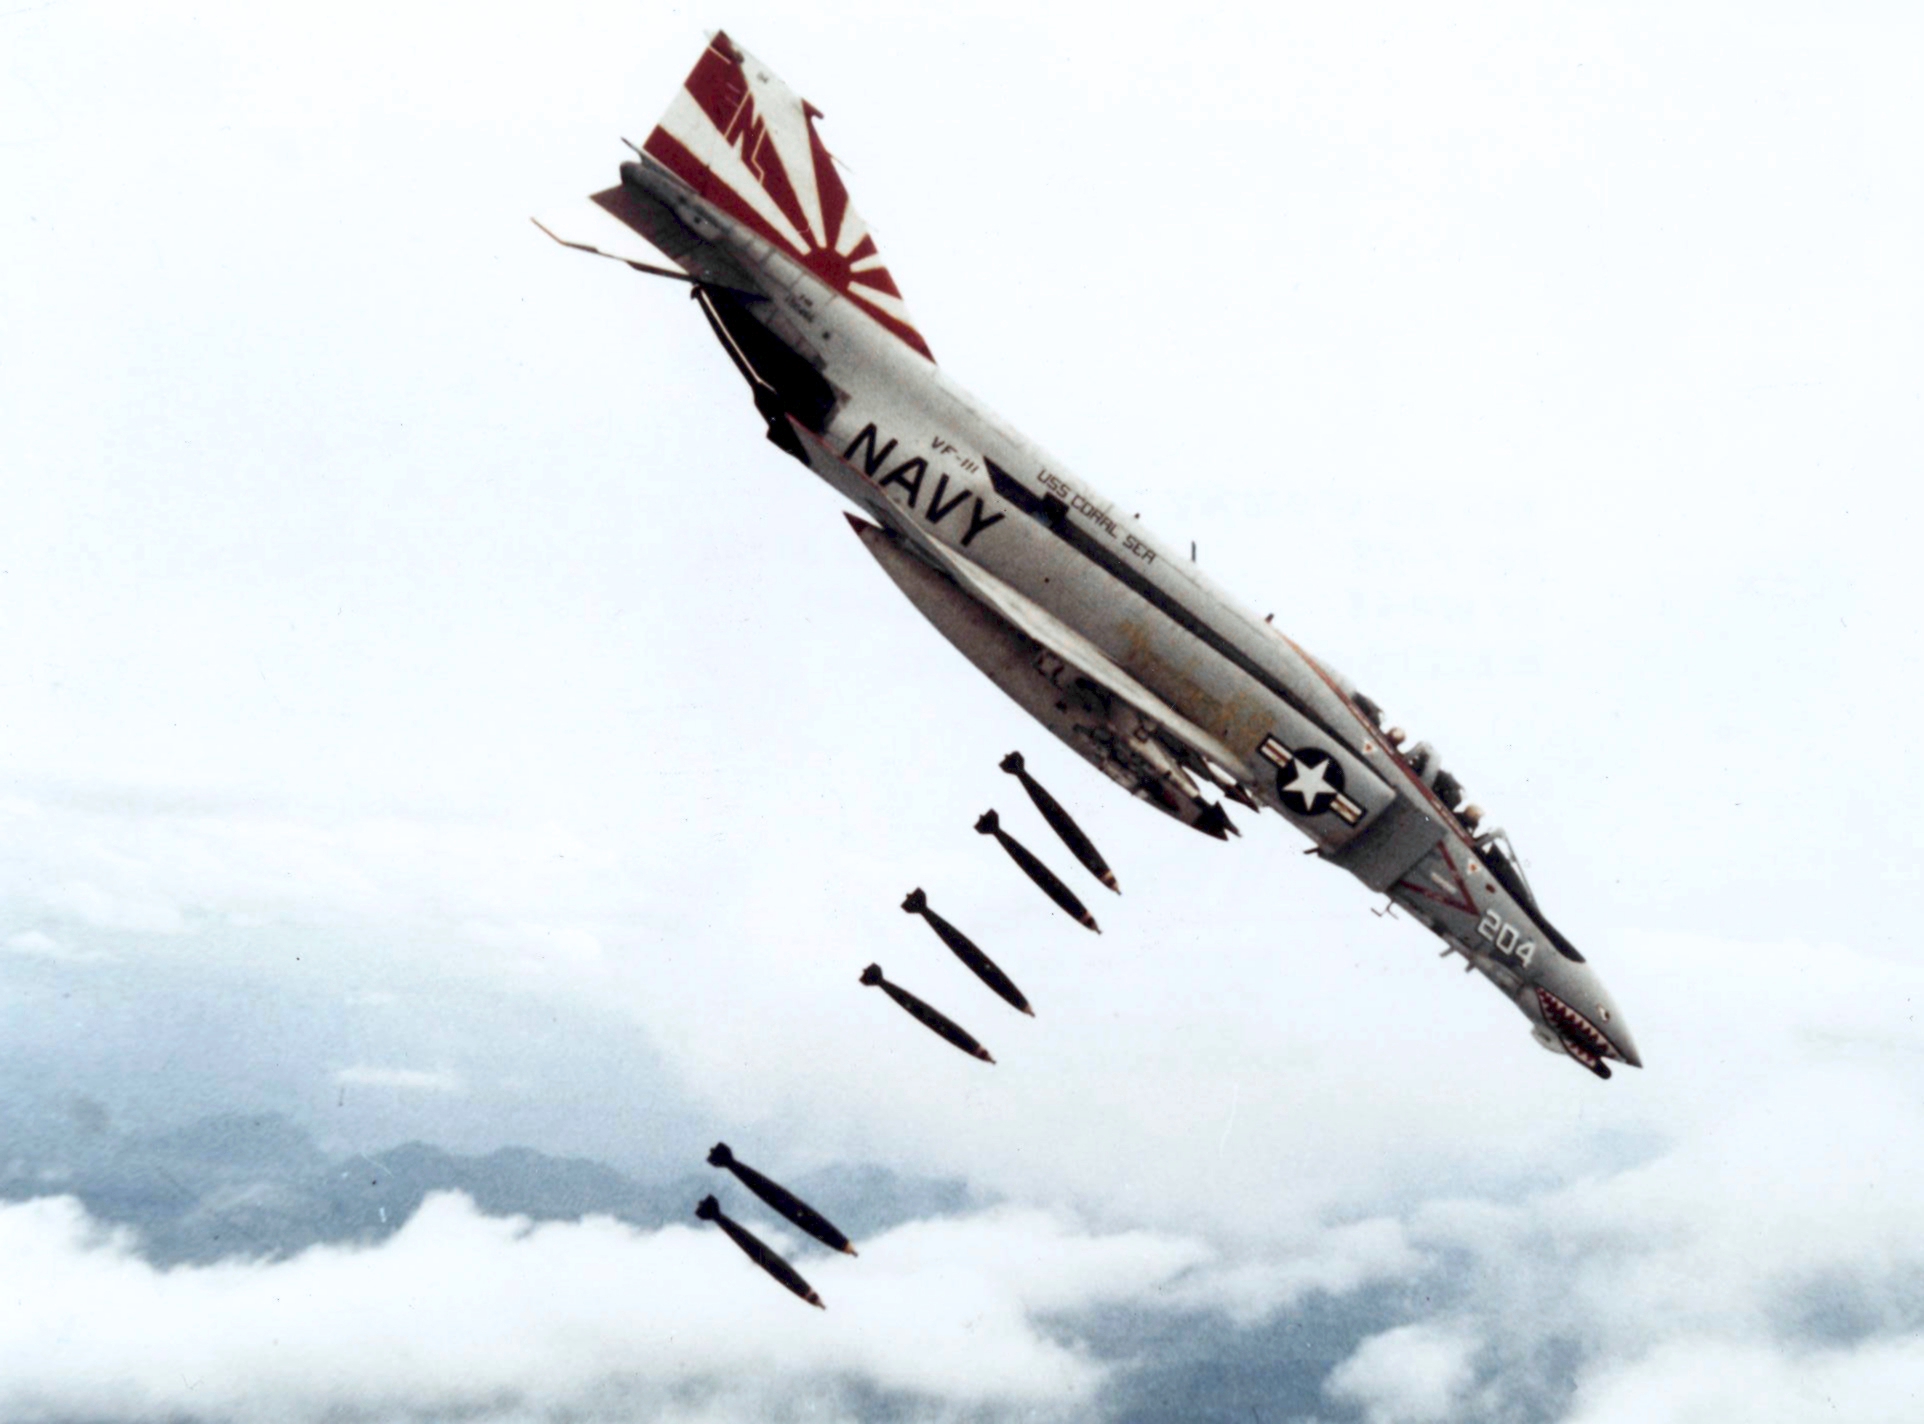
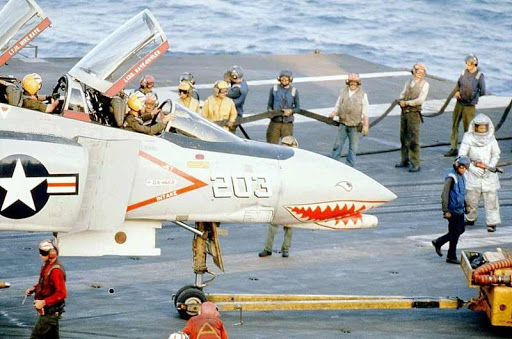
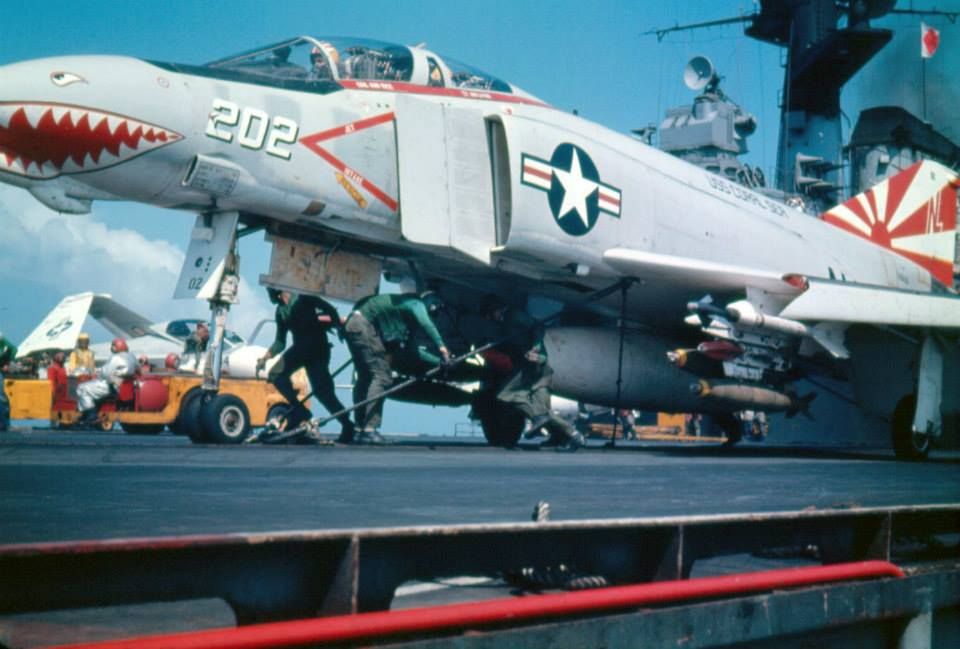
Here’s a selection of VF-111 Phantoms that I used as references for my model.
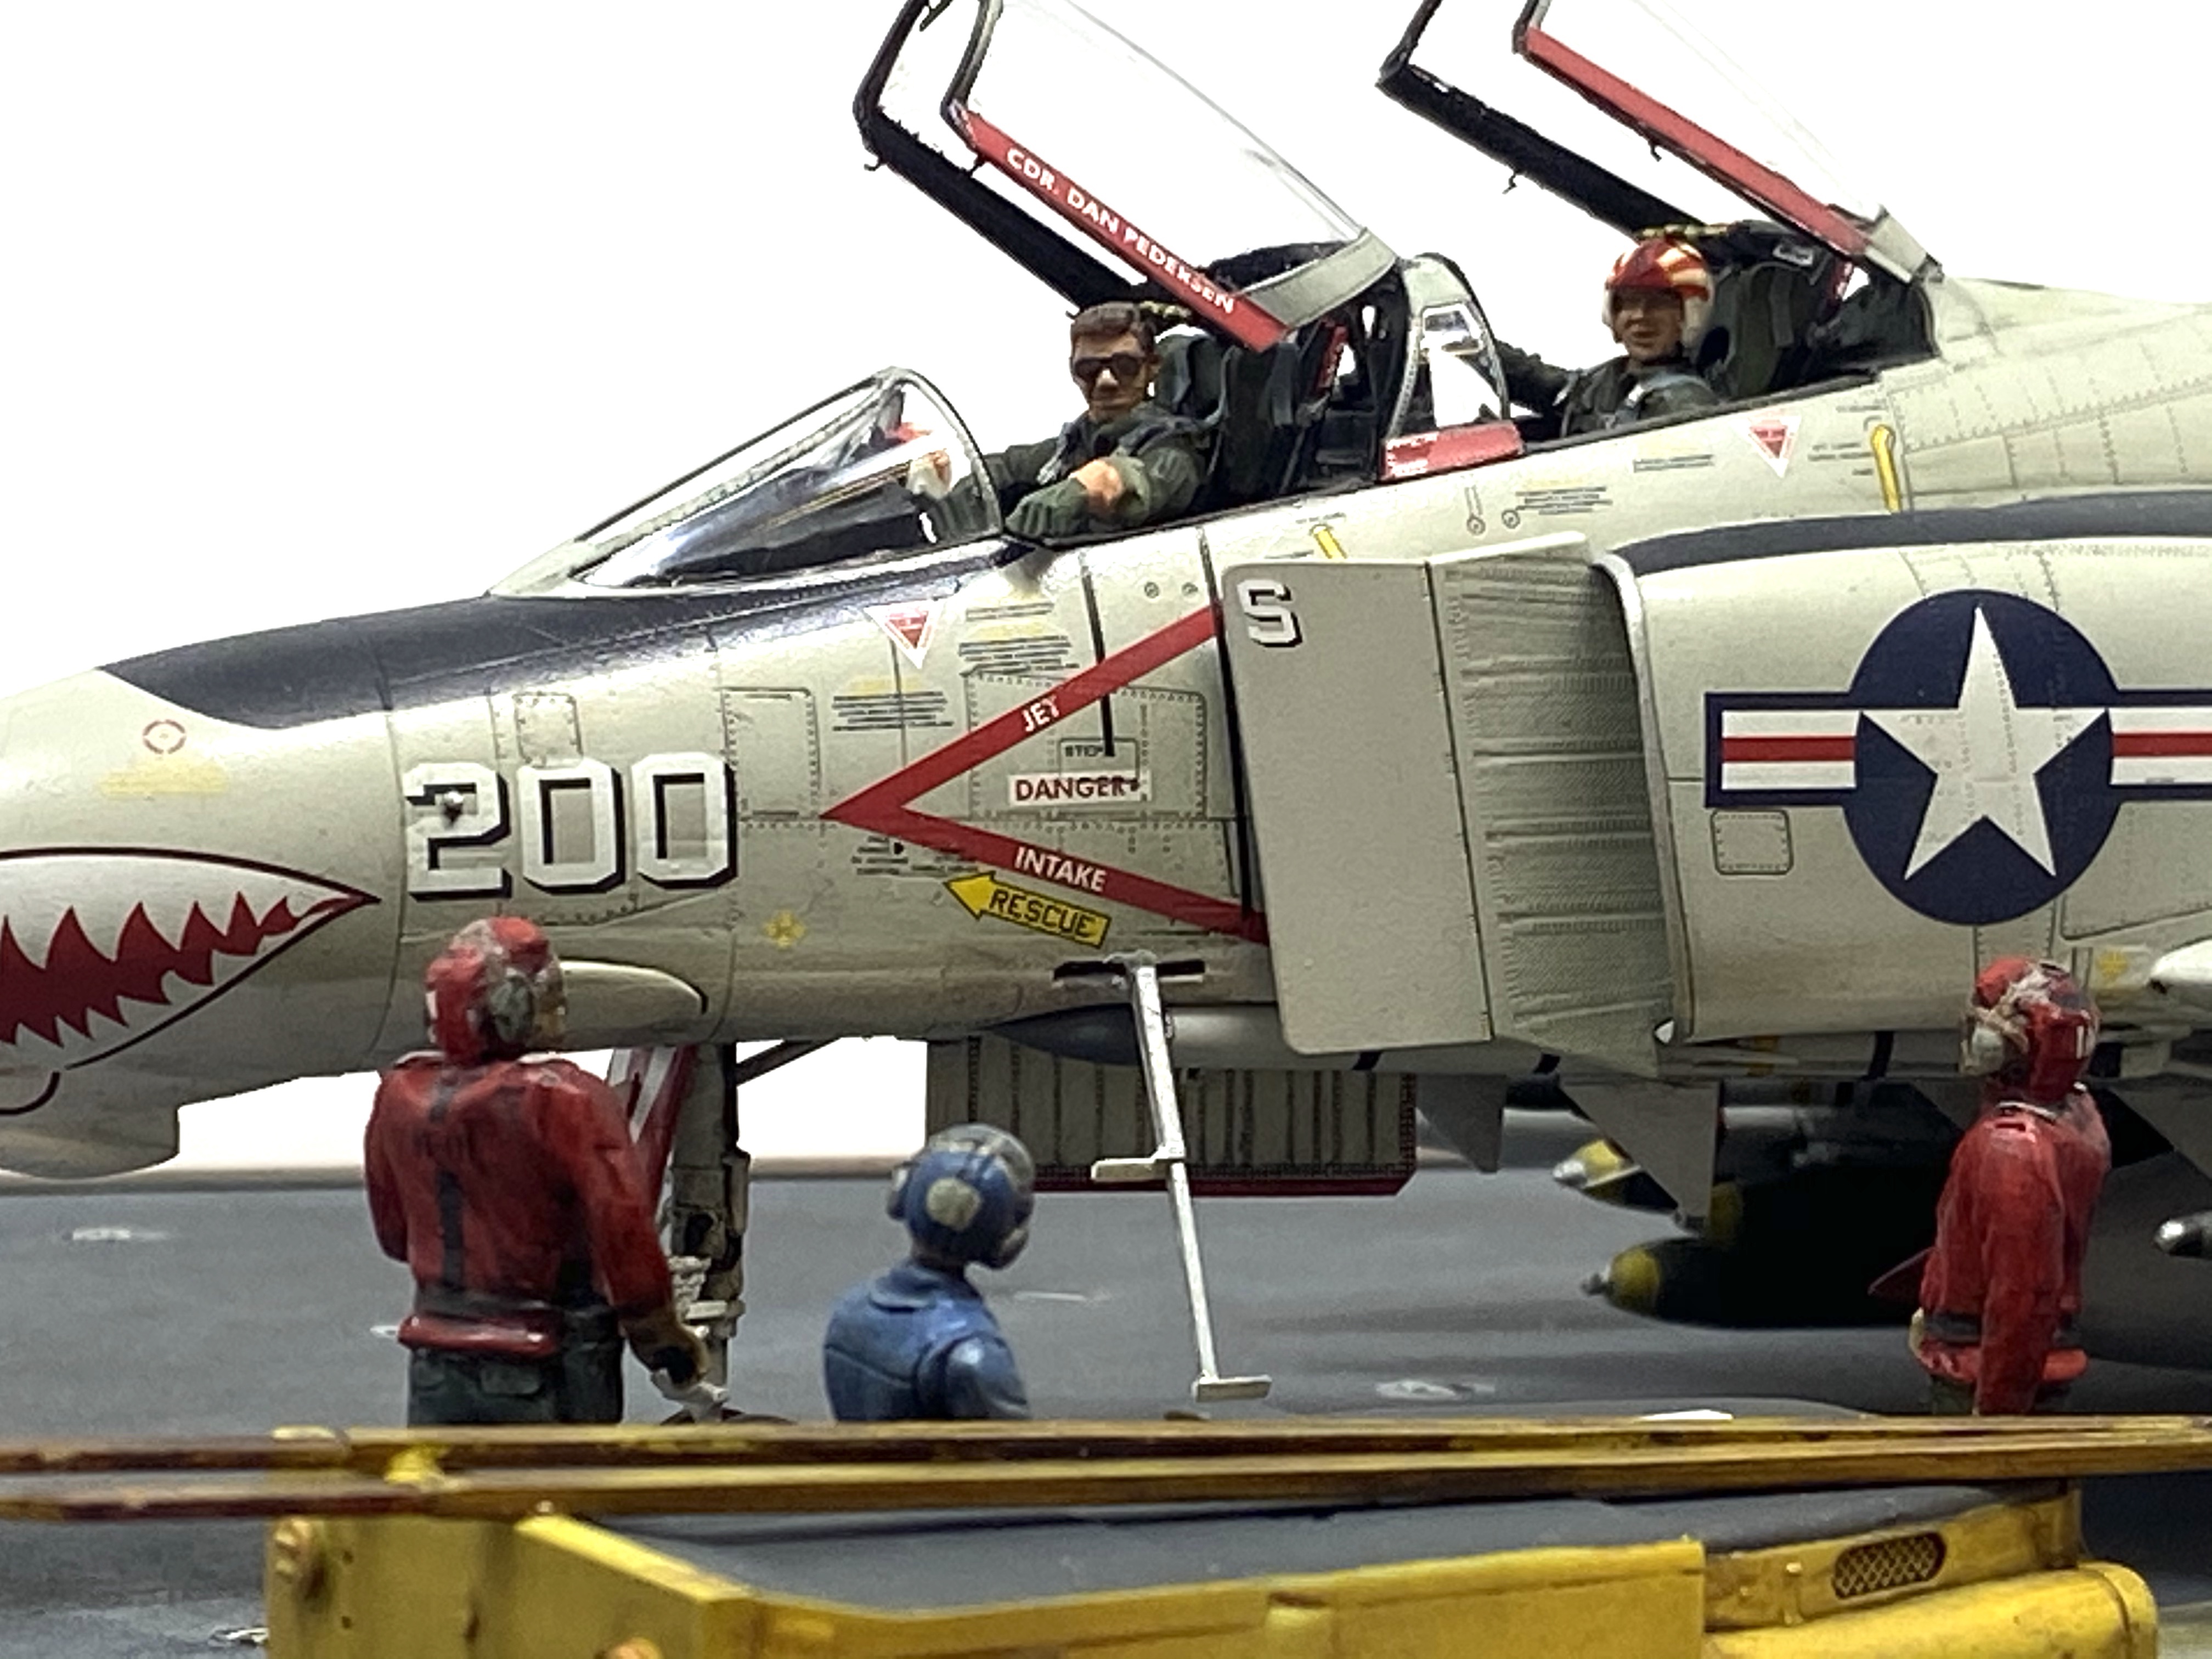
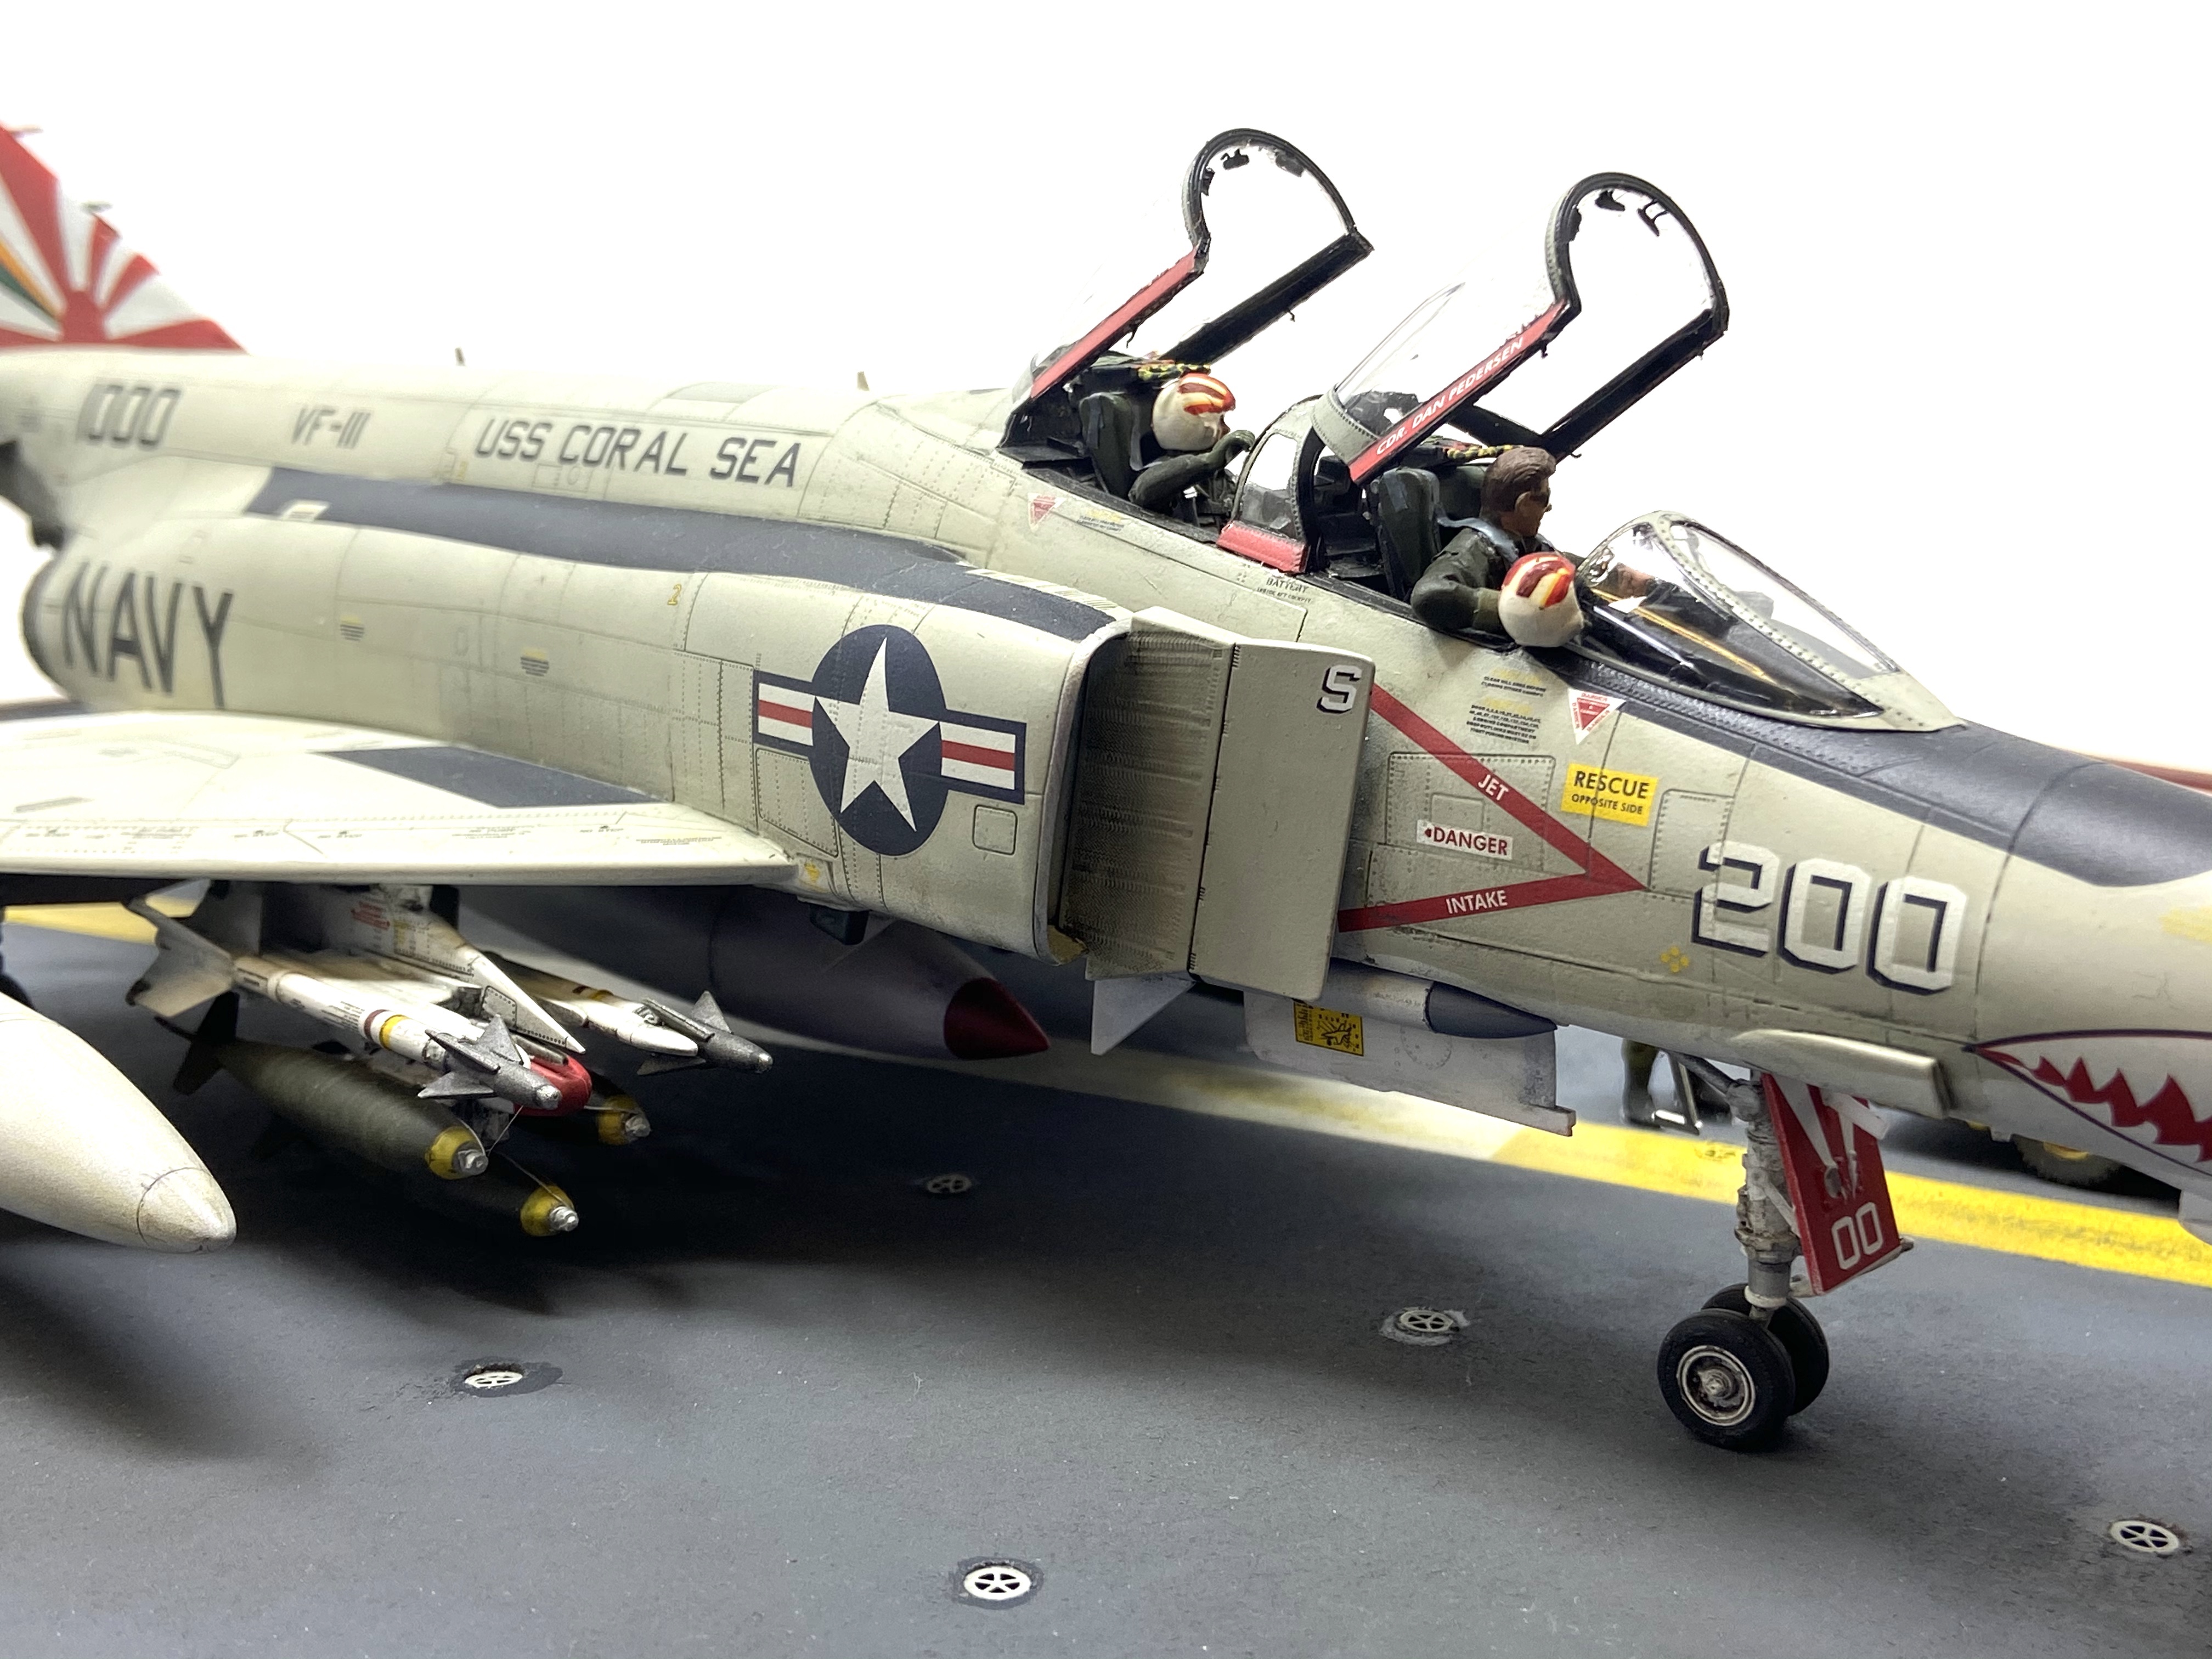
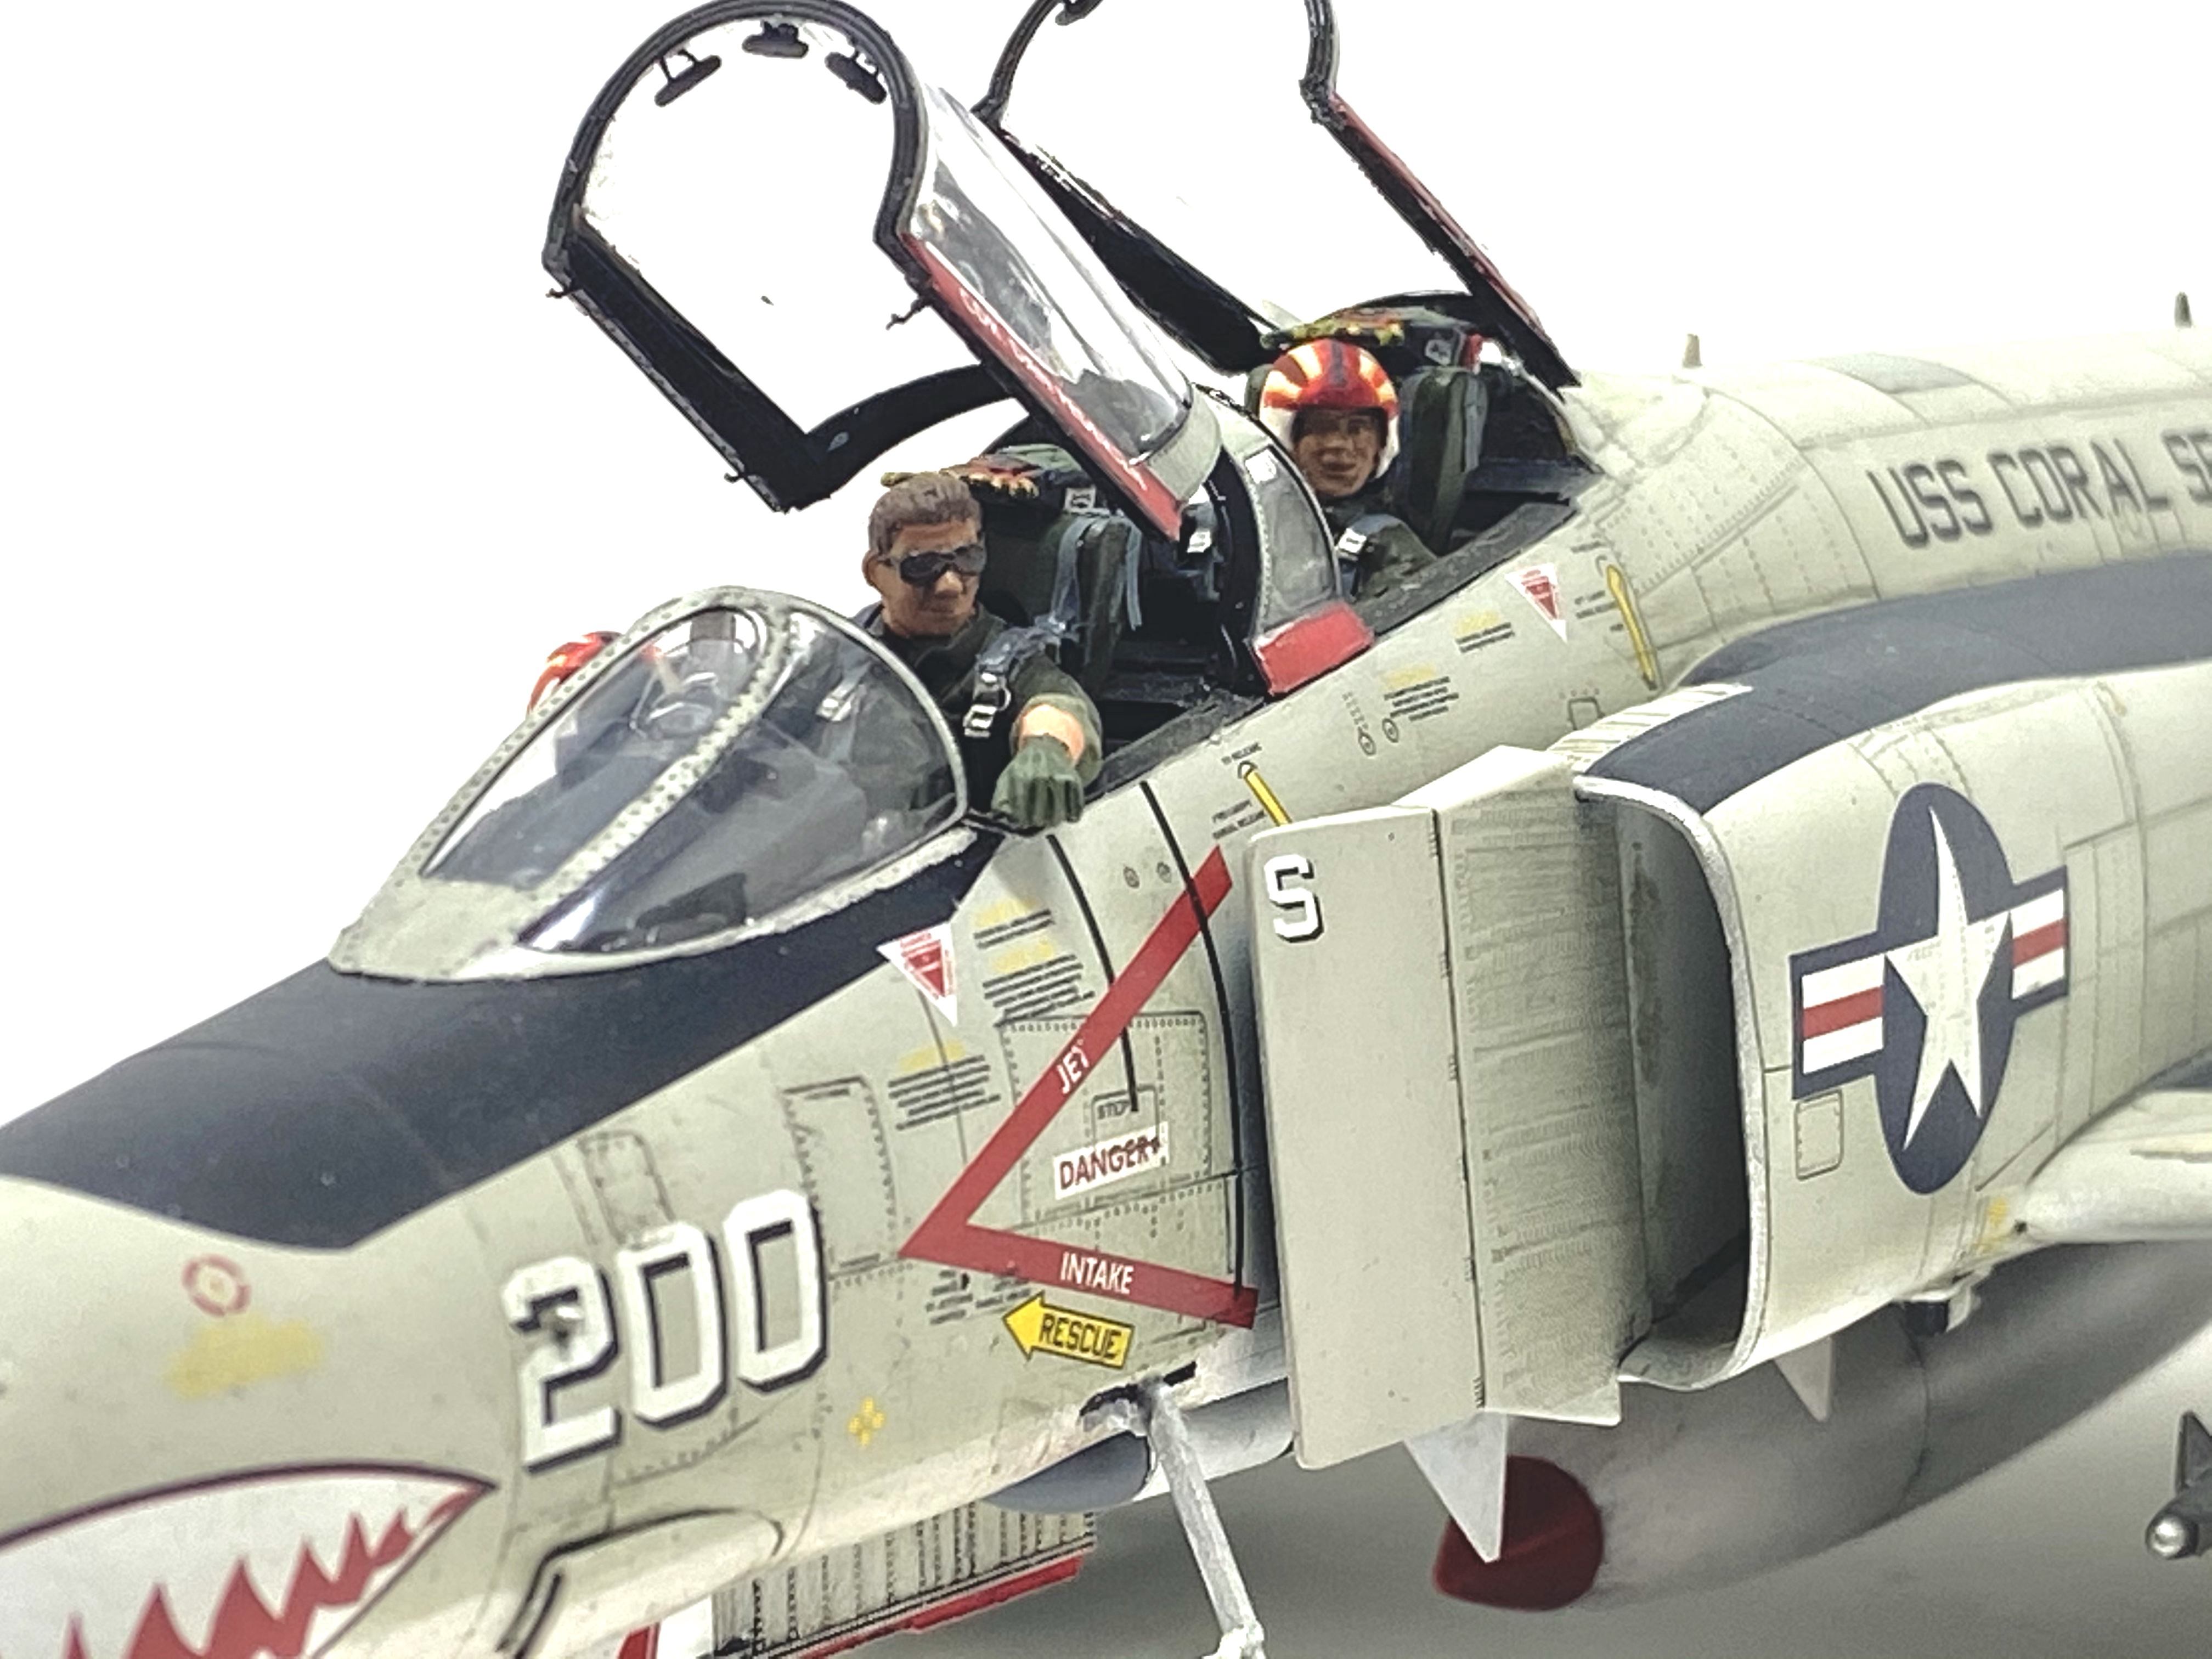
The particular jet I built was flown by an aviation legend-Capt. Dan Pedersen. Callsign “Yank” He was the CAG on USS Coral Sea and he went on to become one of the founders of the United States Navy Weapons Traing Scool- More commonly known today as TOP GUN.
Here is a photo of Capt. Pedersen posing with his F-4.
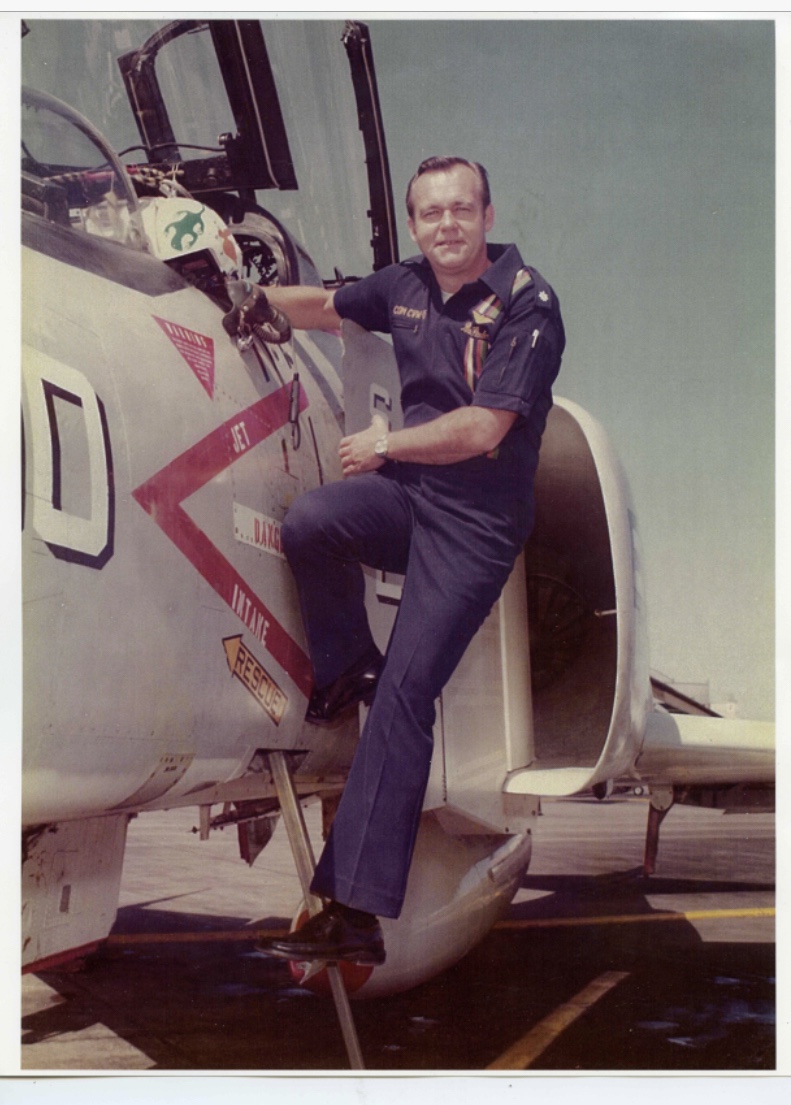
It was when reading Capt. Pedersens book, Top Gun that I realised I had one of his jets and inspired by his story I felt complelled to build it! If you love aviation and military history I can highly recommend his book , its a fantastic read!
The Model:
When Academy released its all new tooling of a 1/48 Phantom it caused quite a sensation! Up until then we had to make do with older, Hasegawa and Esci kits that were showing their age. This new kit with its one piece fuselage construction was great because it eliminated the problem of cleaning up seam lines along the spine of the airframe as encountered with other manufacturers kits. The model kit was well engineered and parts fitment was good. My only critique being the kits main landing gear, that was a tricky fit and the gear bays could have used a little more room to resemble the real aircraft.
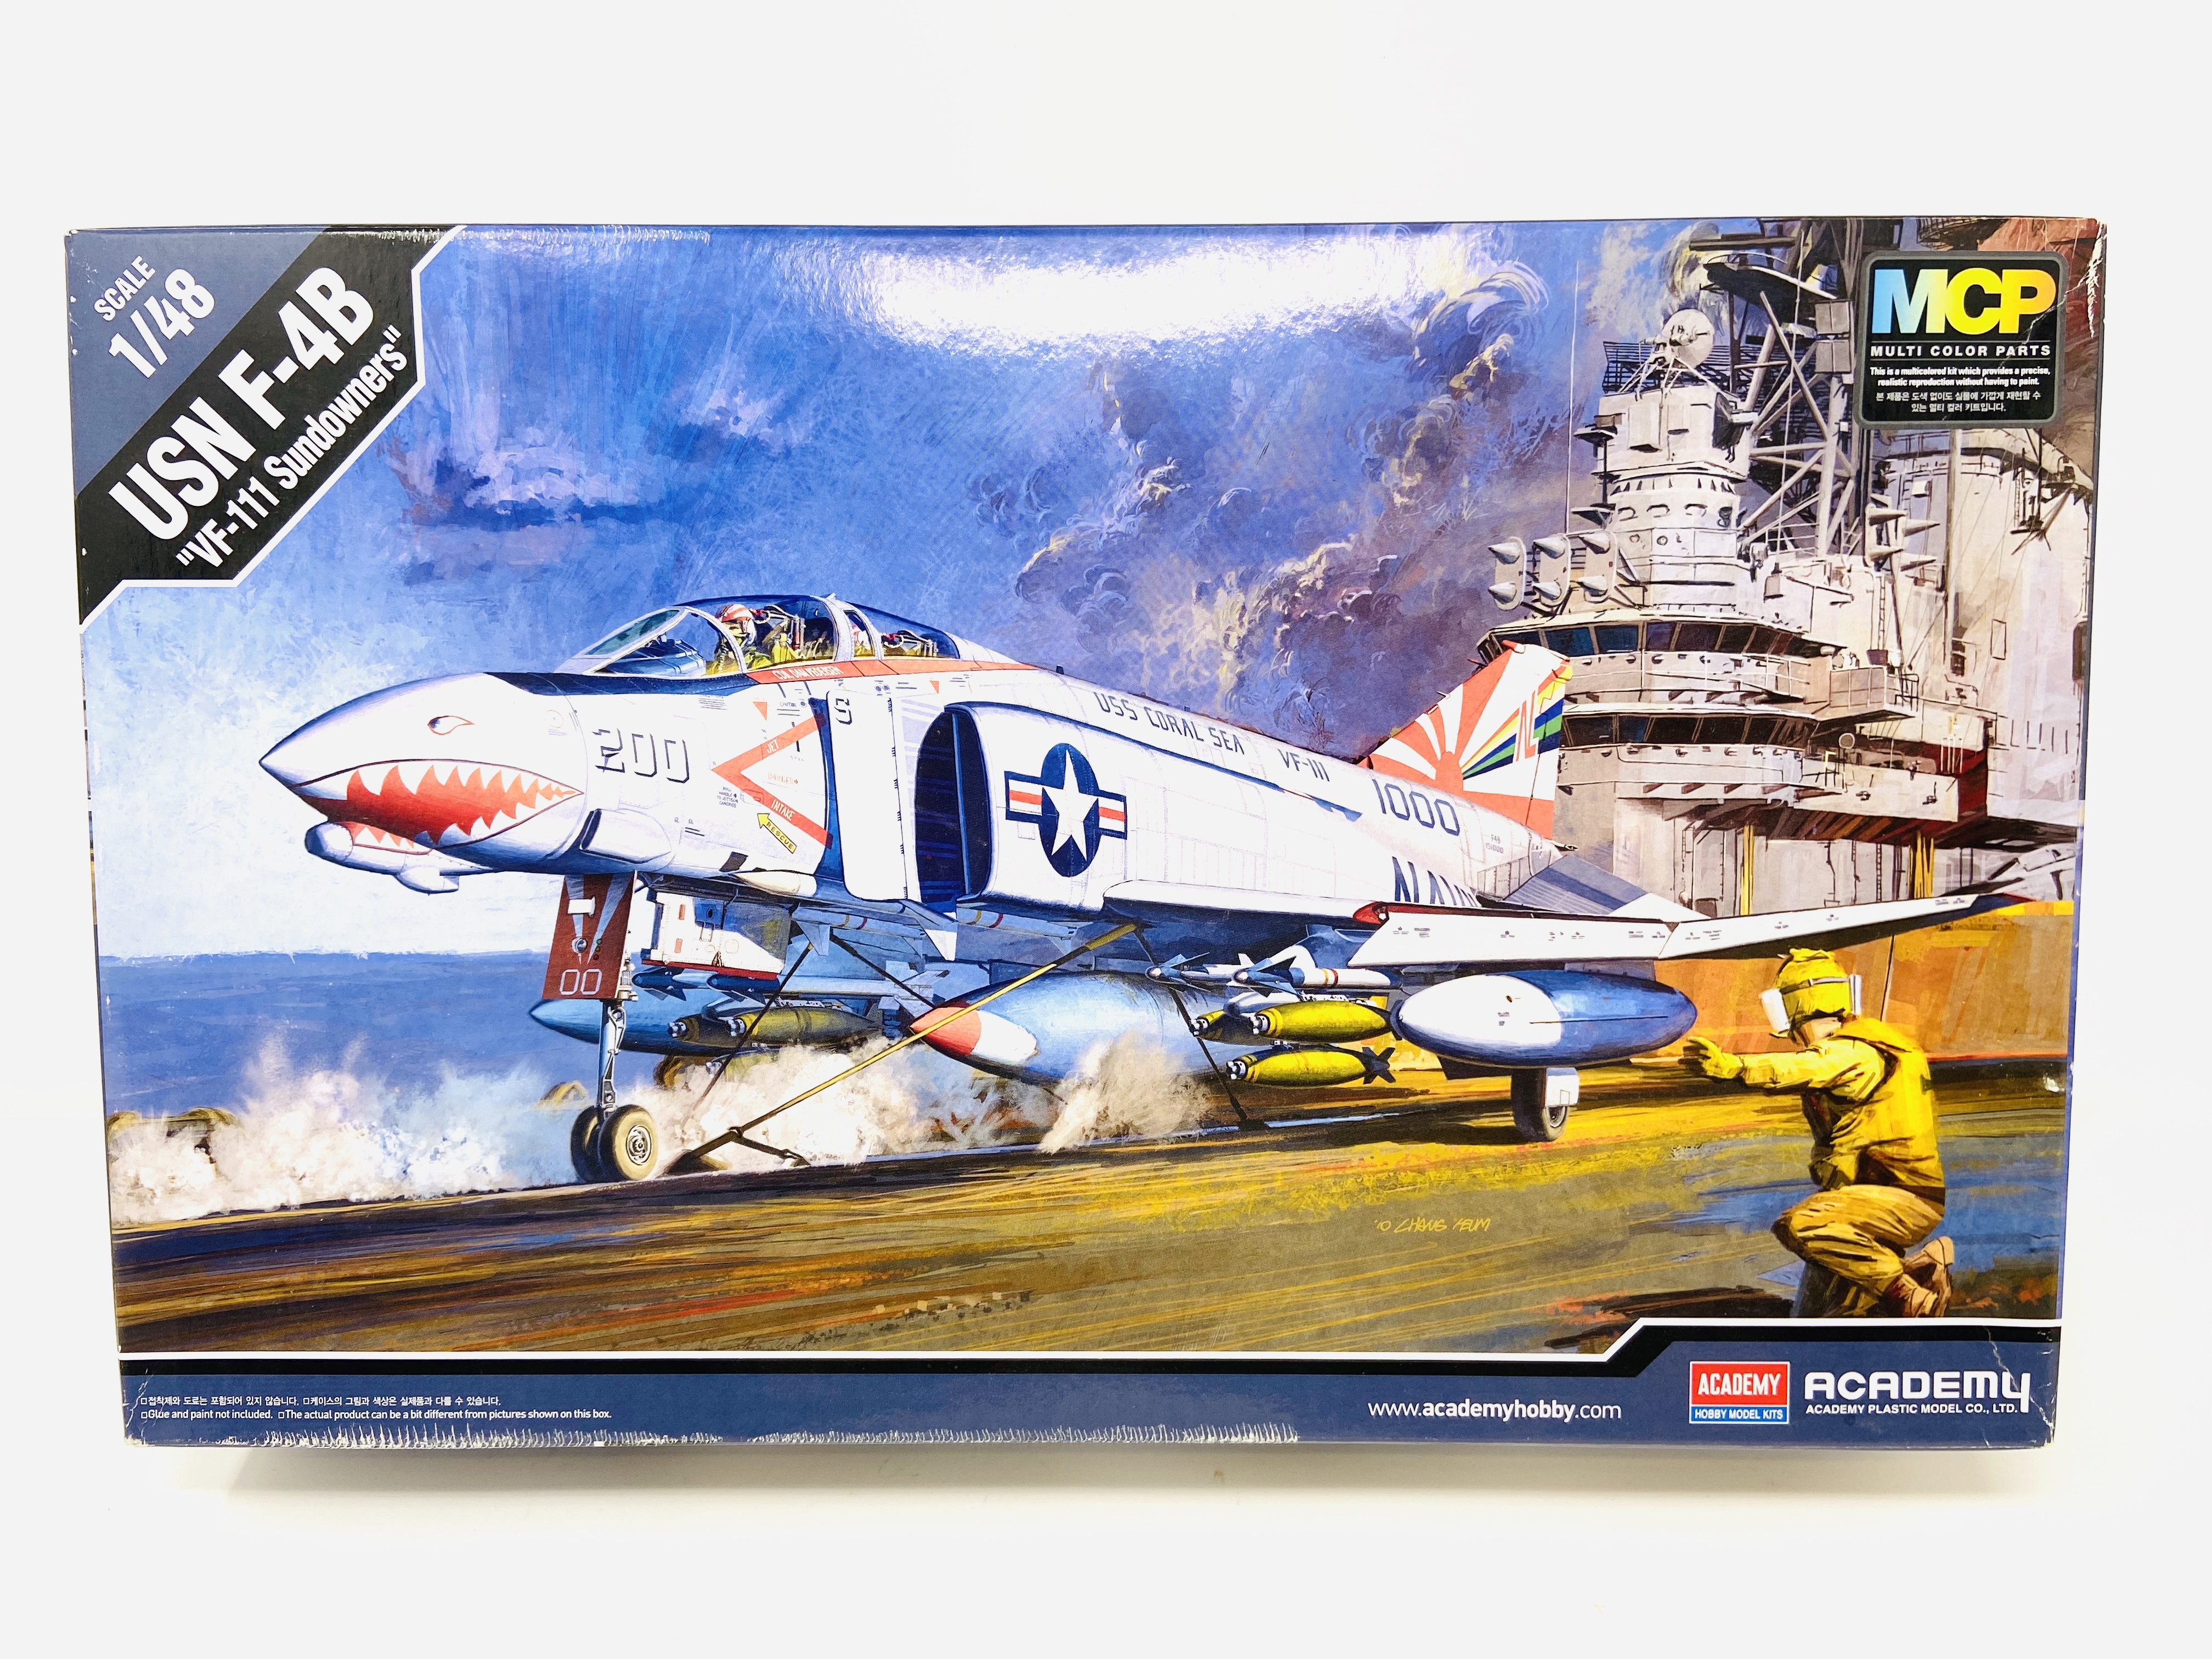
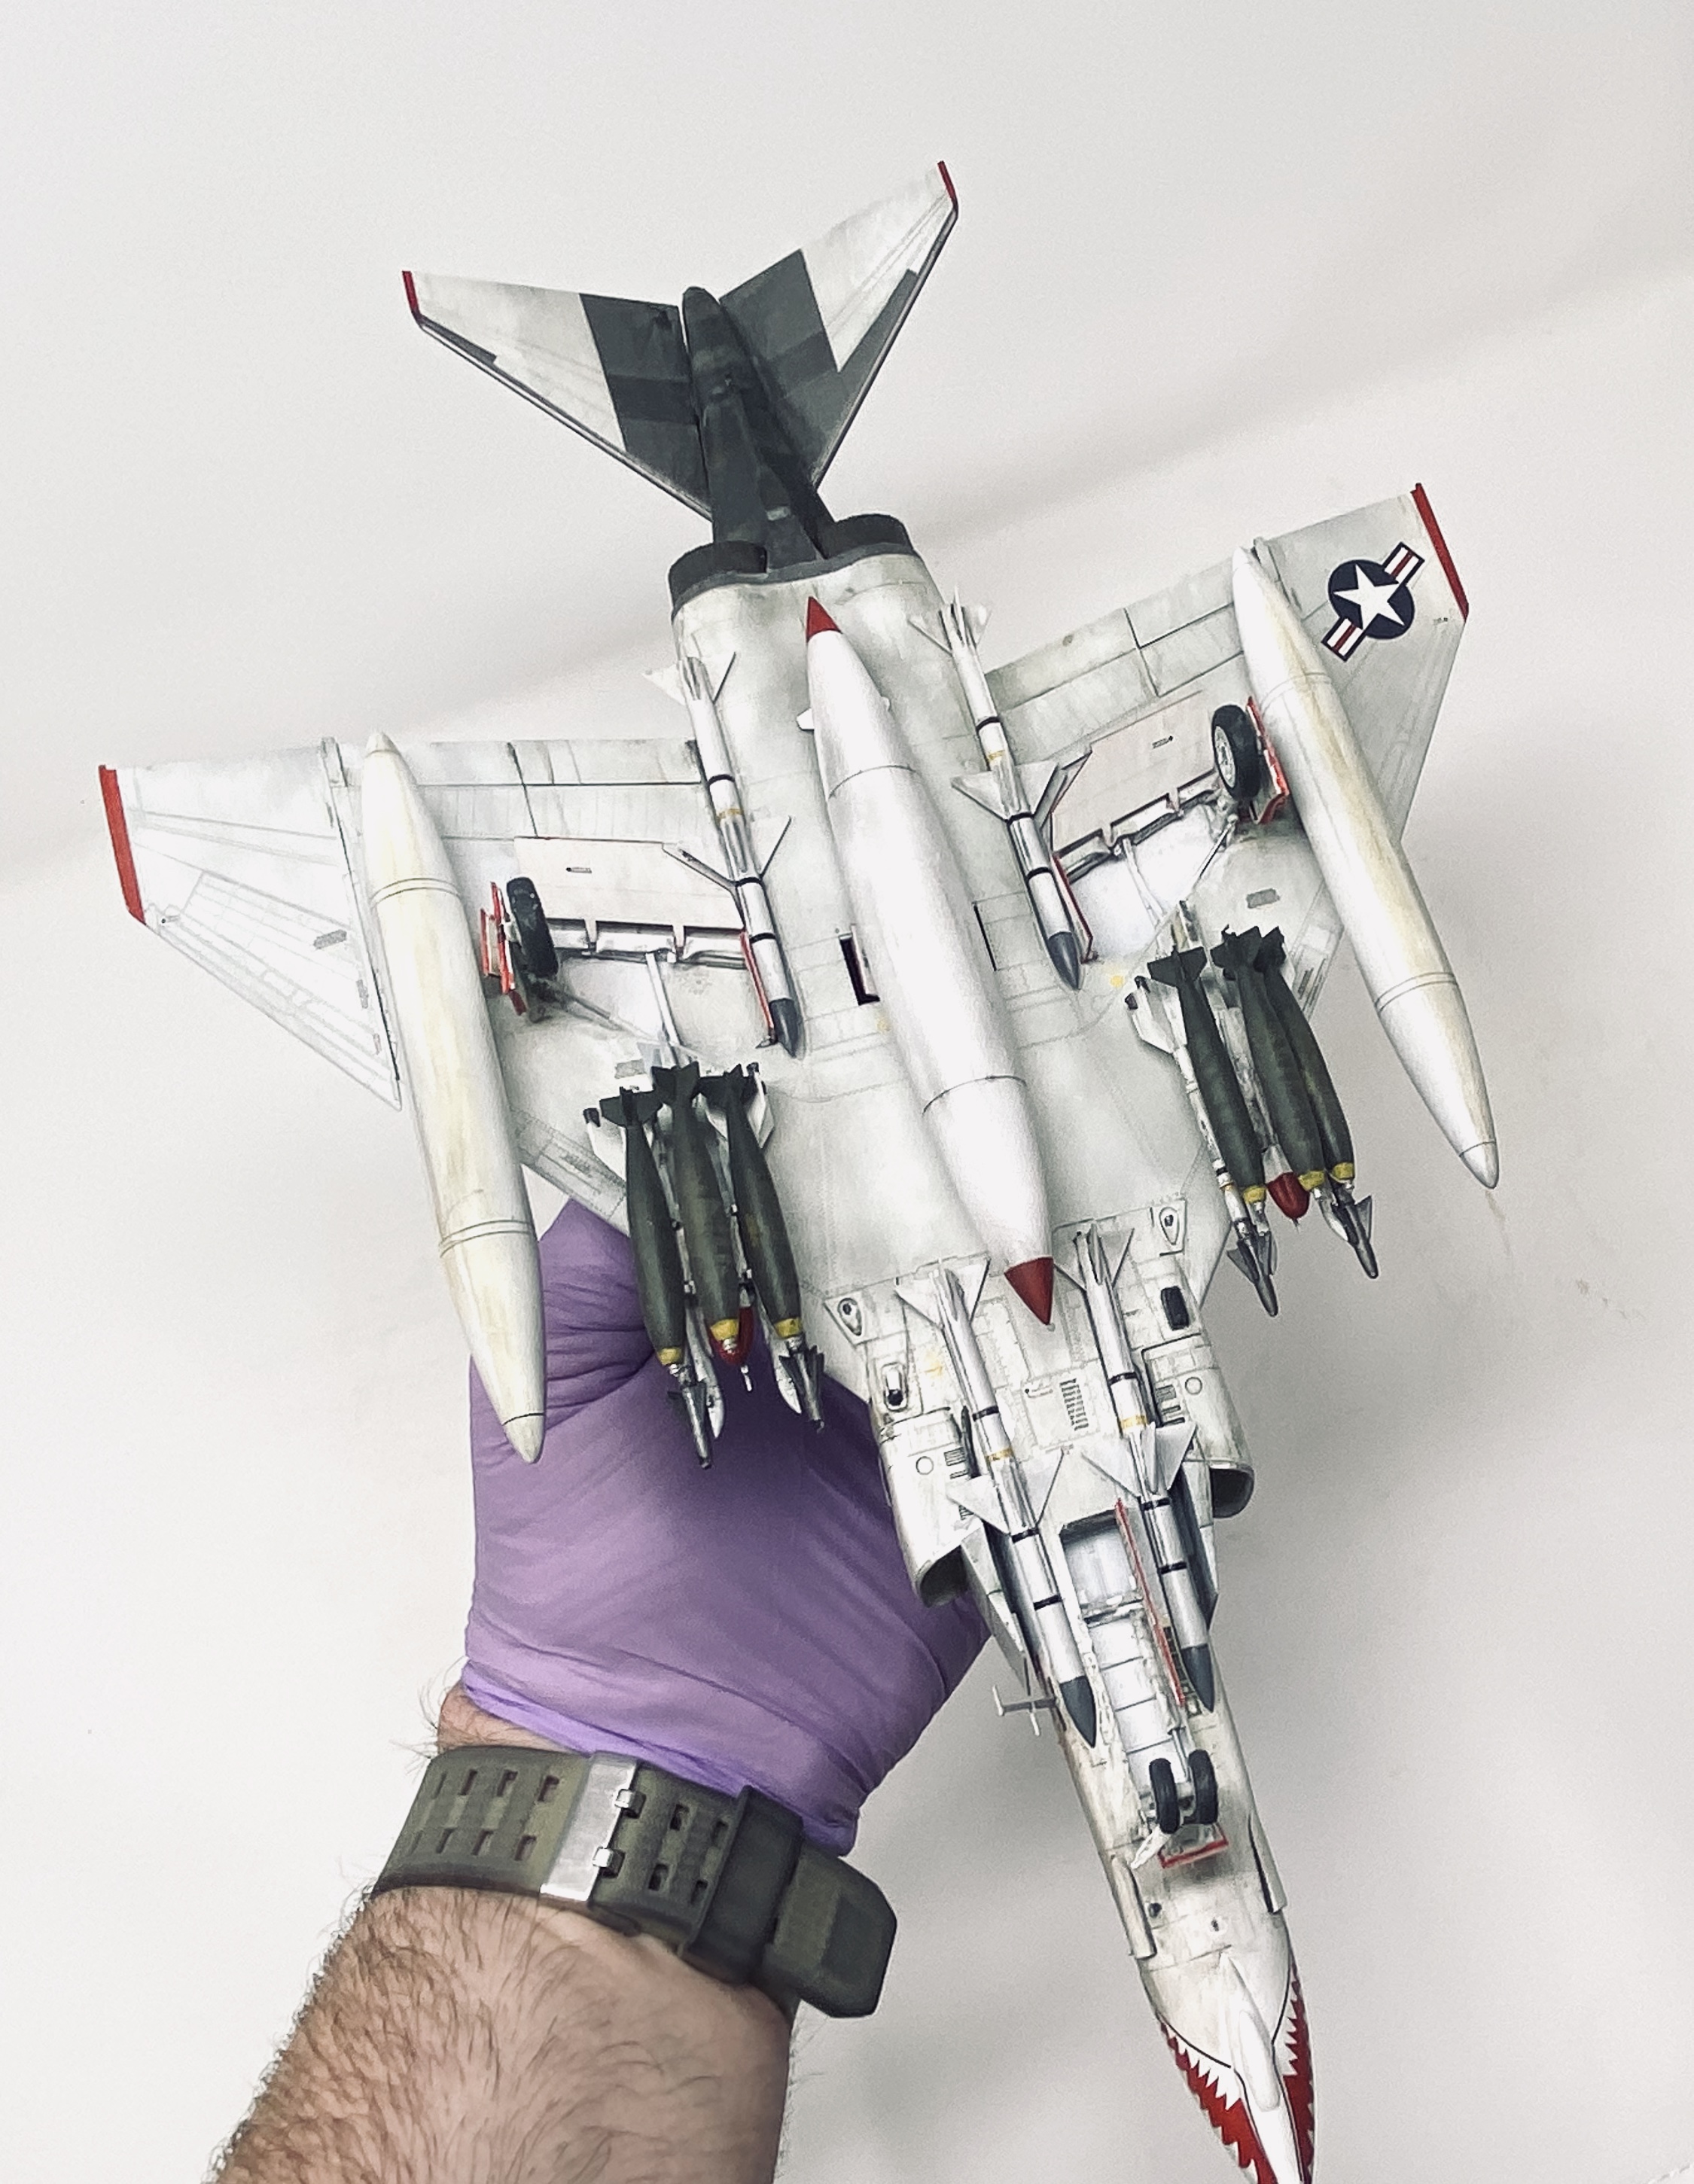
Also, the Academy kit came with crew figures and a full weapons loadout. This was going to be fun! As this was Dan Pedersen’s jet, it had to be real good! He would never except anything less than a persons absolute best. With that in mind, in tribute to him I set myself a task. To build his F-4B Phantom and to make it look Top Gun cool.
The Build
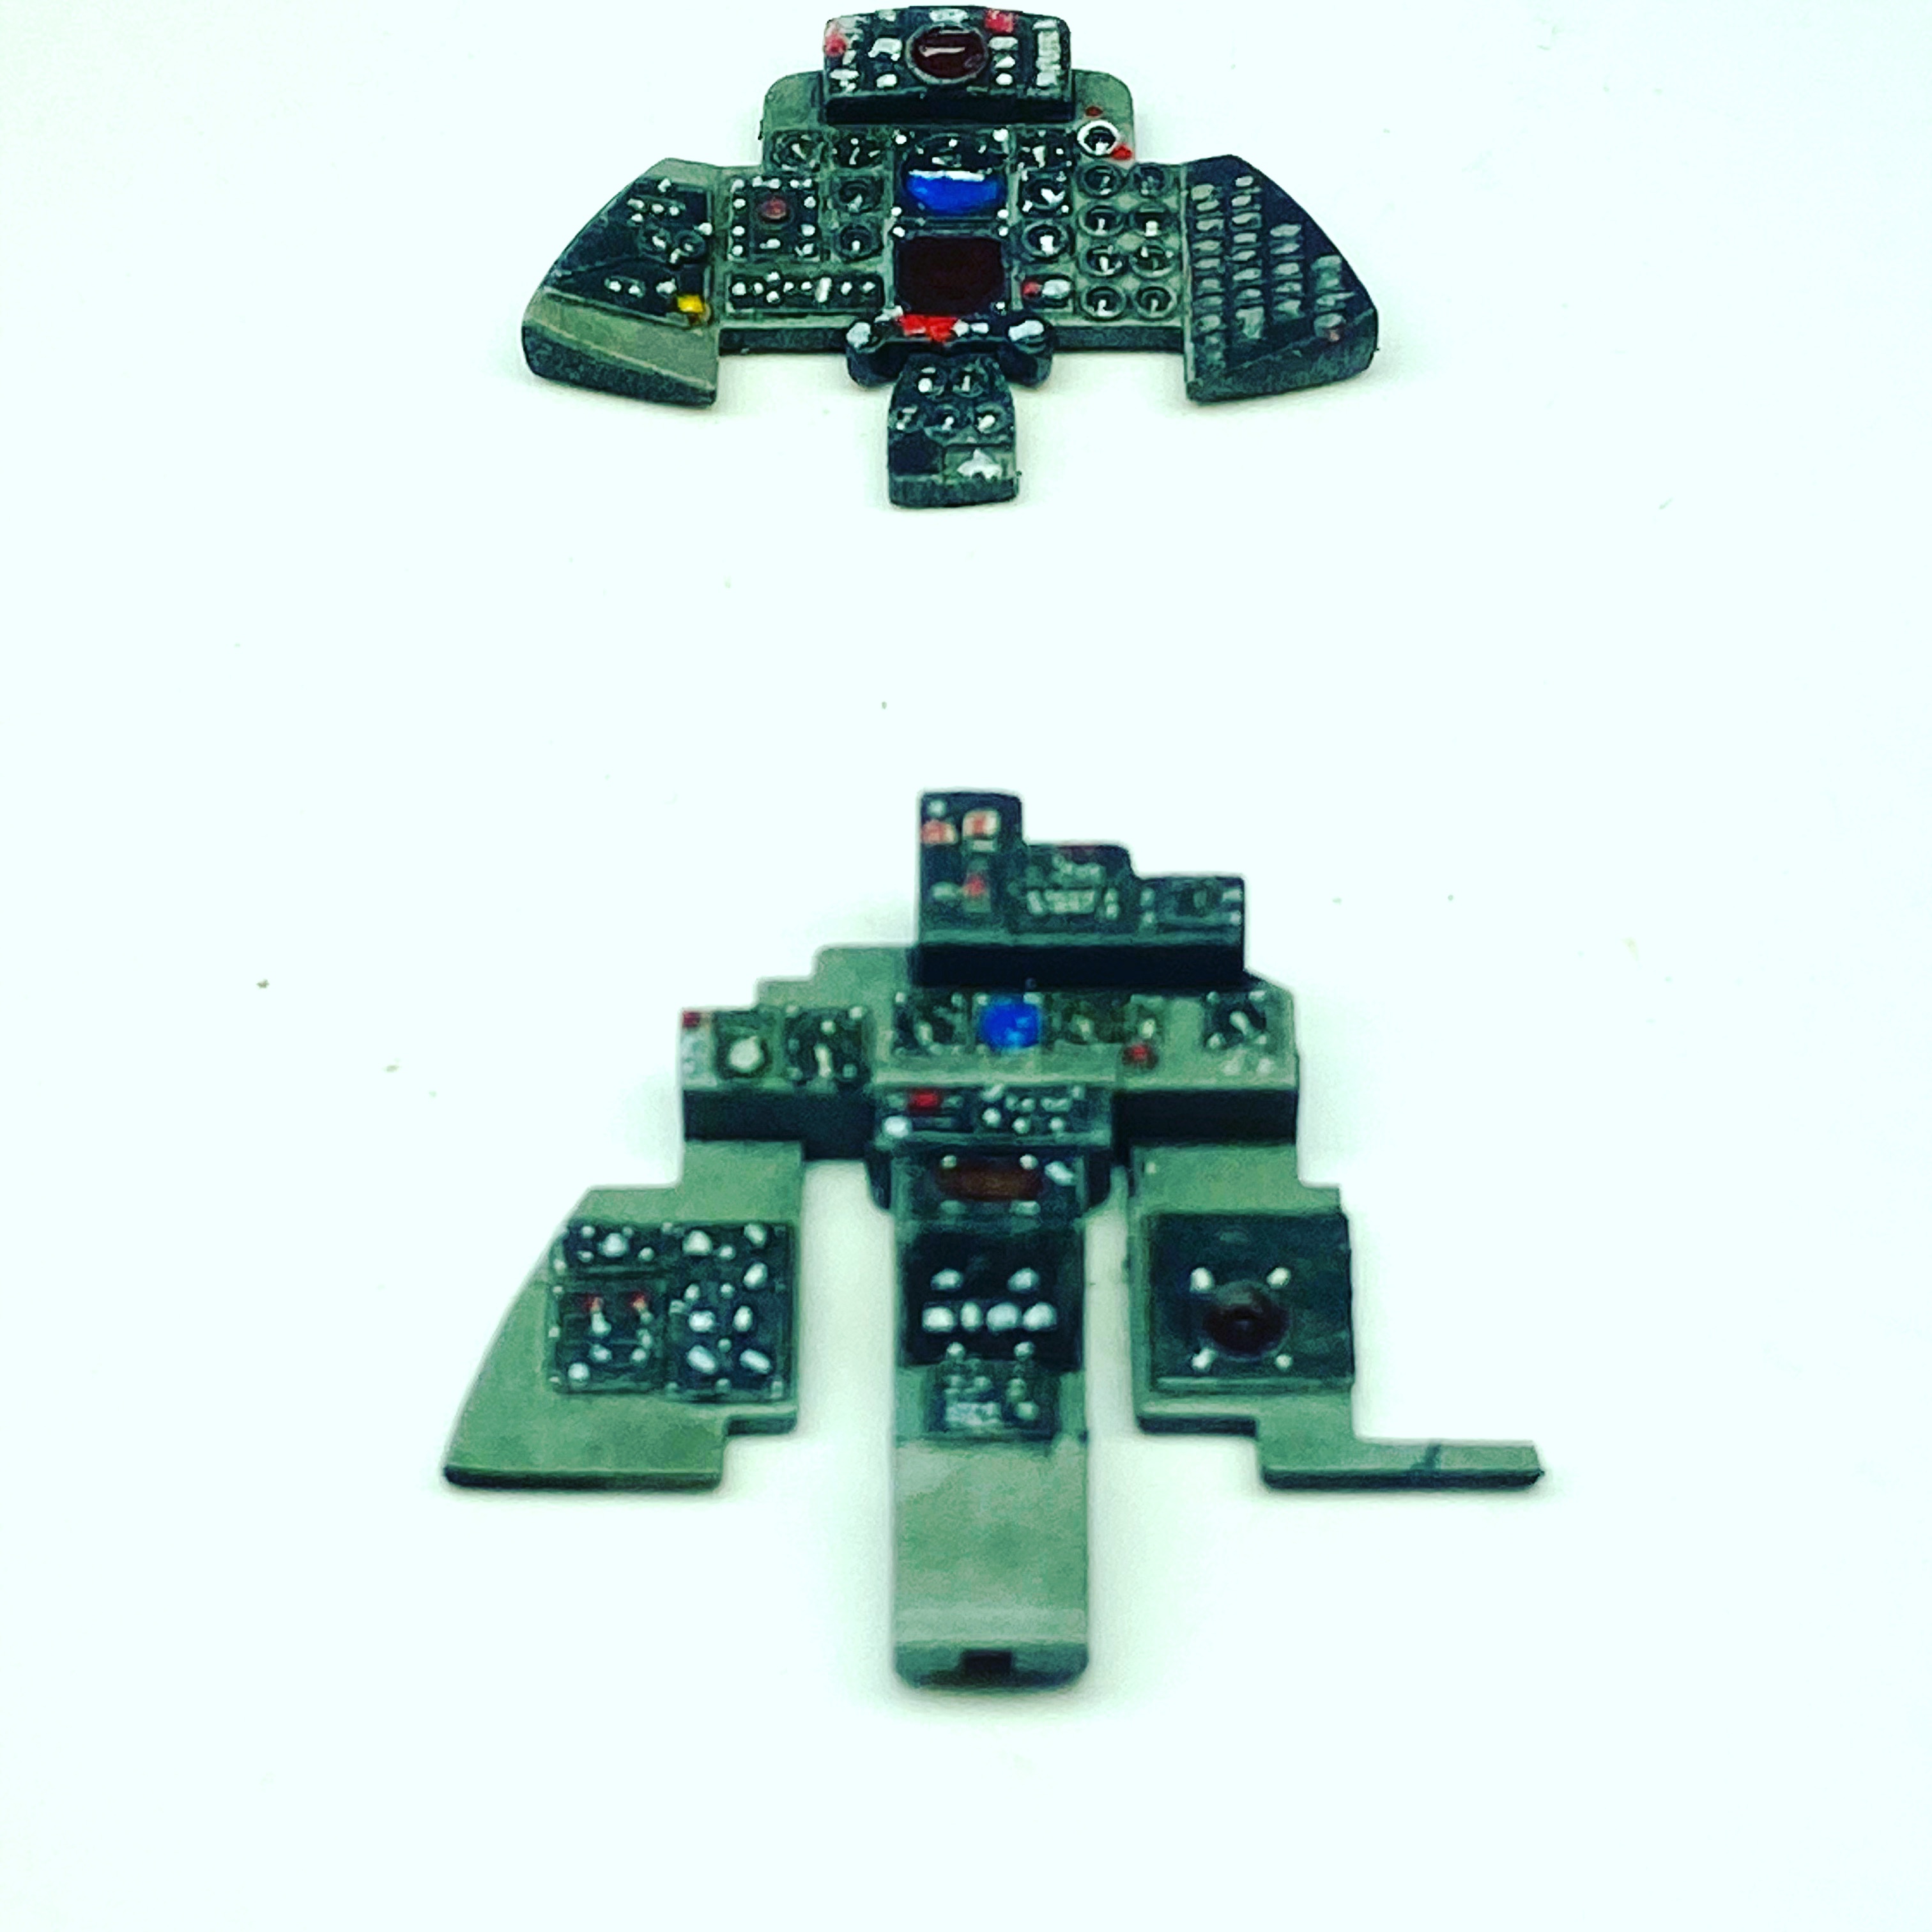
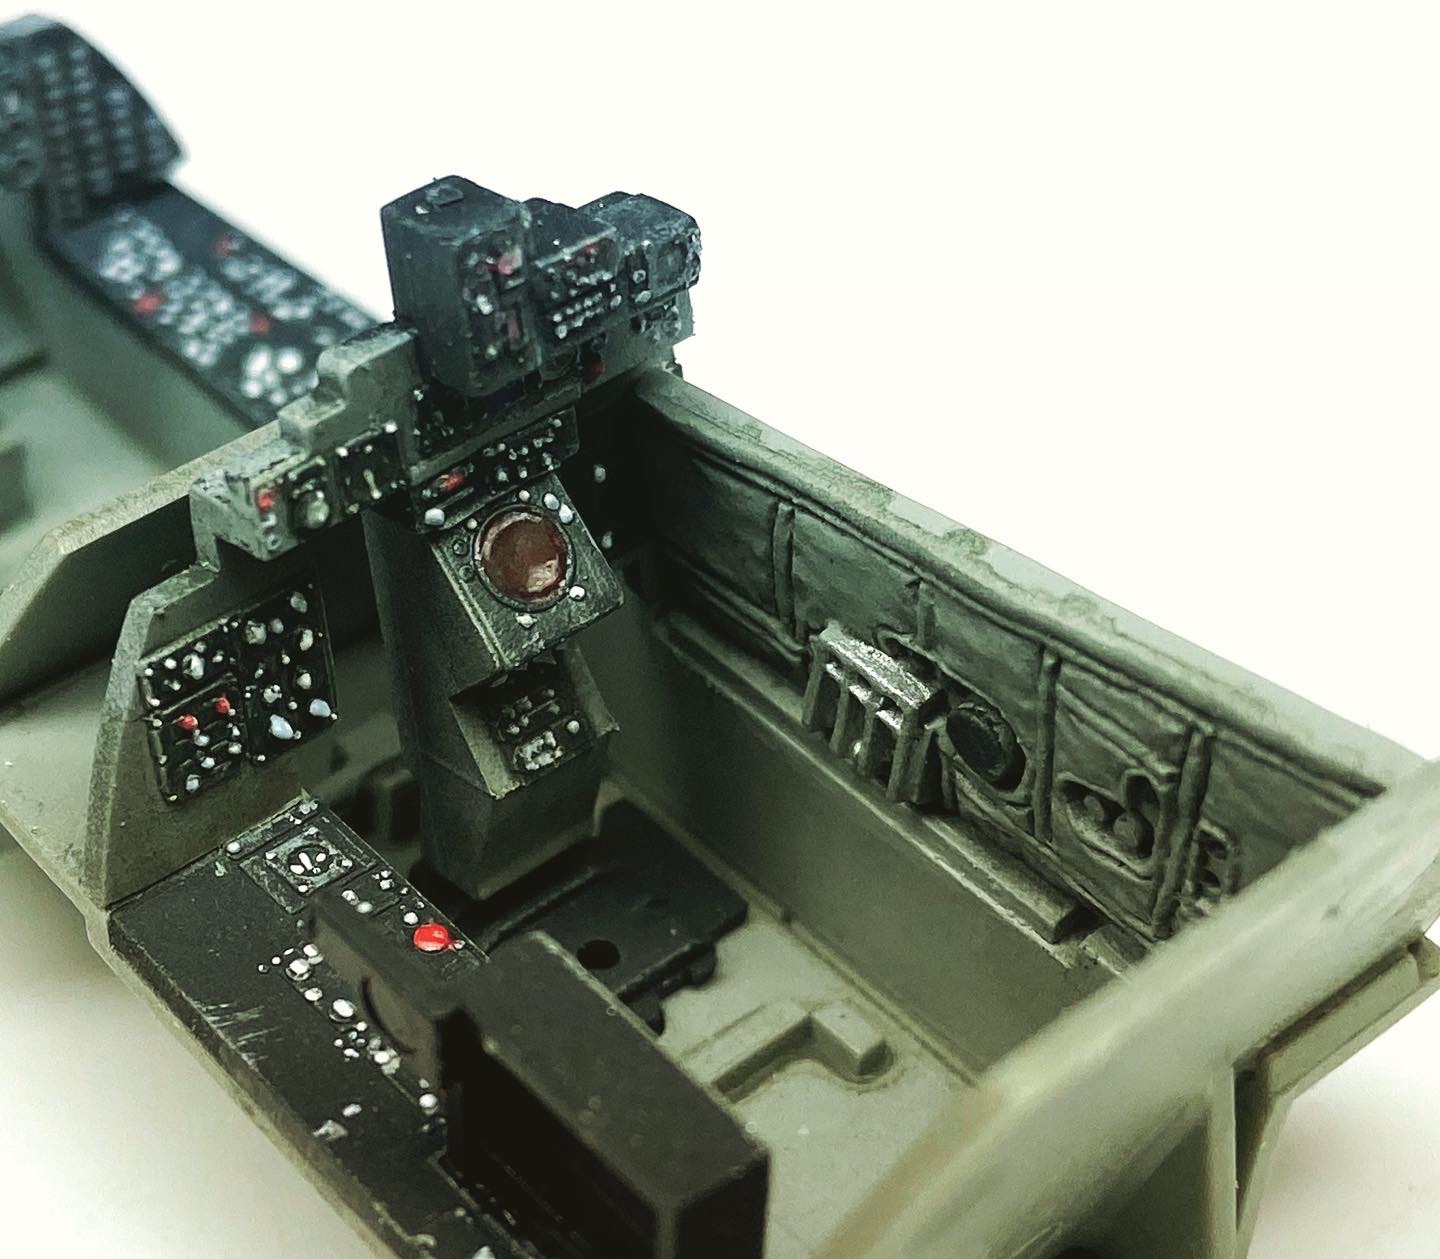
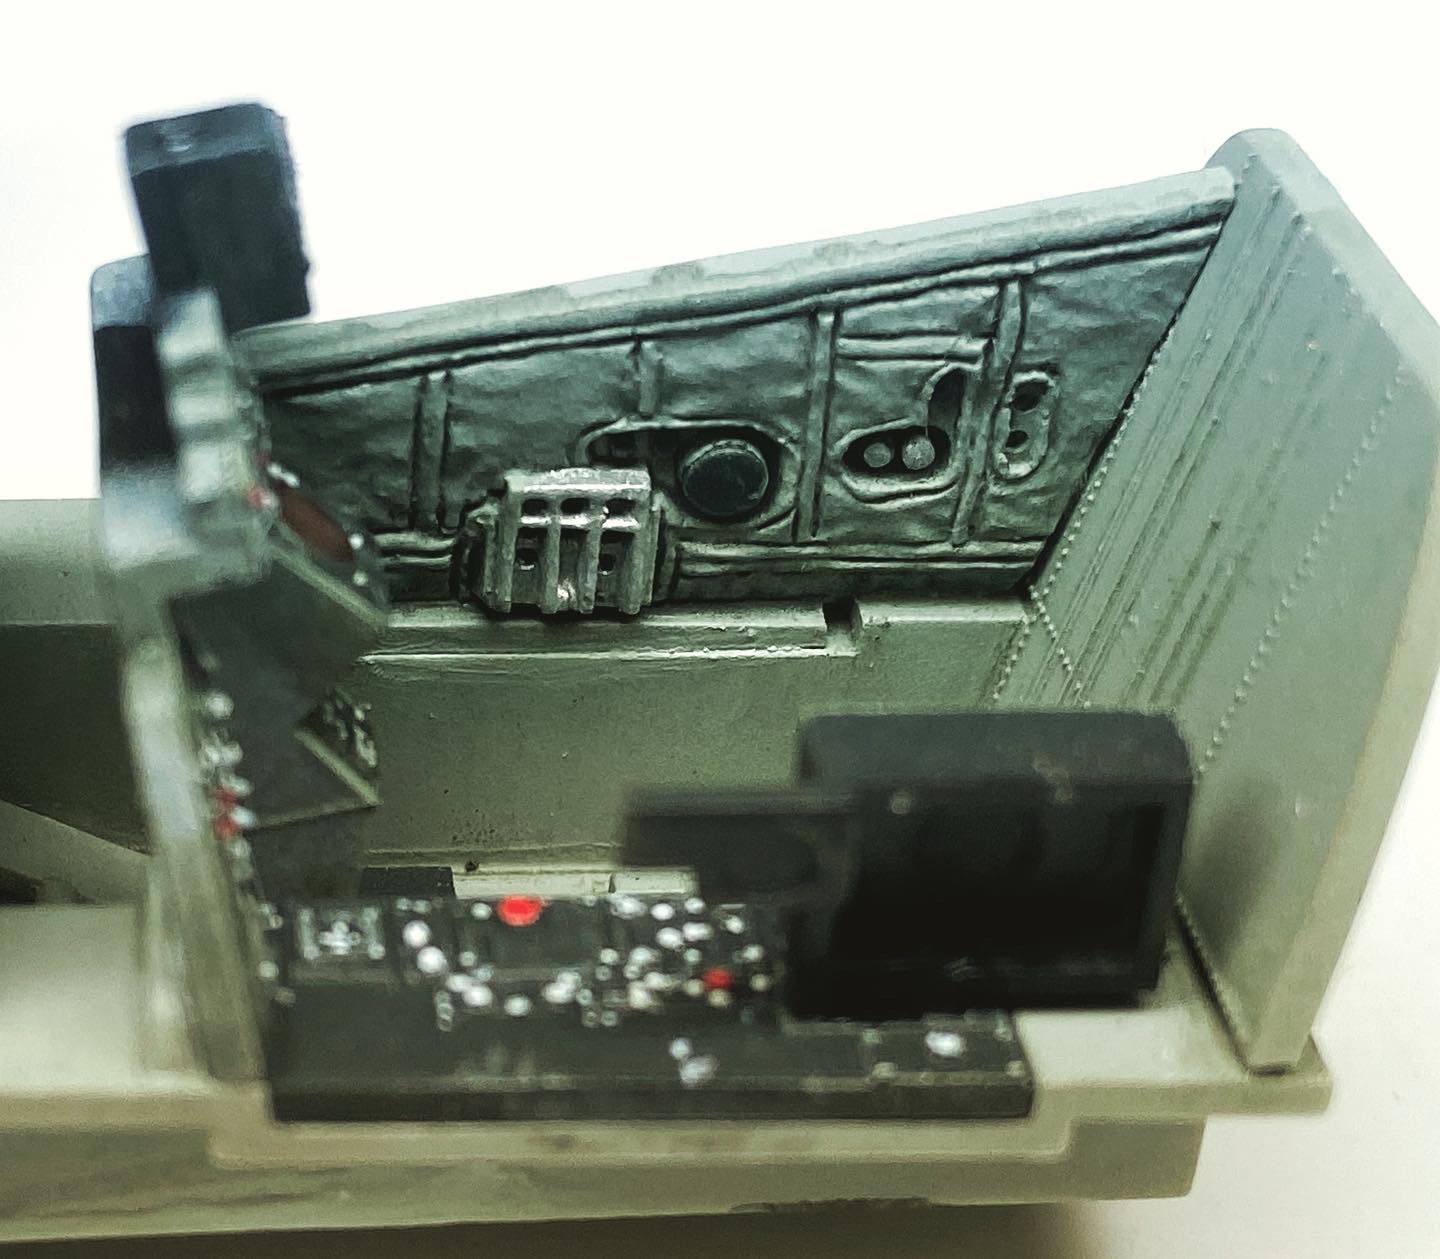
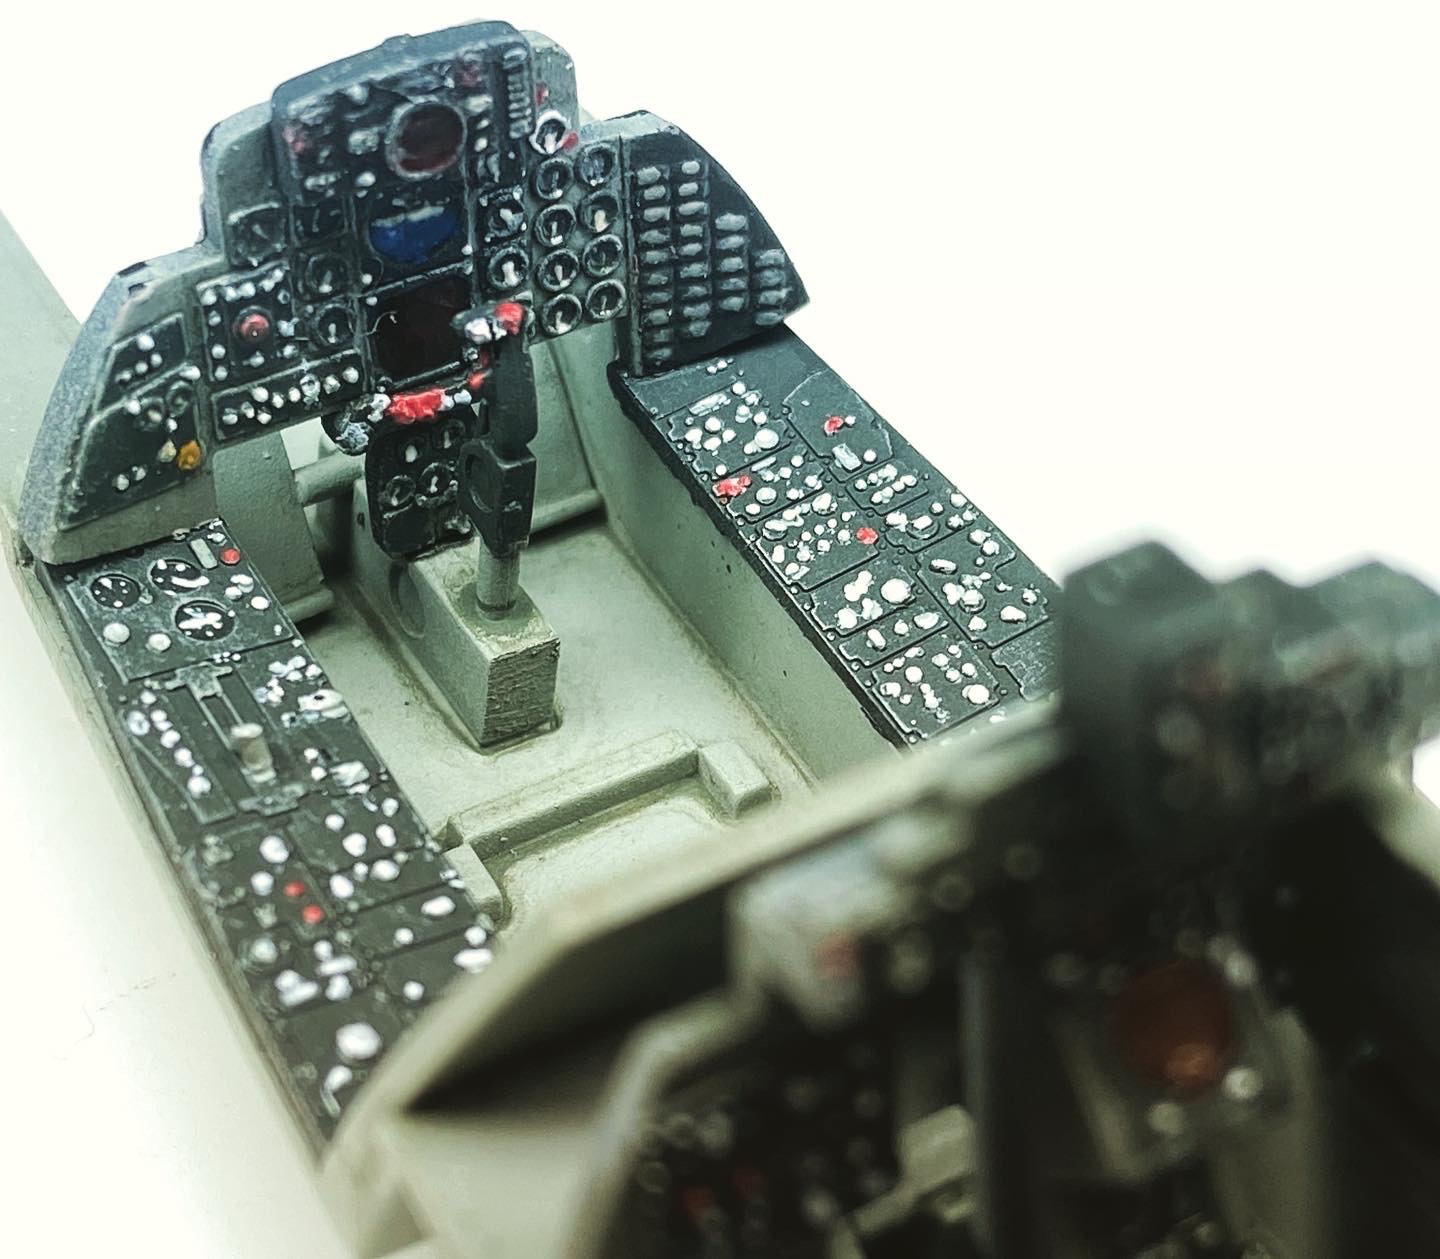
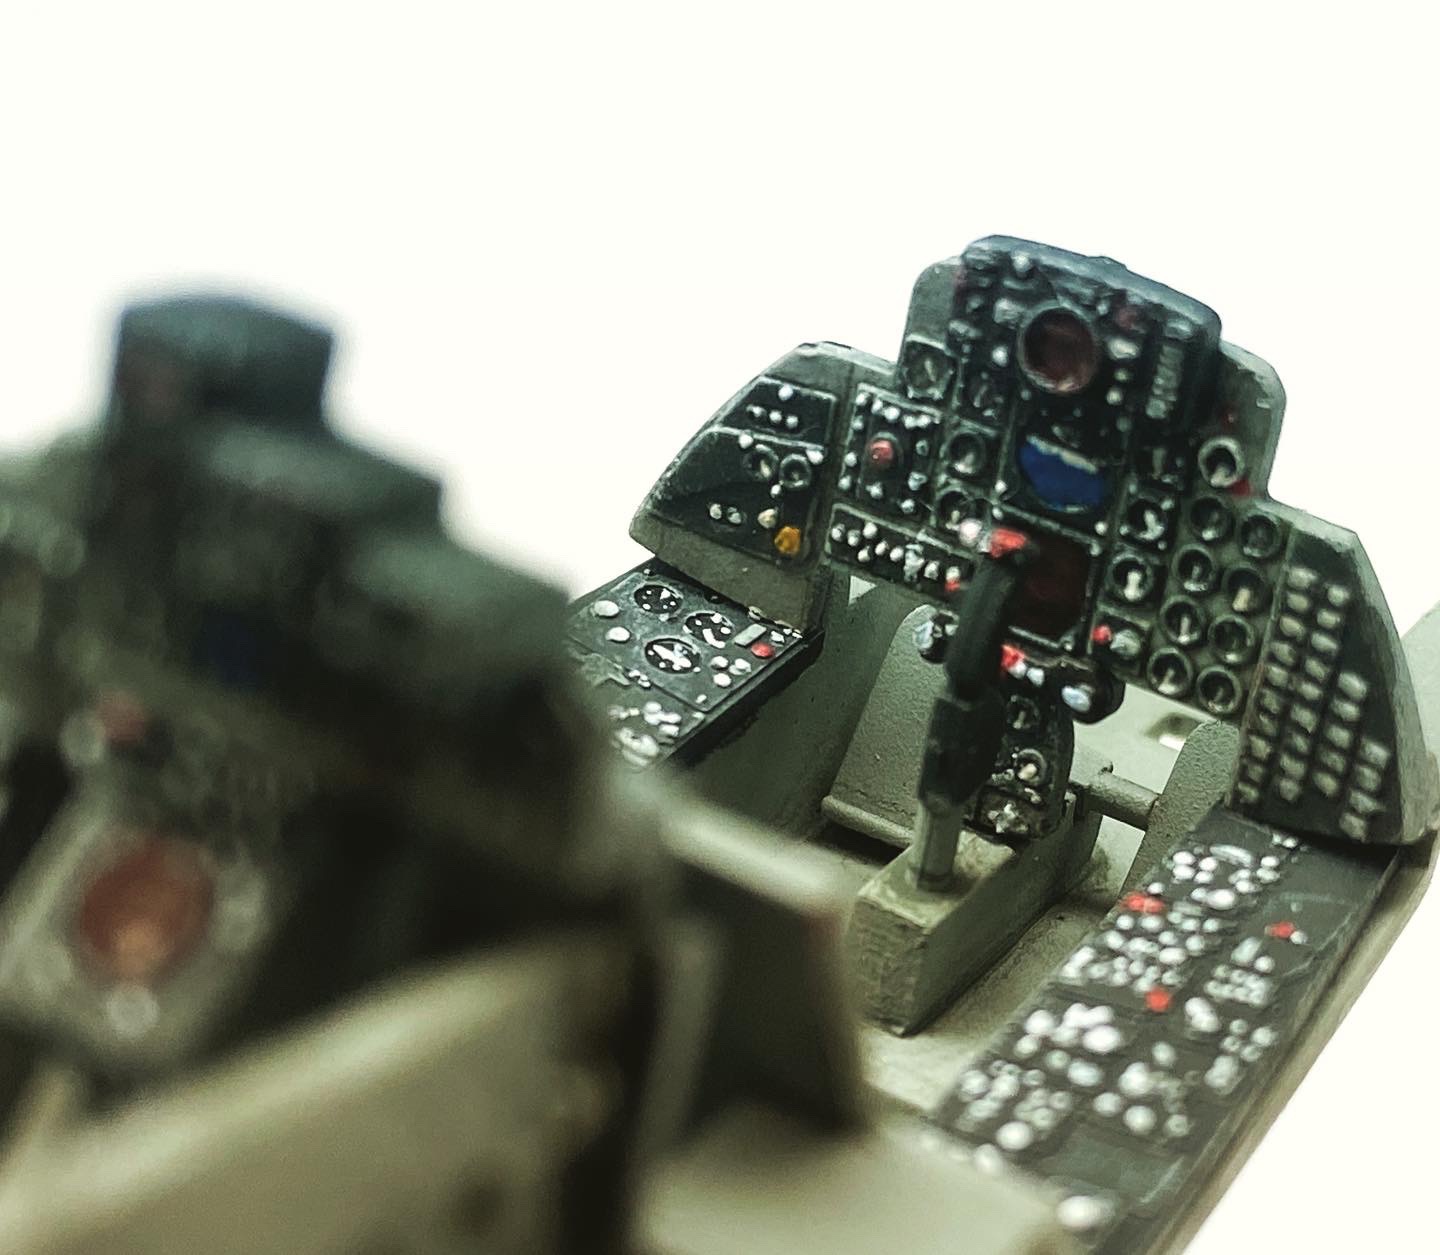
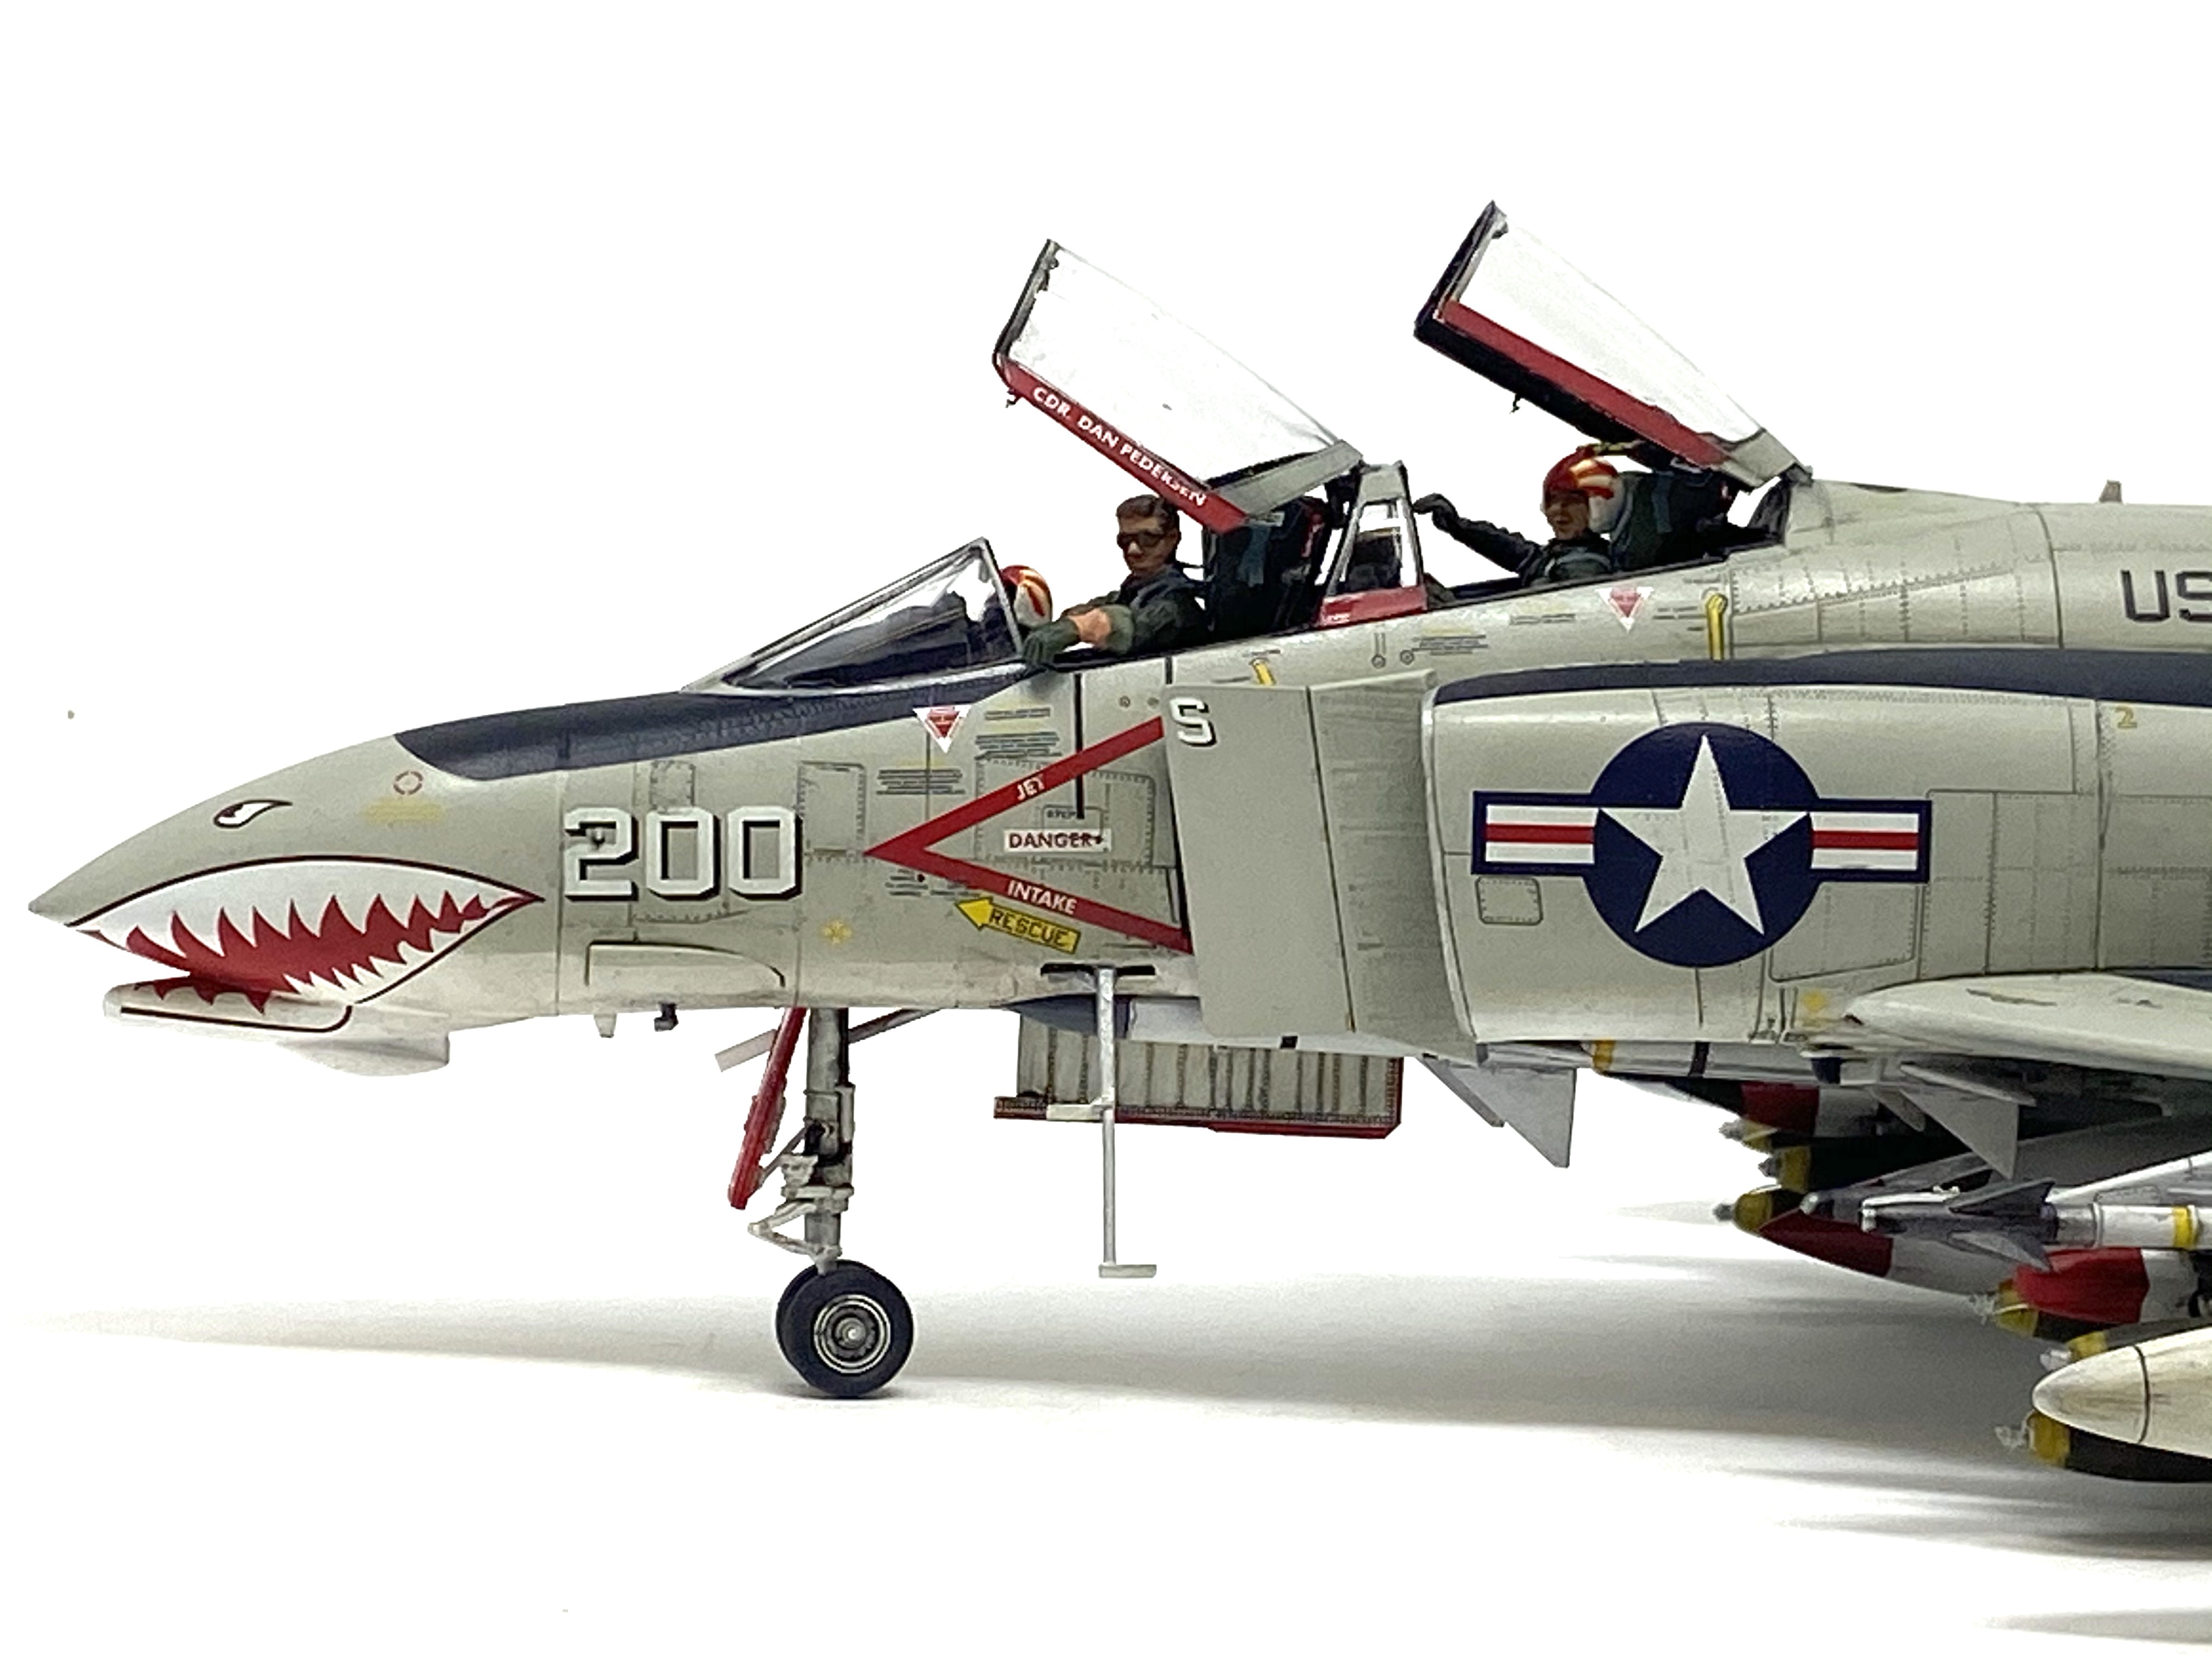
I started with the cockpit and went strigt back to old fashioned modelling skills. The cockpit you see in these photo’s was painted entirely by hand.
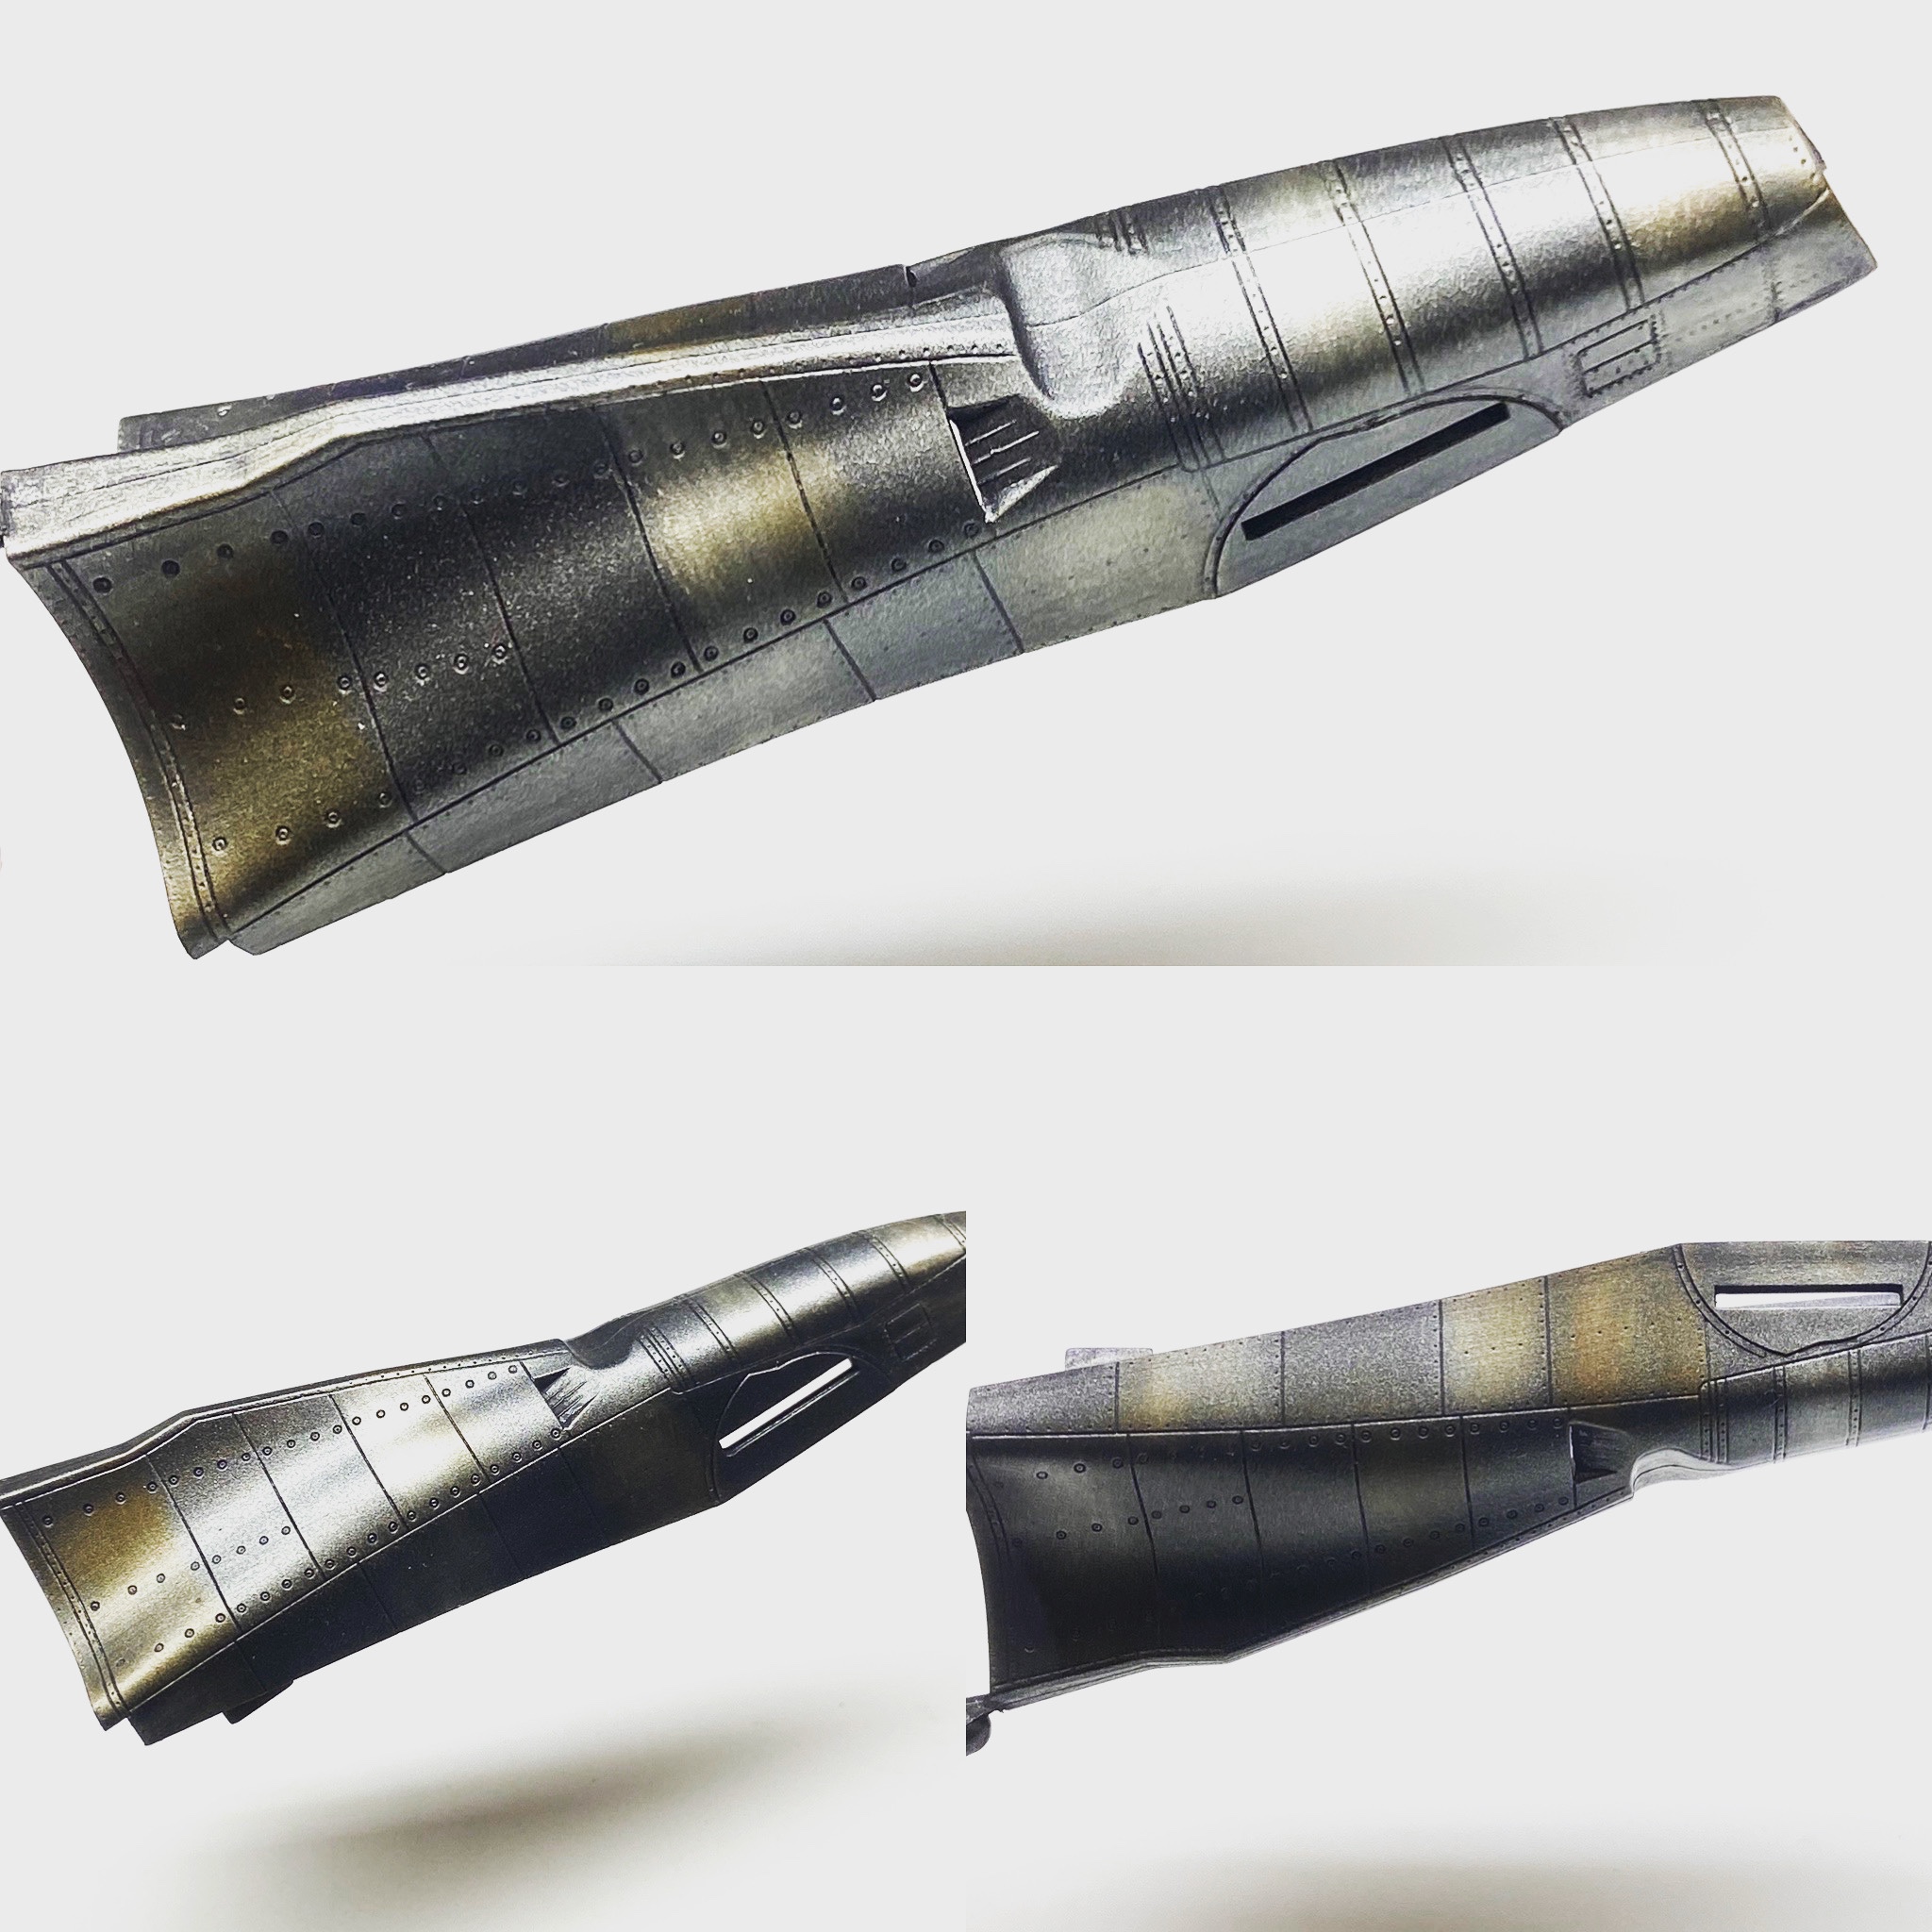
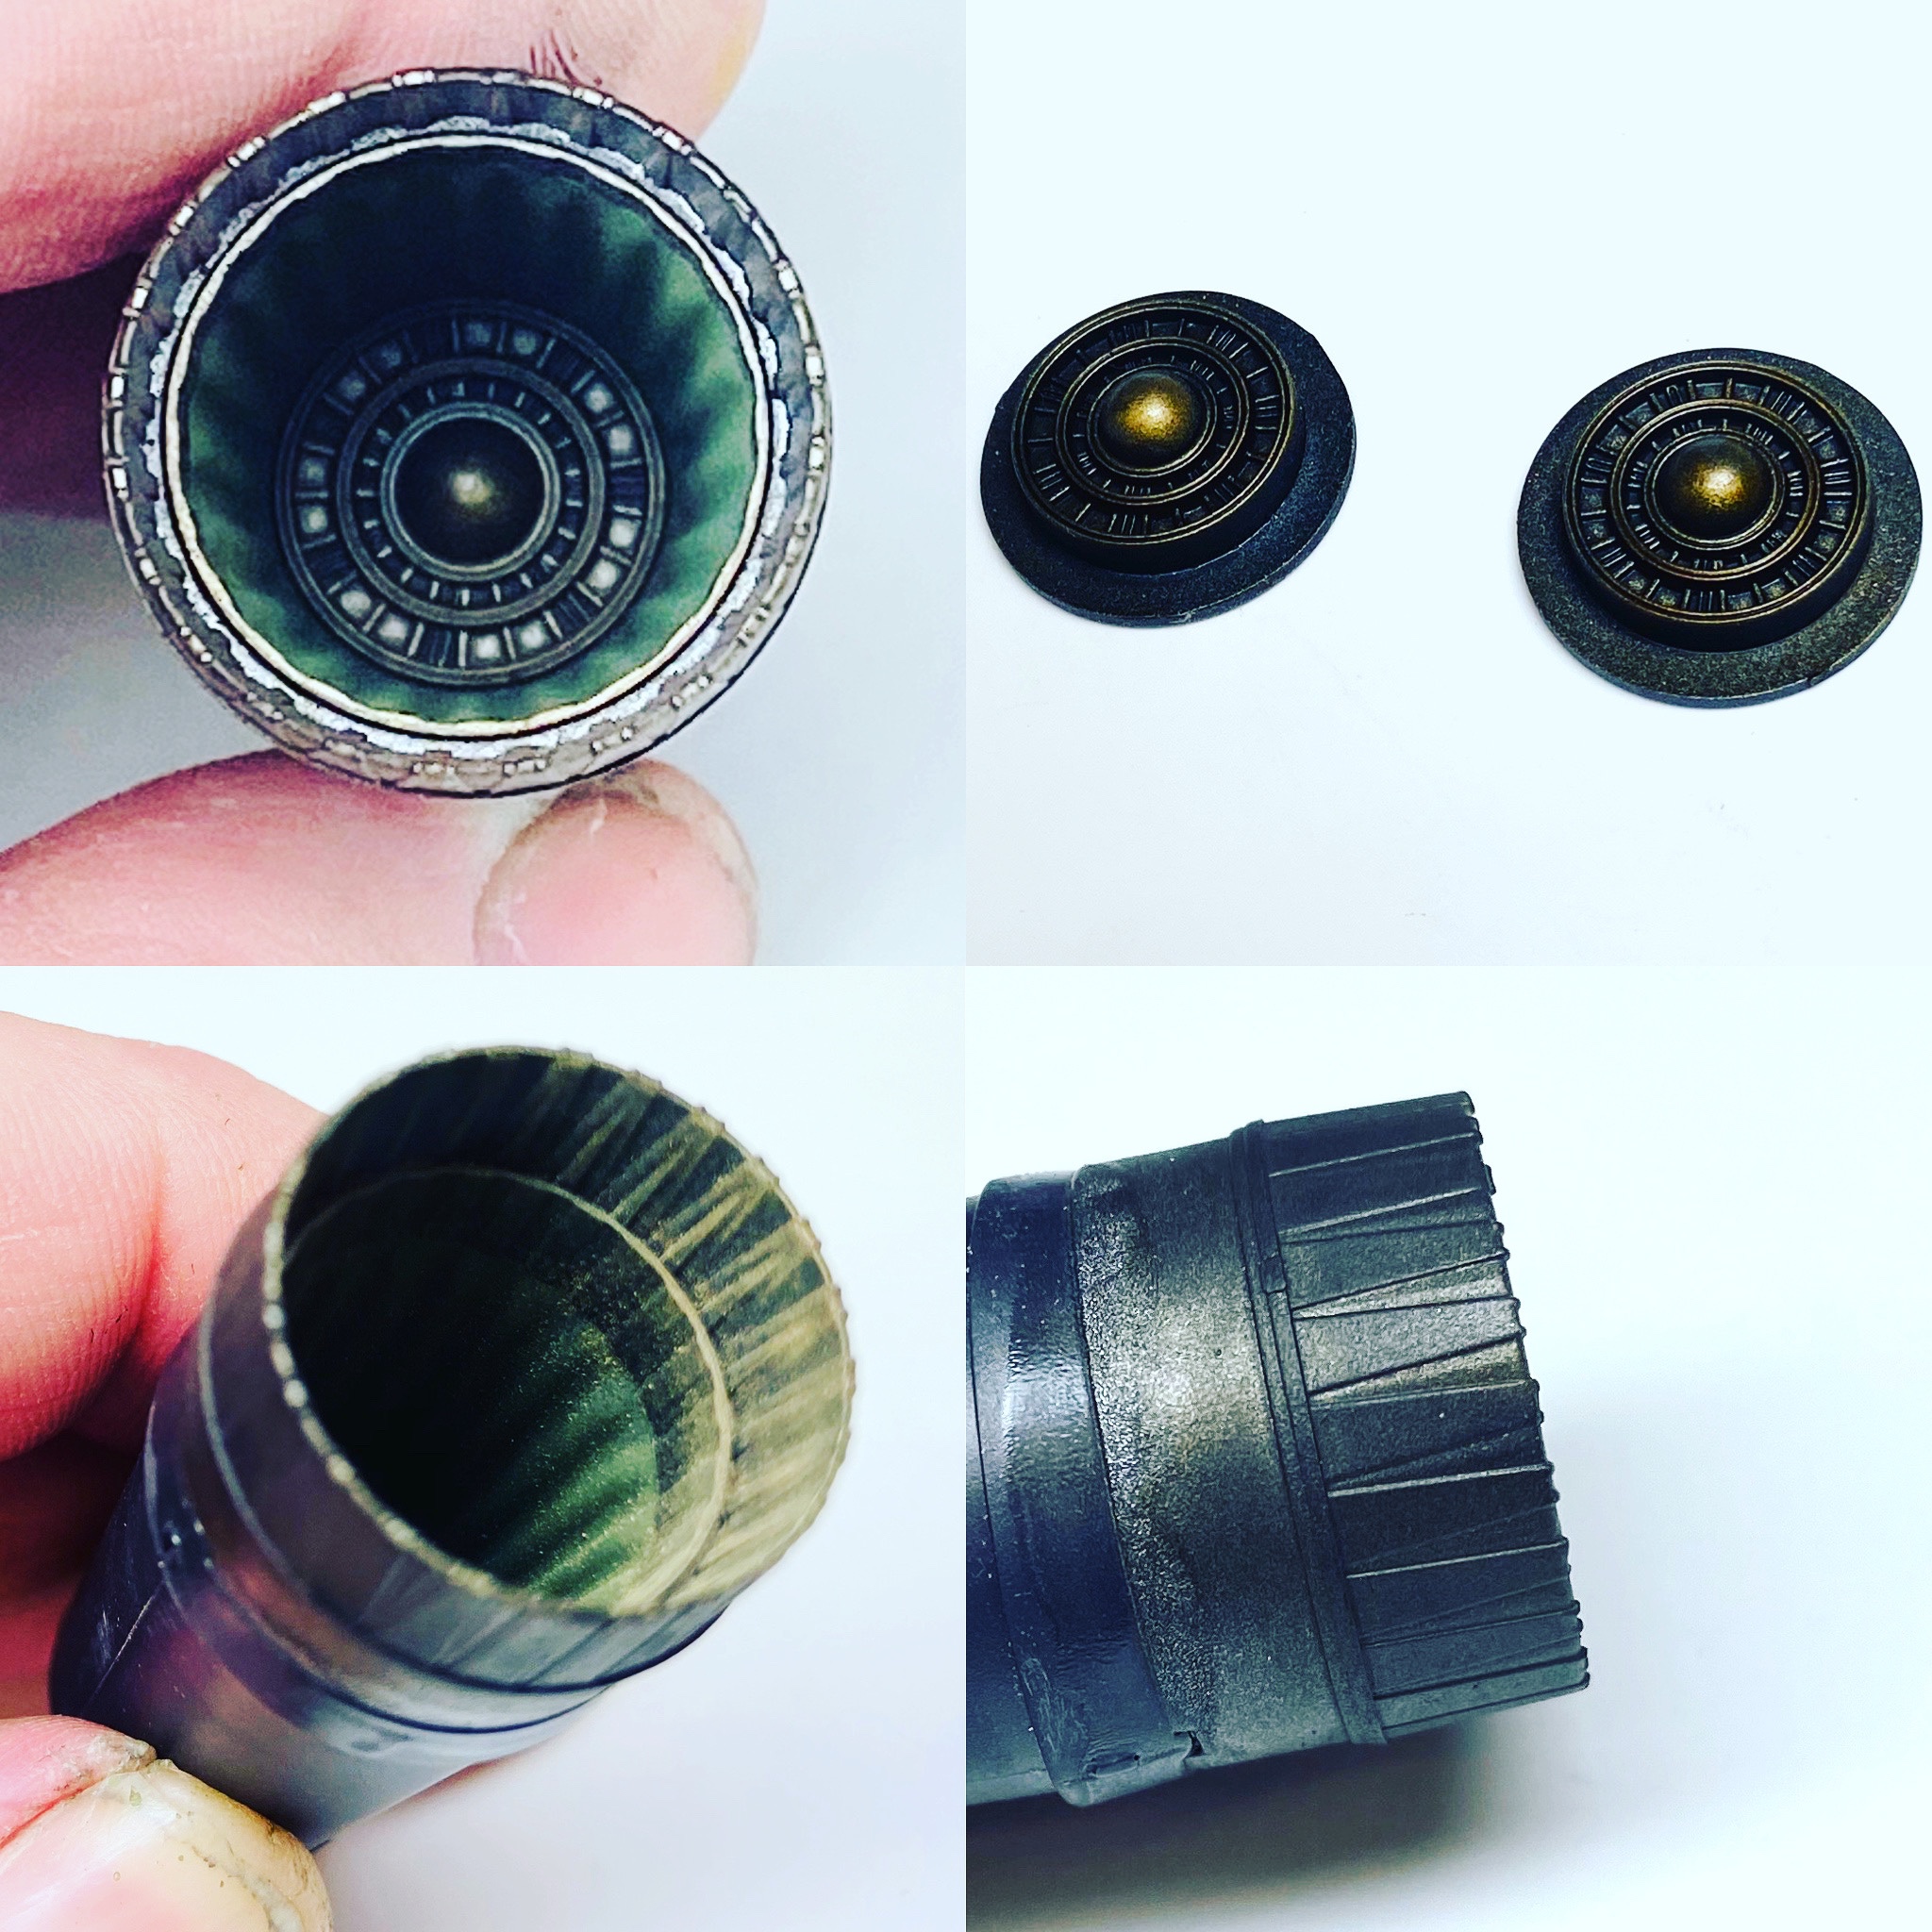
The Phantom had big smokey engines and I wanted to replicate how the metal engine heat sheilding and afterburner nozzles would weather over time on operations. So I used a series of metallic shades to acomplish theese effects….
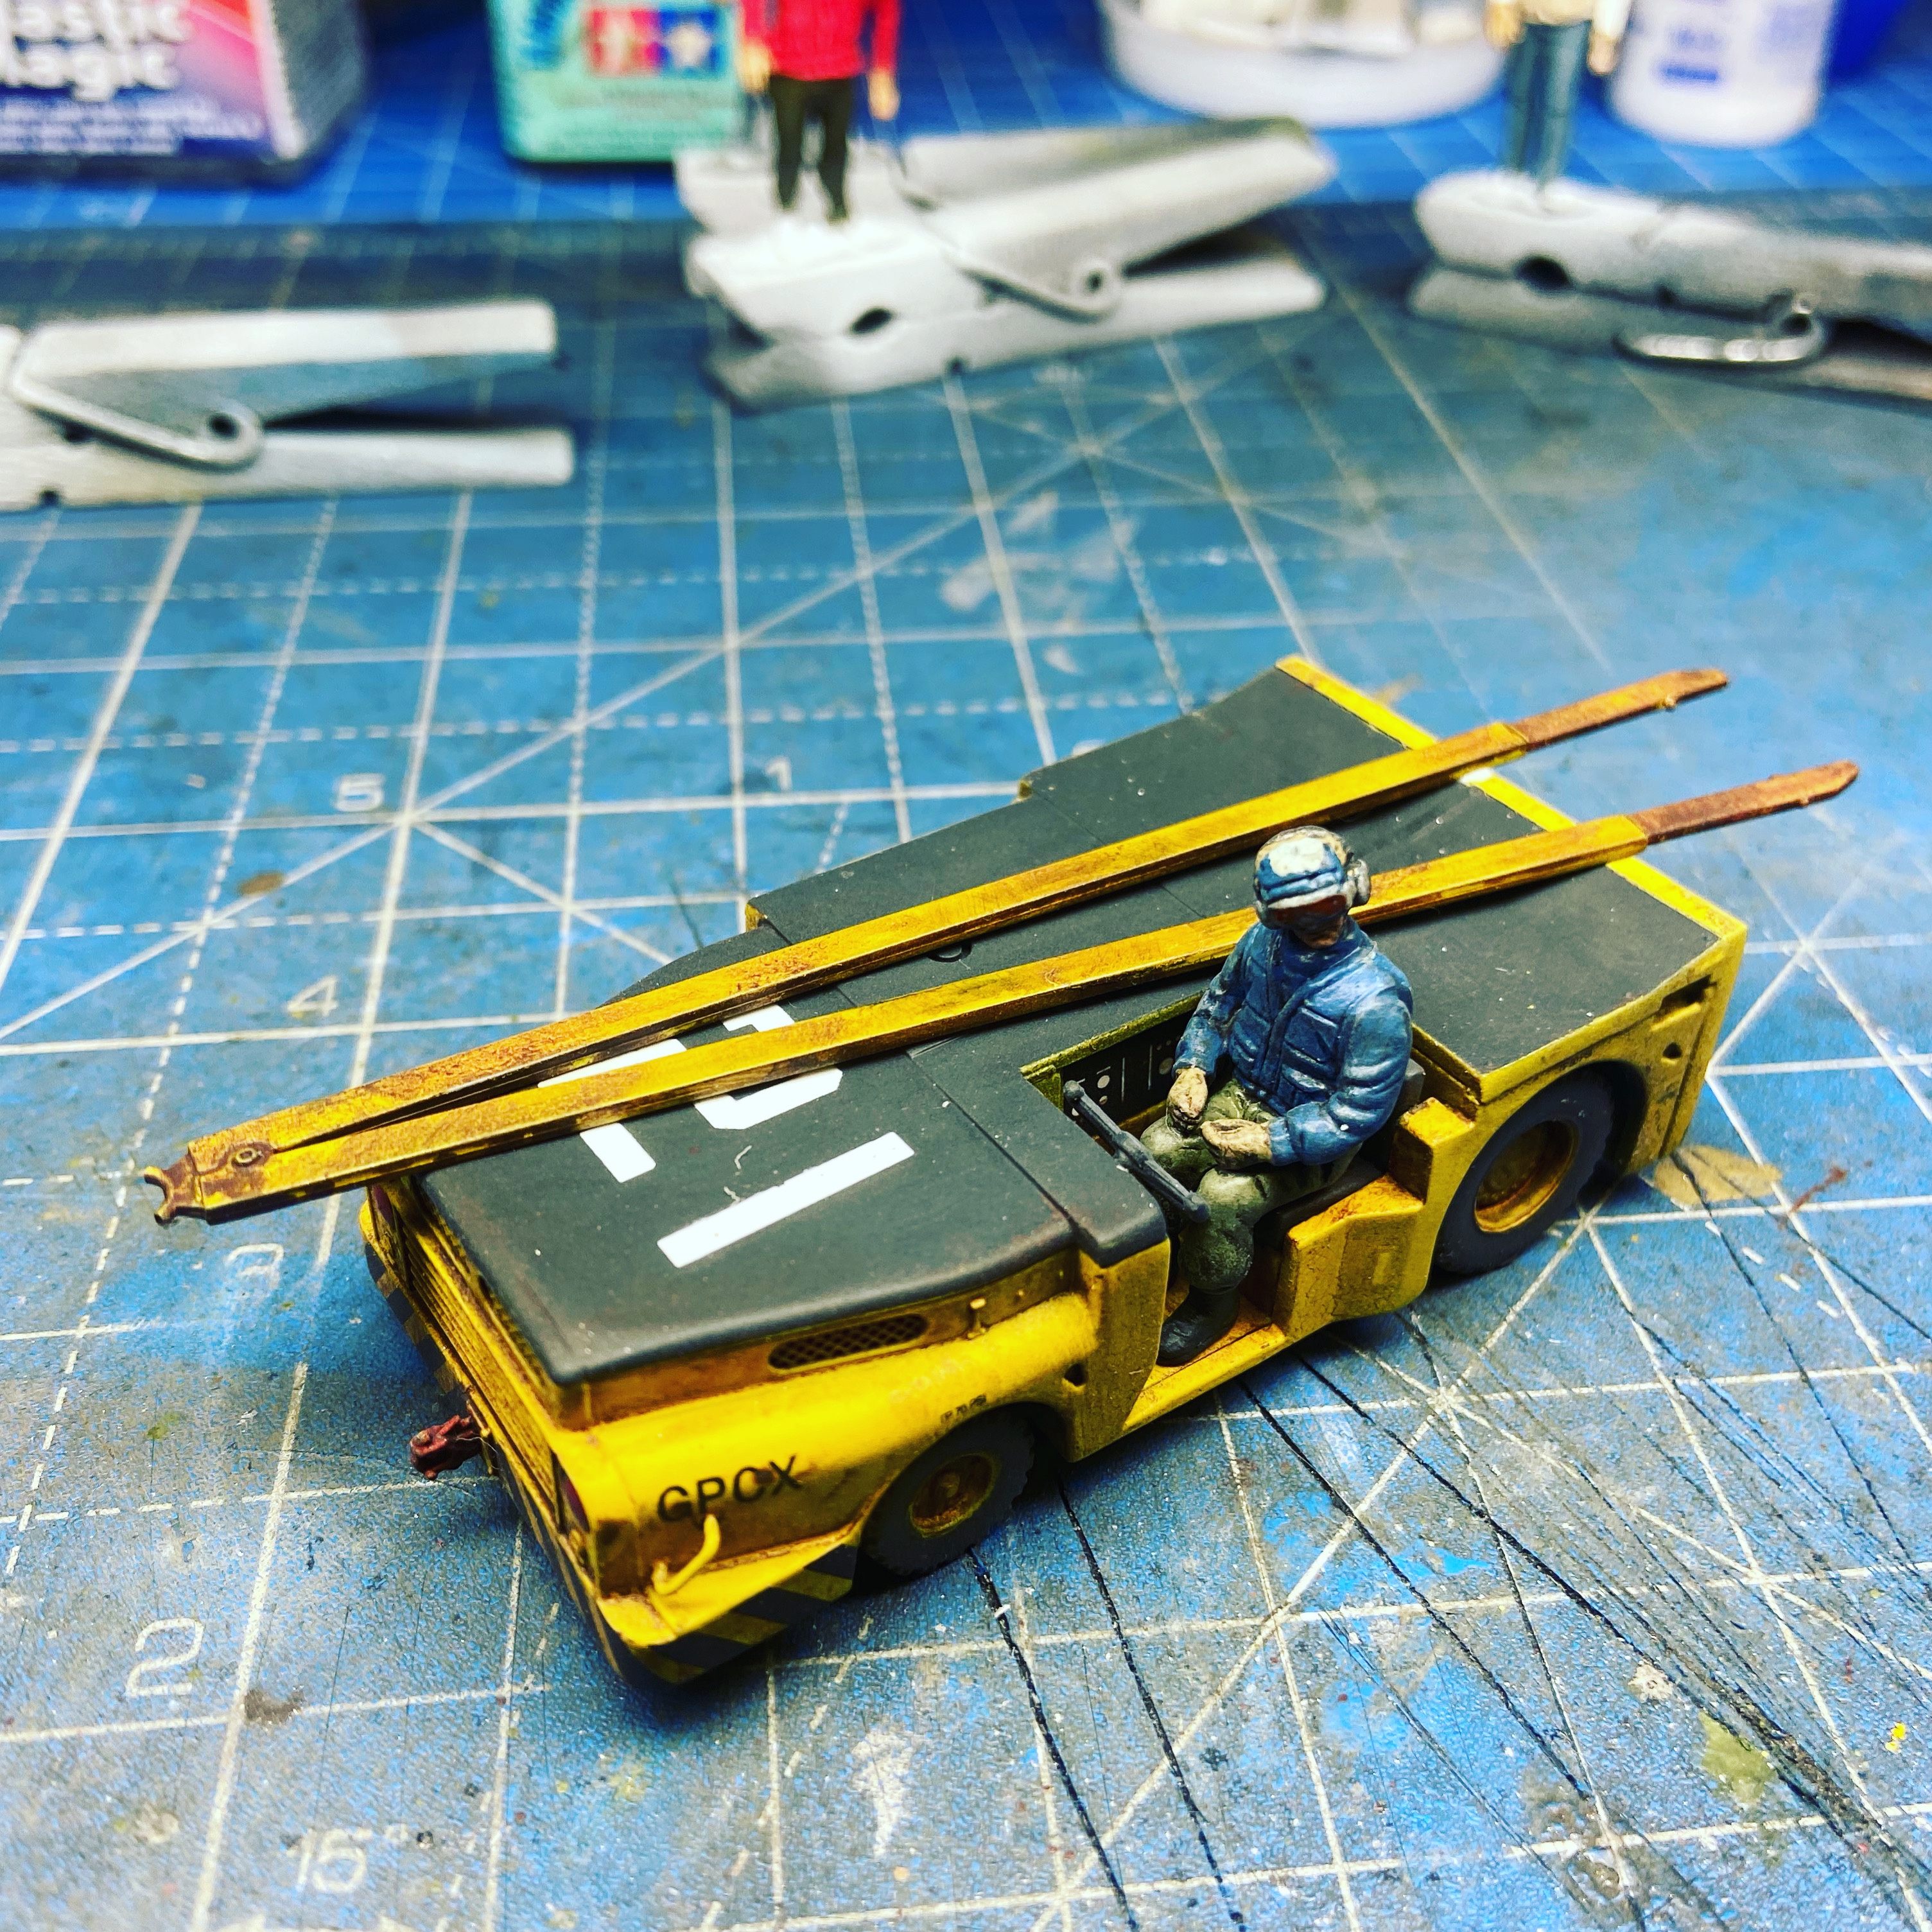
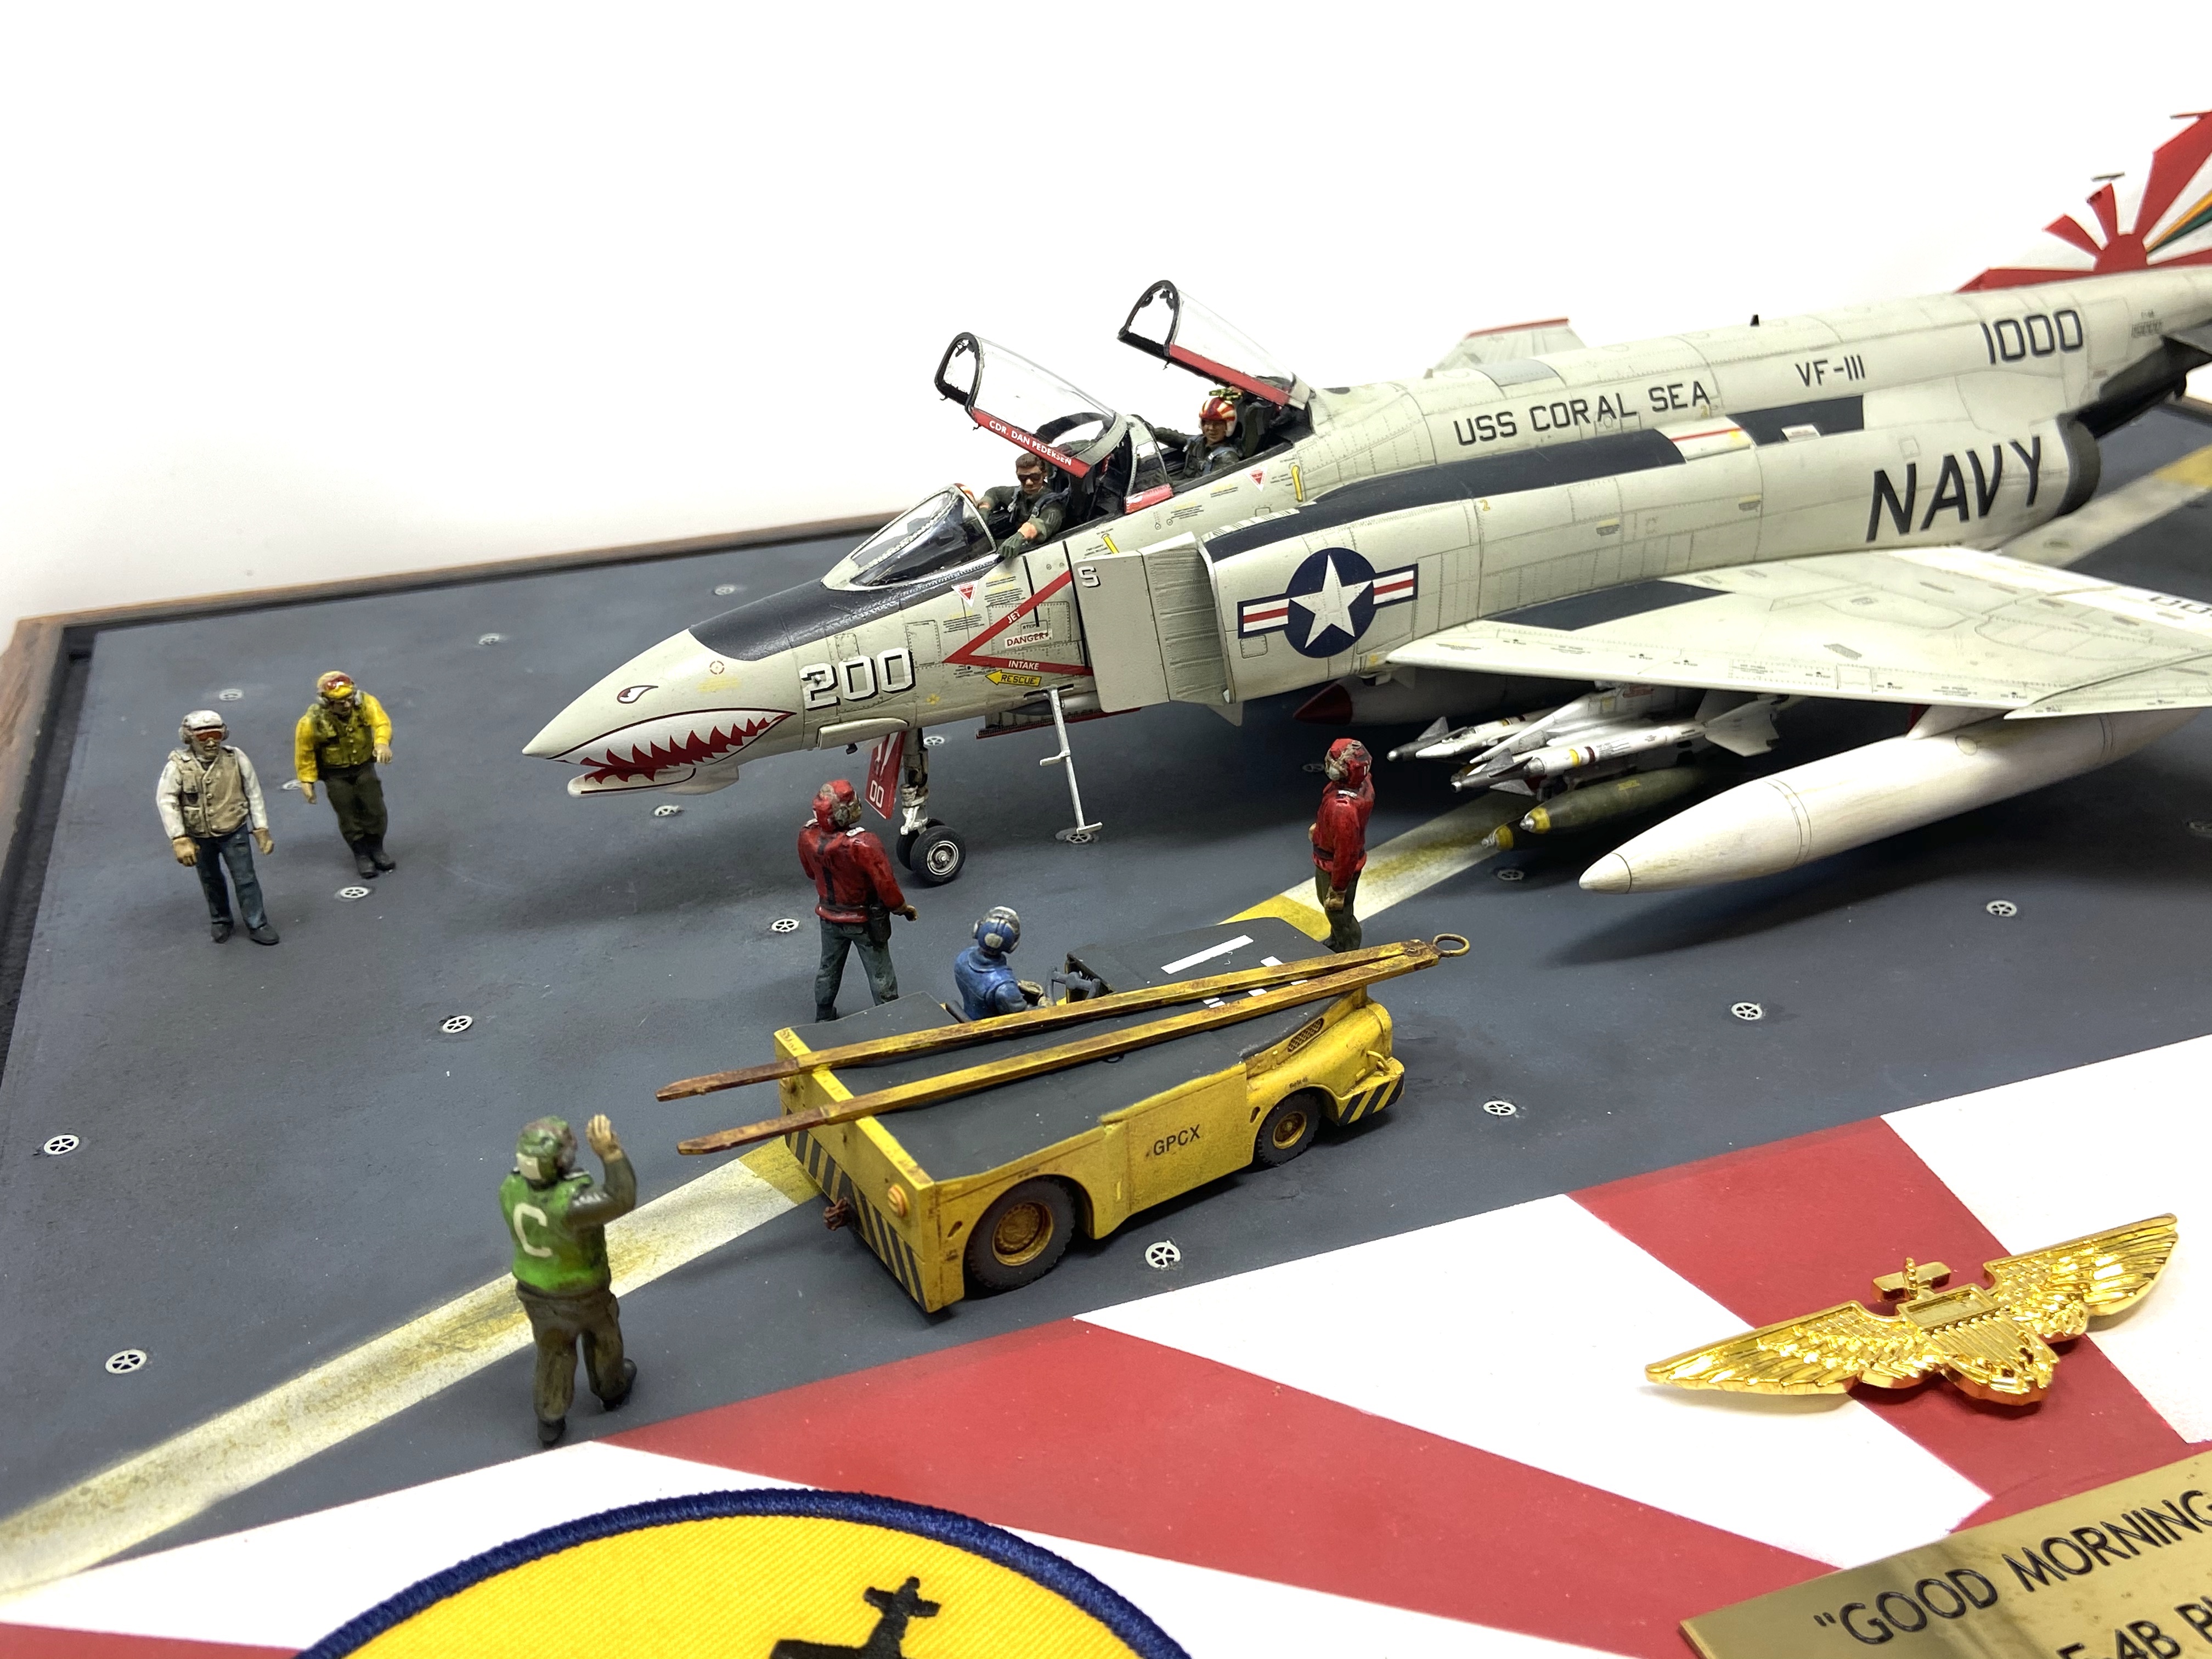
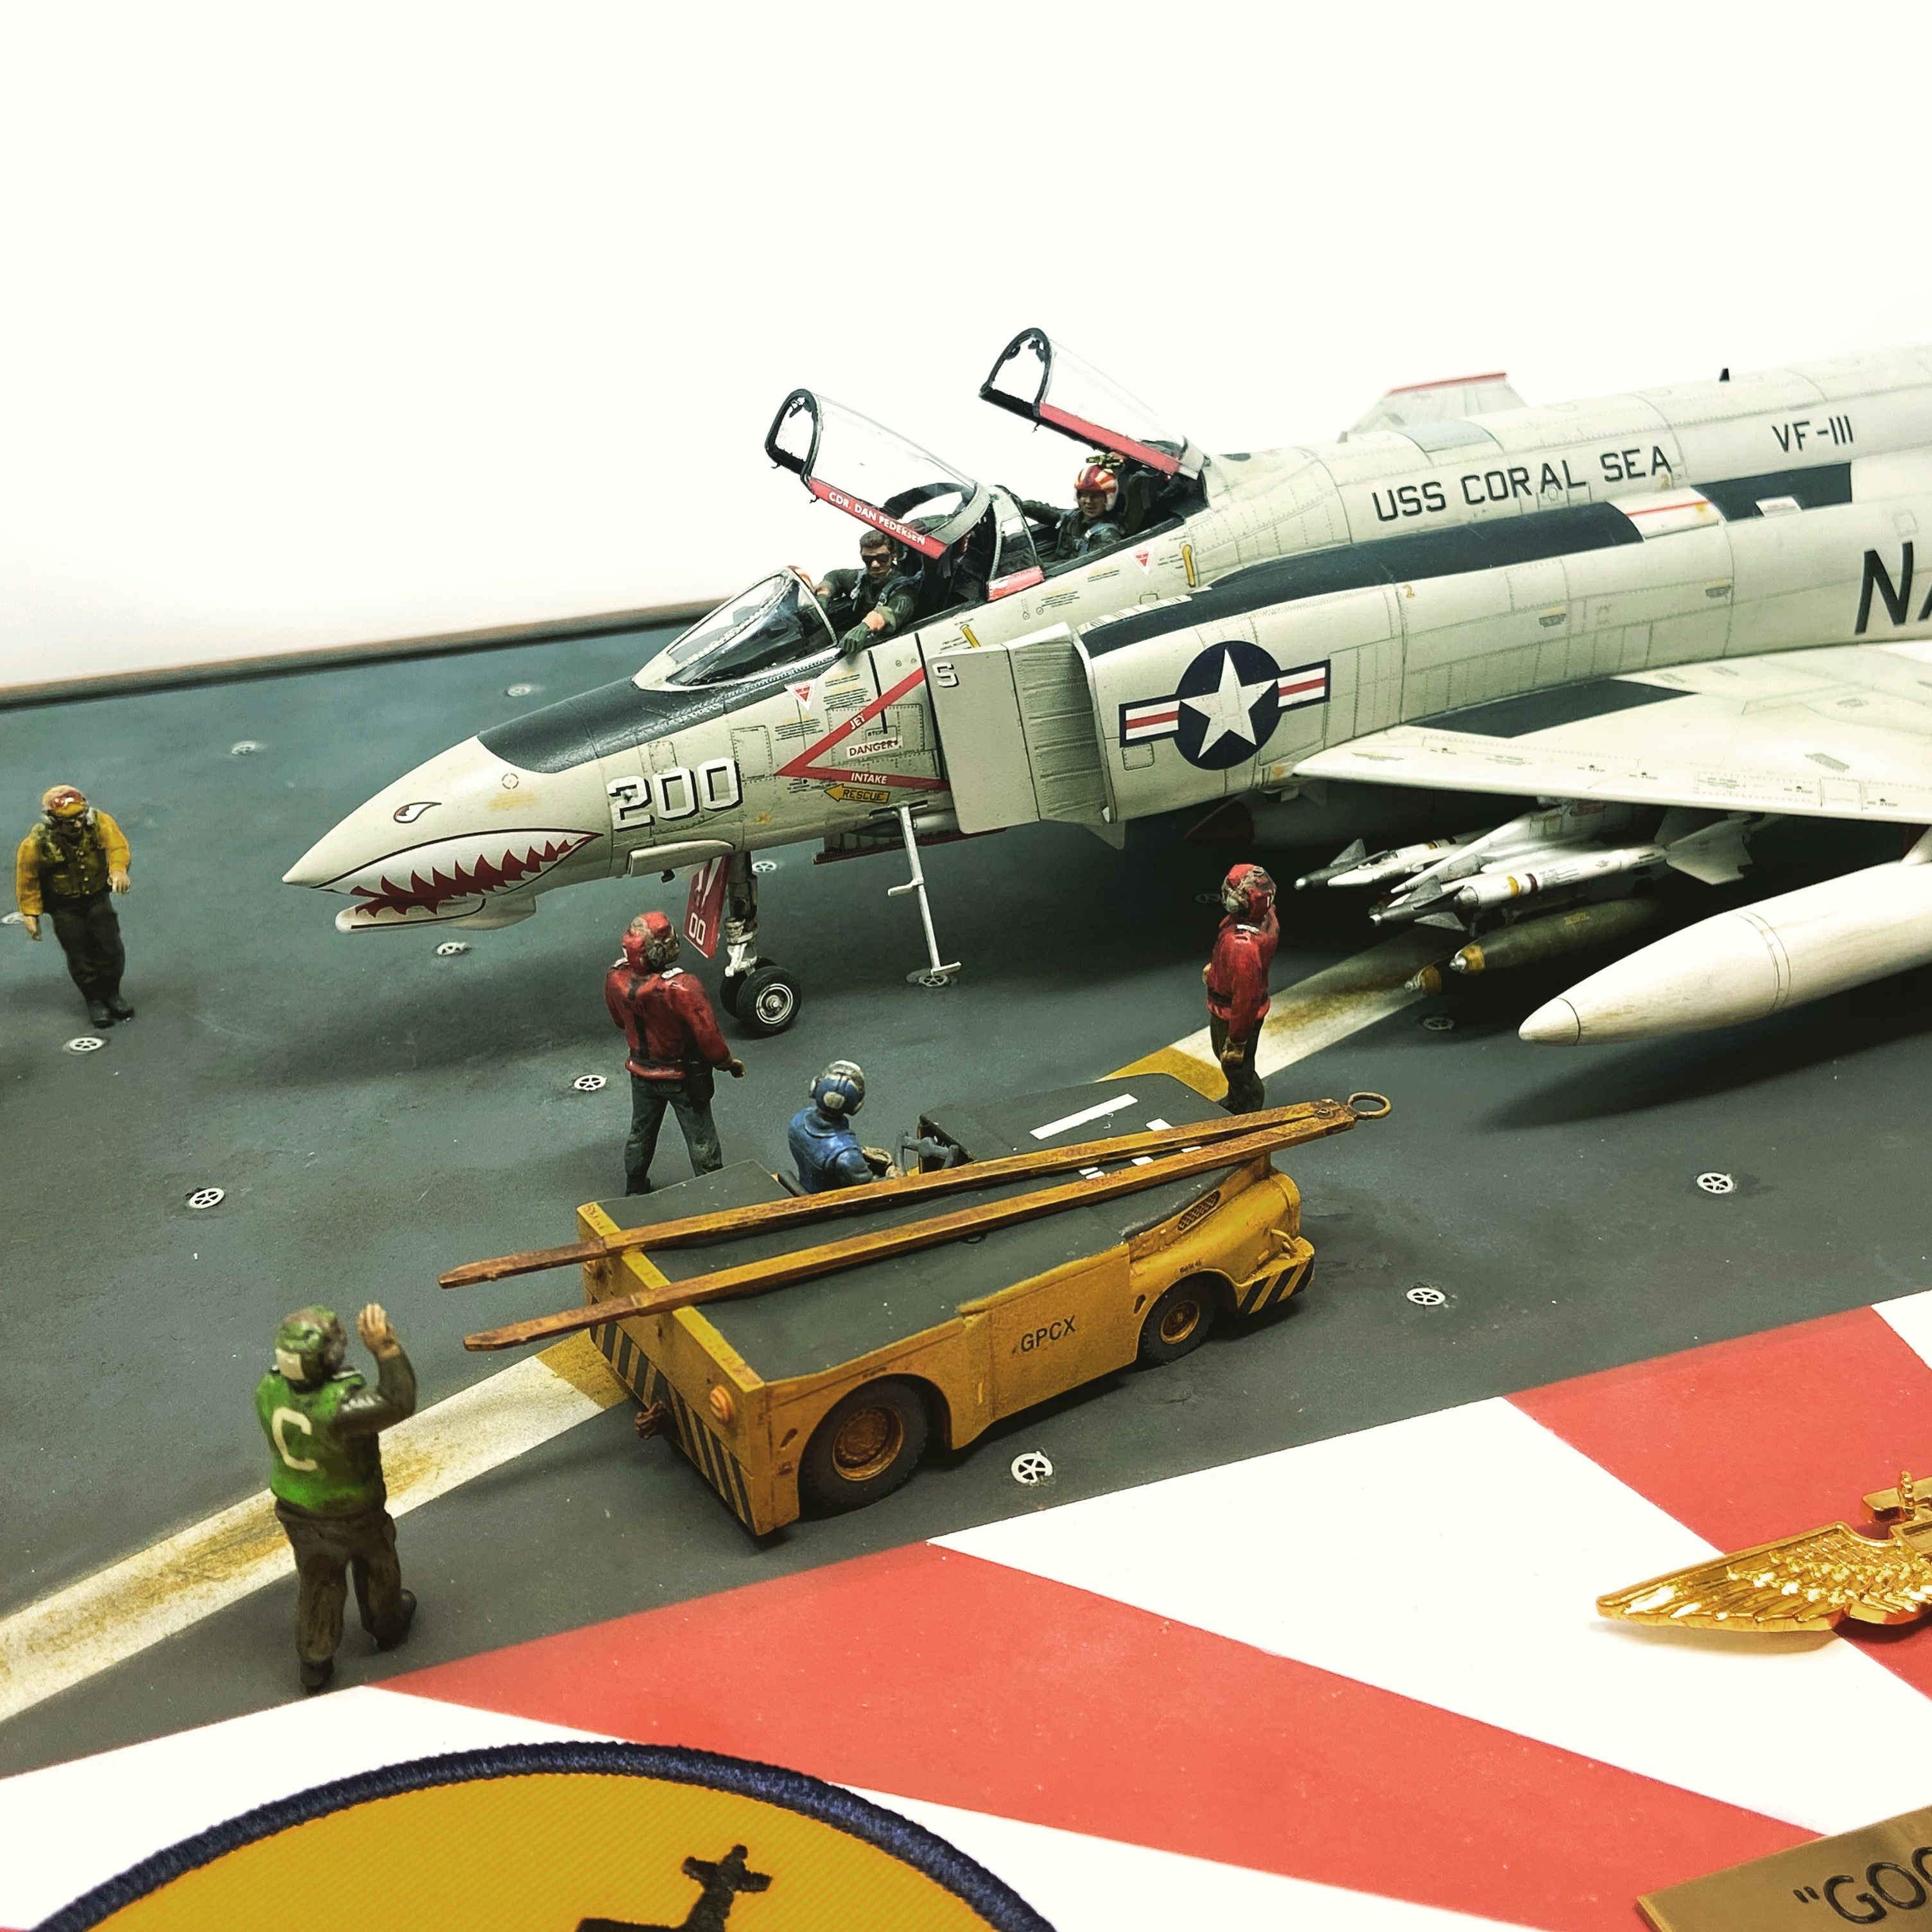
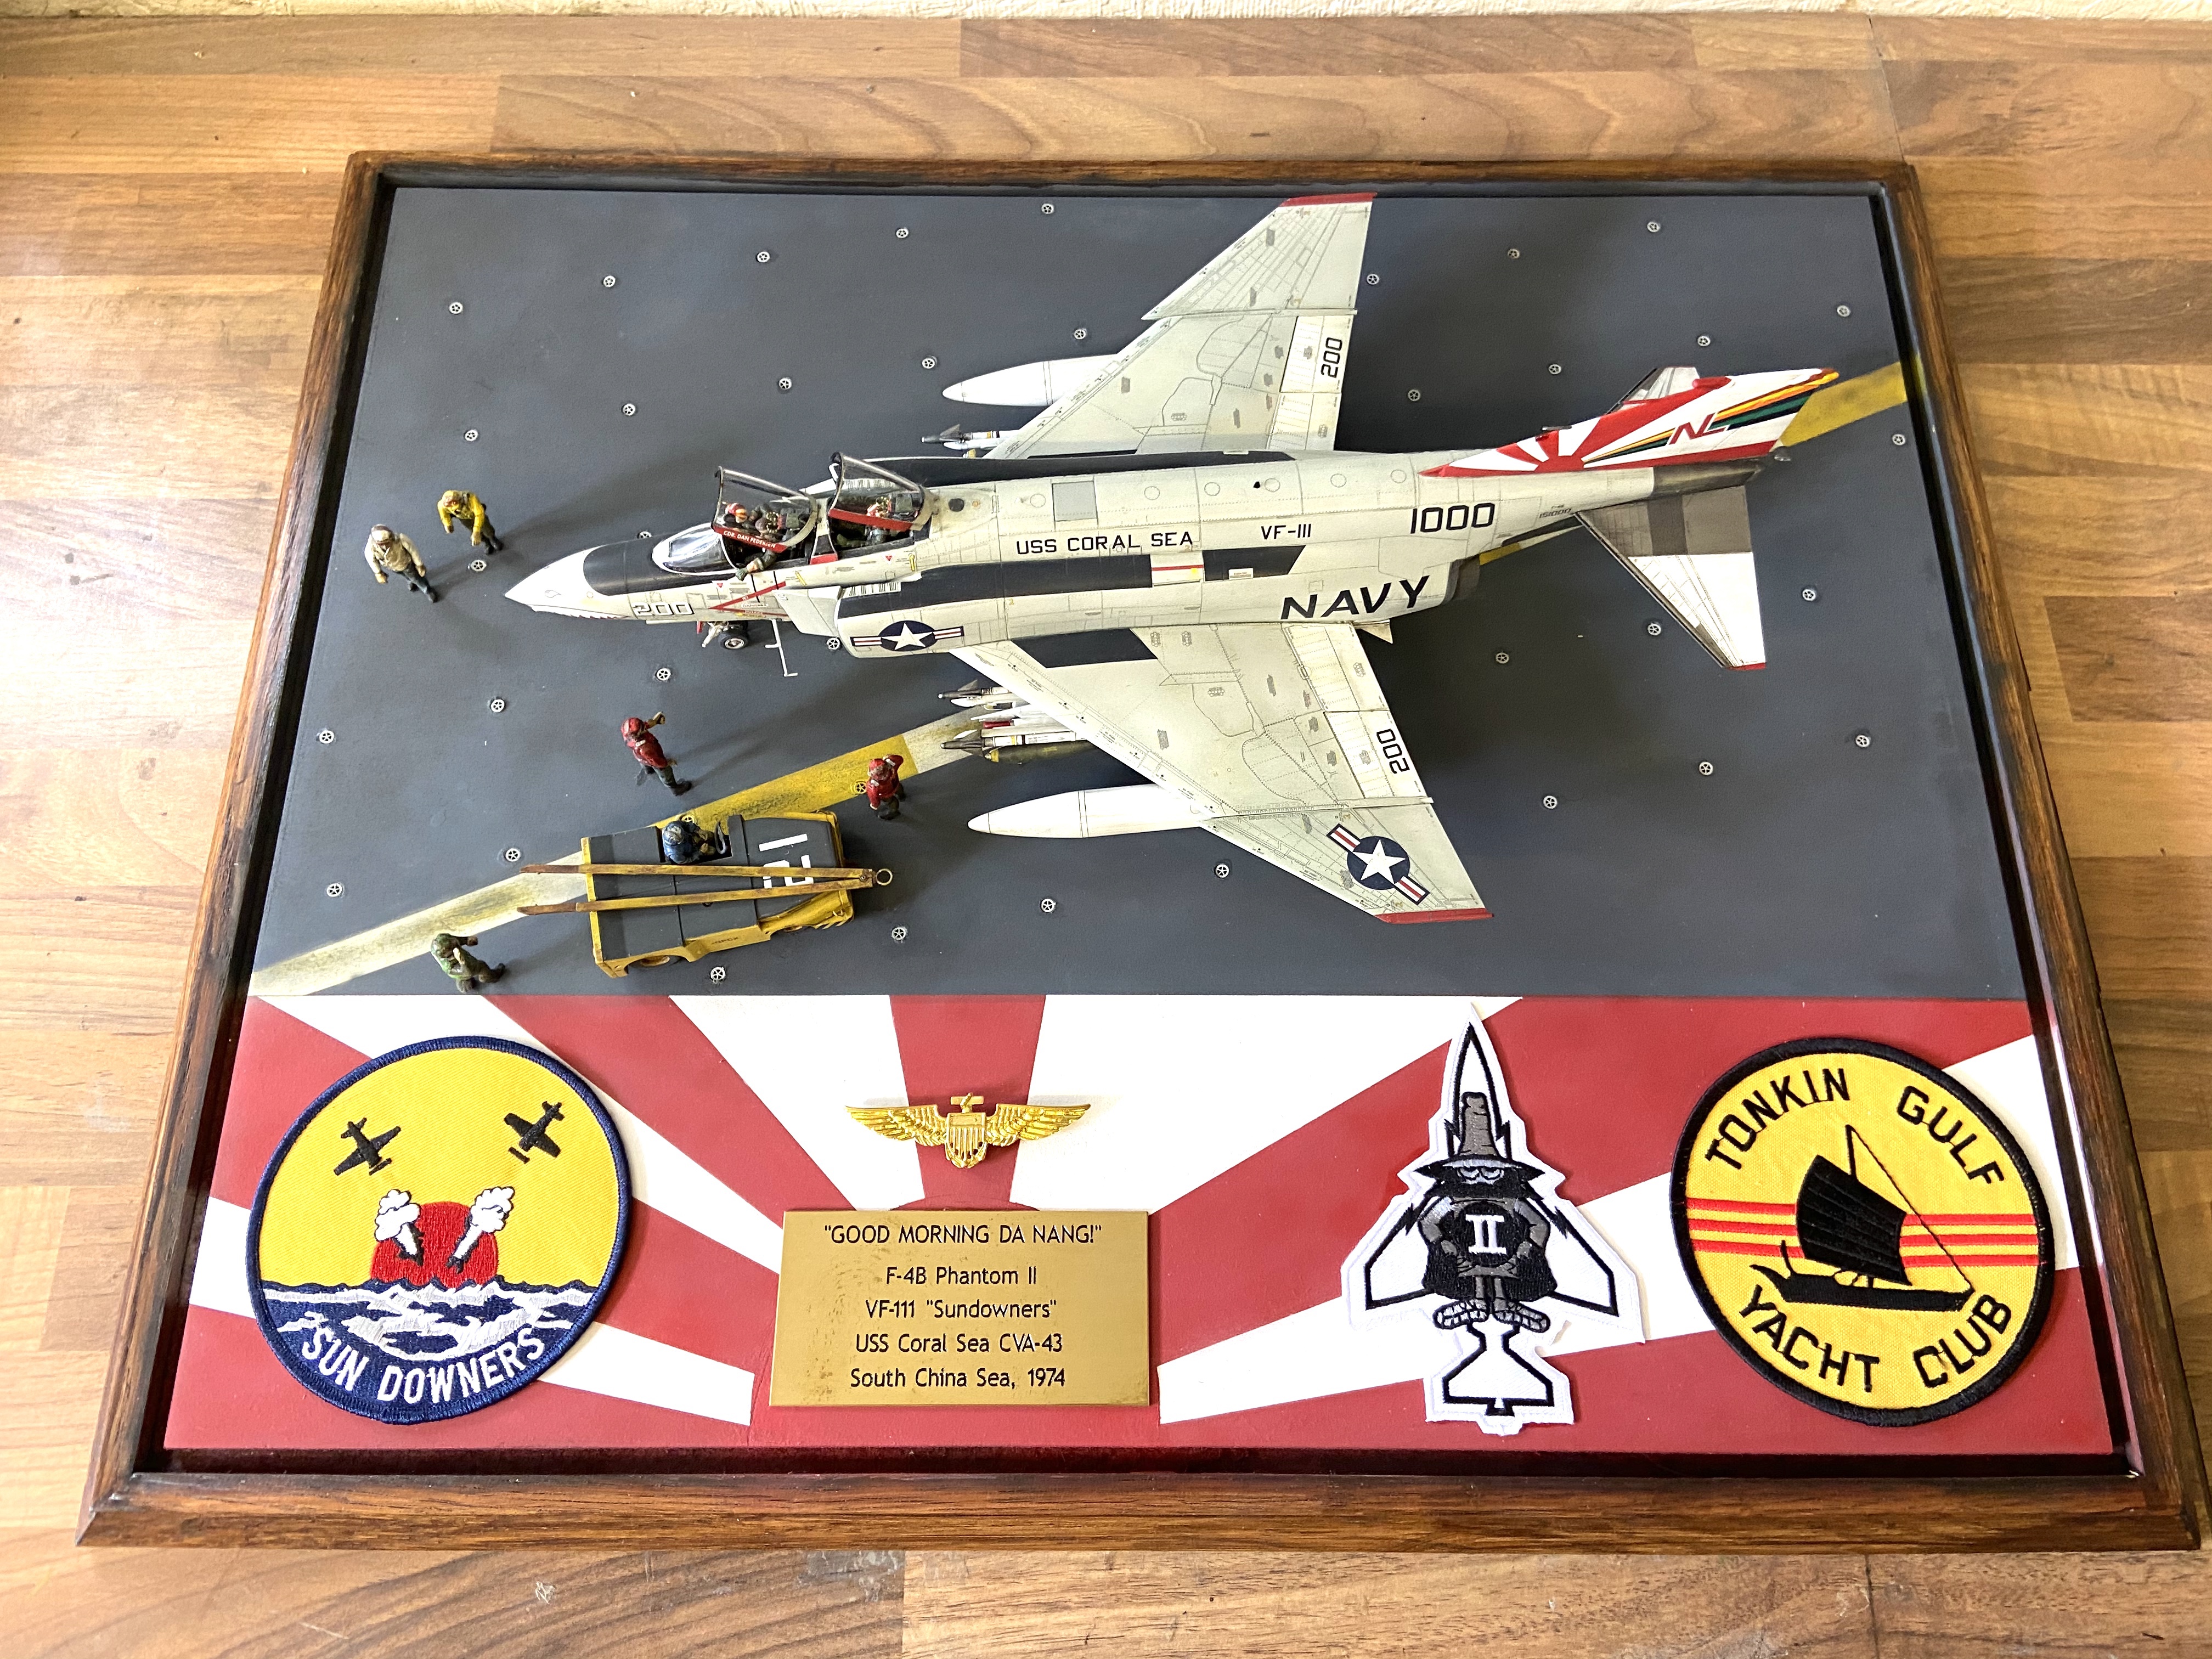
About halfway into the build I had the idea to display the F-4 on a carrier deck with “Yank” and his rear seater sitting in the jet on a Yankee Station misty morning waiting to be called for a close air support mission. So I set about cutomising the kit crew figures and I bought some Hasegawa deck crew figures and a Skunkworks 1/48 USN deck tractor. Its a great kit which when built and painted, gives one an excellent replica that will have any USN model display.
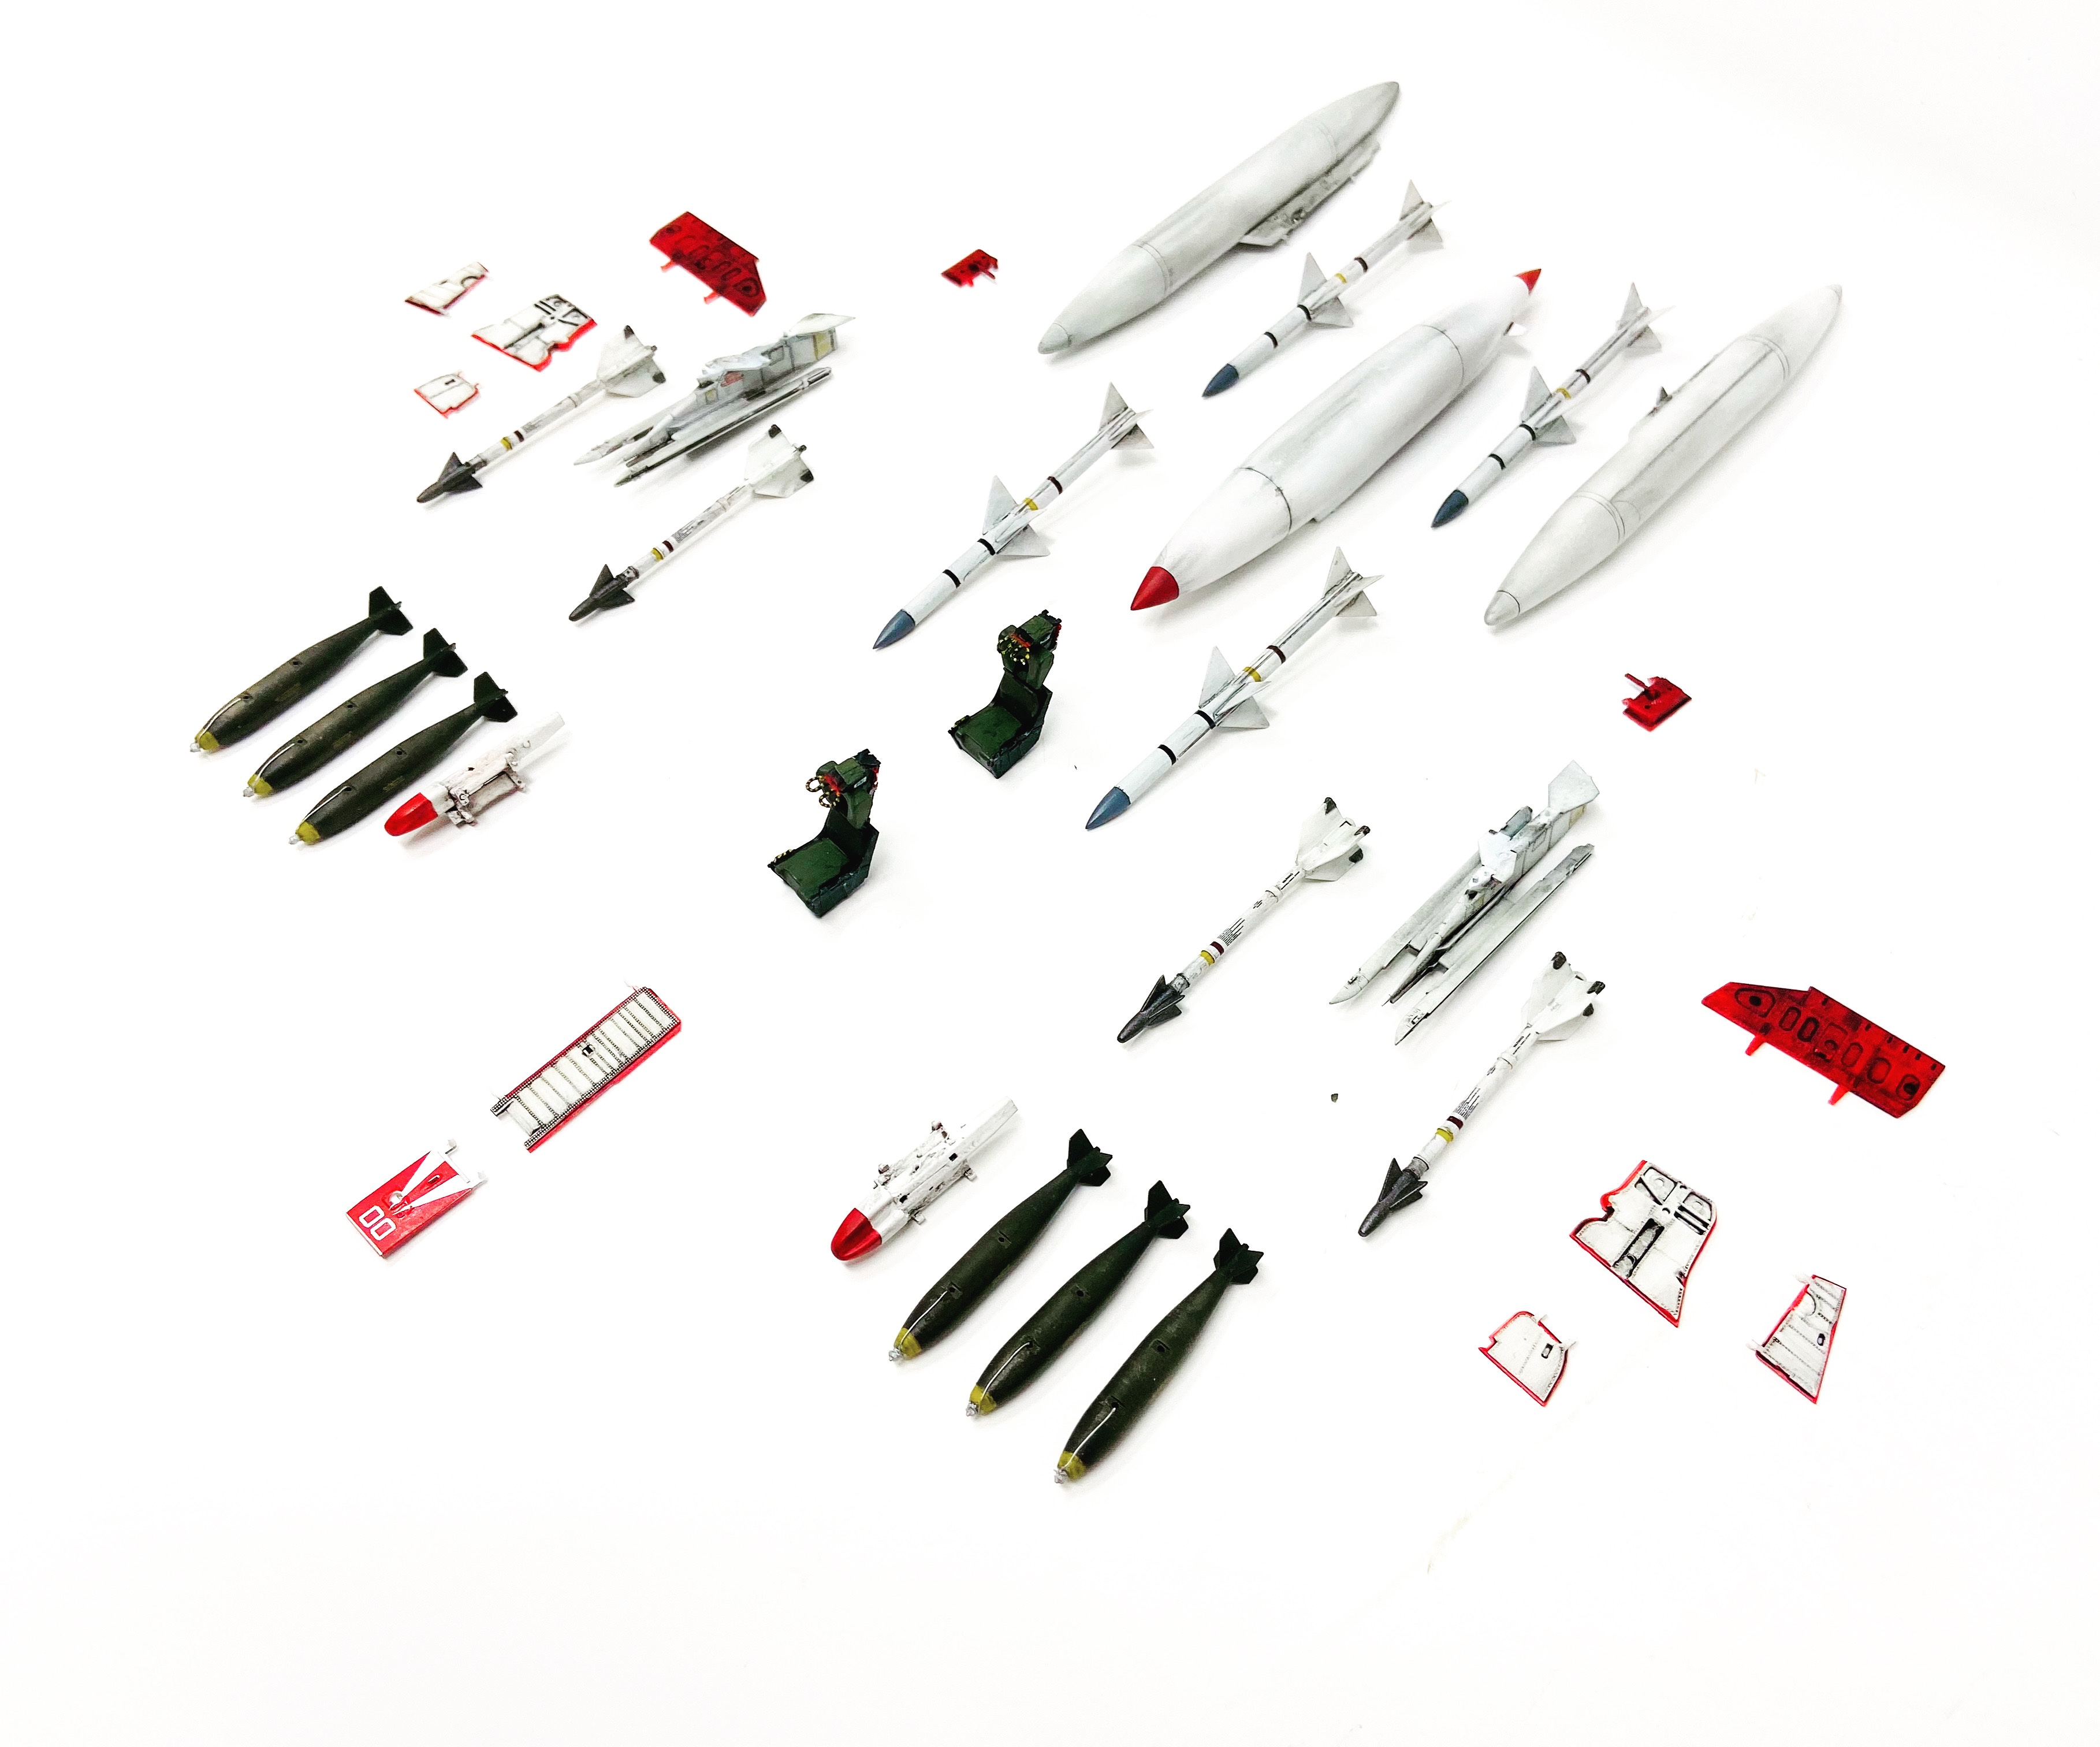
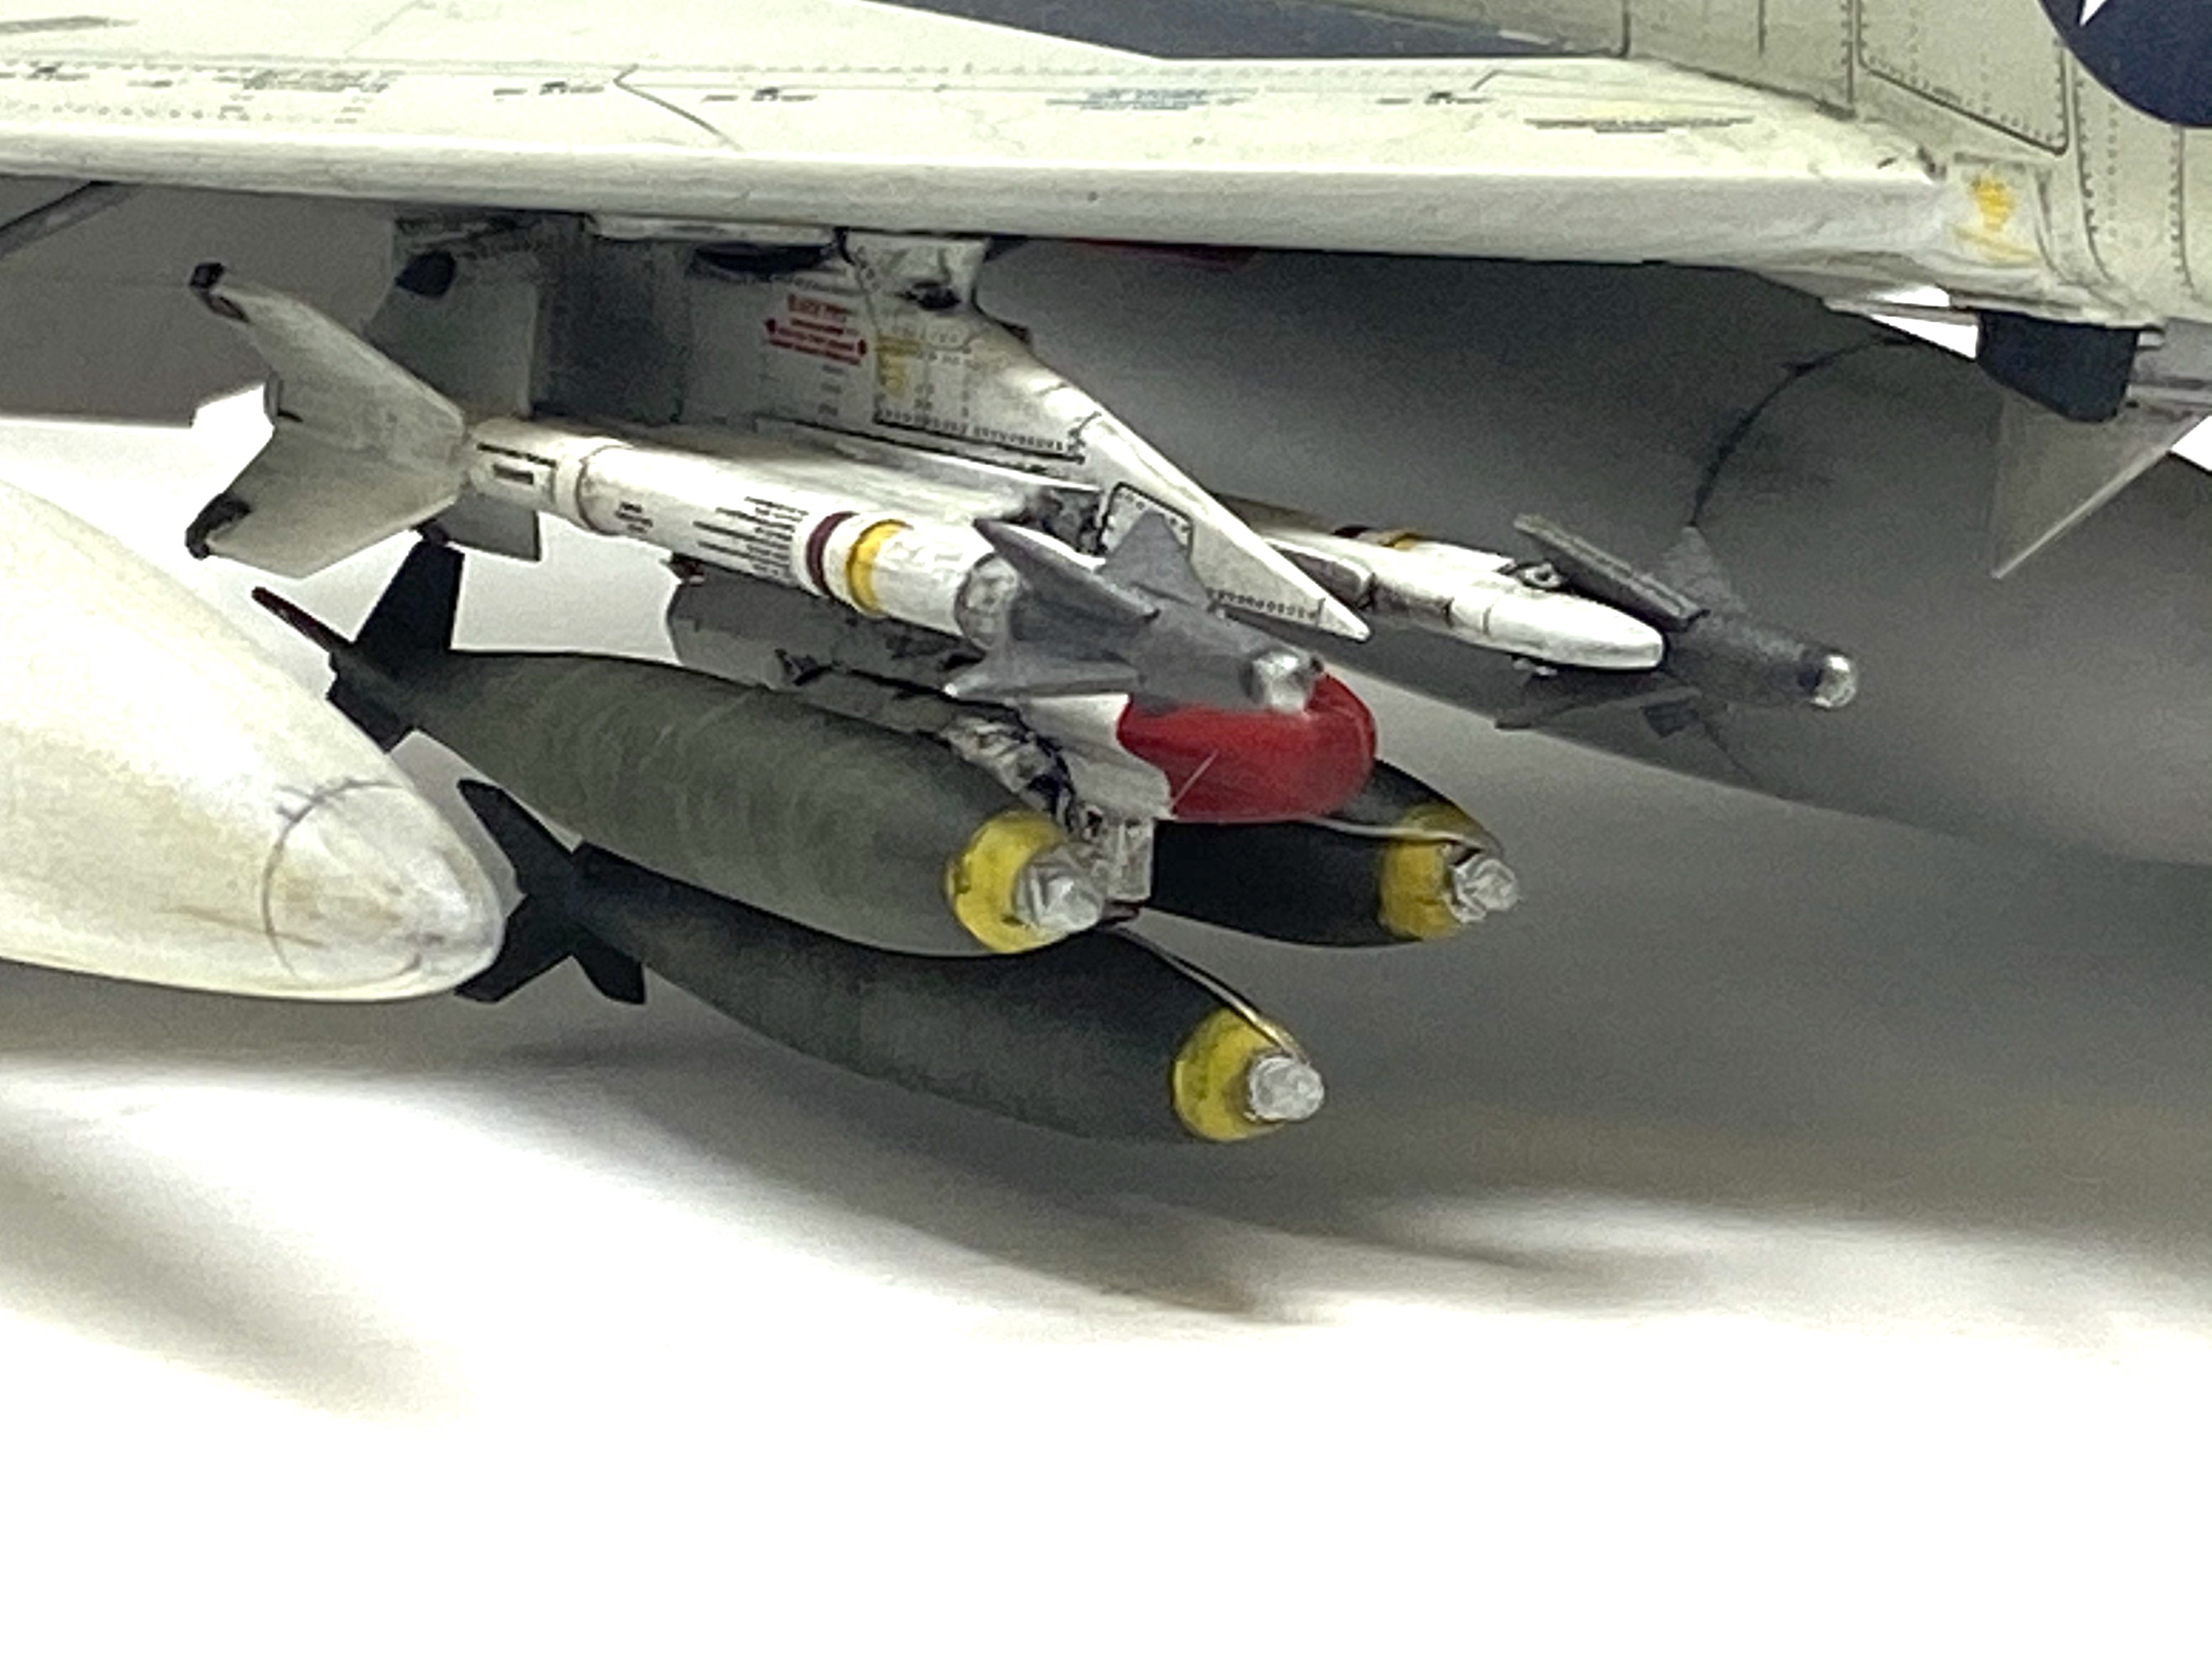
The weapons load out for the F-4B was quite extensive, here you can see the weapons laid out with other airframe parts…..
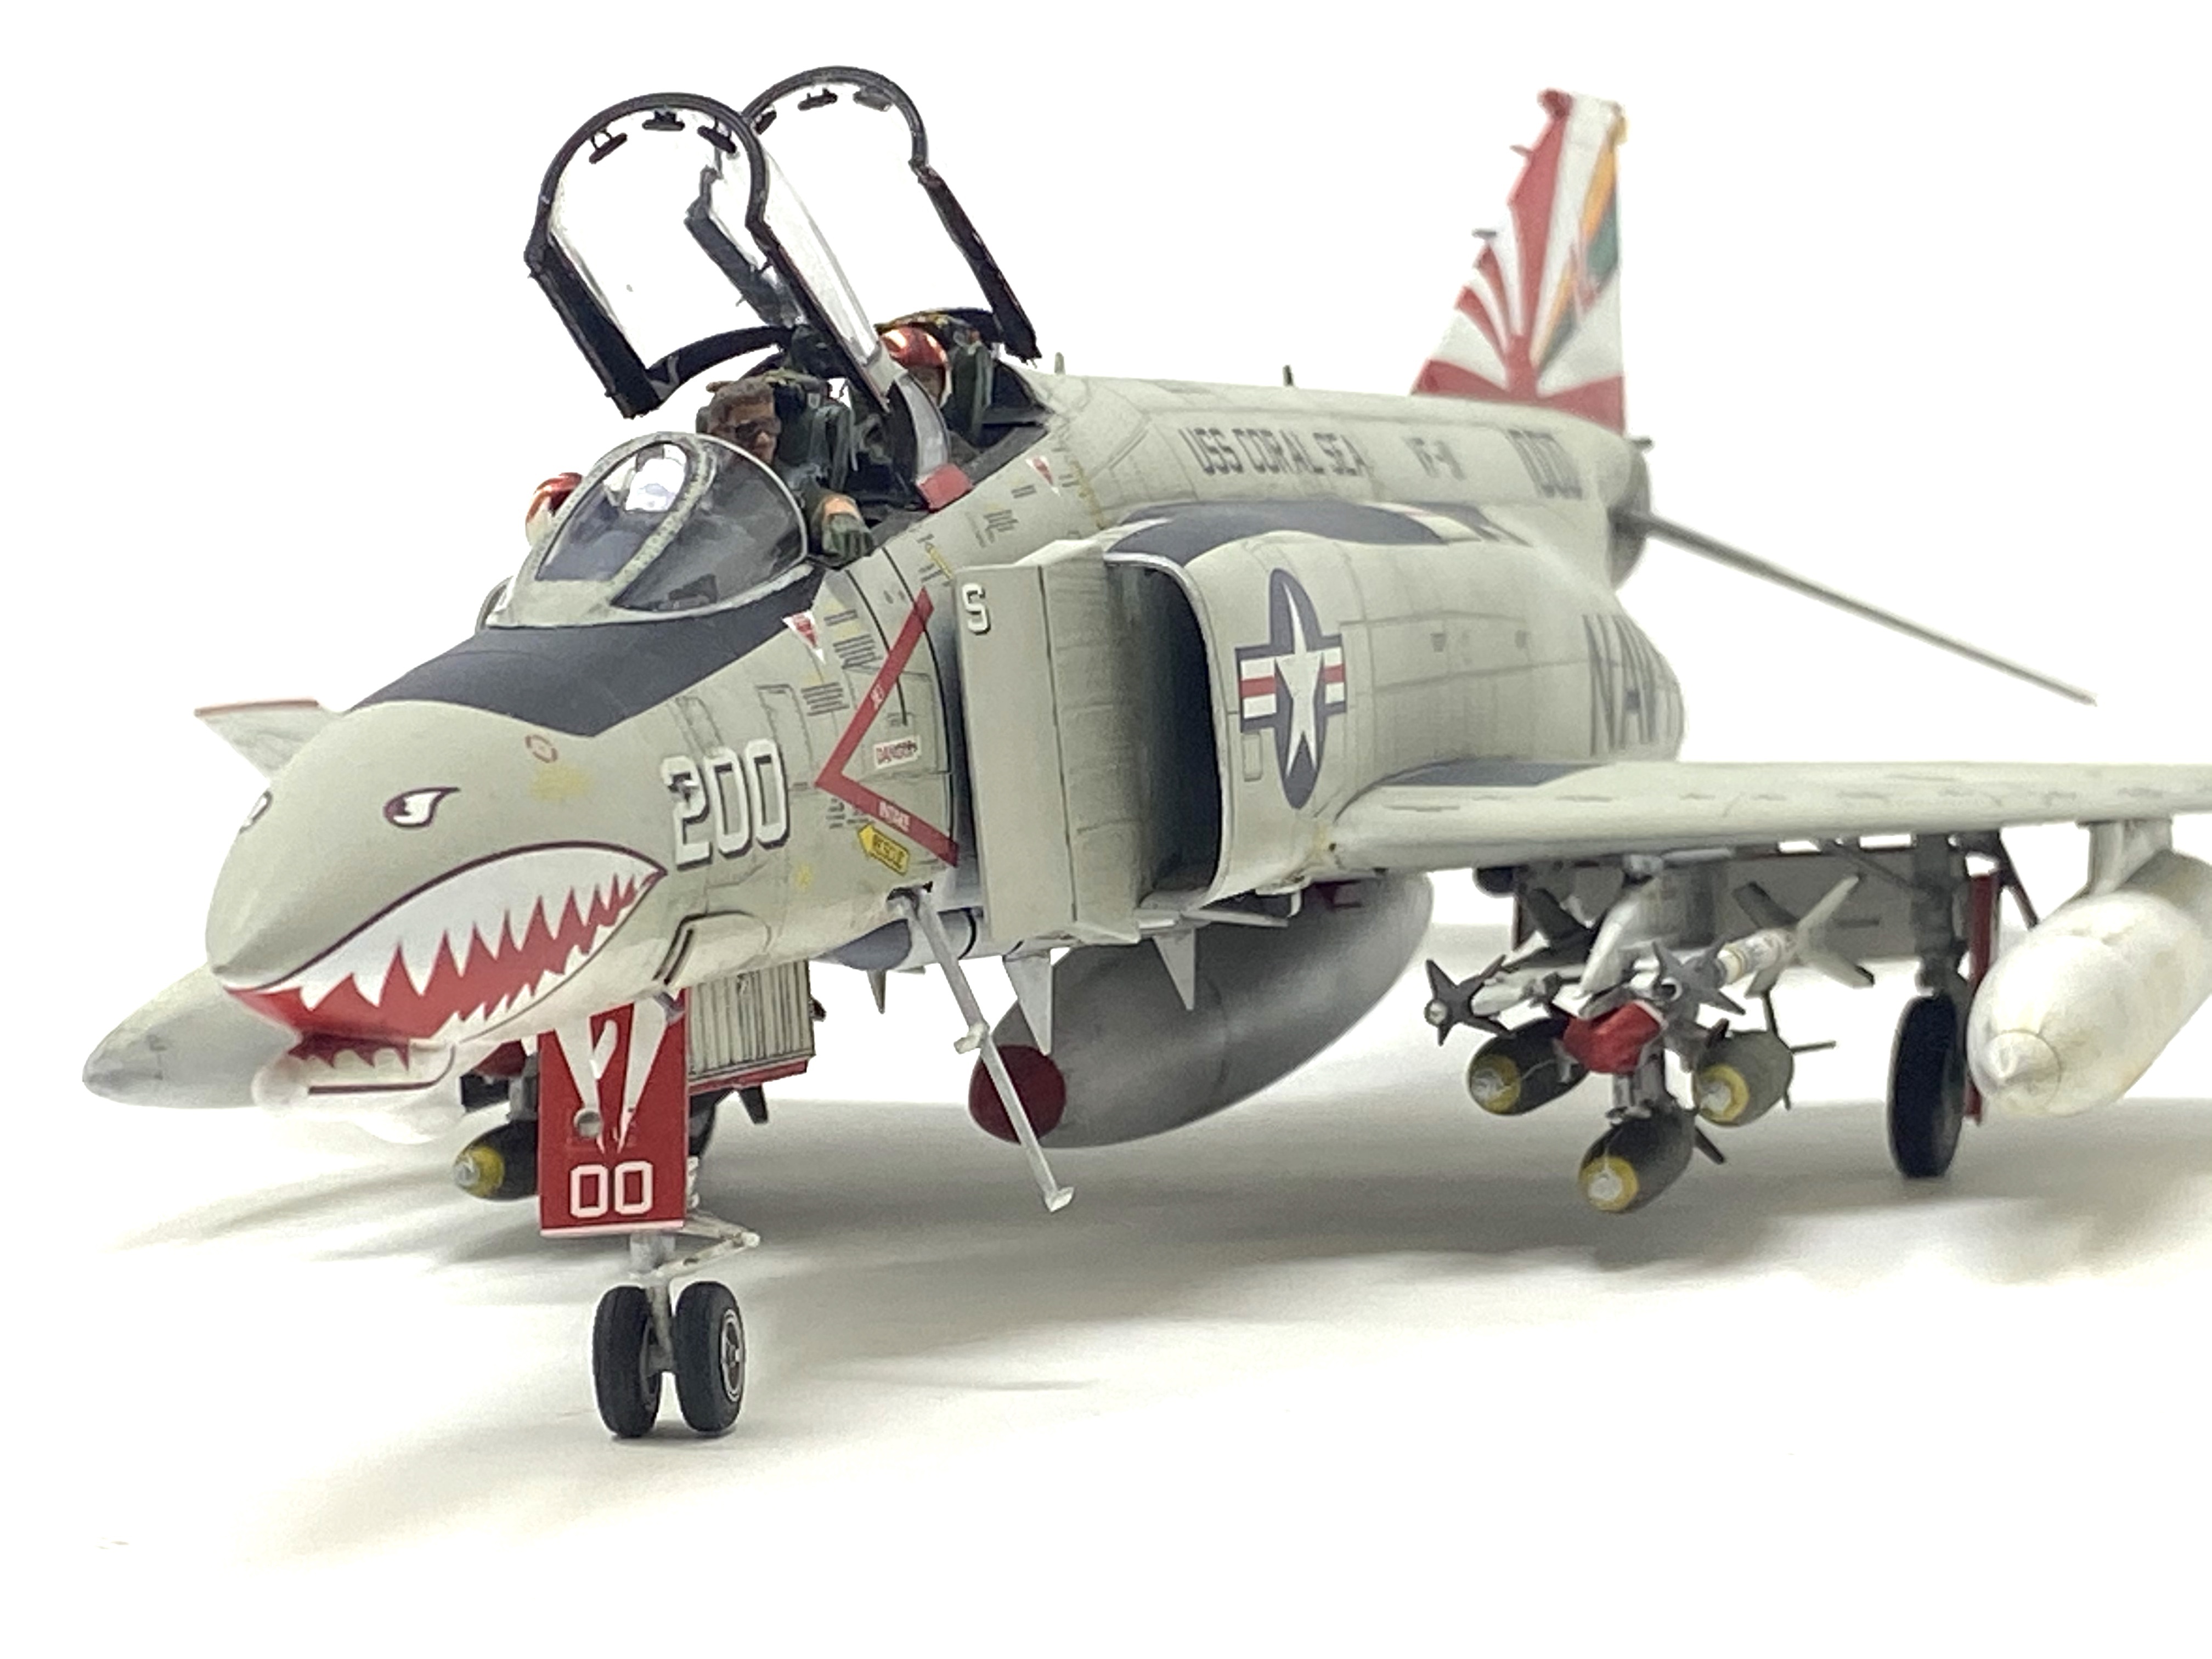
It was a long process to build and paint this F-4B, but I think the result was worth it! Capt. Pederson mentions his Ray Ban sunglasses in his book, so I couldn’t resist posing his figure as I did! I used the kit crew figures and modified them into the poses I wanted. I also made seat harness belts for each figure.
The airframe was painted with Mr Hobby Acrylics and after clear coating and decals were applied I weathered the airframe with Mig Ammo enamel washes. The display base was custom made by my good friend Paul Thompson and I added the individual tie down points, deck crew, patches and plaque.
Here’s the finished build…..


I hope you enjoyed this one as much as I did. Thanks for stopping by and Happy Modelling!
Darren.

Reblogged this on ausevor.
LikeLiked by 1 person
Pingback: The world needs it - Scalemodel.Zone