
Hello and welcome back!
It has been a while since I last wrote a post-This has been due to an extremely busy work schedule and my ill health of late. Now I have had some downtime and space to think, my creative side has been reinvigorated and once again I found myself in my studio looking at half finished projects that need to be completed. This model is one such case in point.
One of my dearest friends was showing me photo’s of his time with the 176th Fighter Squadron at the USAF ANG base in Madison, Wisconsin some years ago and I remarked at how striking the blue tailed anniversary jet looked. We both said we fancied building these Air National Guard F-16’s from his home state and set about finding suitable kits to buy. I ended up with a 1/48 Hasegawa F-16C/J which I soon realised was not the correct kit if I wanted an accurate Block 30 F-16C with scab plates in the right places. Try as I might to modify the Hasegawa kit I was not happy with it and moved away from the project.
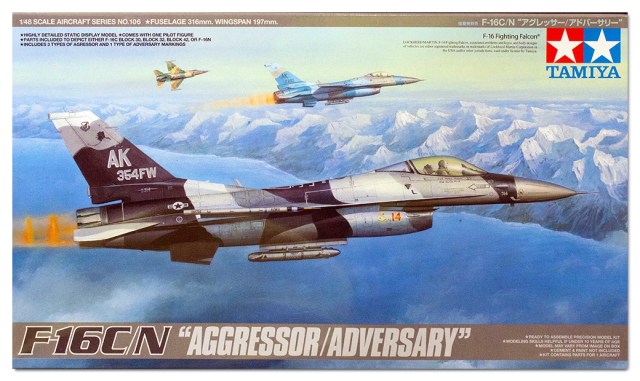
Some time later (years!) My friend built a magnificent F-16C in WI ANG line jet markings, it was a fantastic work and it spurred me onto buying a 1/48 Tamiya kit. In this case the F-16 C/N version. You can build just about any USAF F-16 from the parts in this kit:
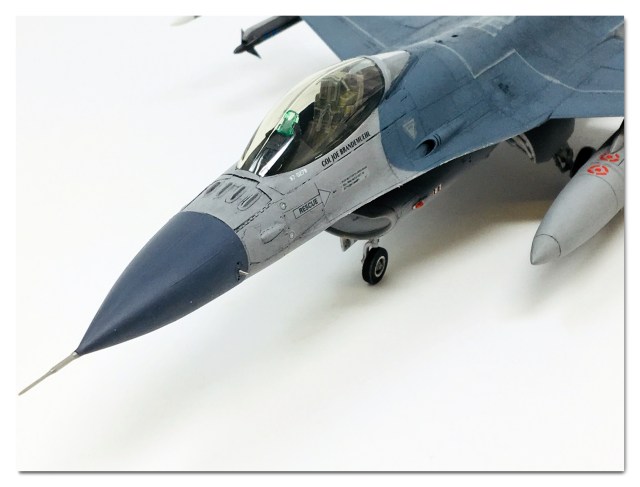
I began the project again and with references from my friend in Wisconsin I set about building my own WI ANG F-16! One item not included in the kit were the scab plates. These were metal reinforcing plates riveted to earlier airframes and they had peculiar shapes. Tamiya produces a “Detail Up” Metal upgrade set that is supposed to help with this, however the metal plates were too thick and did not conform to the aircraft’s surface. This left me scratching my head for a while and in the end the best method I found was to use the metal parts as a template to make my own scab plates from Tamiya masking tape. It took a few goes before I made a set that I found to be acceptable.
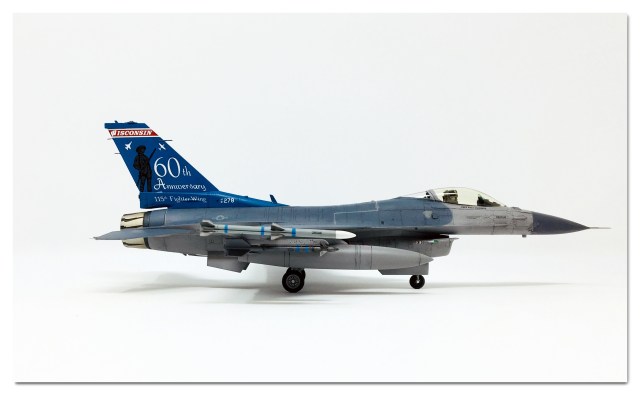
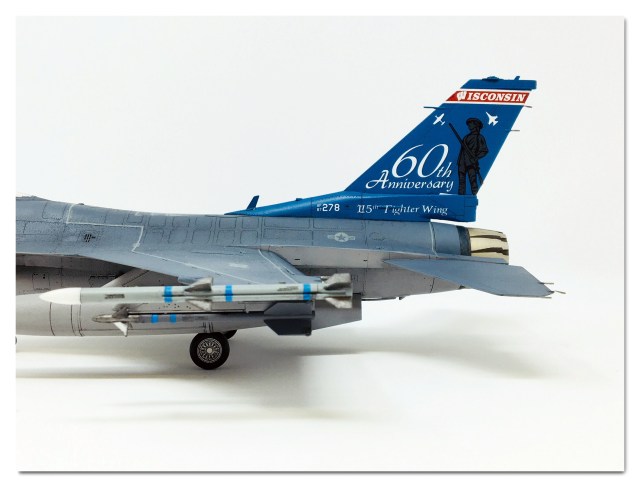
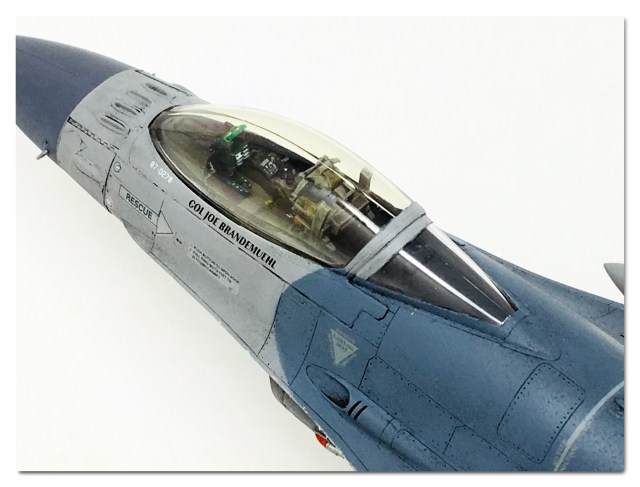
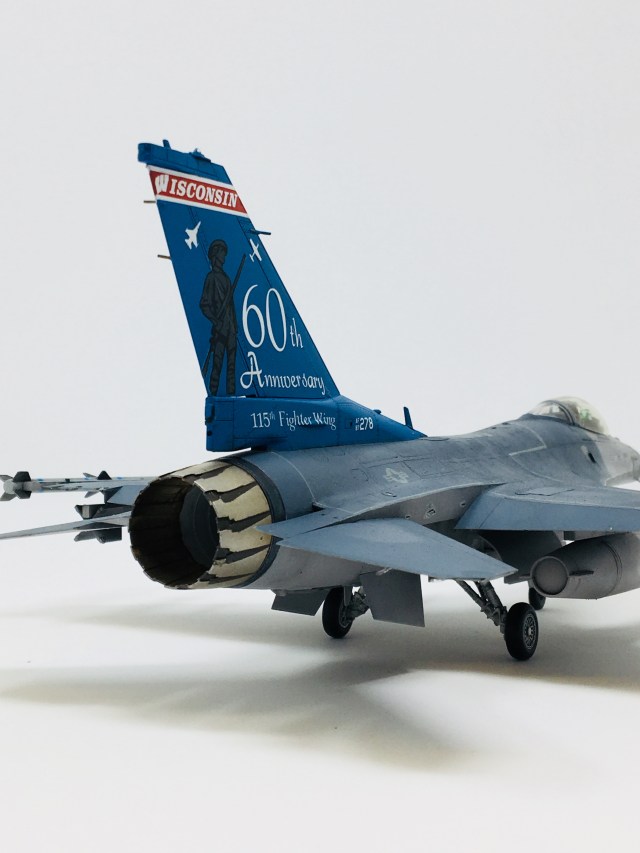
The build process was a little longer than usual, there is a lot of plastic in the box! This kit is well engineered and parts fit well plus the detail is the best for any F-16 in this scale. Once most of the building was out of the way I turned my attention to painting the airframe. I don’t know about you, but I like my grey jets to look interesting, to have a bit of “Umph!” about them. So when my friend sent me the Two Bobs decal sheet featuring the blue tailed 60th anniversary of the US Air National Guard I was delighted and knew exactly how to proceed…….
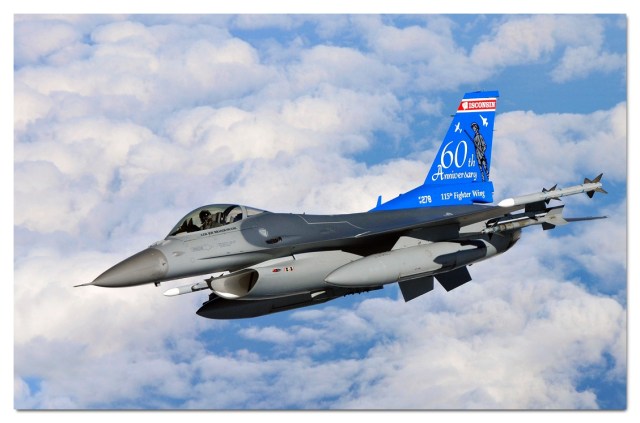
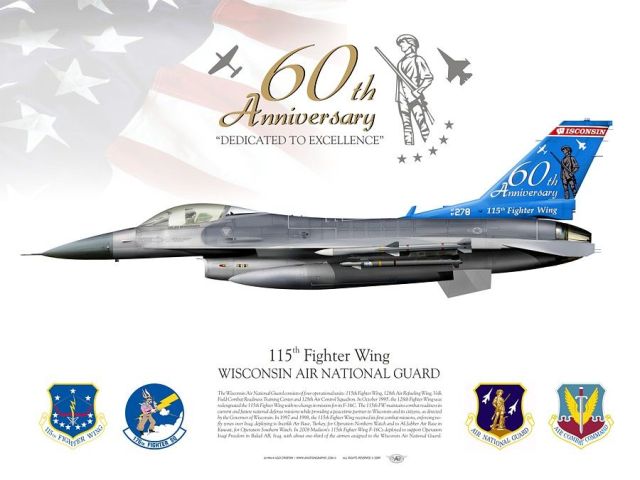
I had the grey shades sorted out, but I needed to mix my own shade of blue so I studied a lot of photo’s of the real airframe, like the ones below here:


Eventually I found a shade of blue I was satisfied with and after that the painting process was quite straightforward. The decals from TwoBobs were nice to work with and before I knew it- It was time to weather and finish the model. I enjoyed this build a lot as it reminded me of my friend and of happy days spent in the great state of Wisconsin.
My friend sent me a Squadron patch from the 176th Fighter Squadron and had hoped that one day I might display it next to a model of one of his beloved F-16’s.
Well, that day has come……..
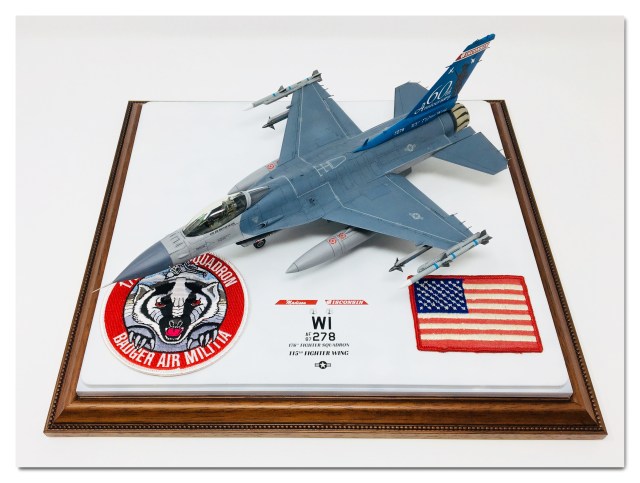
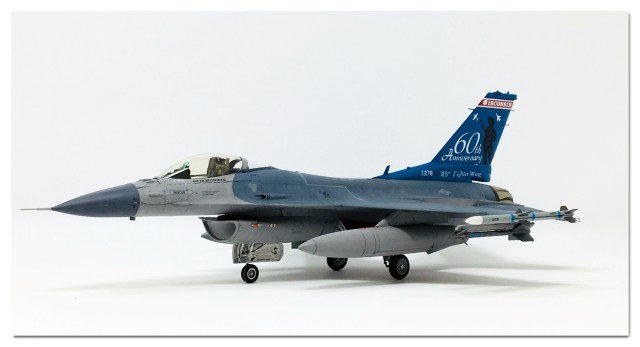
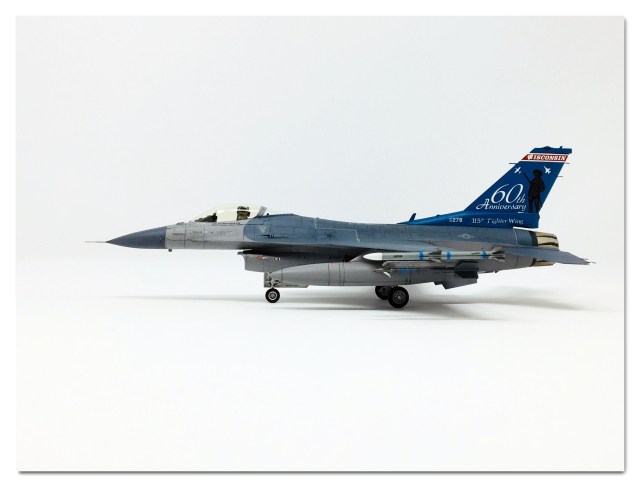
Here are some more photo’s of my Block 30 F-16C from 176th FS, 115th FW, USAF ANG, Madison, Wisconsin, USA.


Now THAT is awesome! Amazing build, colors look spot on. I would be proud to display that one in my display case.
LikeLiked by 1 person
Thanks Frank! Much appreciated Sir!
LikeLike
Paquet super temps, m6prh http://m6prh.ga/ conforme à cette reproduction, merci
LikeLike