

Hello there!
It is good to be back in the studio after my summer holiday! This week has brought me back into the studio to begin the painting process on my 1/48 Spitfire Mk.IX.
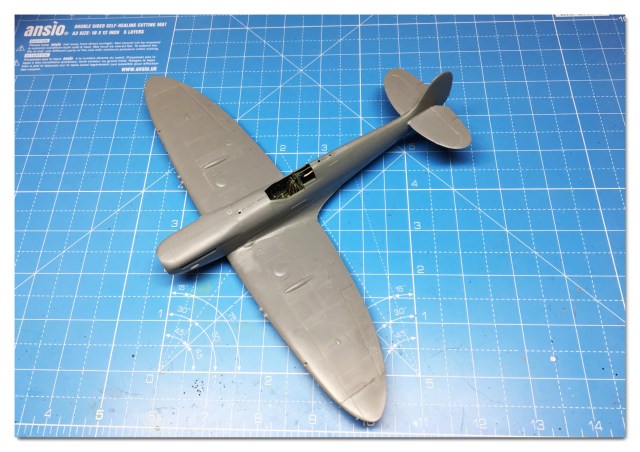
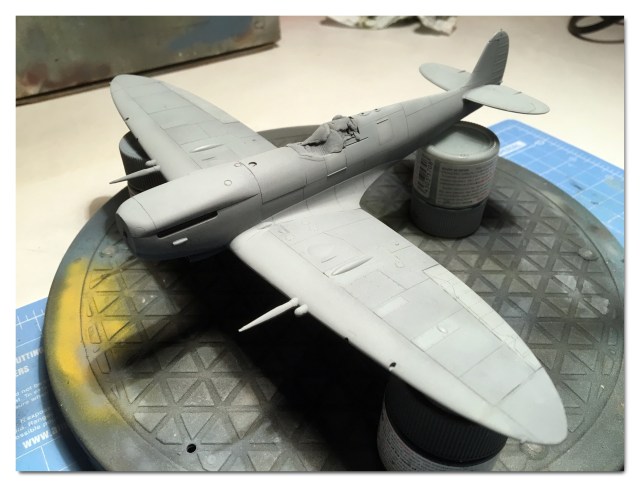
Here is where we left the model last time after completing the airframe assembly:
So we know that this Spitfire had a Grey monotone scheme on the upper surfaces and it’s undersides were painted in PRU Blue. To make this sort of scheme visually interesting can be a challenge for any modeller and I wanted this model to be more than just a grey coat of paint.
As I have mentioned before I have been studying the painting method of black basing and I thought that this model would be a good choice of subject to attempt this new technique.
So what is black basing? It is simply spraying a black primer coat over the model and then building up the layers of paint to add levels of depth to the finished model in the colours of the subject you have chosen. Now I know someone who has told me that he just cannot get his head around this process so I have recorded this process step by step to demonstrate just how easy and rewarding it can actually be.
Step 1:
Black Primer. Here I have masked off the canopy area and I have painted the entire model in Tamiya Flat Black.
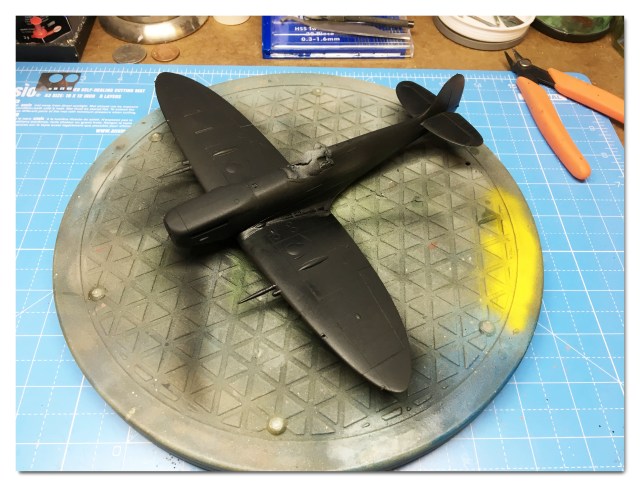
Step 2: The Marble Coat.
OK, how best to describe this? This process involves using a colour darker than the shade of the finished scheme. For this model the finished upper surfaces will be RAF Dark Sea Grey. So I used a darker grey shade to paint a mottle pattern on each and every panel of the aircraft. This method involves a lot of close in airbrush work and with practice it becomes better and easier to achieve. There is no specific pattern to follow, you are just “shading” a panel with the paint in the form of mottling or squiggly lines. The idea here is to build up colour as you will see…….
This photo shows the finished marble effect on the model. Notice the different styles of filling in the various panels on the aircraft. Here I have chosen to fill in the moving surfaces like the ailerons , elevators, rudder and weapon panels. This now adds contrast between the panels and will add depth to the finished painting process.

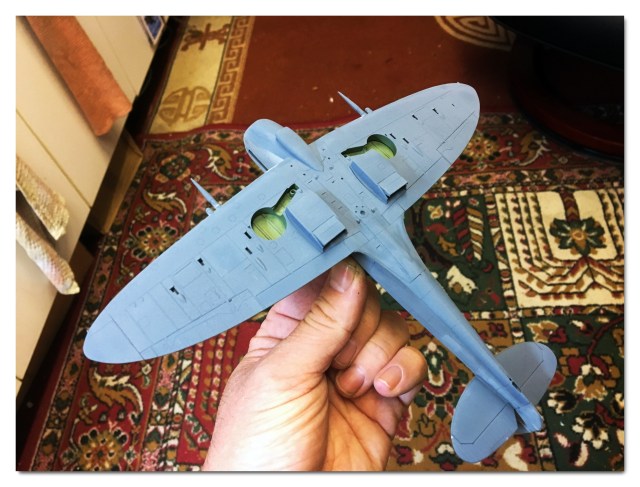
Here is the underside painted in my own mix of PRU Blue. Here I have created a subtle effect of variation in between the panels after spraying over the marble coat.
Step 3: Paint it!
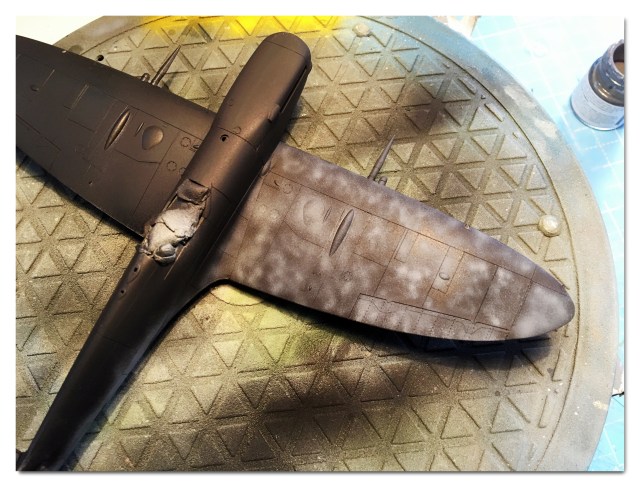
So after the mottle coat we begin the process of adding the grey paint to achieve our depth of colour. Using Tamiya RAF Dark Sea Grey I spray a very light coat over the mottle. This takes time as one needs to stand back and judge how much paint is enough? Well, less is more! Keep taking breaks and “mist” the paint on. Buld it up in layers like you see here. If you look hard you will see the mottle coat is still visible underneath.

Here I have added more mist coats of the same paint and now the colour has the depth I wanted.

The final layer: I took the same RAF Sea Grey and lightened it with white. I then picked out certain area’s of the airframe and highlighted them in the lighter shade. This adds even more contrast to the finished scheme.
And that’s how I used the black basing and marbling method to paint this Spitfire. I have enjoyed this process, I still require more practice but I am happy with this attempt.
The next steps:
Once happy with the paint scheme and it’s depth of colour I sealed the entire model in Clear Gloss and after curing for 24 hours I set about adding the decals to the model.
Another gloss coat was used to seal them in and I then set about the weathering process. I used AK Interactive’s Panel Liner for Blue/Grey paint schemes. These enamel washes are superb and now I don’t use anything else. I also used washes from AK Interactive Engine set and Landing Gear set to add detail to the underside, landing gear and to darken certain area’s.

I hope you have enjoyed this update, I cannot wait to finish this build and share it with you! Until then, take care and Happy Modelling!
Darren

Nice!
LikeLiked by 1 person
Thank you Pierre!
LikeLike
Pingback: Ready for Inspection: Spitfire Mk.IX – THE SCALE MODEL HANGAR
I always learn so much reading your blogs Darren. I’d give you 2 likes if I could! Welcome back!
LikeLiked by 1 person
Pingback: TOJO EATS S**T! WIP Part 3. – THE SCALE MODEL HANGAR
Thank you very much Dan! It’s good to be back at the bench again. I am so happy to hear you are enjoying the blog. Thanks!
LikeLike
Pingback: A6M5, ready for more primer – Dutch Scale Models