

Hello and welcome back to The Scale Model Hangar!
It’s been a while since I have shared any work with you so I thought it time for an update. I have begun work on a project that I have wanted to build for many years now, a 1/48 HAF F-16C in special anniversary markings.
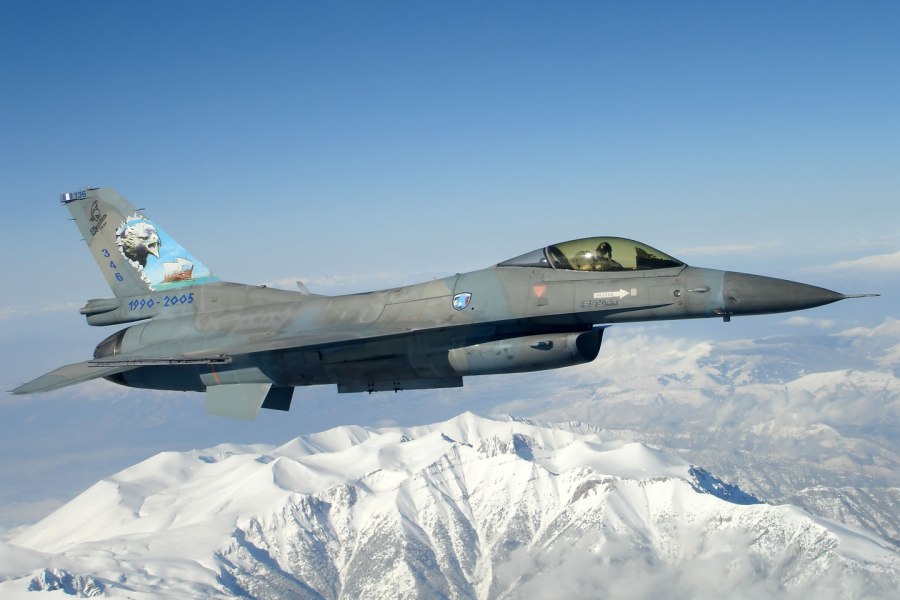
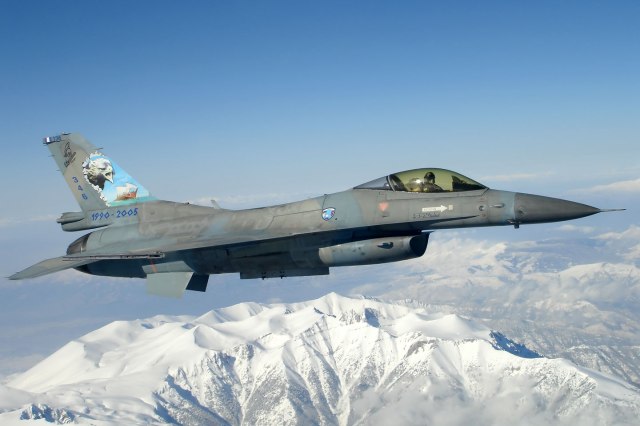
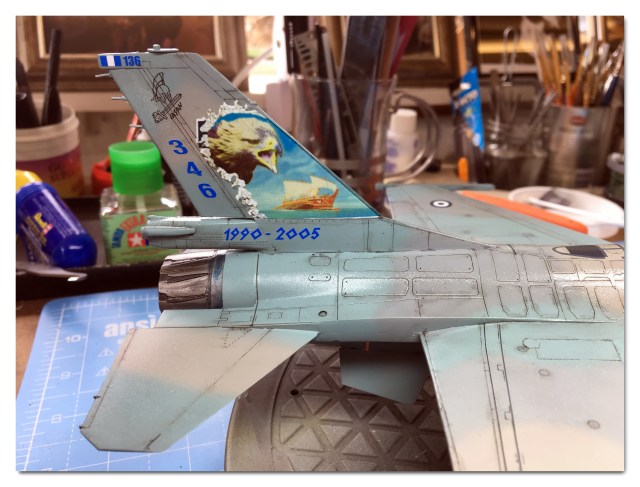
There is something quite special about Greek Air Force jets, I love their paint schemes and when they do special markings they do so well! In this case I came across this beautiful scheme when Zotz decals released the 136 Mira markings for this aircraft:
I just had to build this one! The trouble was that I did not have a kit in 1/48 scale that was an accurate HAF Block 30 F-16. I needed an extended tail and big mouth intake in the same box and that was not available. Halfway through building a USAF F-16 from a Tamiya kit I was looking through my kit stash for some spare parts and I found the ideal solution…………well, sort of!
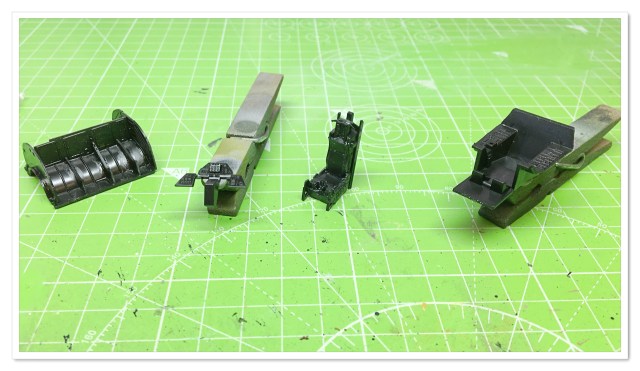
This is going to be a plastic mash up between my Revell F-16A and spares from Hasegawa F-16C and Tamiya F-16N kits. I have also added a Eduard photo etch cockpit set in the mix so this is going to keep me busy for a while!
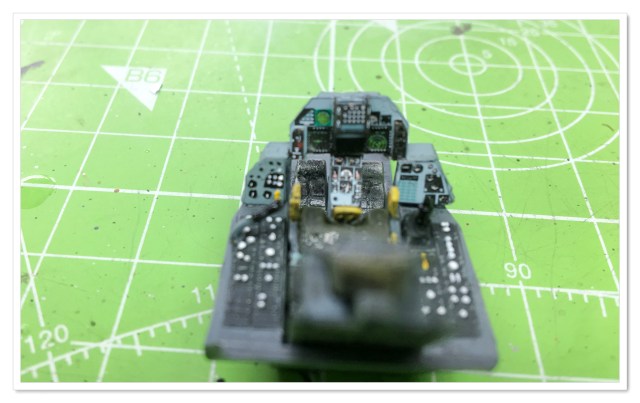
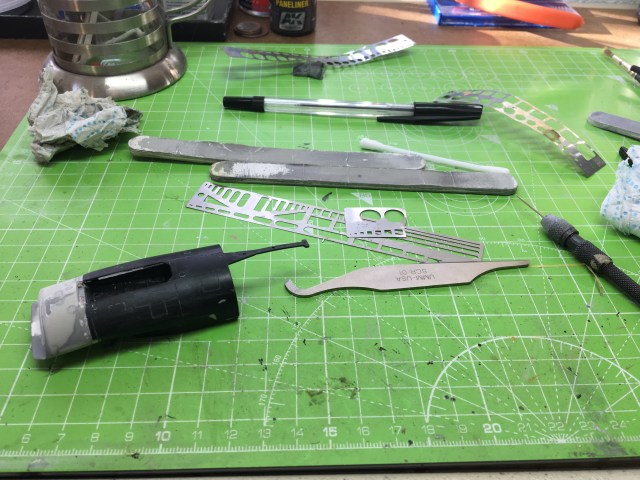
The Office:
Here we have the kit parts from Revell’s F-16A. This kit will provide the basic airframe parts and the other donor kits will give me the upgrades I need to turn it into the HAF Block 30 F-16C I need.
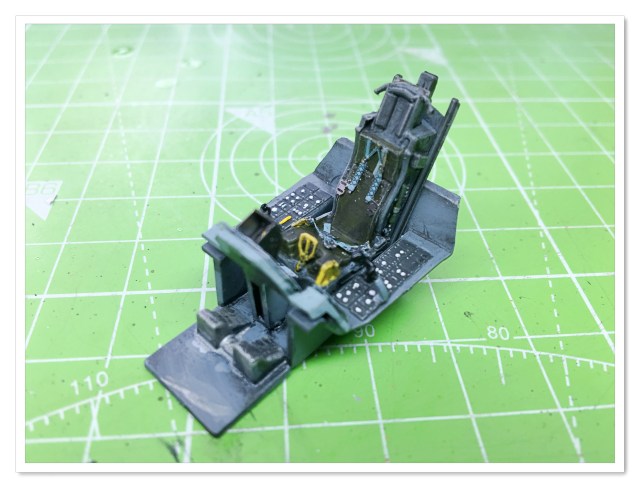
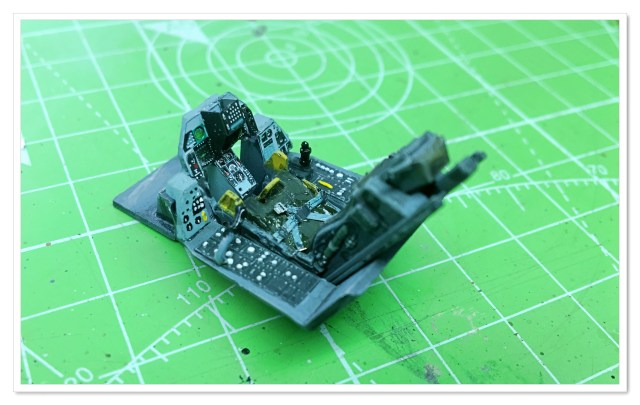
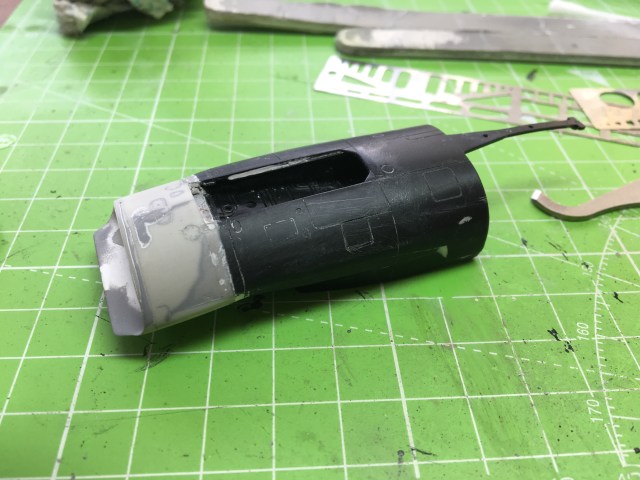
After some painting and added details from the Eduard P/E set we have our finished cockpit……

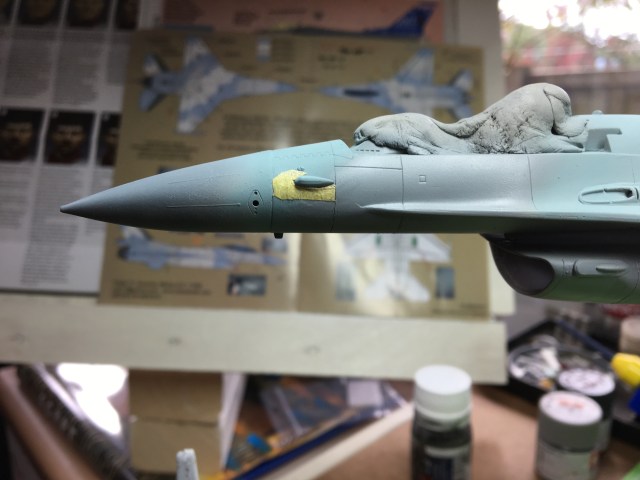
The biggest physical difference about HAF F-16’s is the extended tail. I managed to add the bulge from scrap plastic and sand it into shape to match the photograph’s on Zotz’s decal sheet guide.
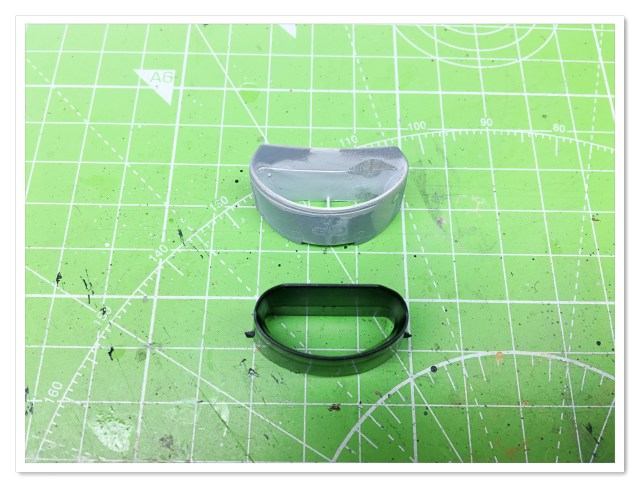
BIG mouth!
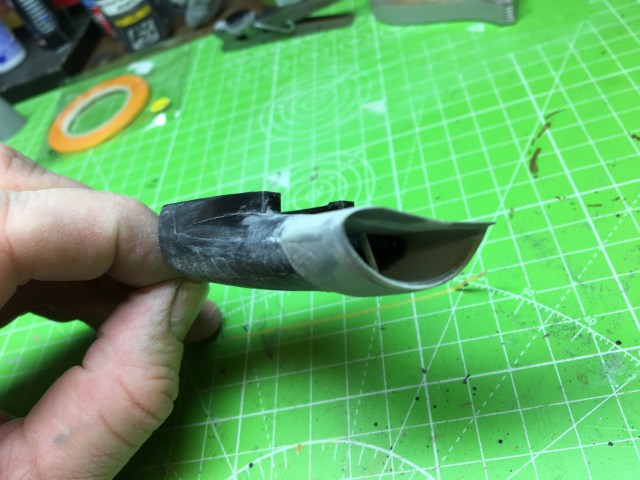
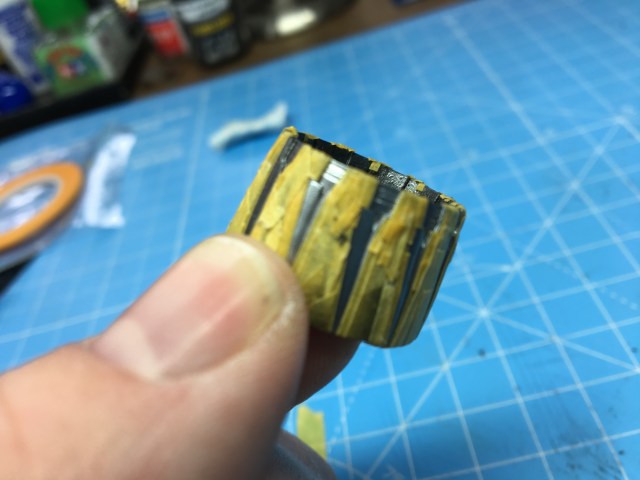
The Block 30 F-16’s feature the “Big Mouth” intake that came with that upgrade and I needed to replace and upgrade the “A” version that Revell’s kit provides. To this end I have grafted the Tamiya Block 30intake onto the Revell engine intake trunking. ]
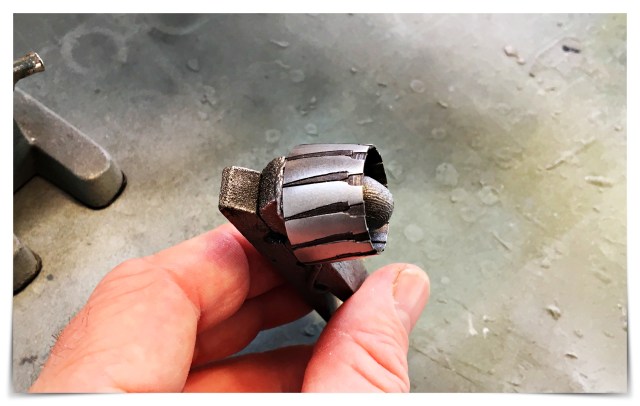
Yes, it was a PIA job to do! But the end result was worth it! You can see below the difference in size and scale between the two intakes:
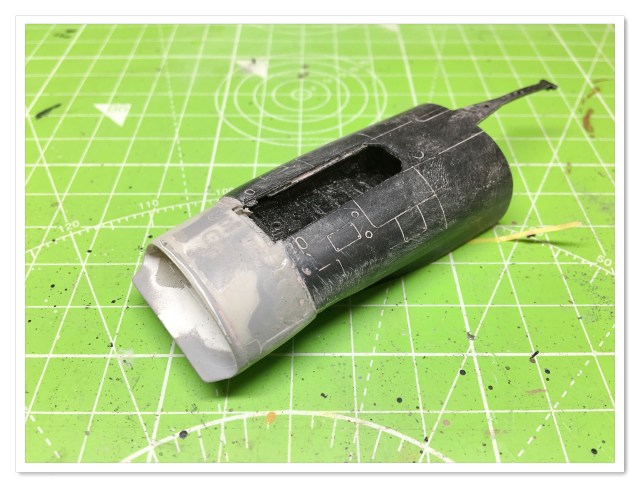
So after lots of shaping, filling and smoothing I ended up with this………
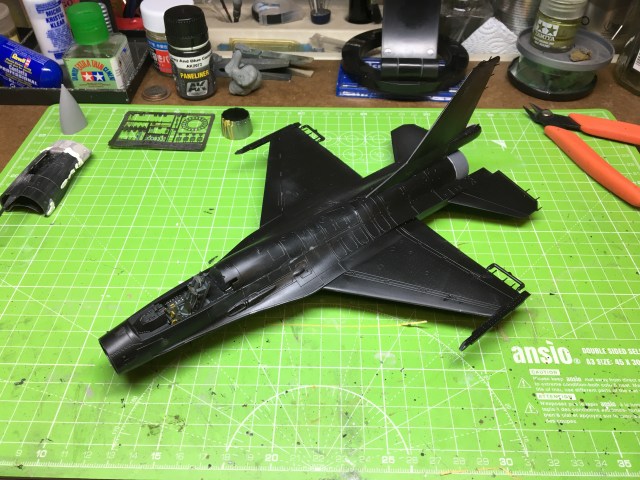
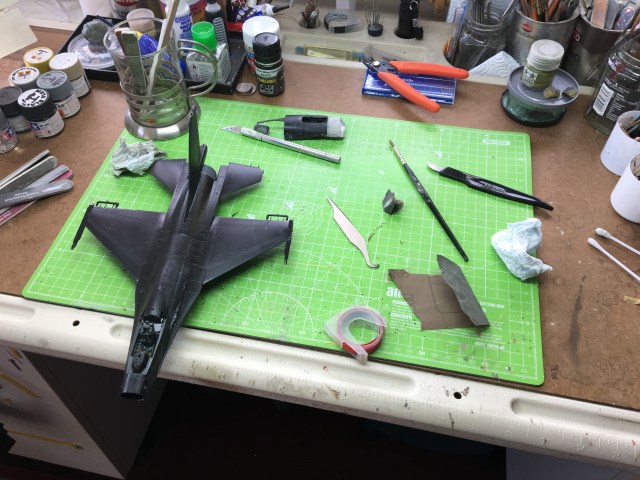
In-between all of those sanding sessions I commenced assembly on the airframe:

Here is how the fitted cockpit looked with the painted burner can in the background.

The intake took a lot of work as I had to continuously test fit it and correct its fit.
Now it is beginning to take shape!
I needed to re-scribe all the details lost whilst sanding and shaping the intake to the rest of the model.
Behind the mask!
I have to say, I hate masking up F-16 afterburner cans! I wish someone would release a masking sheet for these things! I primed the plastic with gloss black acrylic paint and after drying I misted on several light coats of True Metal dark Aluminium. To get that dark gap in-between the petals there’s only one way to go. Mask, mask and more mask!
With the burner can drying out and my new intake installed, it was time to get this bird onto the paint bench! I mixed my own shades of Tamiya acrylic paint from studying reference photo’s of the real aircraft.

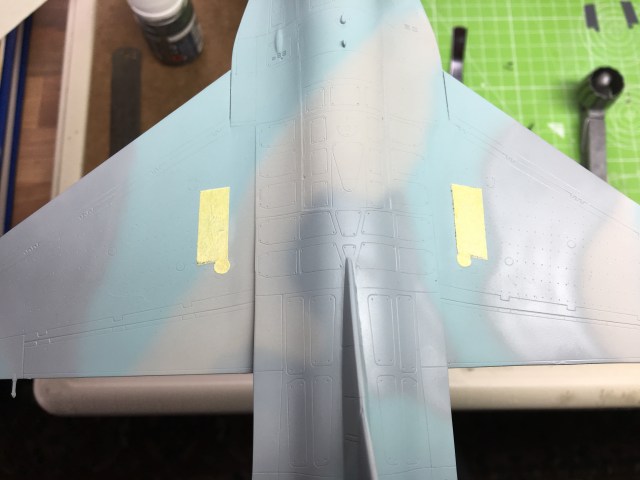
HAF Block 30’s have the same scab plates that USAF F-16s have and Tamiya produce a set of metal aftermarket parts to reproduce them. However, they are way too thick fro ythis scale and do not conform to the curves of the airframe. I wanted to be as accurate as I could with this model so using the Tamiya parts as a guide, I cut my own scab plates from Tamiya masking tape. You can see the plates fitted to the model below:
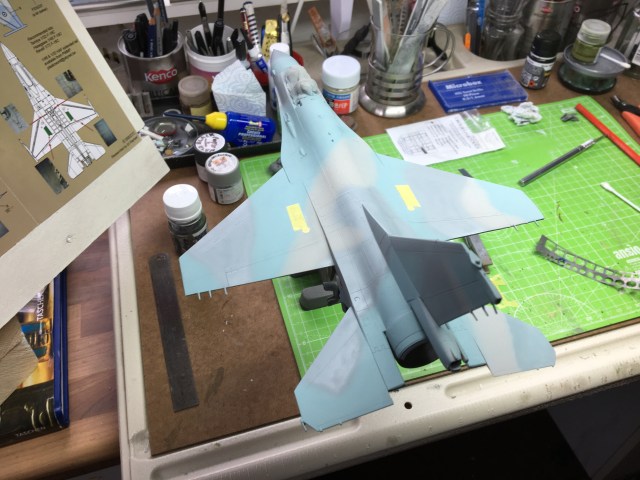
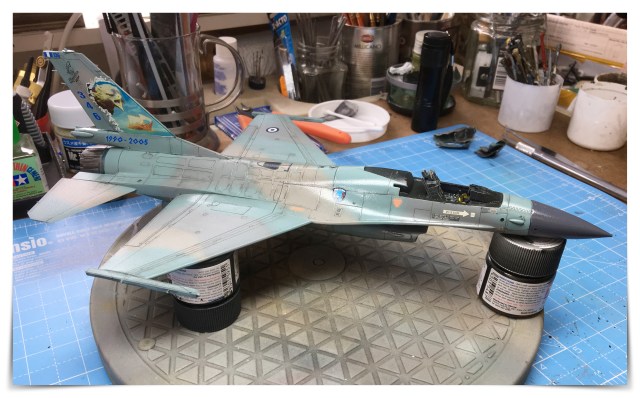
I continued with painting the airframe and when I was satisfied, I sprayed a clear gloss varnish over the entire model and left it to cure for 48hrs. Applying the decals is always one of my favourite parts of a build as this stage is usually the milestone that tells us we are on our way to completing the model. Being as found as I was of these markings, it was great to see them adorn this model. The Zotz decals are quite thick for this scale so I needed a lot of setting solution to get them to conform and eliminate silvering. They are of excellent register though and on a model like this that really counts! Once I was happy with the decals, another clear gloss varnish was airbrushed over the entire model and again left to cure.
The next process was to weather the model. F-16’s have many different panels of various shapes and sizes all over the upper part of its airframe. The Greek F-16’s are based near the sea and fade very quickly so I decided in accordance with the grey/blue paint scheme I used the AK Interactive panel line wash for grey or blue paint schemes. Painted onto a gloss surface this will look a little stark but I can assure you that once the model is matt coated the effect will take on a more realistic appearance. Here are some photo’s of how the model looks now:

So that’s where we are up to this build. I still have a lot more to do here such as undercarriage, canopy, wing stores and external details. I hope you have enjoyed this update, until next time , take care and Happy Modelling!
Darren.

The Viper looks fantastic !
I “need” to build one too
LikeLike
Thanks for your kind words Pete! If I get the faded paint look to “right” then I will be happy with it.
LikeLike
I’m sure, she will look fantastic
LikeLike
Pingback: HAF F-16C “JASON” – THE SCALE MODEL HANGAR
very nice but wrong tail fin base ,yours is from A version and Greek F-16 are C ,the base is fat and bigger
LikeLike