
The Hawker Sea Hurricane is one of those aircraft that has been relatively unloved by the aircraft enthusiast masses and scale modellers alike.
Sure, there have been kits released in 1/48 scale in the last couple of decades from Italeri and Airfix and they sold pretty well-but how often do we see one finished?
And that’s my point, lots of modellers may have the faithful Sea Hurricane in their stash, but few feel the inspiration to build it.
I have always had an interest in Royal Navy, Fleet Air Arm aircraft and for a time in my life I spent a long period building them. I love the Seafire’s, the Corsair’s and the Sea Hurricane’s in Fleet Air Arm schemes as I think they look fantastic!
The Sea Hurricane:


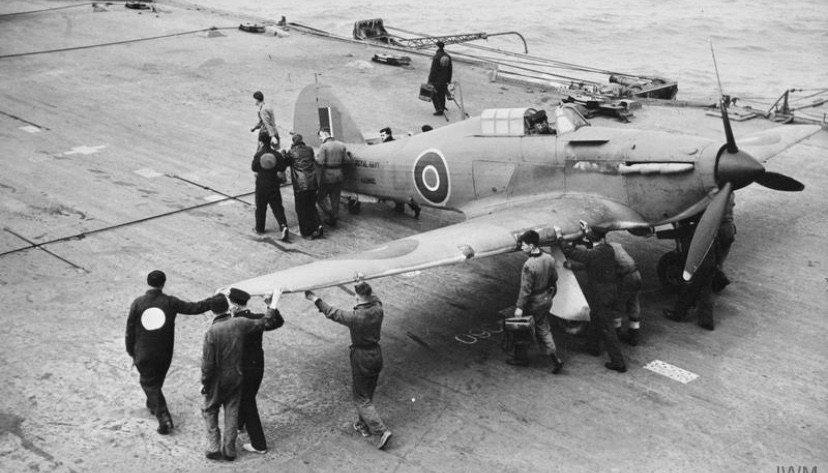
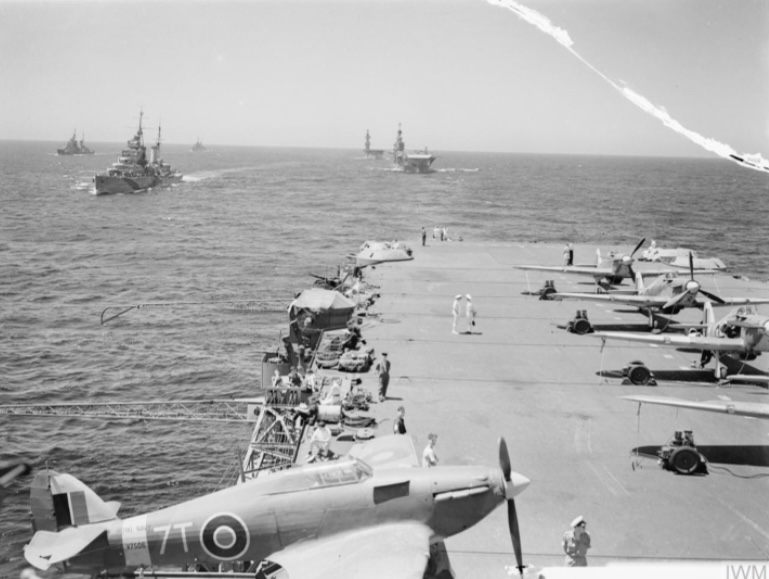
The Sea Hurricane was converted from the Battle of Britain veteran RAF Hurricanes and it was chosen for its robust design. It’s was literally a flying war horse that was initially launched from short run catapult frames at the end of Royal Navy ships and then converted to Mk1B specification which saw an A frame tail hook being fitted under the fuselage tail.
A fuller history on the subject can be found here:
https://www.armouredcarriers.com/hawker-sea-hurricane-variants
Many years ago I built the 1/48 Hasegawa Sea Hurricane and while I thought at the time I had done a good job, years later with the benefit of experience I saw that my painting and weathering of this subject was too dark and terribly over weathered.
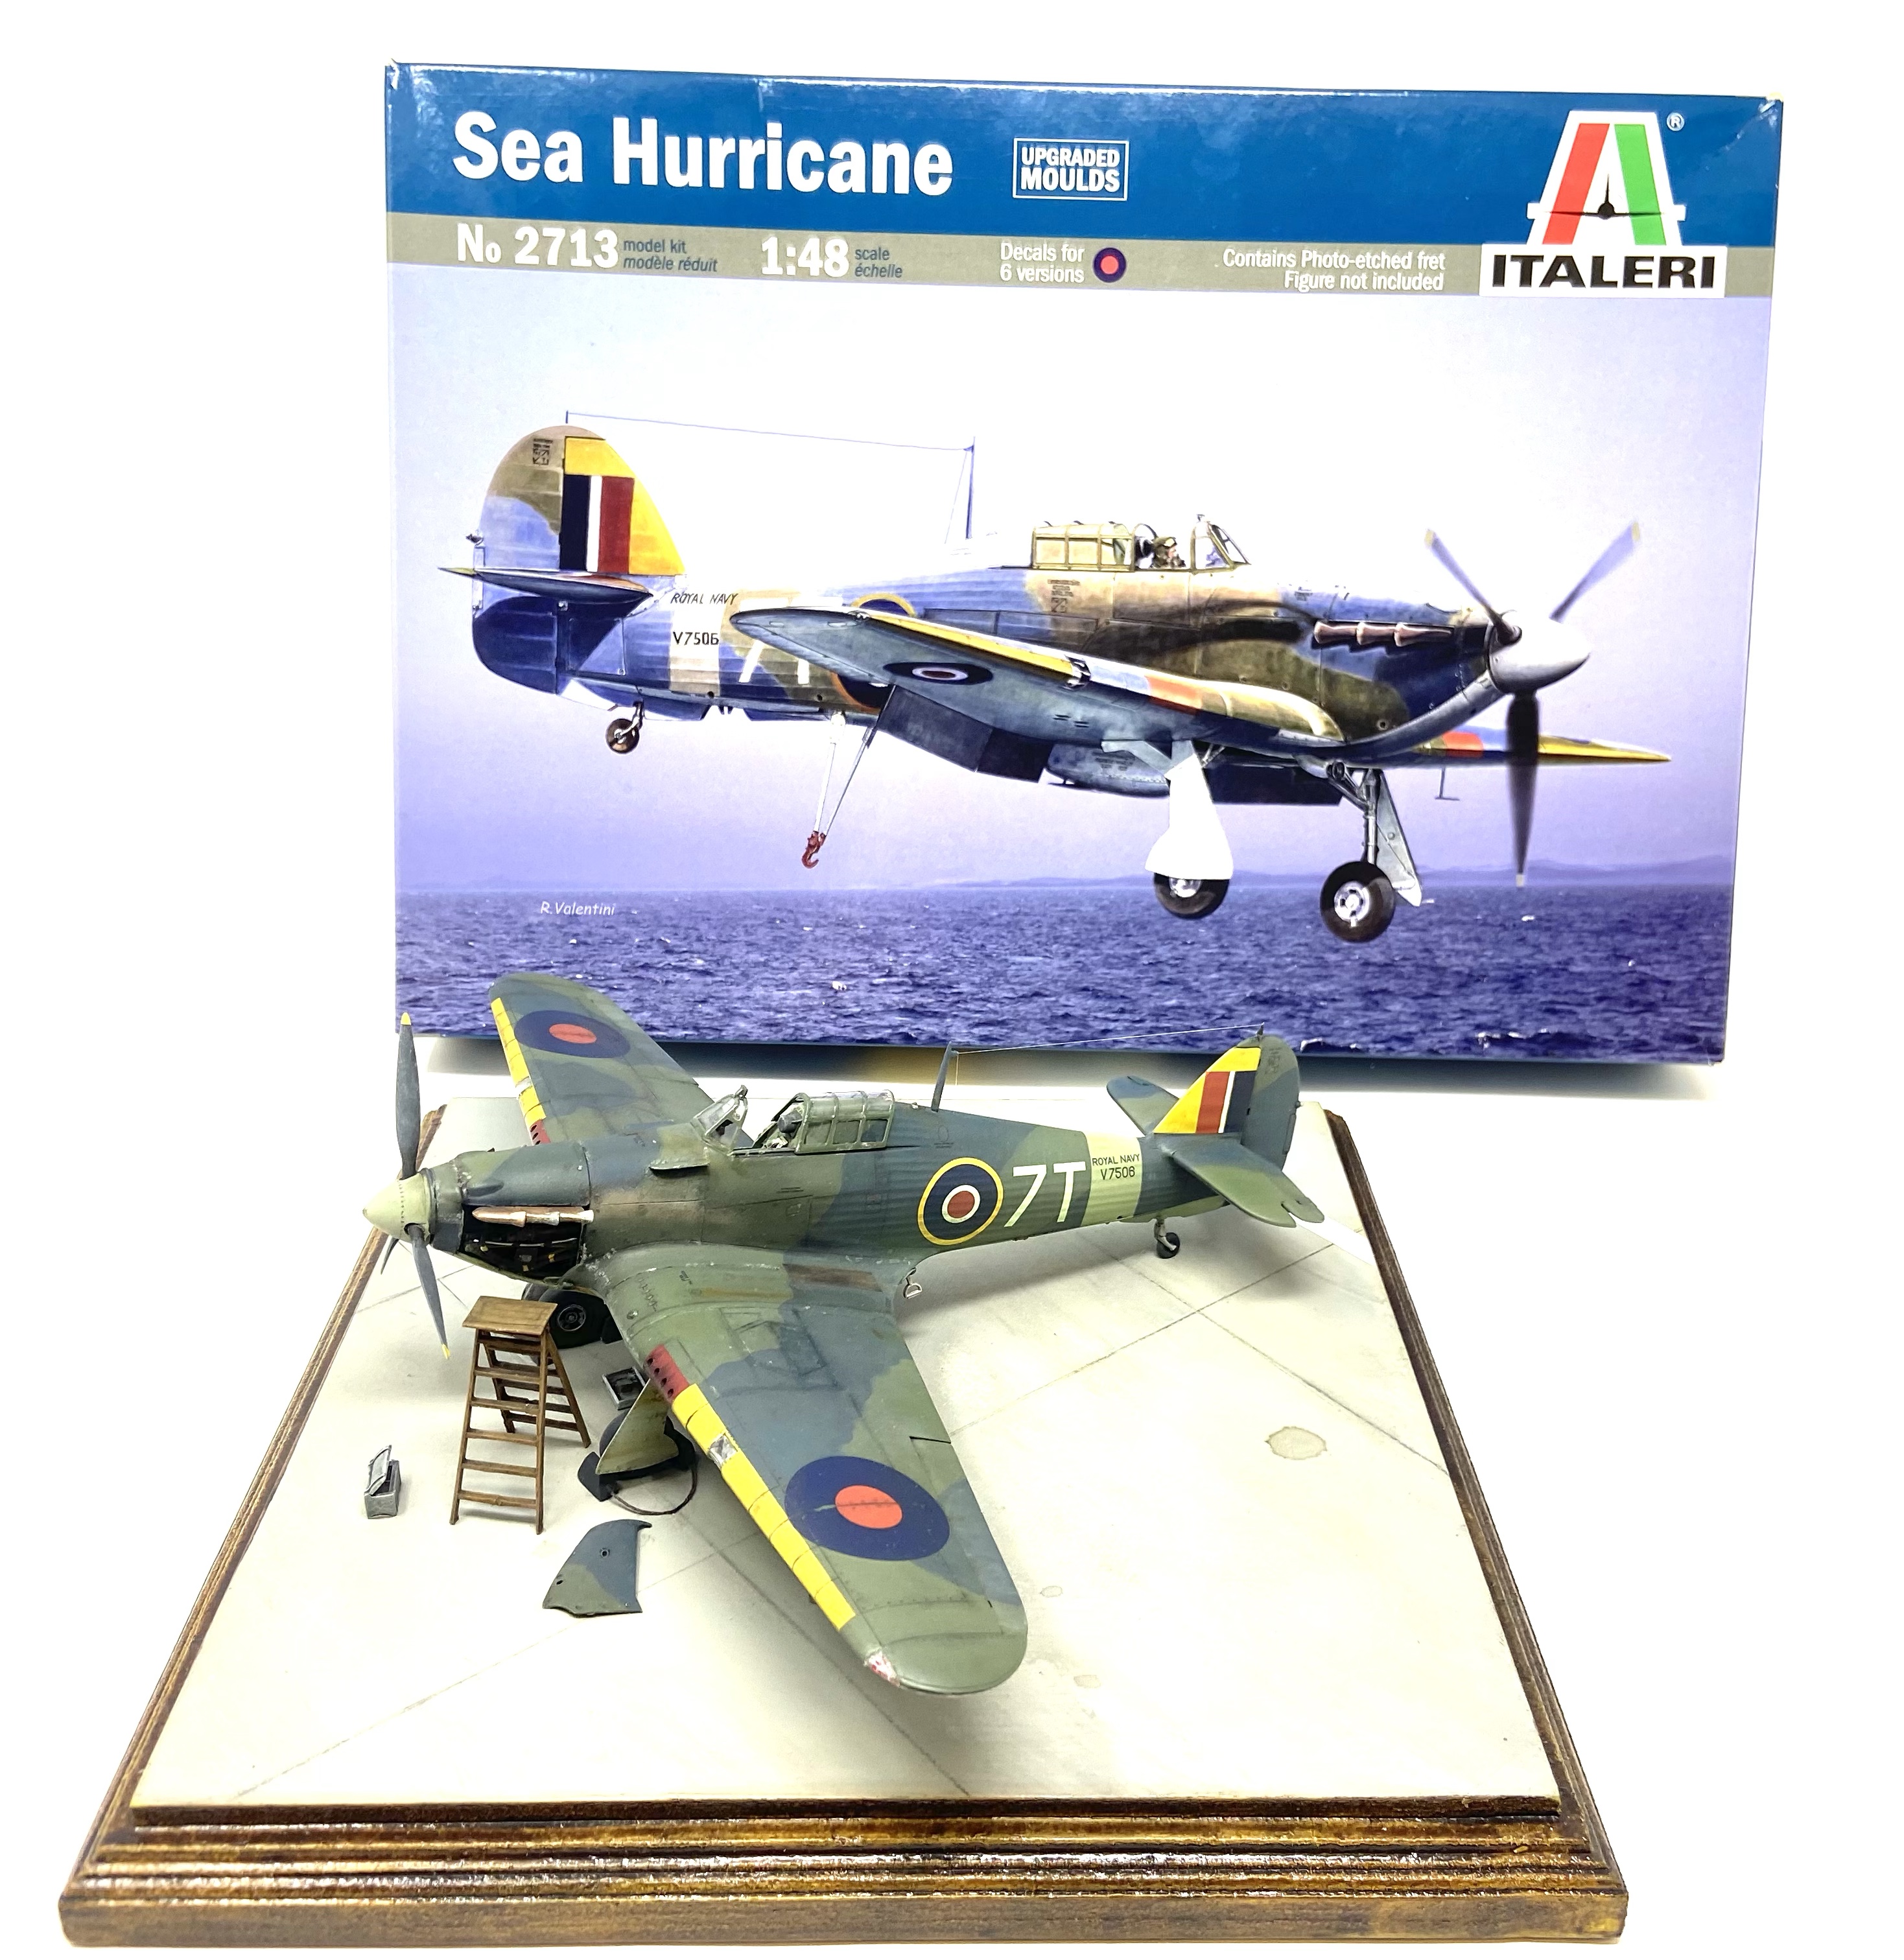
Fast forward ten years or so and I was up in my loft retrieving a kit and I stumbled across the Italeri 1/48 Sea Hurricane kit. Upon scrutiny of the box contents I was overtaken by the impulse to use this kit as a slammer build and try out some new weathering techniques.
The Kit:
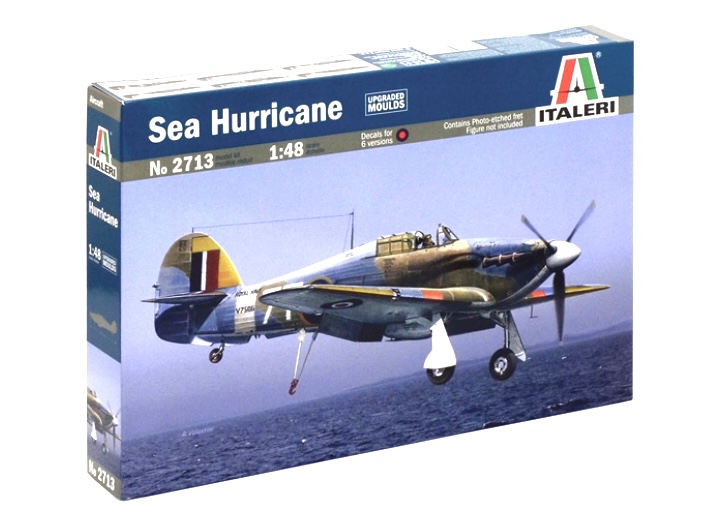
Italeri’s kit is actually rather good!
The model had nicely engraved details, it comes with a Merlin engine that has separate cowlings to display it open, a canopy that can actually be posed in the open position, an etched brass instrument panel and seat harness plus six different decal options. Not too bad at all!
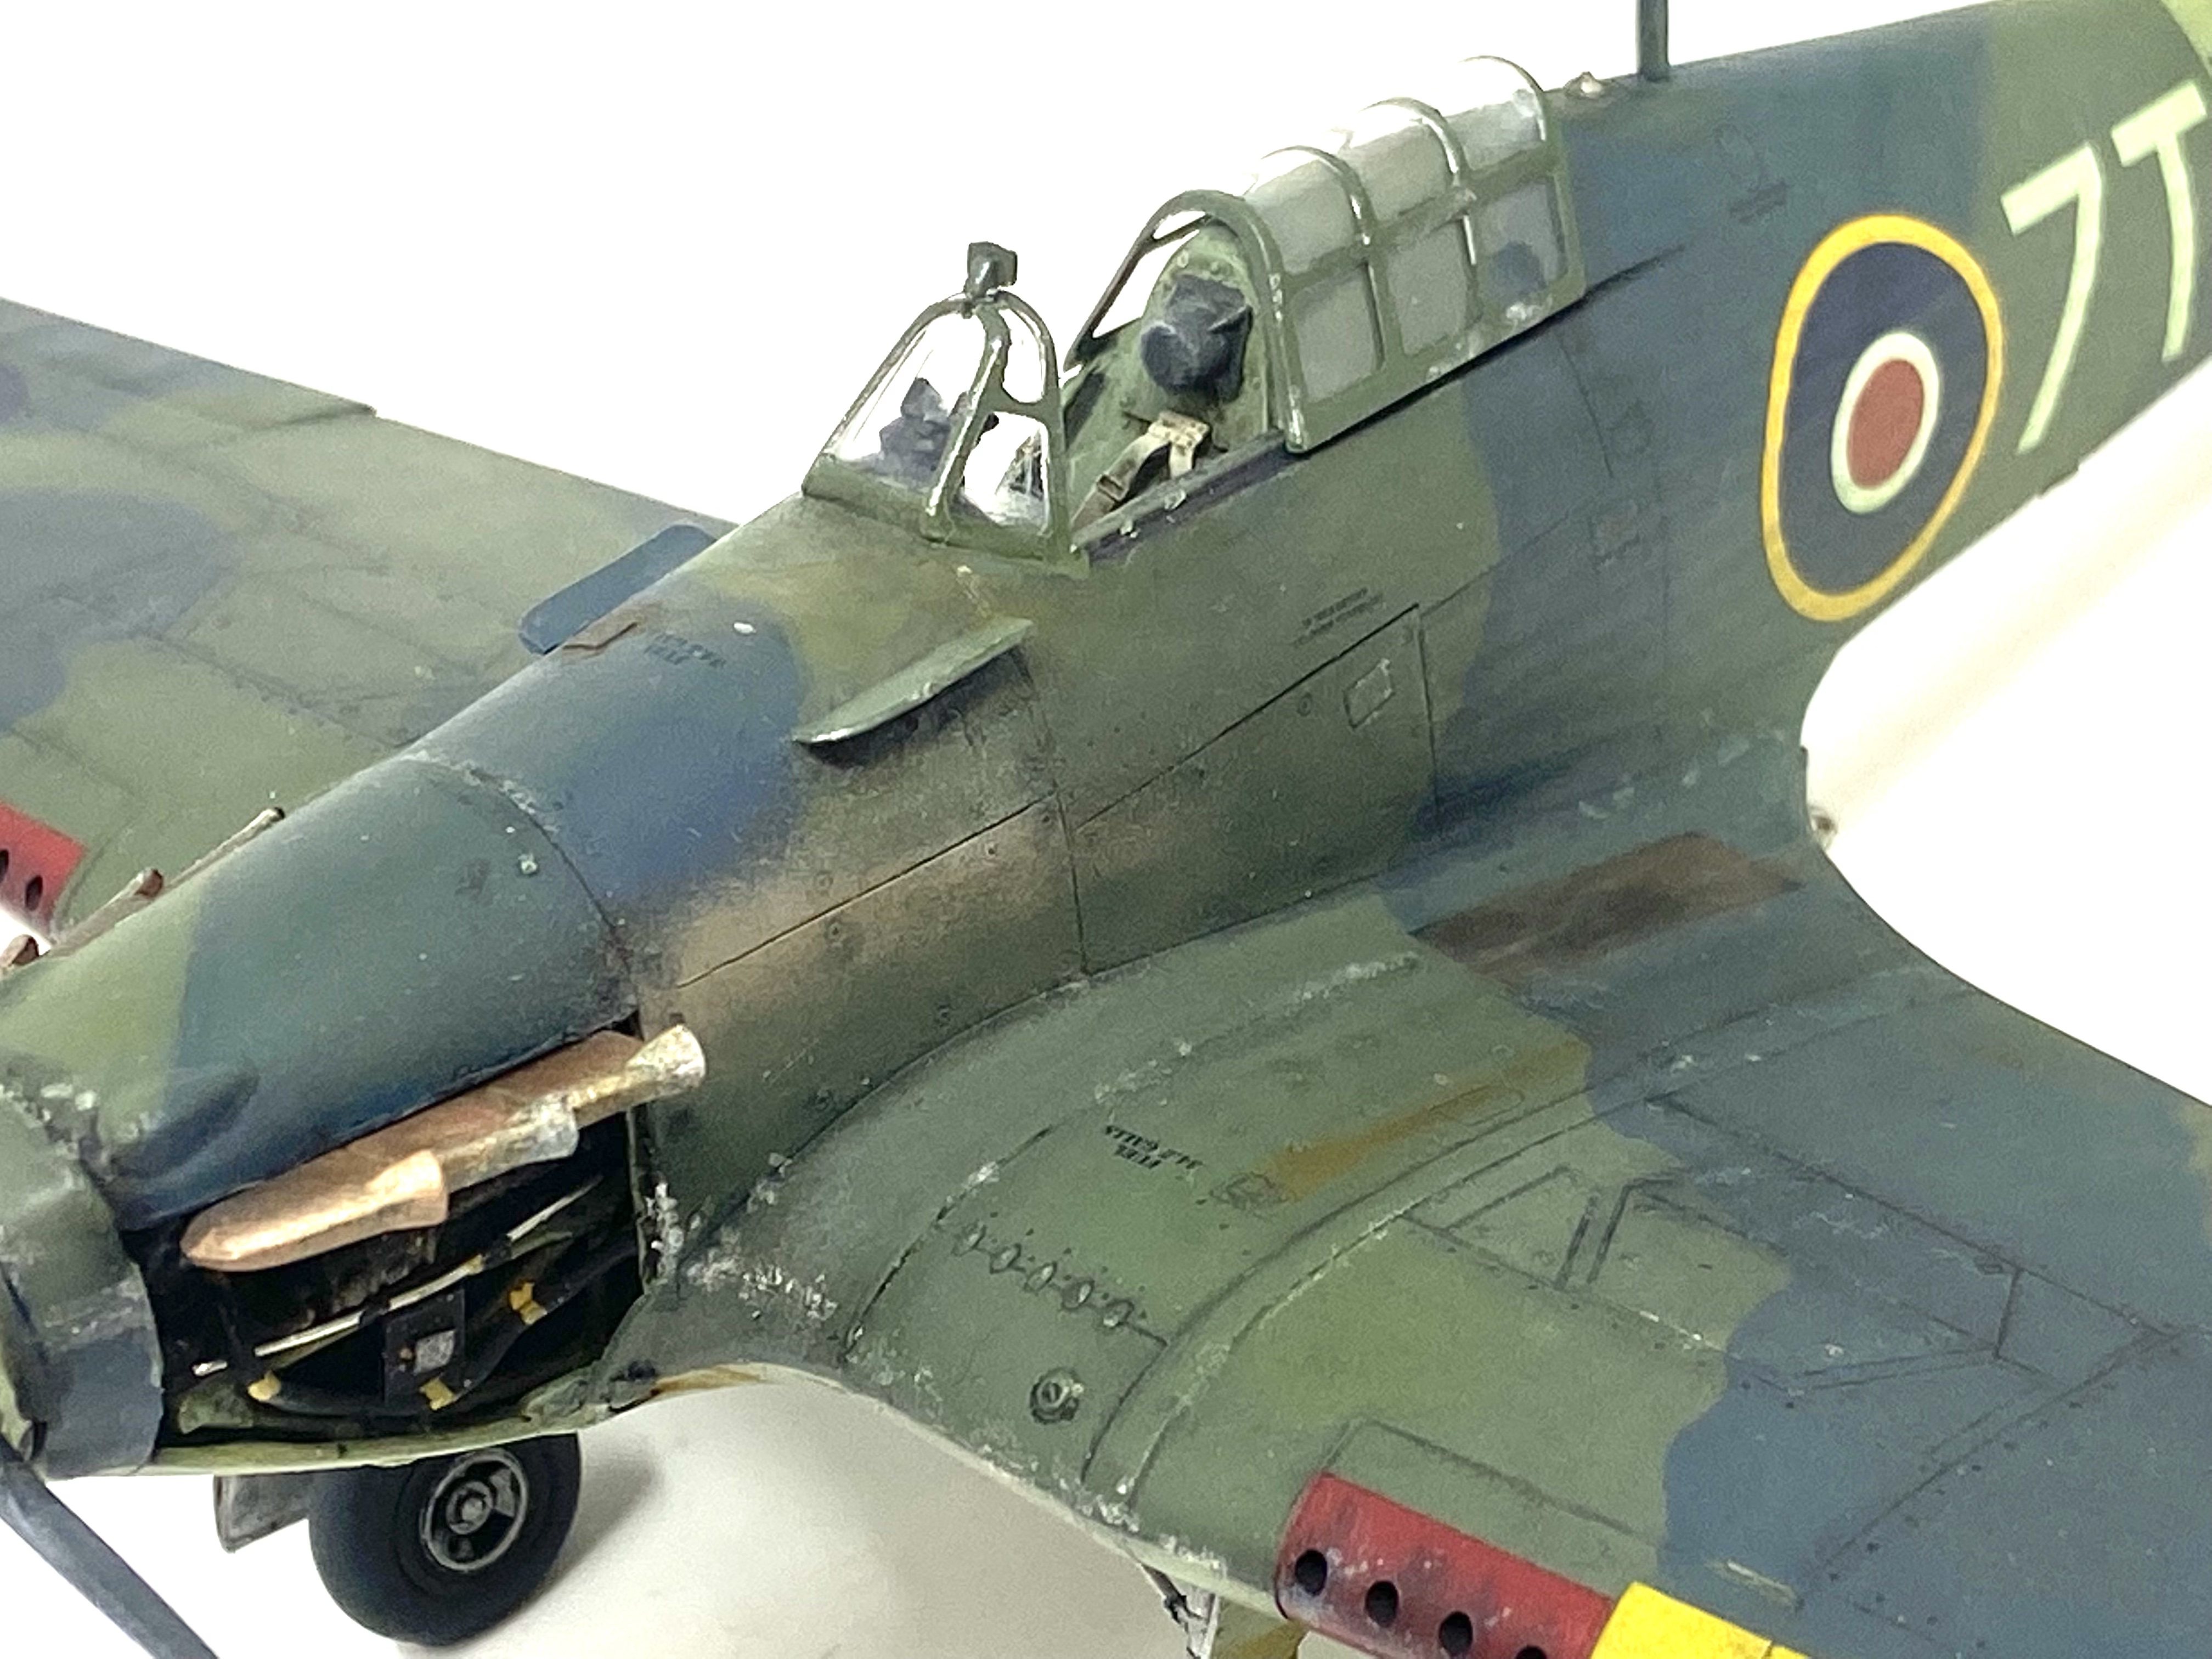
As with most aircraft models work commenced in the cockpit. This was nice and easy as the instructions were clear and the fit of the cockpit parts was good. I added the etched brass seat harness to the kit seat during the build process as I wanted to secure the brass parts in place before painting.
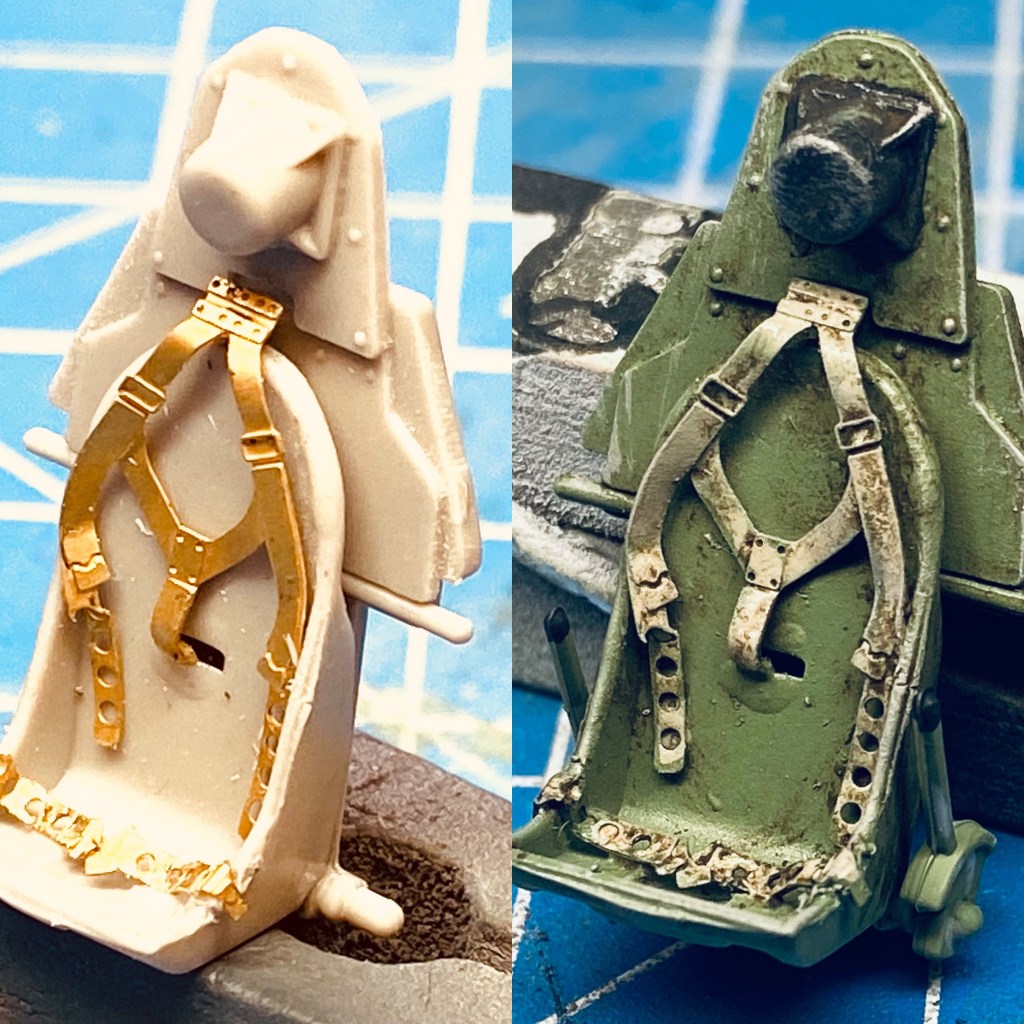
The finished seat assembly was painted in Tamiya Cockpit Green , with the seat harness being painted in Tamiya Buff. After a clear coat was applied I applied a dark enamel wash to add depth and when dry, I then applied a dry brushed light grey colour over all the raised detail.
The instrument panel was made up from the plastic back plate, decal and etched brass panel front. Once details were picked out it was fitted to the rest of the cockpit tub….


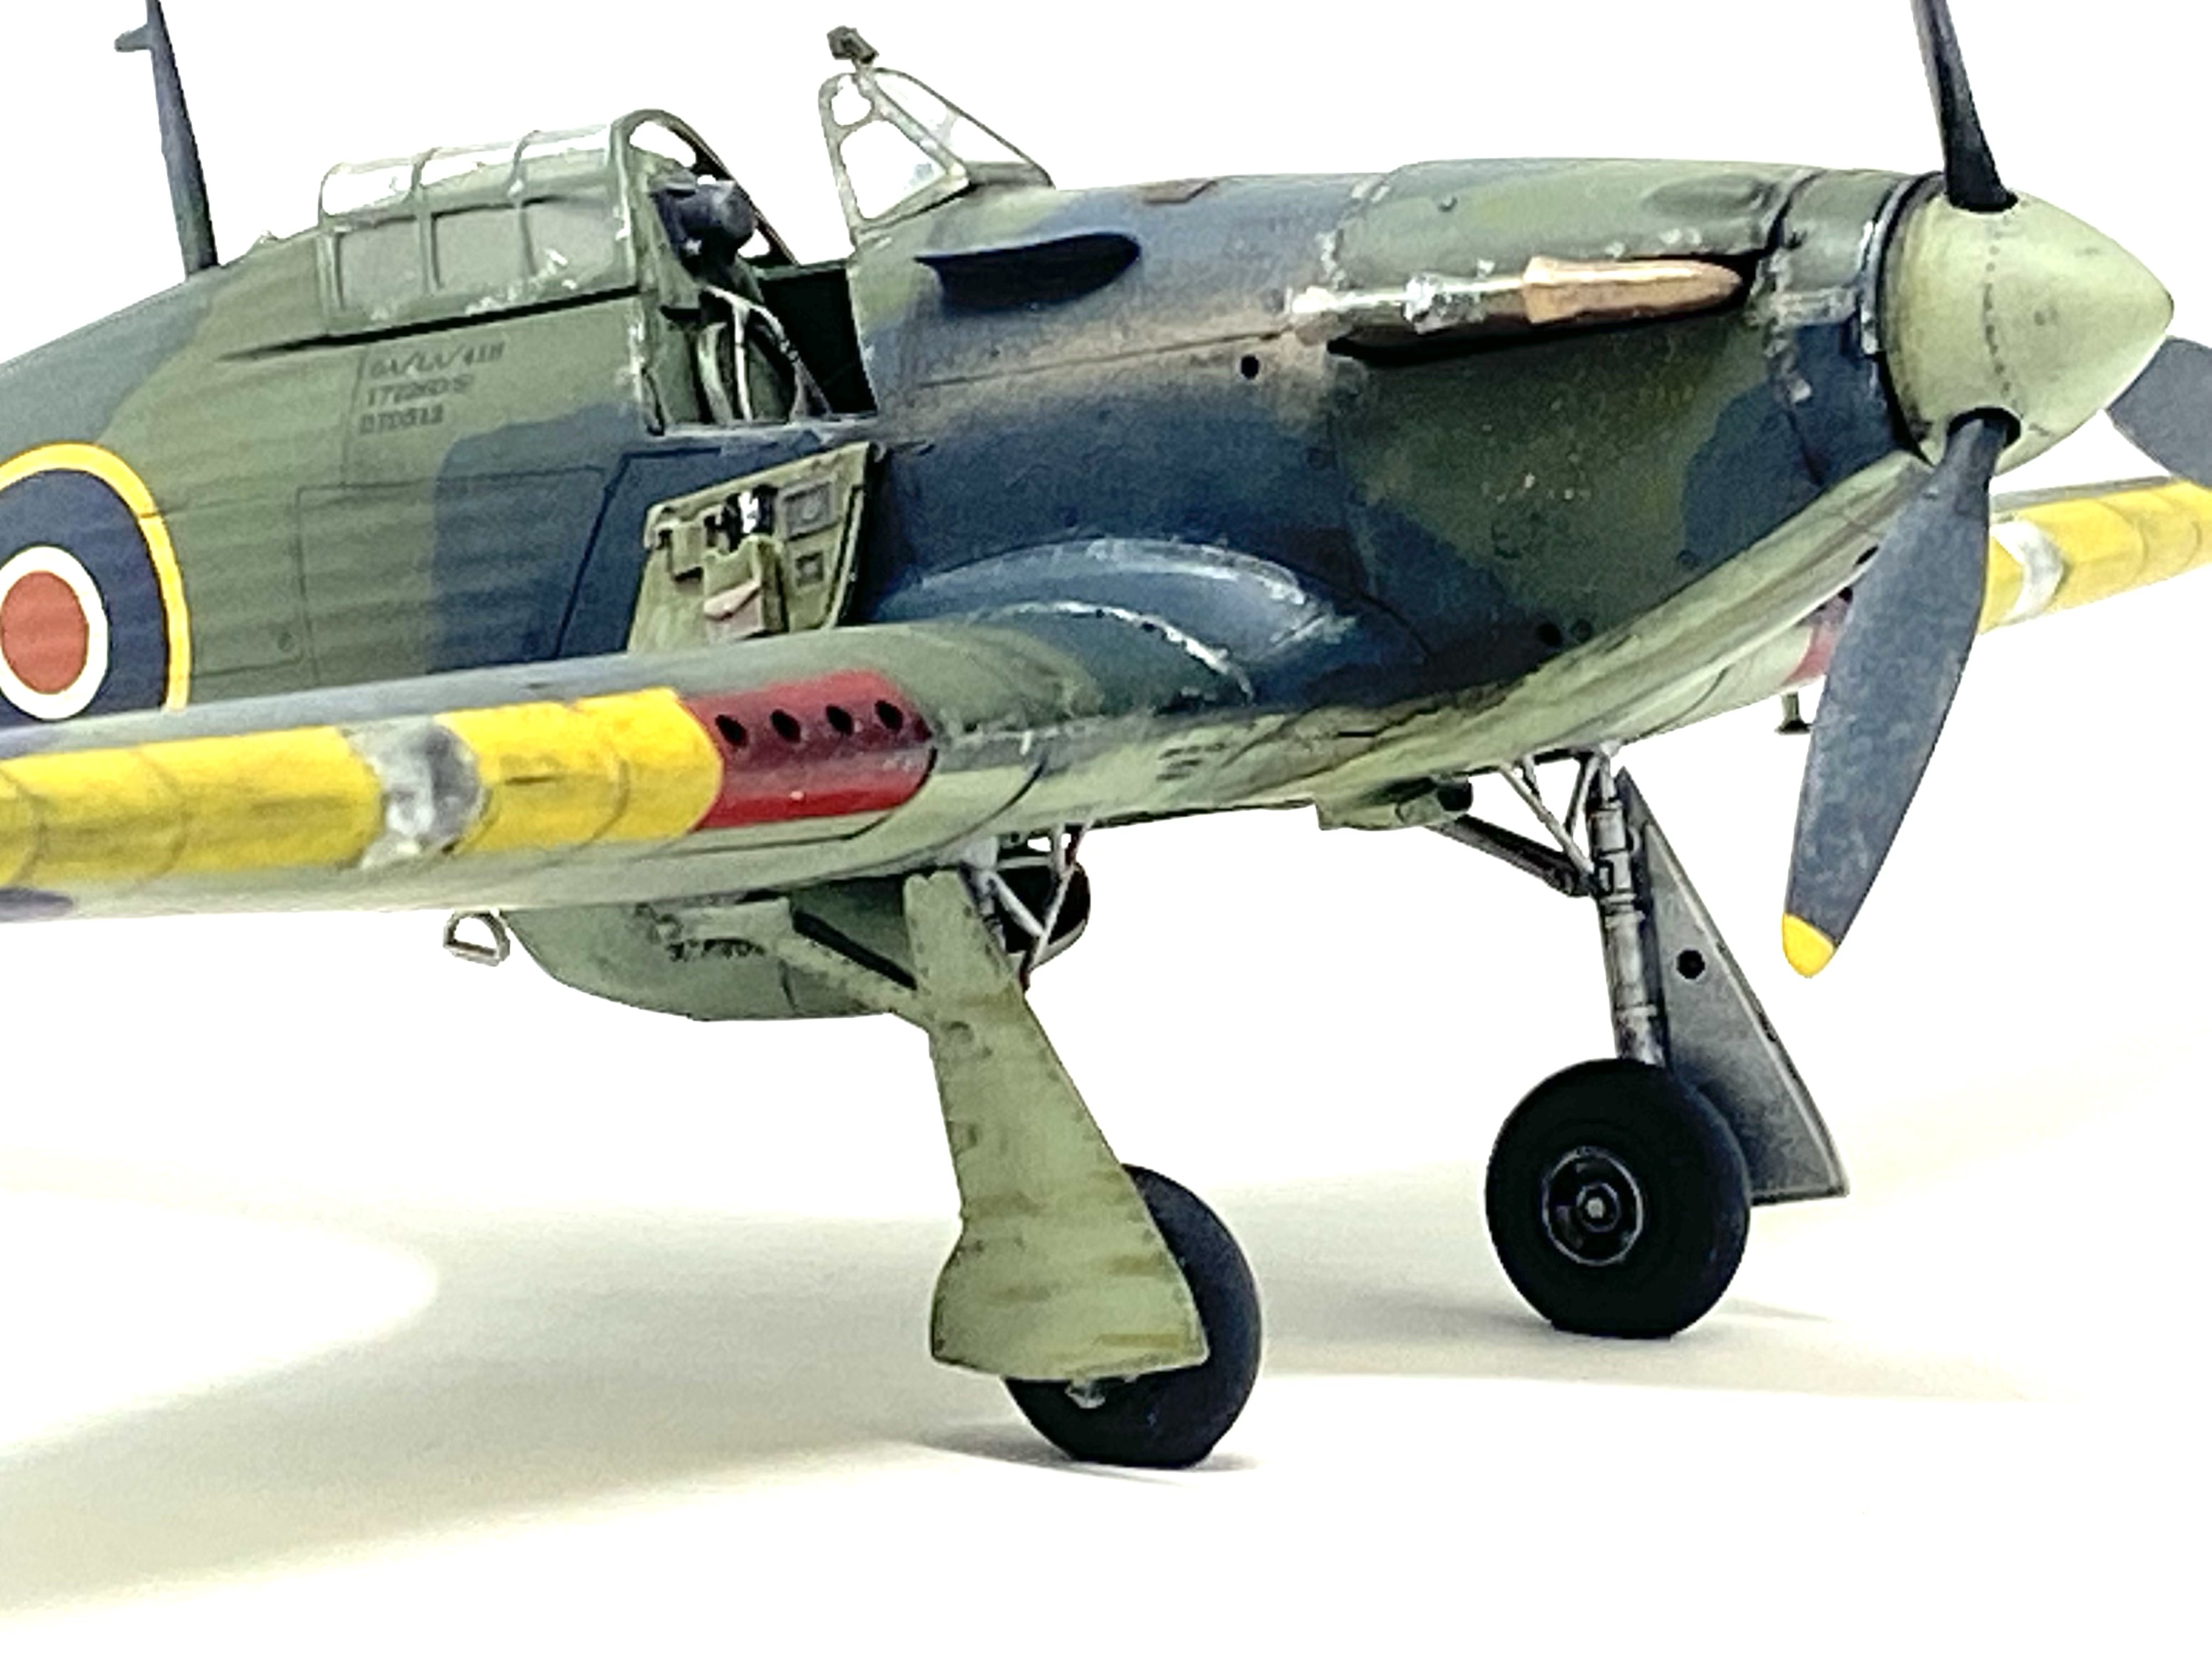
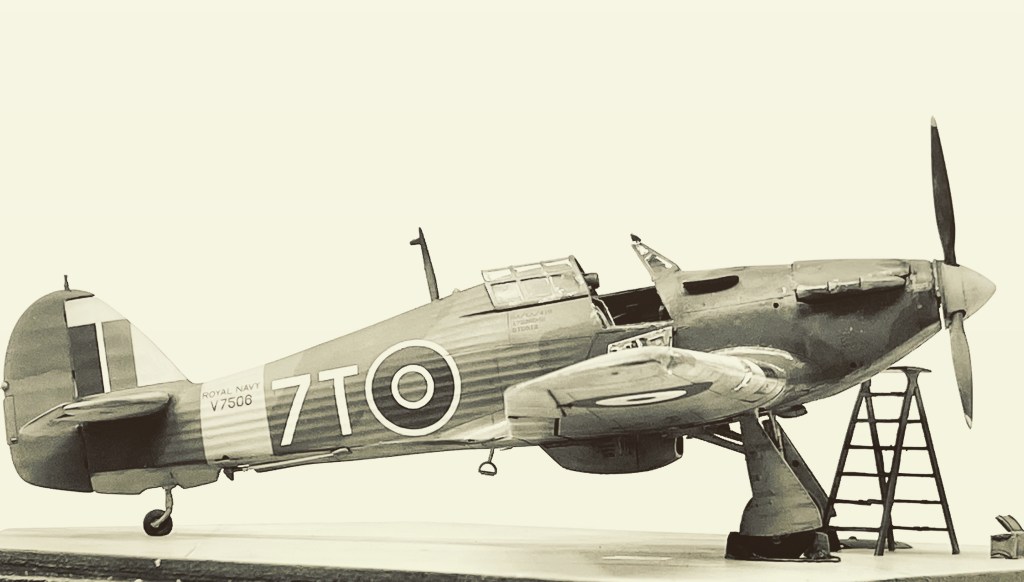
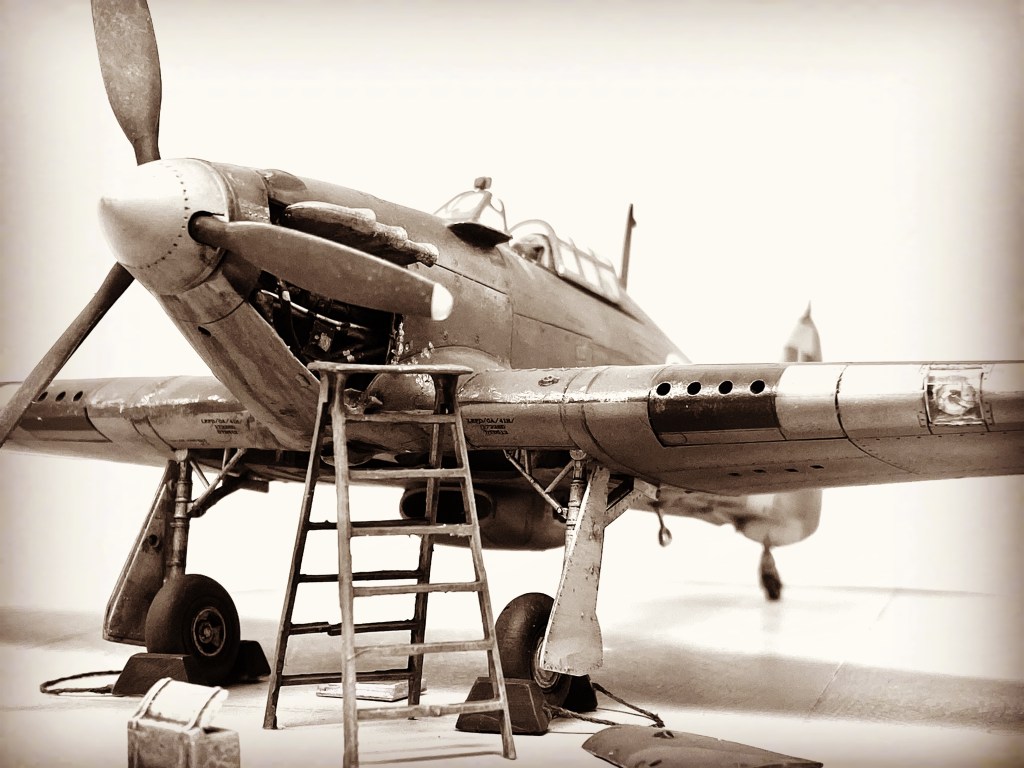
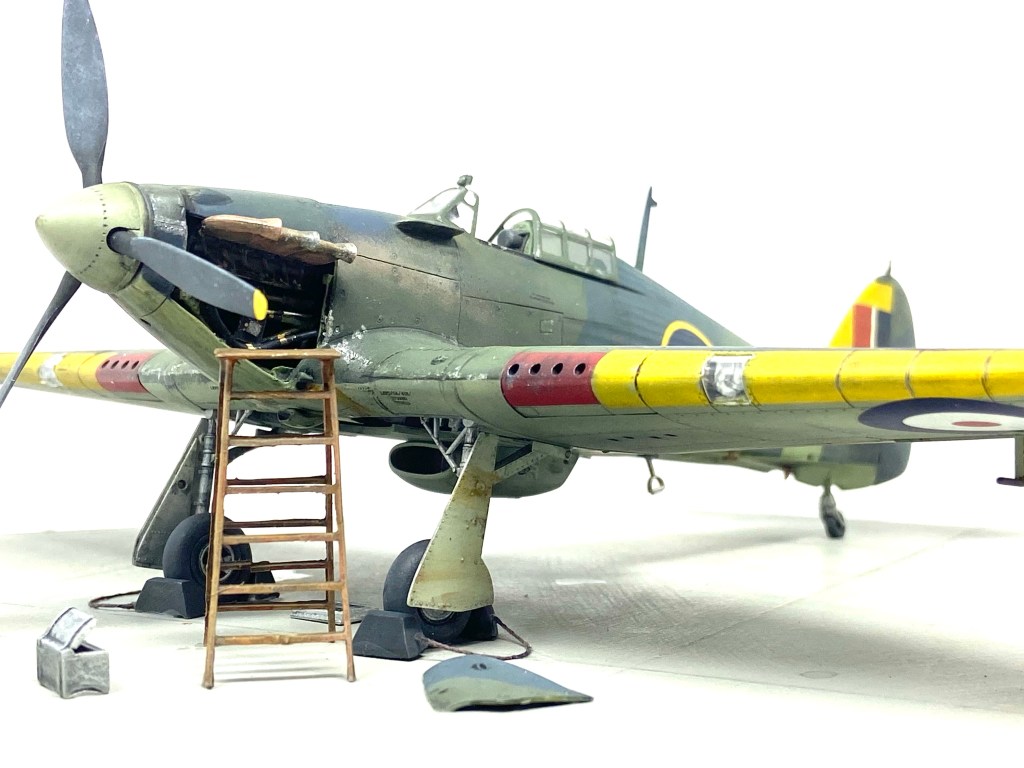
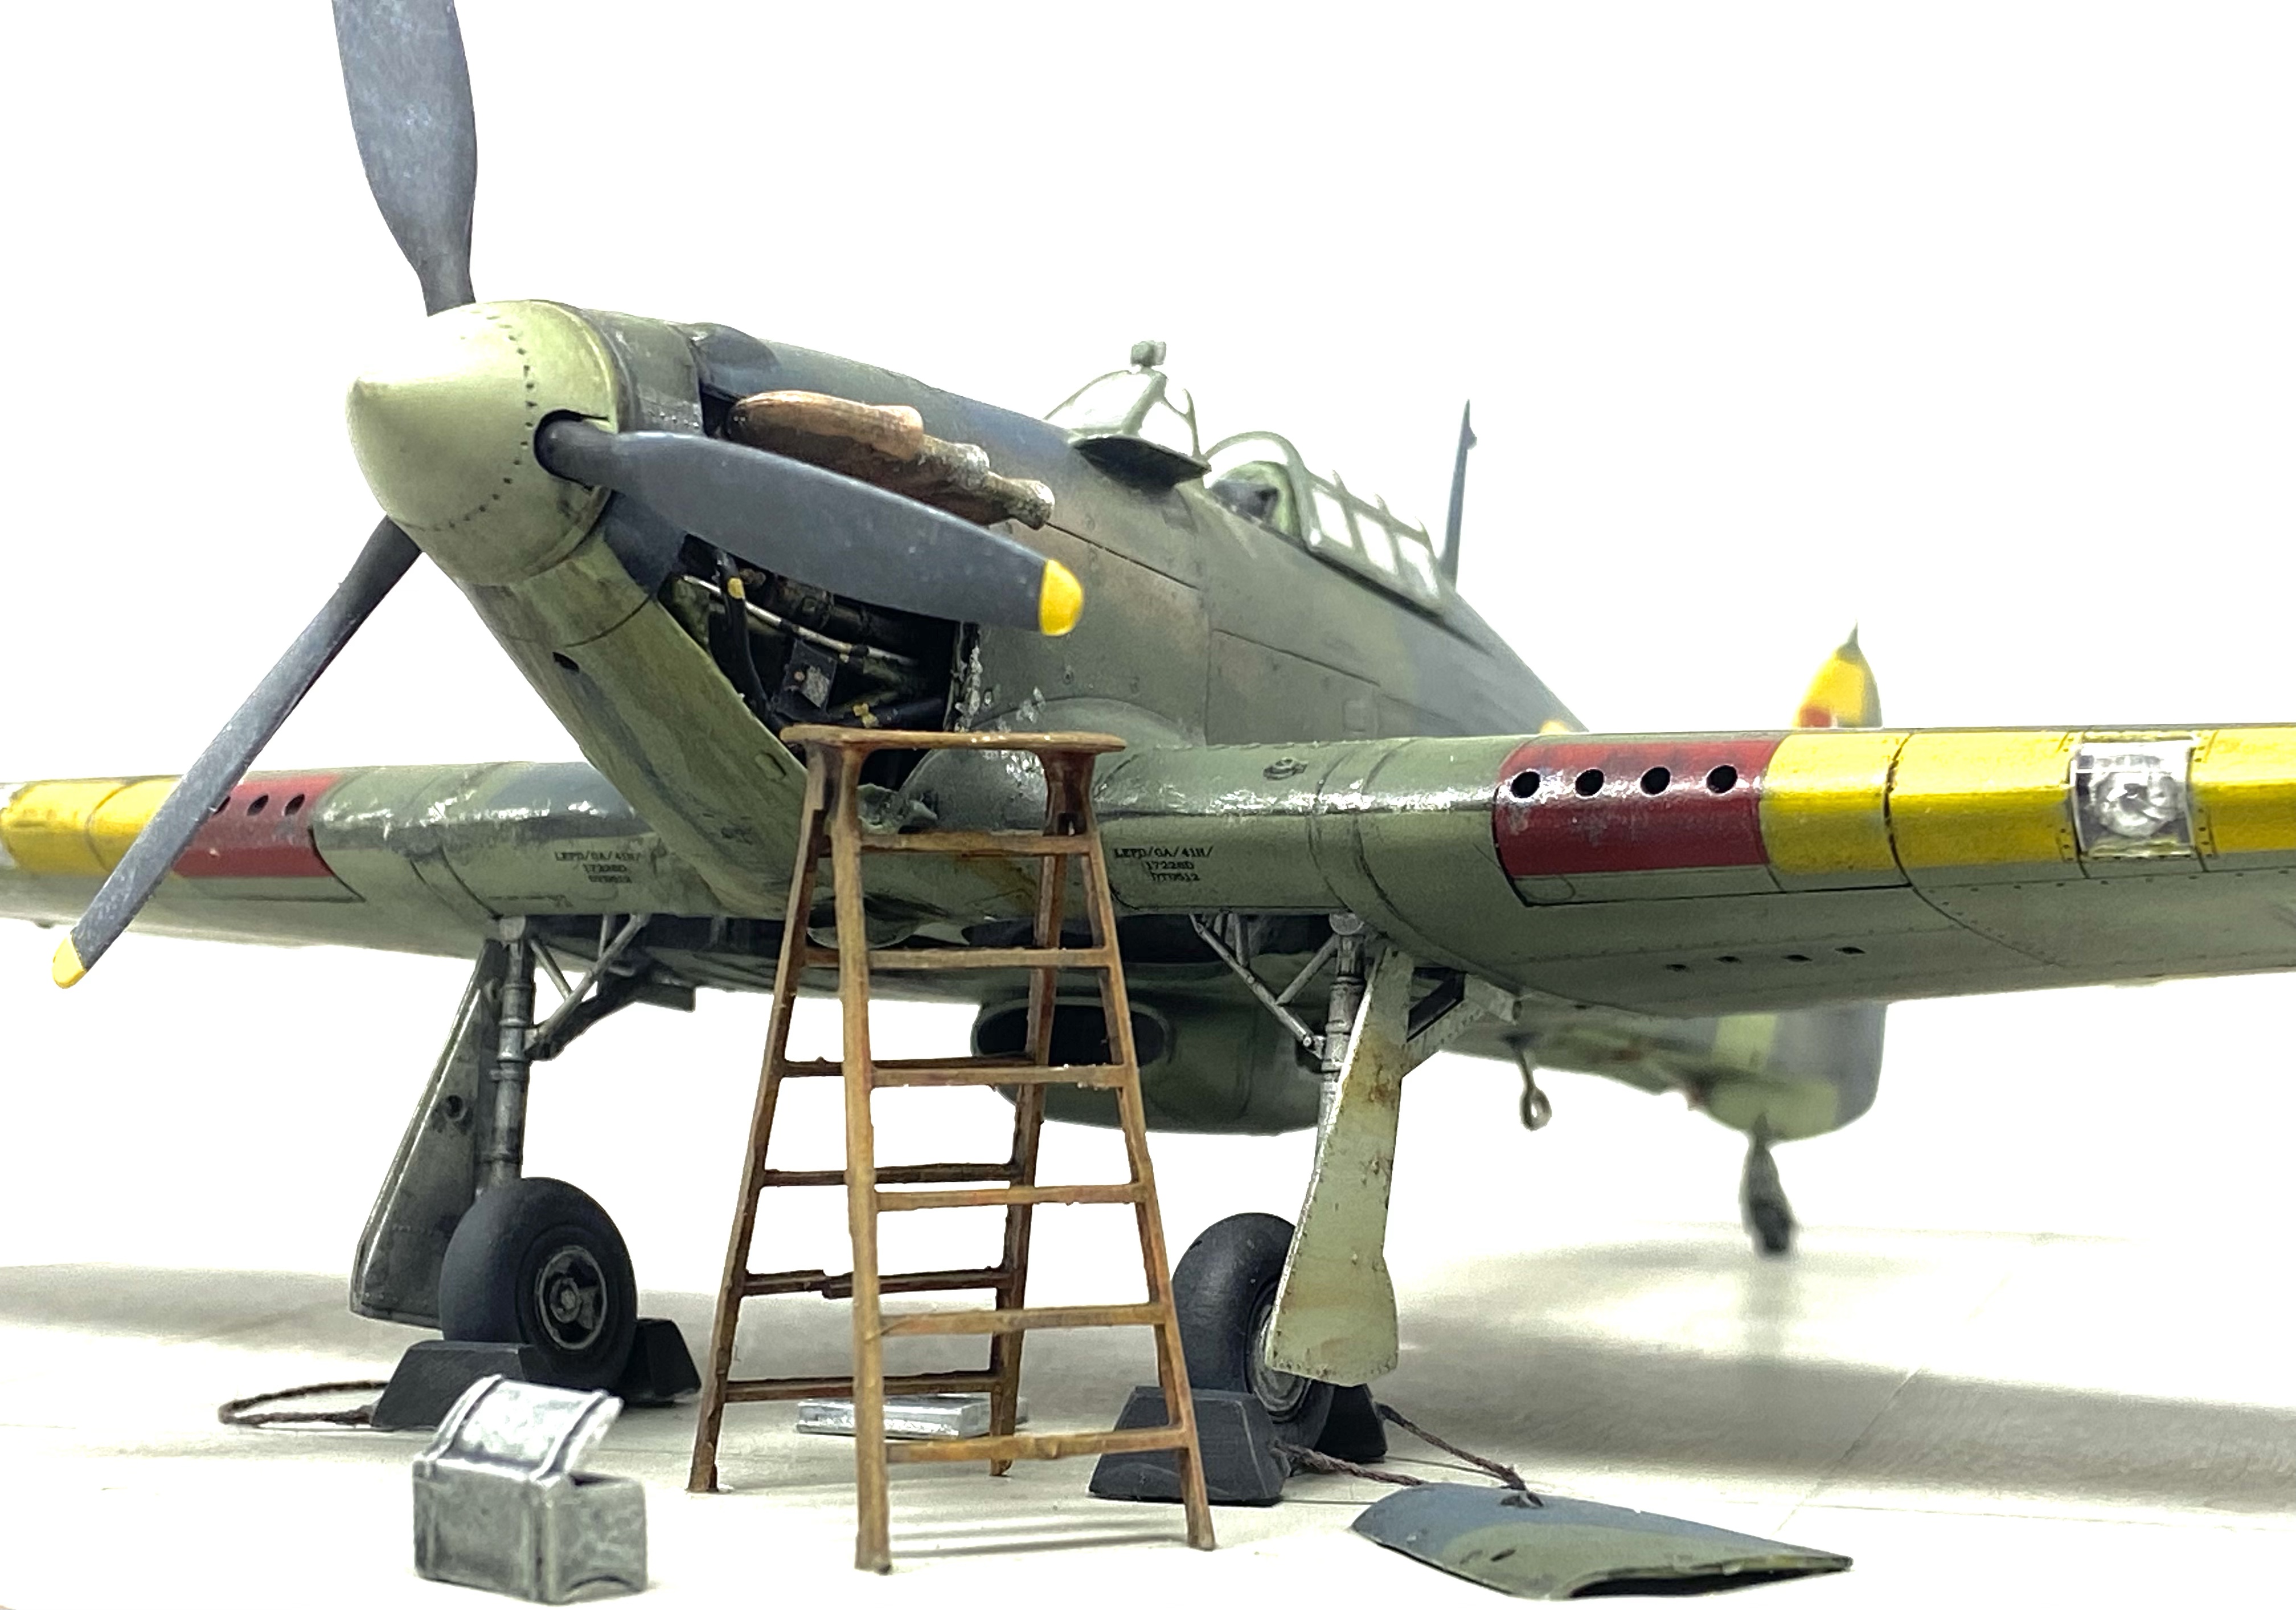
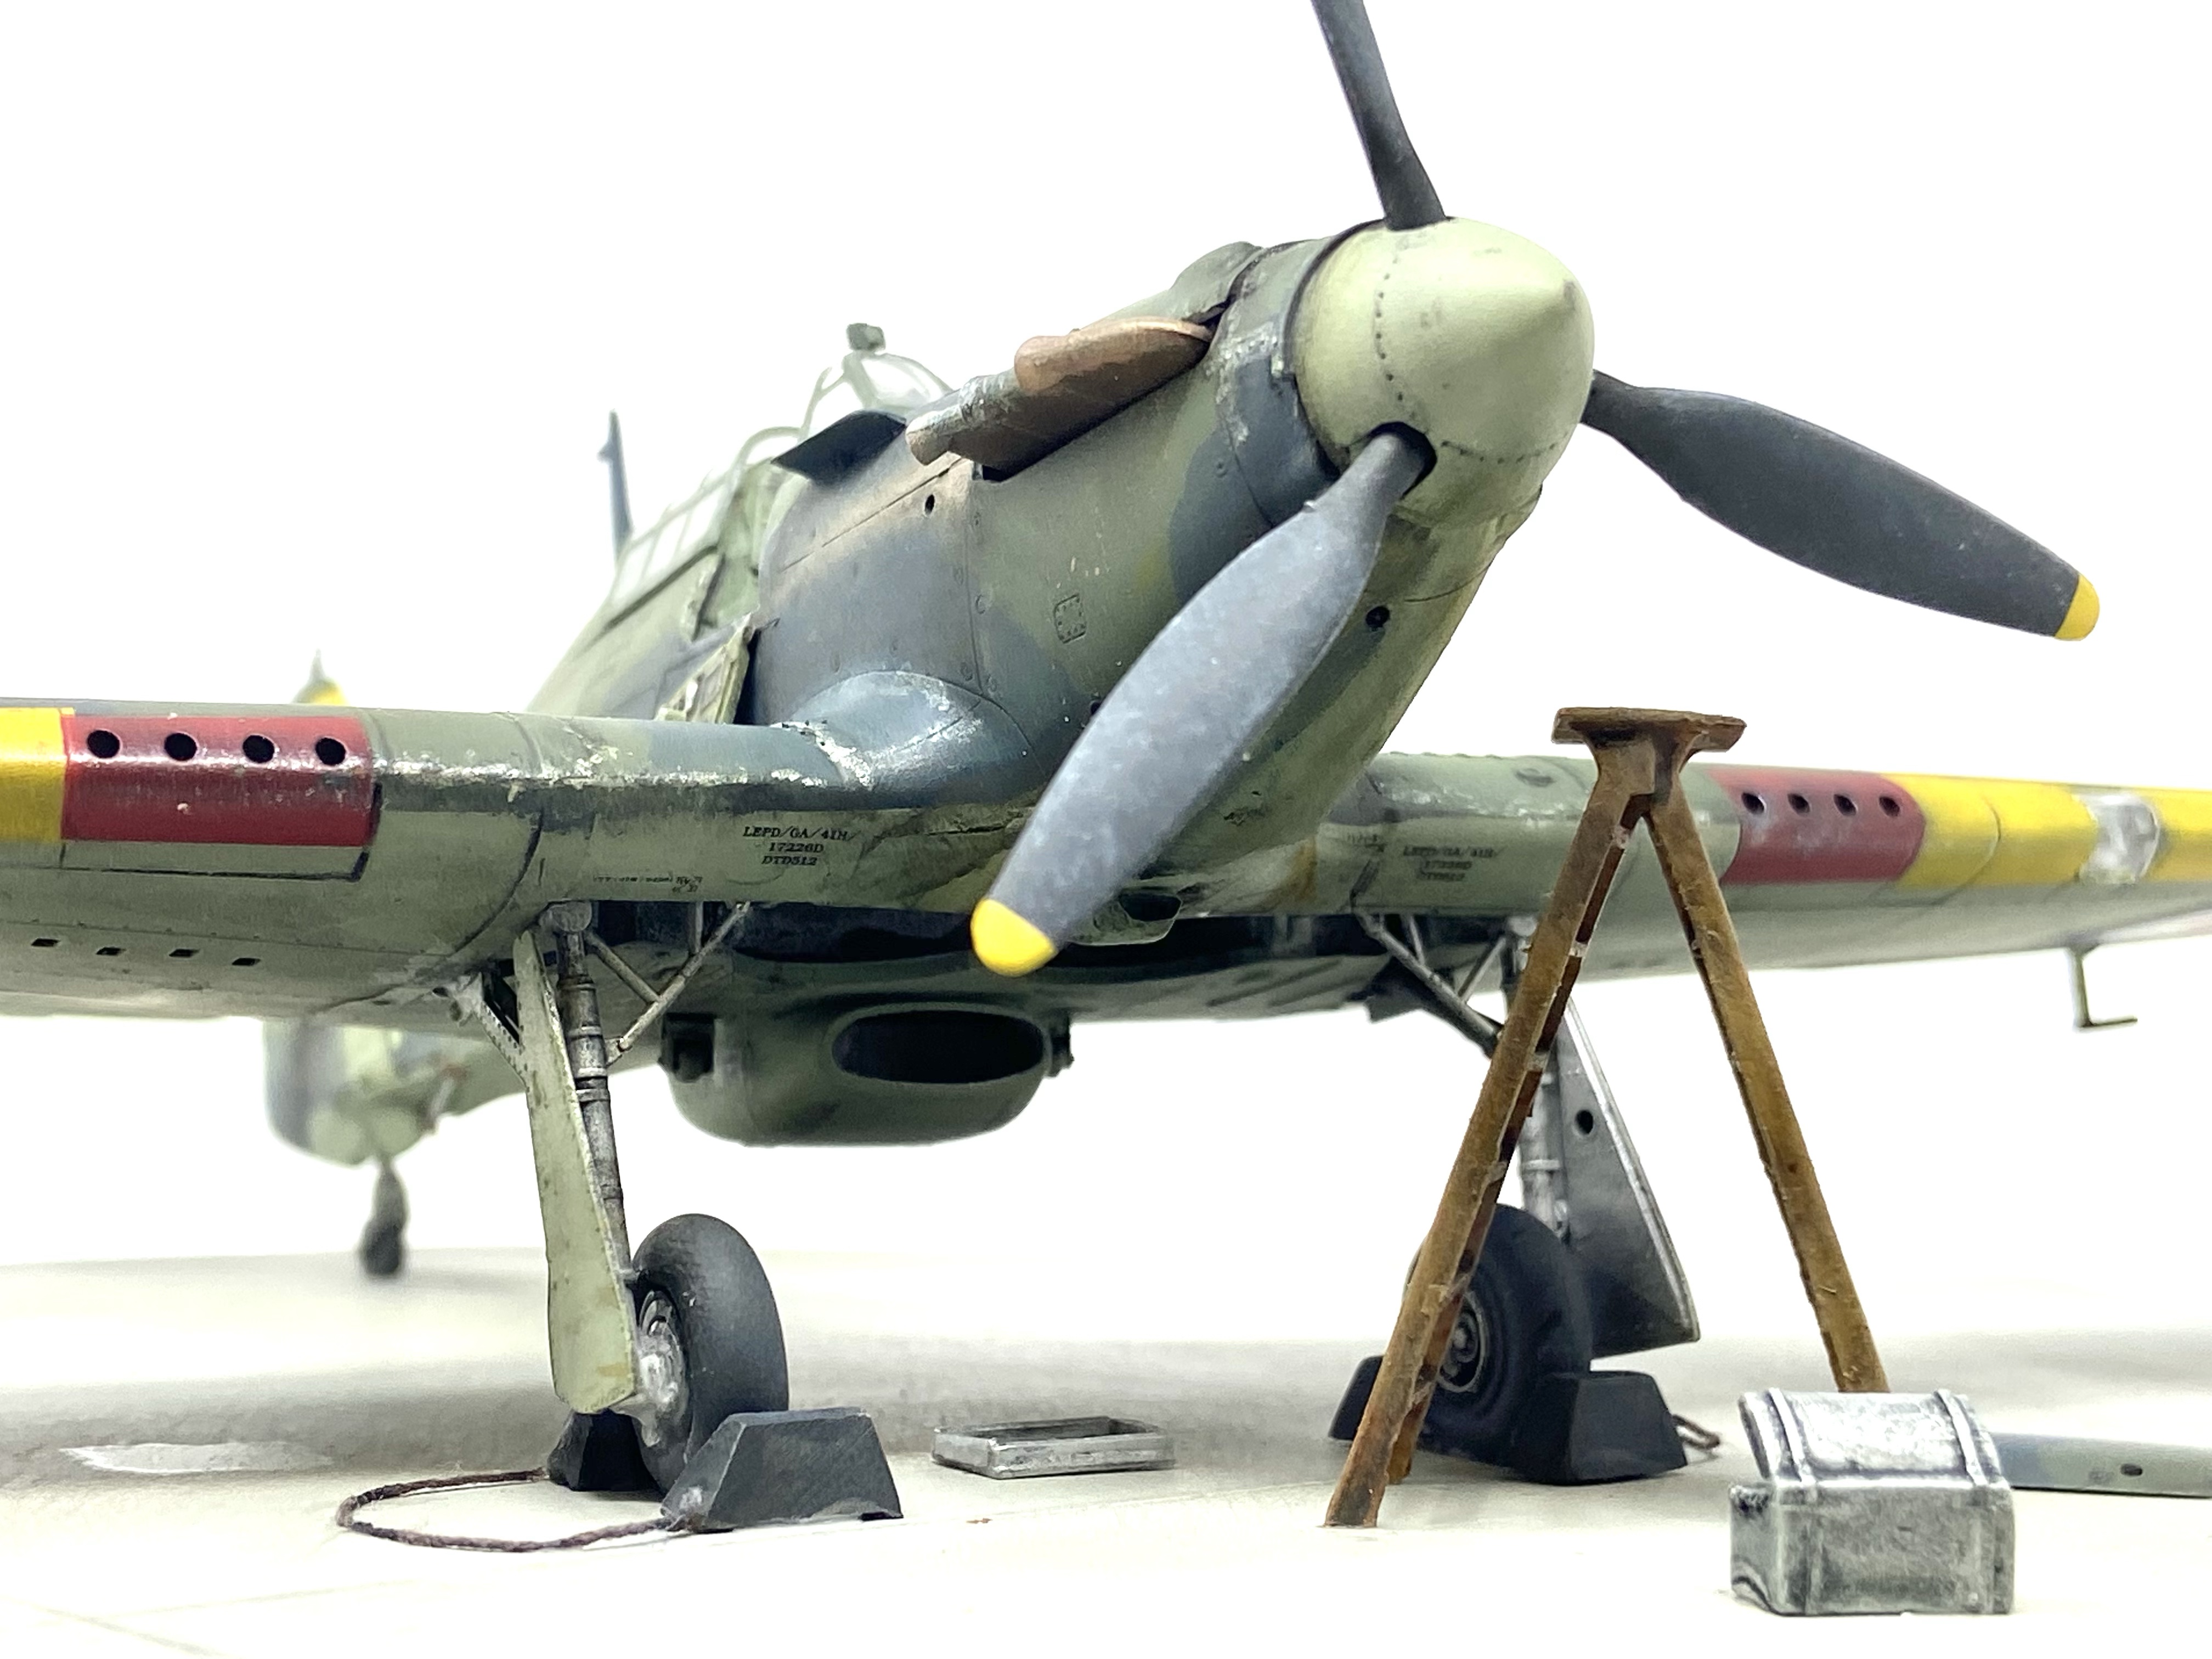
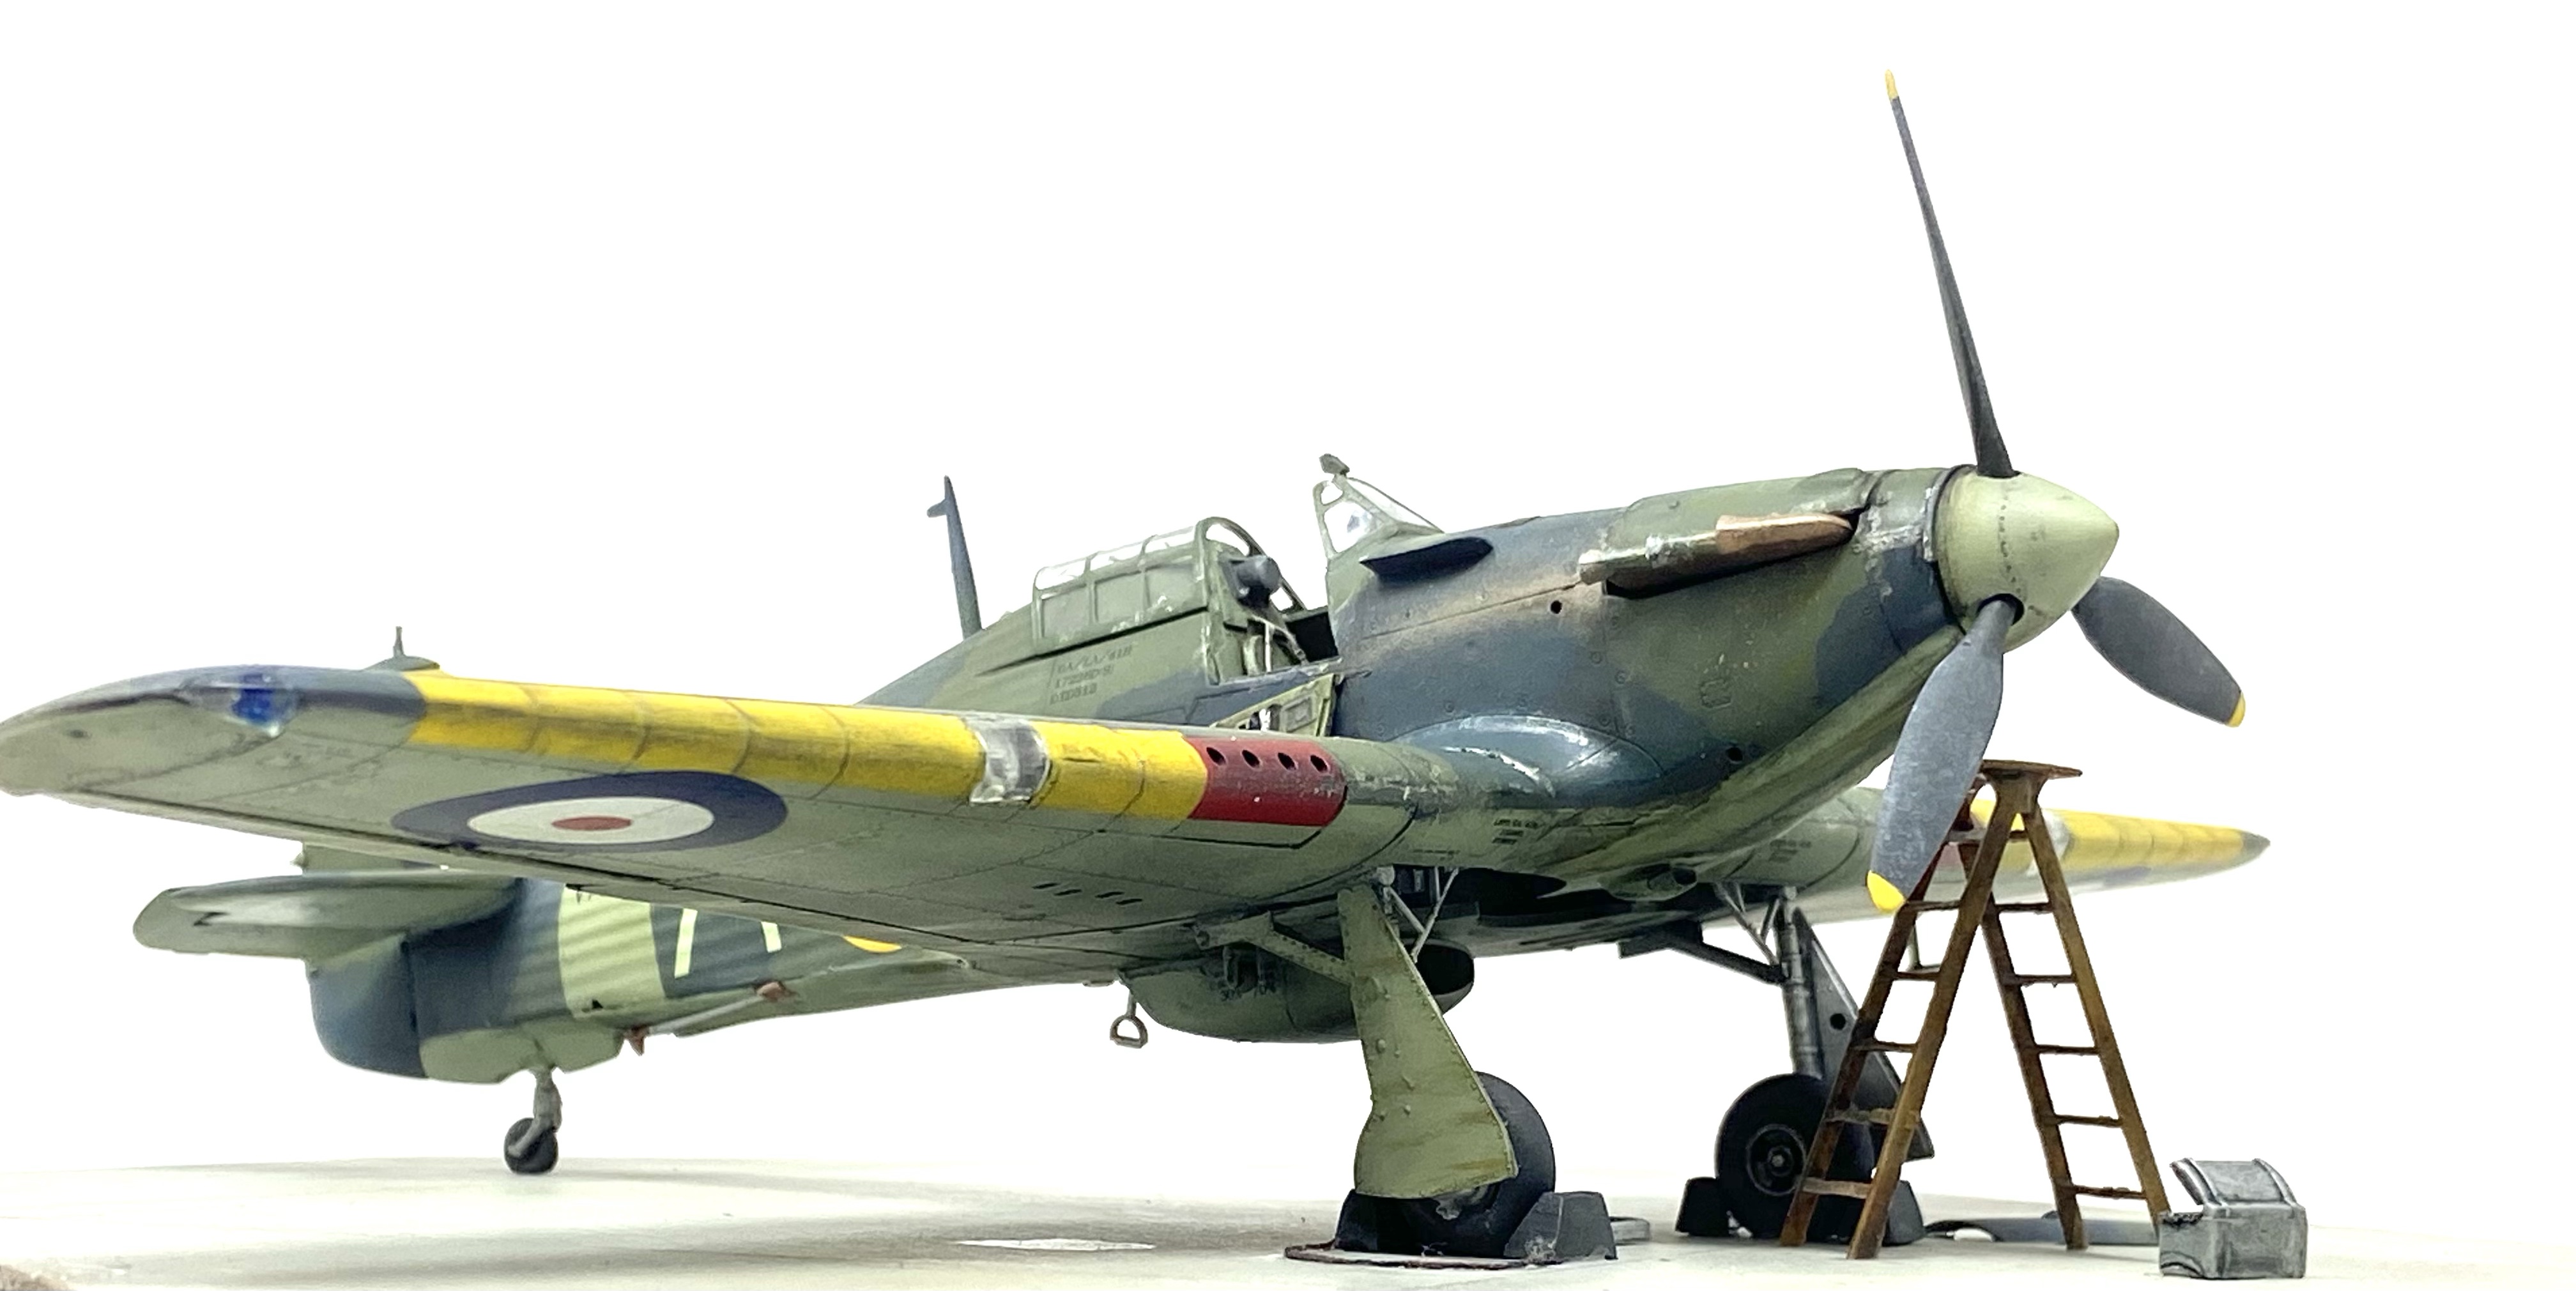
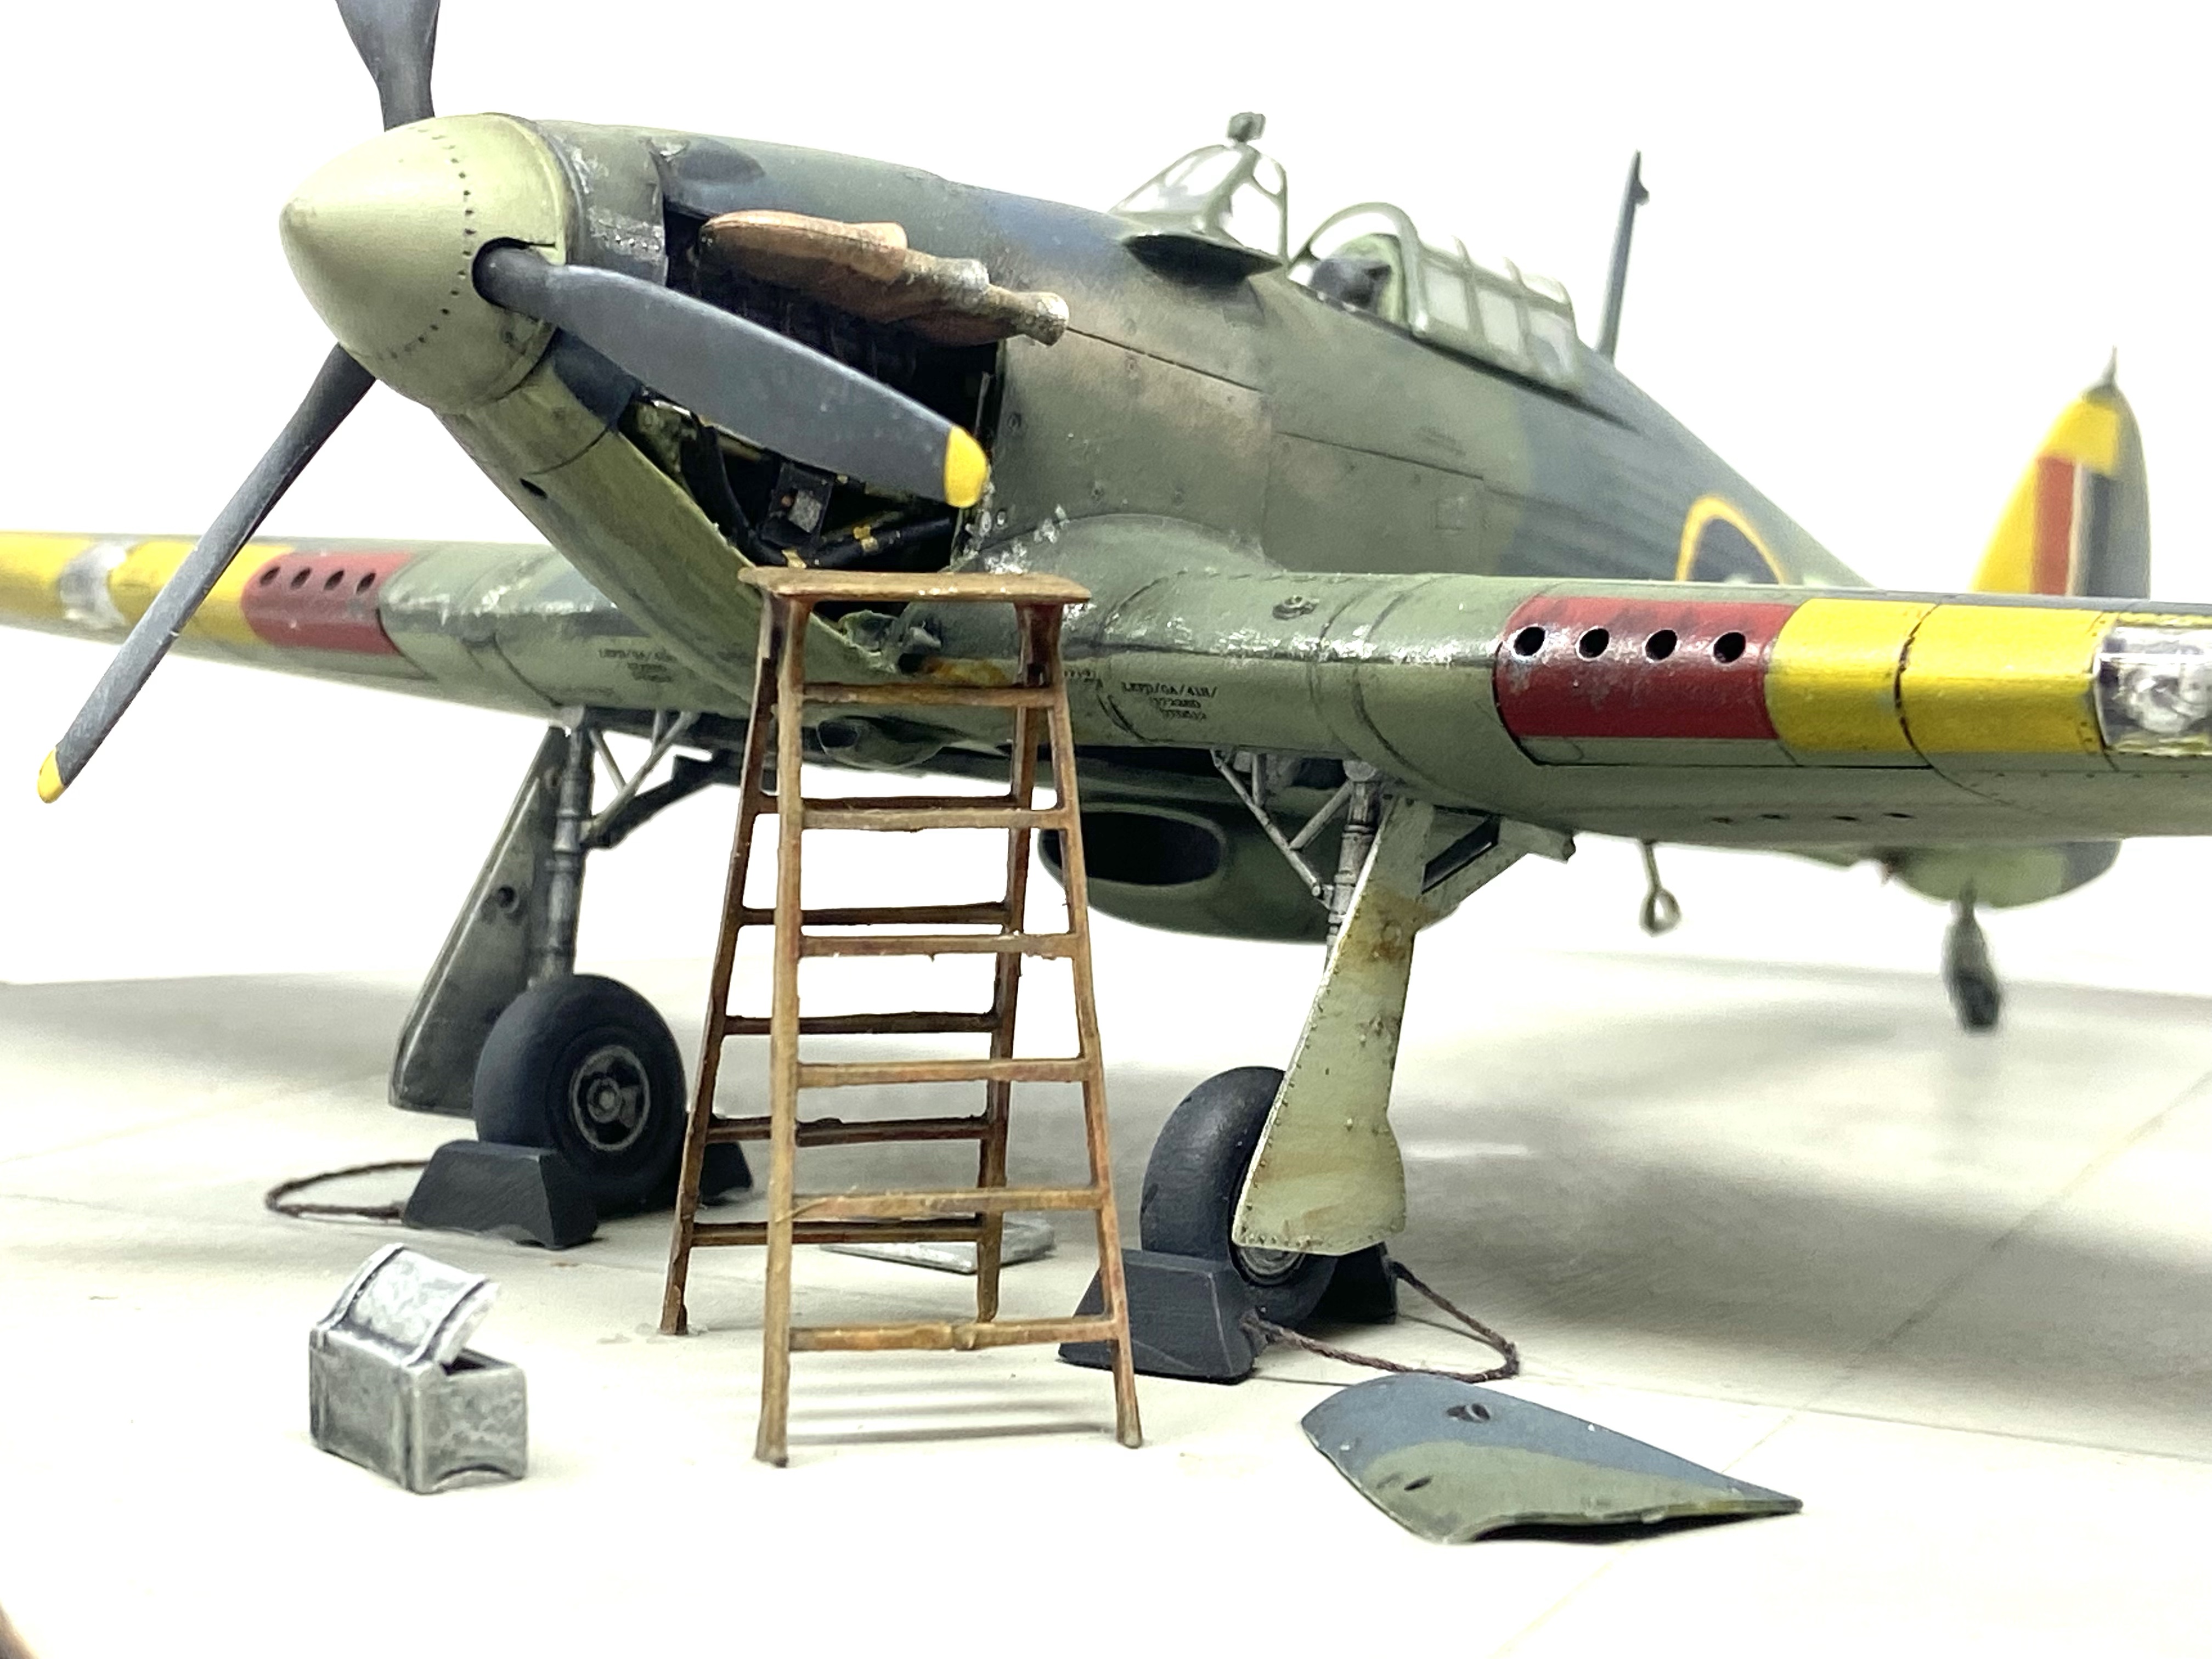
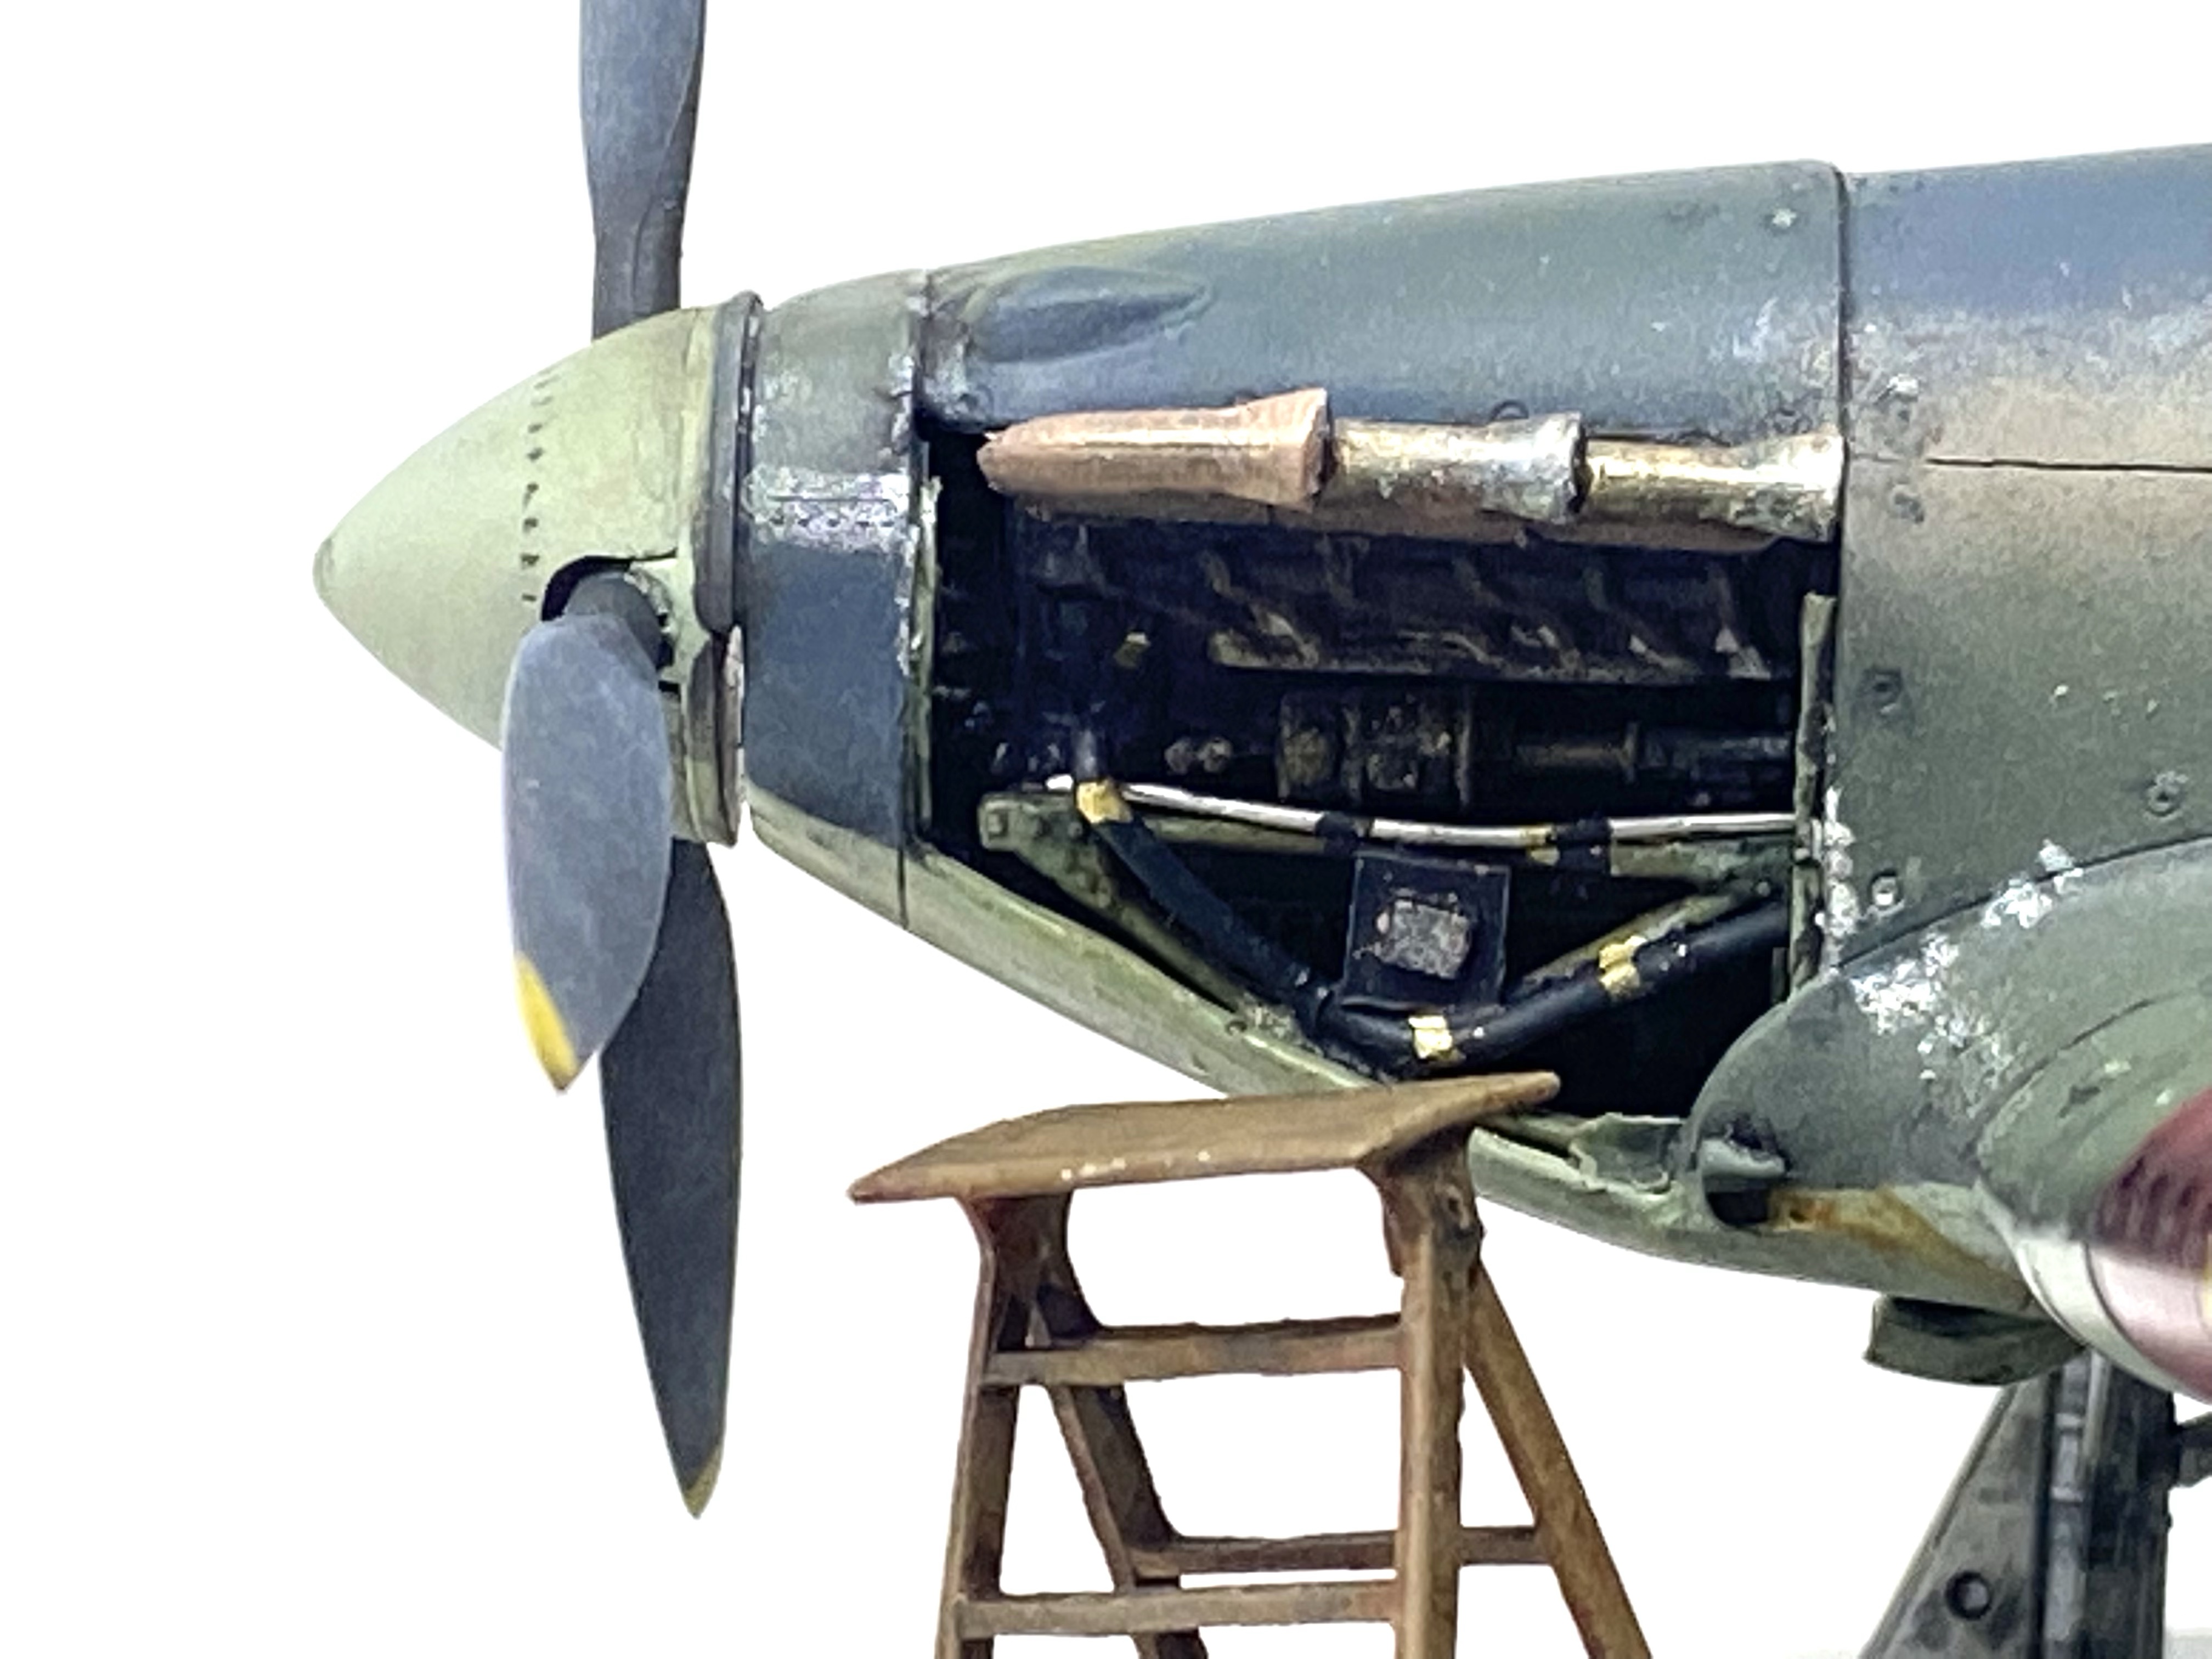
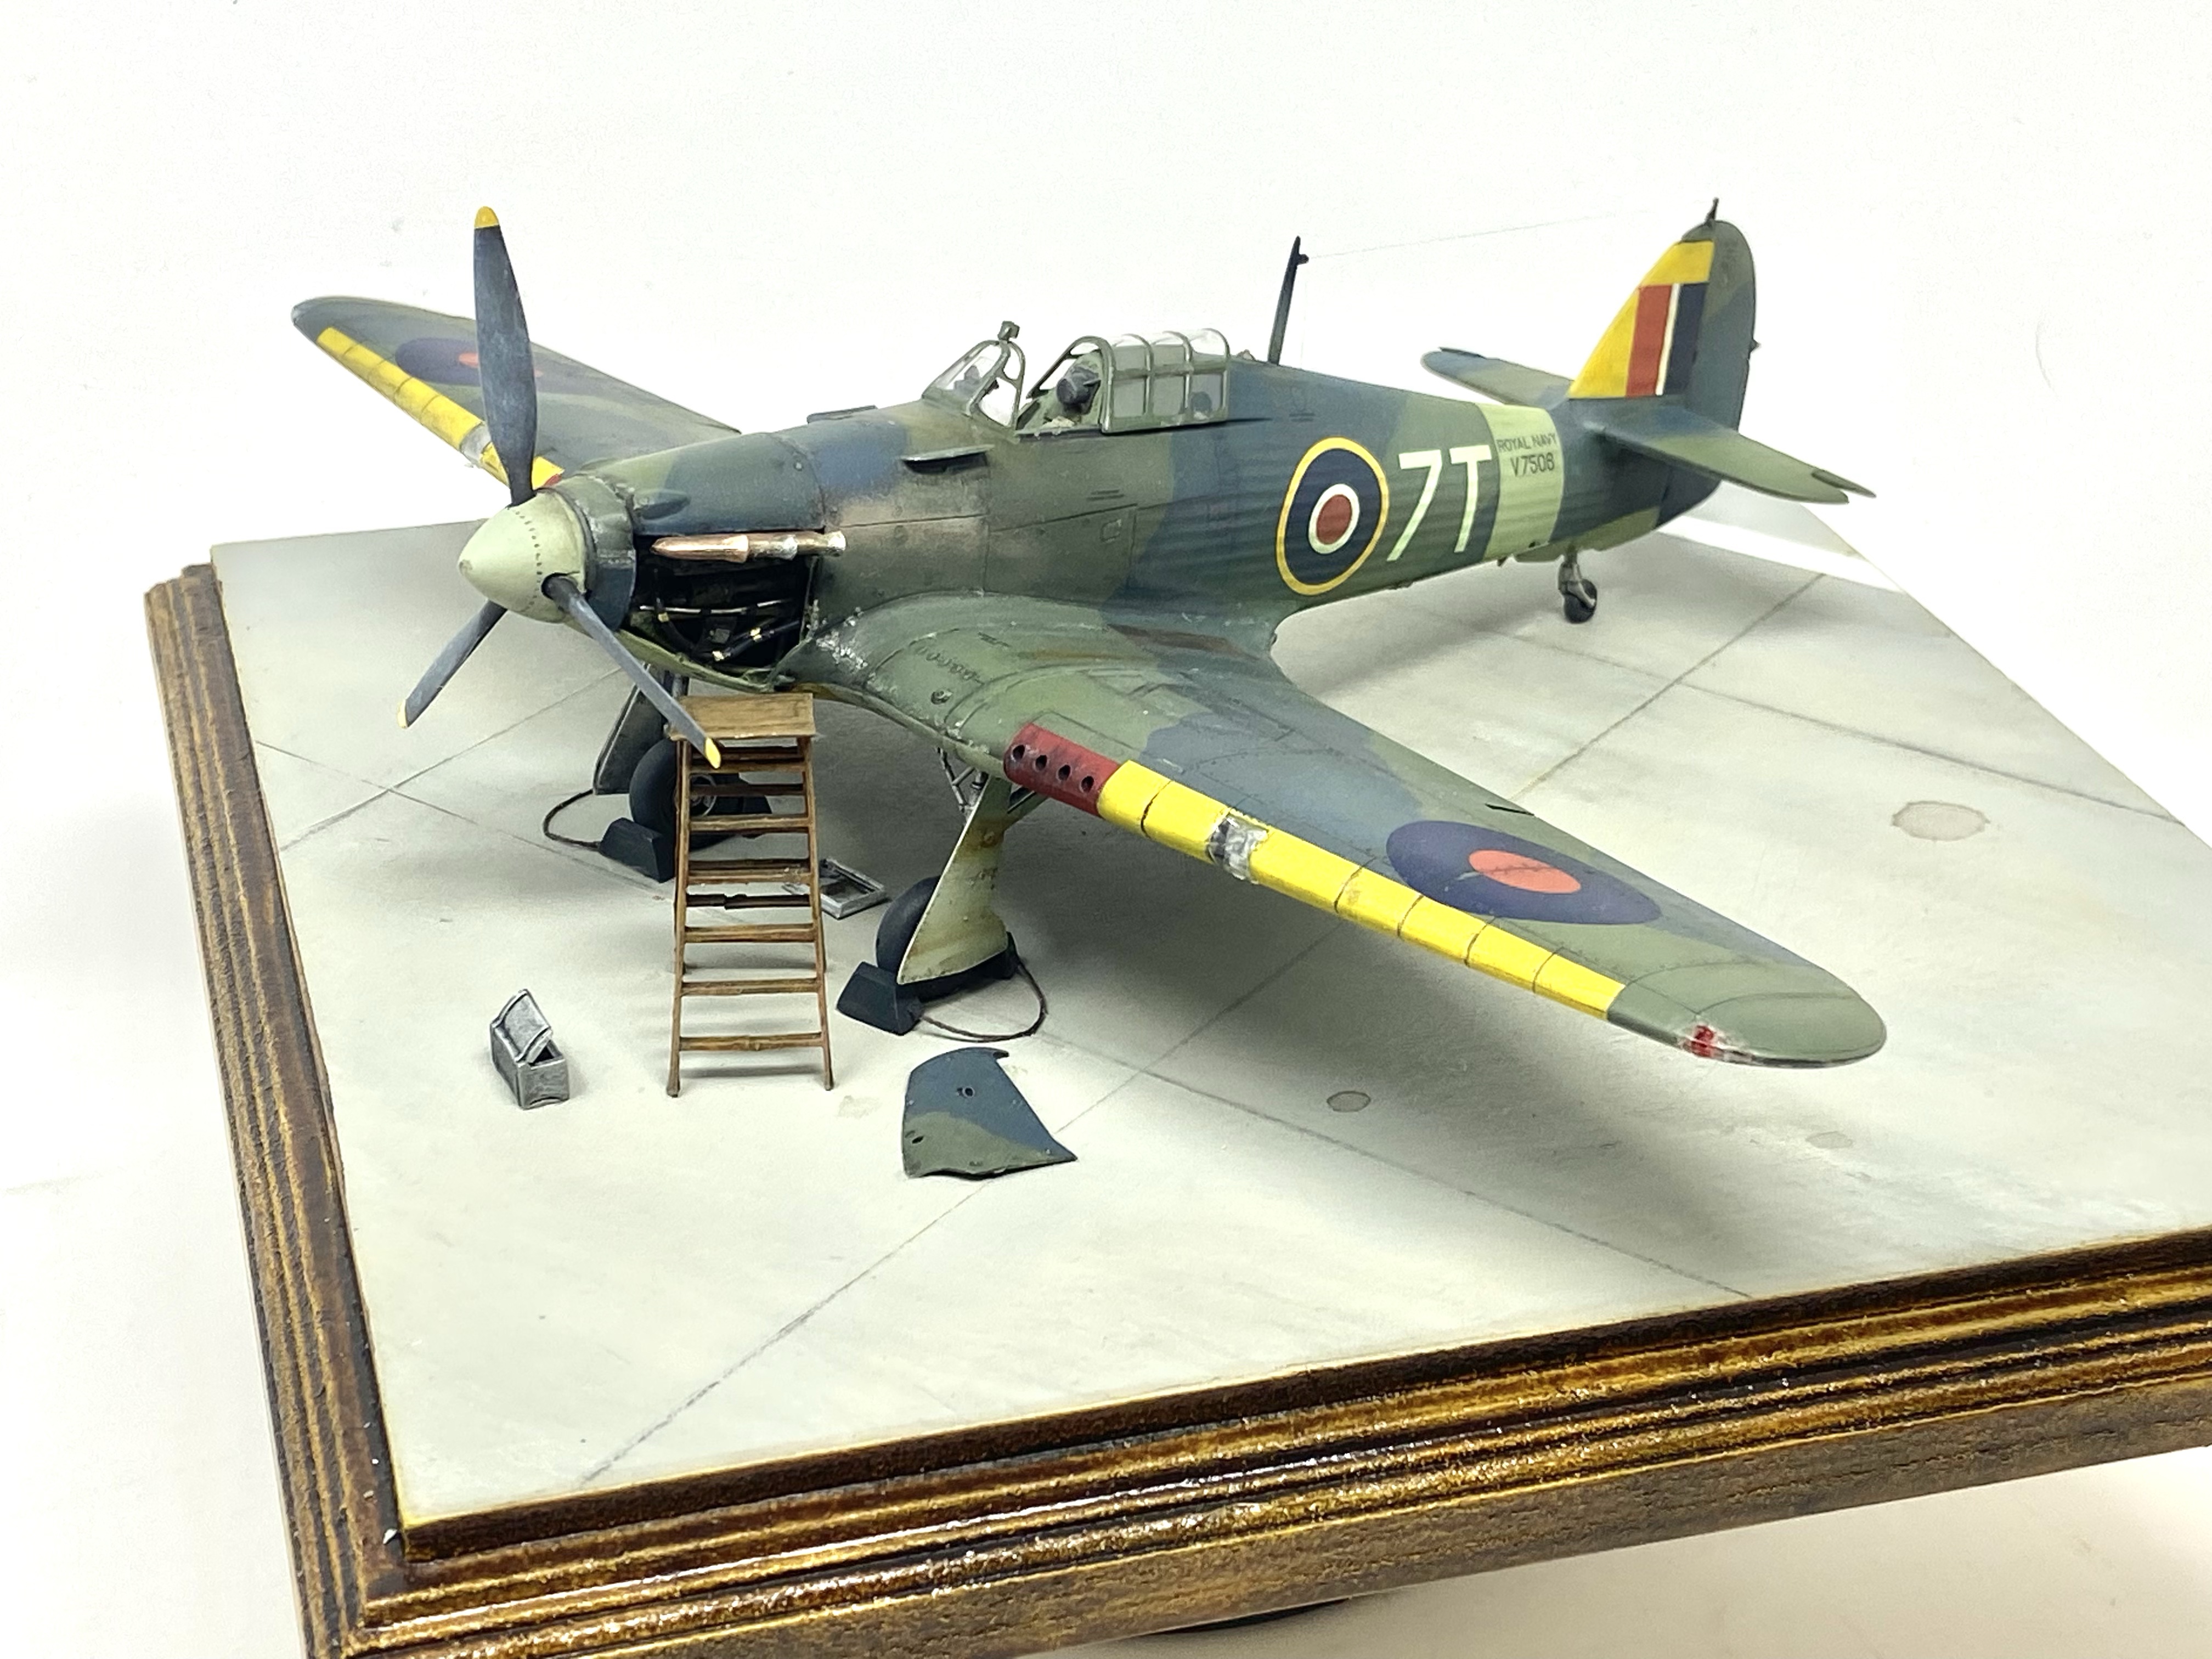
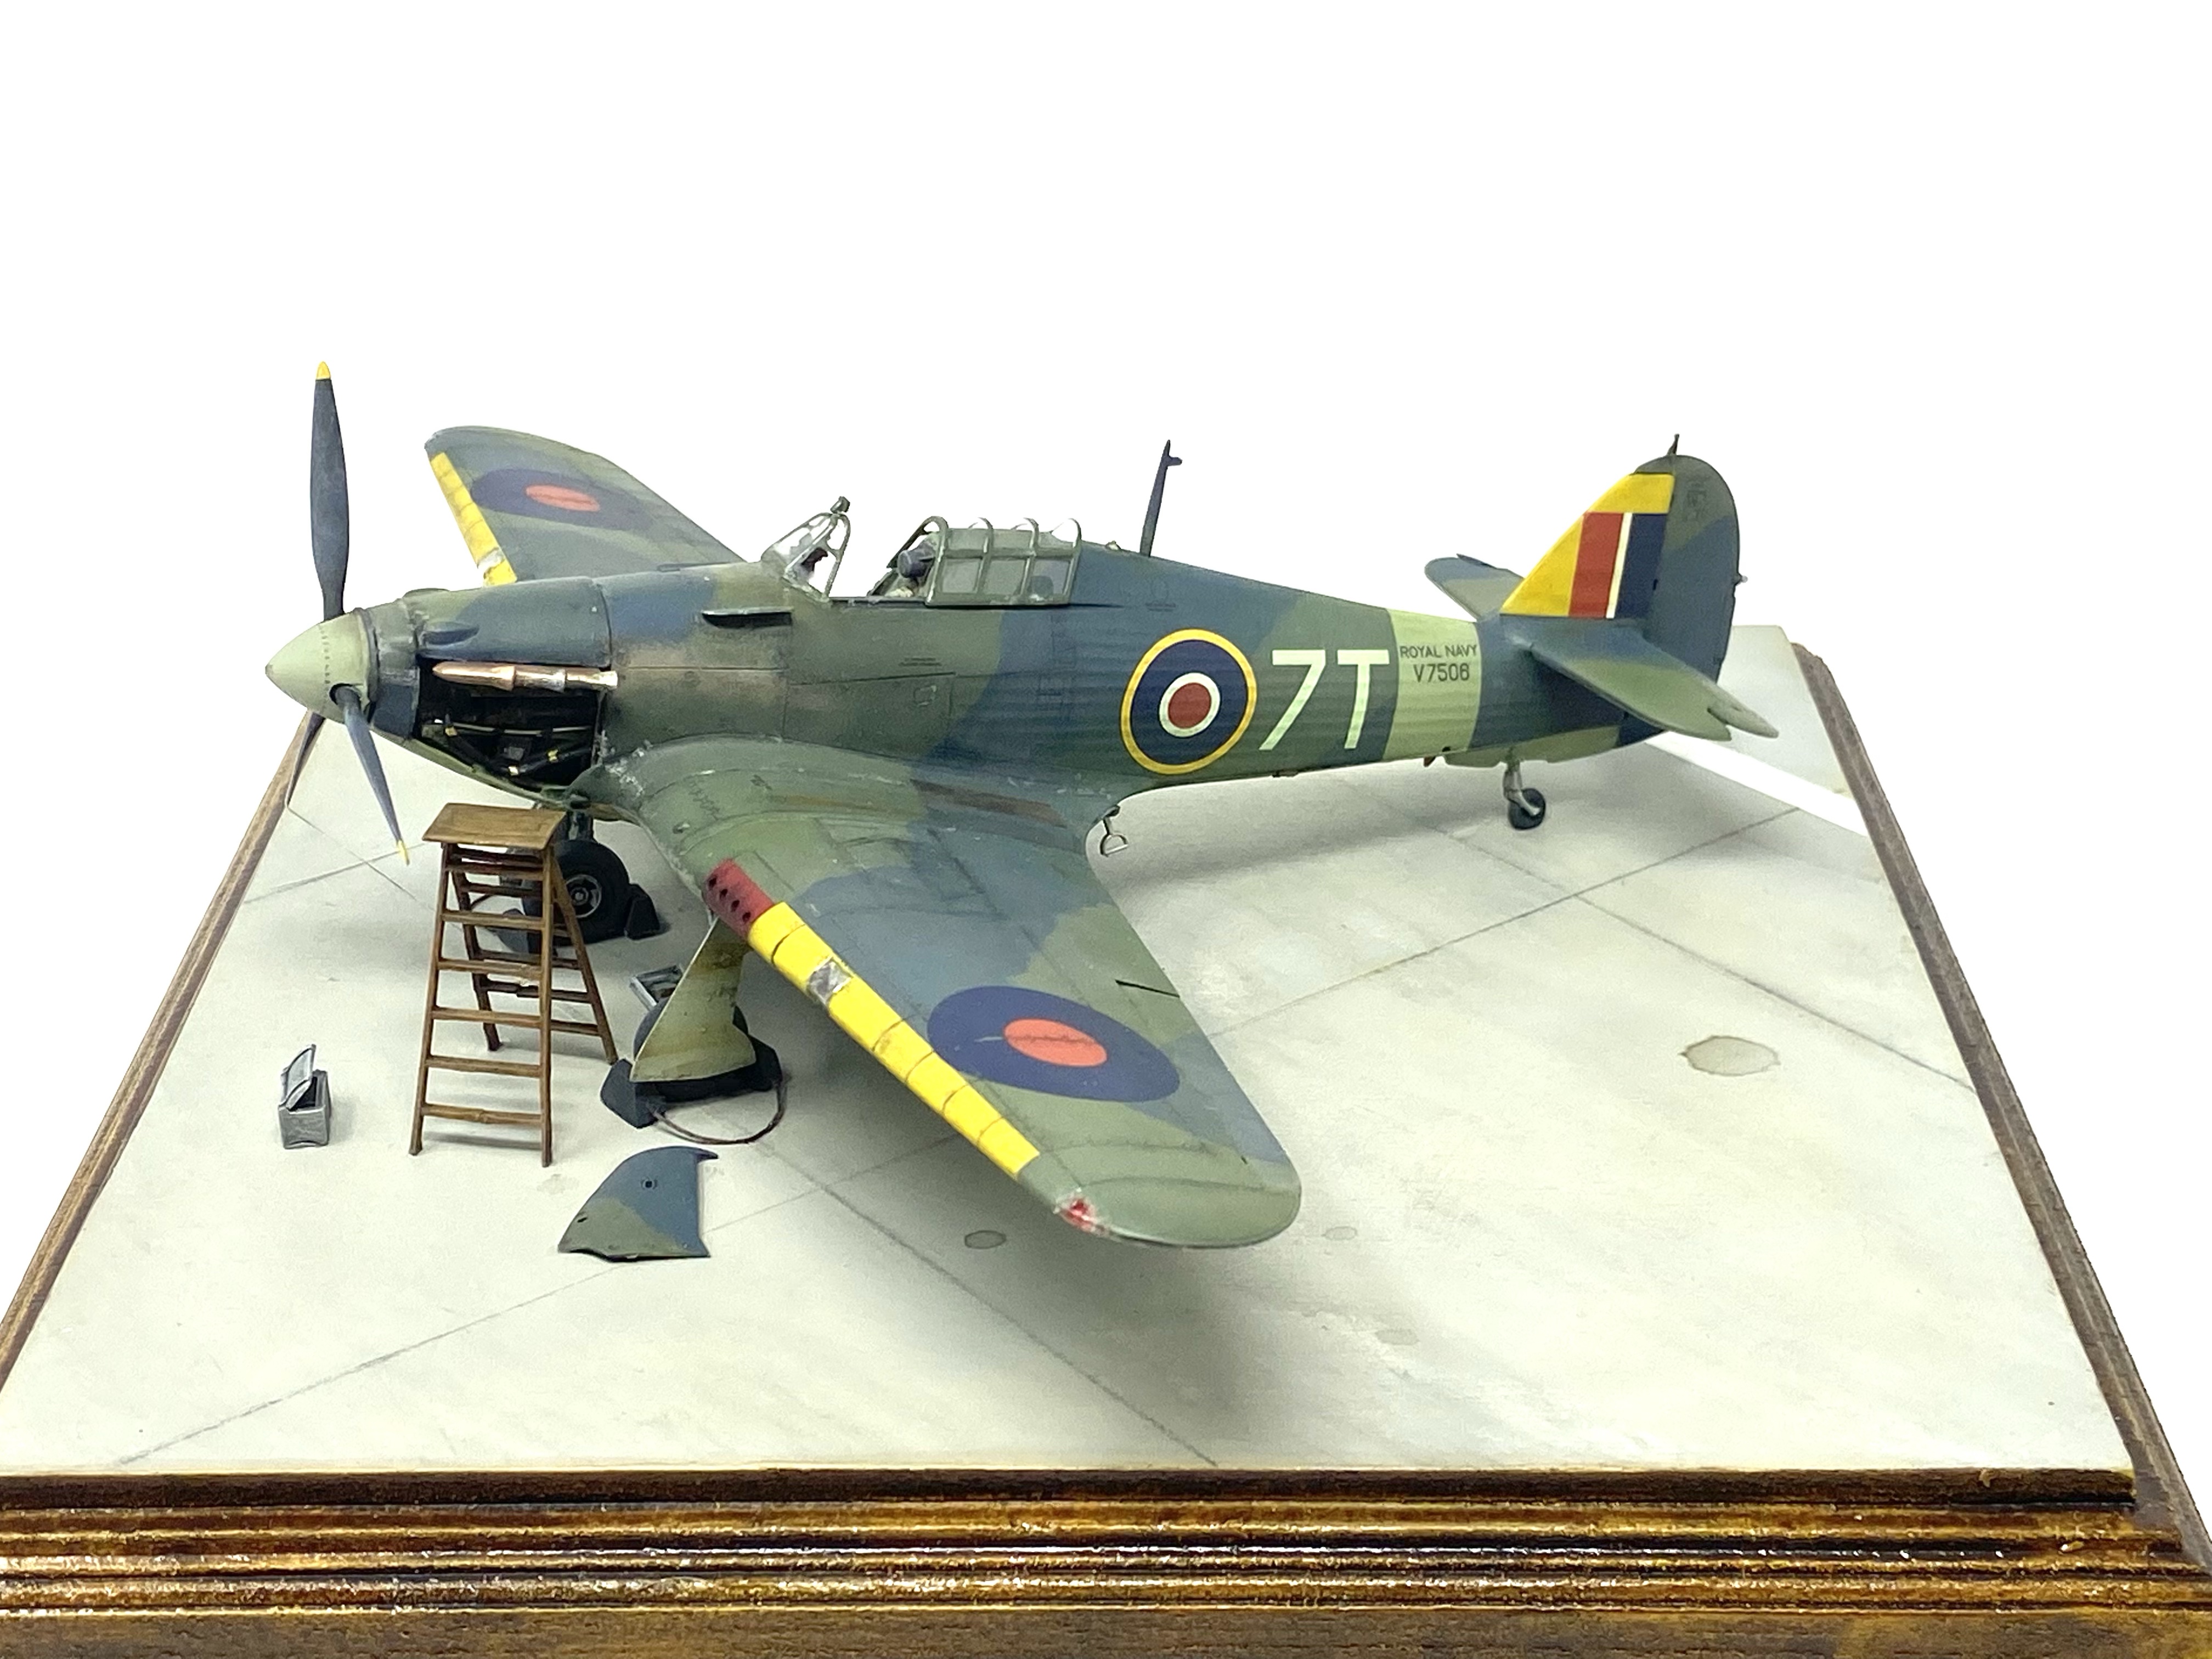
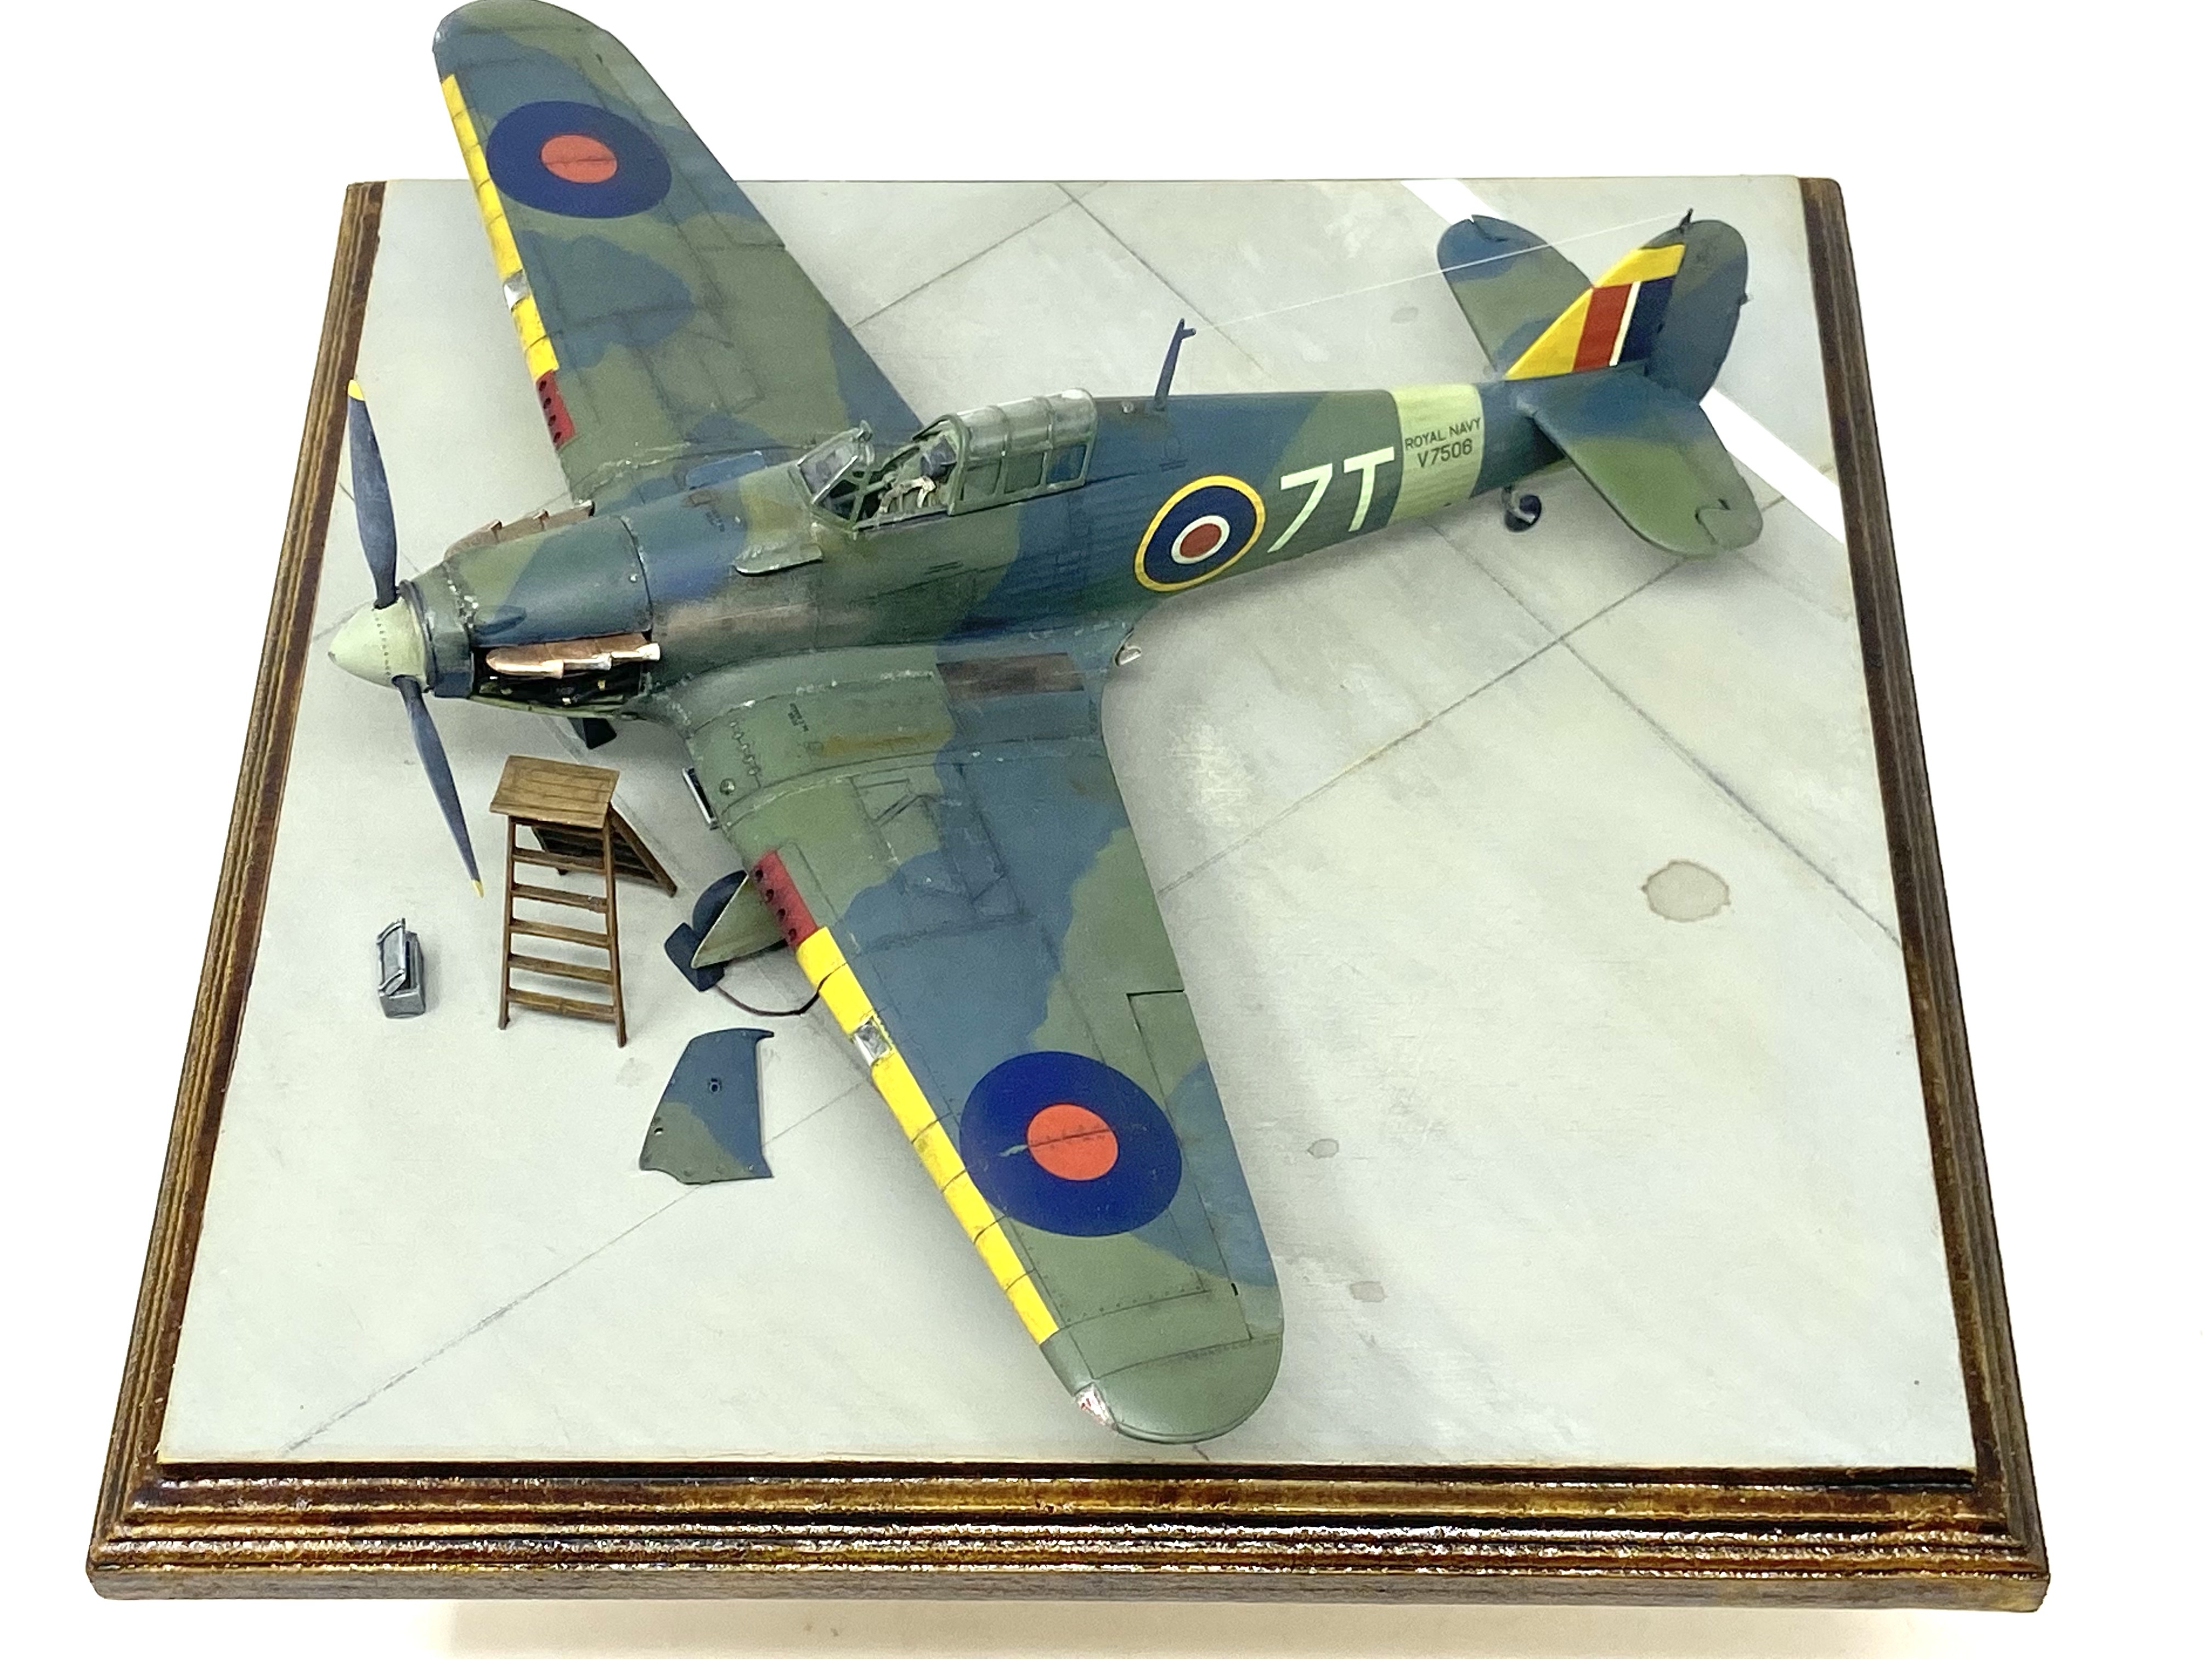
After putting the cockpit together, the rest of the build was very straight forward. The next step was to assemble and paint the kits Merlin engine. I was quite pleased with the level of detail in the finished piece , but I fitted it to the fuselage I saw that it was out of scale, being undersized. I got around this problem by just adding extra wire and hoses to the port side of the engine and leaving only that side of the engine with its cowling removed. This led me to think of setting the model in a vignette maintenance scene.
I painted the engine gloss black then I dry brushed it with metallic pigments to bring out the details.

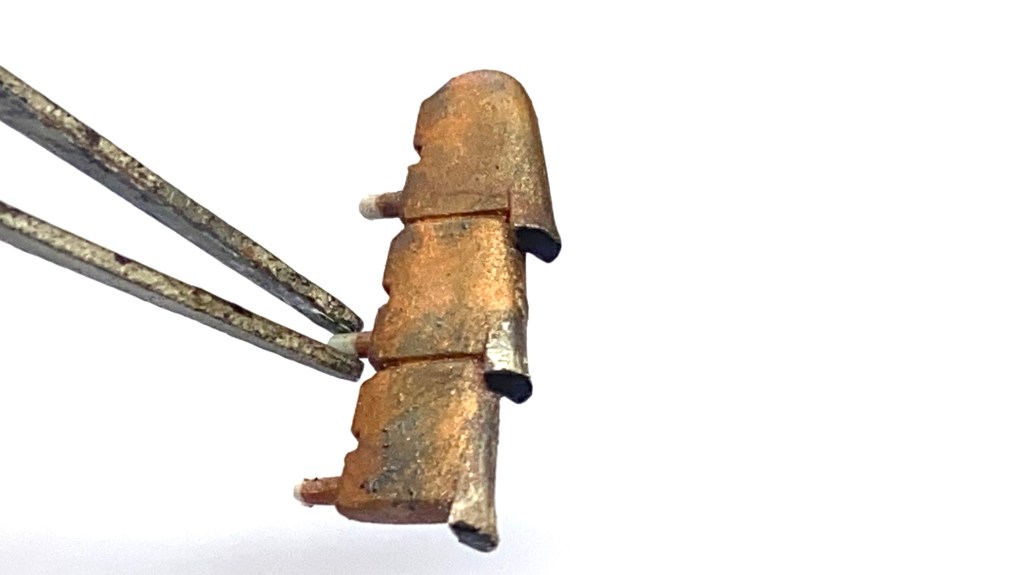
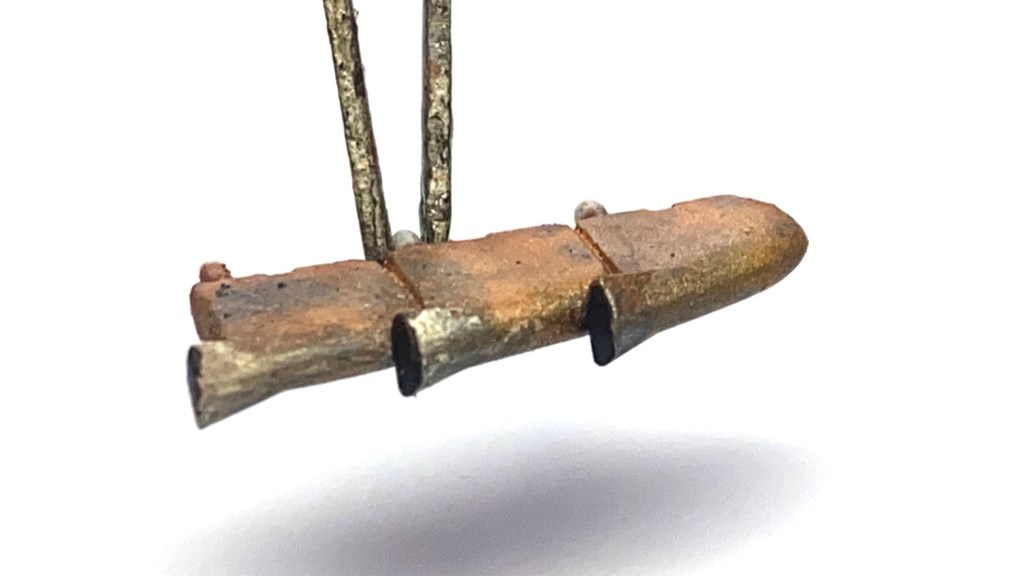
I used a similar technique on the exhaust stacks painting them in metallic bronze then adding successive layers of metallic pigments and oil paint rendering to get the burnt ash , high temperature look to the stacks.
It was also at this time my research pointed out to me that my Sea Hurricane should have exhaust shrouds fitted just above the exhaust stacks. This was an easy enough job to do. I drew an outline of each shroud onto plastic card and after cutting and shaping them to size they were attached to the model.
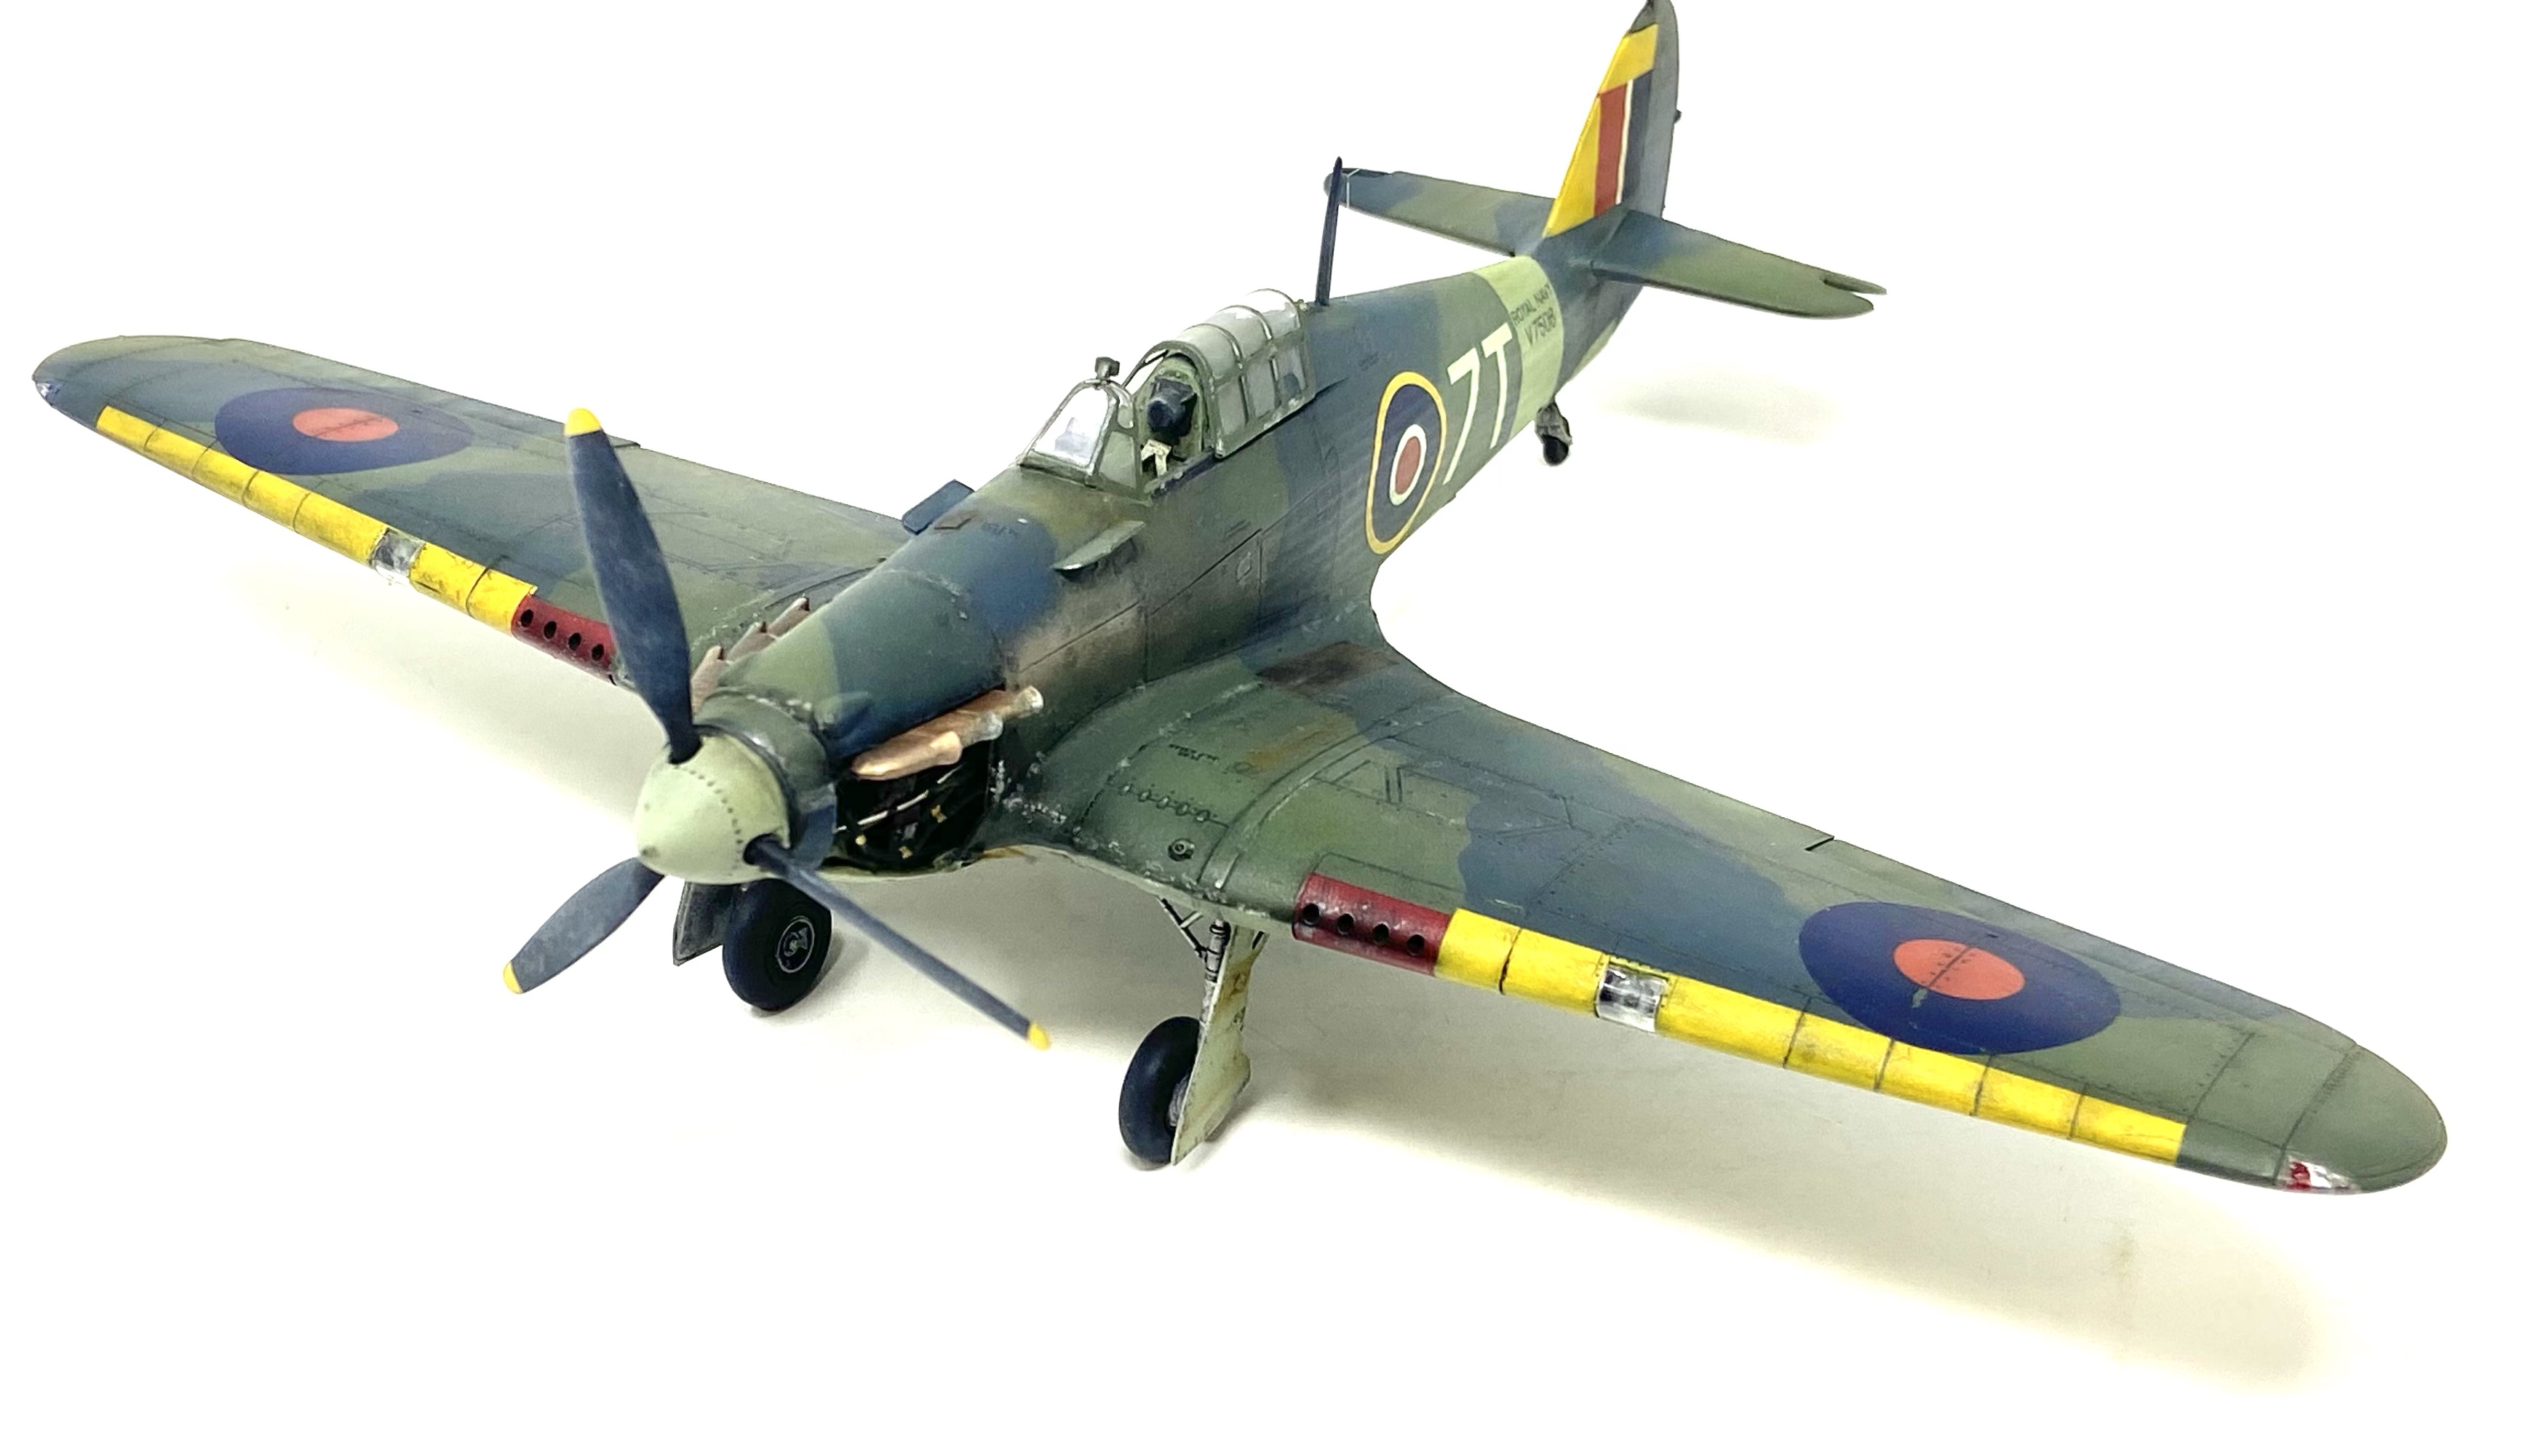
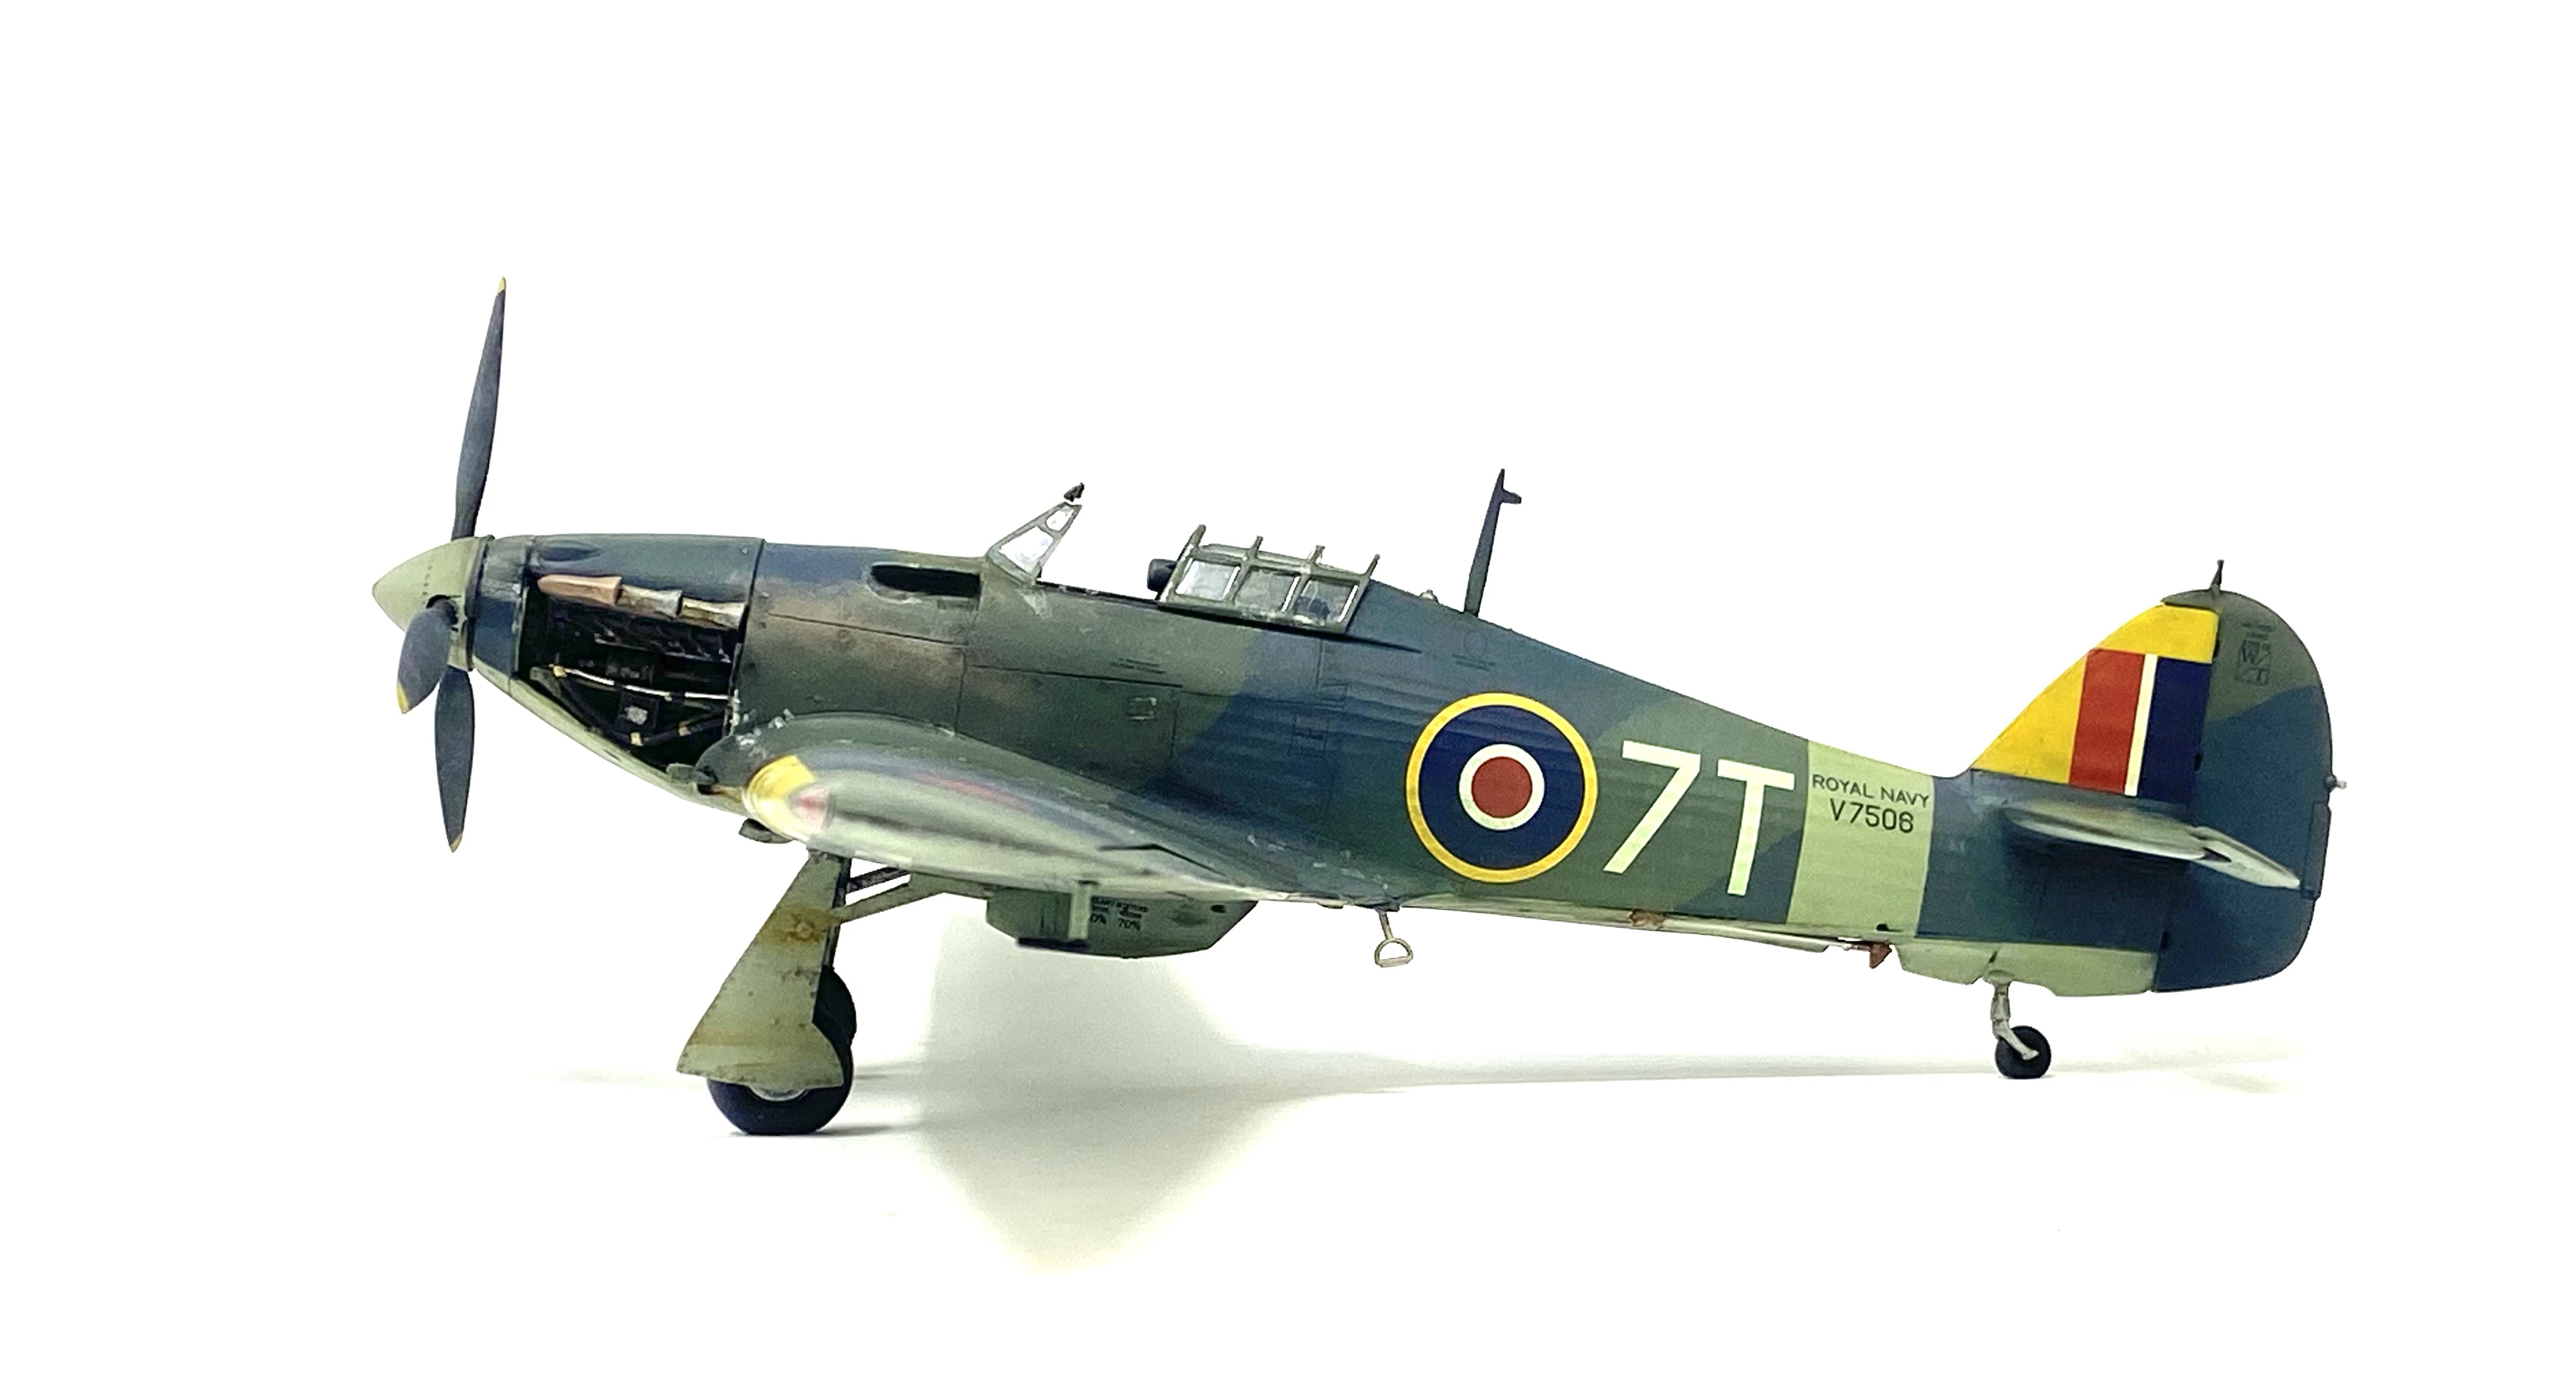
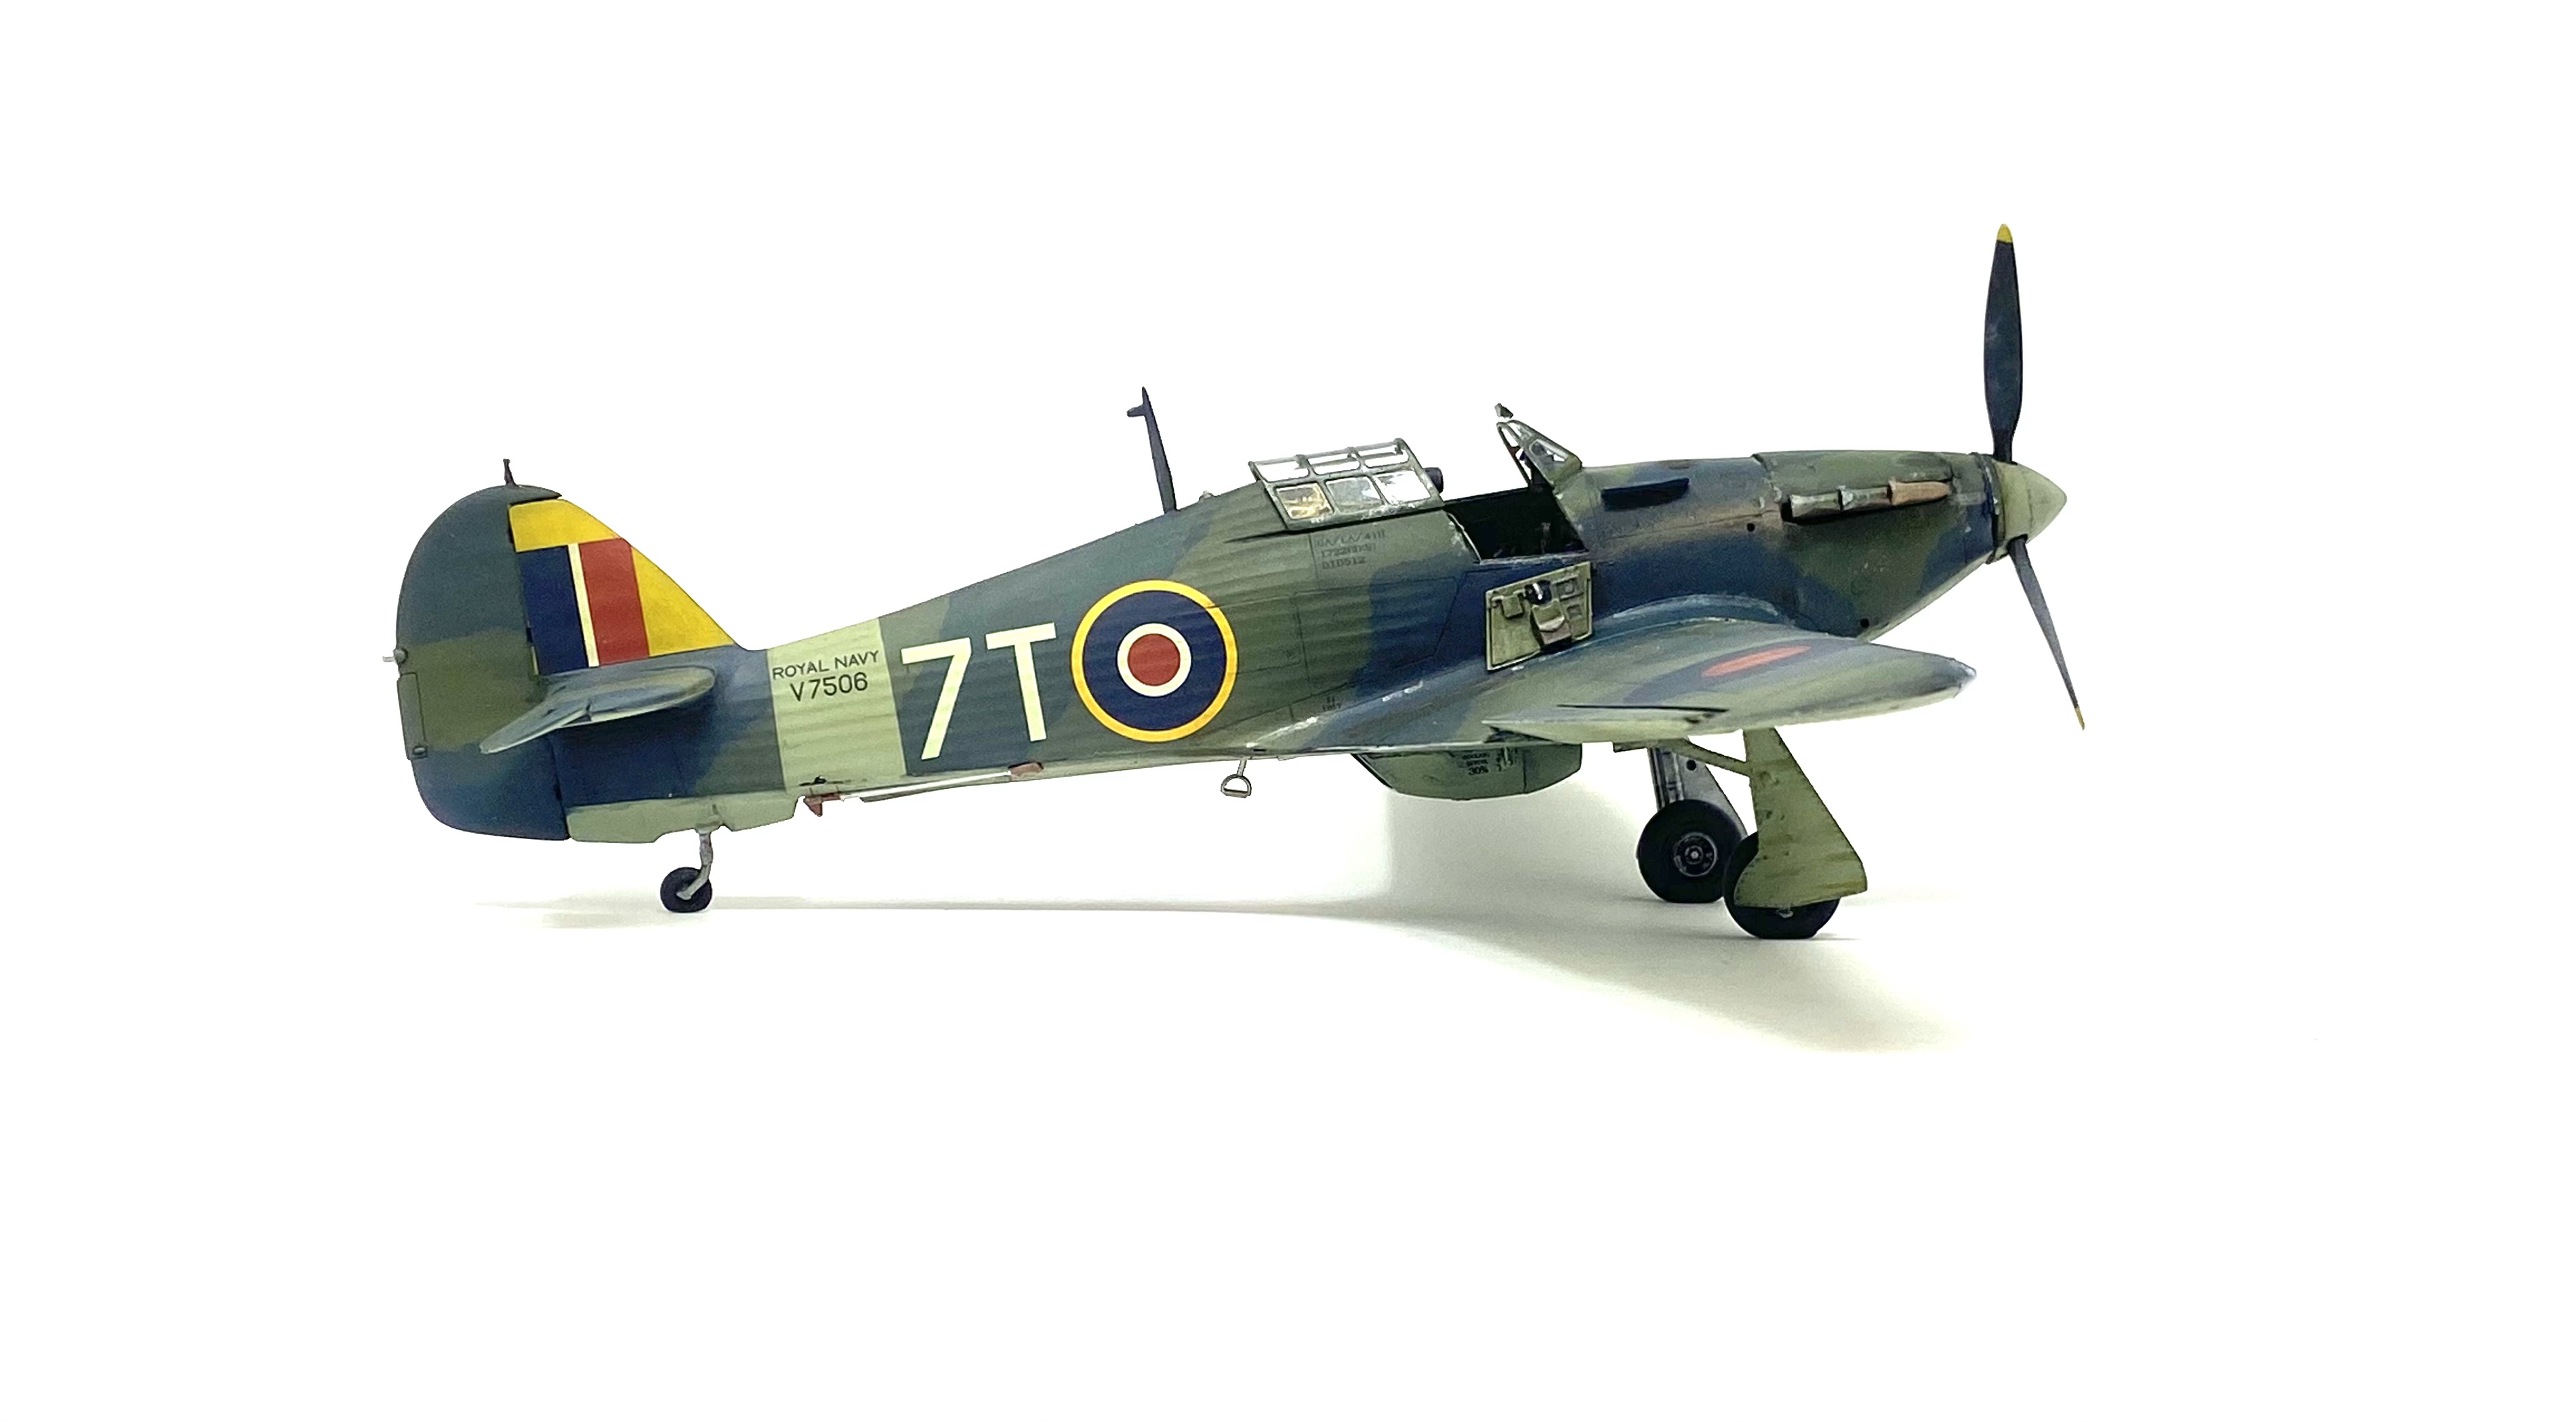
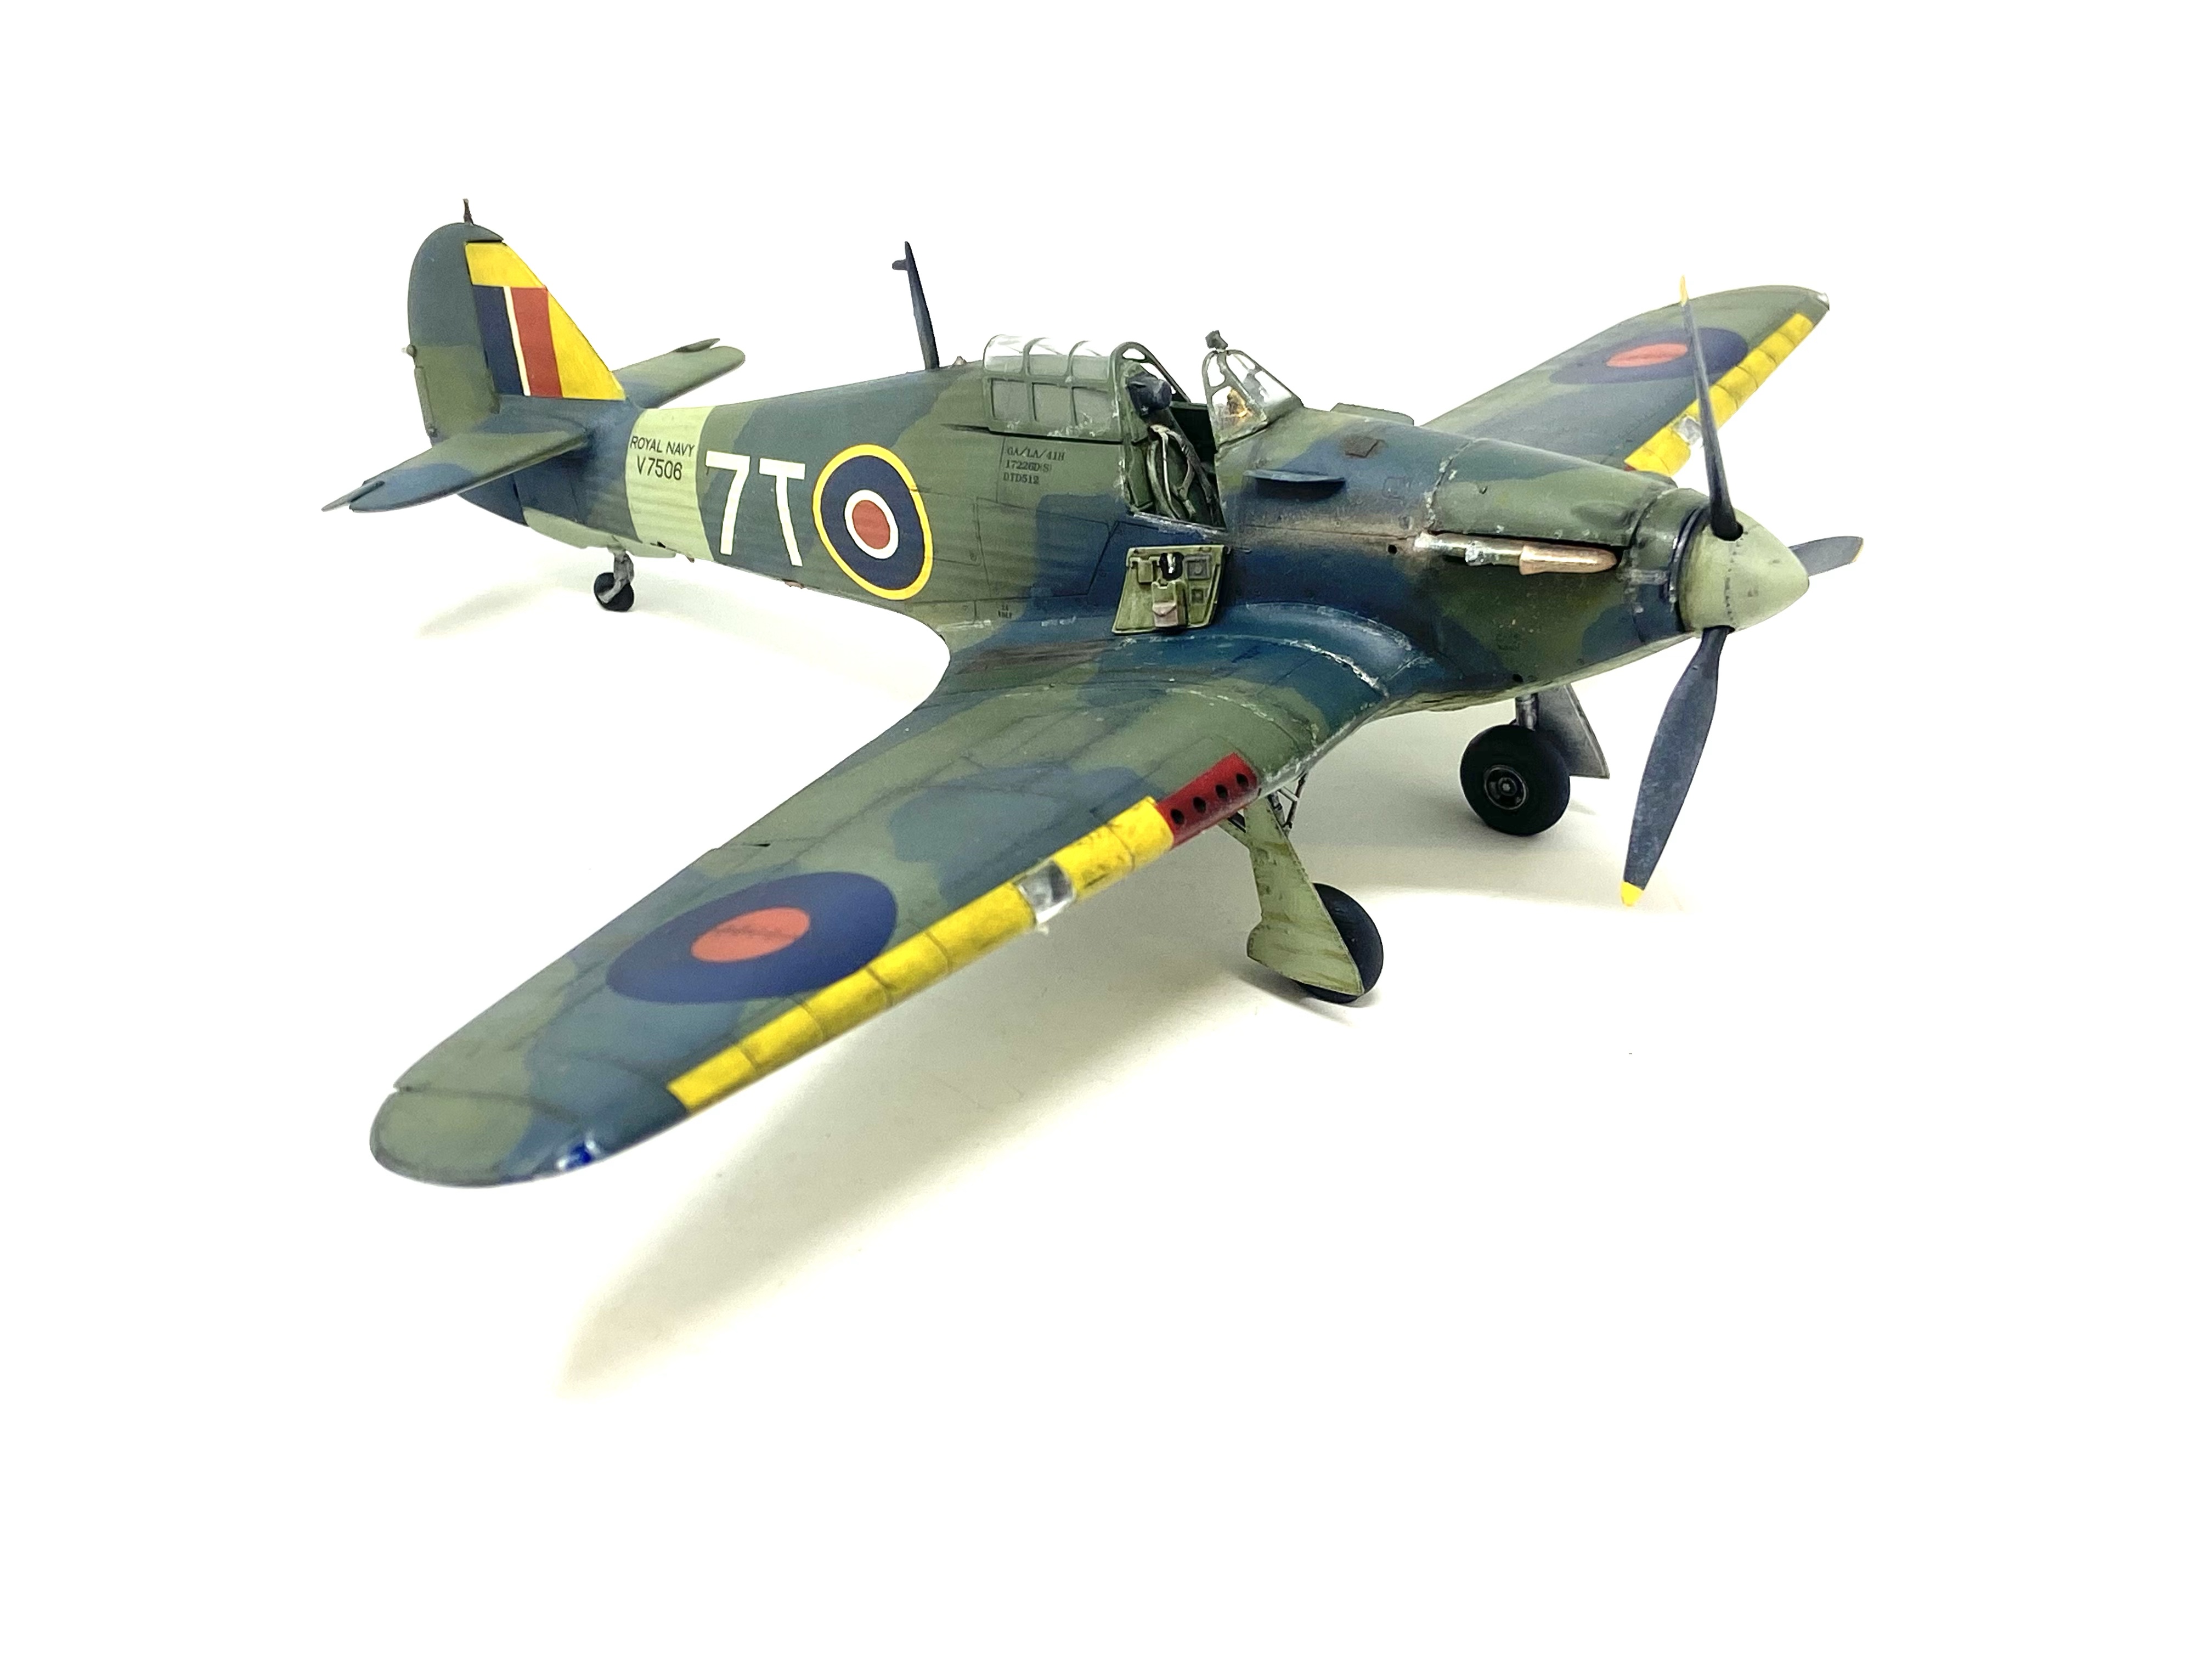
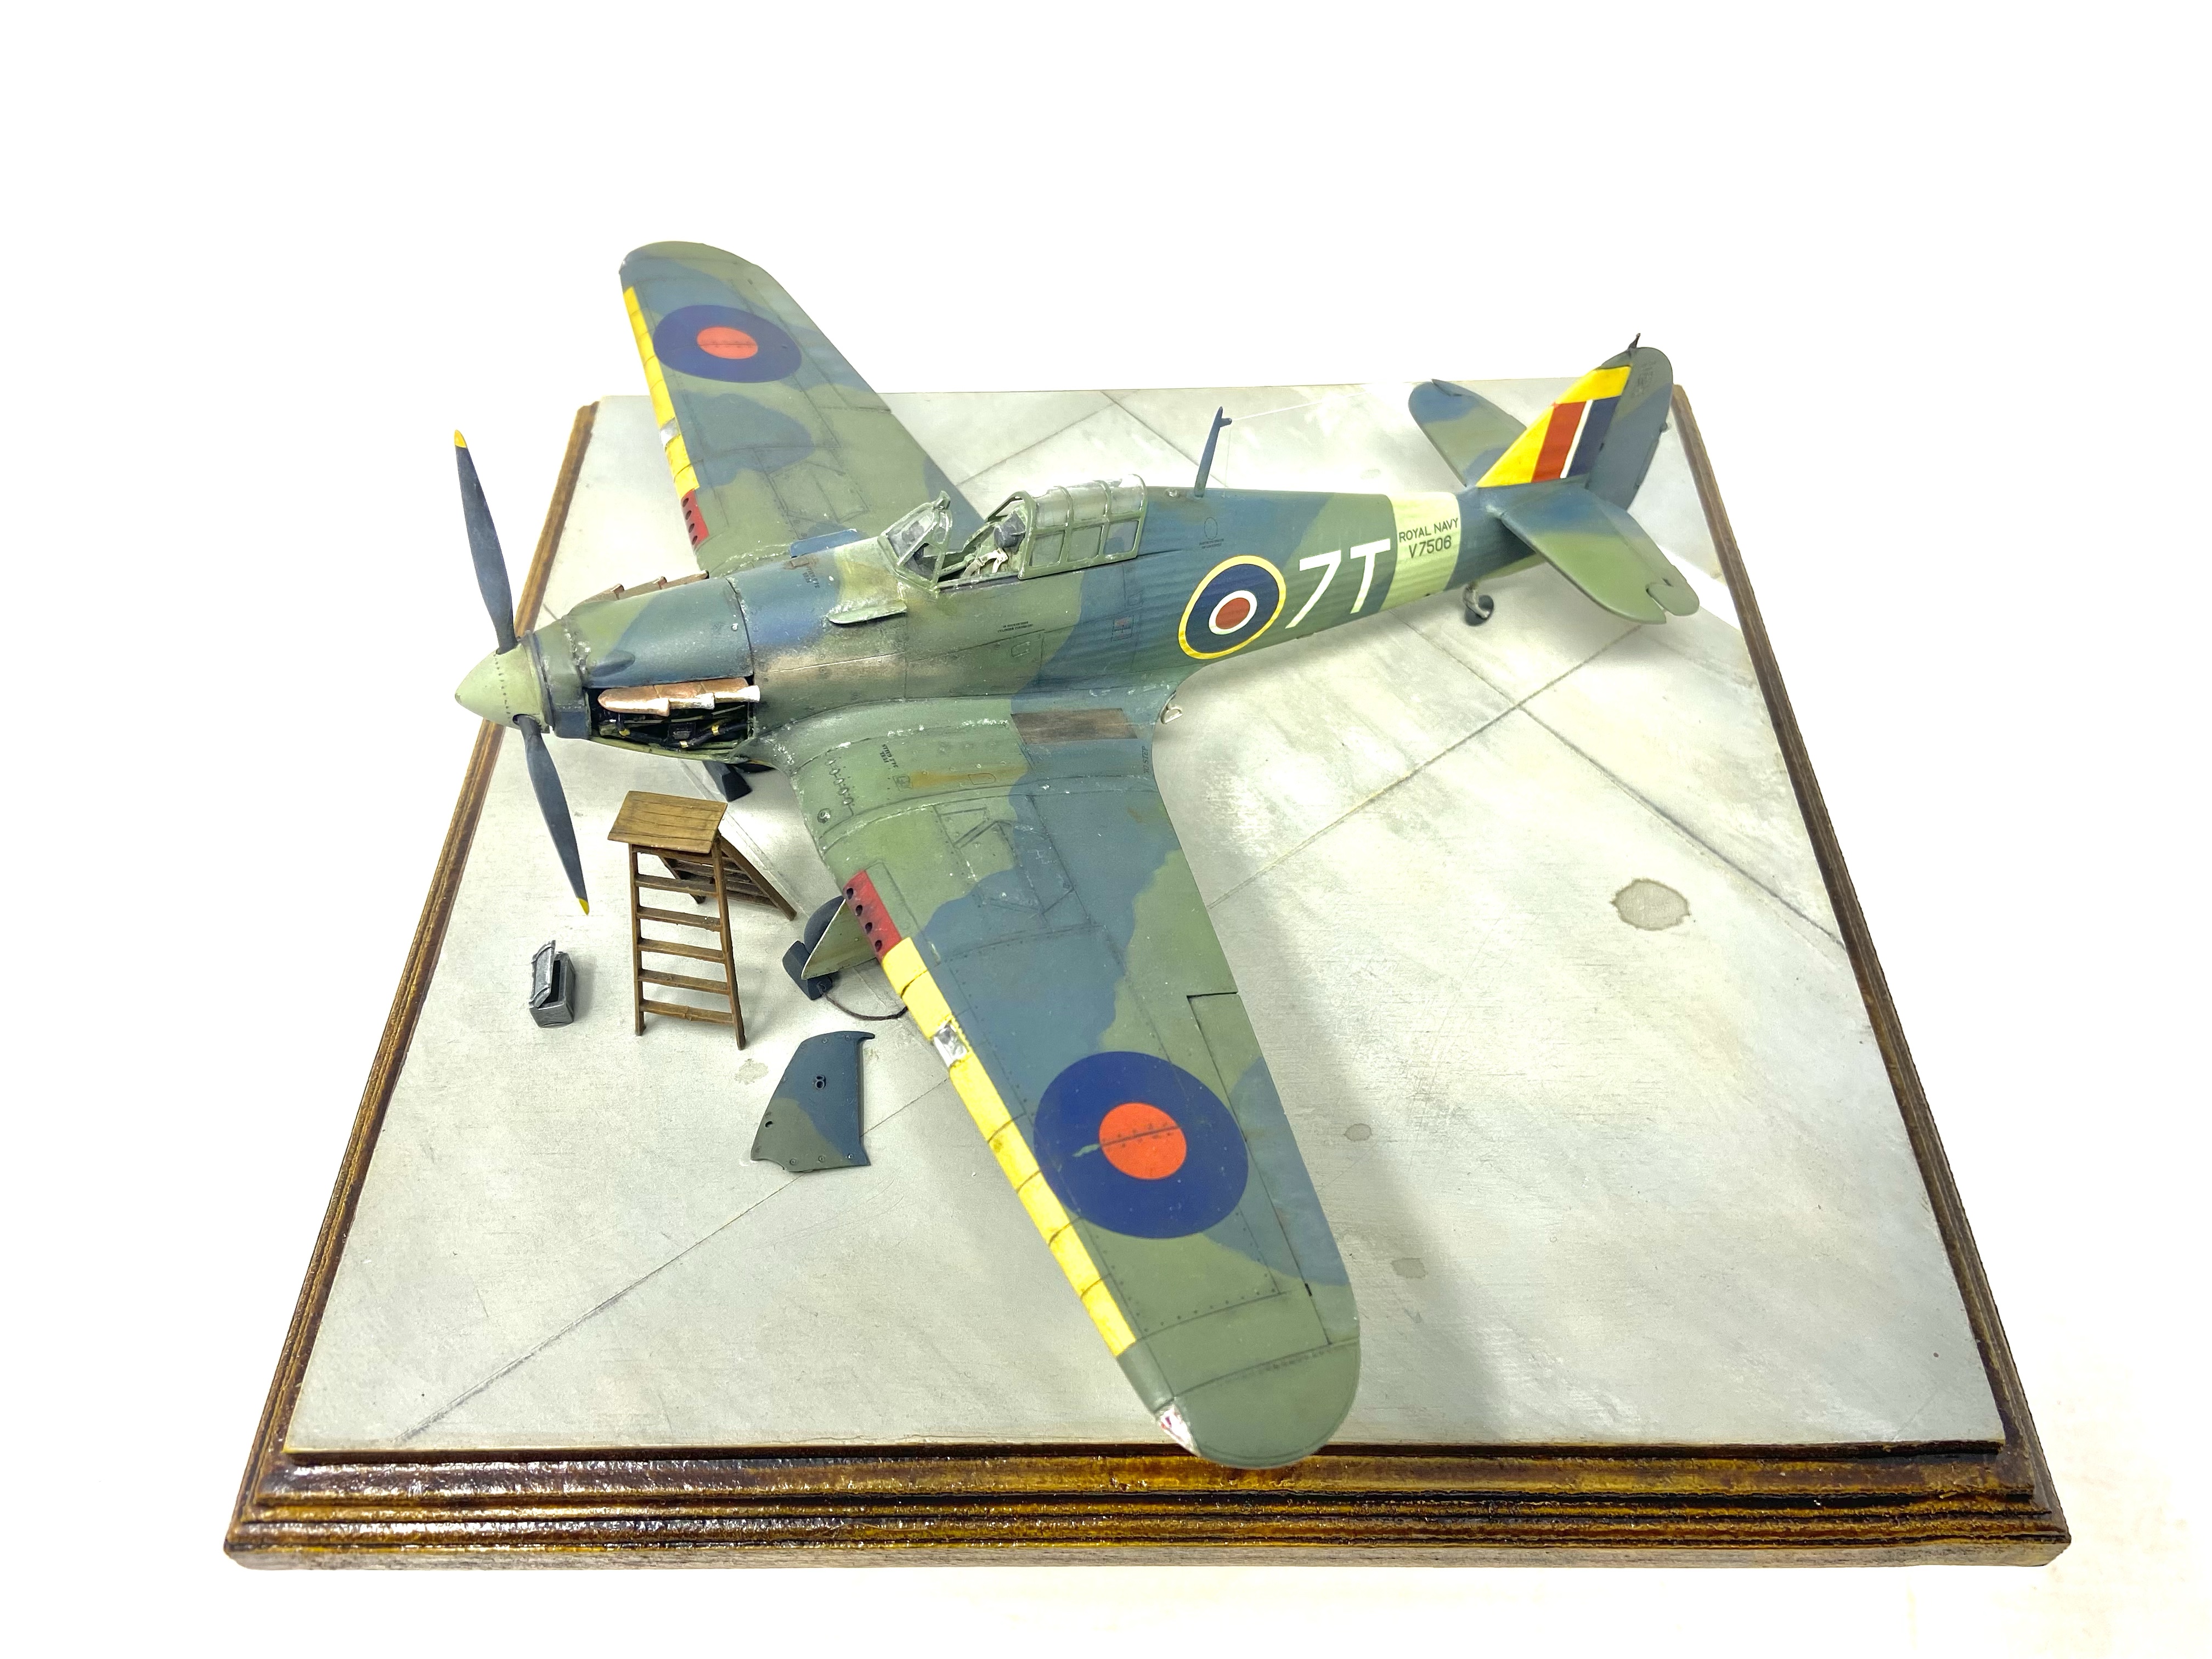
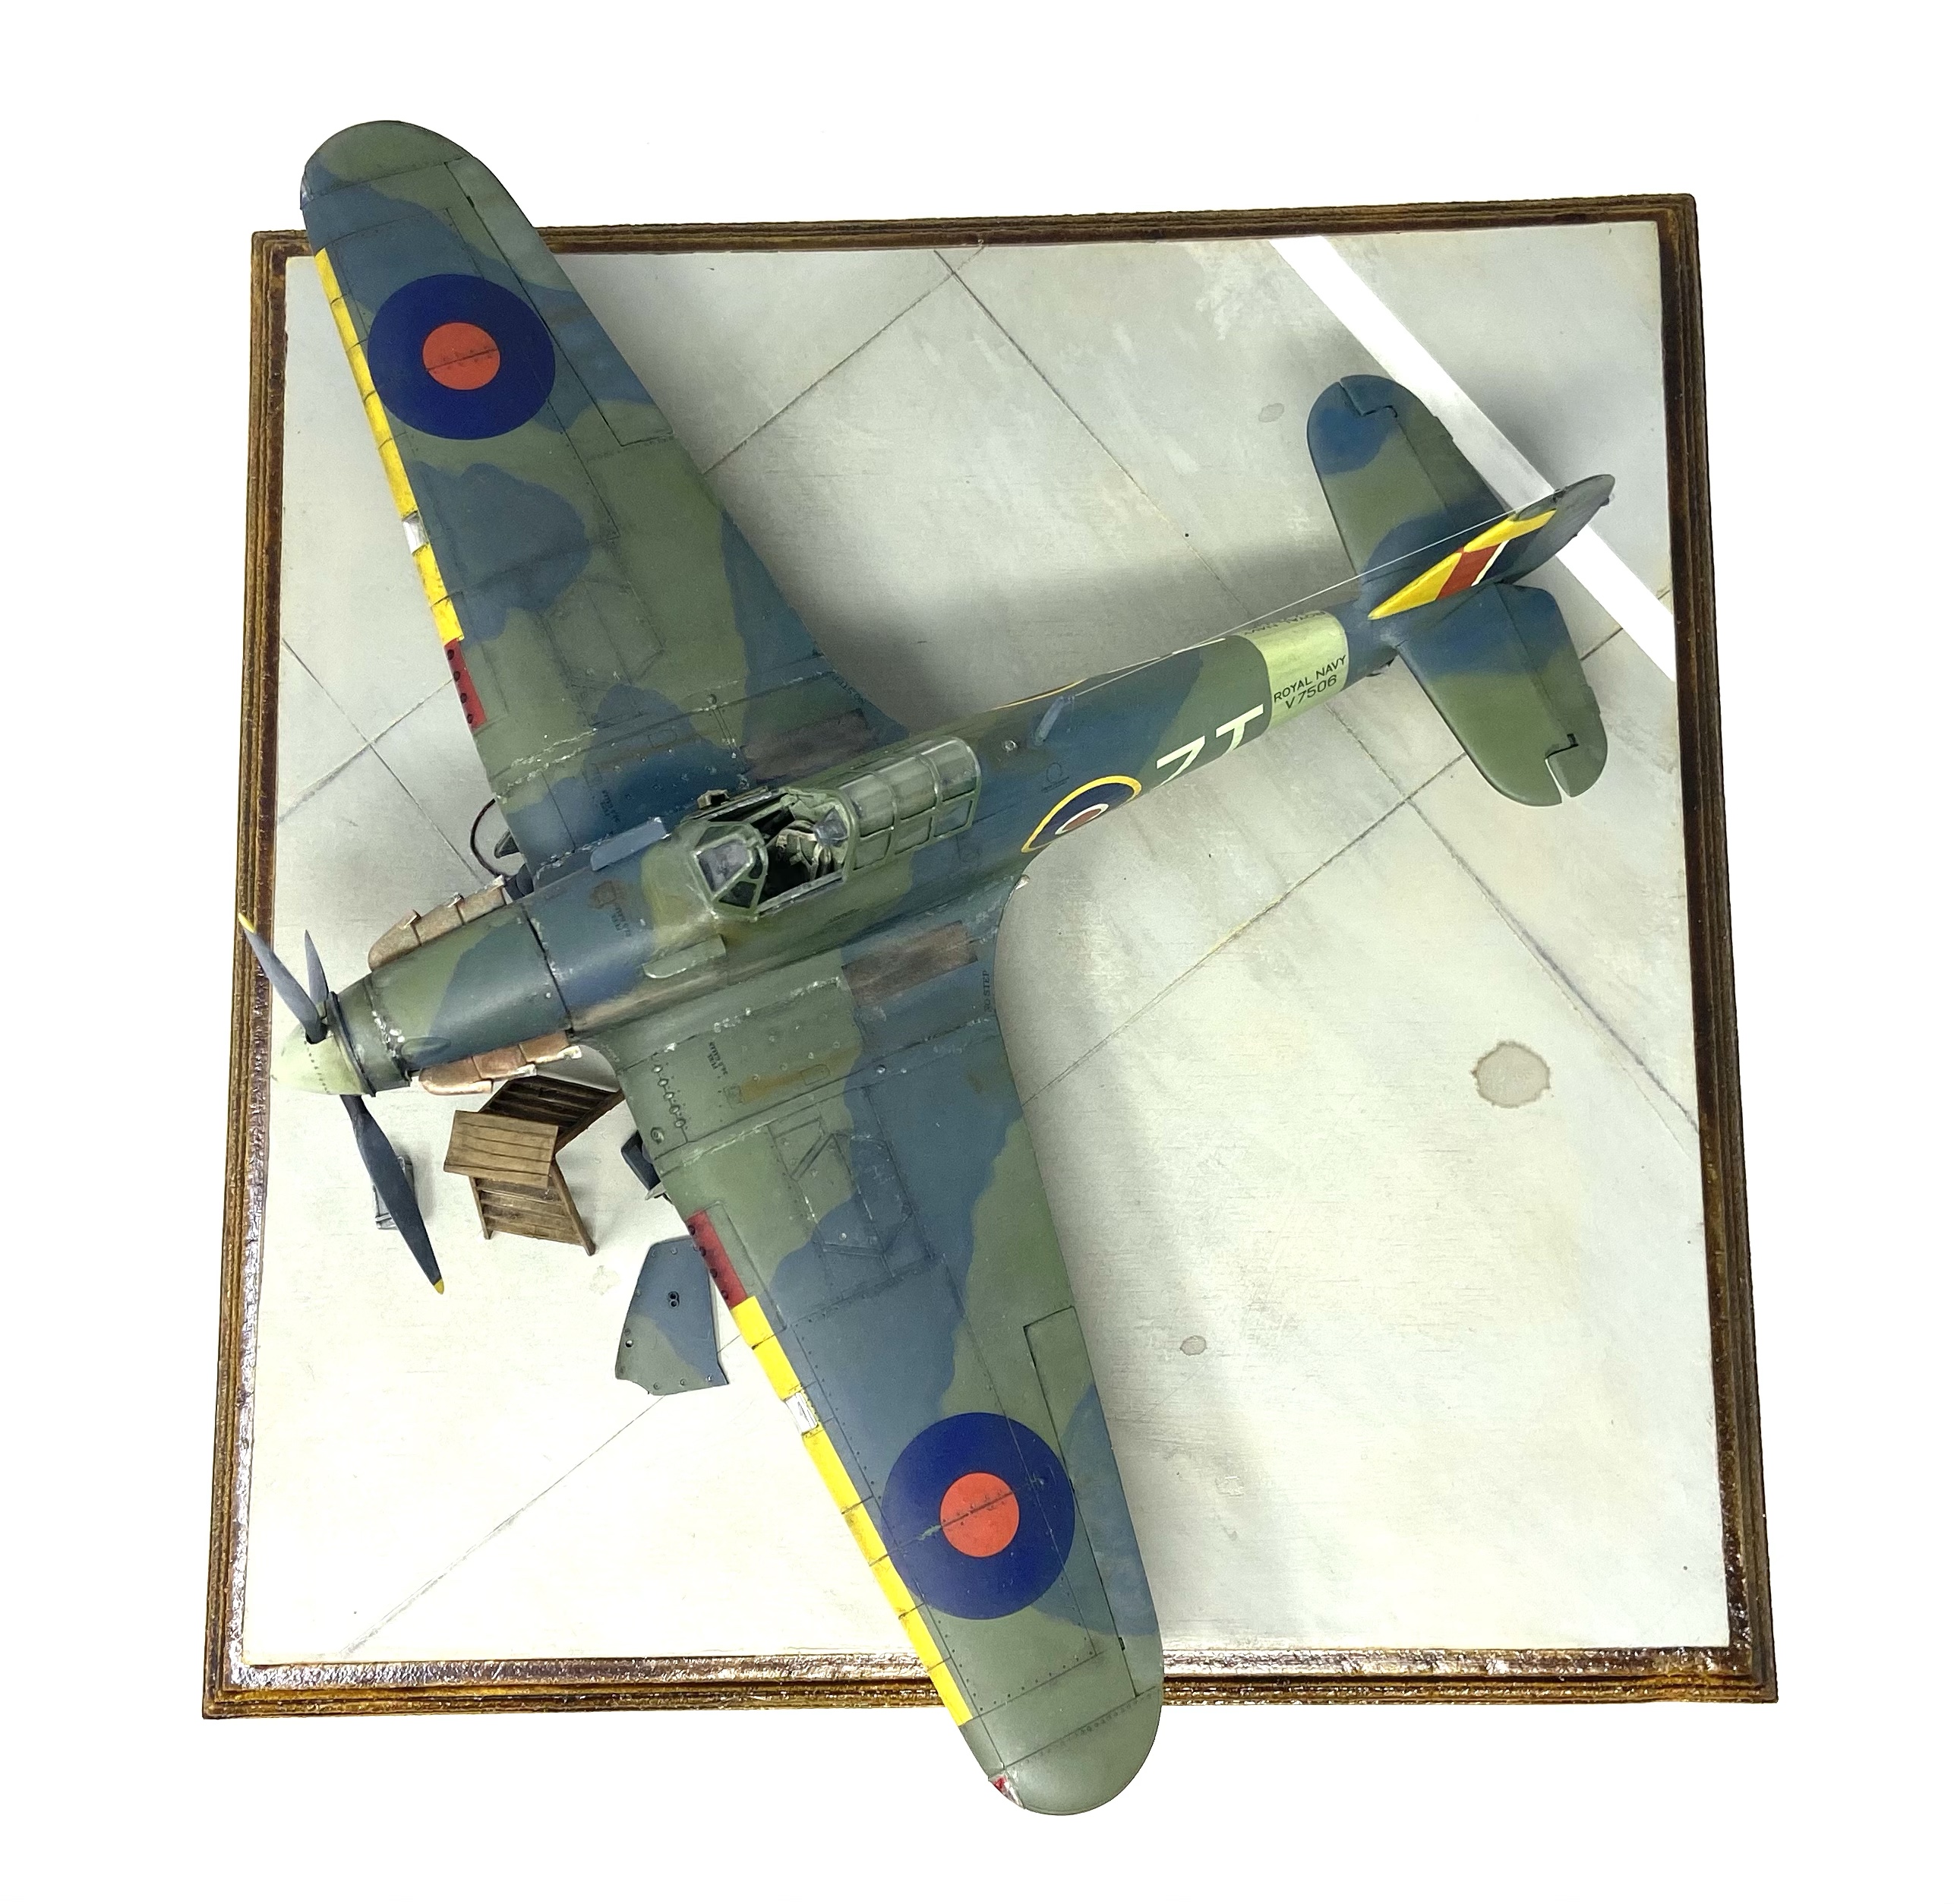
The painting phase was nice and easy, I used Tamiya acrylics to paint the FAA camouflage.
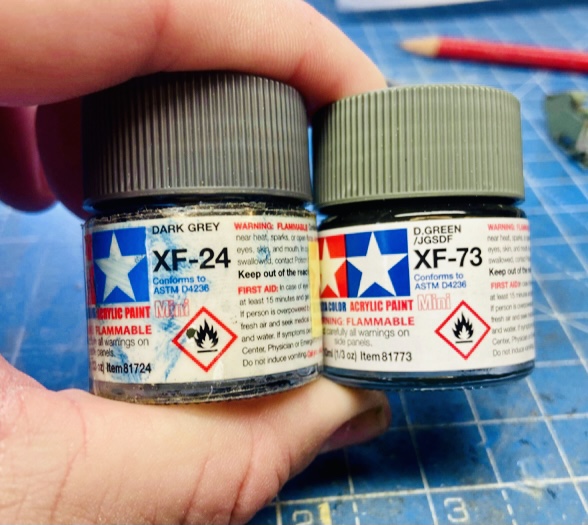
For the top camouflage colours I used a combination of Tamiya’s XF-24 and XF-73 and I used a slightly lightened tone of XF-21 for the underside.
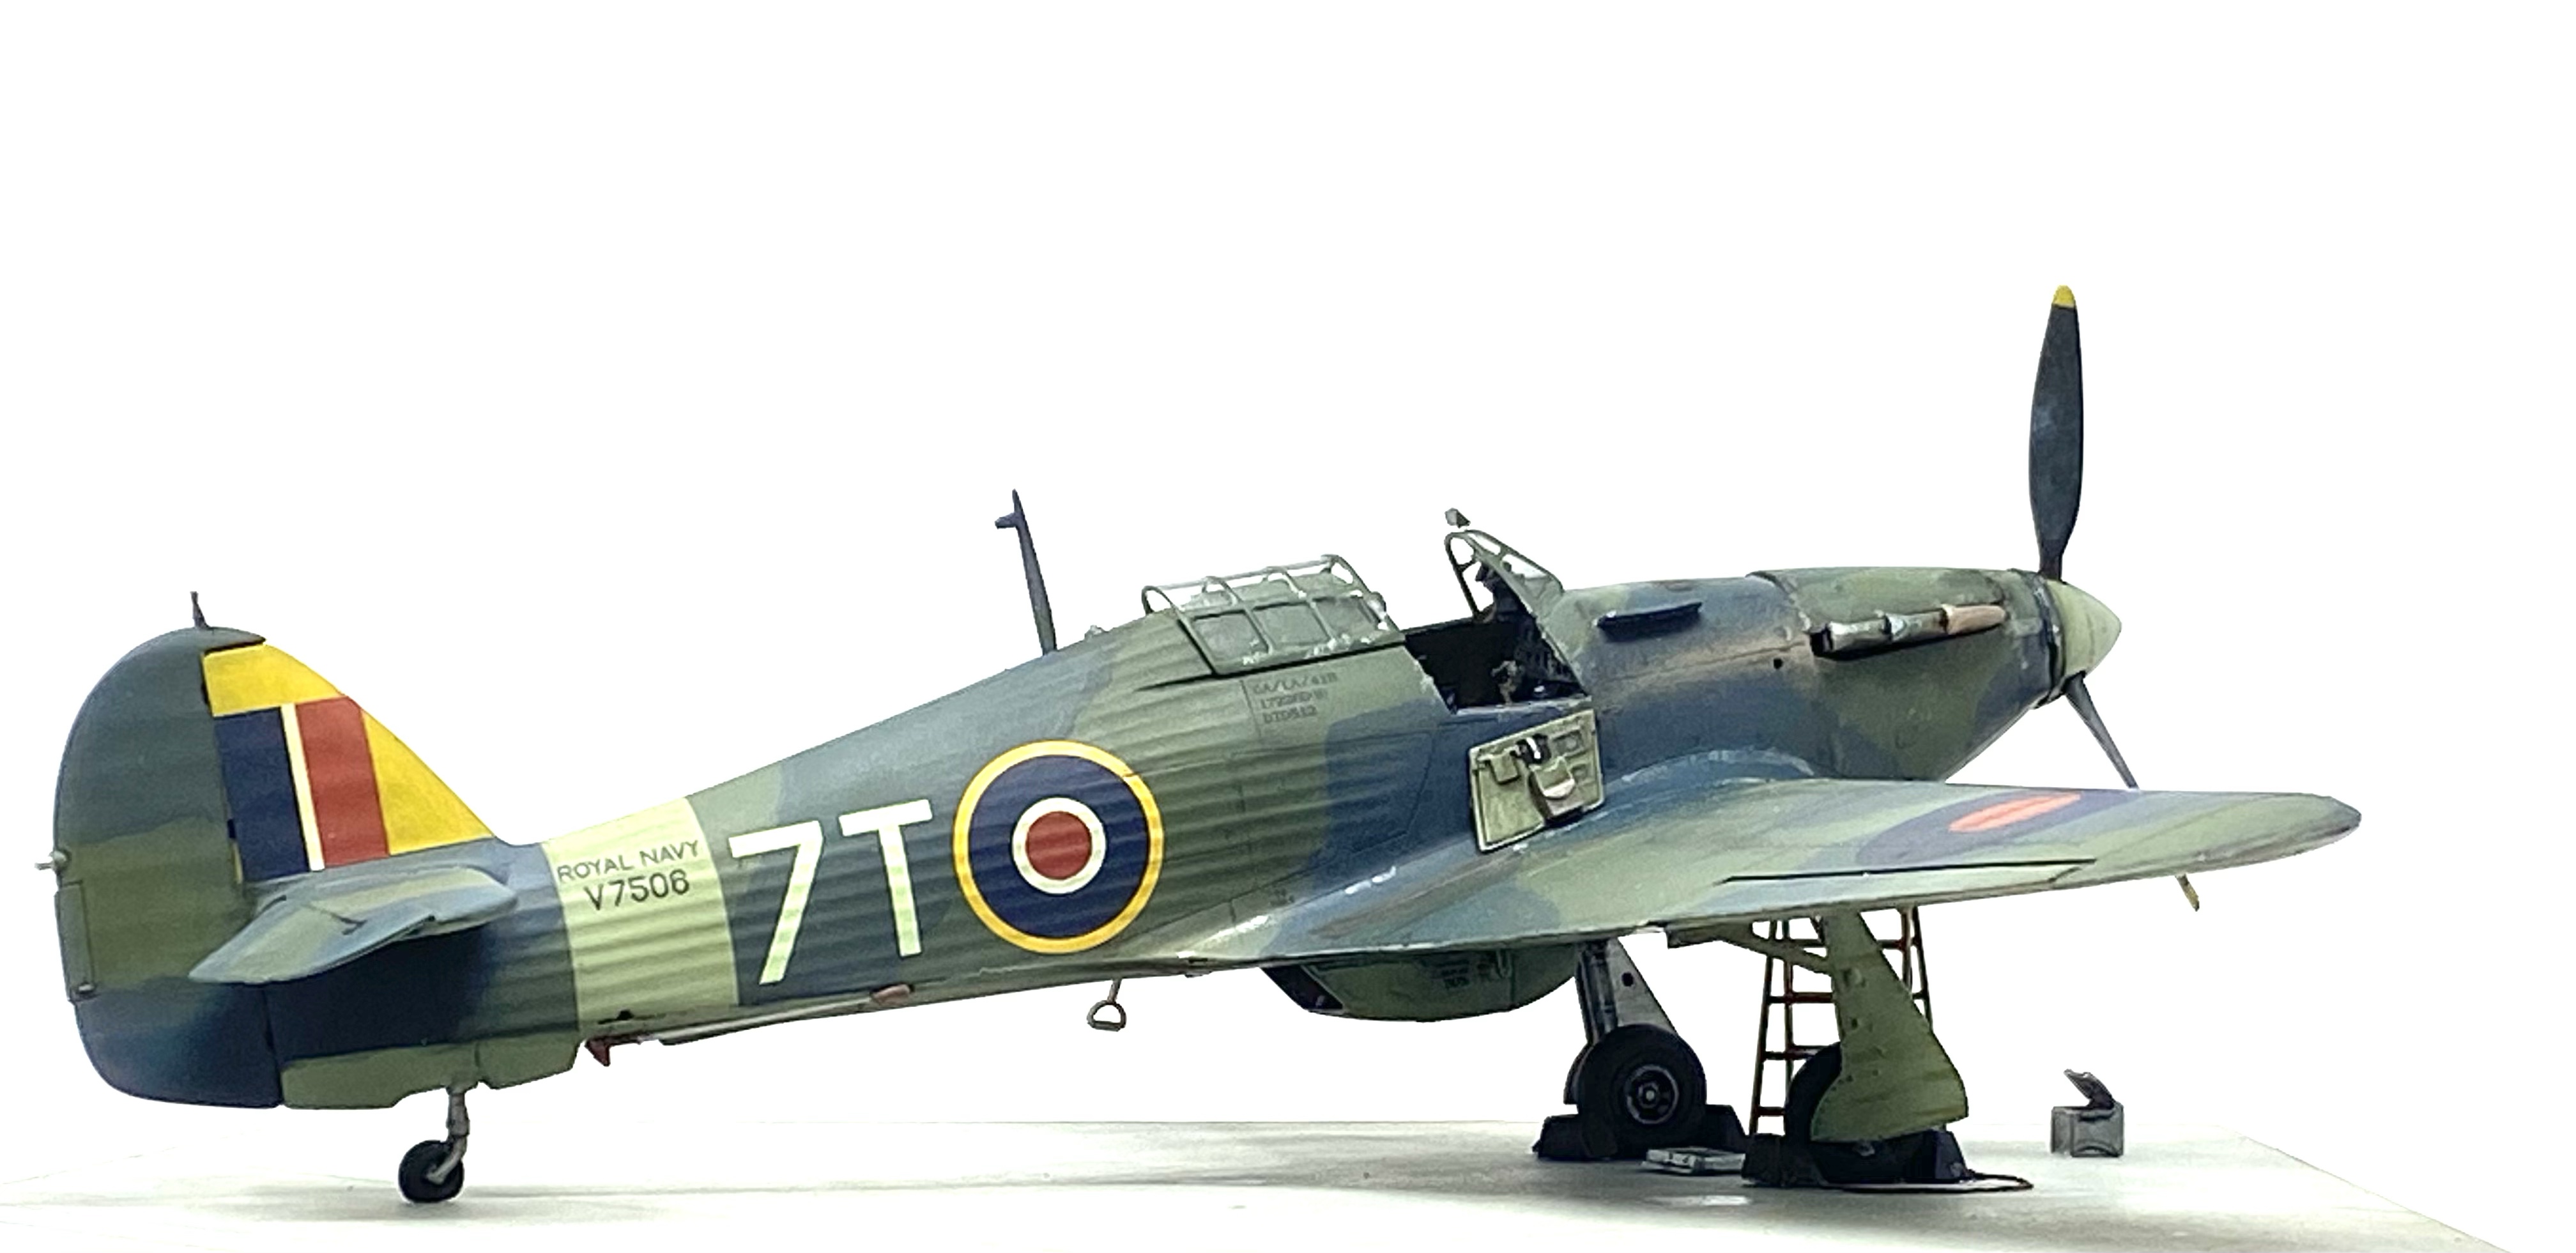
Decals were applied over a clear gloss coat and I chose a Hurricane from Operation Pedestal embarked aboard HMS Victorious , V7506 was also the subject of the kits box art and it looked the most pleasing to me.
After the decals had been applied with a modest amount of Microsol setting solution I sealed everything in another acrylic gloss coat and then set about weathering the Sea Hurricane.
As usual I began with an enamel wash, in this case Mig Ammo PLW black night. This thin wash was used to highlight all the engraved details such as panel lines and fasteners.
After this came the oil paint rendering or OPR as the trending modellers call it! I used greens, blues and yellow shades to fade the paint in various panels on the airframe and then I used a very light grey filter to blend everything together. A final matte acrylic clear coat was sprayed over the model to seal all the weathering work in.
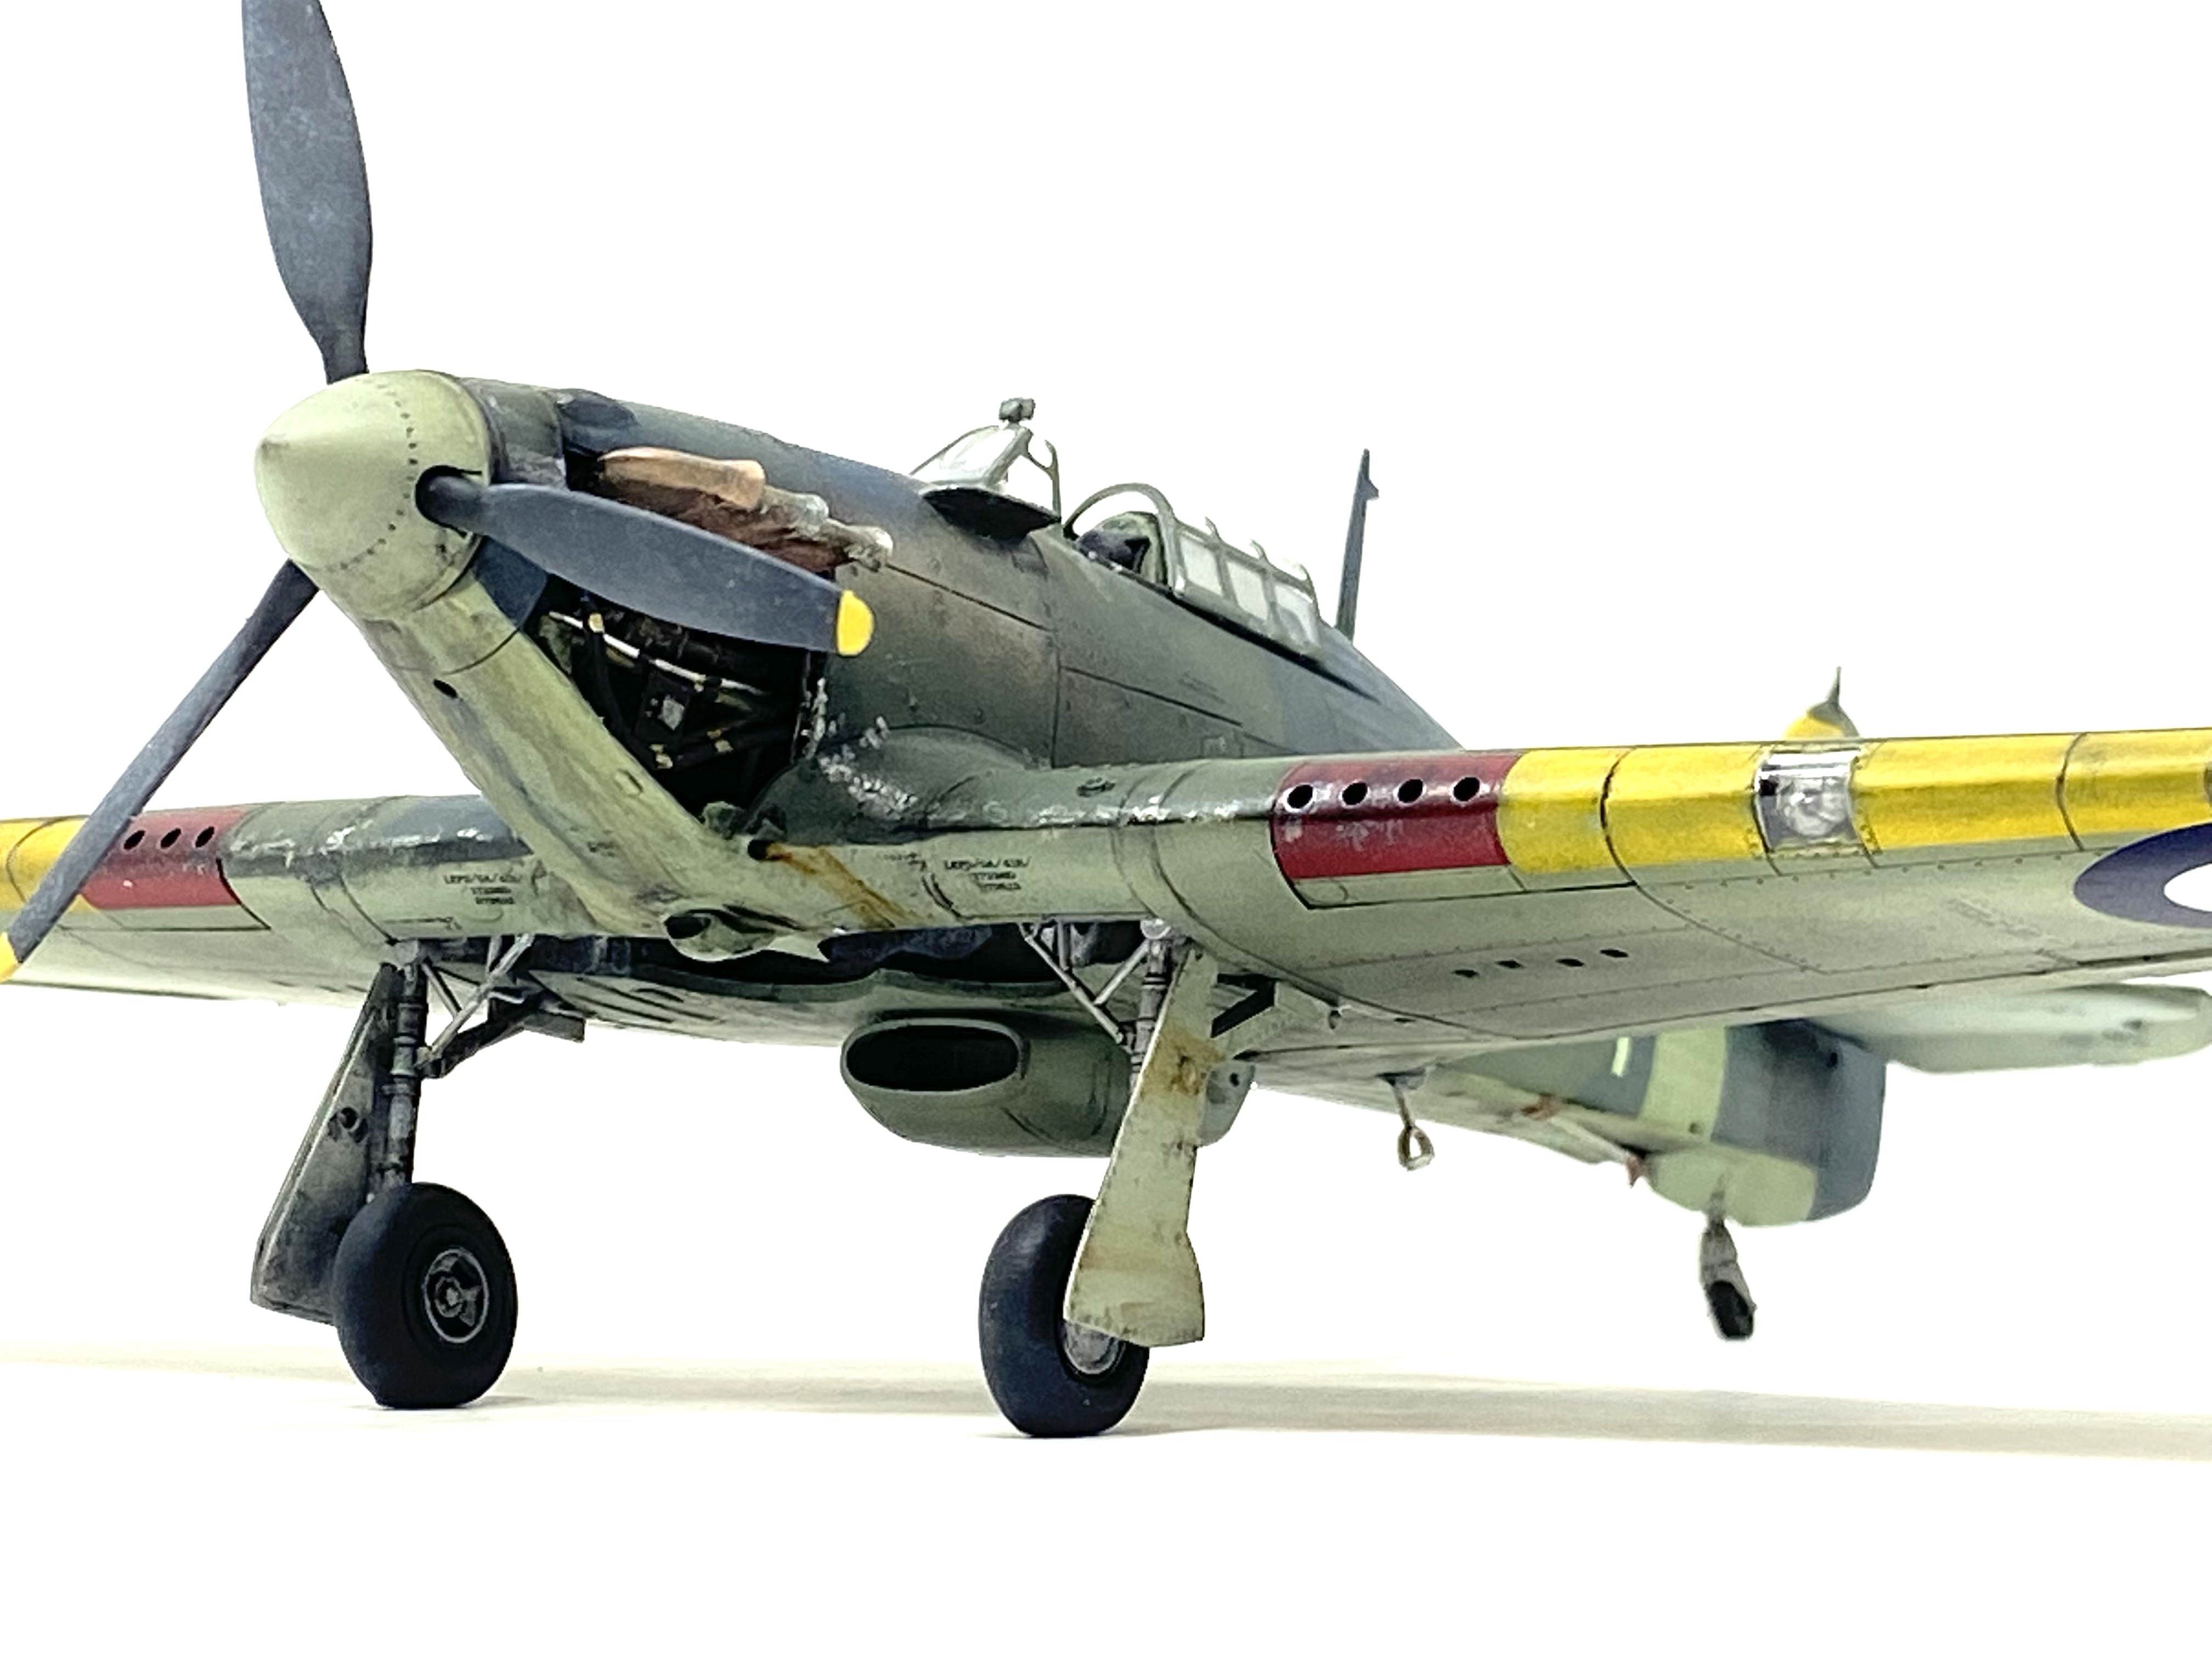


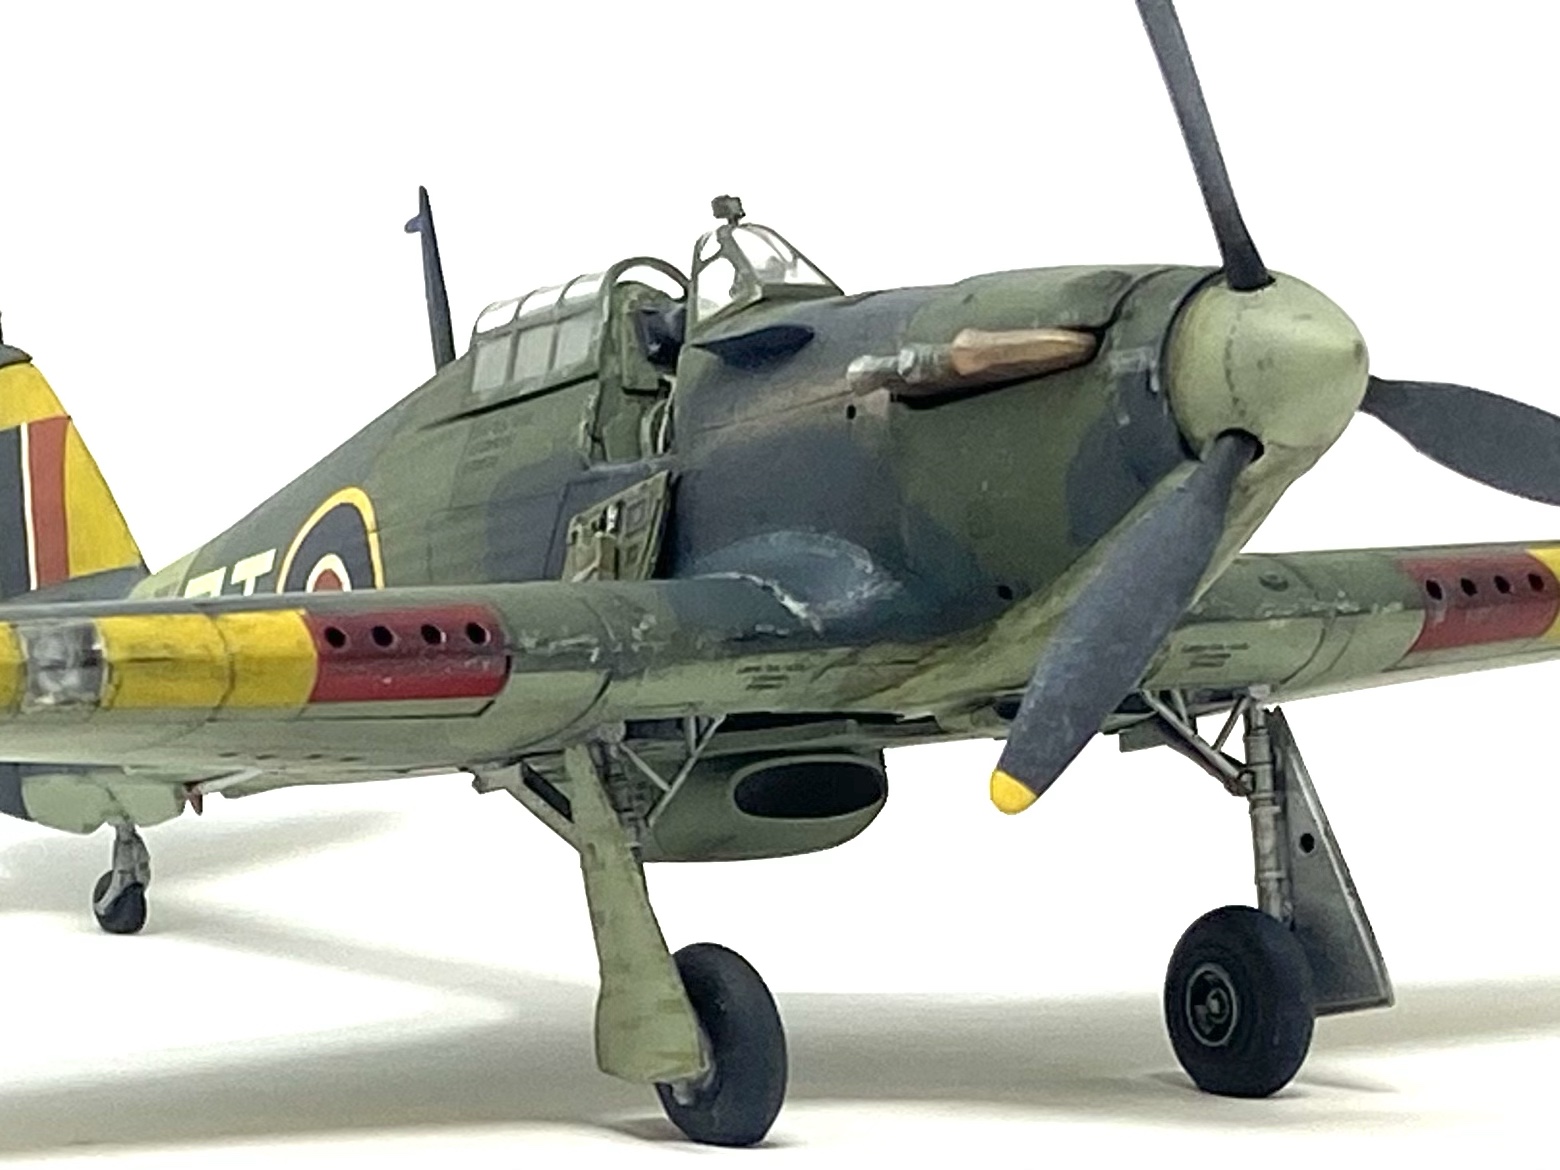


I was very pleased with the finished model and my thoughts turned to how best to display it. With one of the engine cowlings already removed, it was perfectly logical to present this build as maintenance vignette, so with a few simple parts from the spars box I was able to set the stage for the finished display…


I hope you have enjoyed this model-I certainly did! Taking a quick and easy slammer build and turning out a model one can be proud of really is a great feeling.
Thanks for visiting, take care and I’ll see you again next time
Happy Modelling!
Darren.

Outstanding!
LikeLike
Thank you!
LikeLike
Reblogged this on ausevor.
LikeLike
Love it mate.
Great subject and one that is often unrepresented.
You did it real justice.
All the best.
Phil
>
LikeLiked by 1 person
Thank you Phil, much appreciated!
LikeLike
Pingback: Hawker Sea Hurricane Mk IIc – THE SCALE MODEL HANGAR