

I love F-14 Tomcat’s! Who doesn’t right? Way back when I was just beginning in the hobby of model building I was presented with a book about modelling post war modern aircraft. On the cover was an inspiring build of a 1/72 F-14A bearing the famous bright red VF-1 Wolfpack livery.
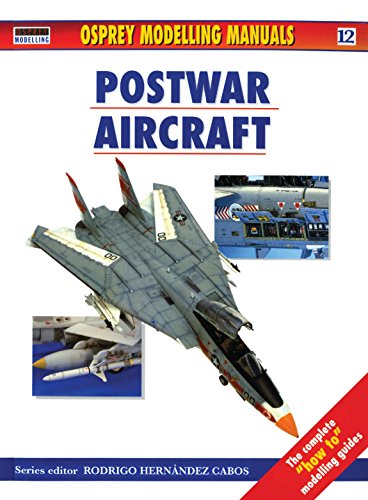
Having this book on the shelf over the years I kept promising myself that one day I would build my own VF-1 Tomcat. Even now, when I thumb through the pages, I am still inspired by the models in this book. The Tomcat in Wolfpack markings just looks superb and encapsulates the 70’s Hi Vis US Navy markings of the time. I had all the inspiration I needed!
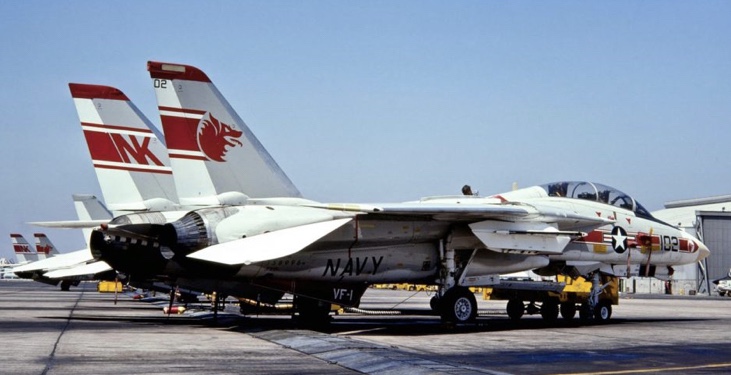
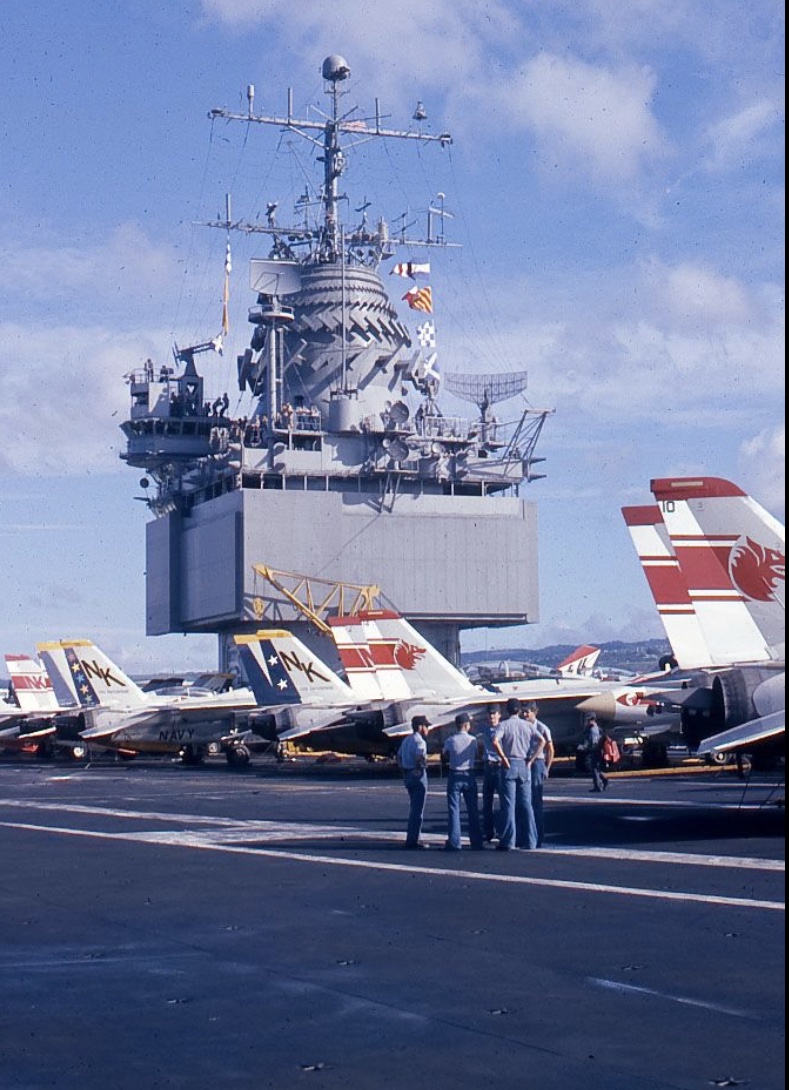
The Wolfpack:
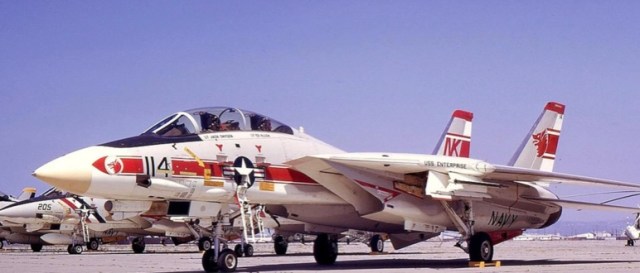
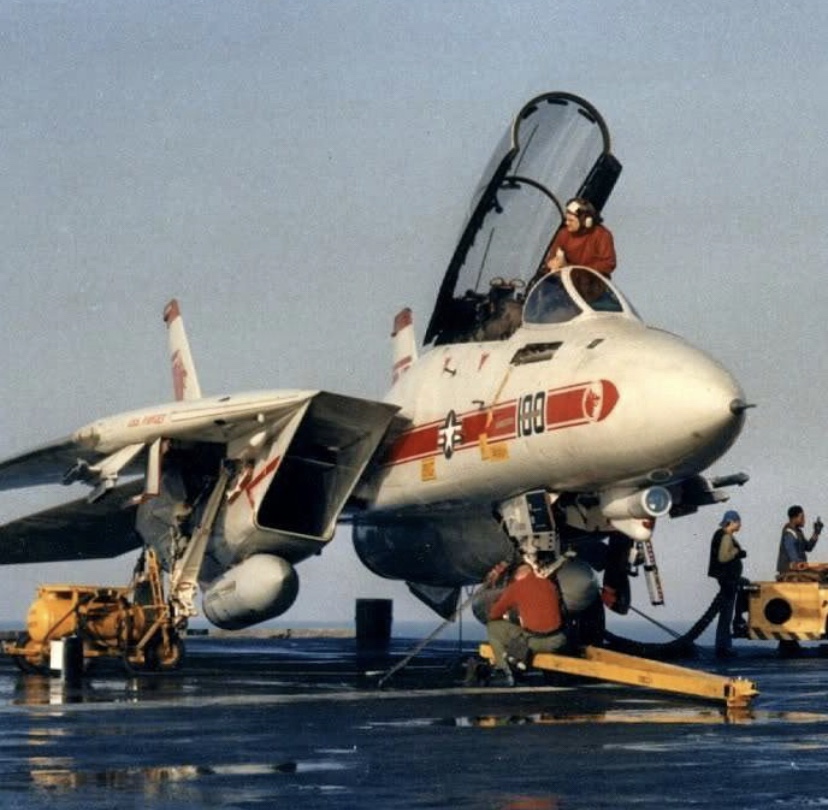
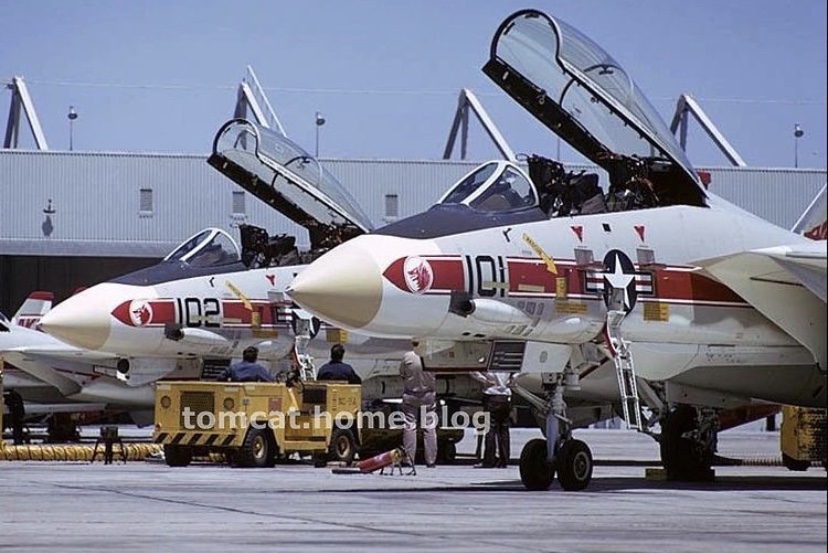
VF-1 were among the first Tomcat squadrons and they were operational by 1972. The squadron has a long and proud history and by 1974 they were flying the most advanced fighter interceptor in the world and the US Navy wanted the rest of the world to know about it. Maybe that’s why the Wolfpack went with this design? Maybe!
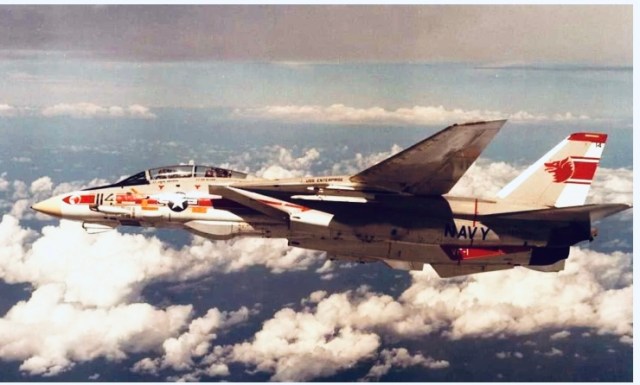
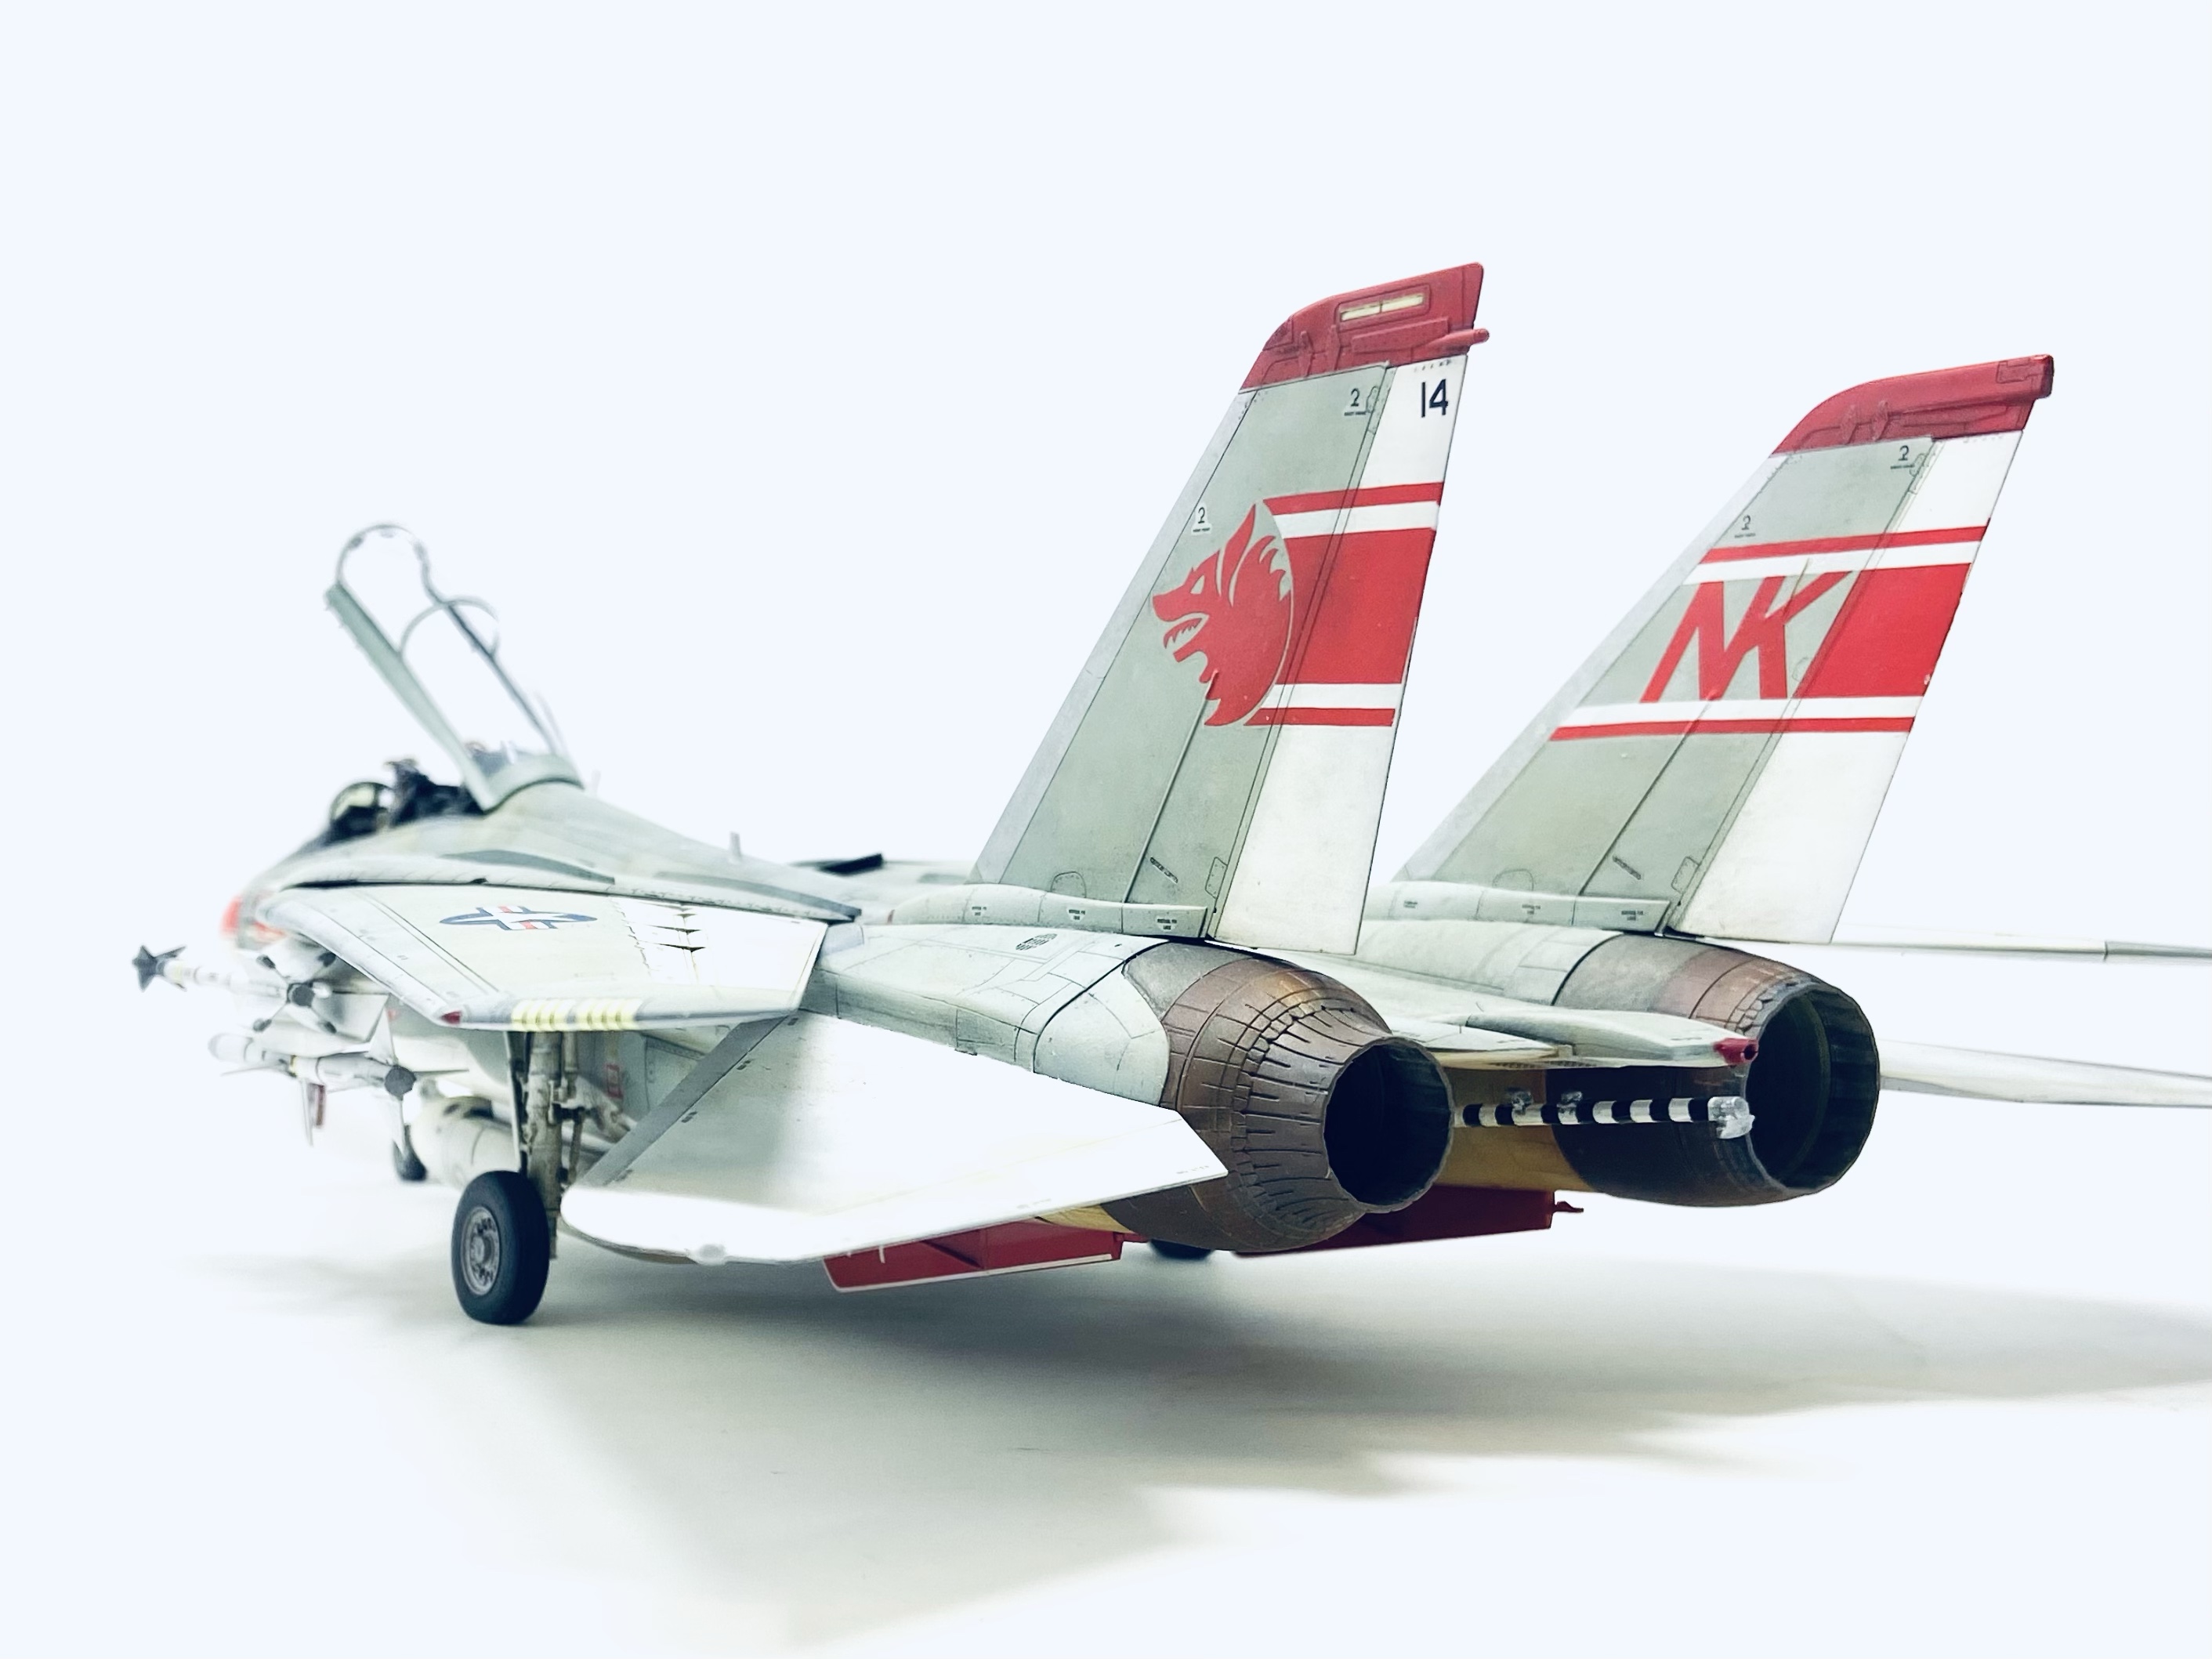
Whatever the origin of there Tomcat scheme, it was a winner and is still regarded as the definitive Tomcat paint scheme and below we can see why:
The Kit:
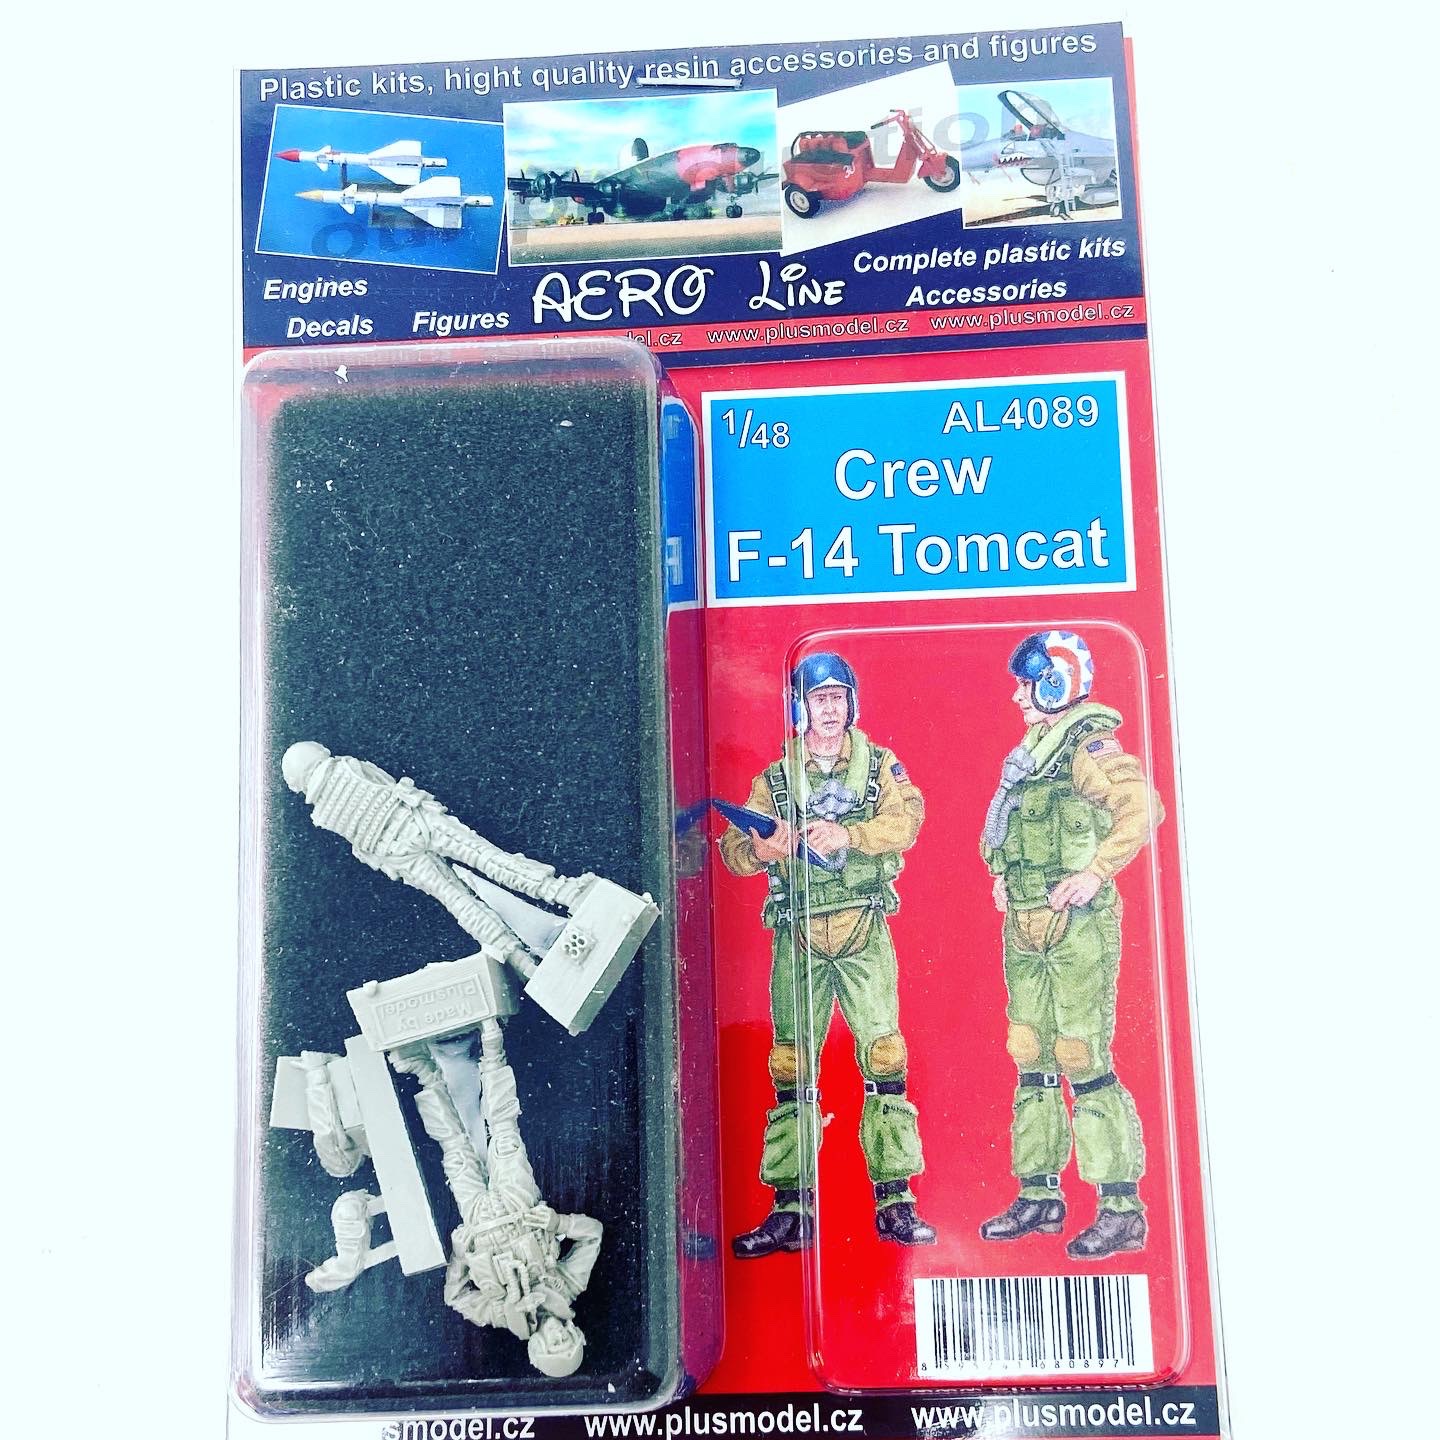
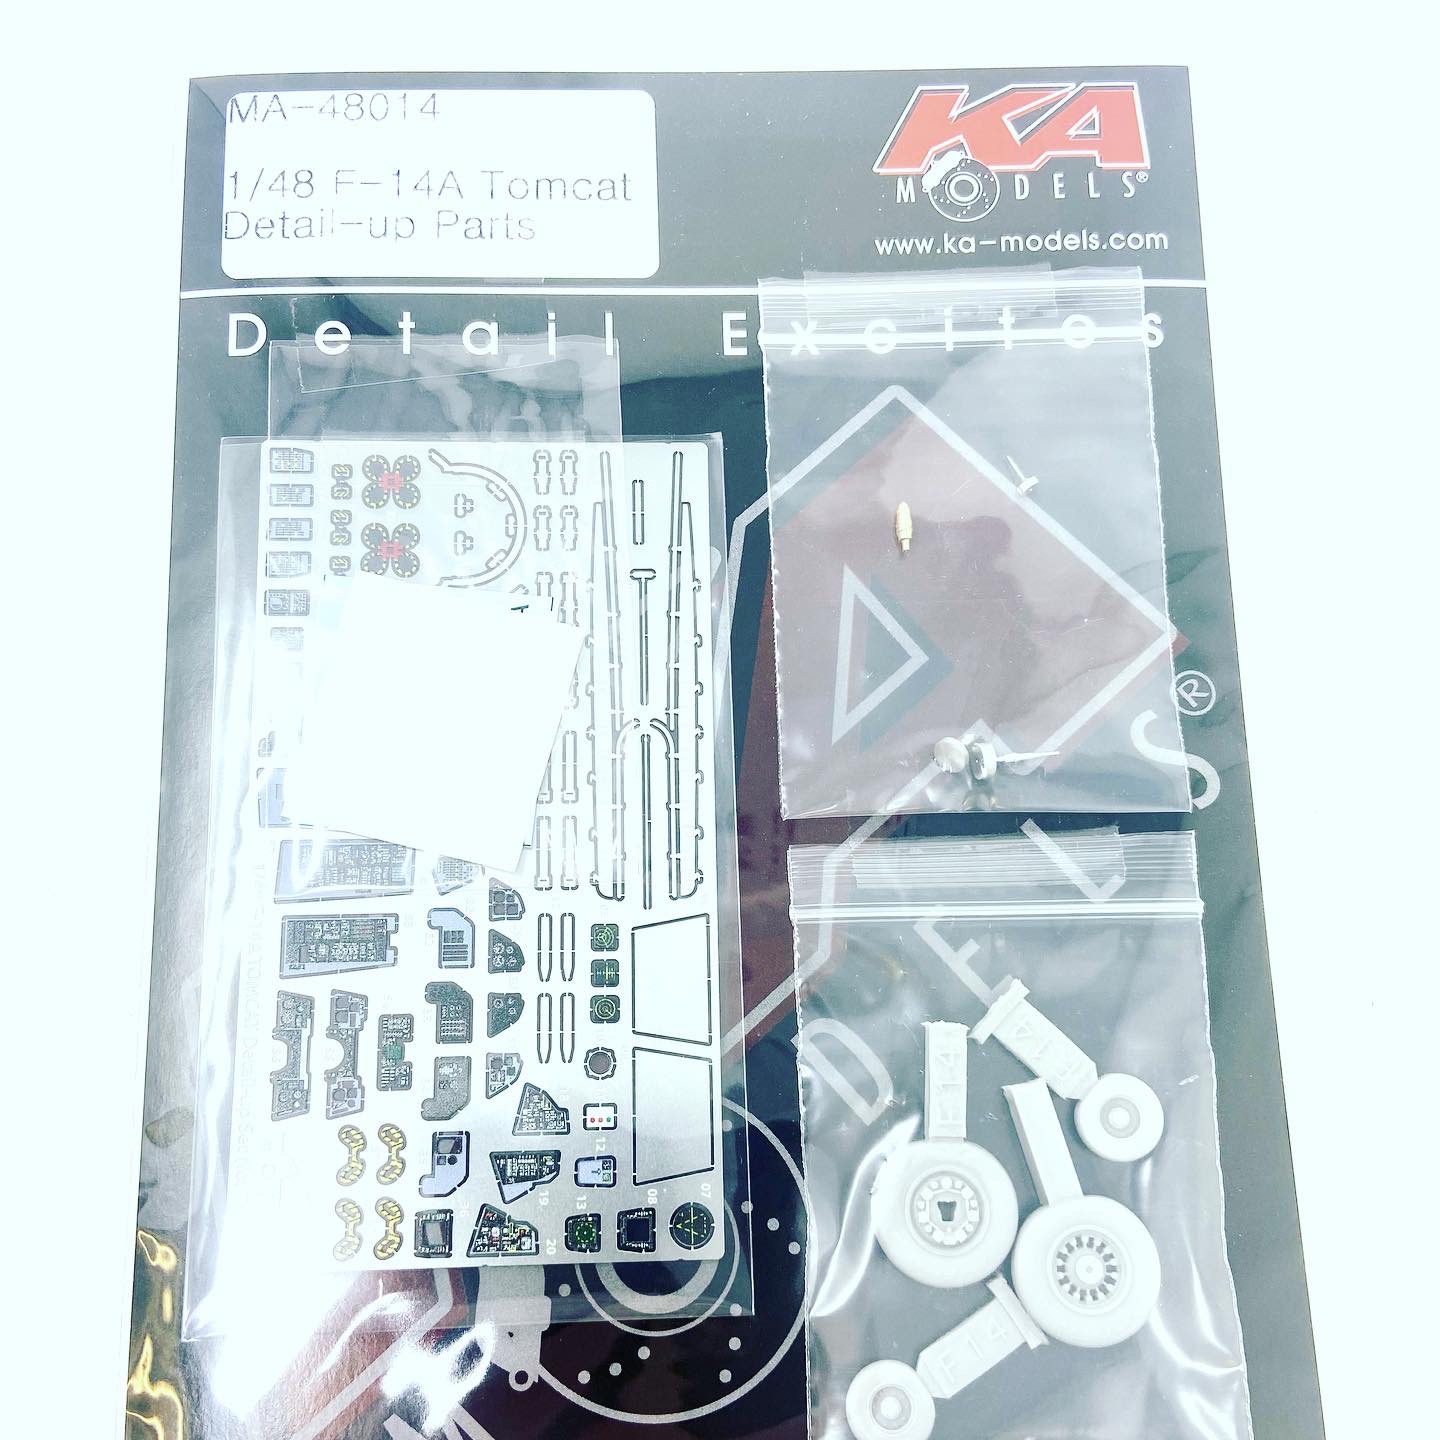
This really was a no-brainer. The Tamiya 1/48 F-14A Tomcat is unarguably the best rendition of a F-14A in this scale. I wanted to make mine really stand out so it was enhanced with aftermarket items from Mark 1 Designs detail set, Plus Model crew figures and HAD Decals.
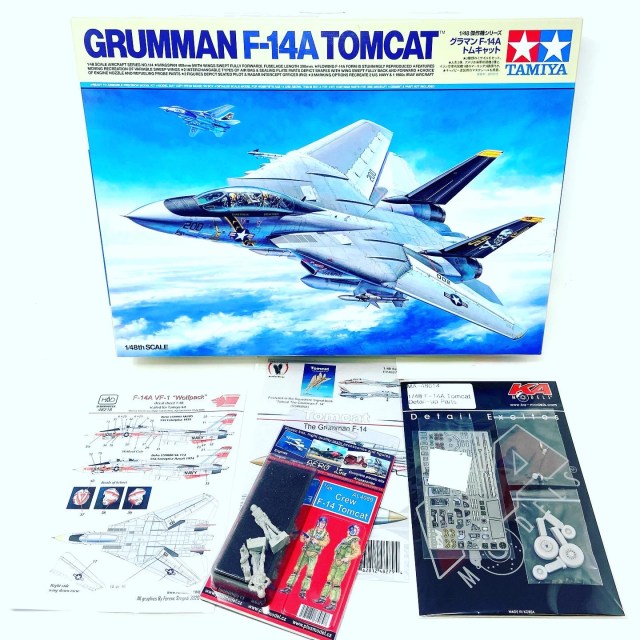
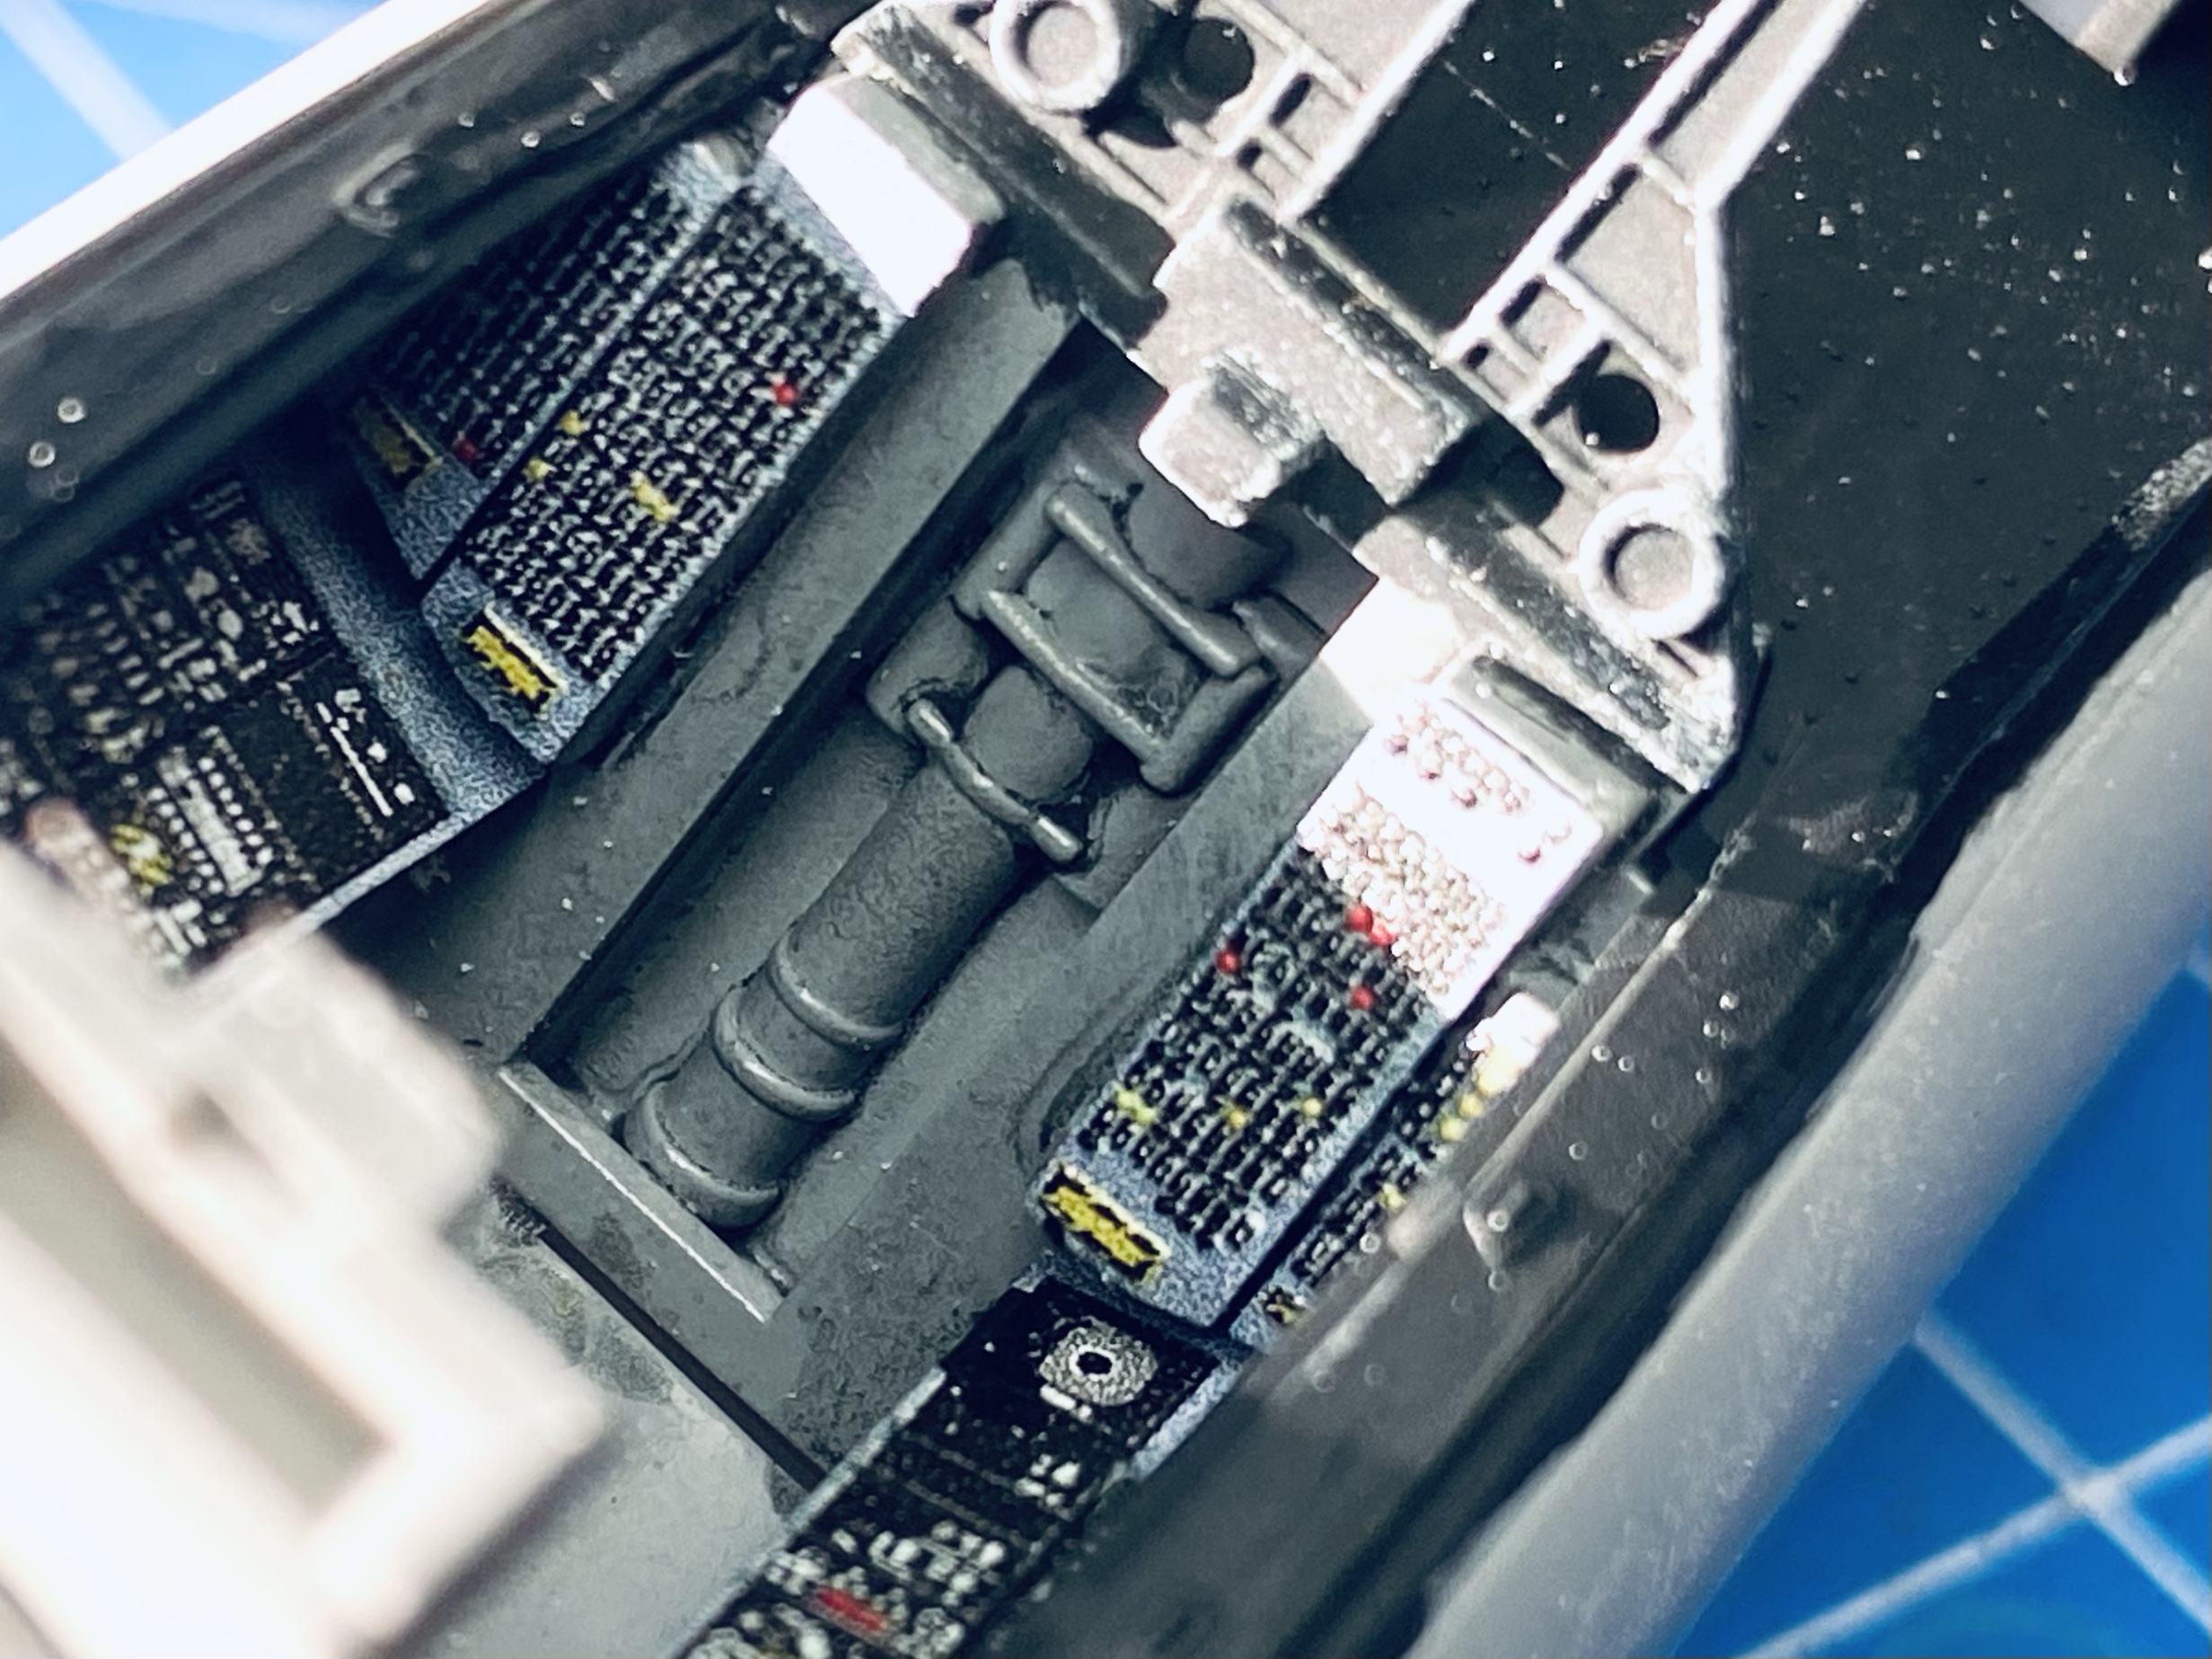
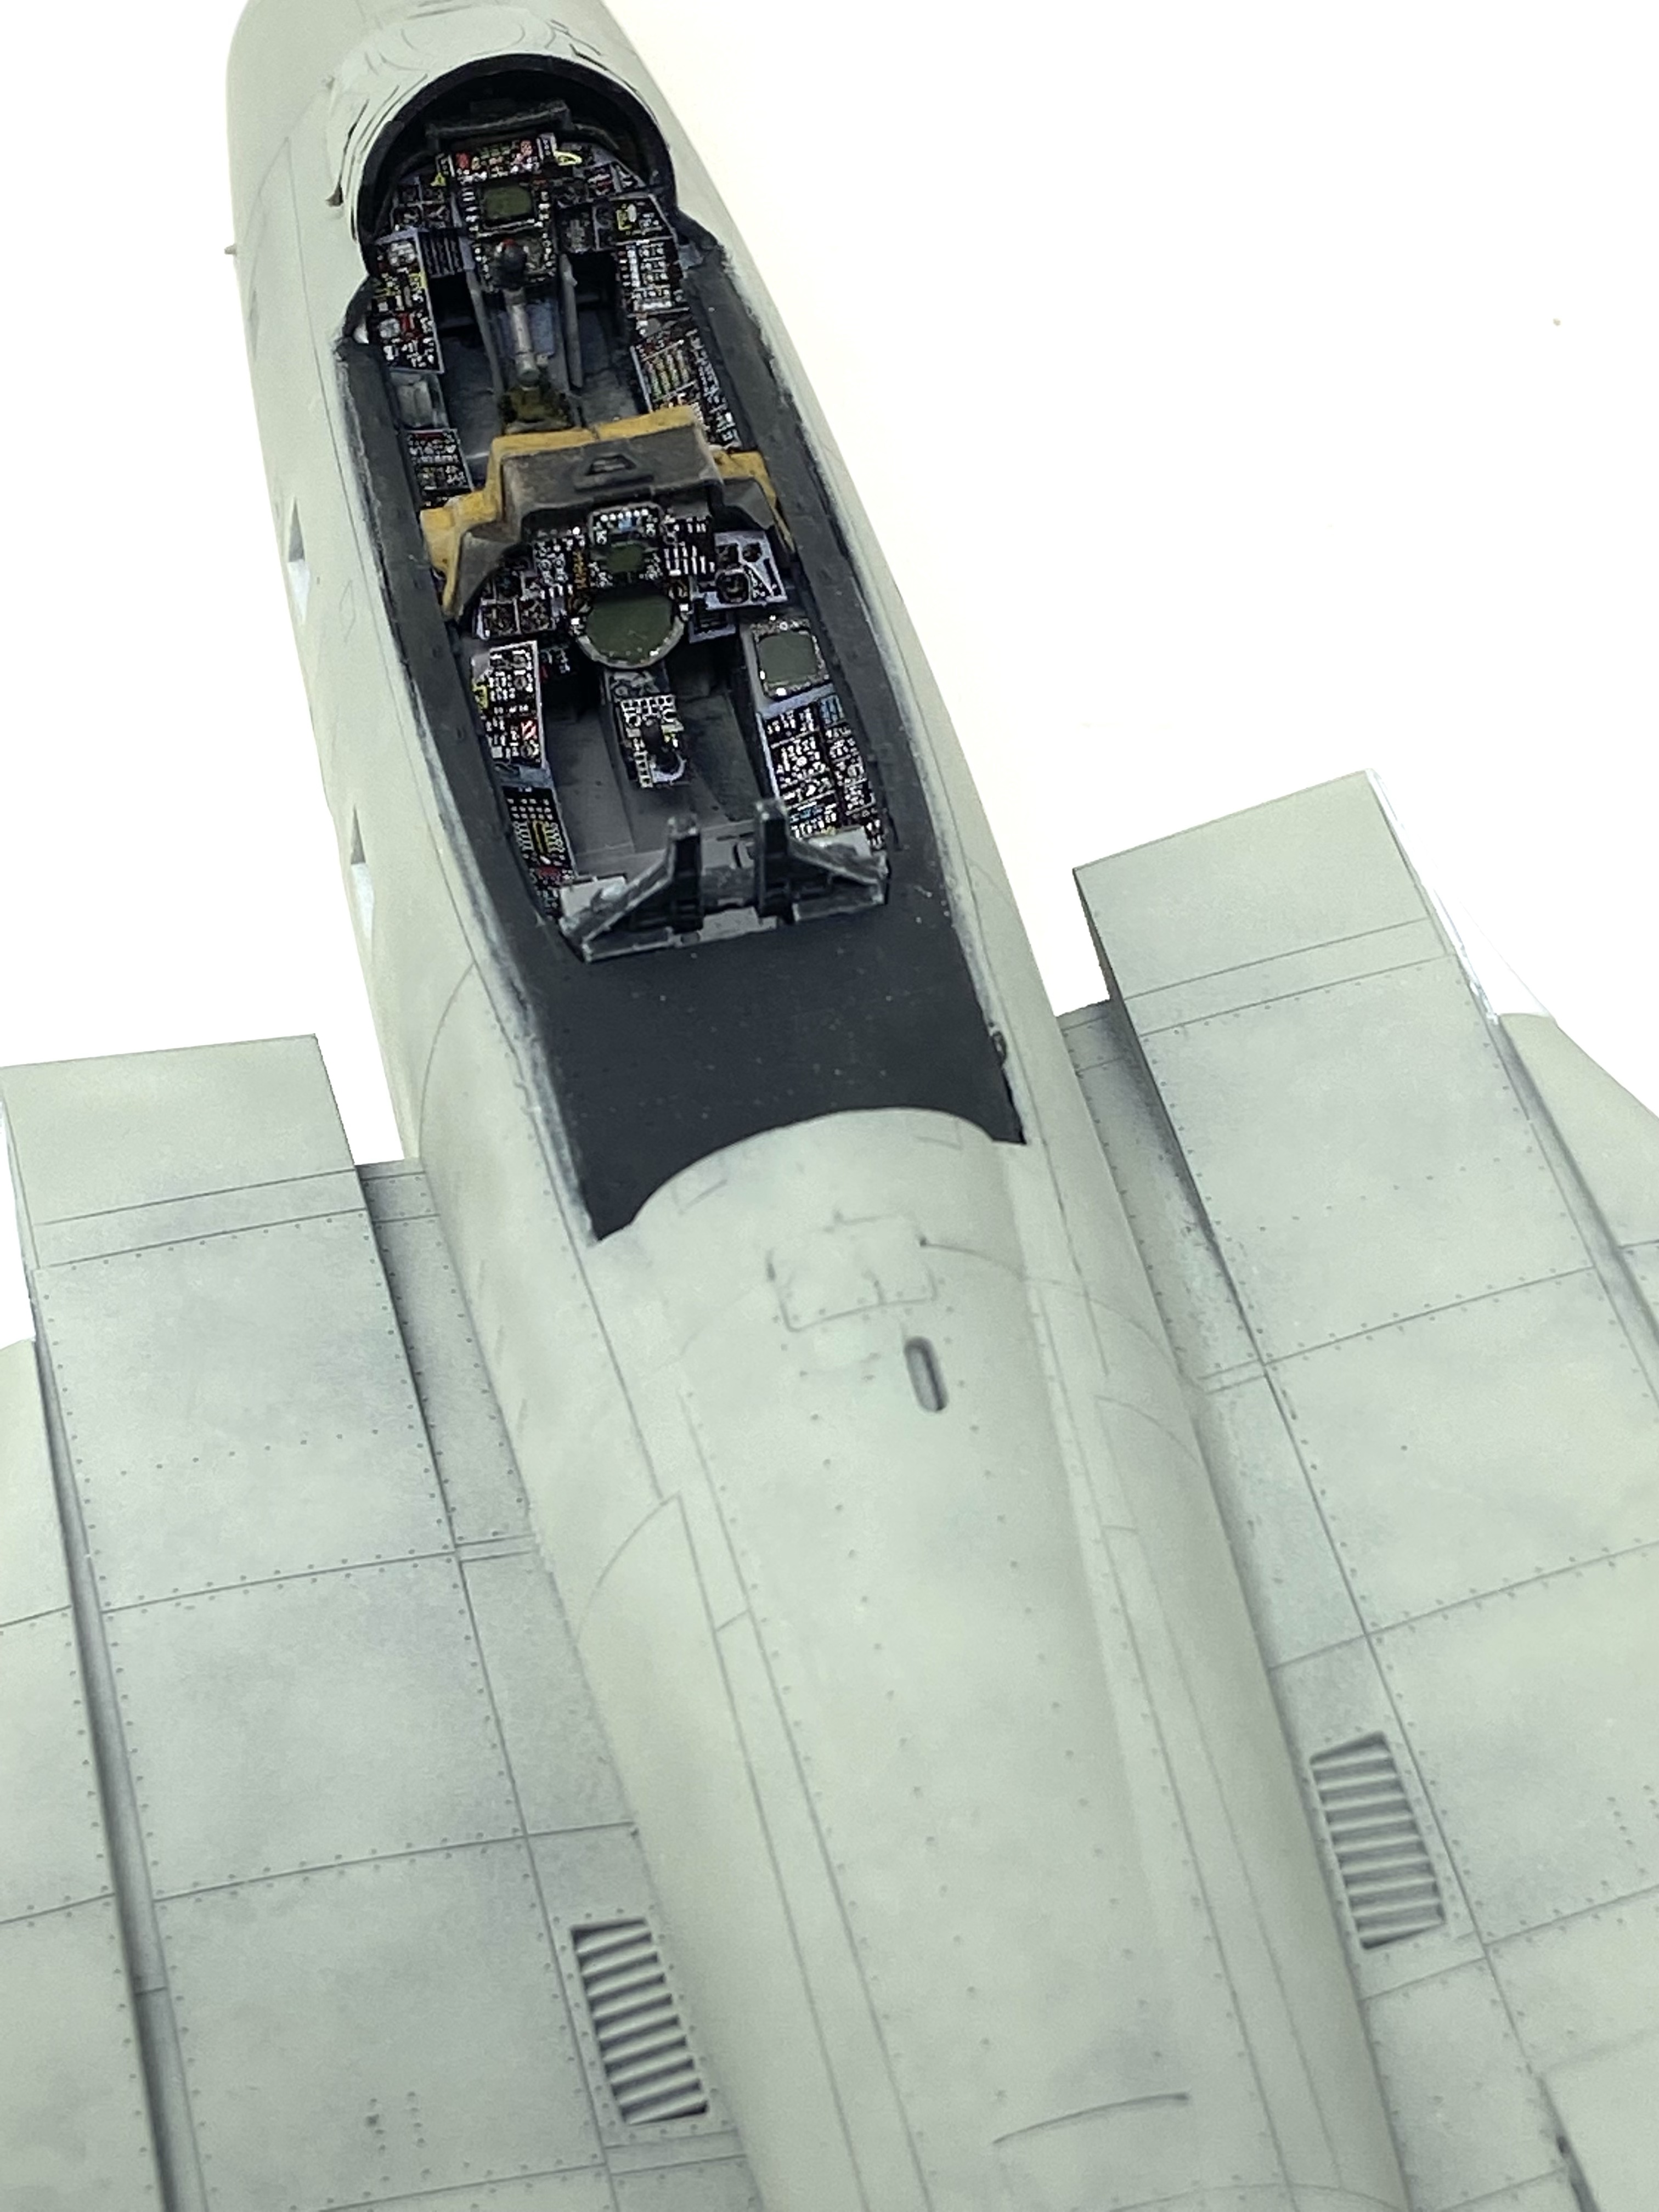
The Mk.1 Designs detail set is fantastic value, it provides excellent cockpit colour PE details for the instrument panels, side consoles, ejection seats and resin wheels too. There are also turned metal parts for the pitot tubes and angle of attack sensors.

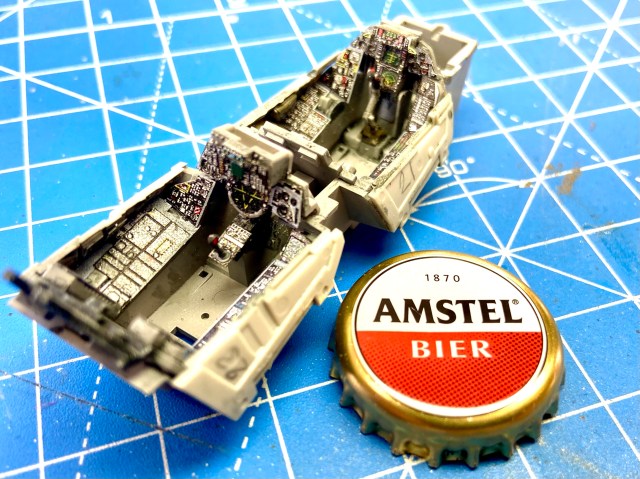
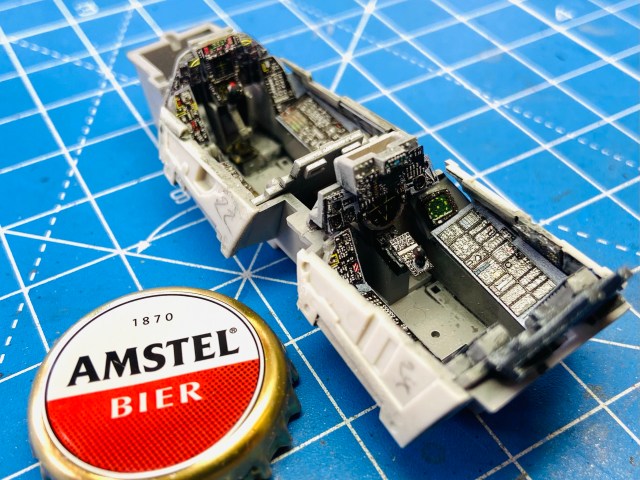
Here are the PE details installed in the cockpit:
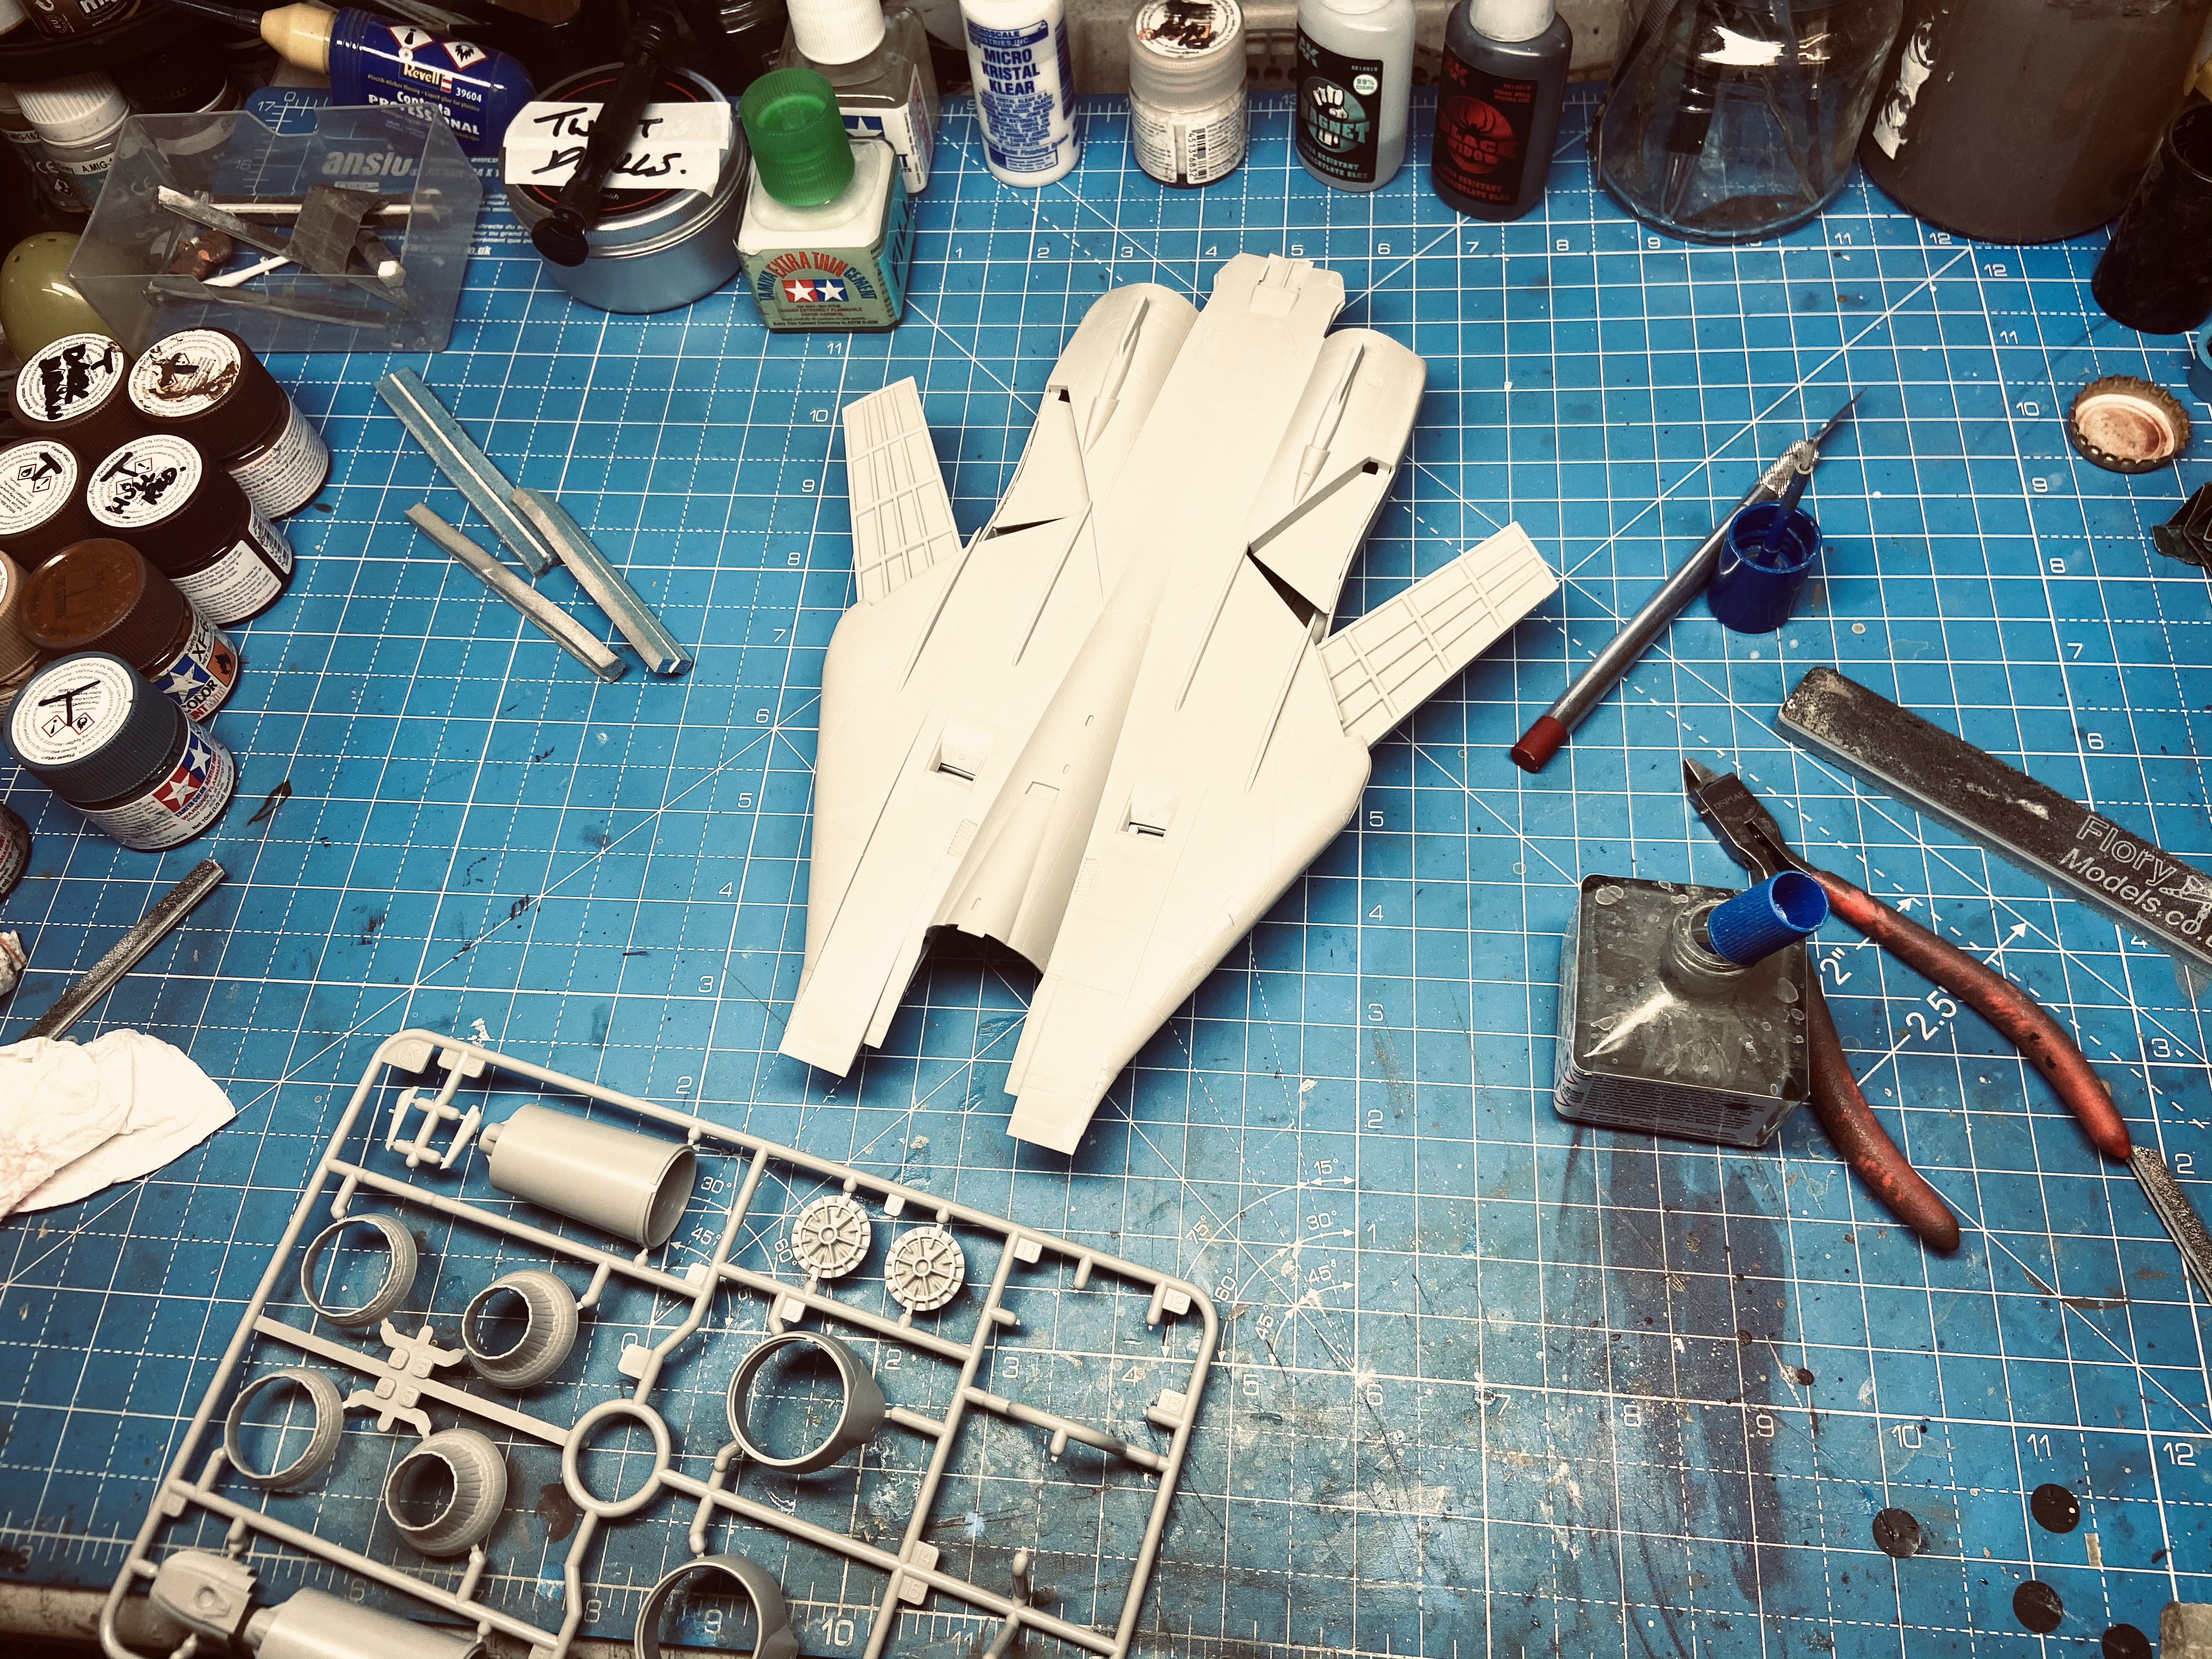
Once the cockpit was finished, work moved forward to assembling the kits airframe. Tamiya make this kit a joy to put together as it goes together in sub assemblies and its so well engineered that filler is redundant on this model. If only all builds could be like this!
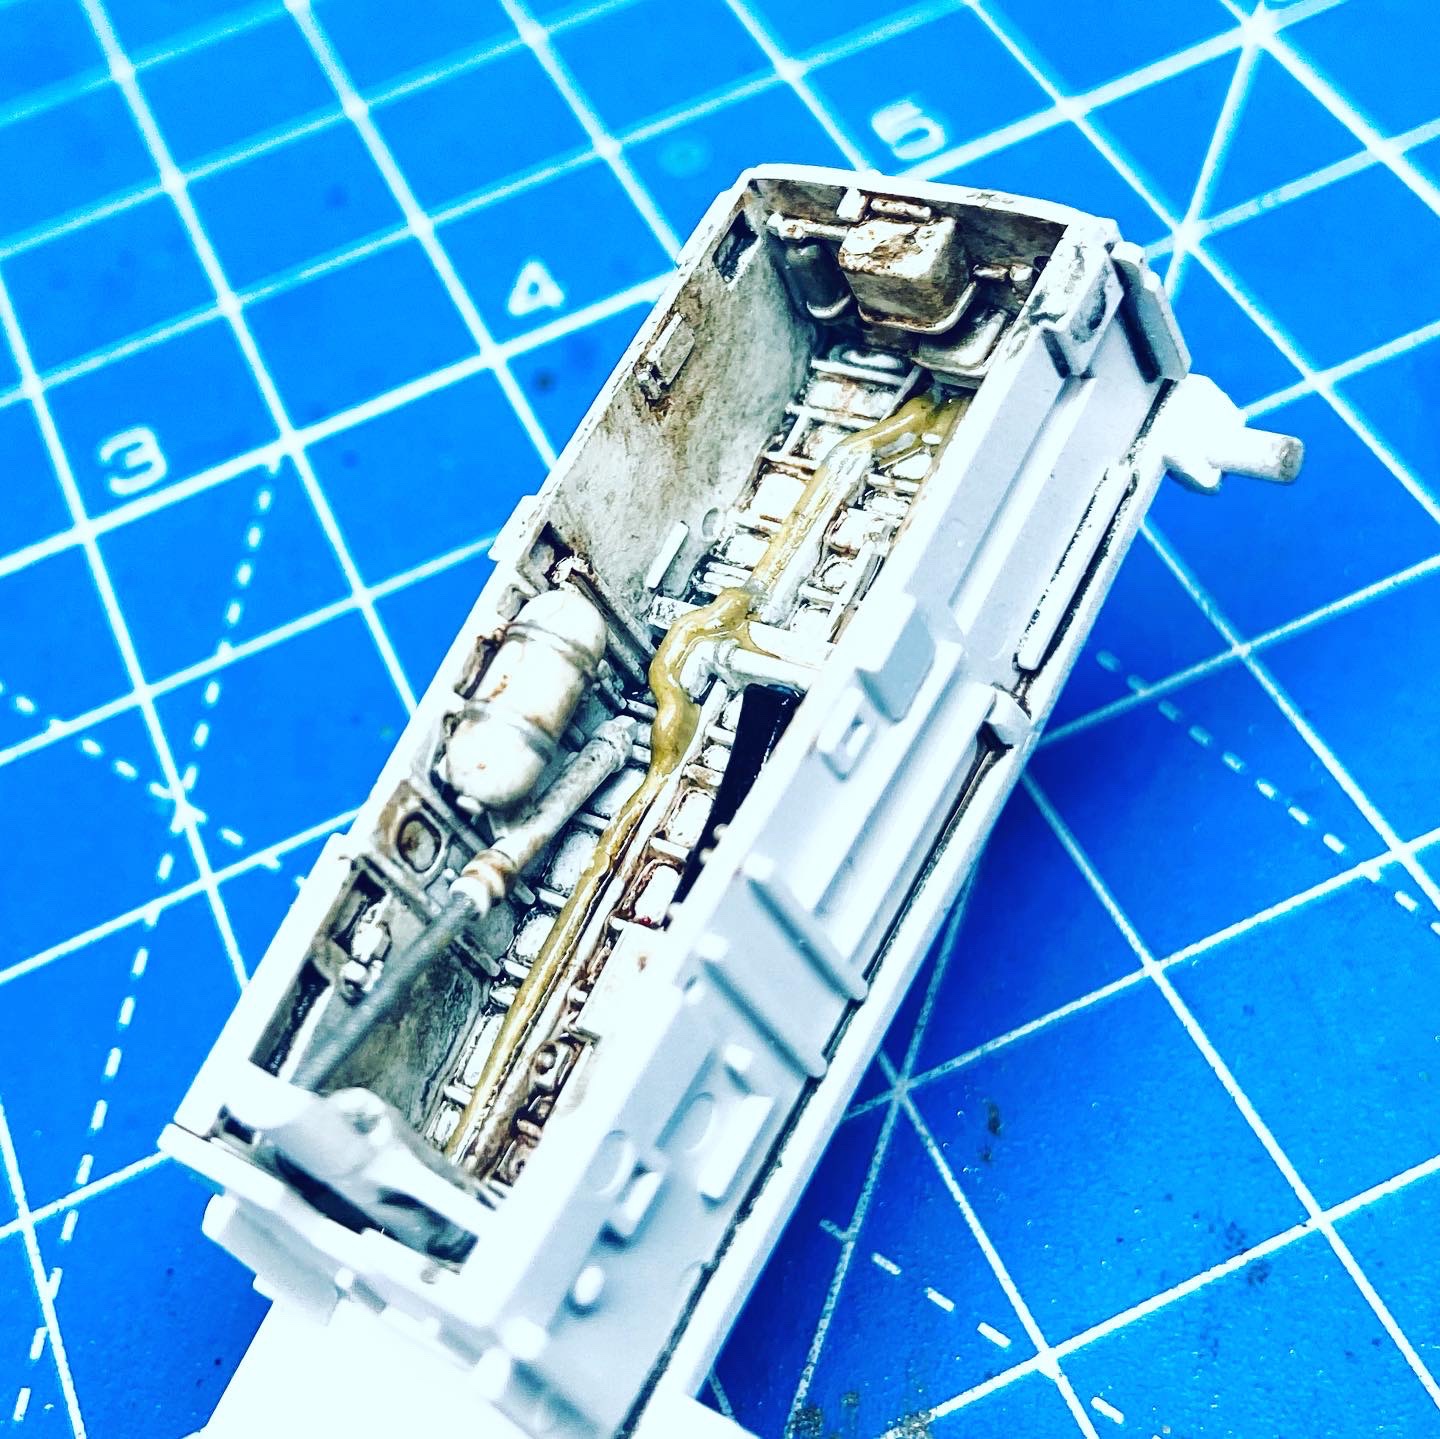
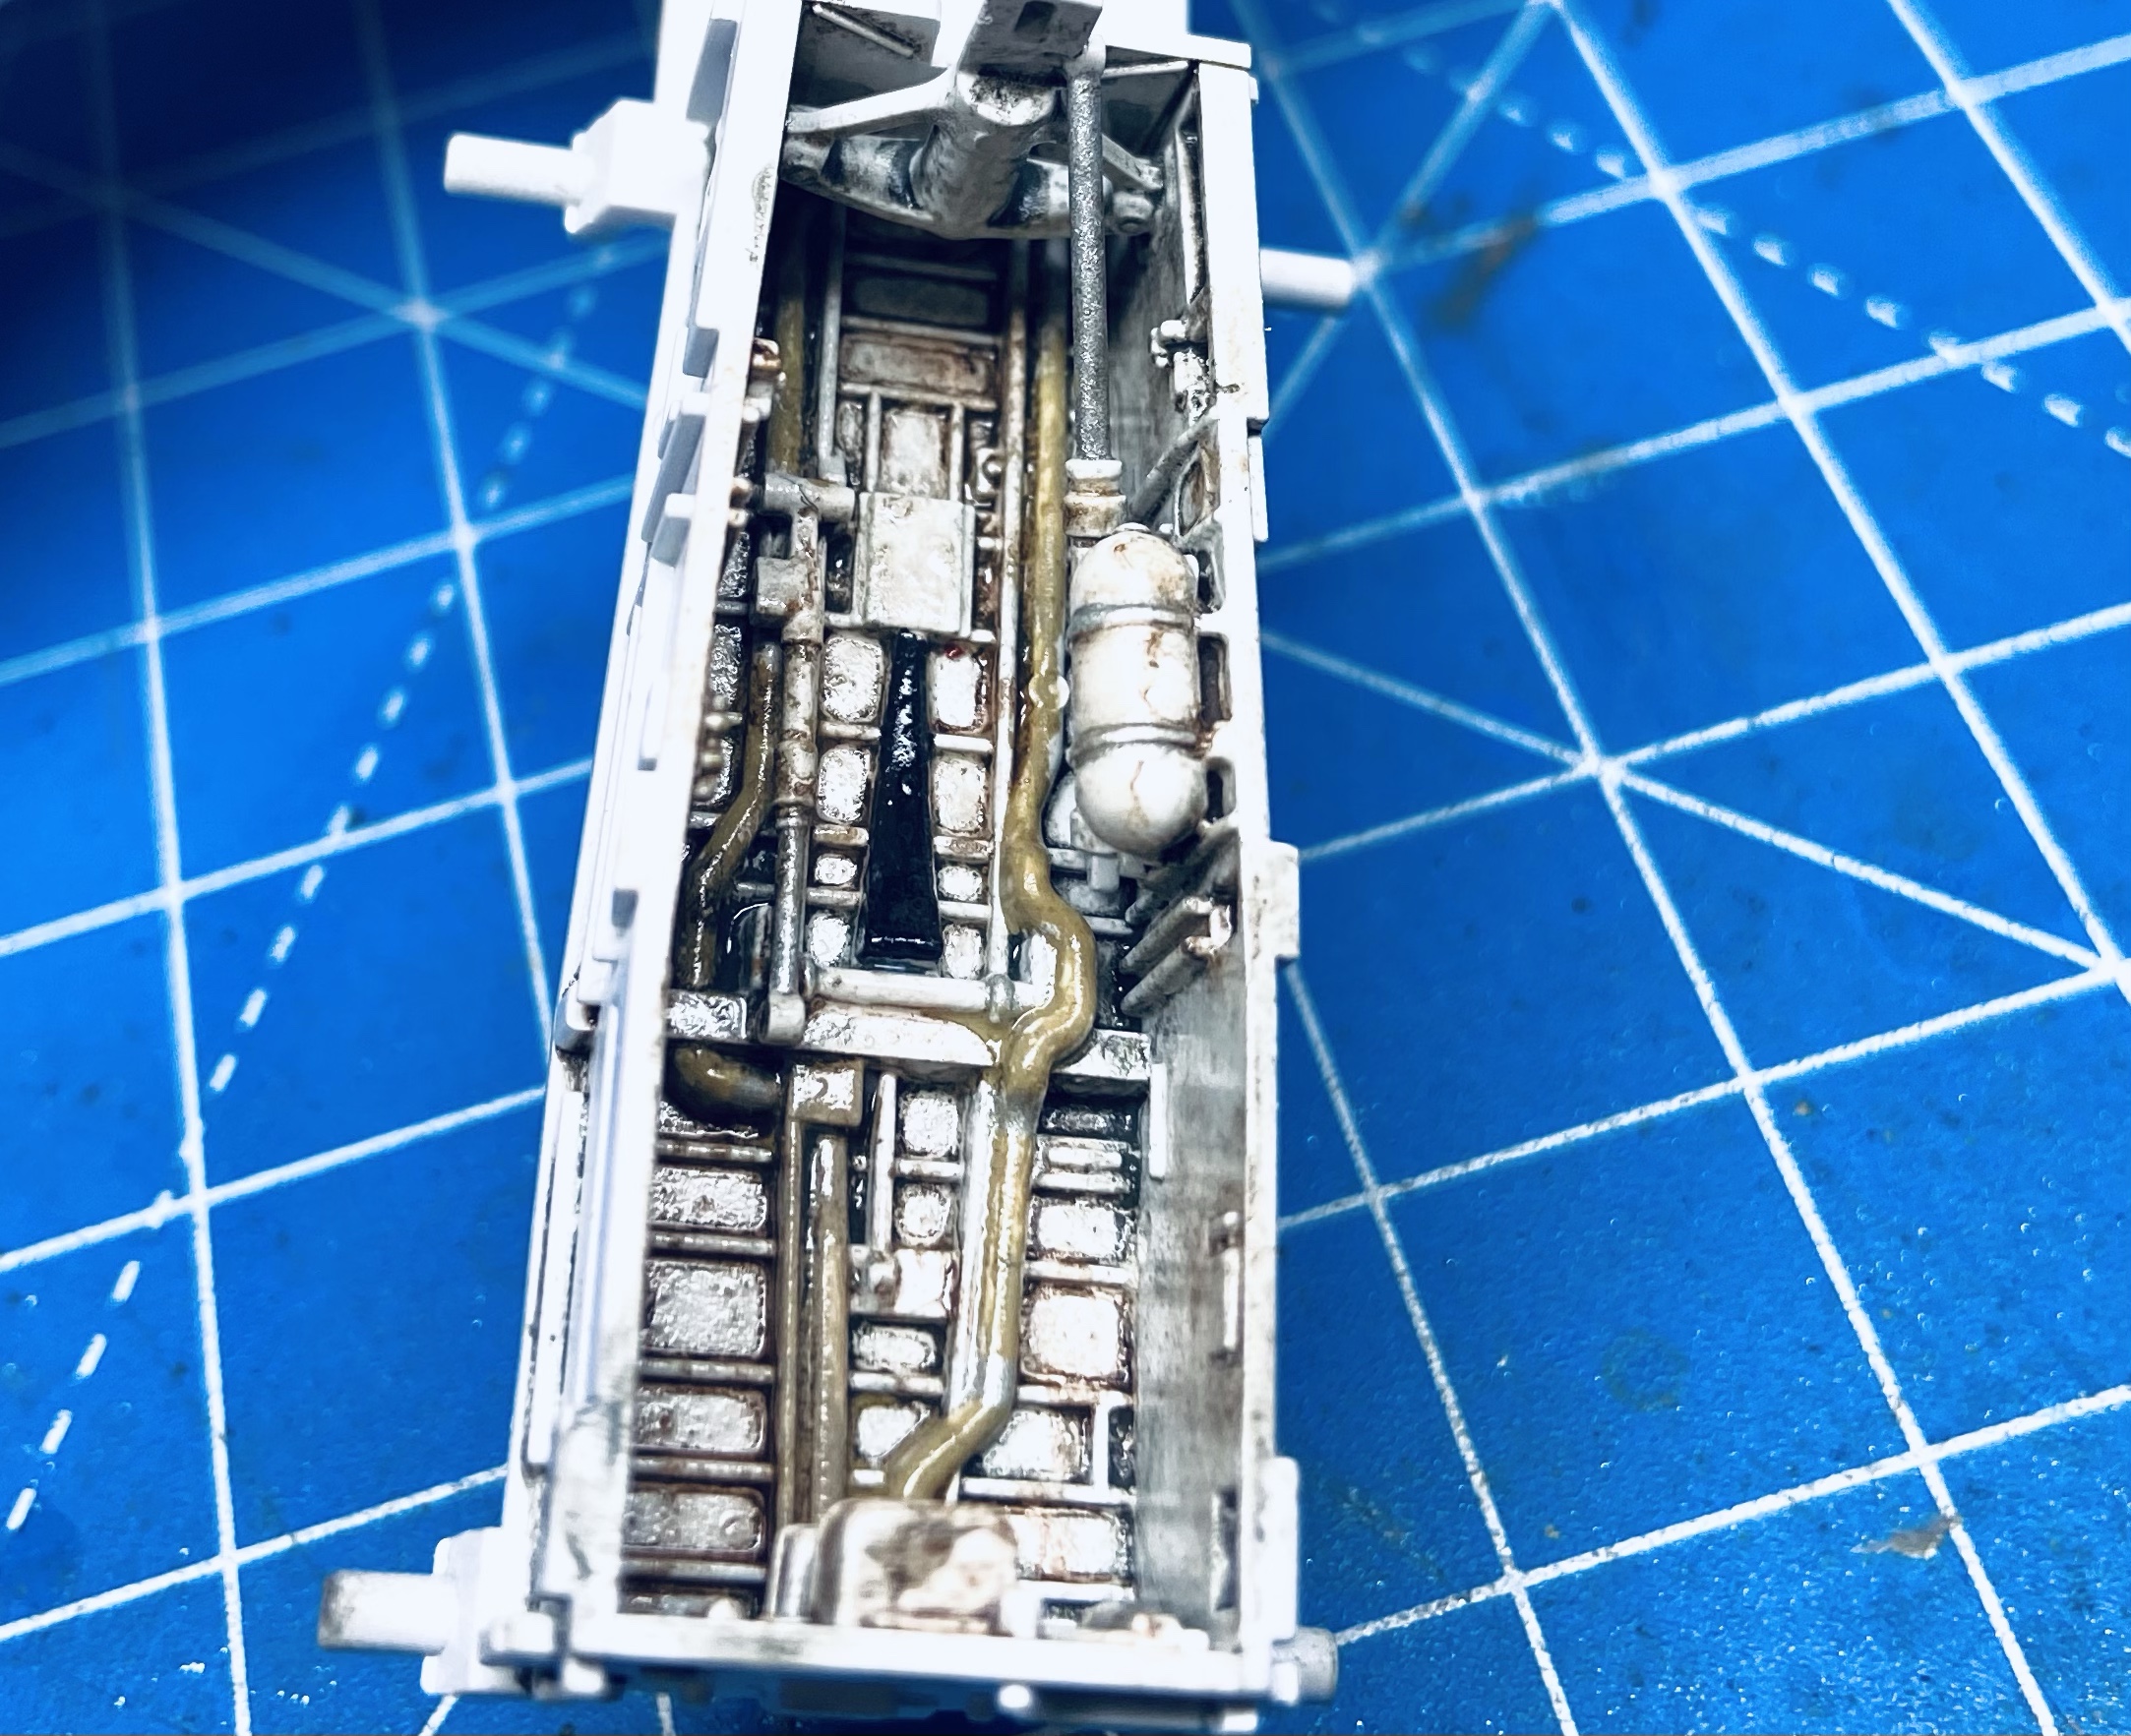
Details, Details…….
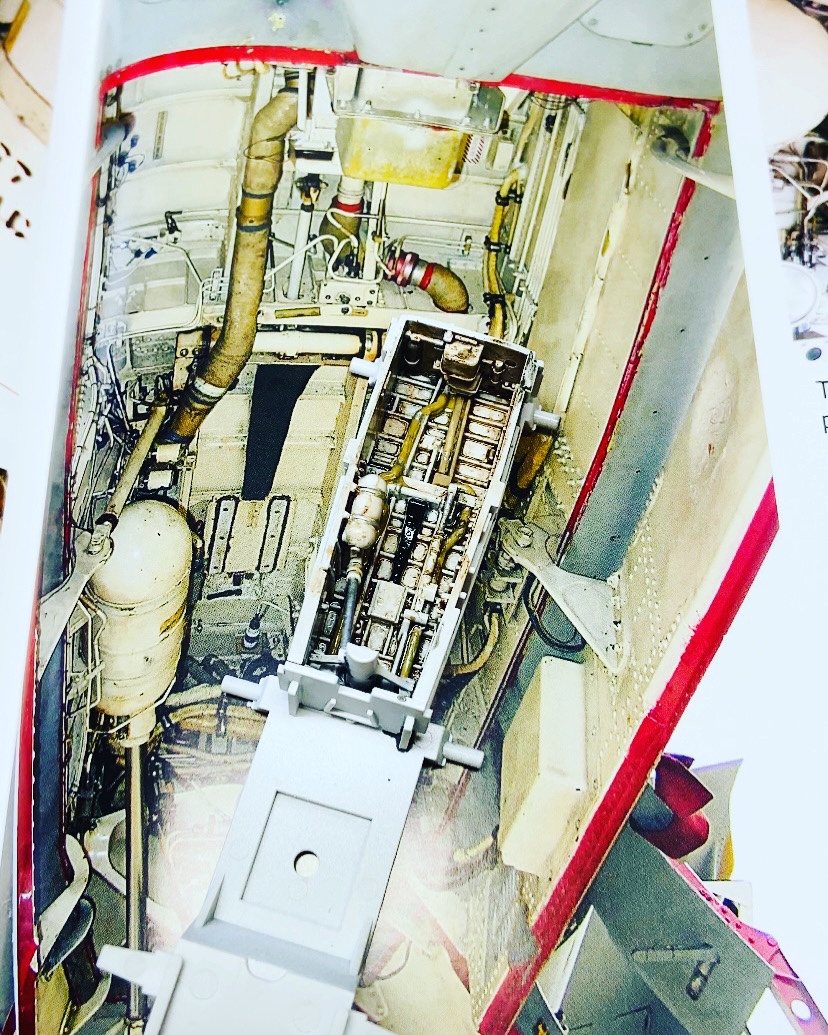
Here you can see the kits Nose landing gear well and alI I have done is paint it and add an enamel wash to bring those lovely details. In the picture on the right, you can see the models nose gear well sat upon a photograph of the real nose gear well.
I won’t go into airframe assembly here as its very straightforward, suffice to say you really cannot go wrong if you simply follow the instructions. Yes, this kit really is that good!
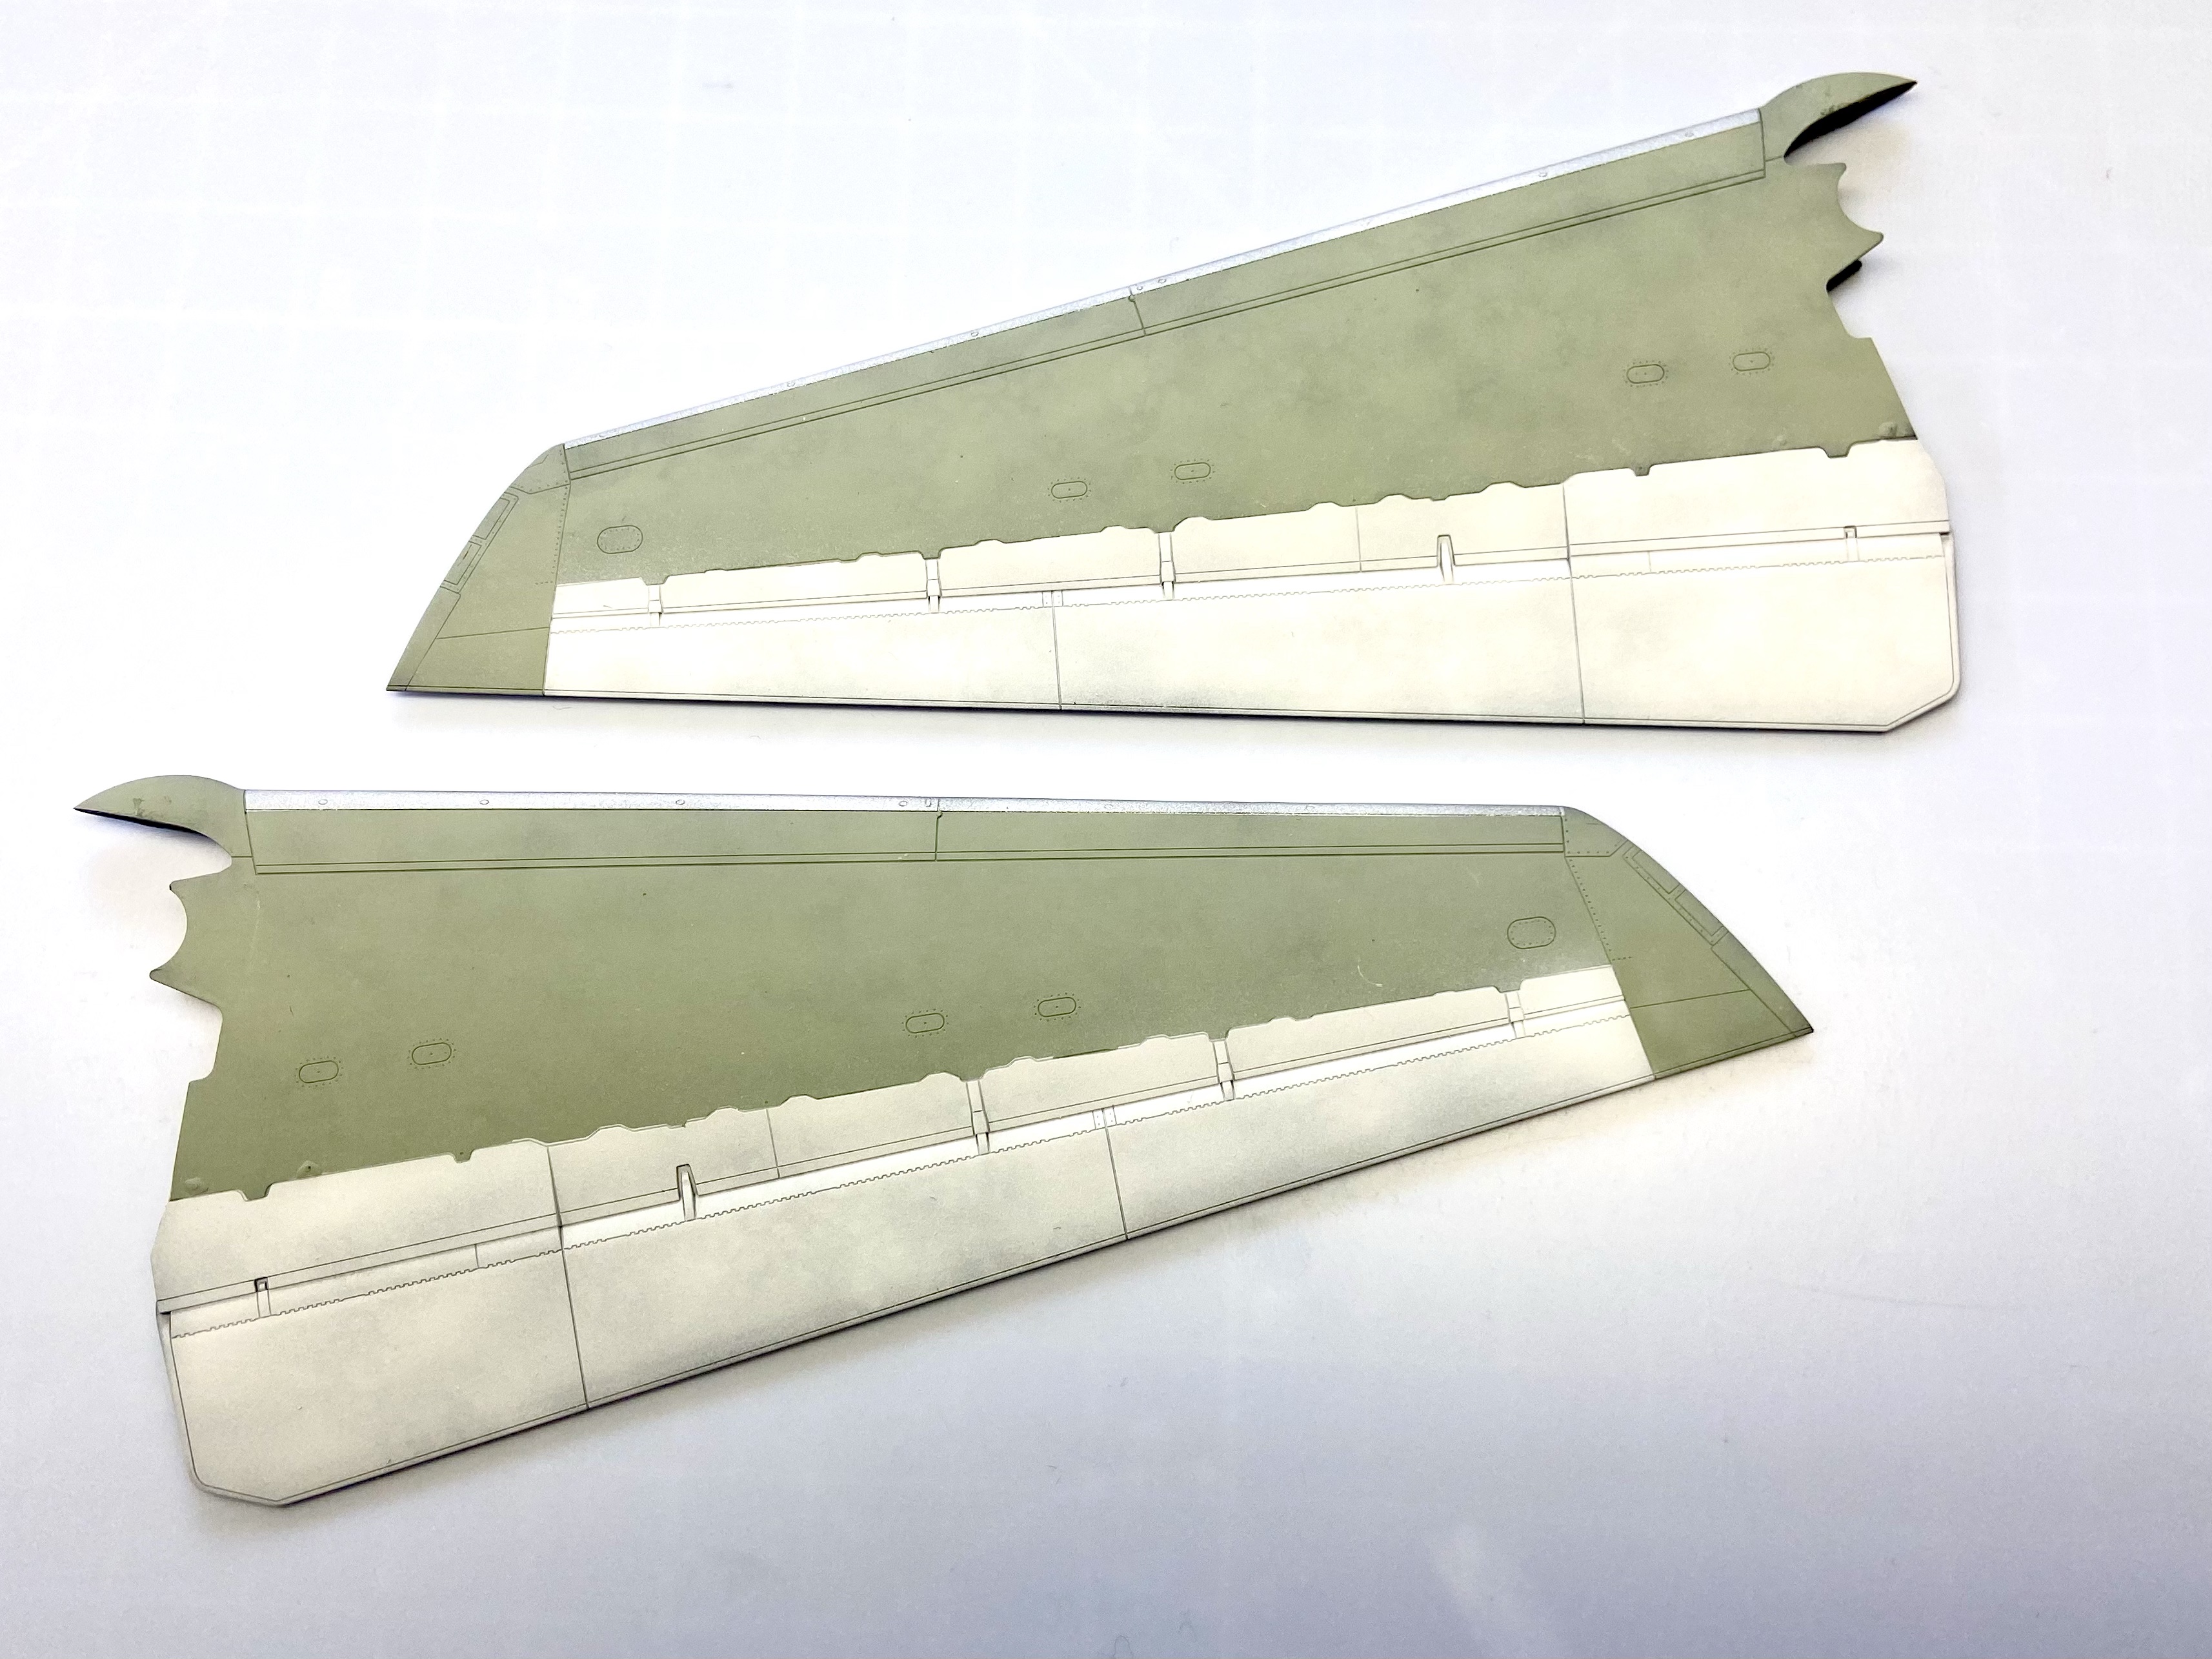
With the airframe completed minus its wings-They can be assembled separately and added to the airframe later, it was time to move onto the painting phase.


As is now the usual case with my models I primed the model with Tamiya NATO black acrylic and then sprayed a marble coat over it, this technique builds up a layer underneath the top camouflage colour which gives depth to the paint and adds visual interest to the model.
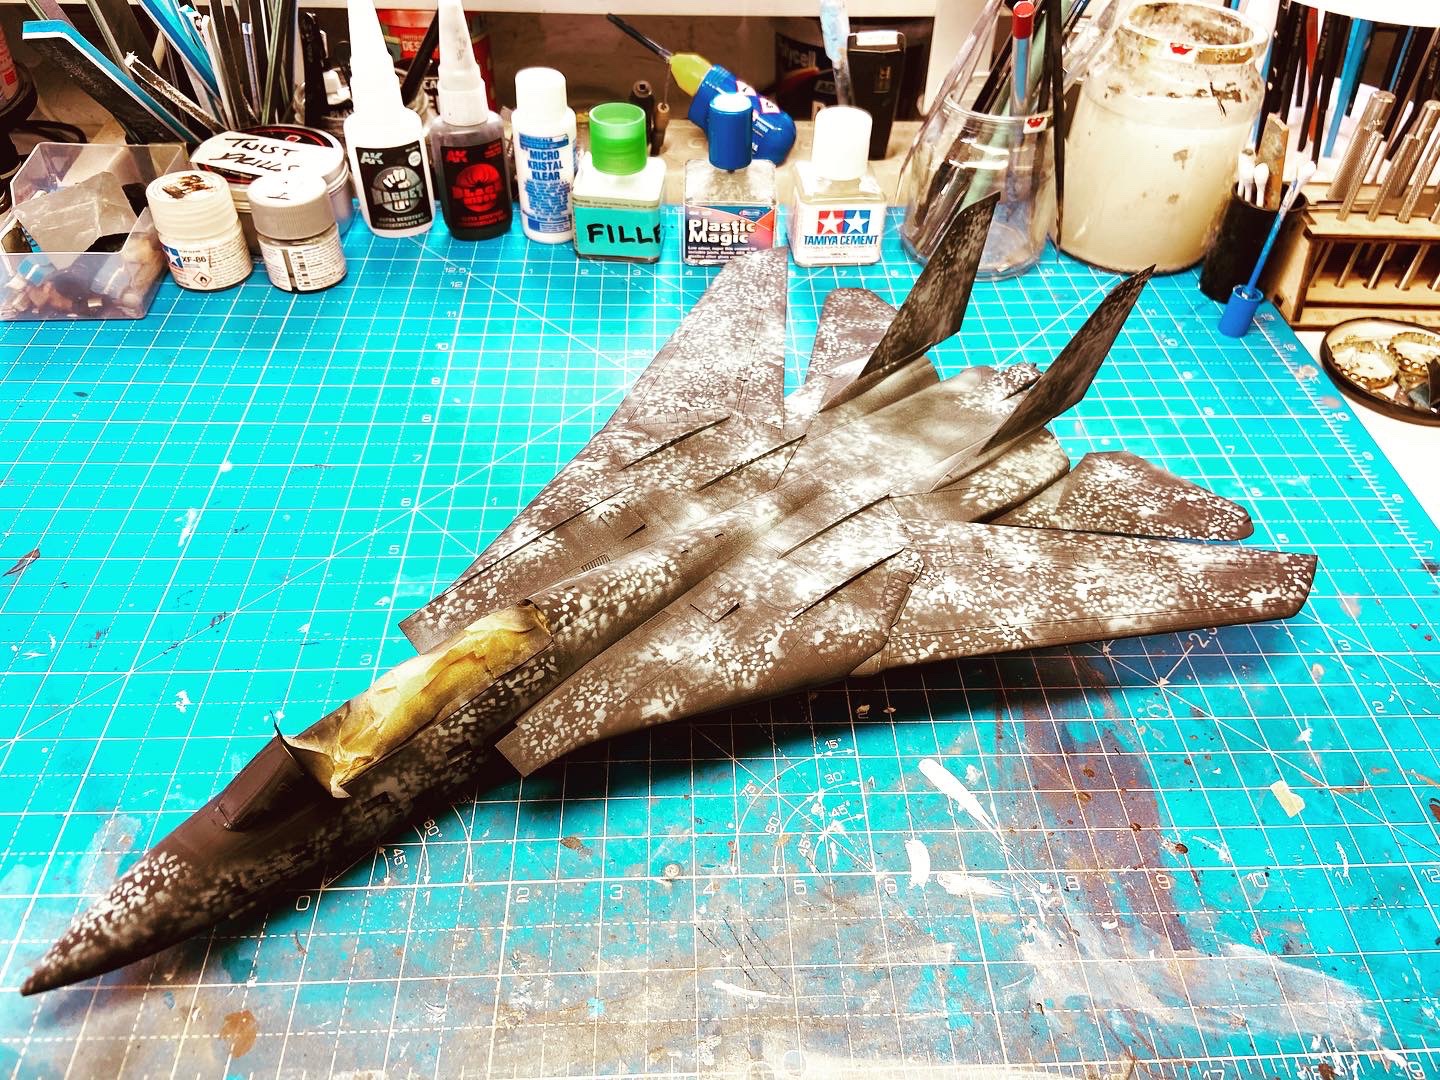
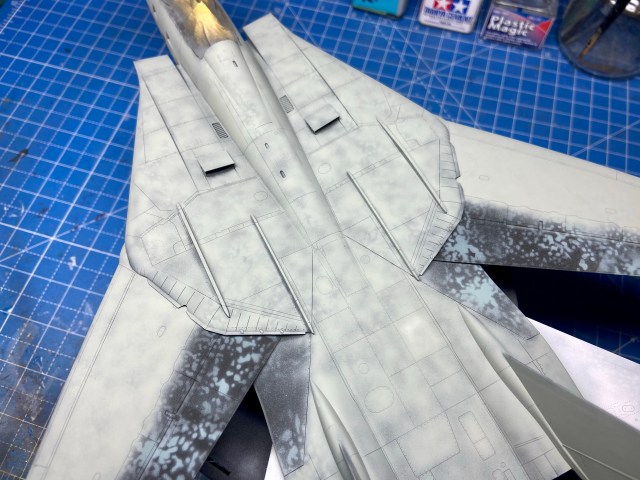
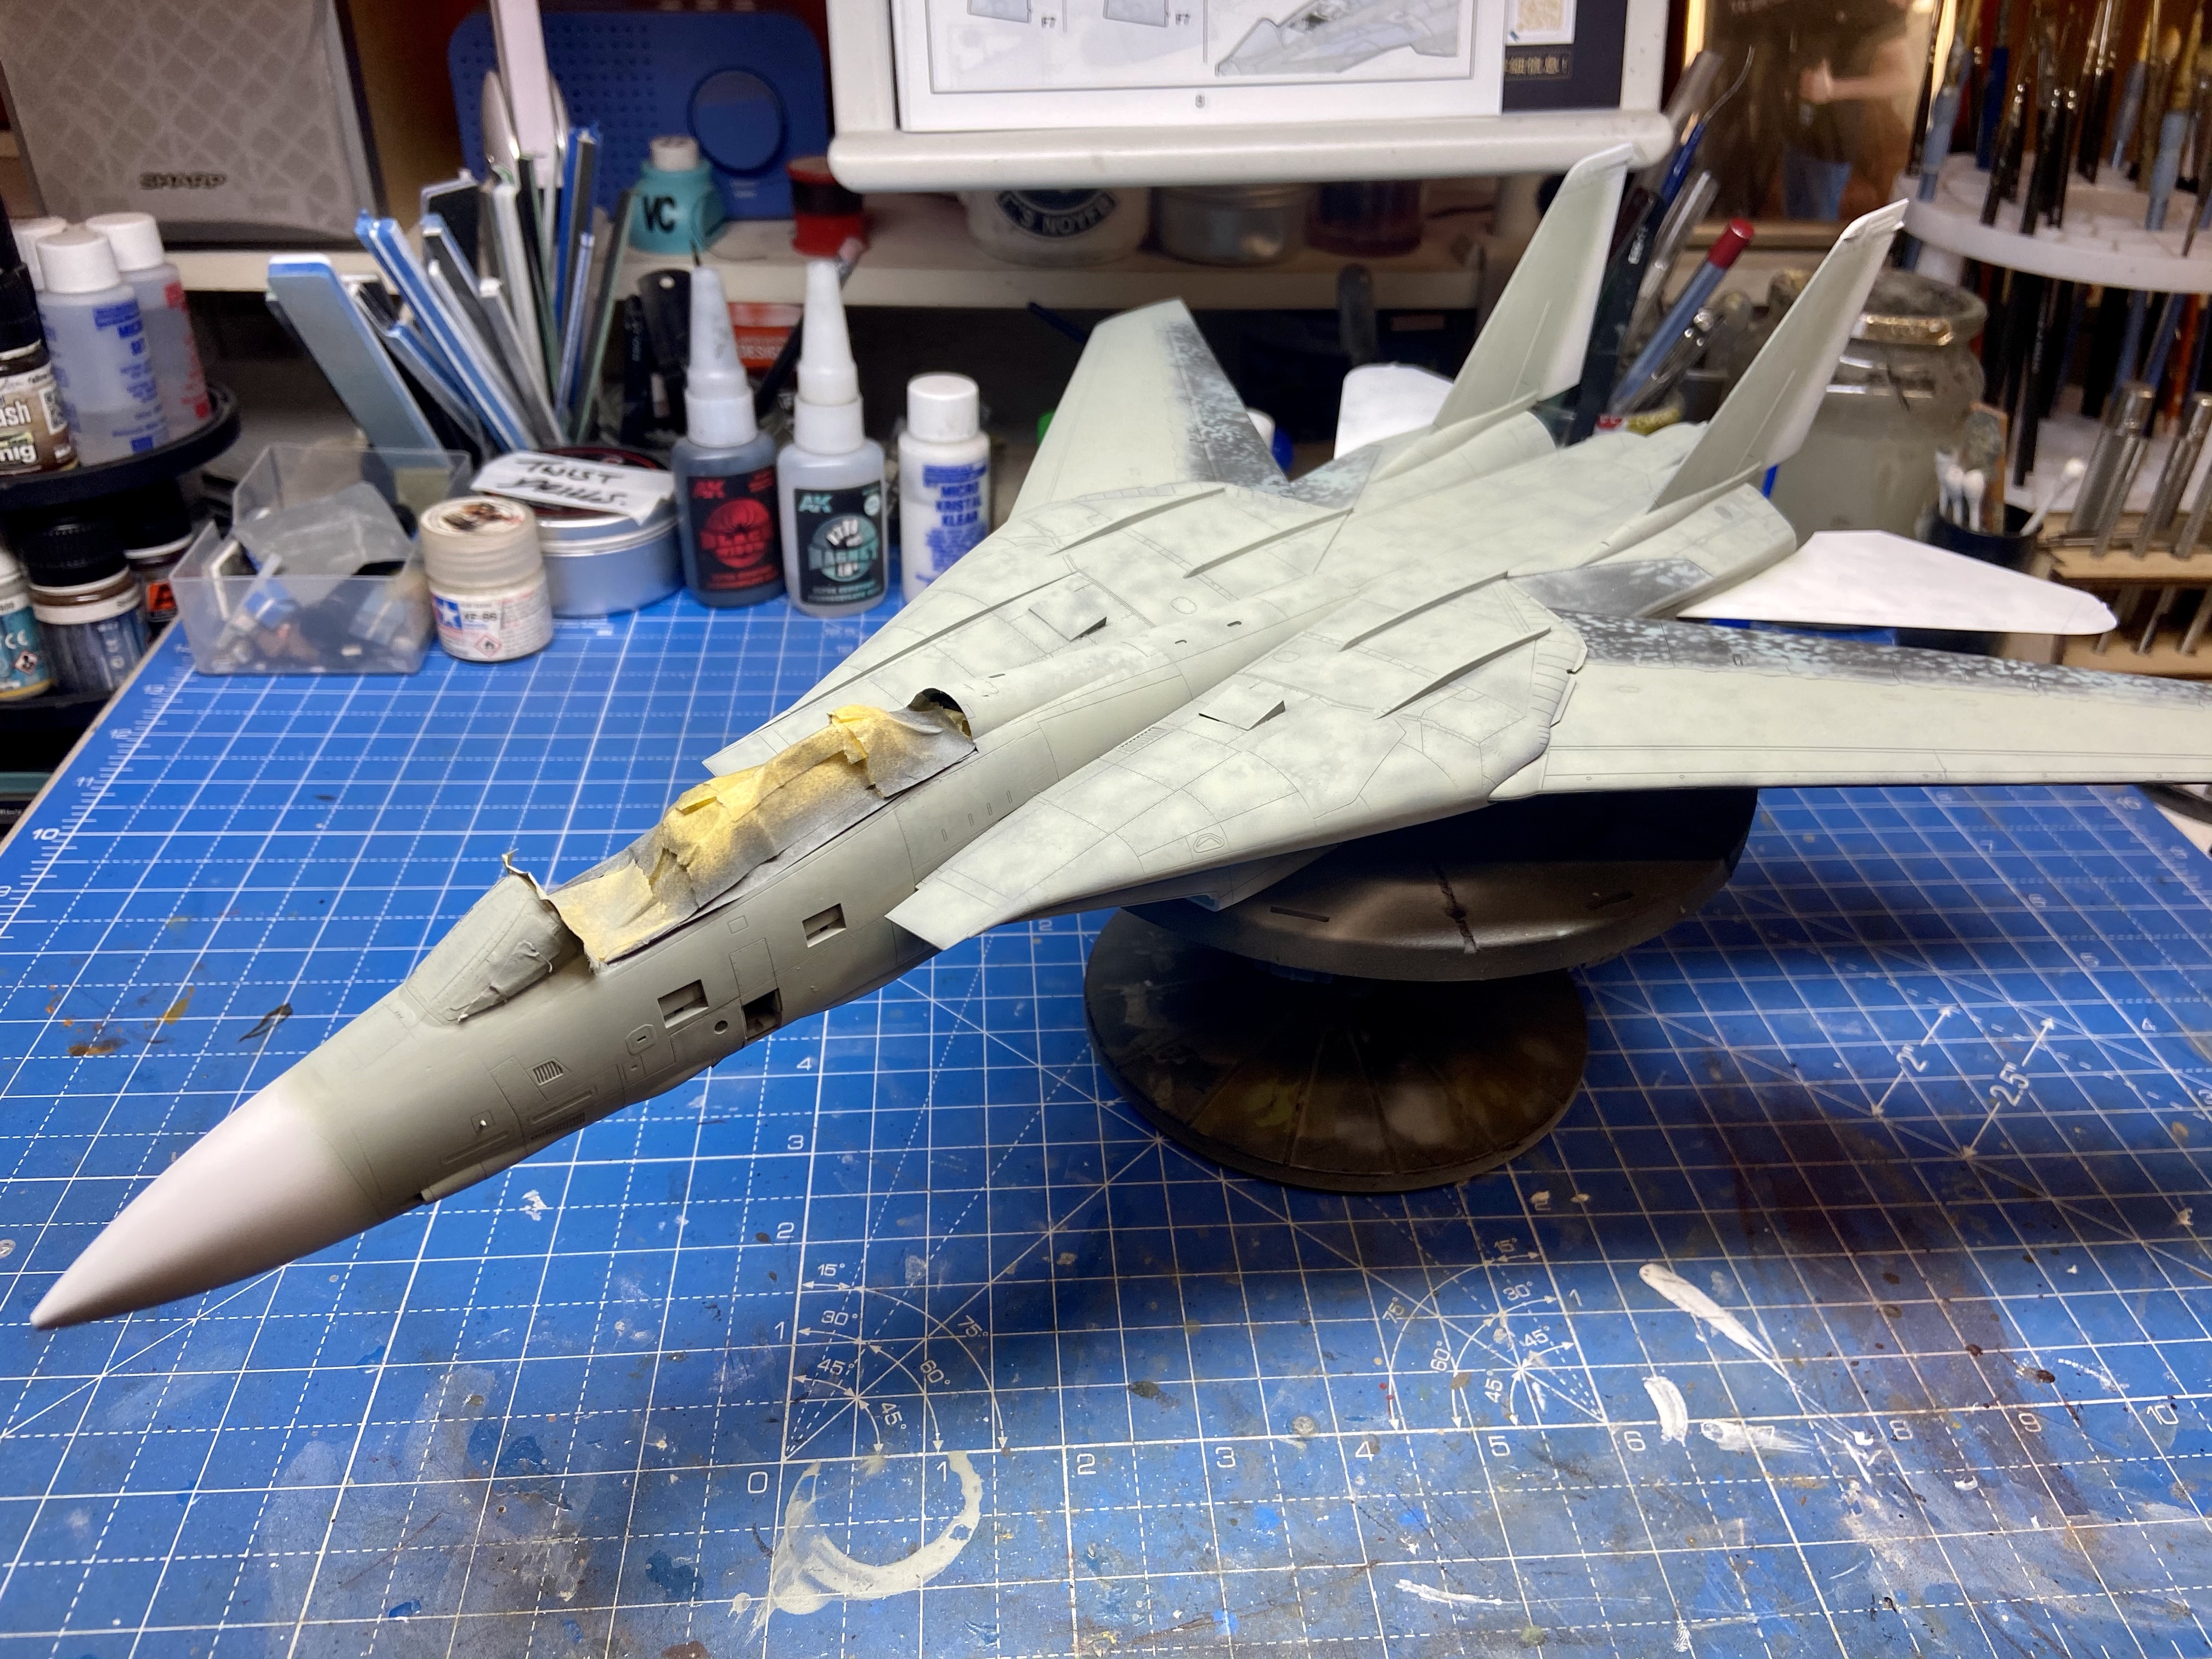
Above, you can see the camouflage colour being sprayed over the mottle layer. It is best to mist multiple light coats of paints rather than spray one heavy wet coat.
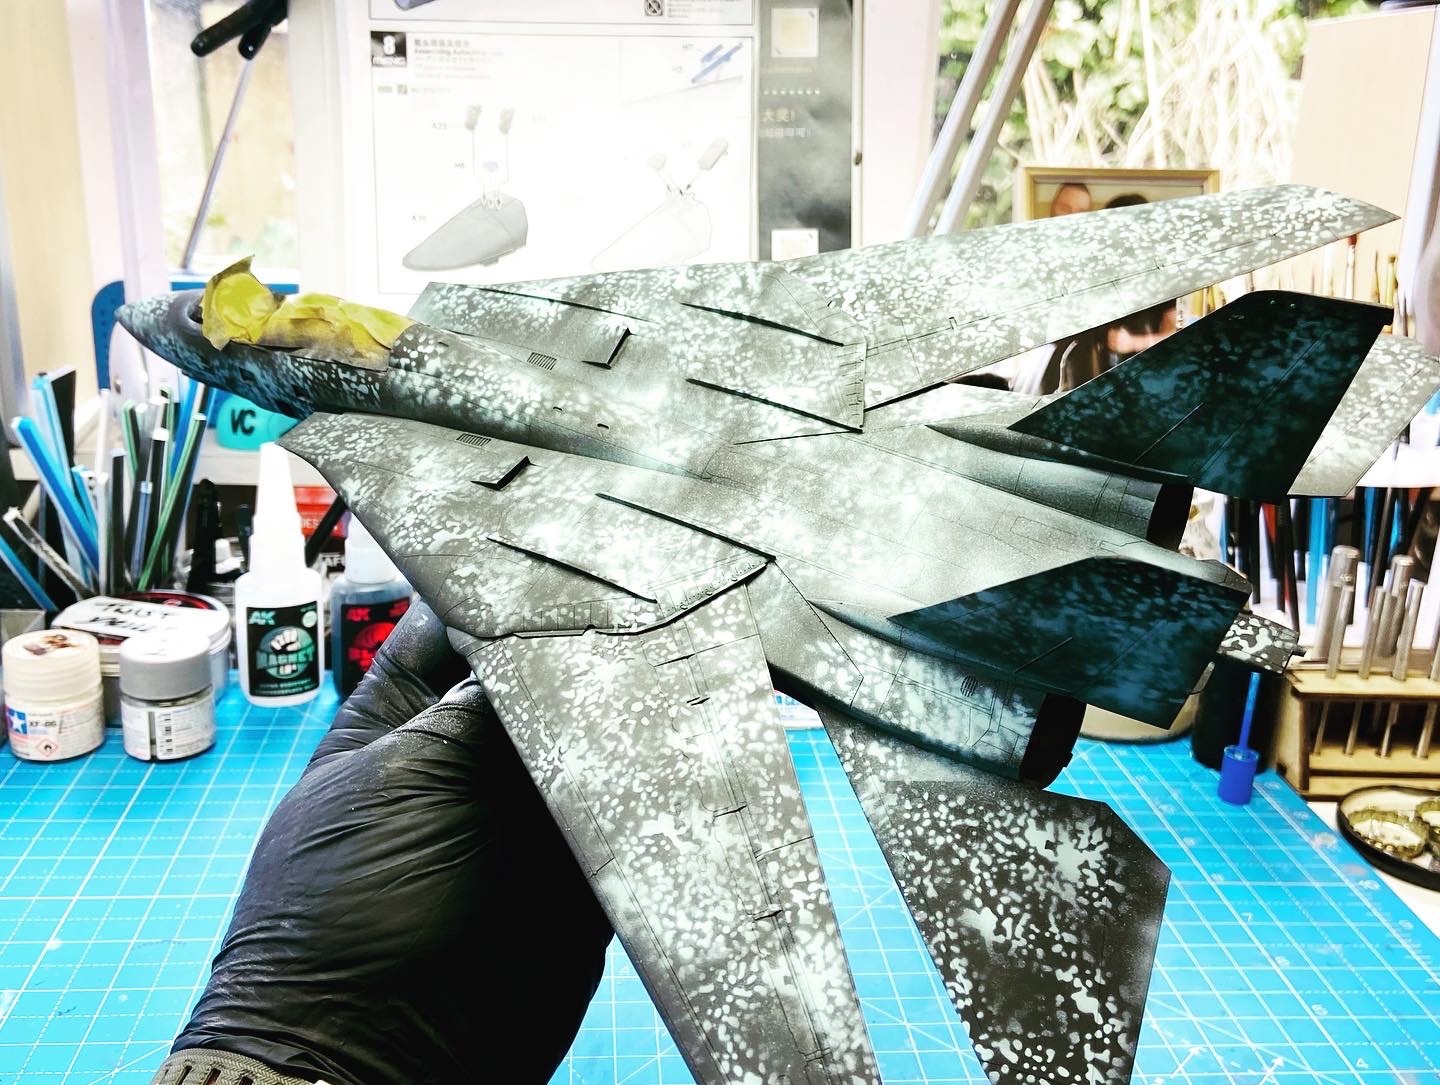
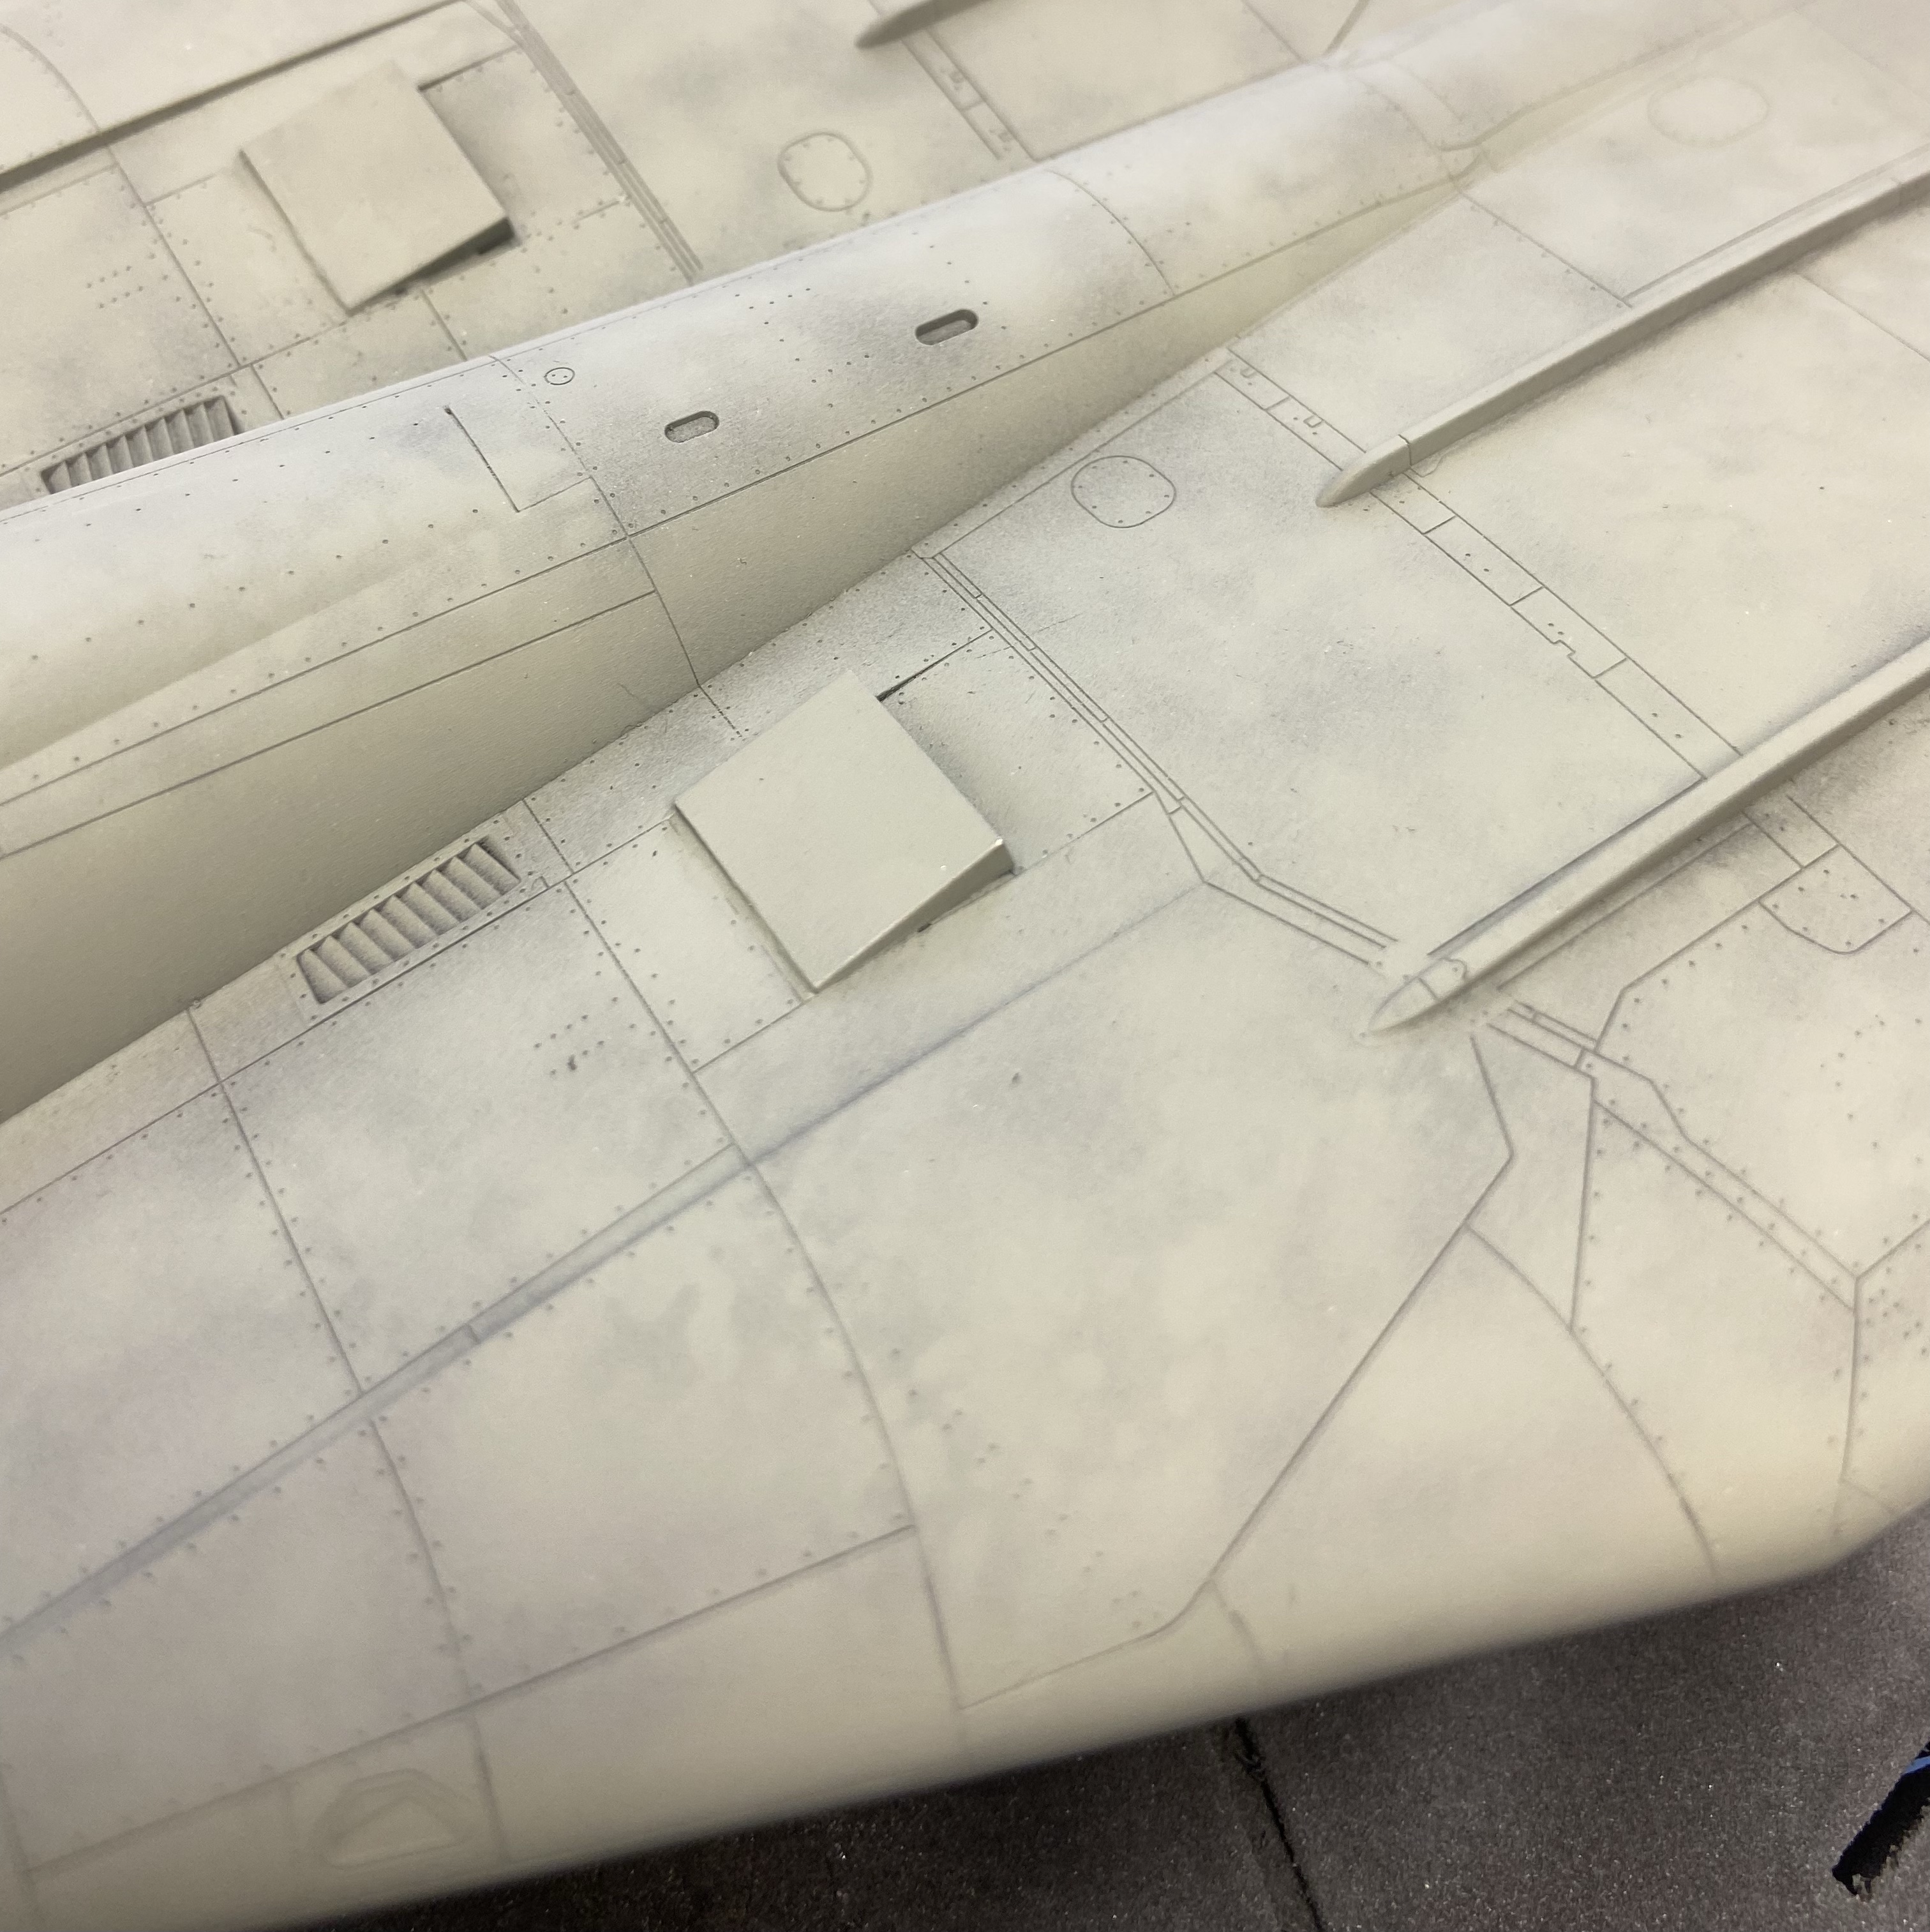
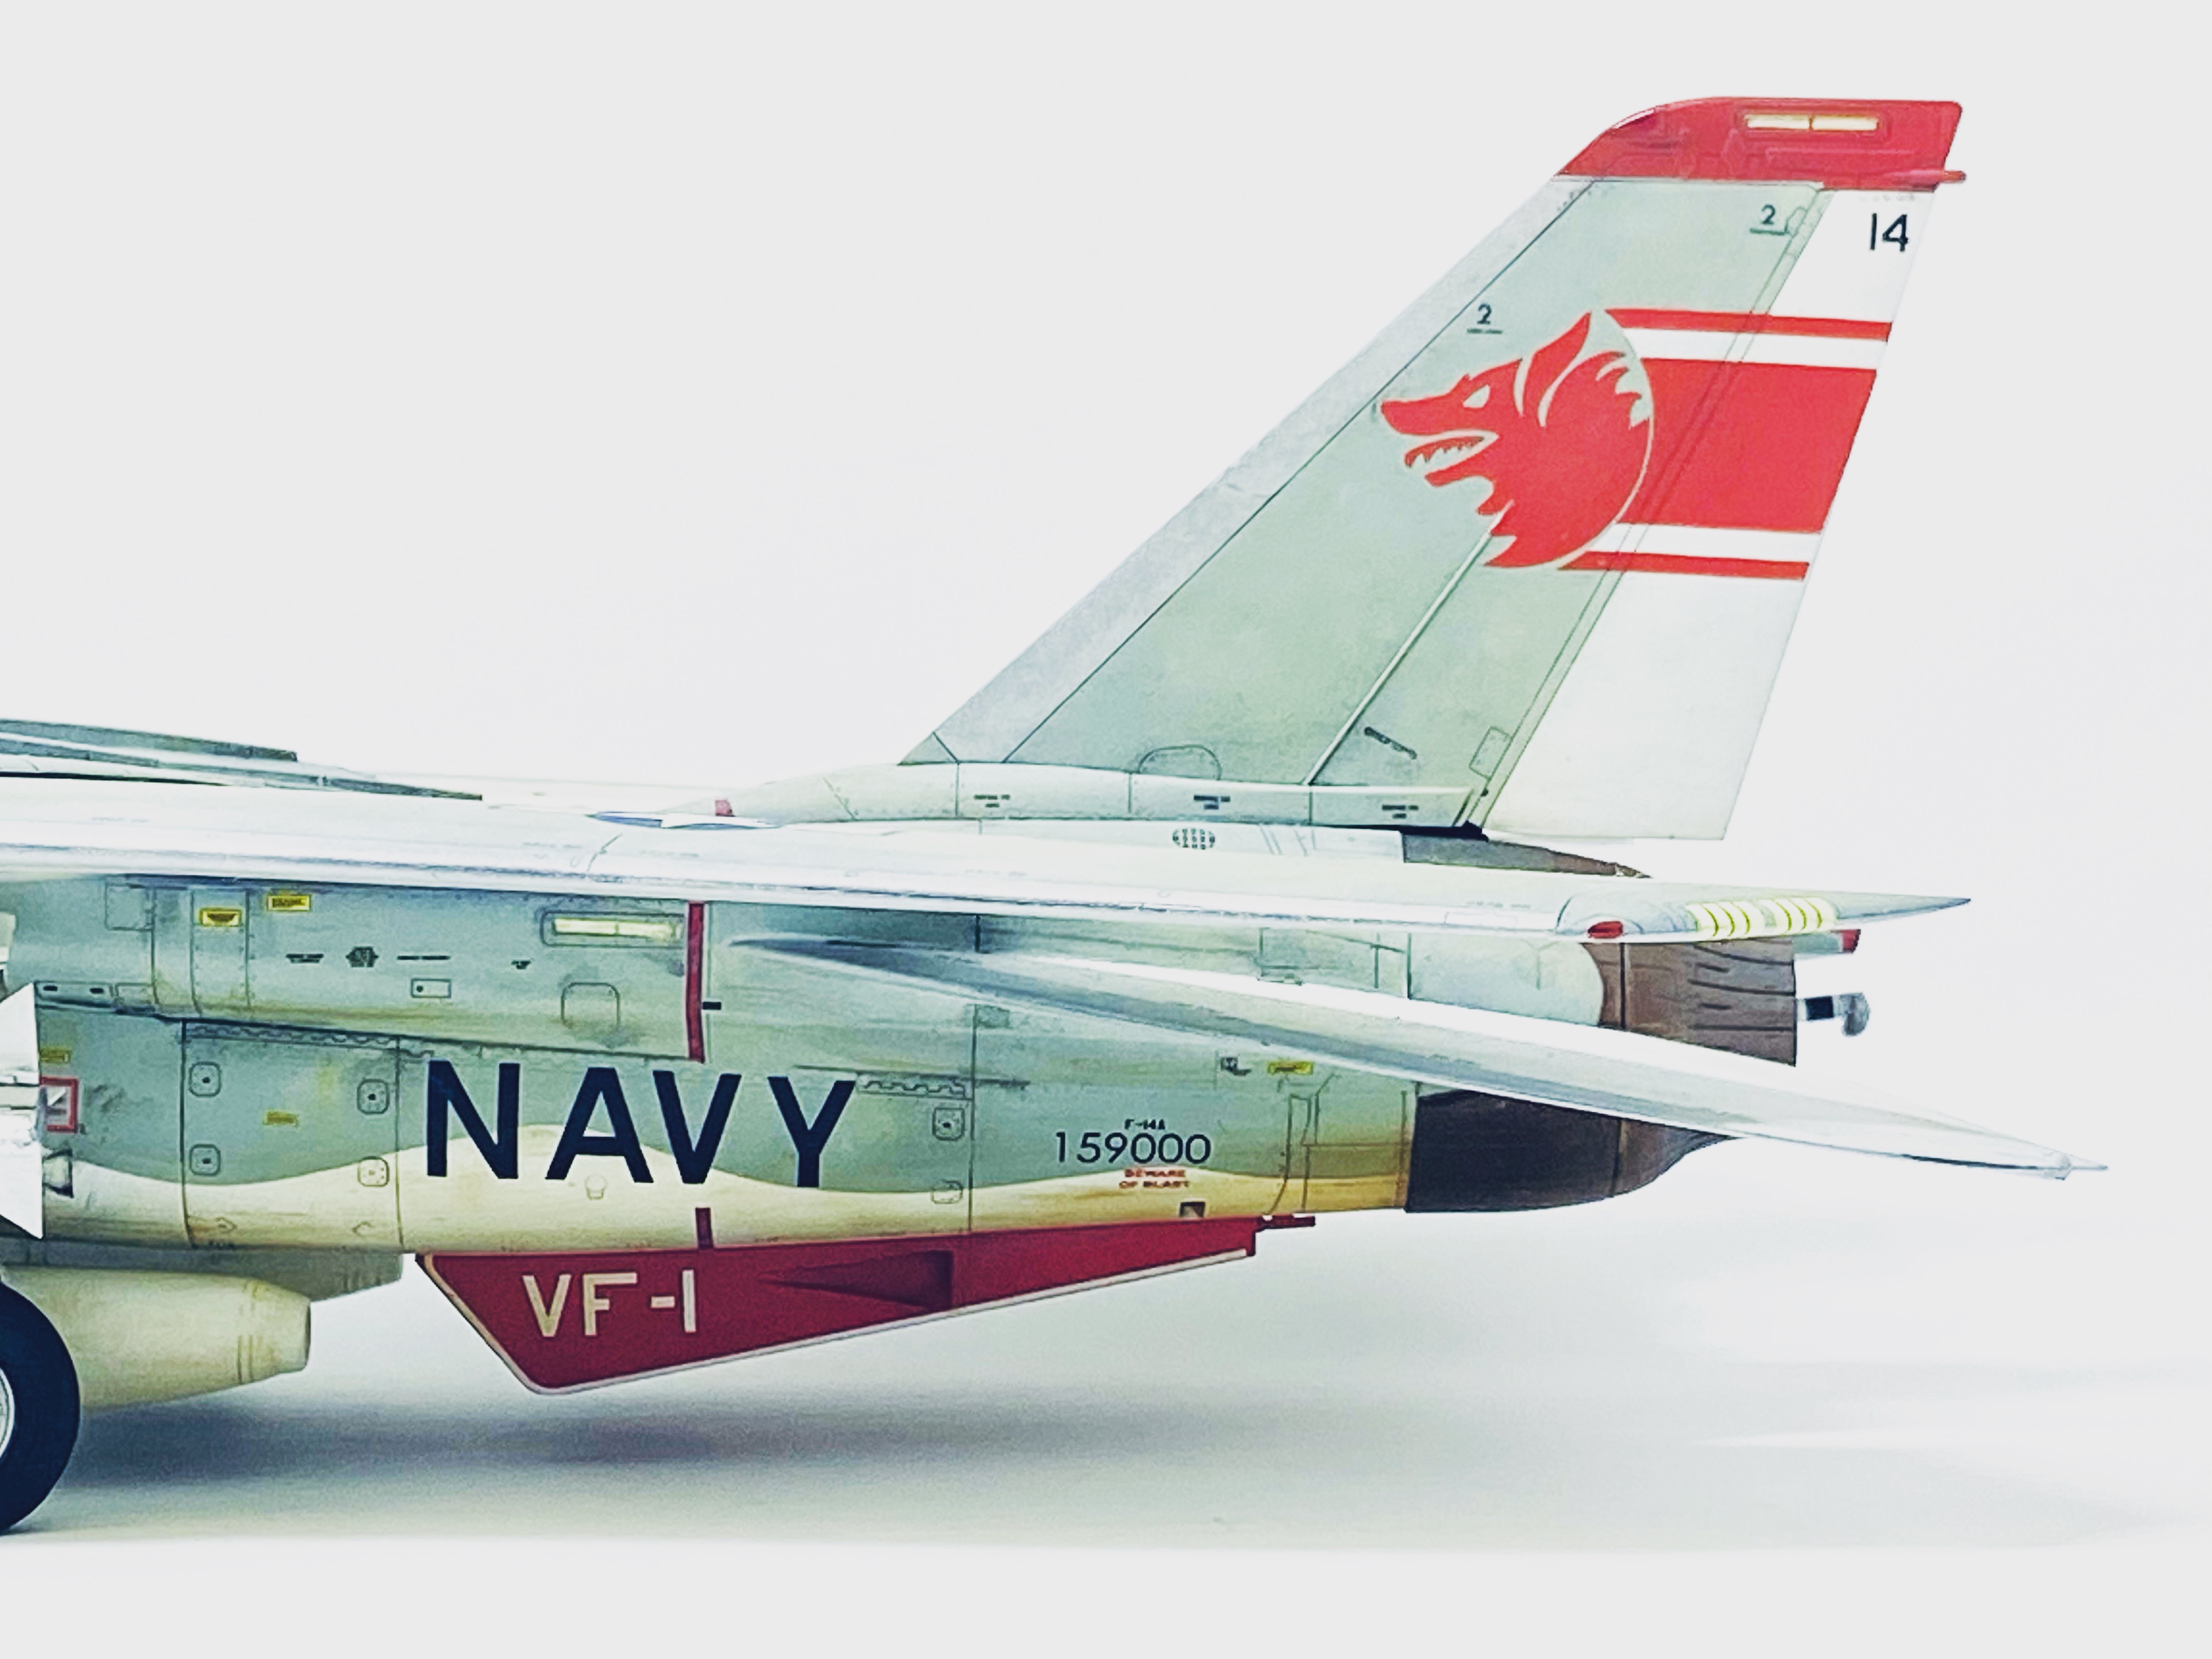
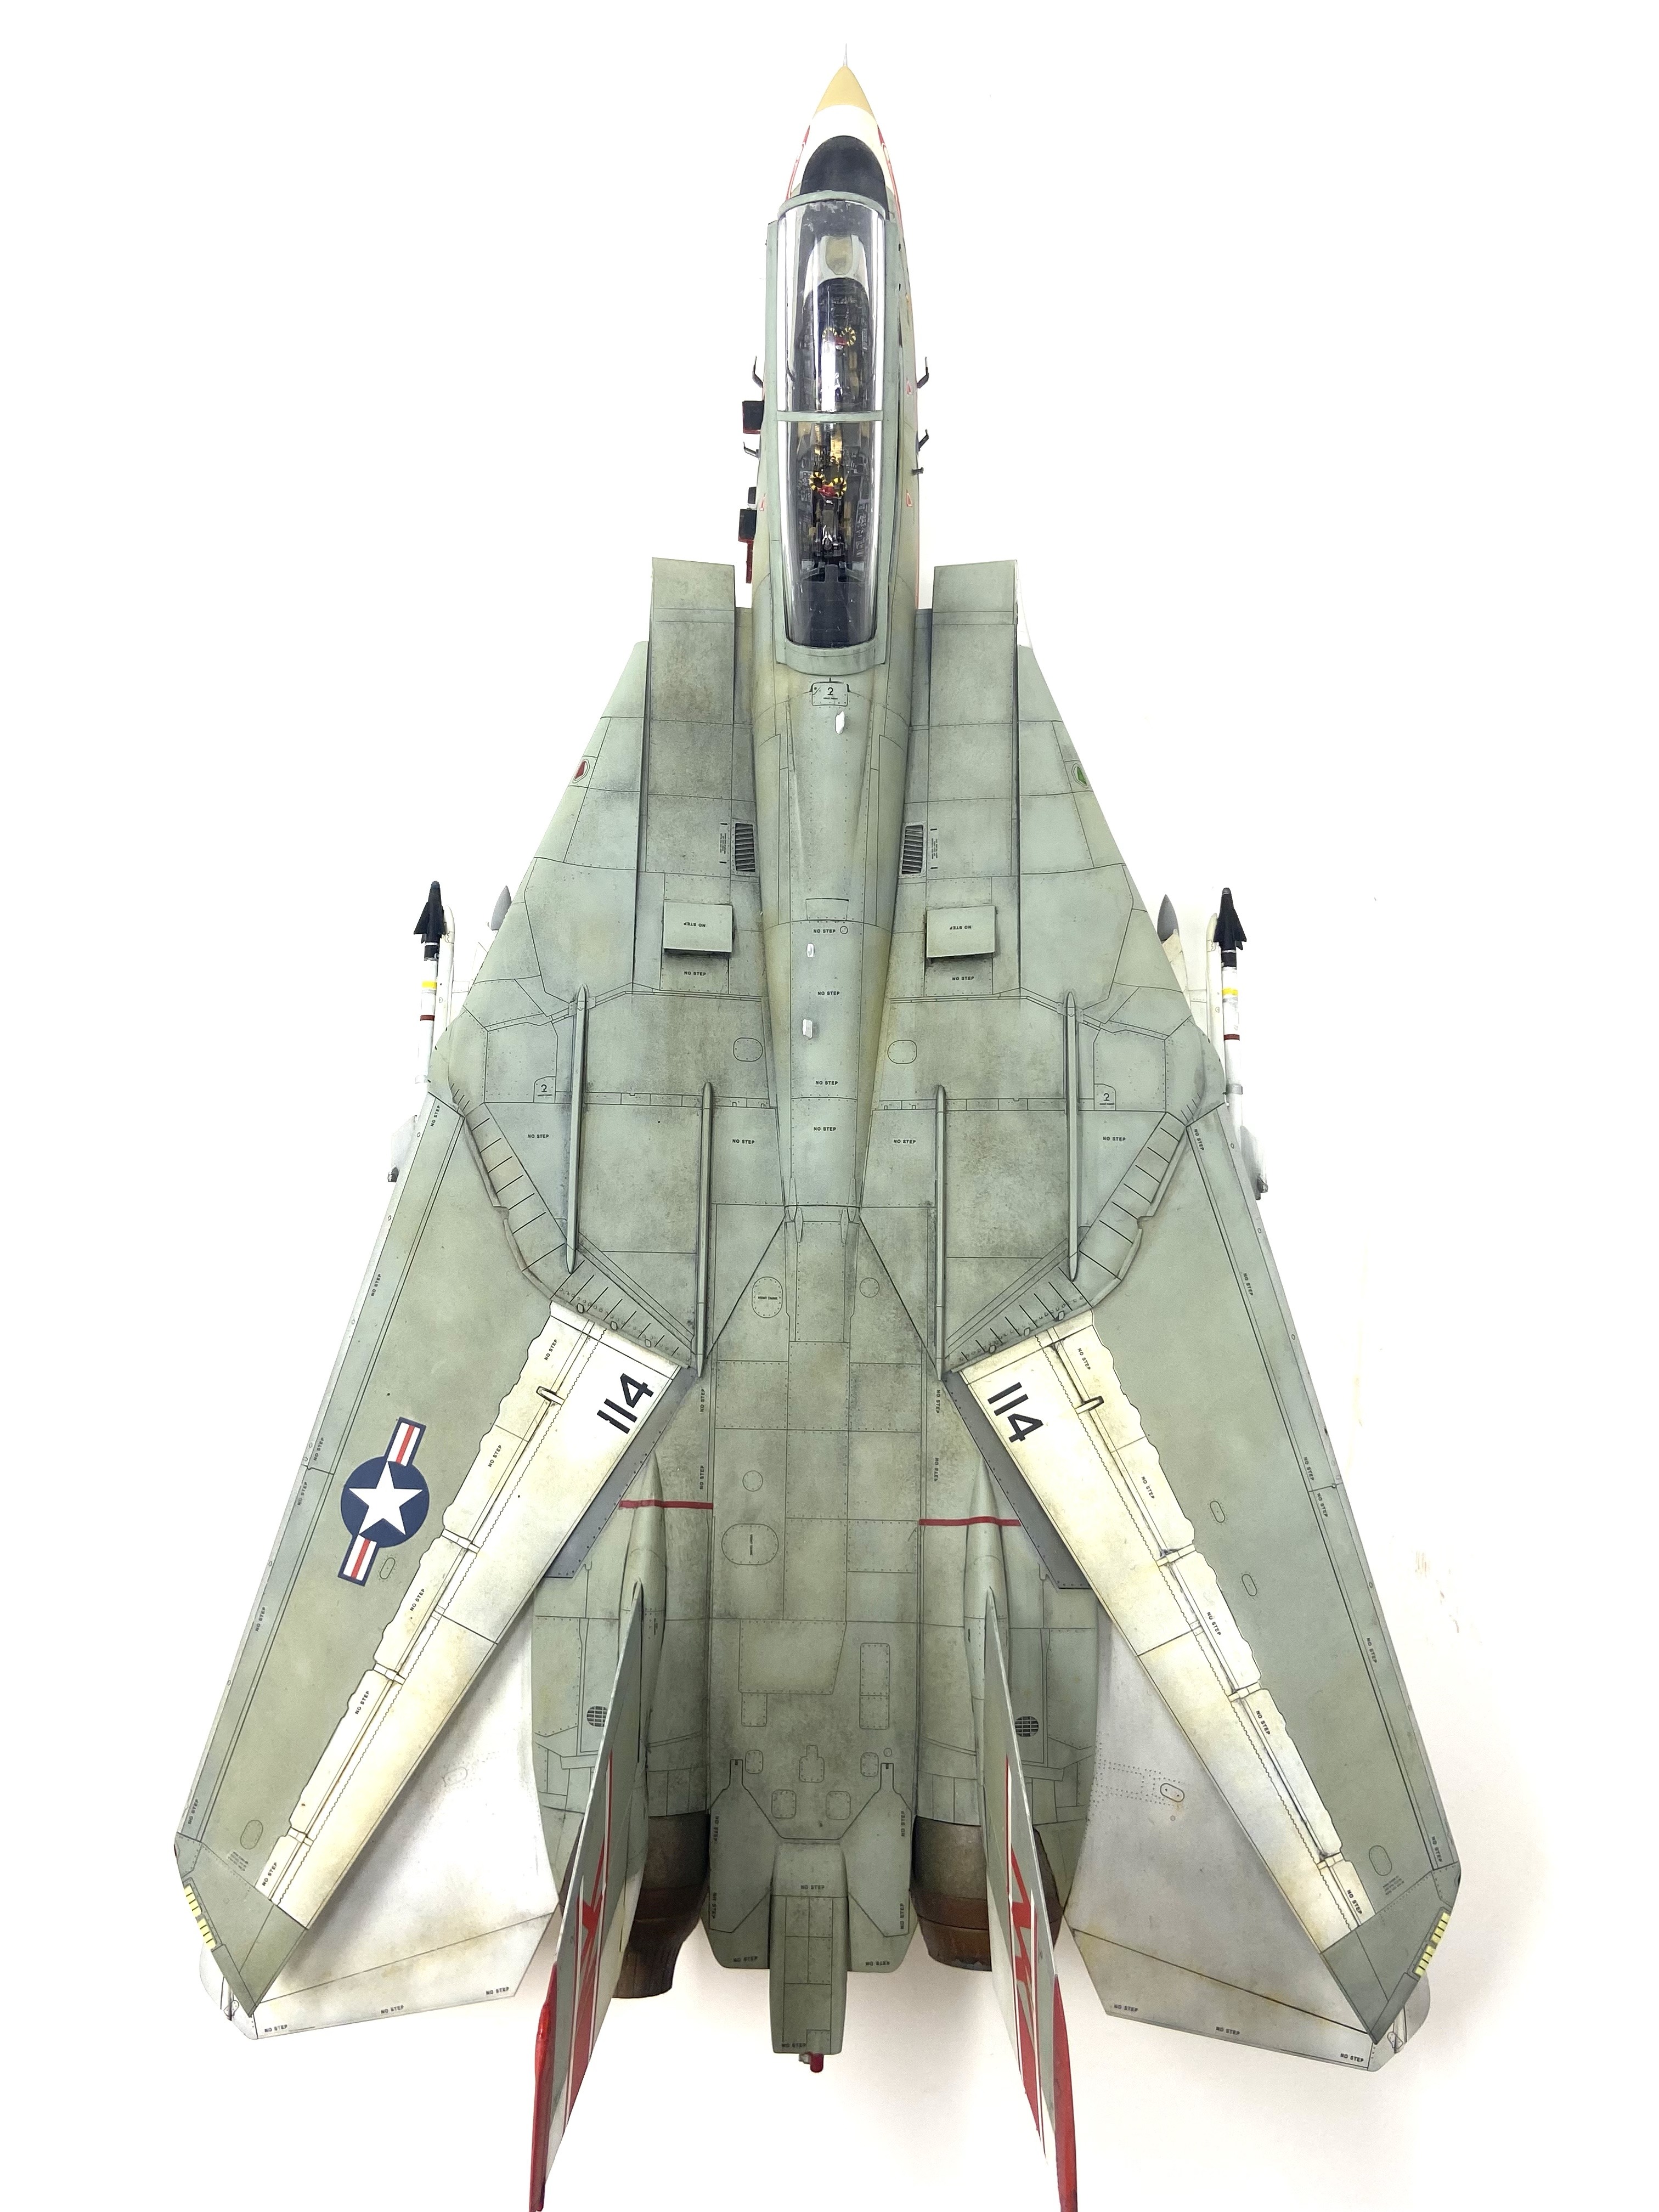
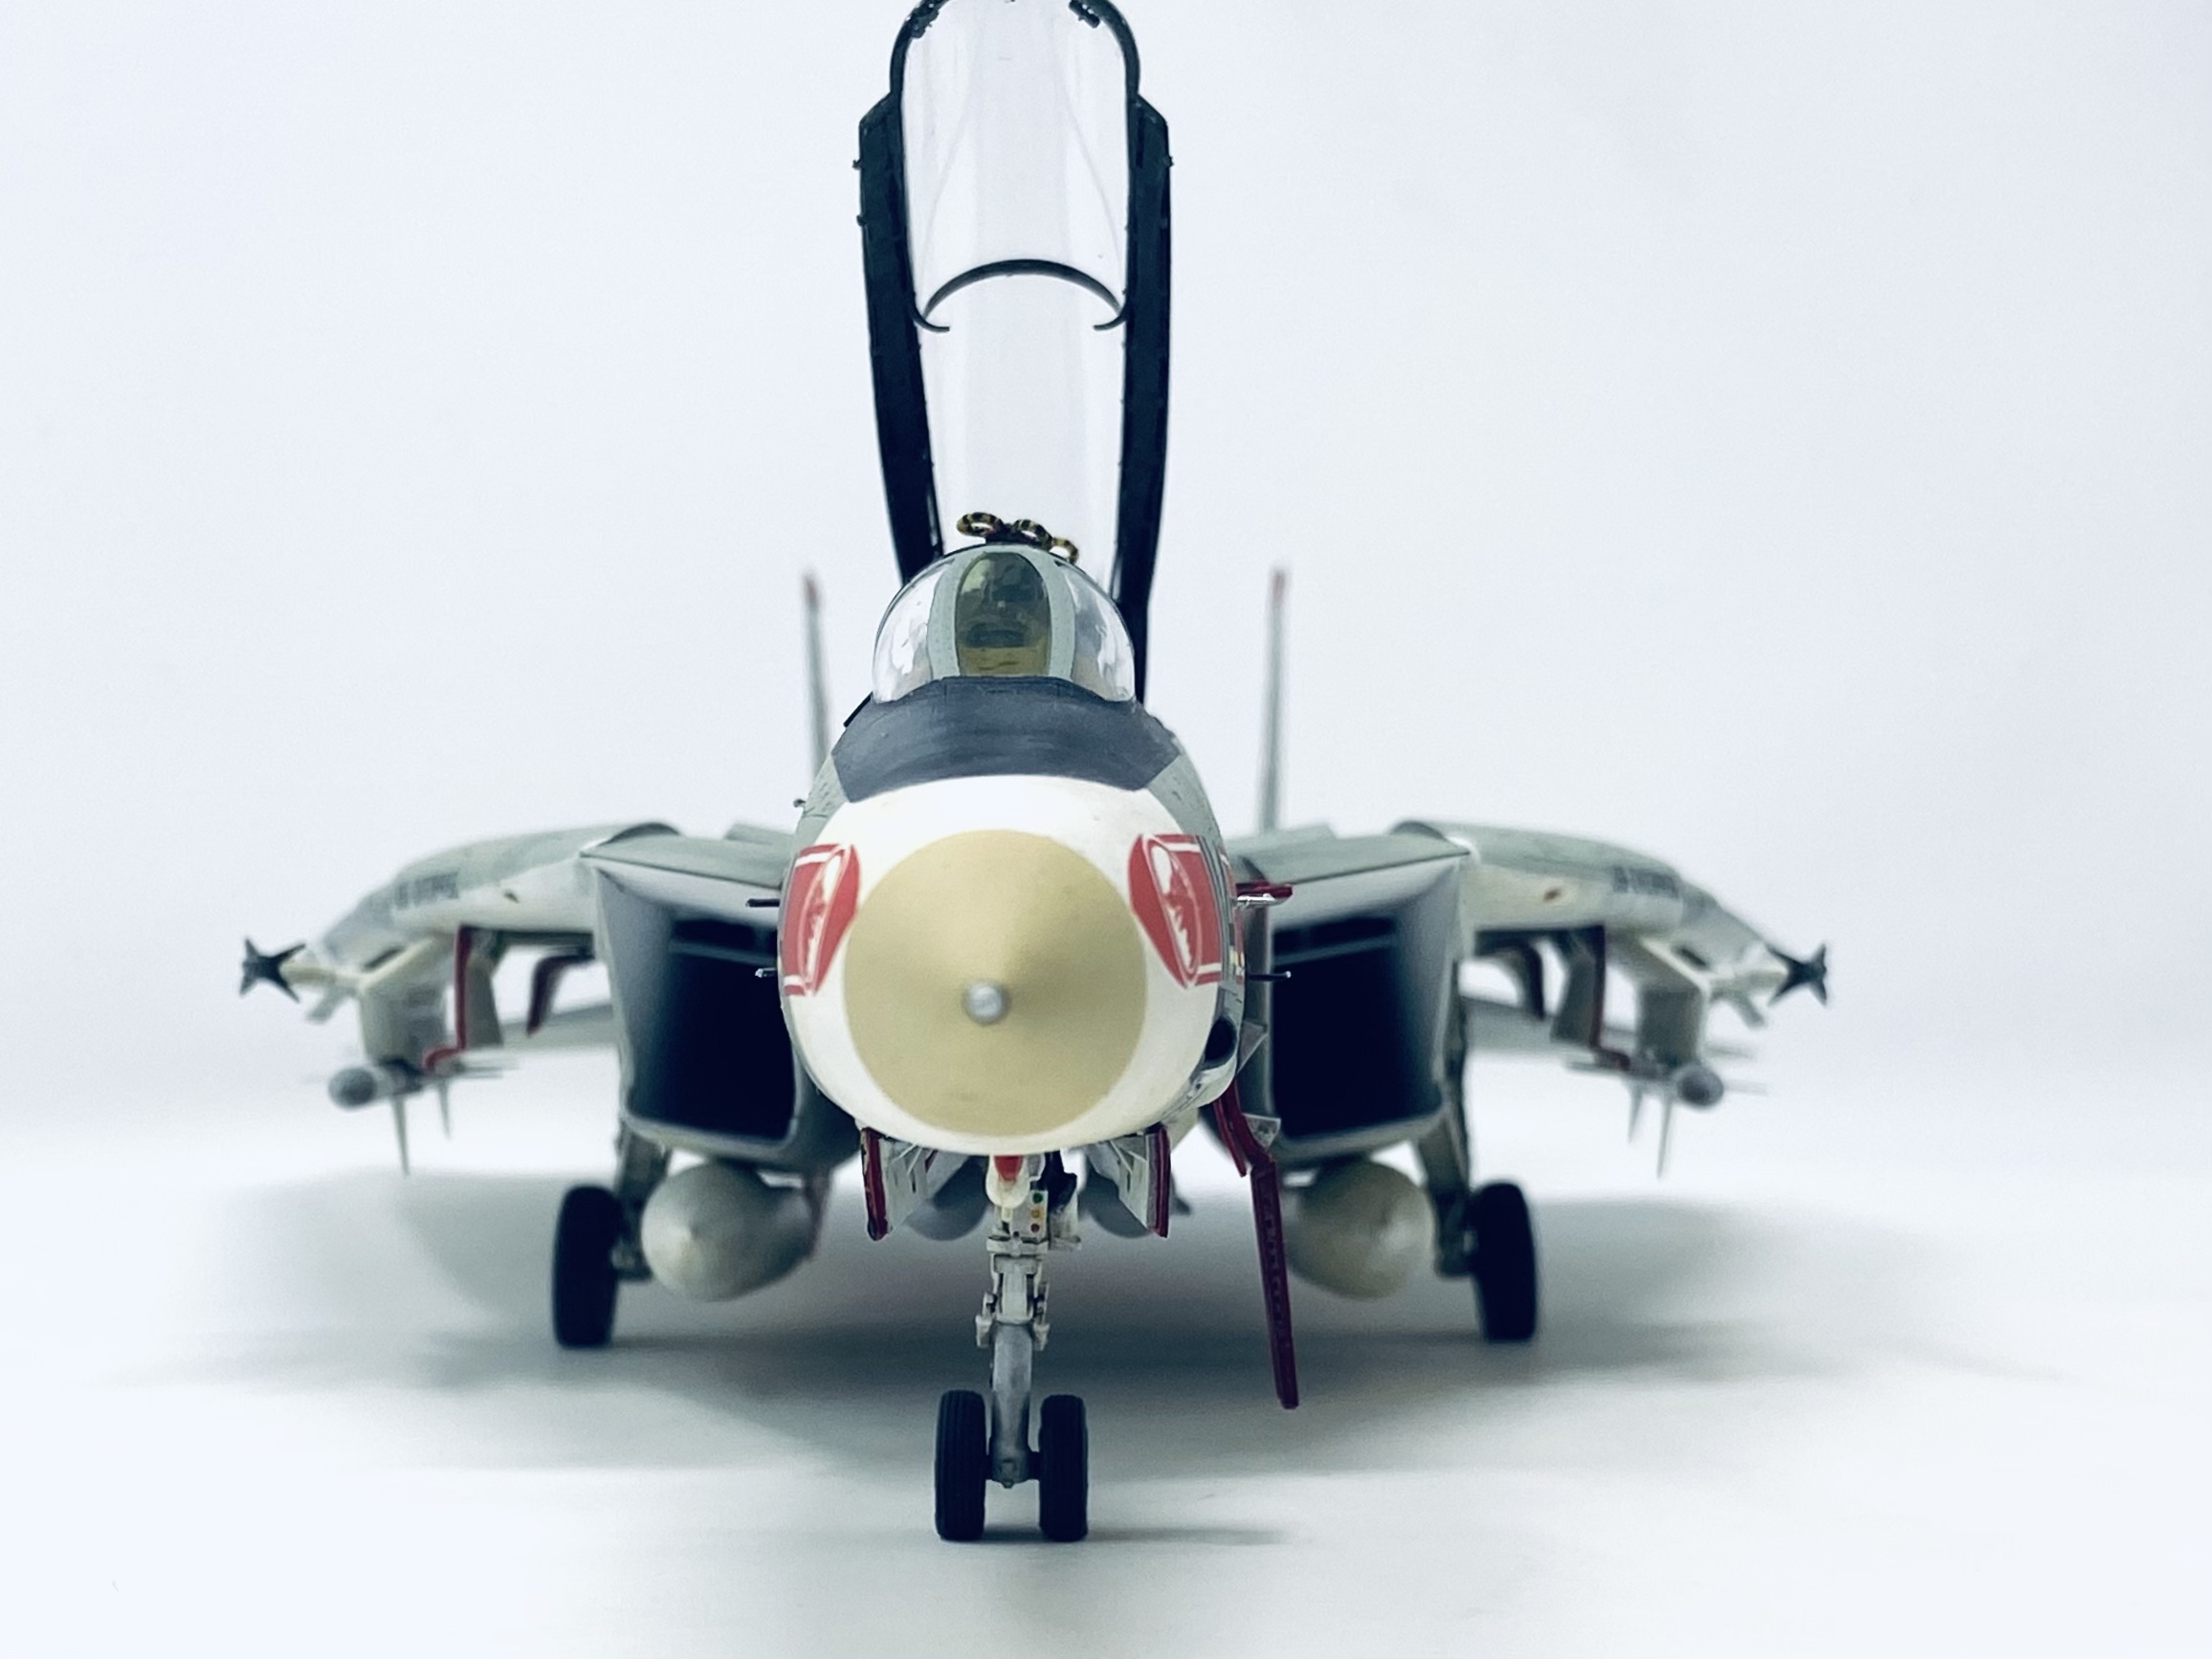
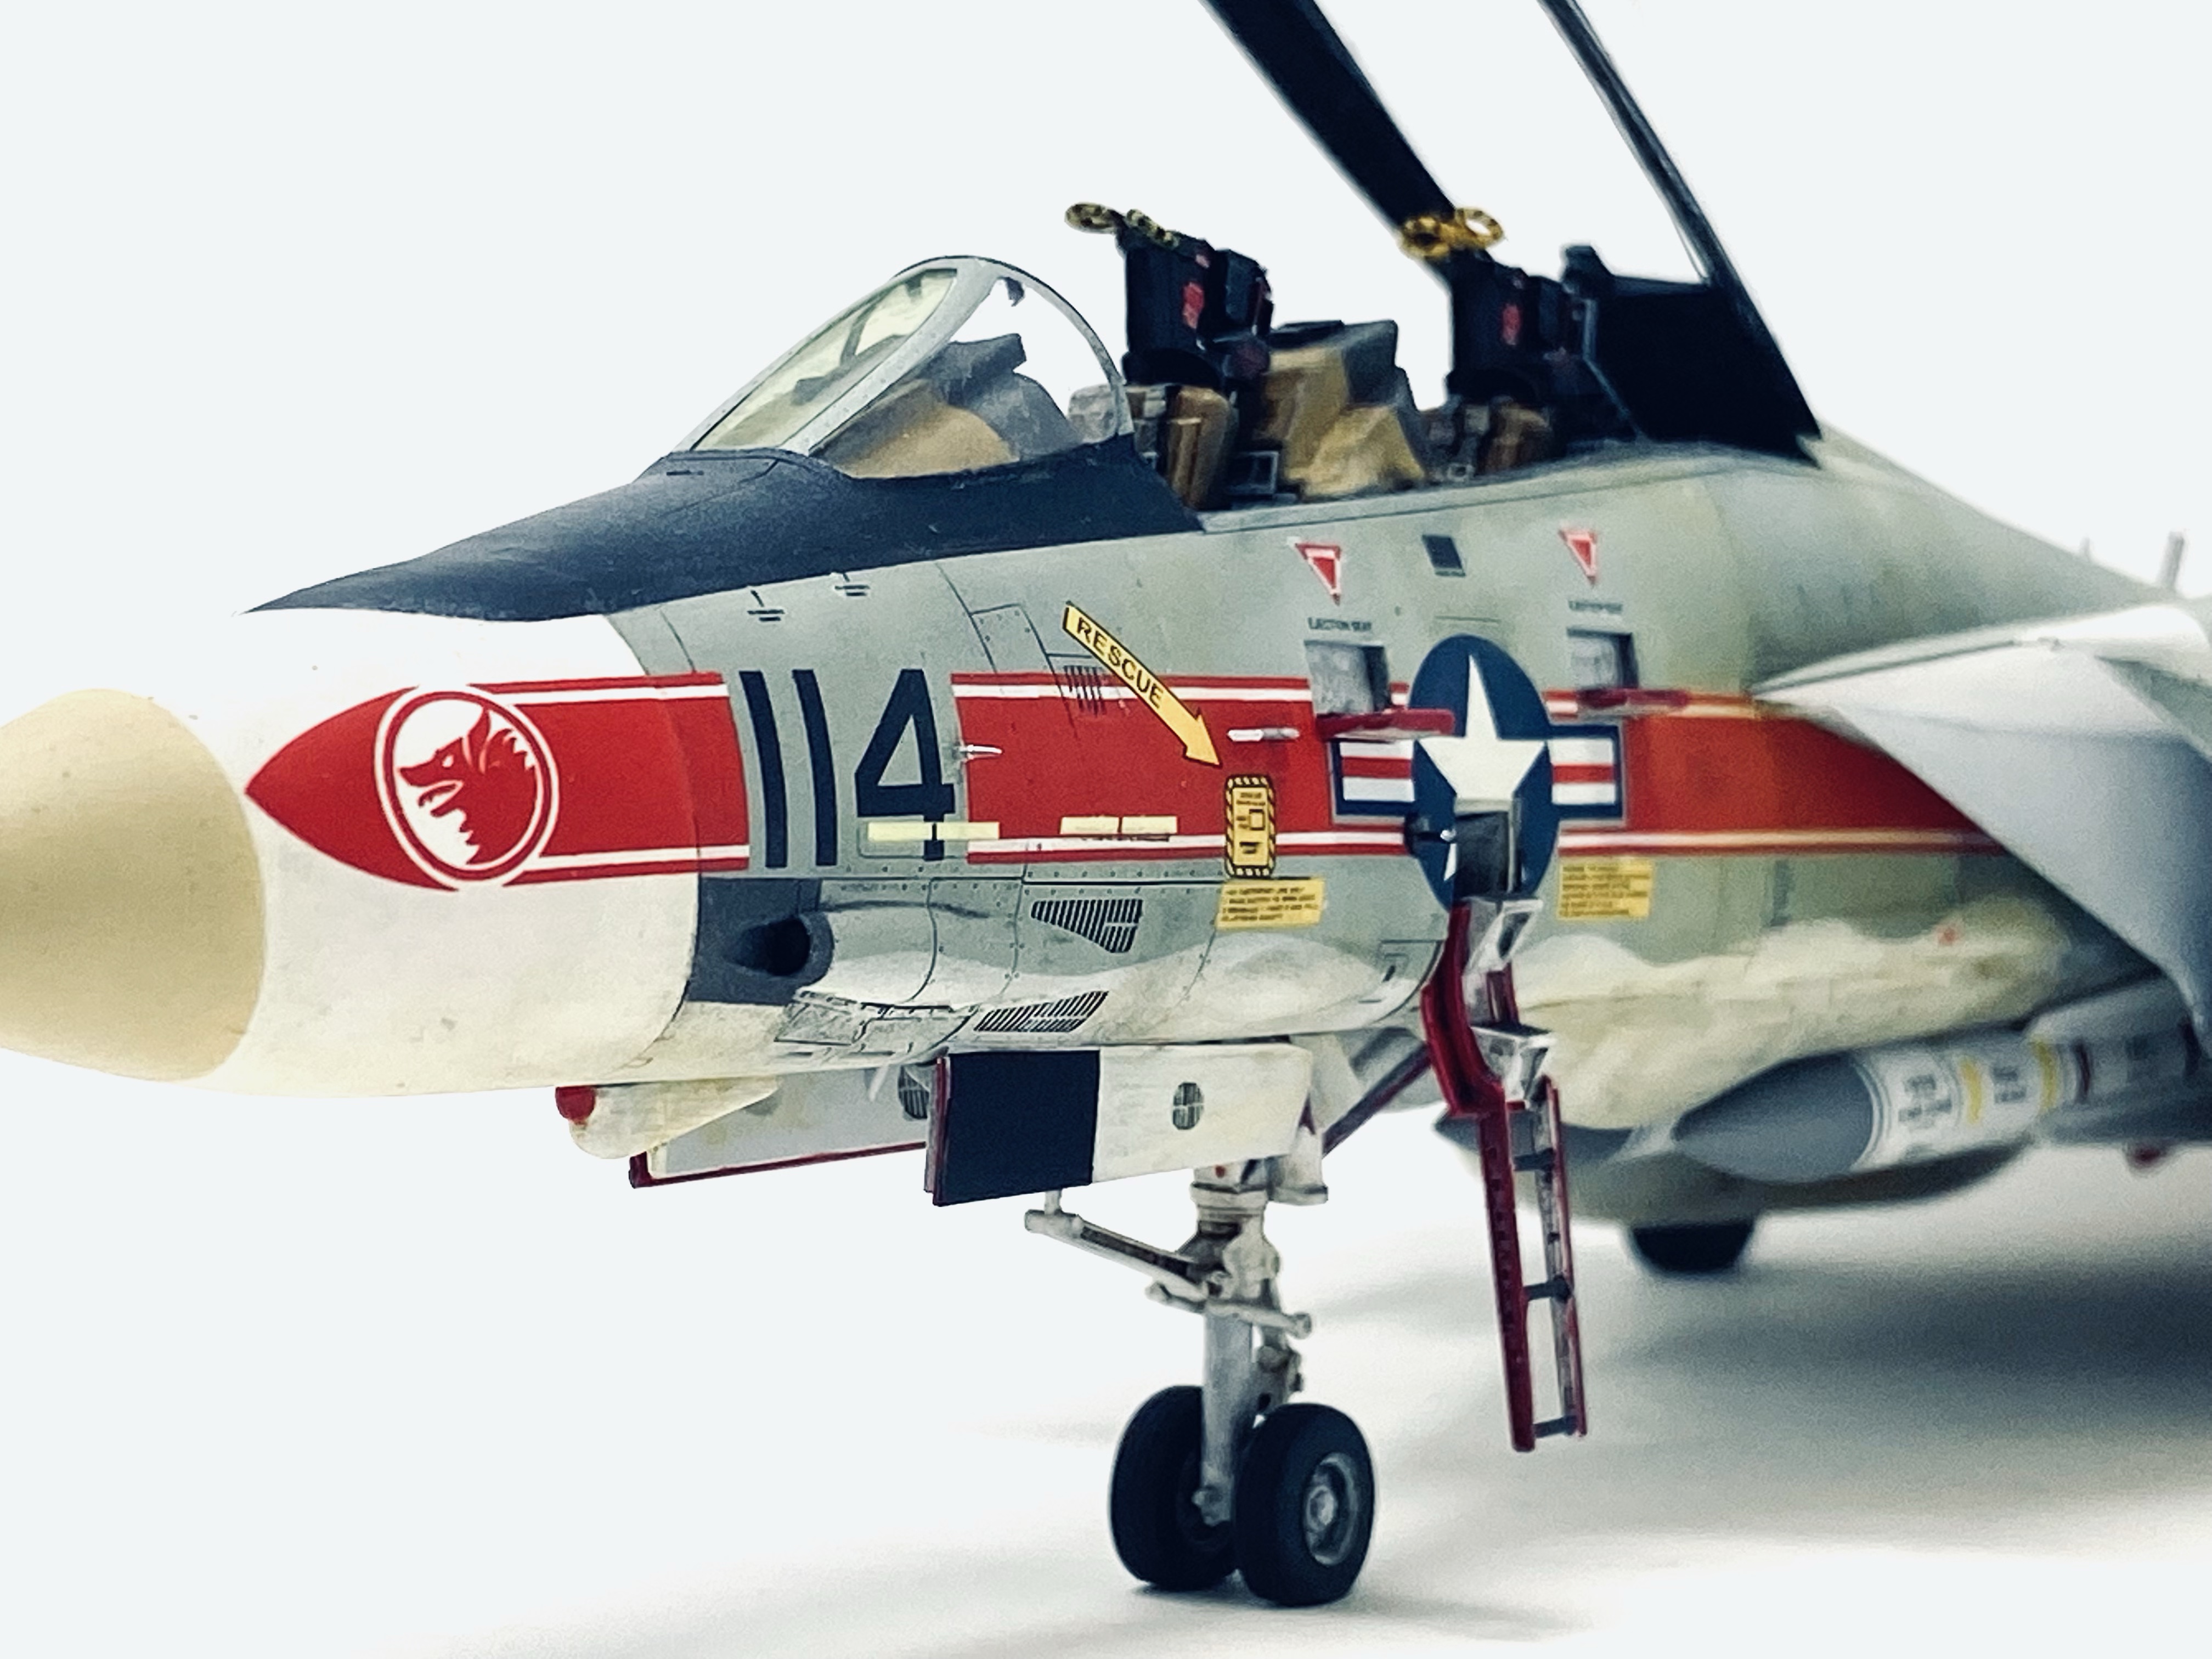
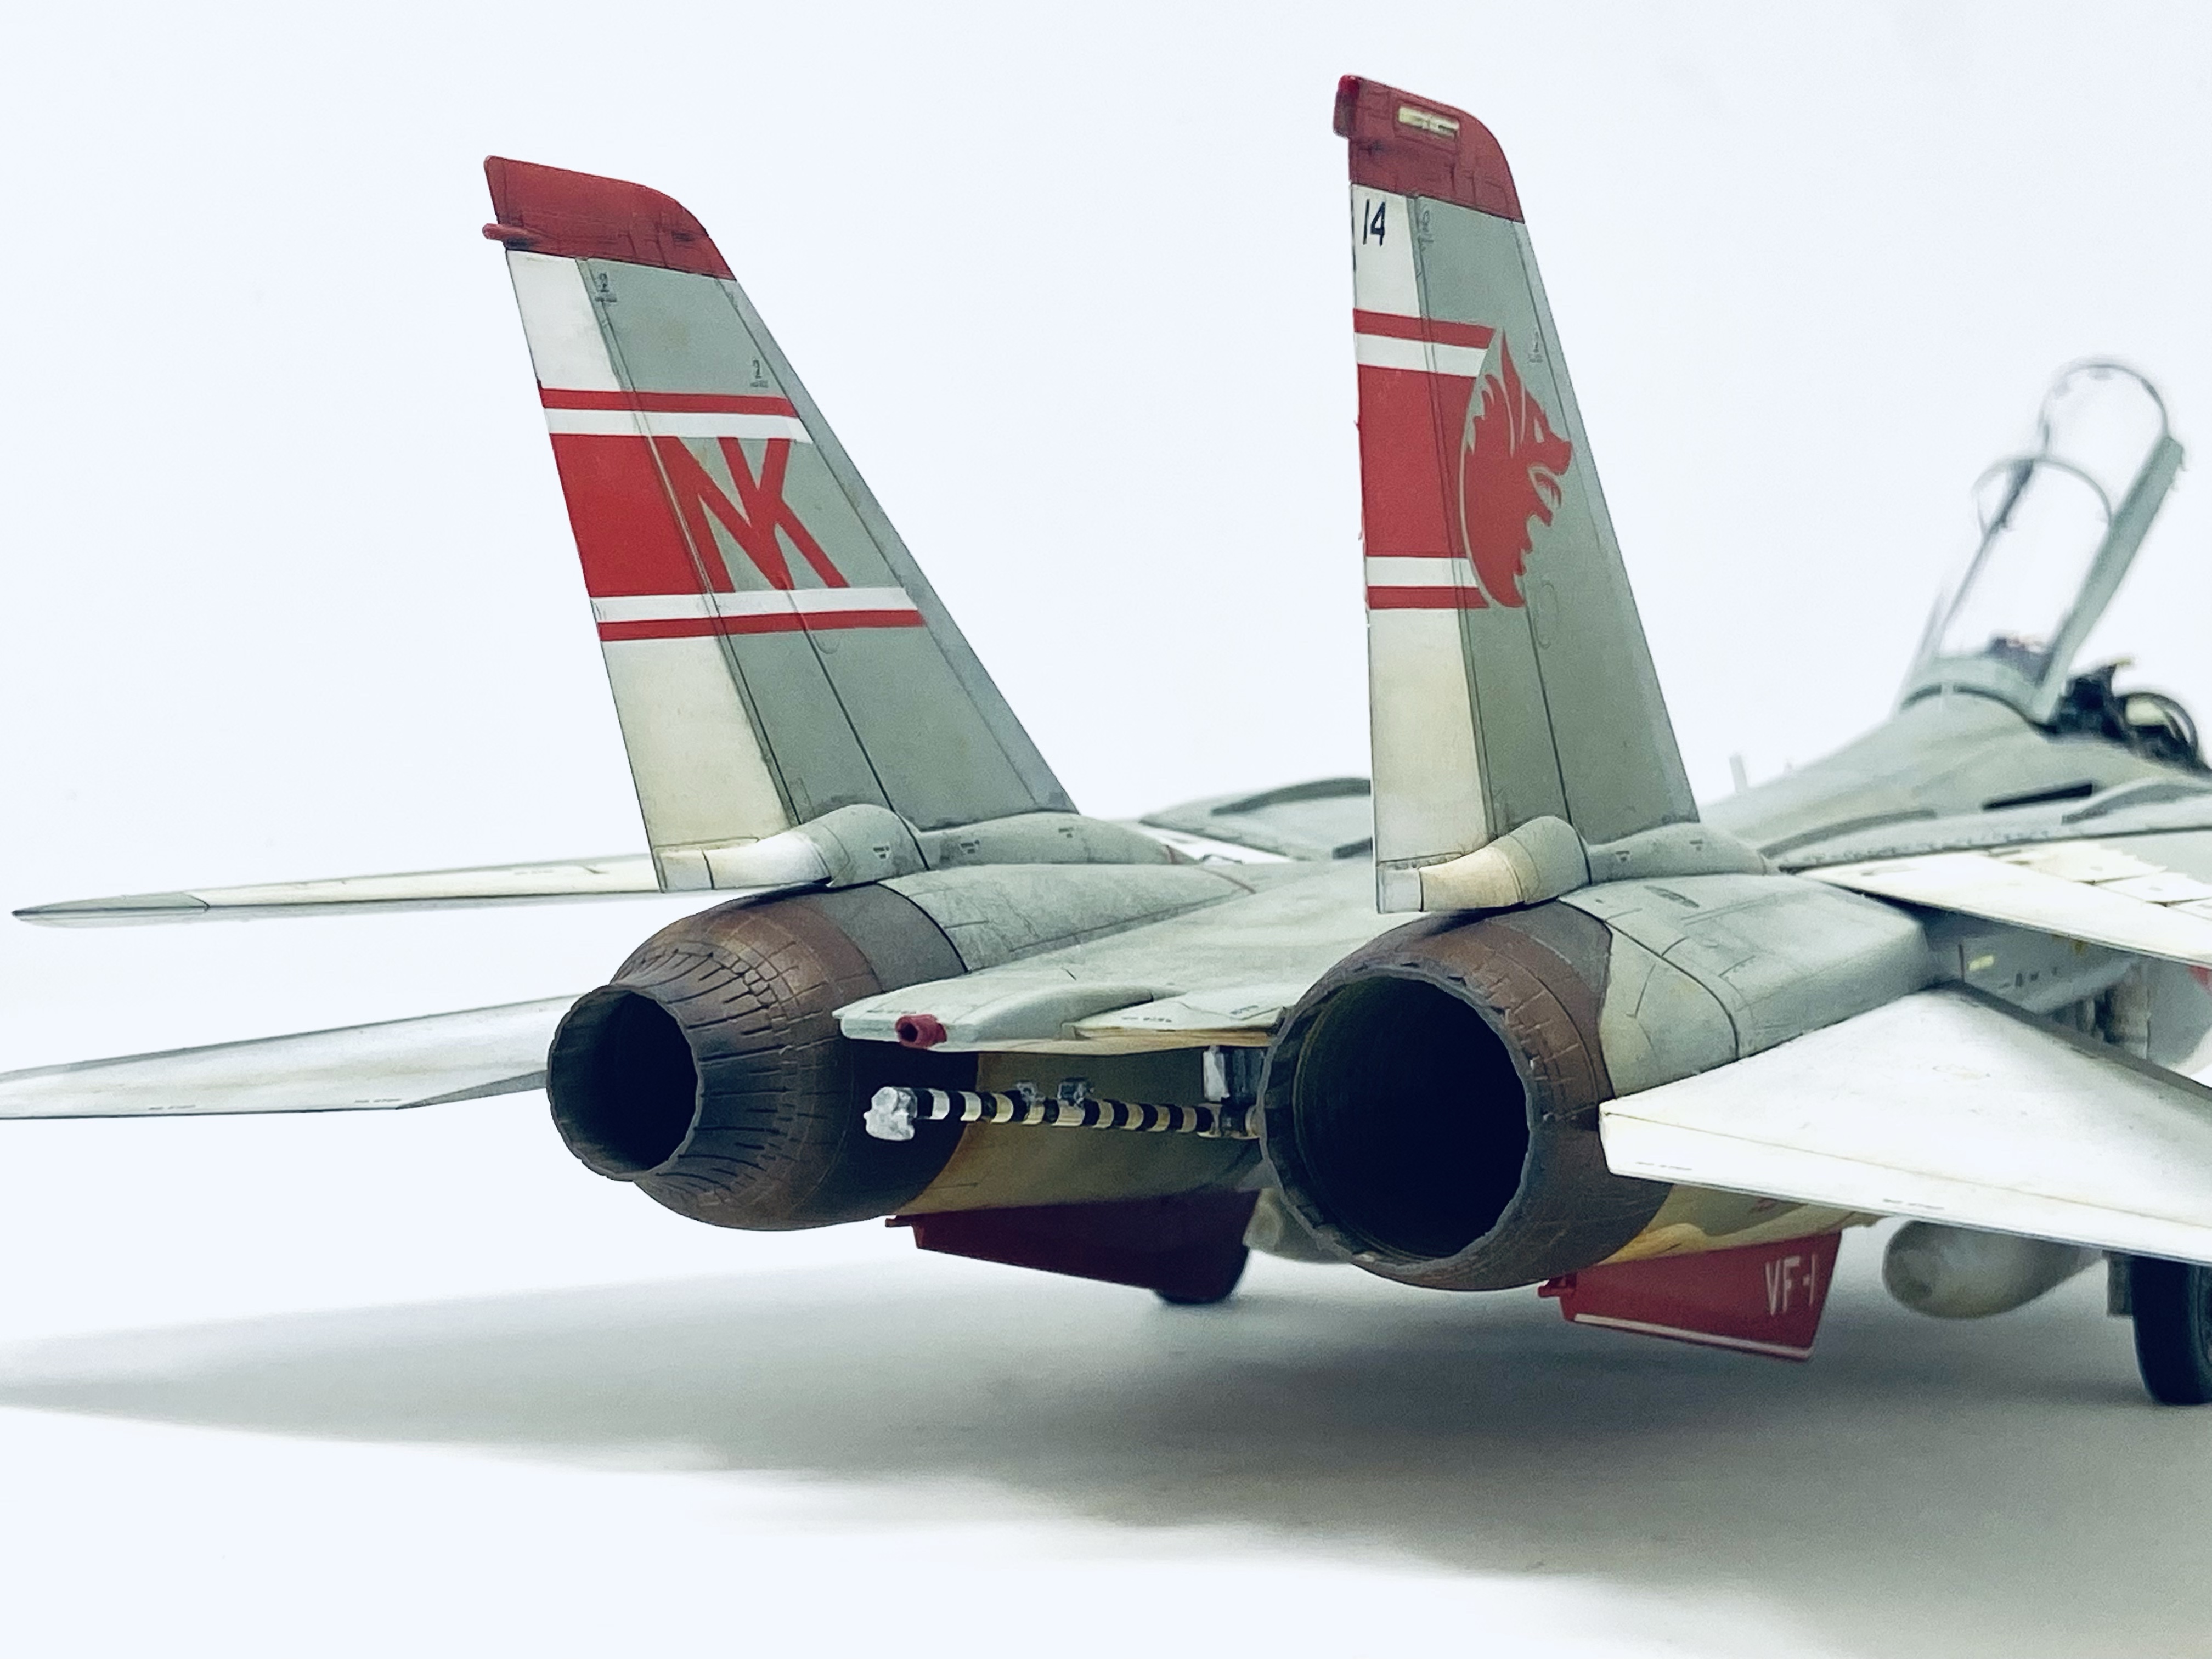
Here we can see the resulting finished paint scheme, the red trim was matched to the same shade of red on the decal markings by mixing Tamiya acrylics as was the radome tan on the nose. I used Tamiya Flat White for the undersides and the top colour was sprayed Tamiya IJN Grey.
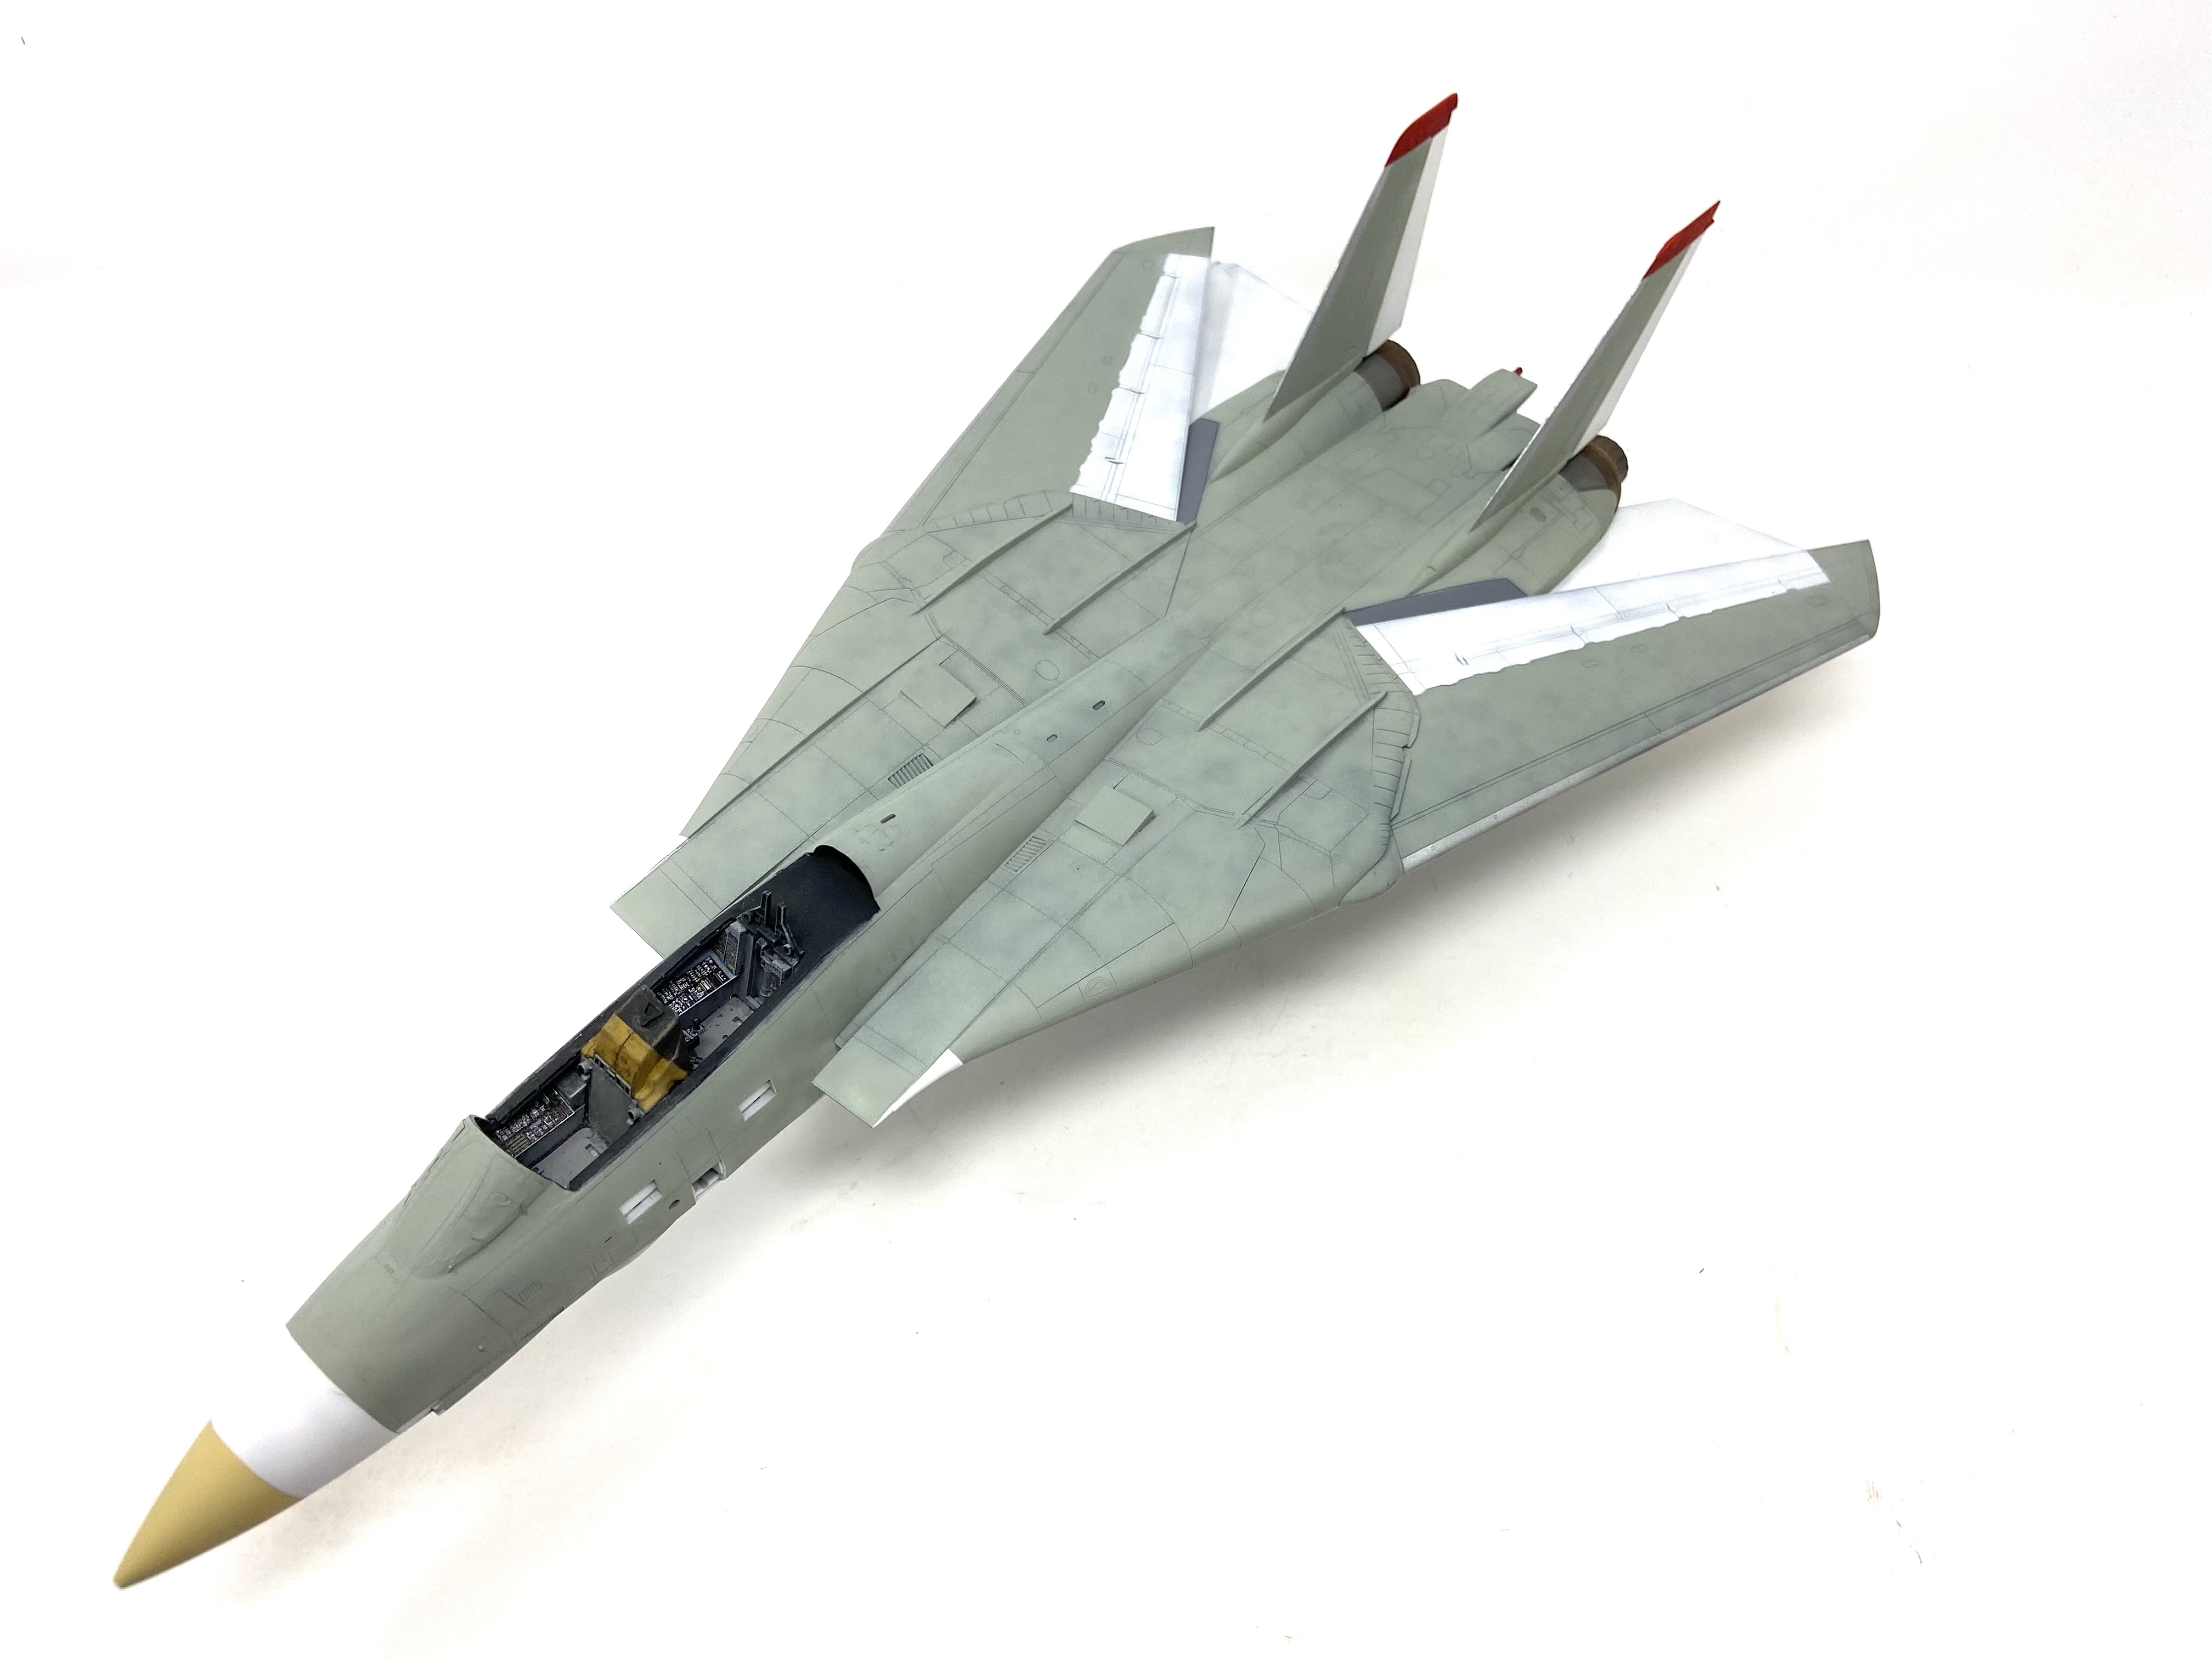

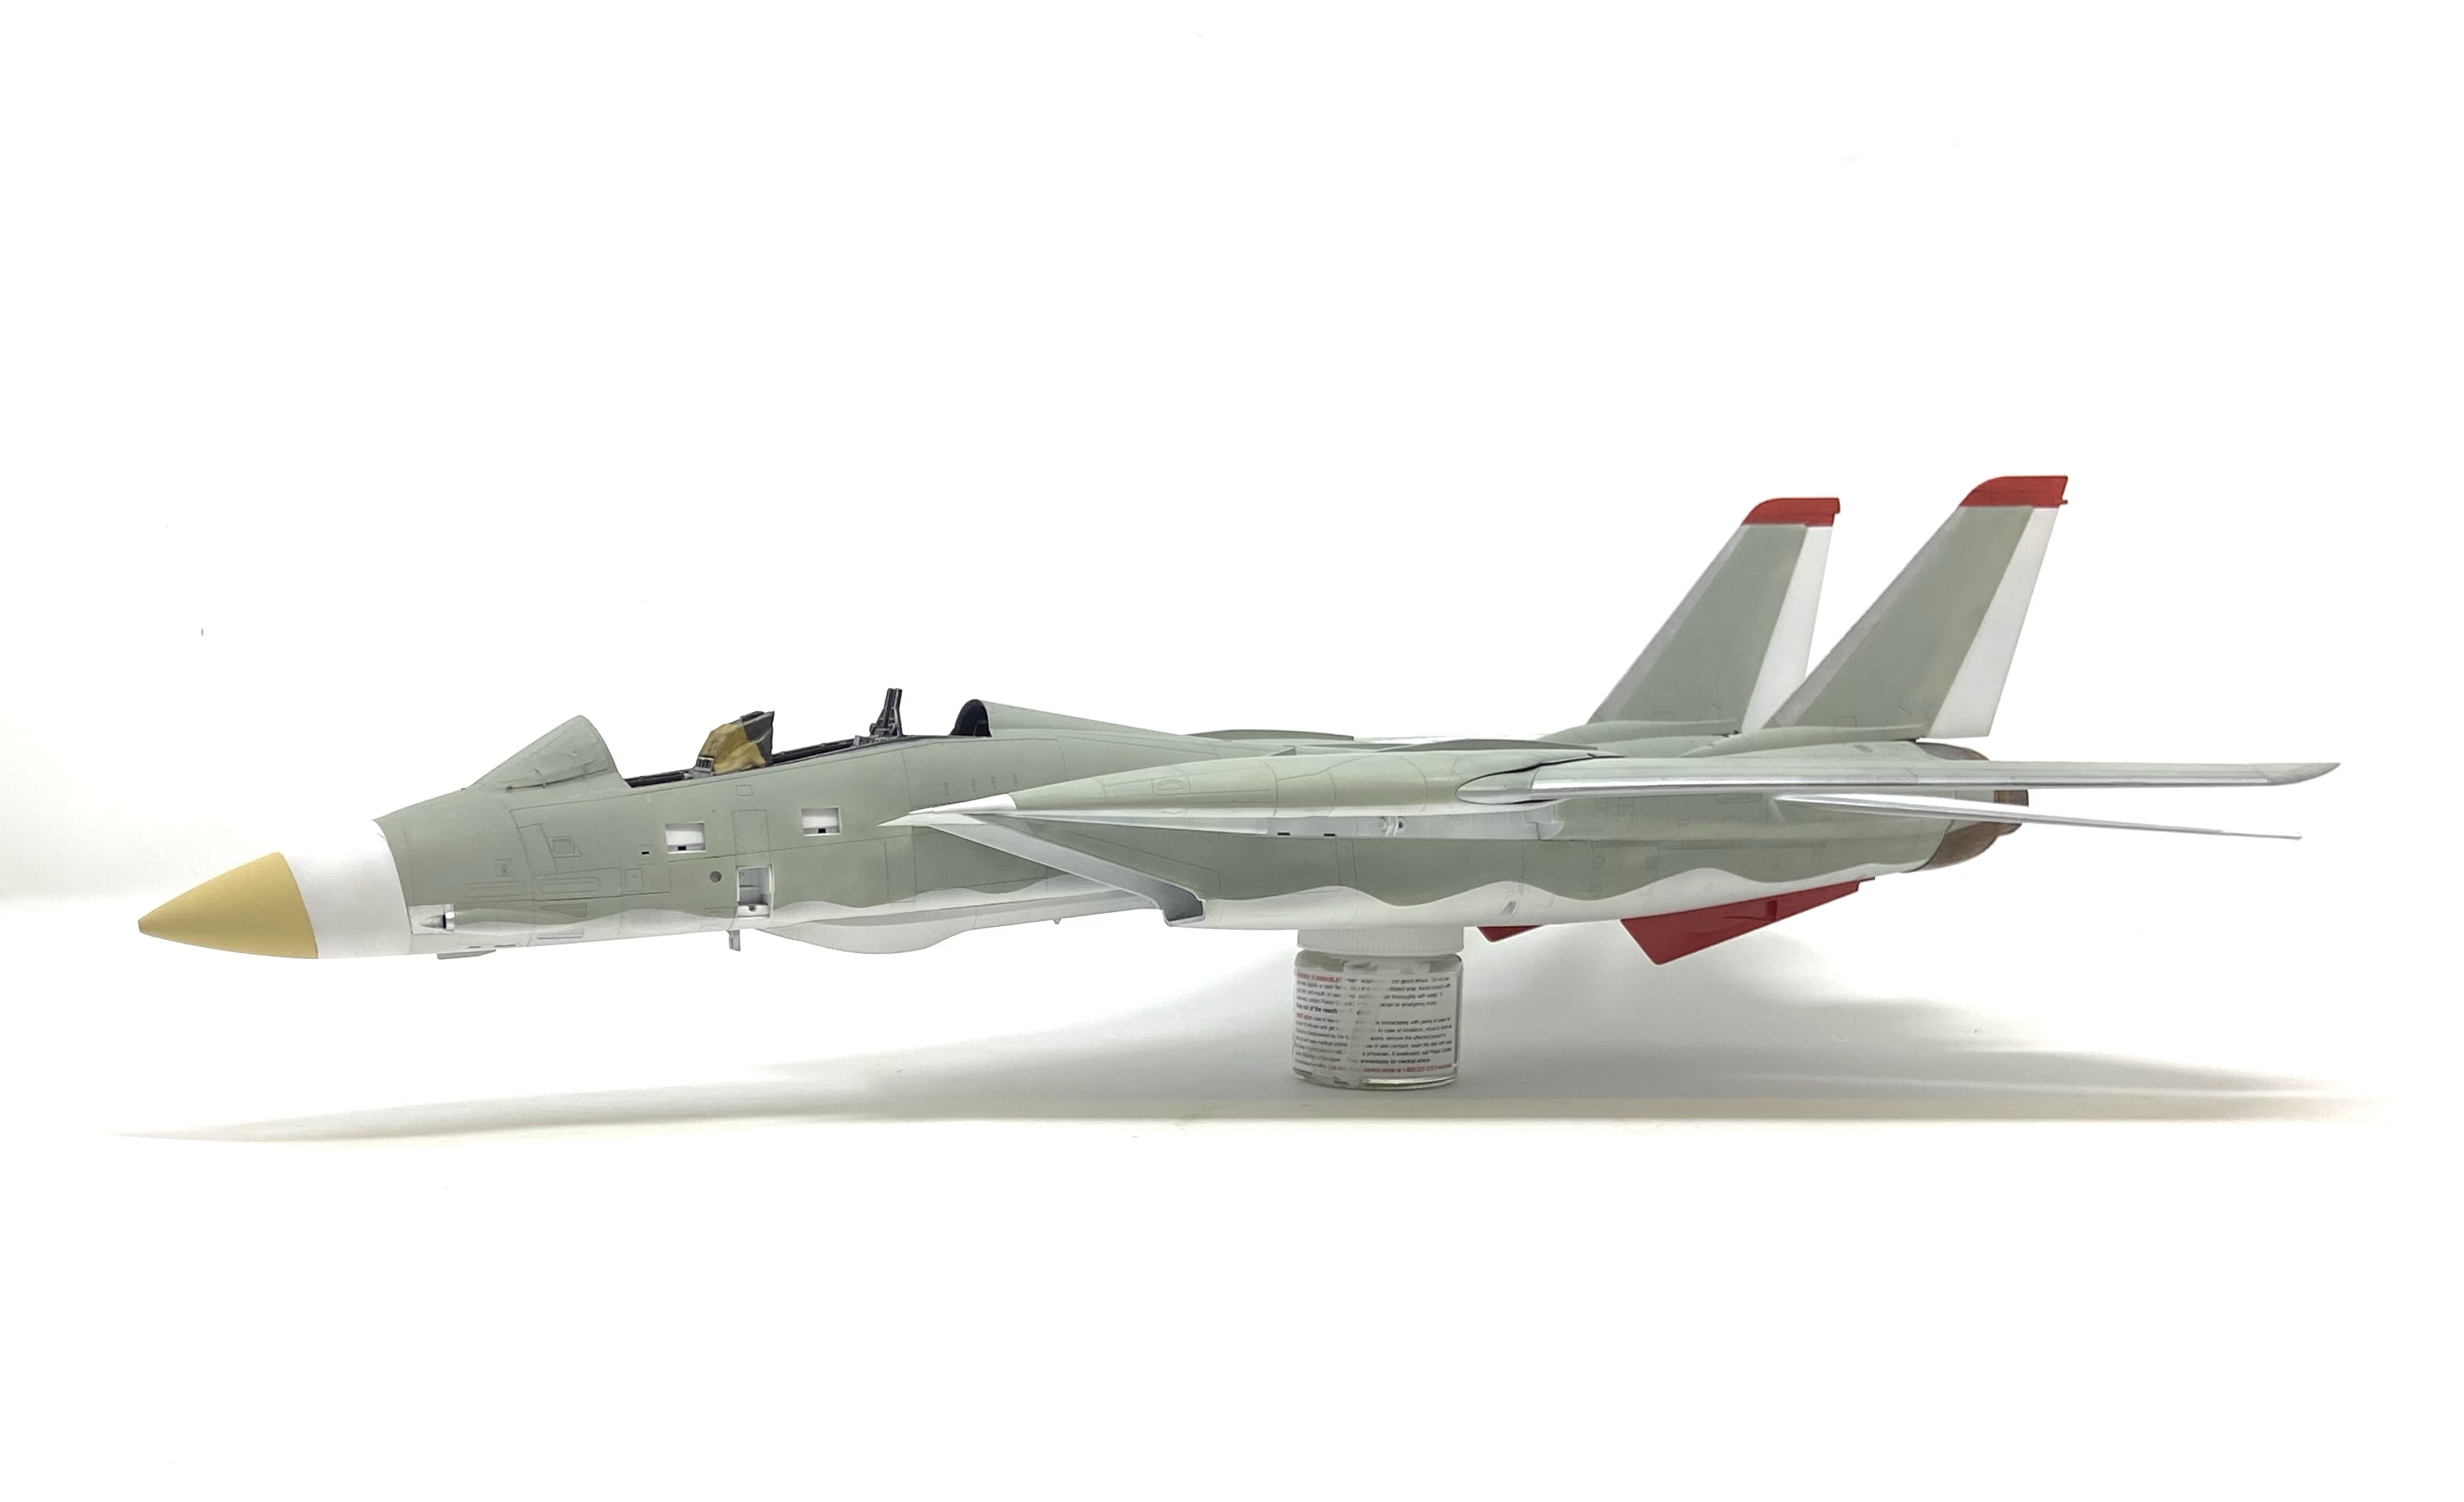
Here are some close up pictures of the finished paintwork:
Once the paint was cured, I then sprayed on a clear gloss coat in preparation for the decal application. In the meantime I had more work to do-Namely the weapons, landing gear and figures to paint!
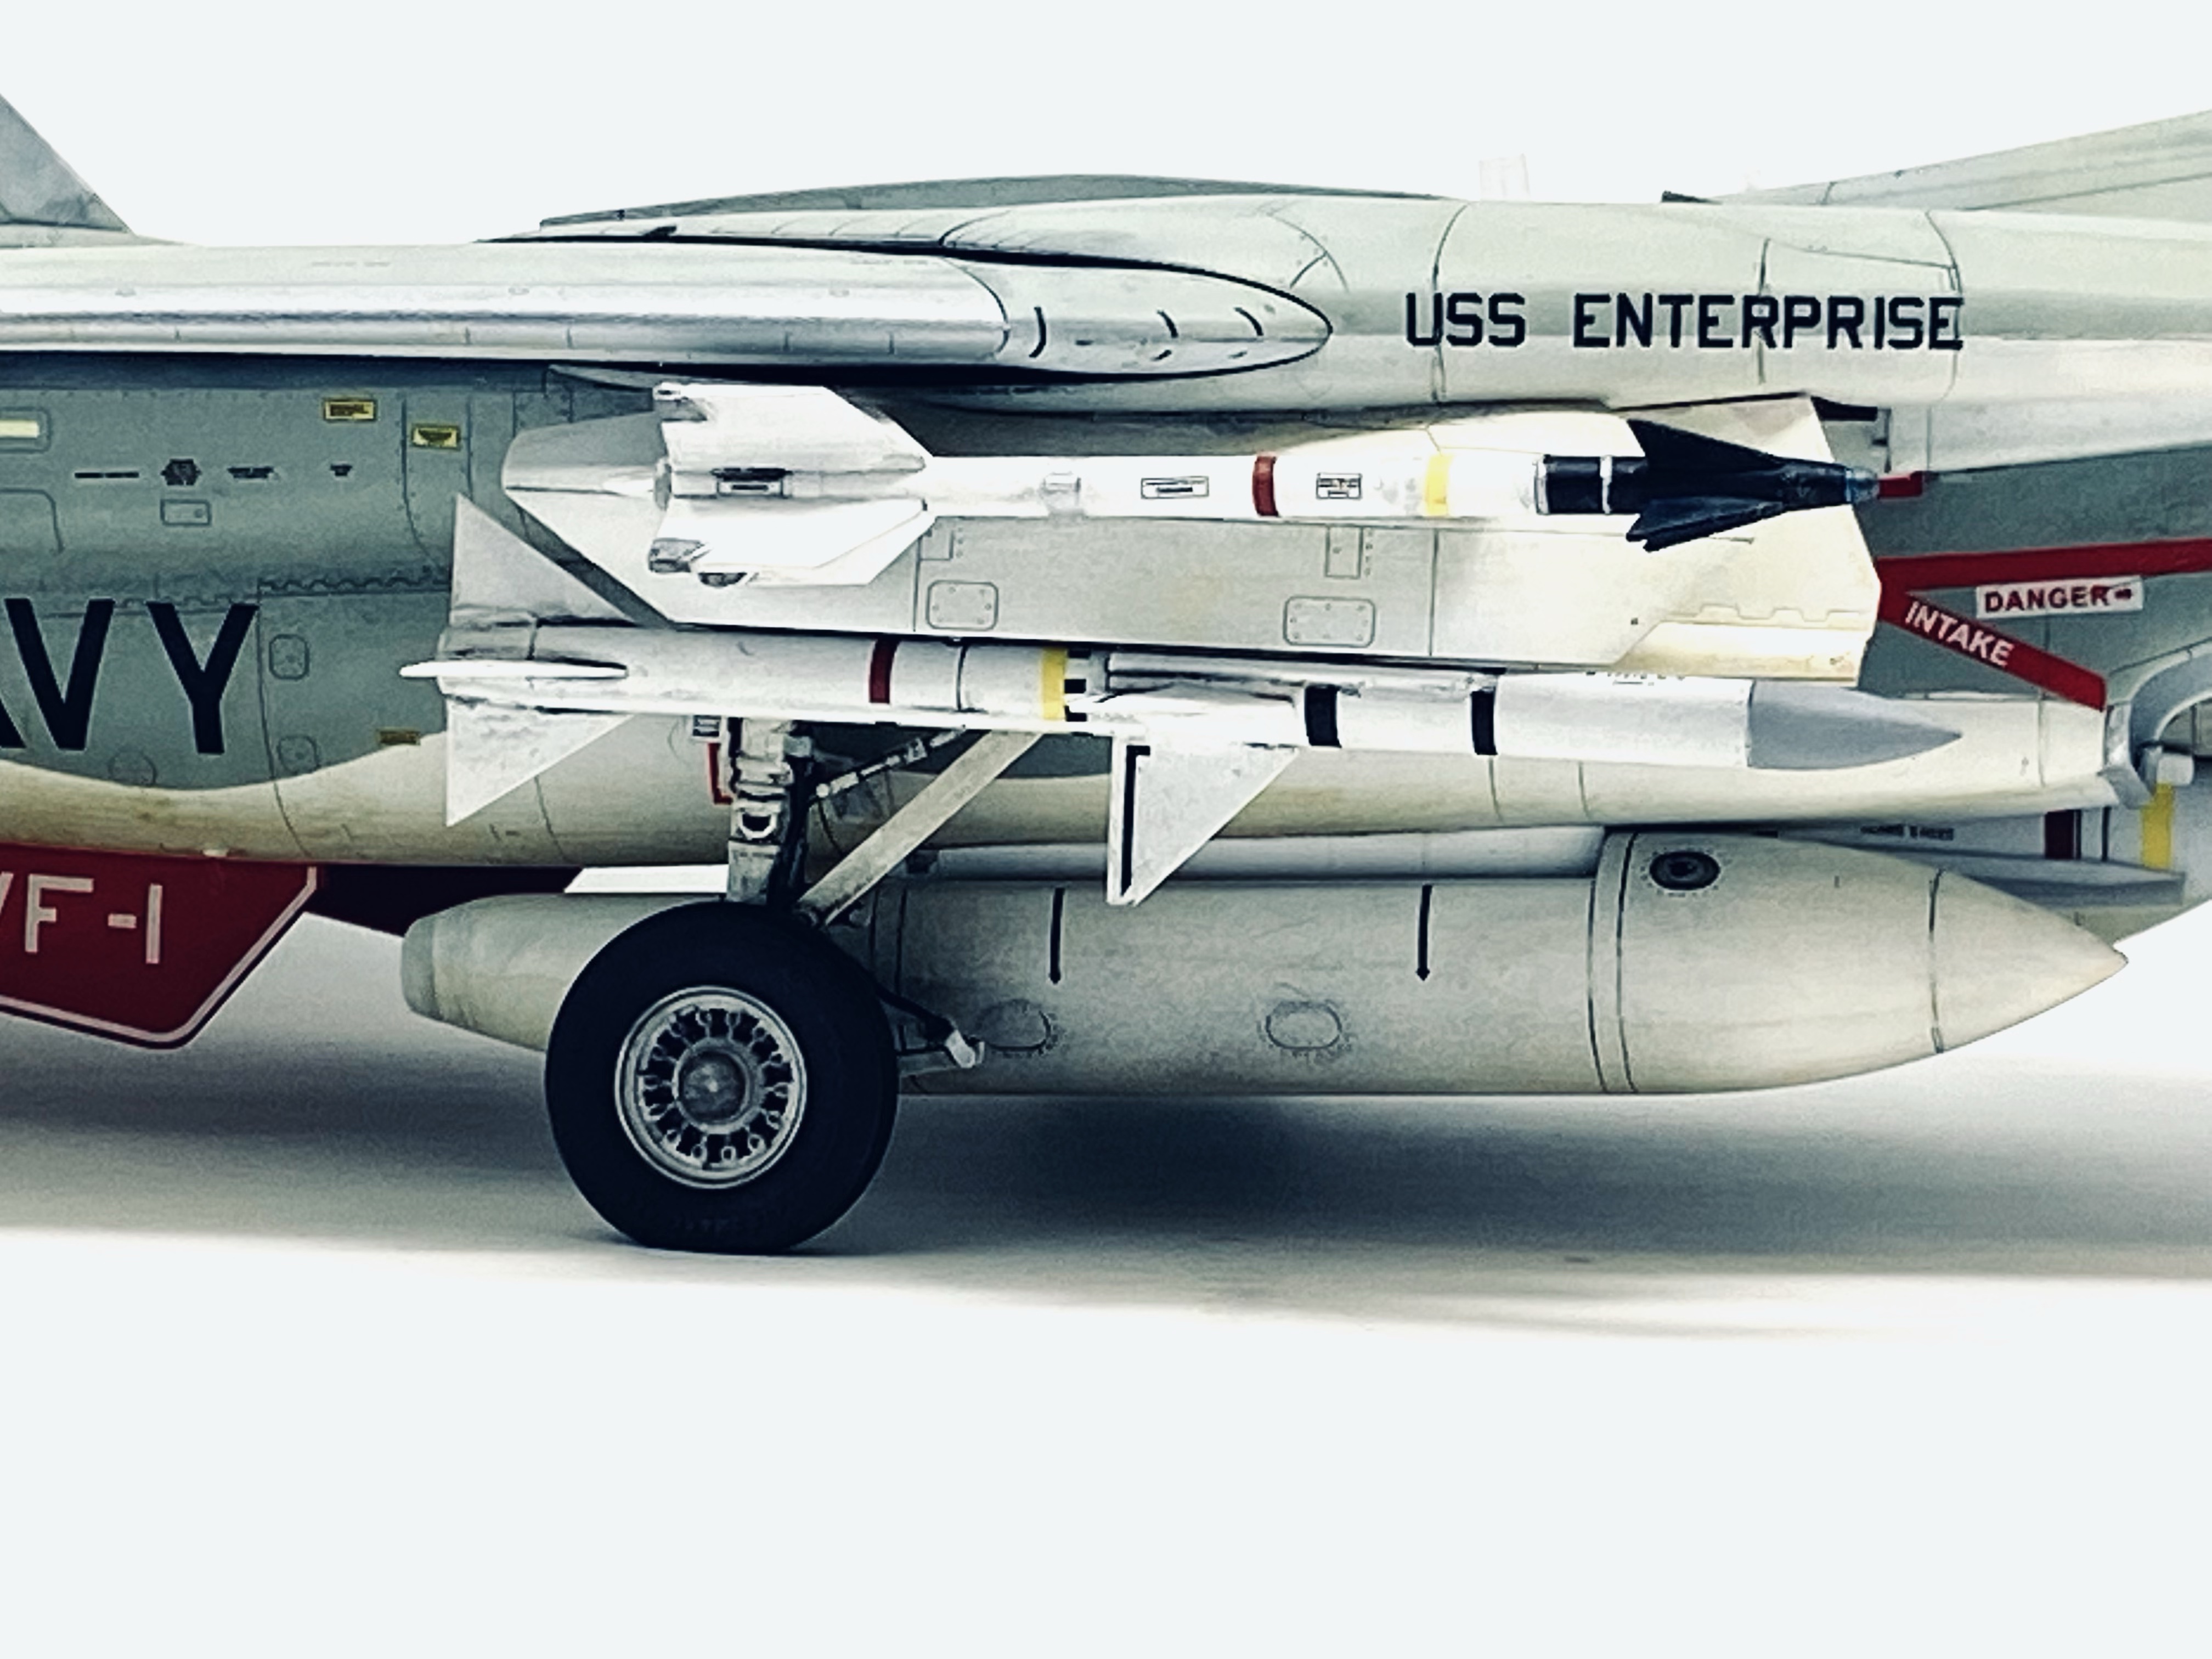
Here’s how the weapons looked when completed:

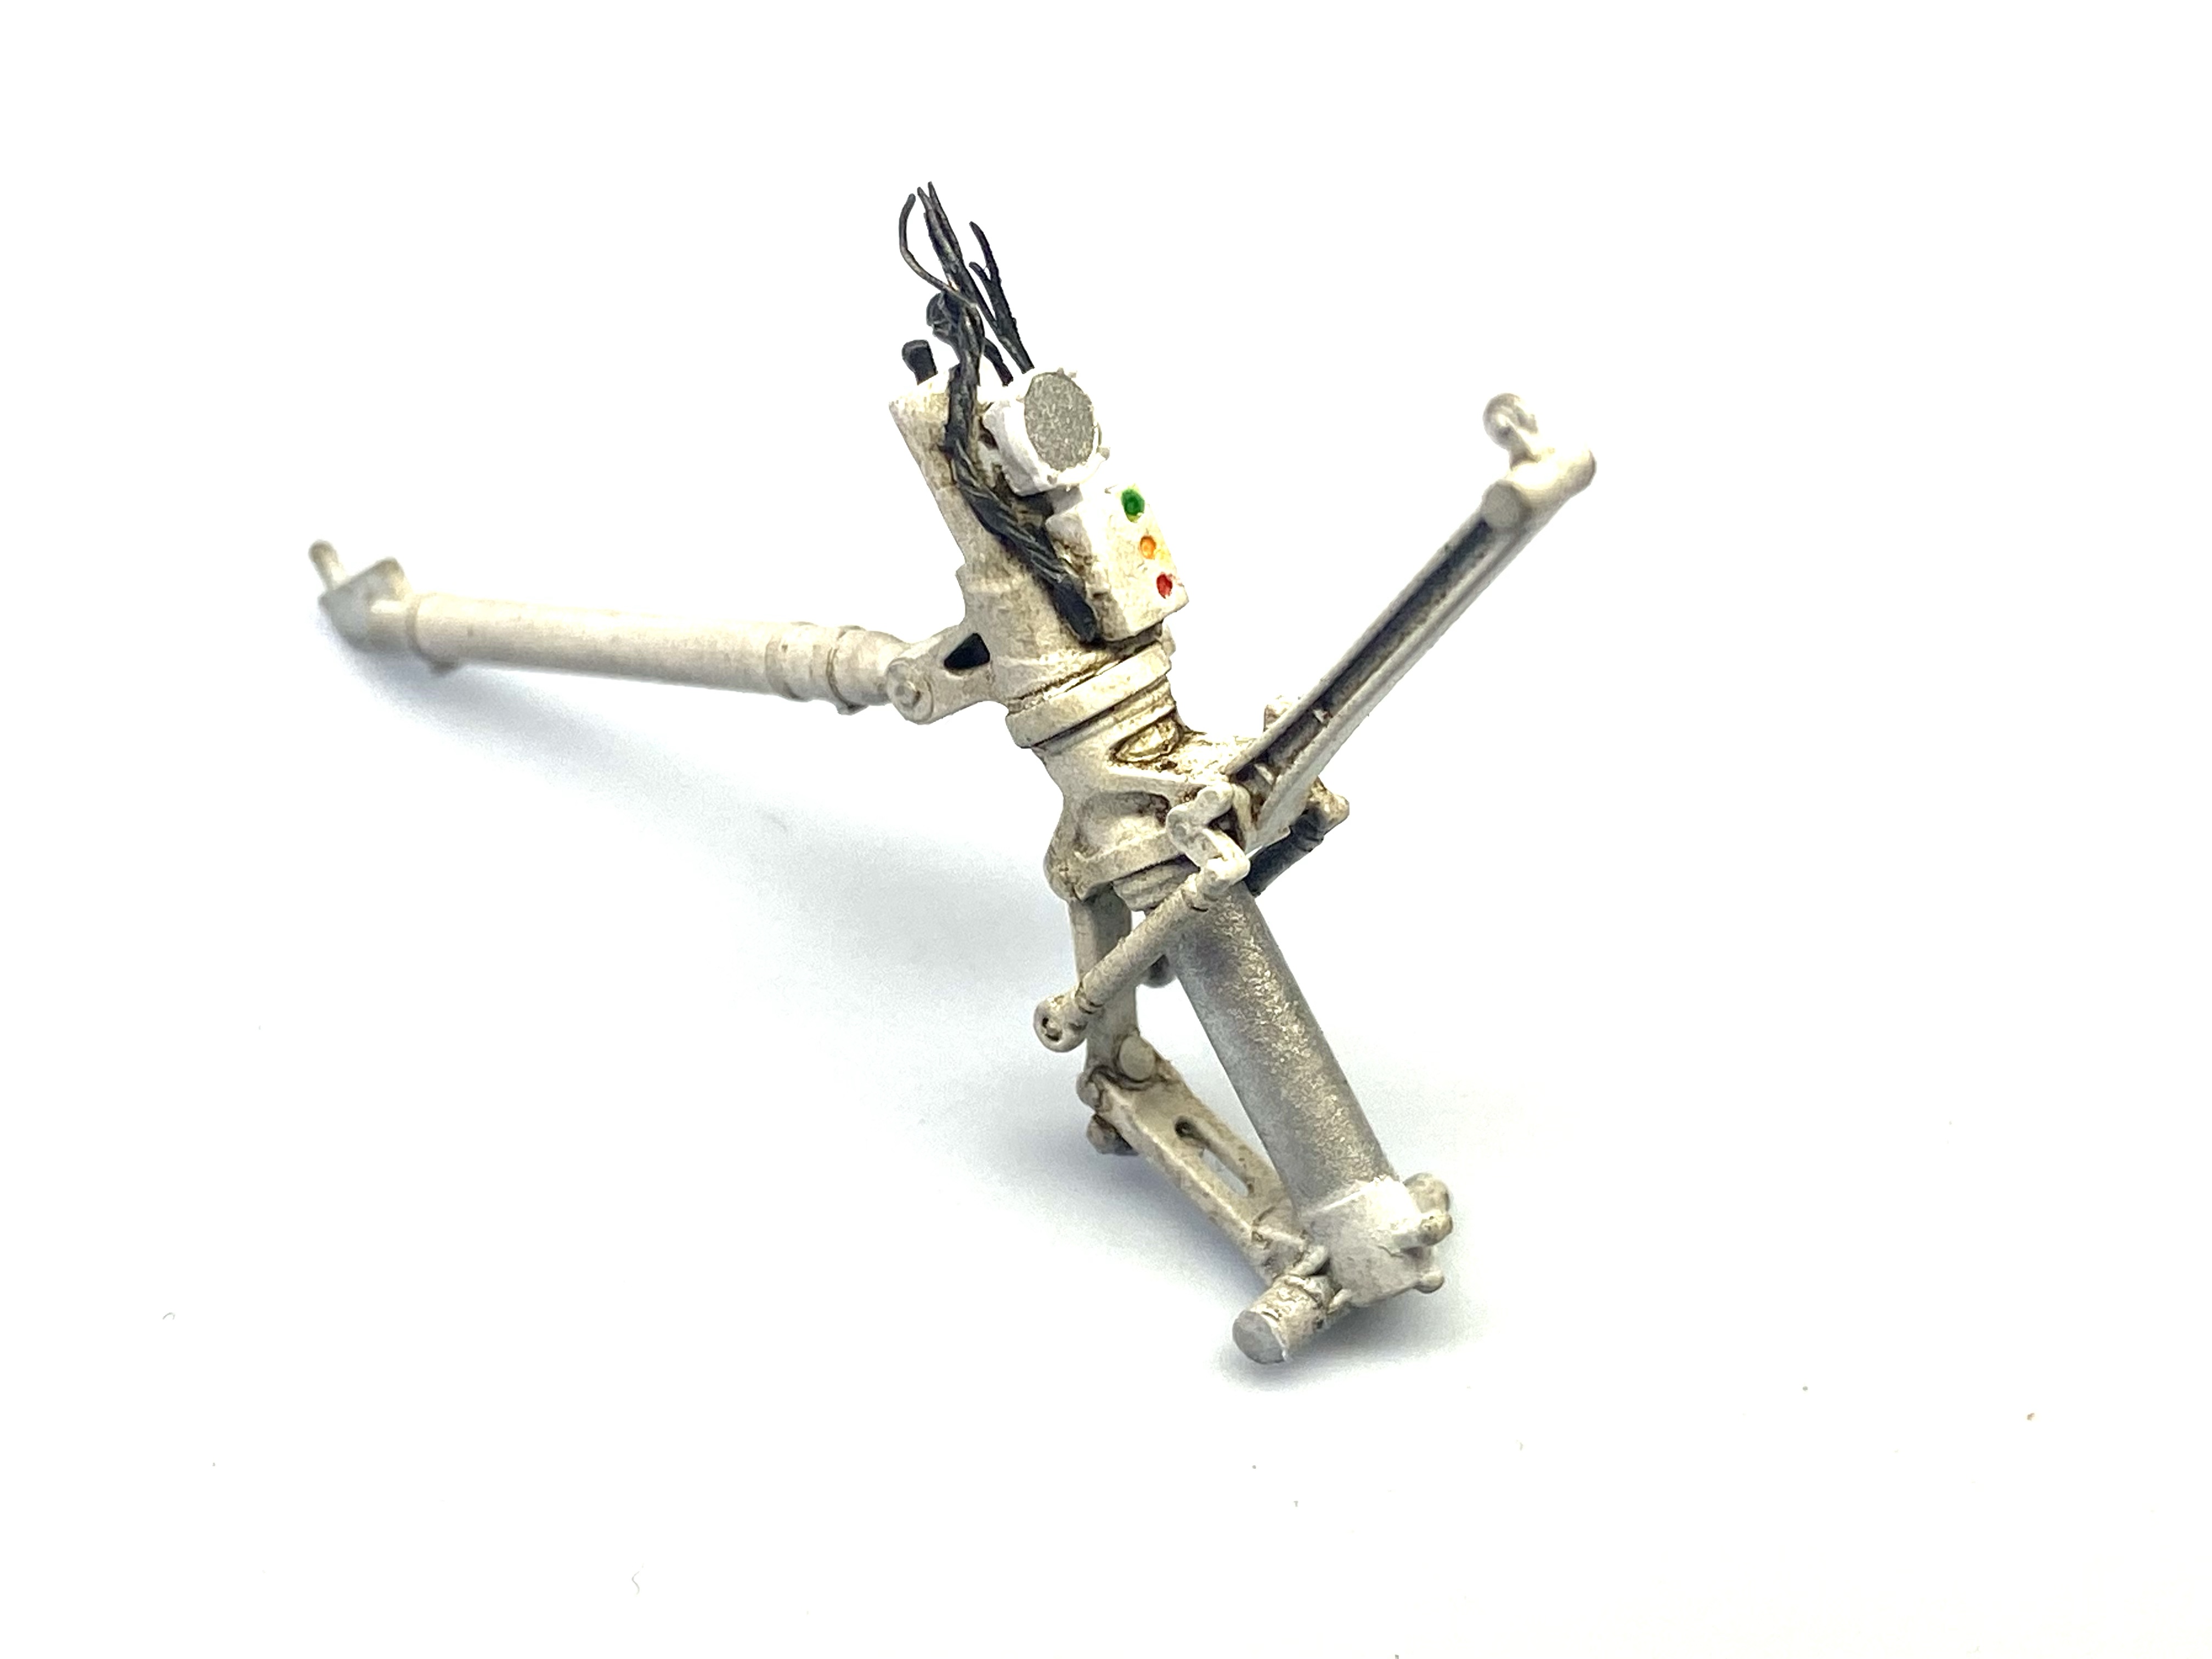
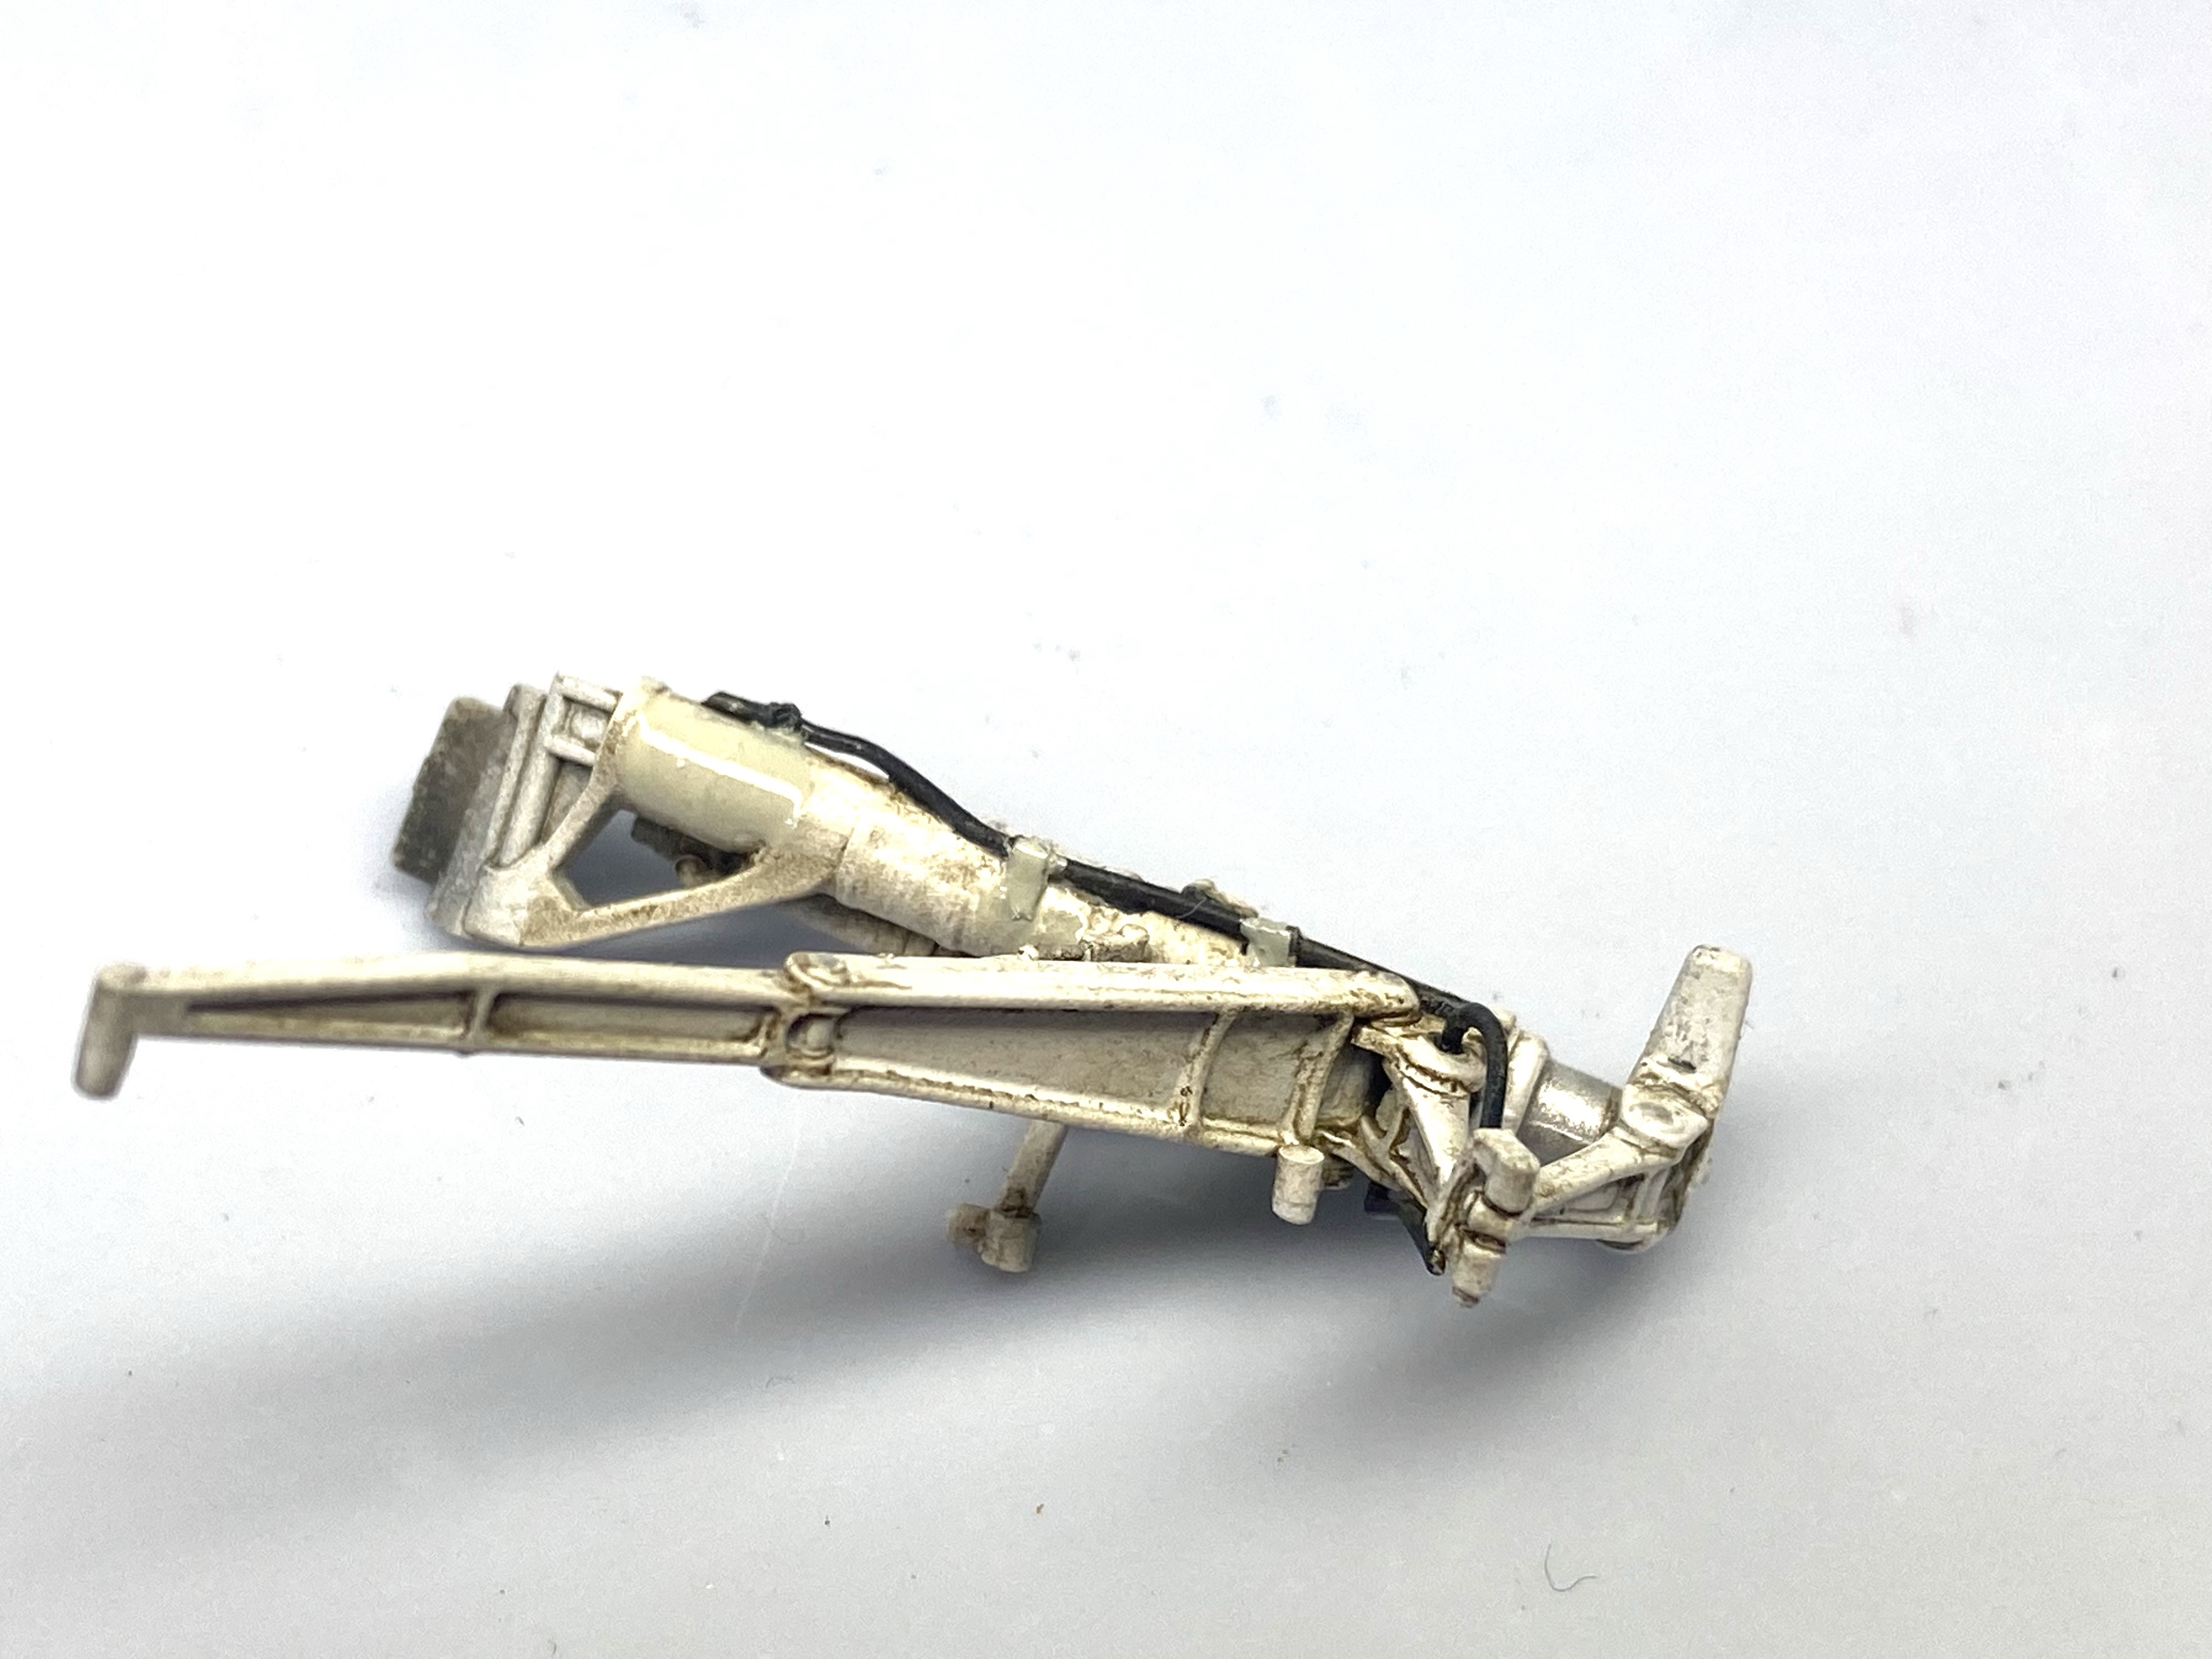
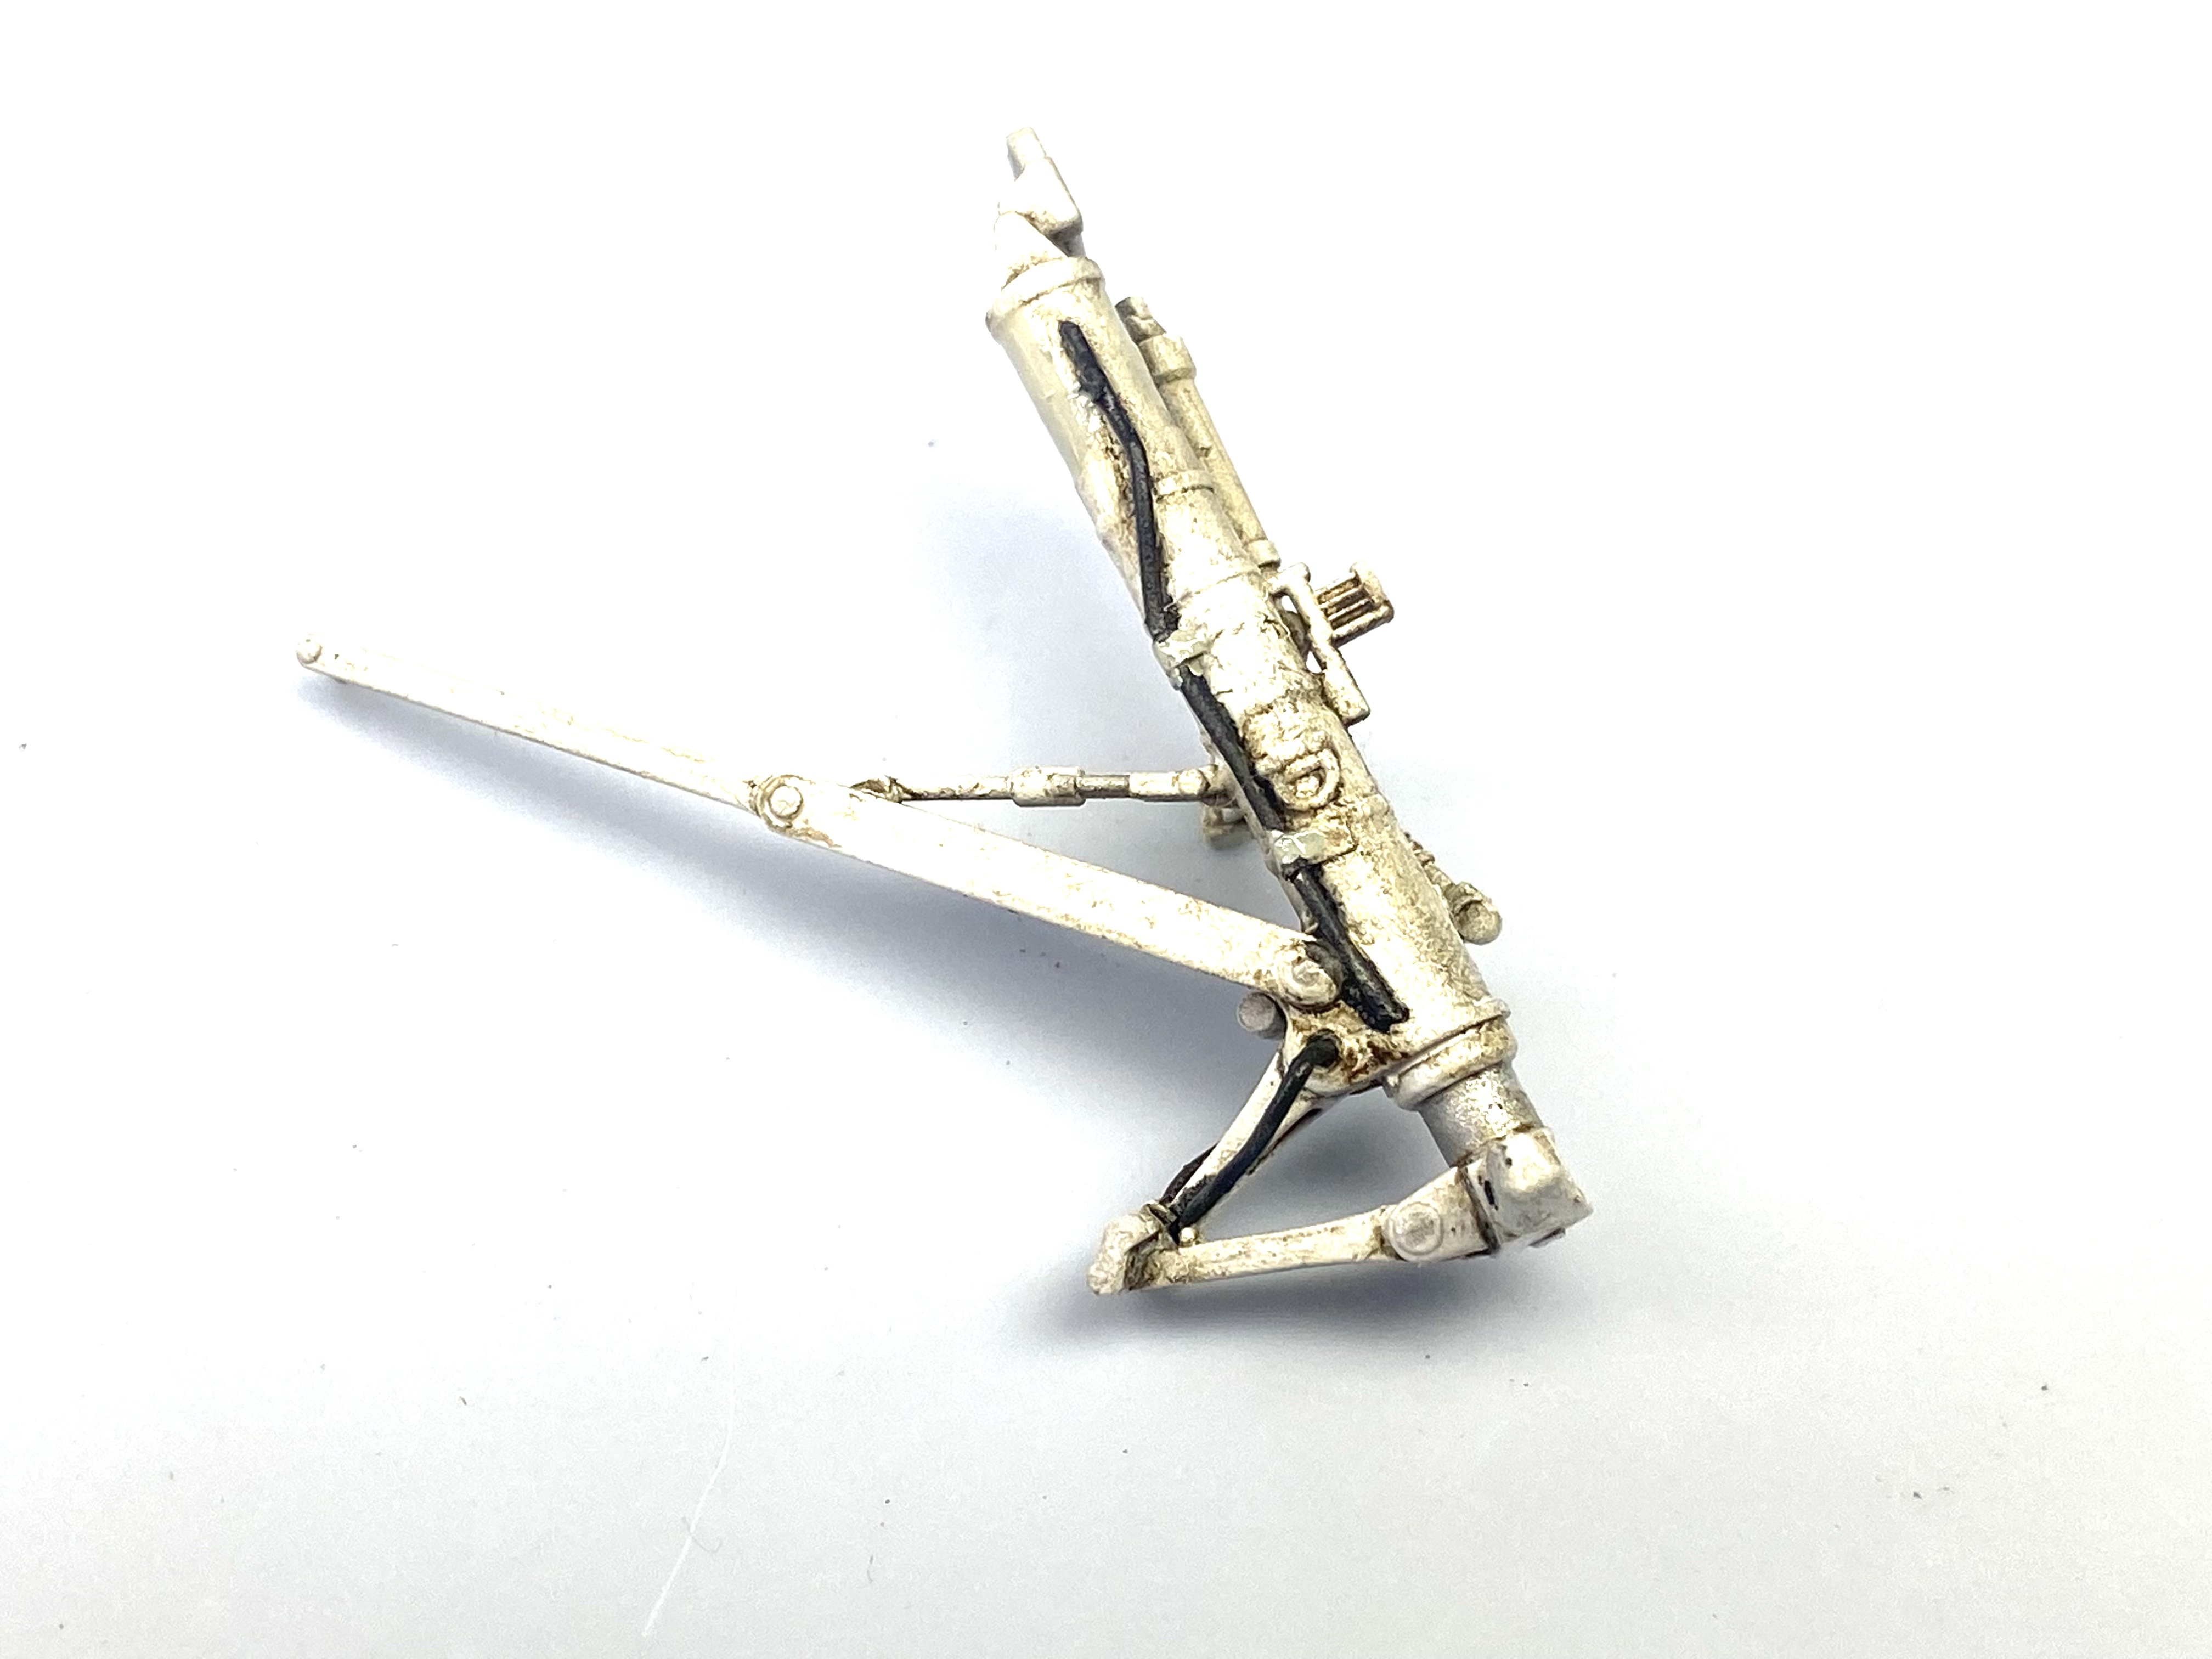
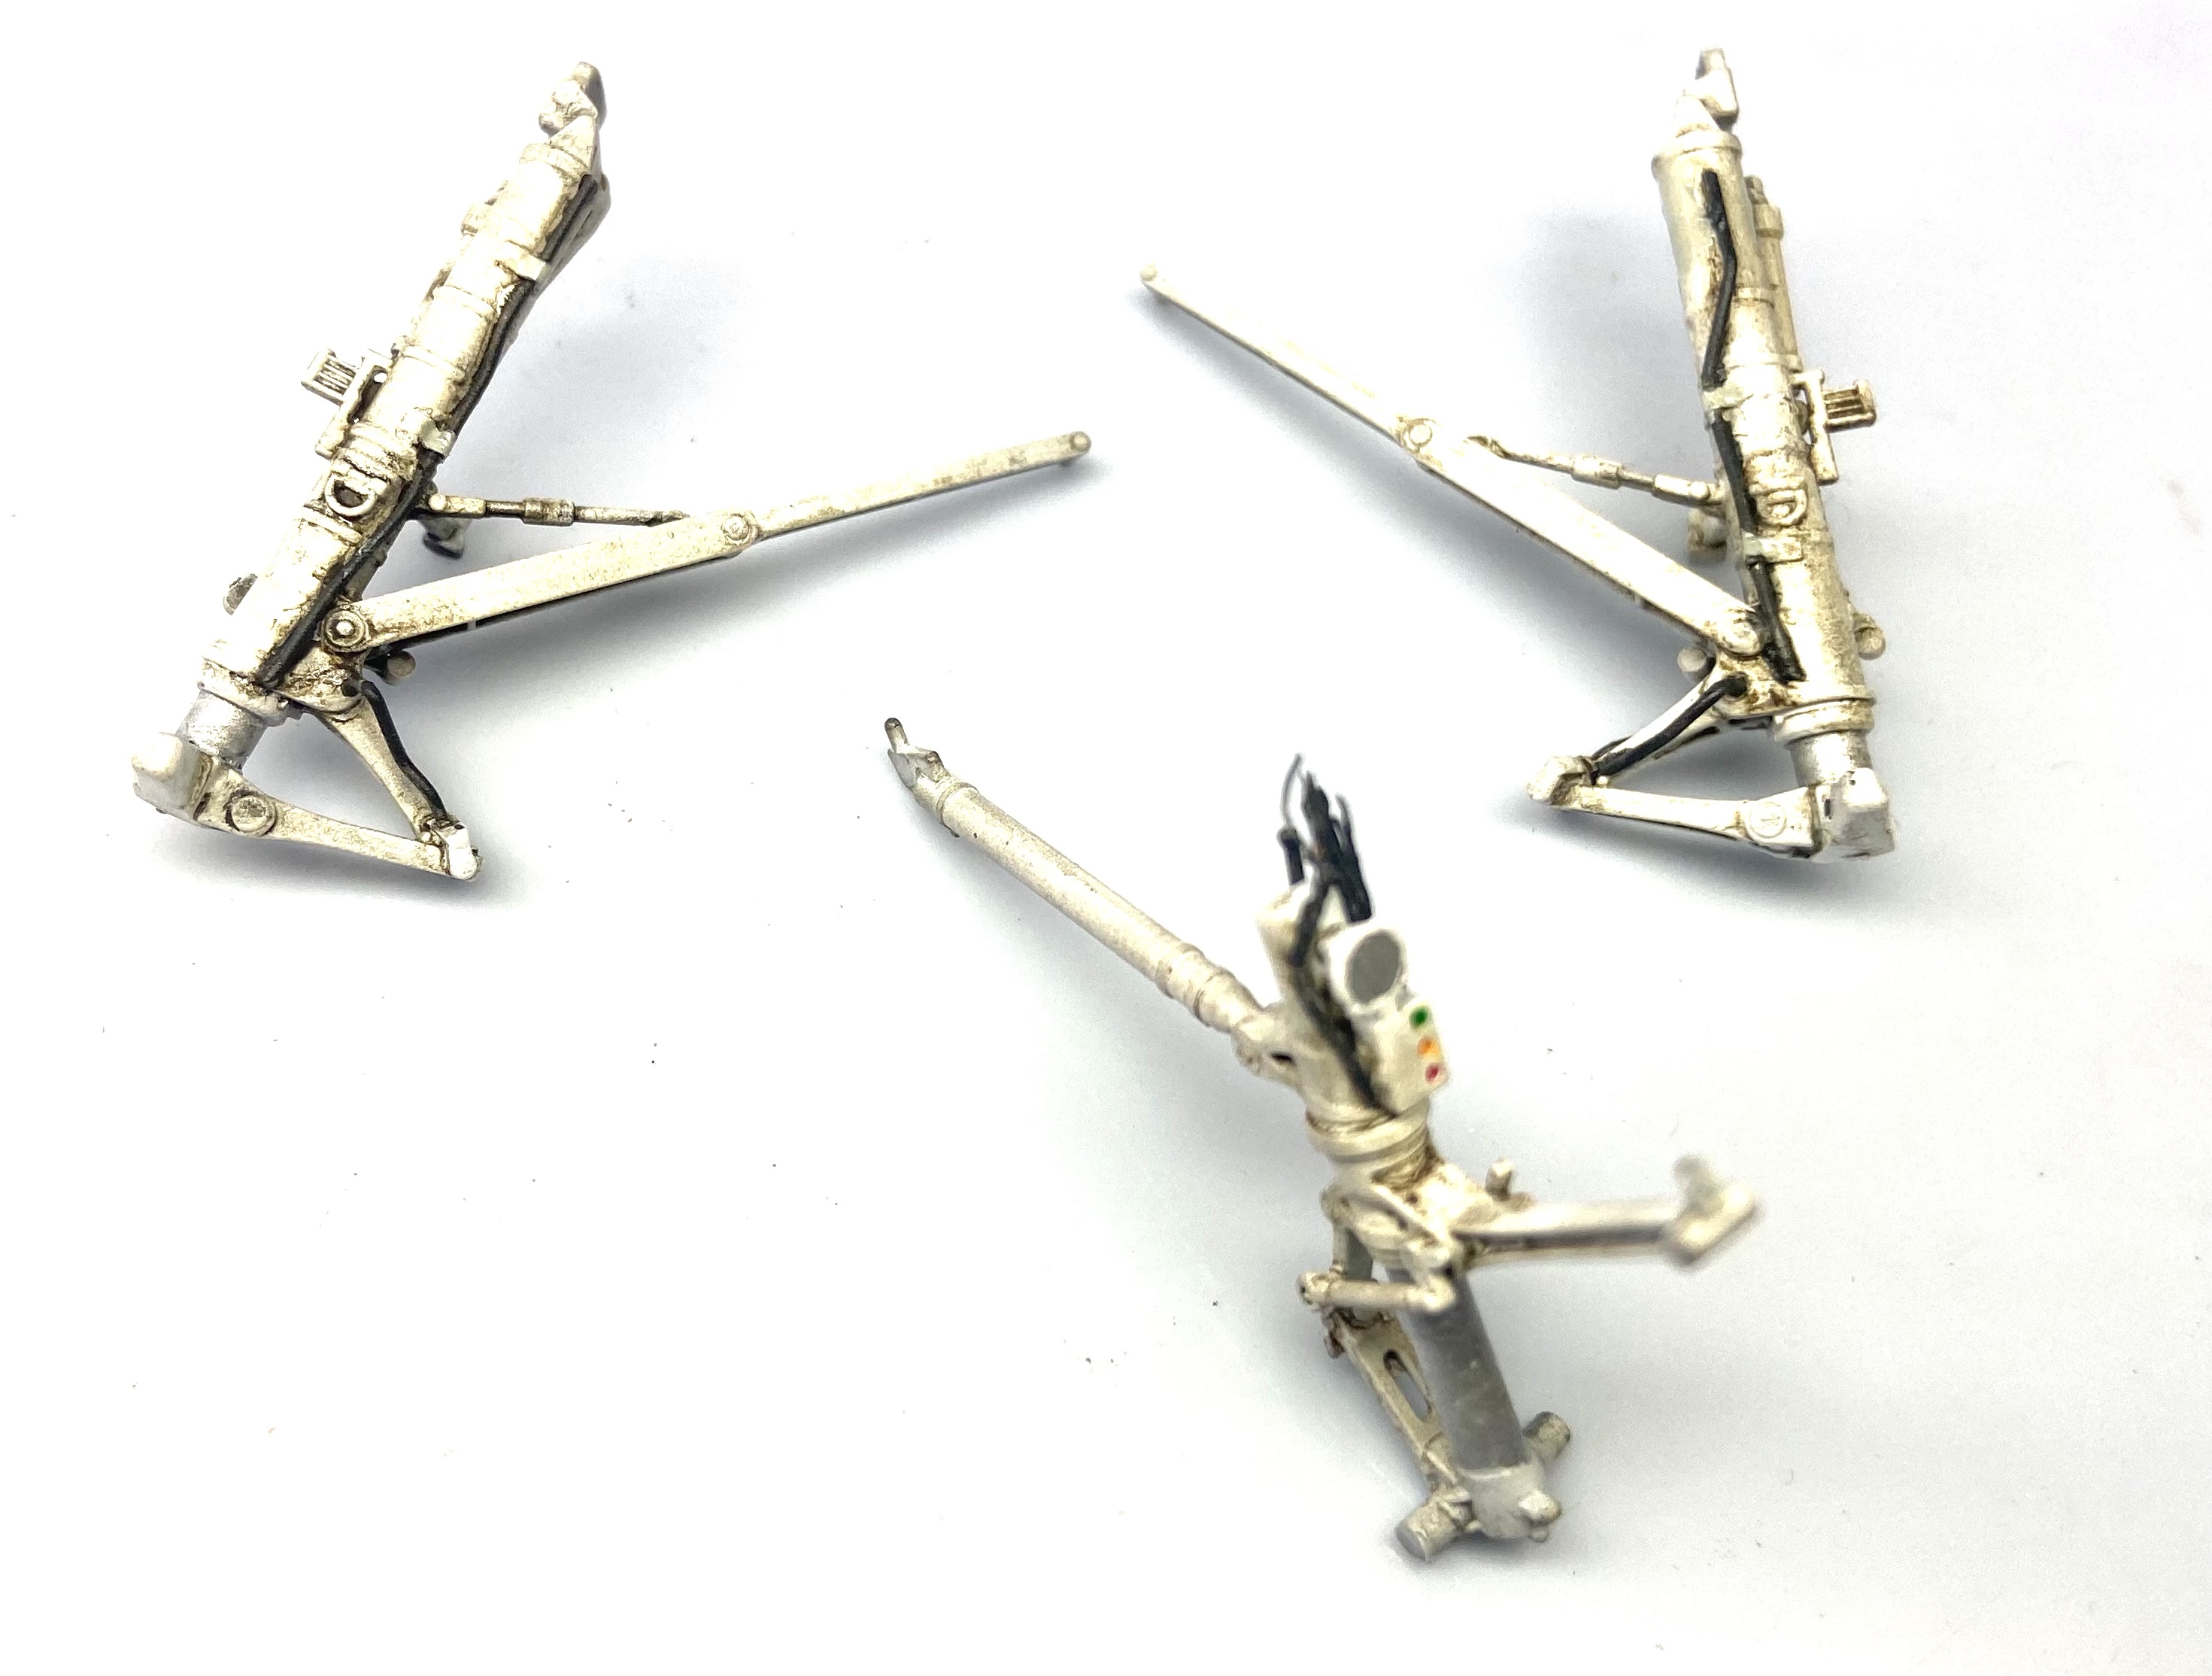
Next, landing gear:
Here is how our Tomcat’s landing gear looked after painting and weathering:
My attention now turned to the bang seats (ejection seats) I assembled the kits seats and added the PE seat harness to each one before painting:
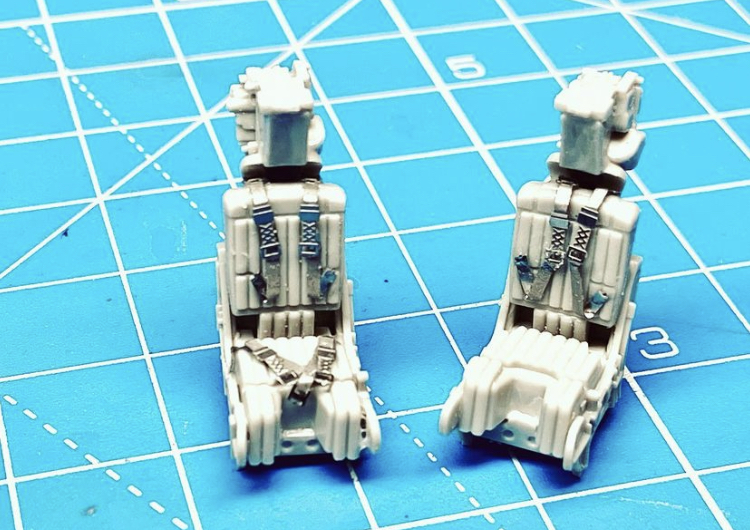
Here is how the seats looked after careful painting and weathering:

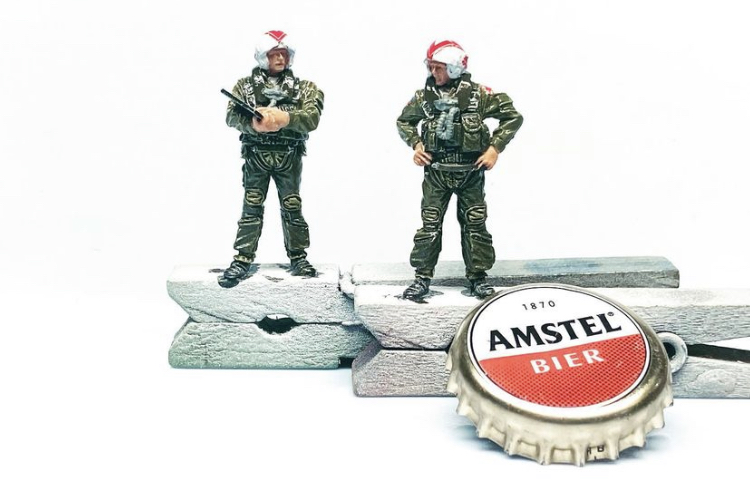
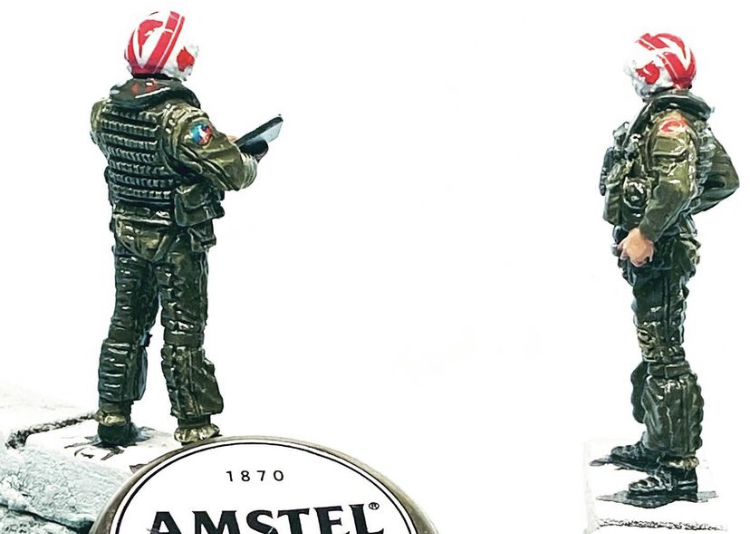
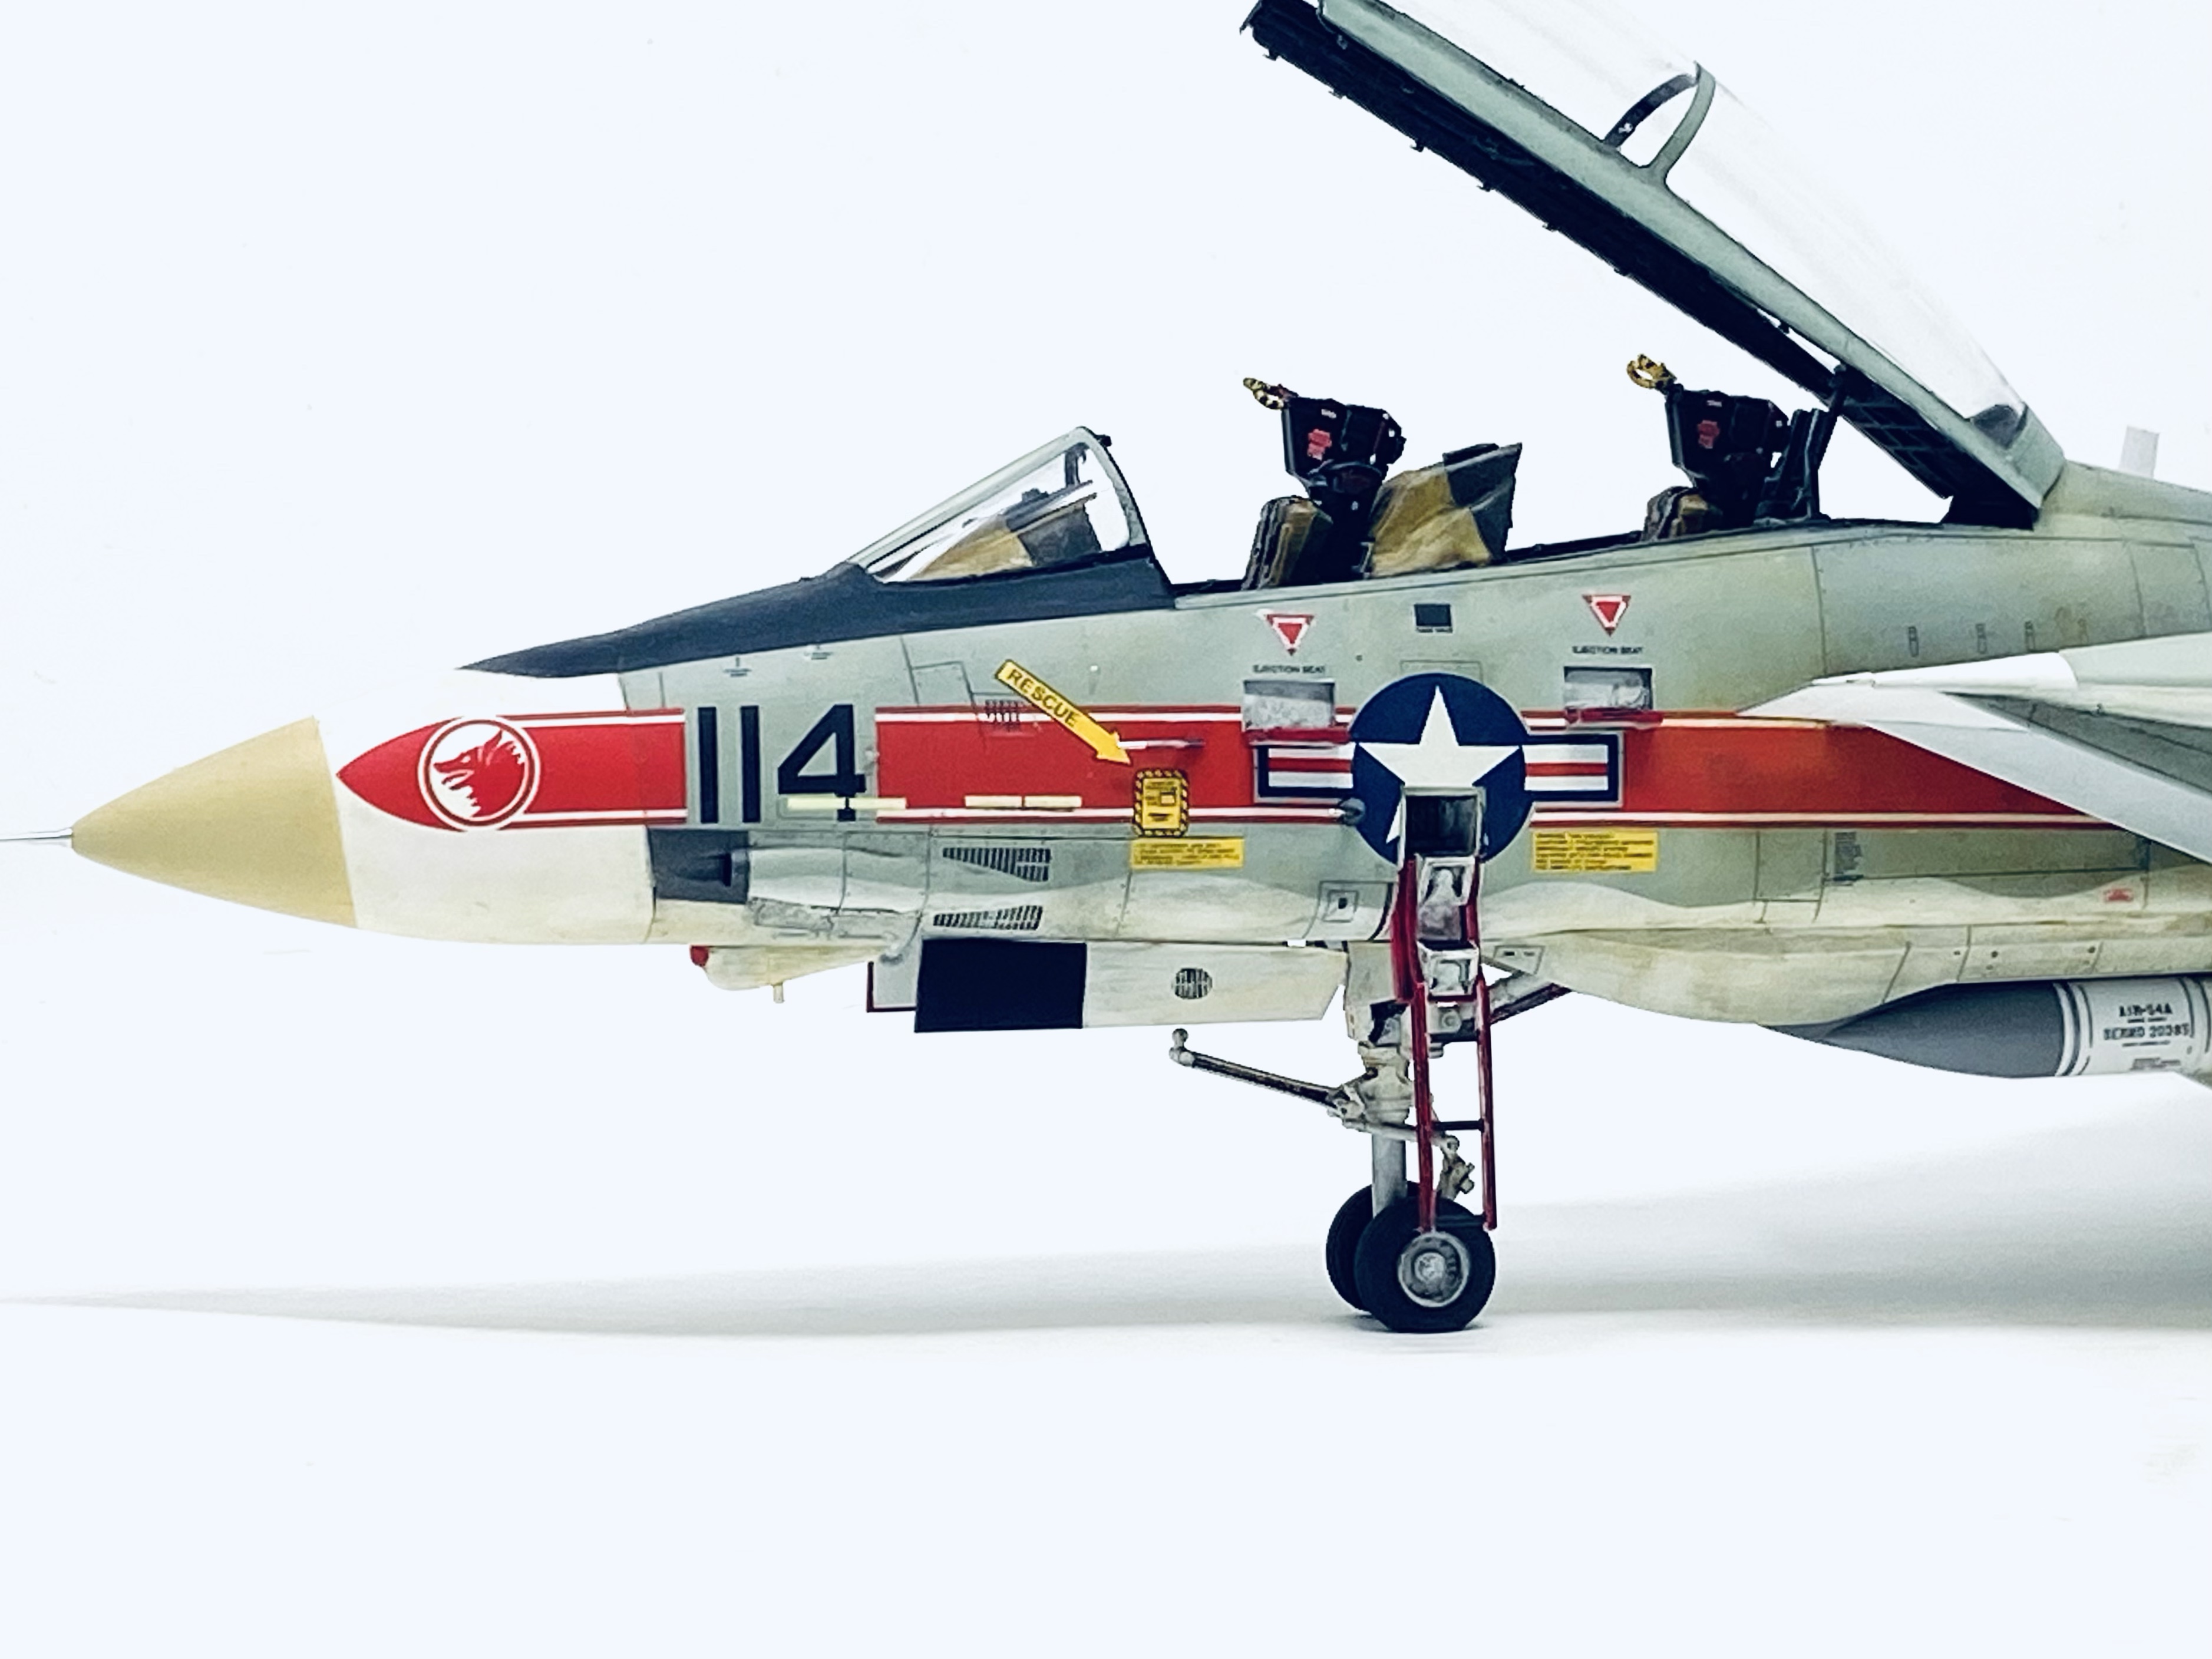
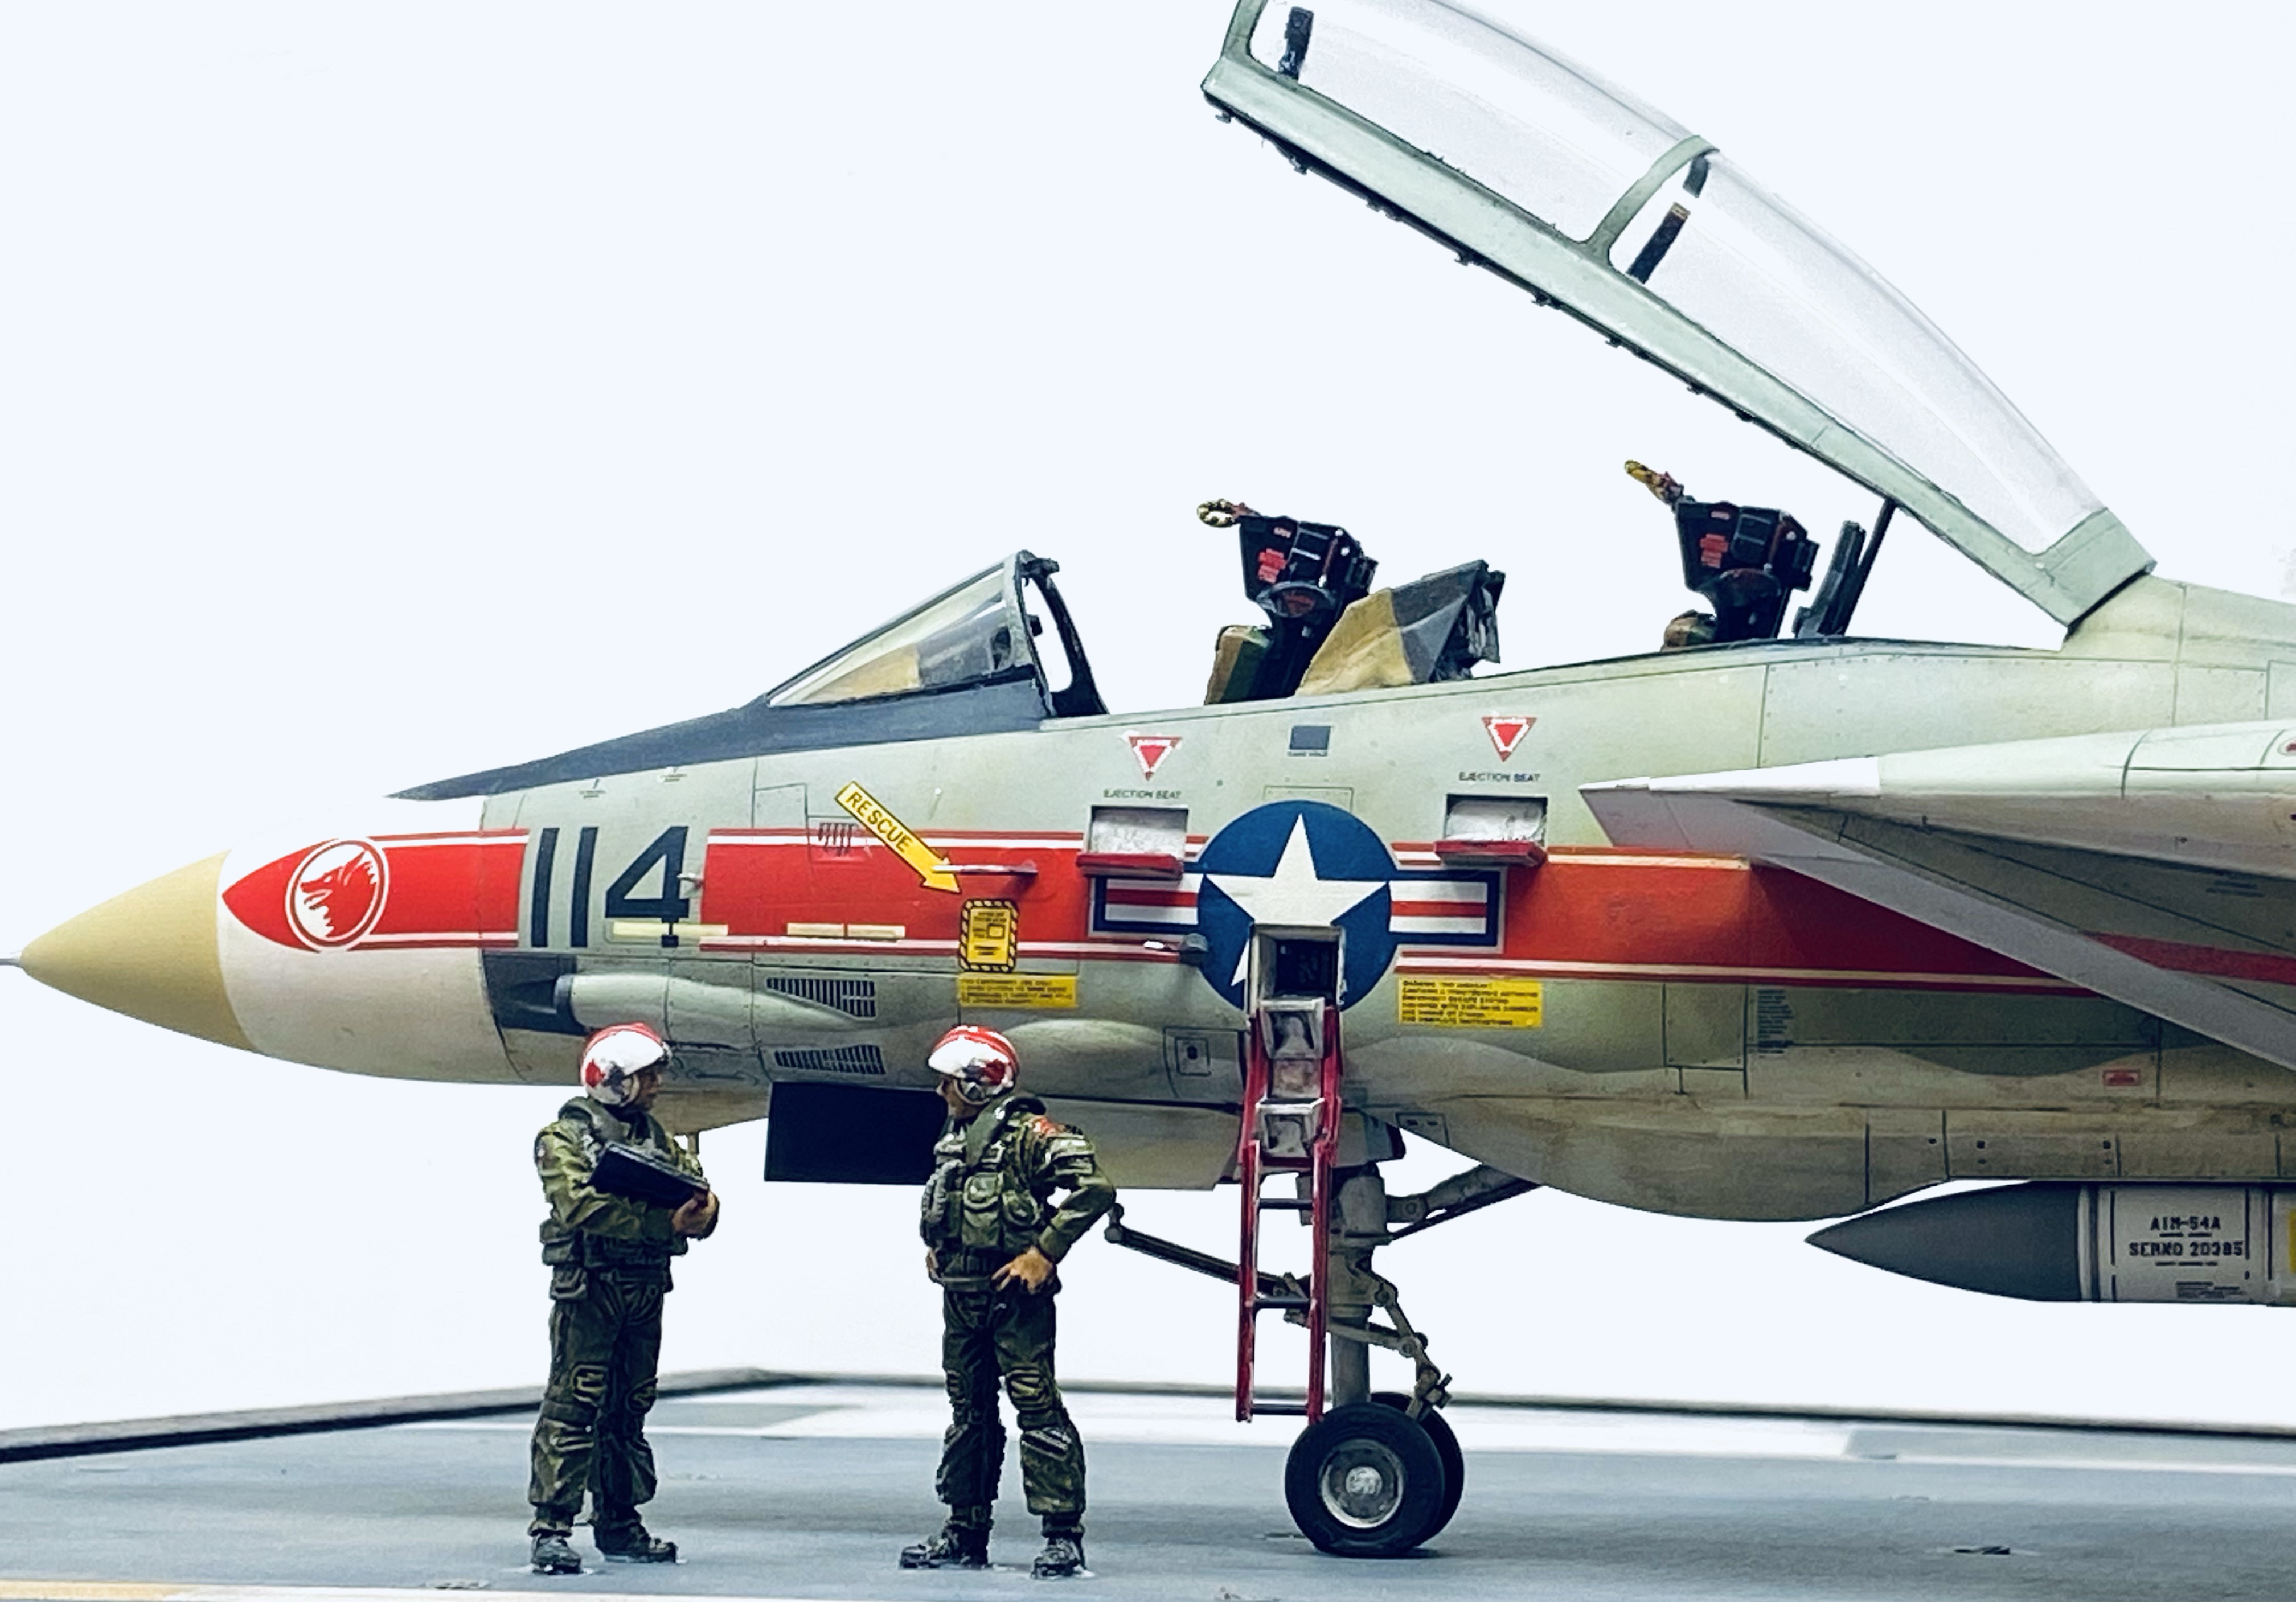
The Crew: These Plus Model resin figures are fantastic! The are exquisitely detailed and with the helmet decals they really look the part. With a little patience and in my case some good luck too, they turned out rather nice in the end.
Decals and Weathering-Keeping it real!
The aftermarket HAD decals were very thin and I had to take great care that they did not tear, which they did! So I went out and bought a second decal sheet, worth doing to get it right! The decals settled down with Micro Set and Sol without any issues.
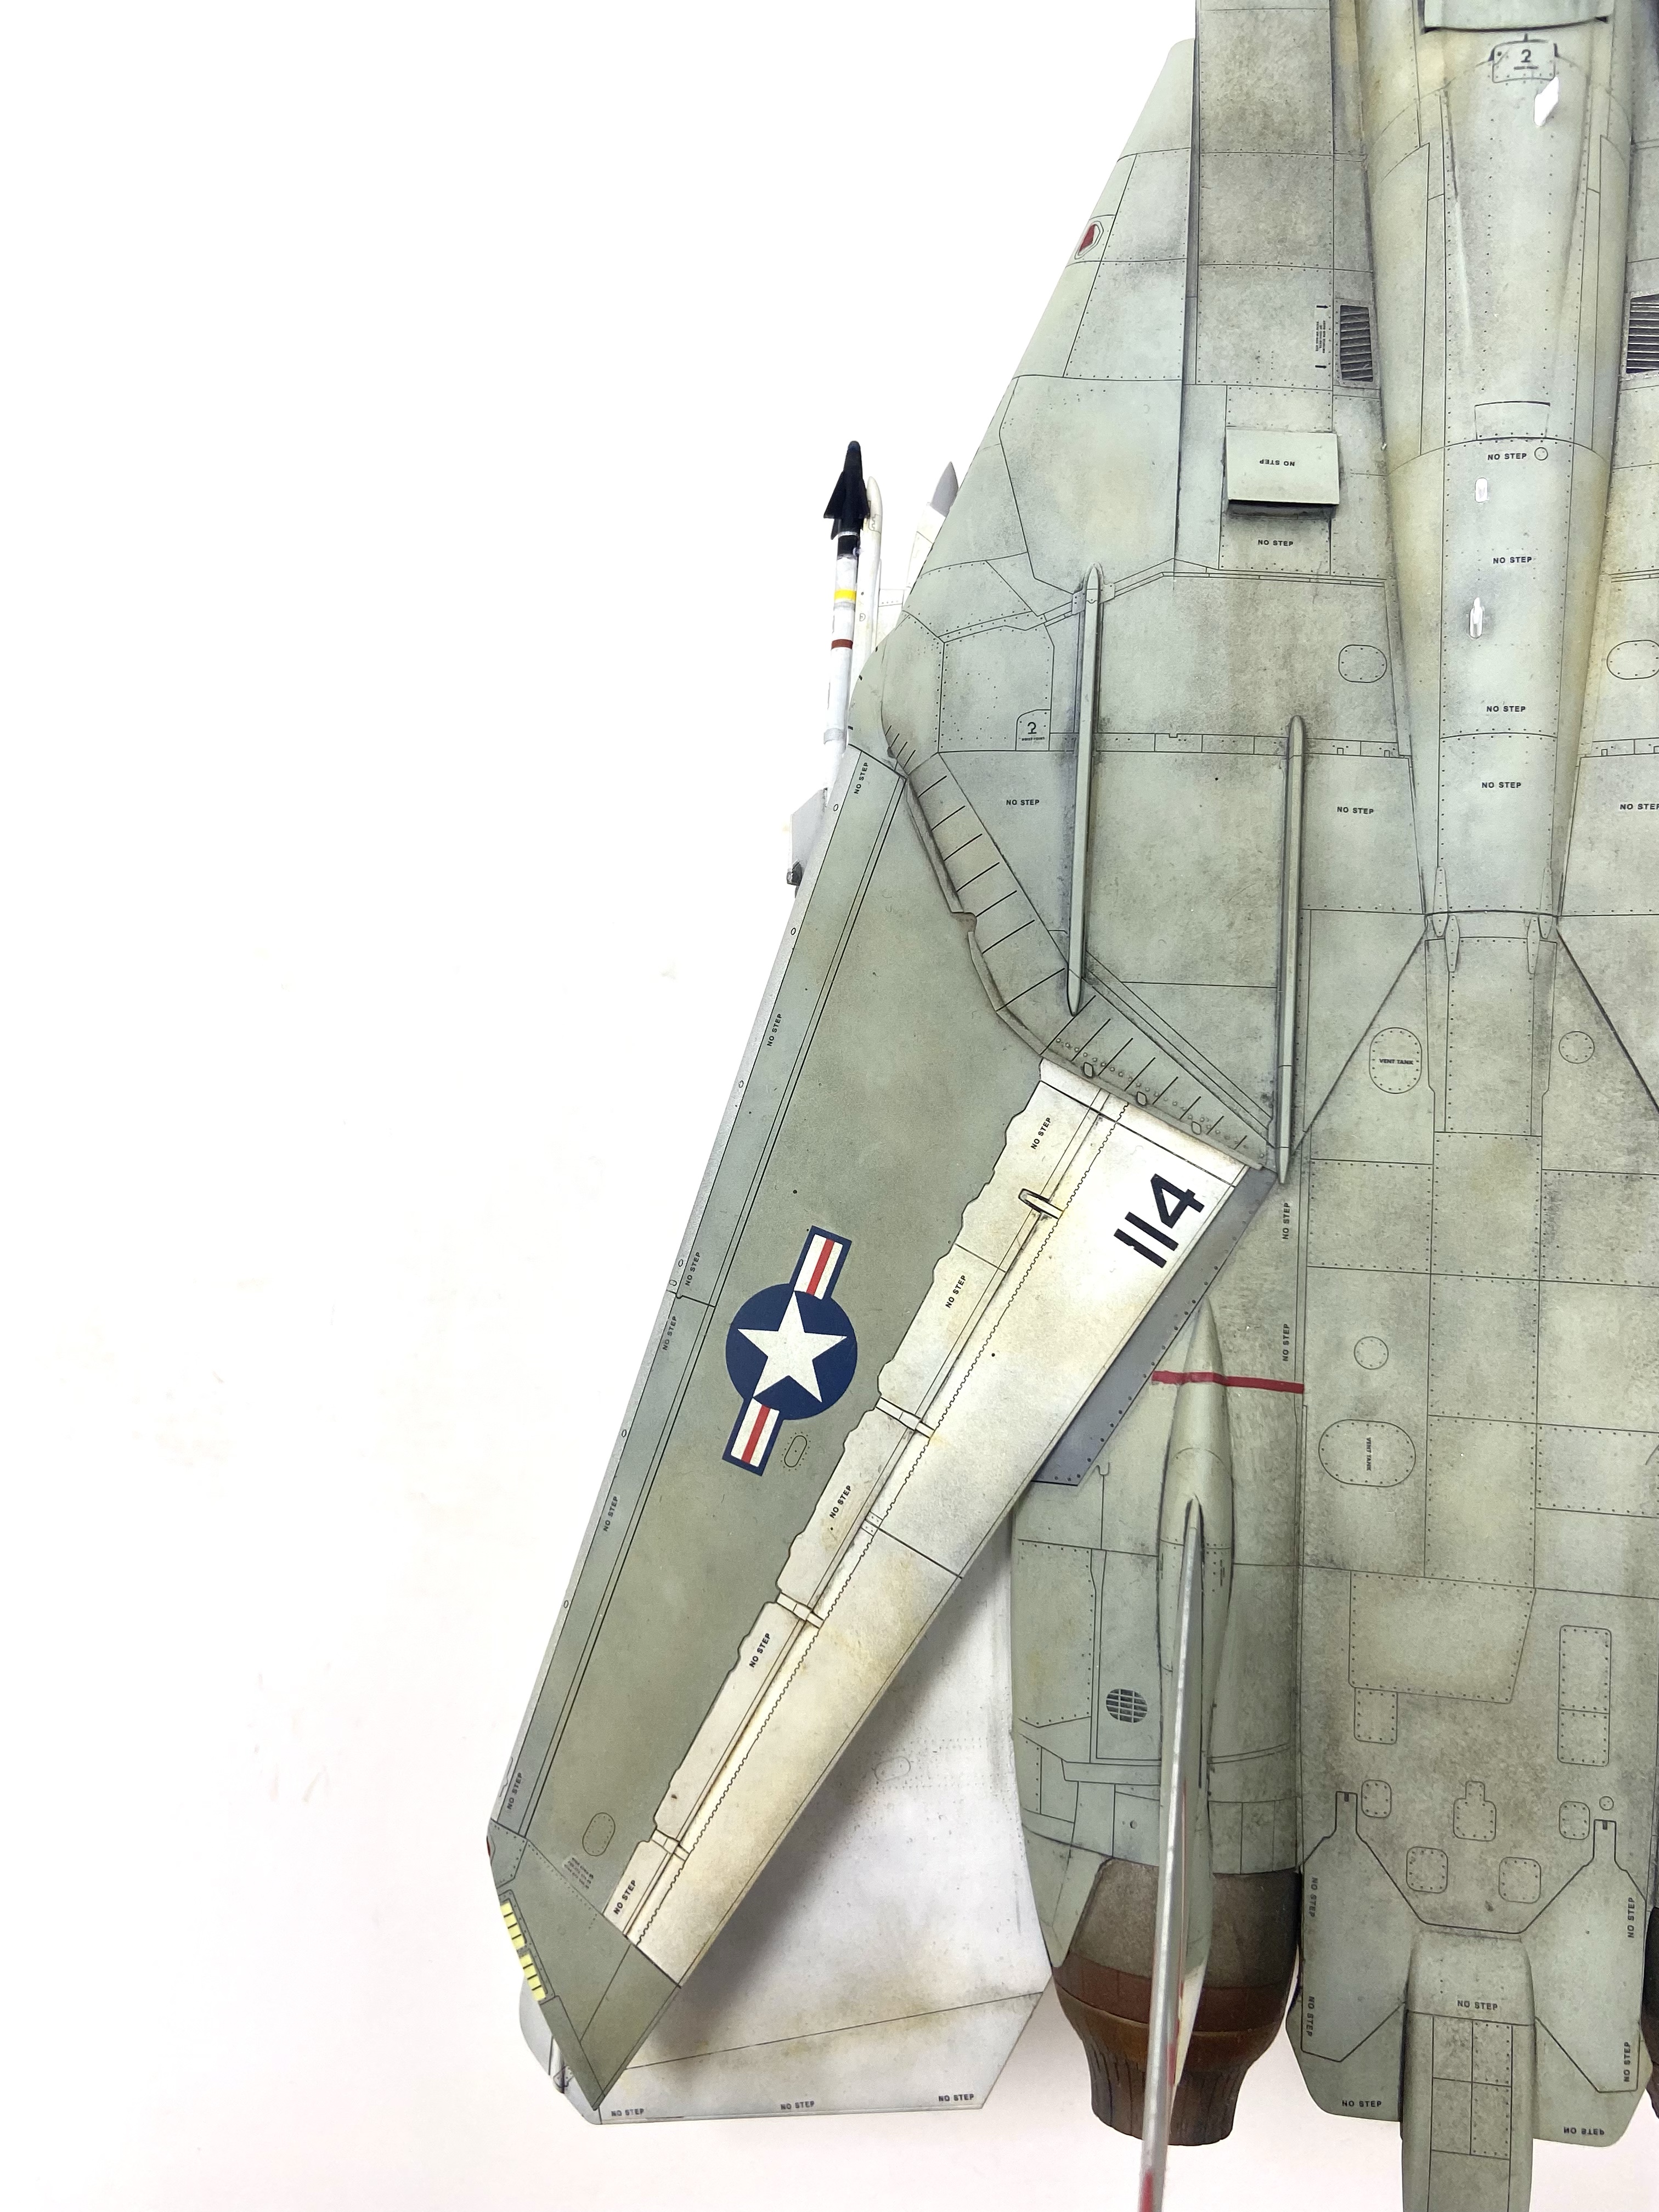
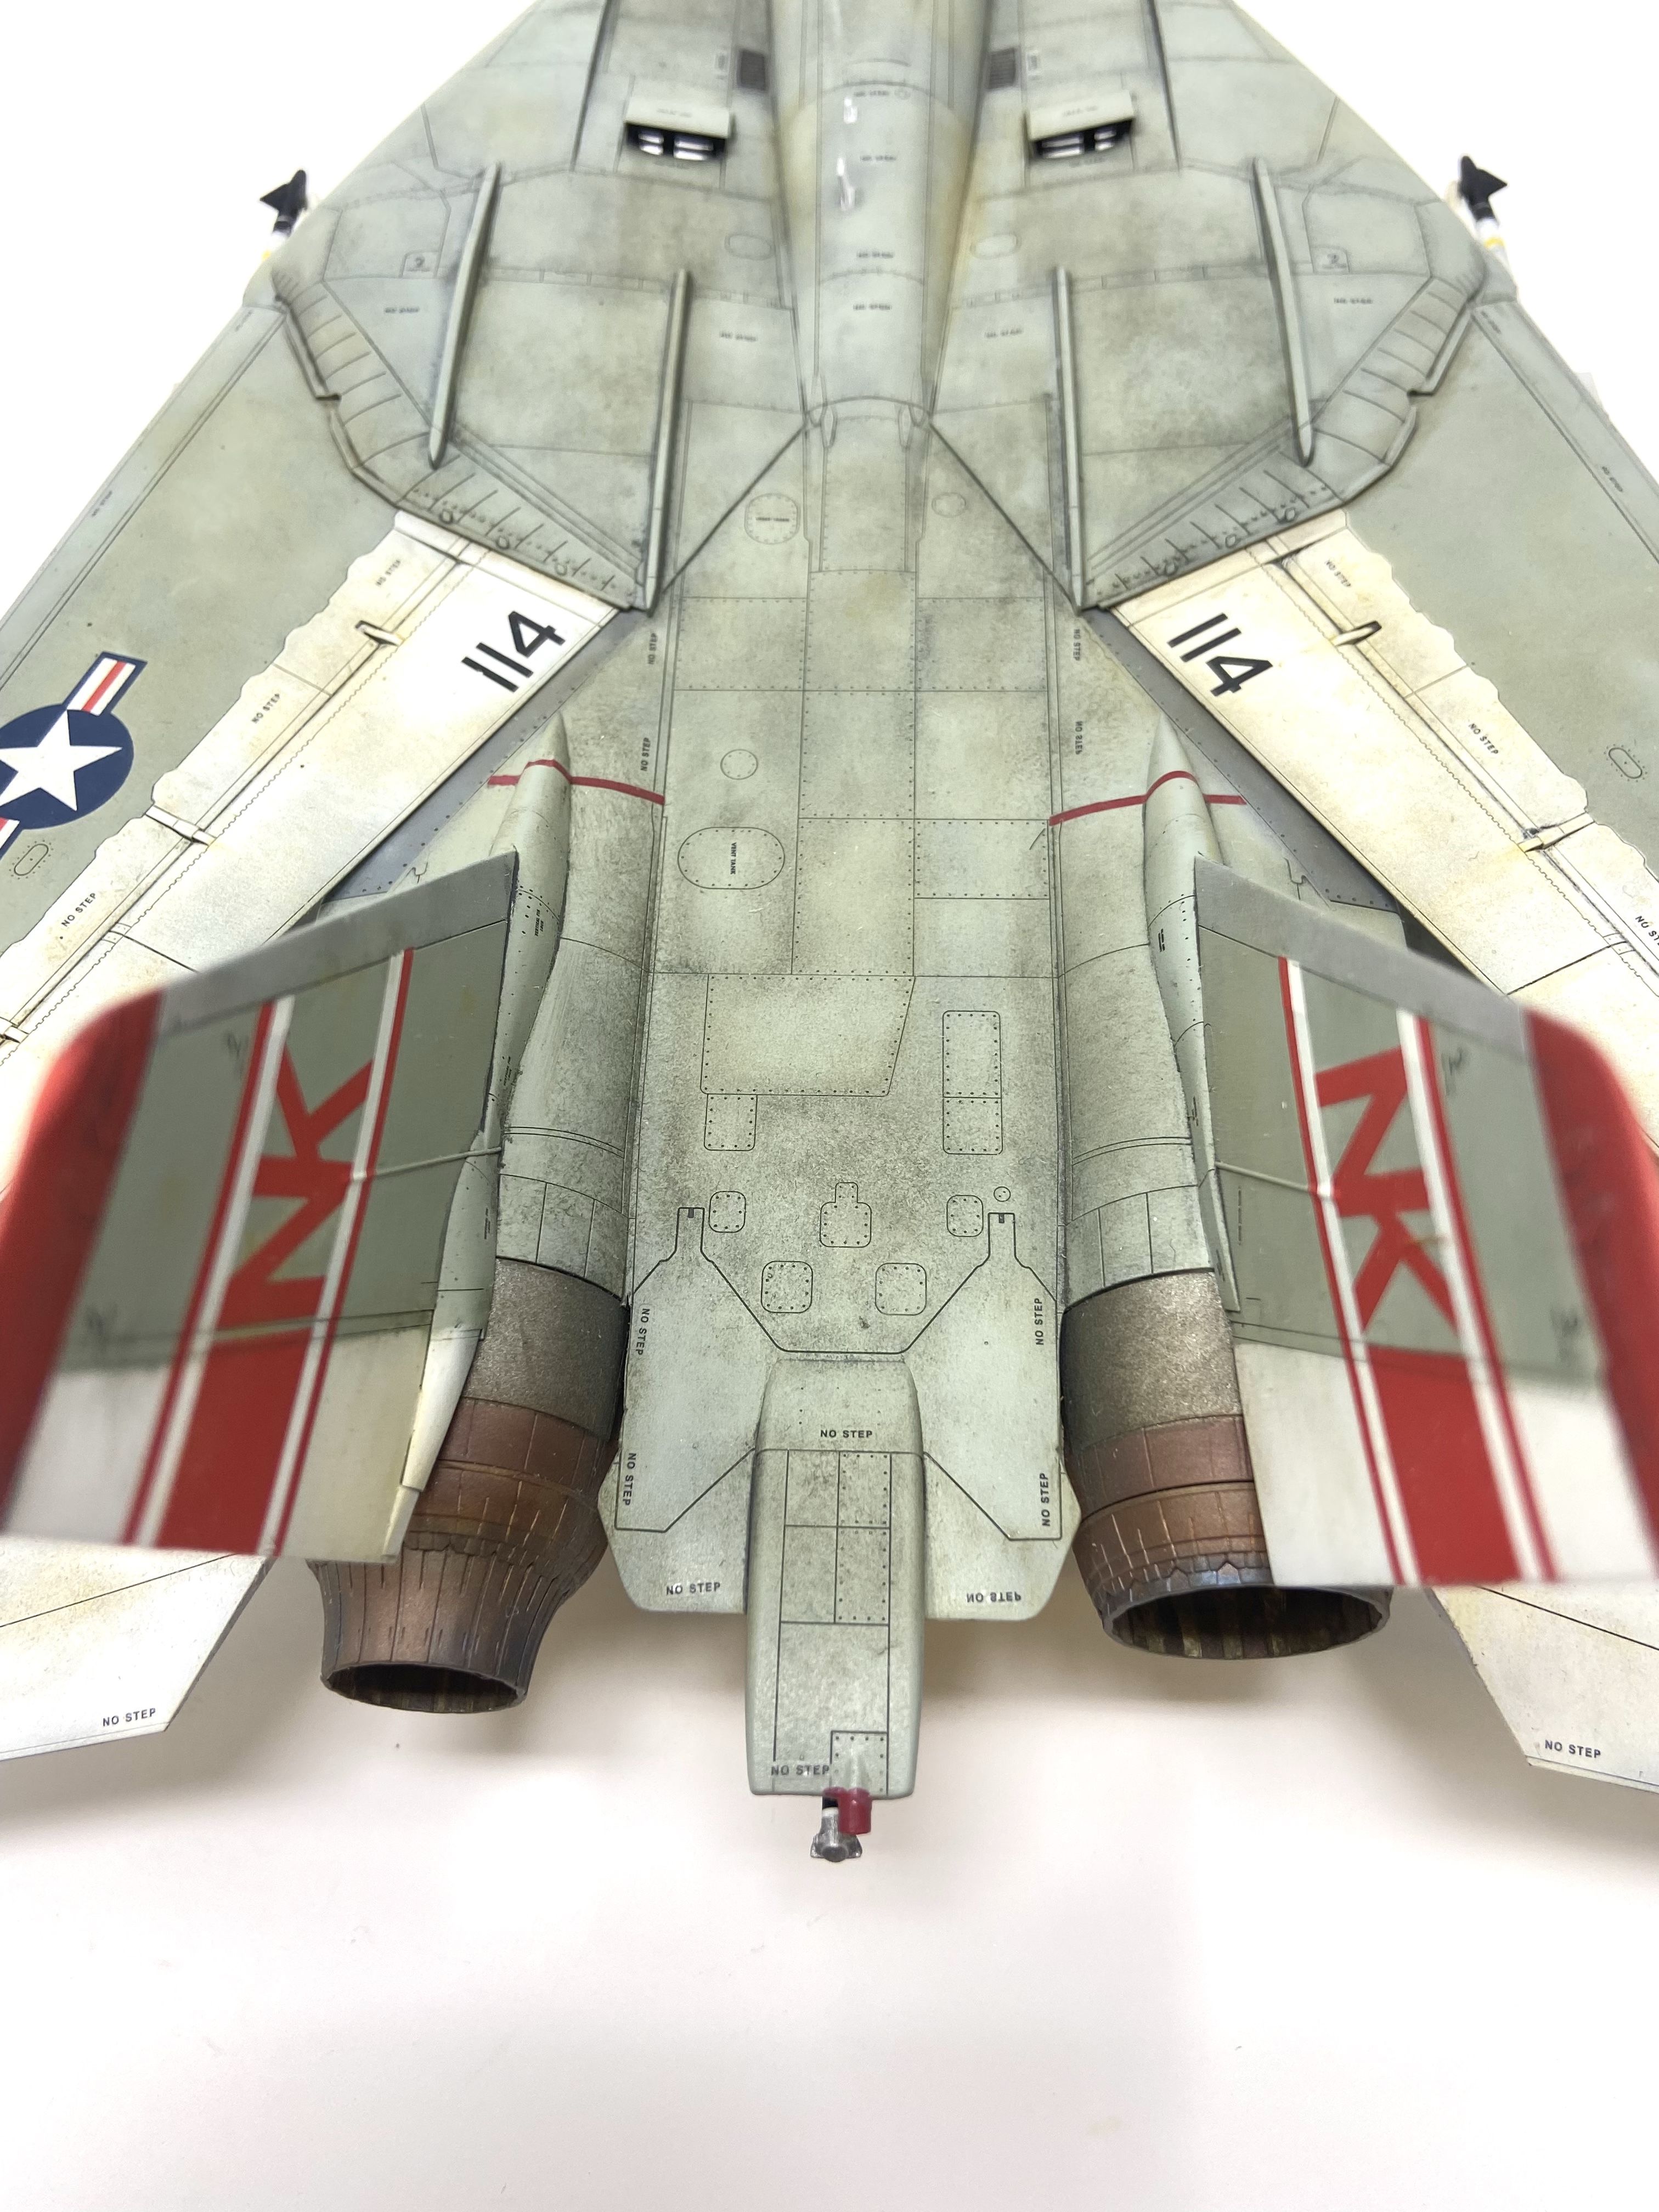
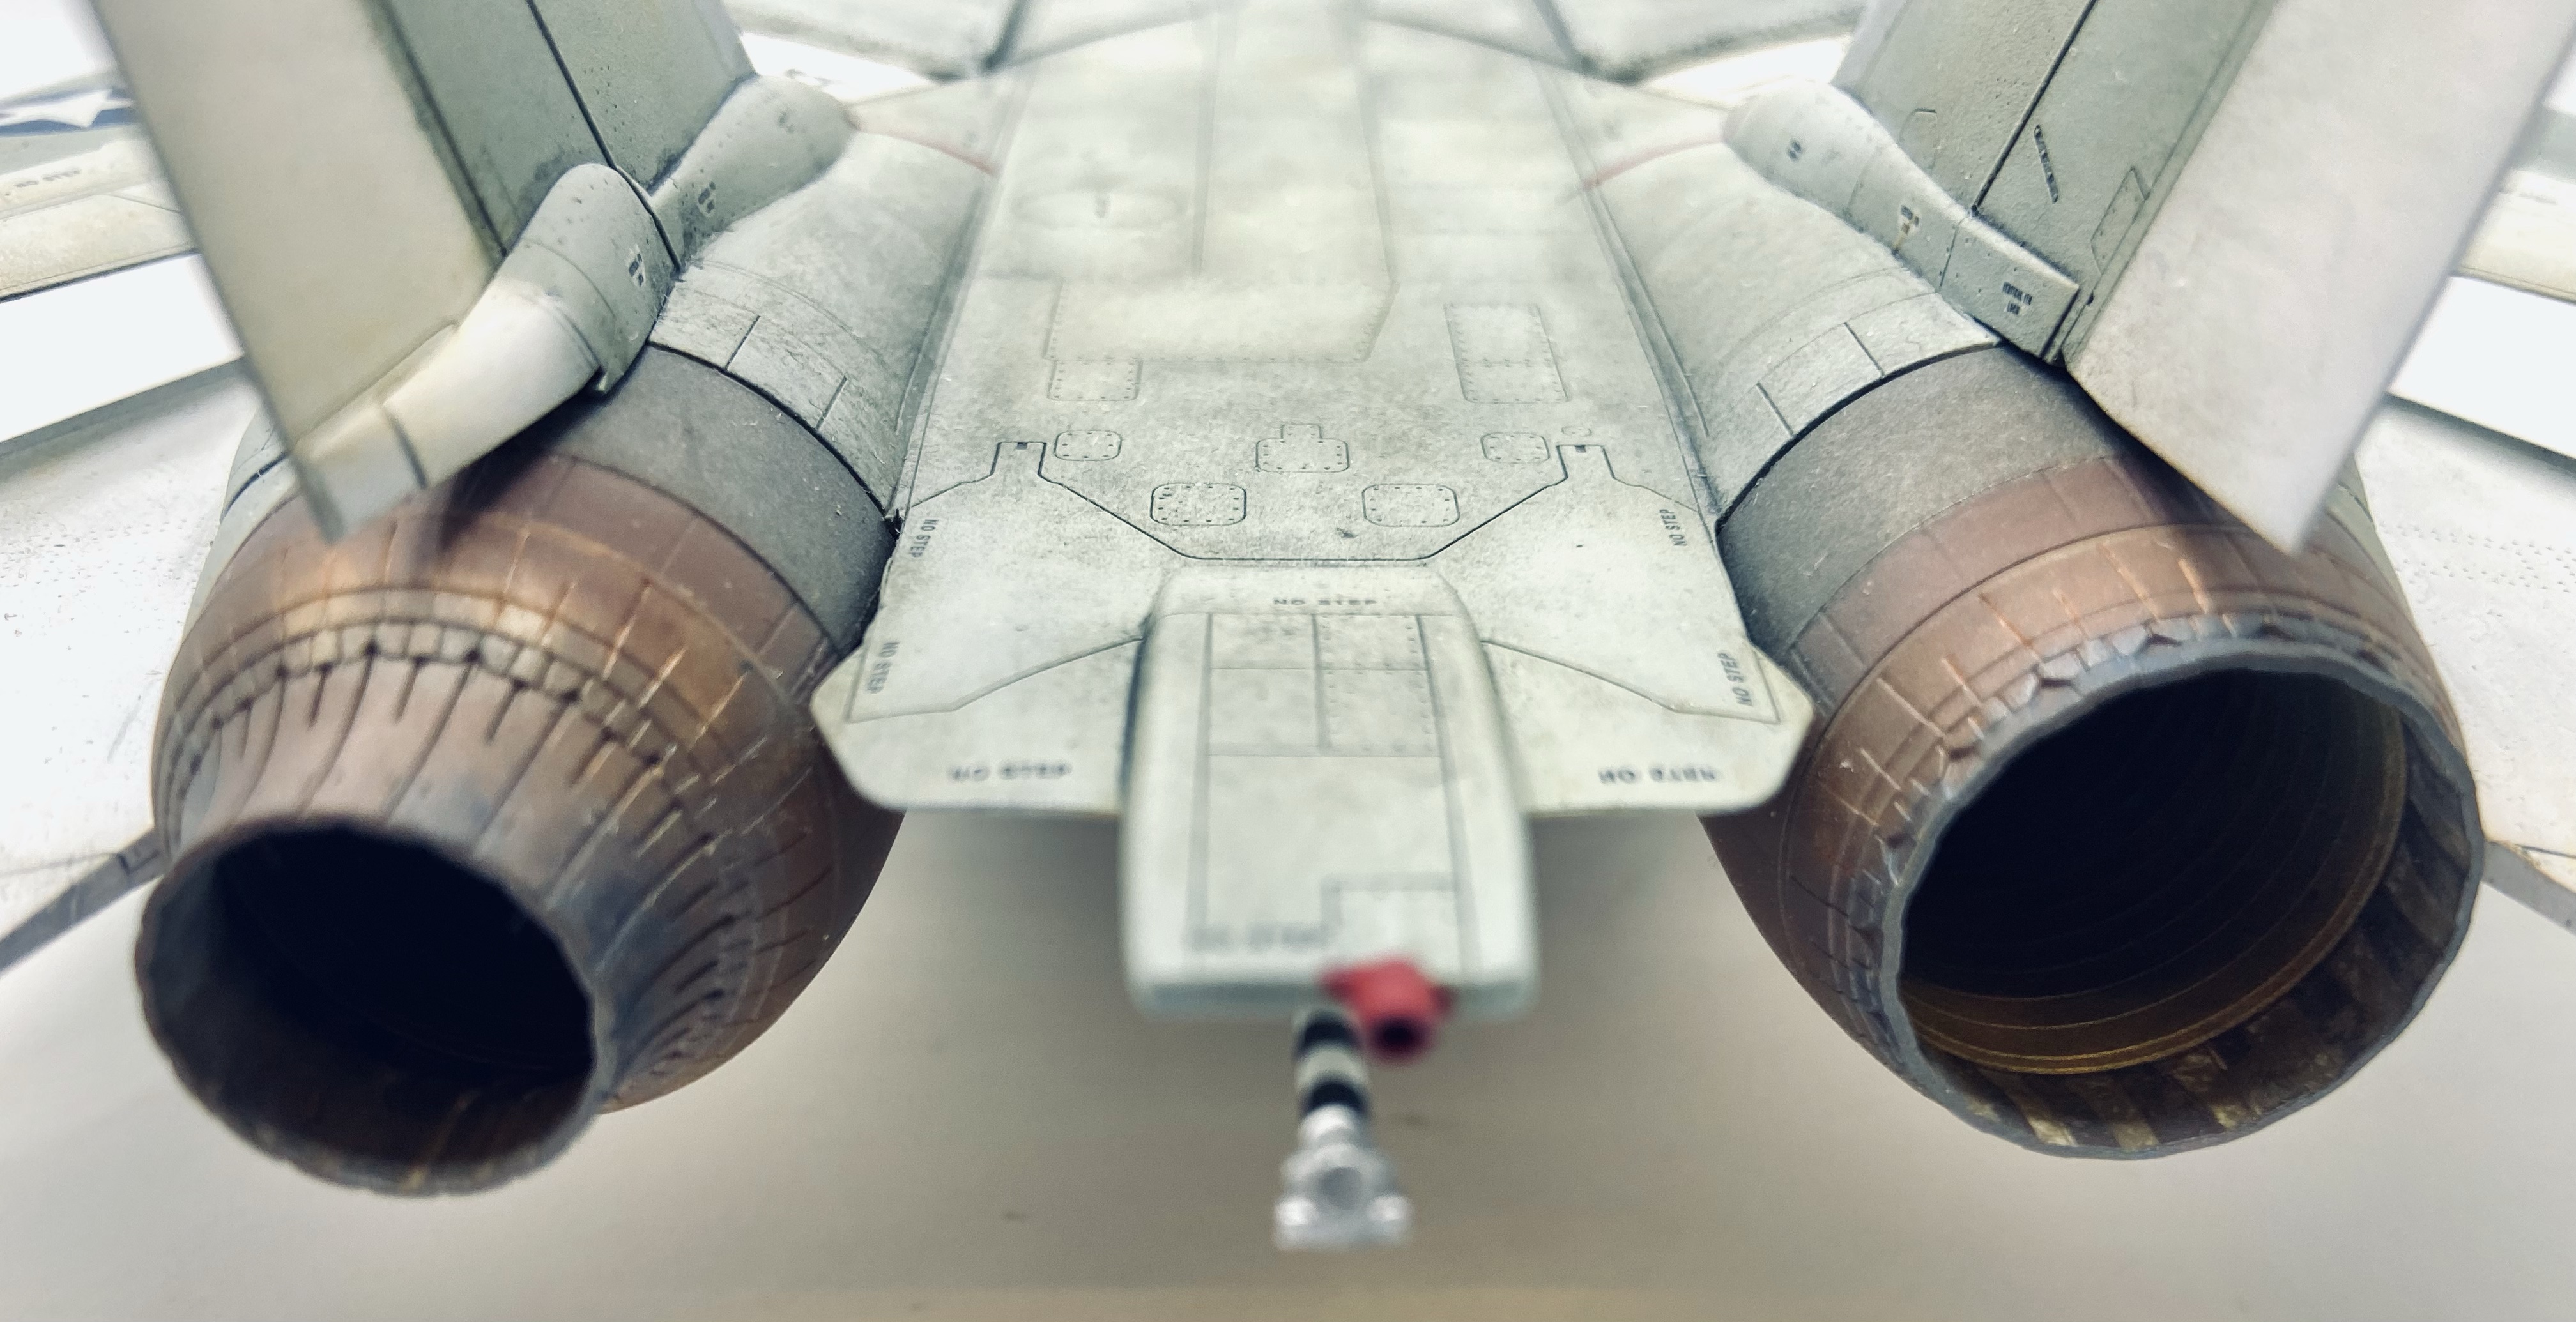
I love how Navy jets weather over time. There’s just something about the way they look that I like. My Tomcat needed that weathered look too. So I used a MIg Ammo panel line wash, in this case Blue Dirt.
I applied the wash to all of the recessed details and panel lines on the airframe. The next layer of weathering was to add an Oil Paint Render (OPR). This technique is simply adding an oil paint colour to the surface of the model and blending it in. For this model I used a combination of White, Raw Siennea and Burnt Umber. It takes a bit of practice to get it right, but when you do it really adds to the finished look of the model.
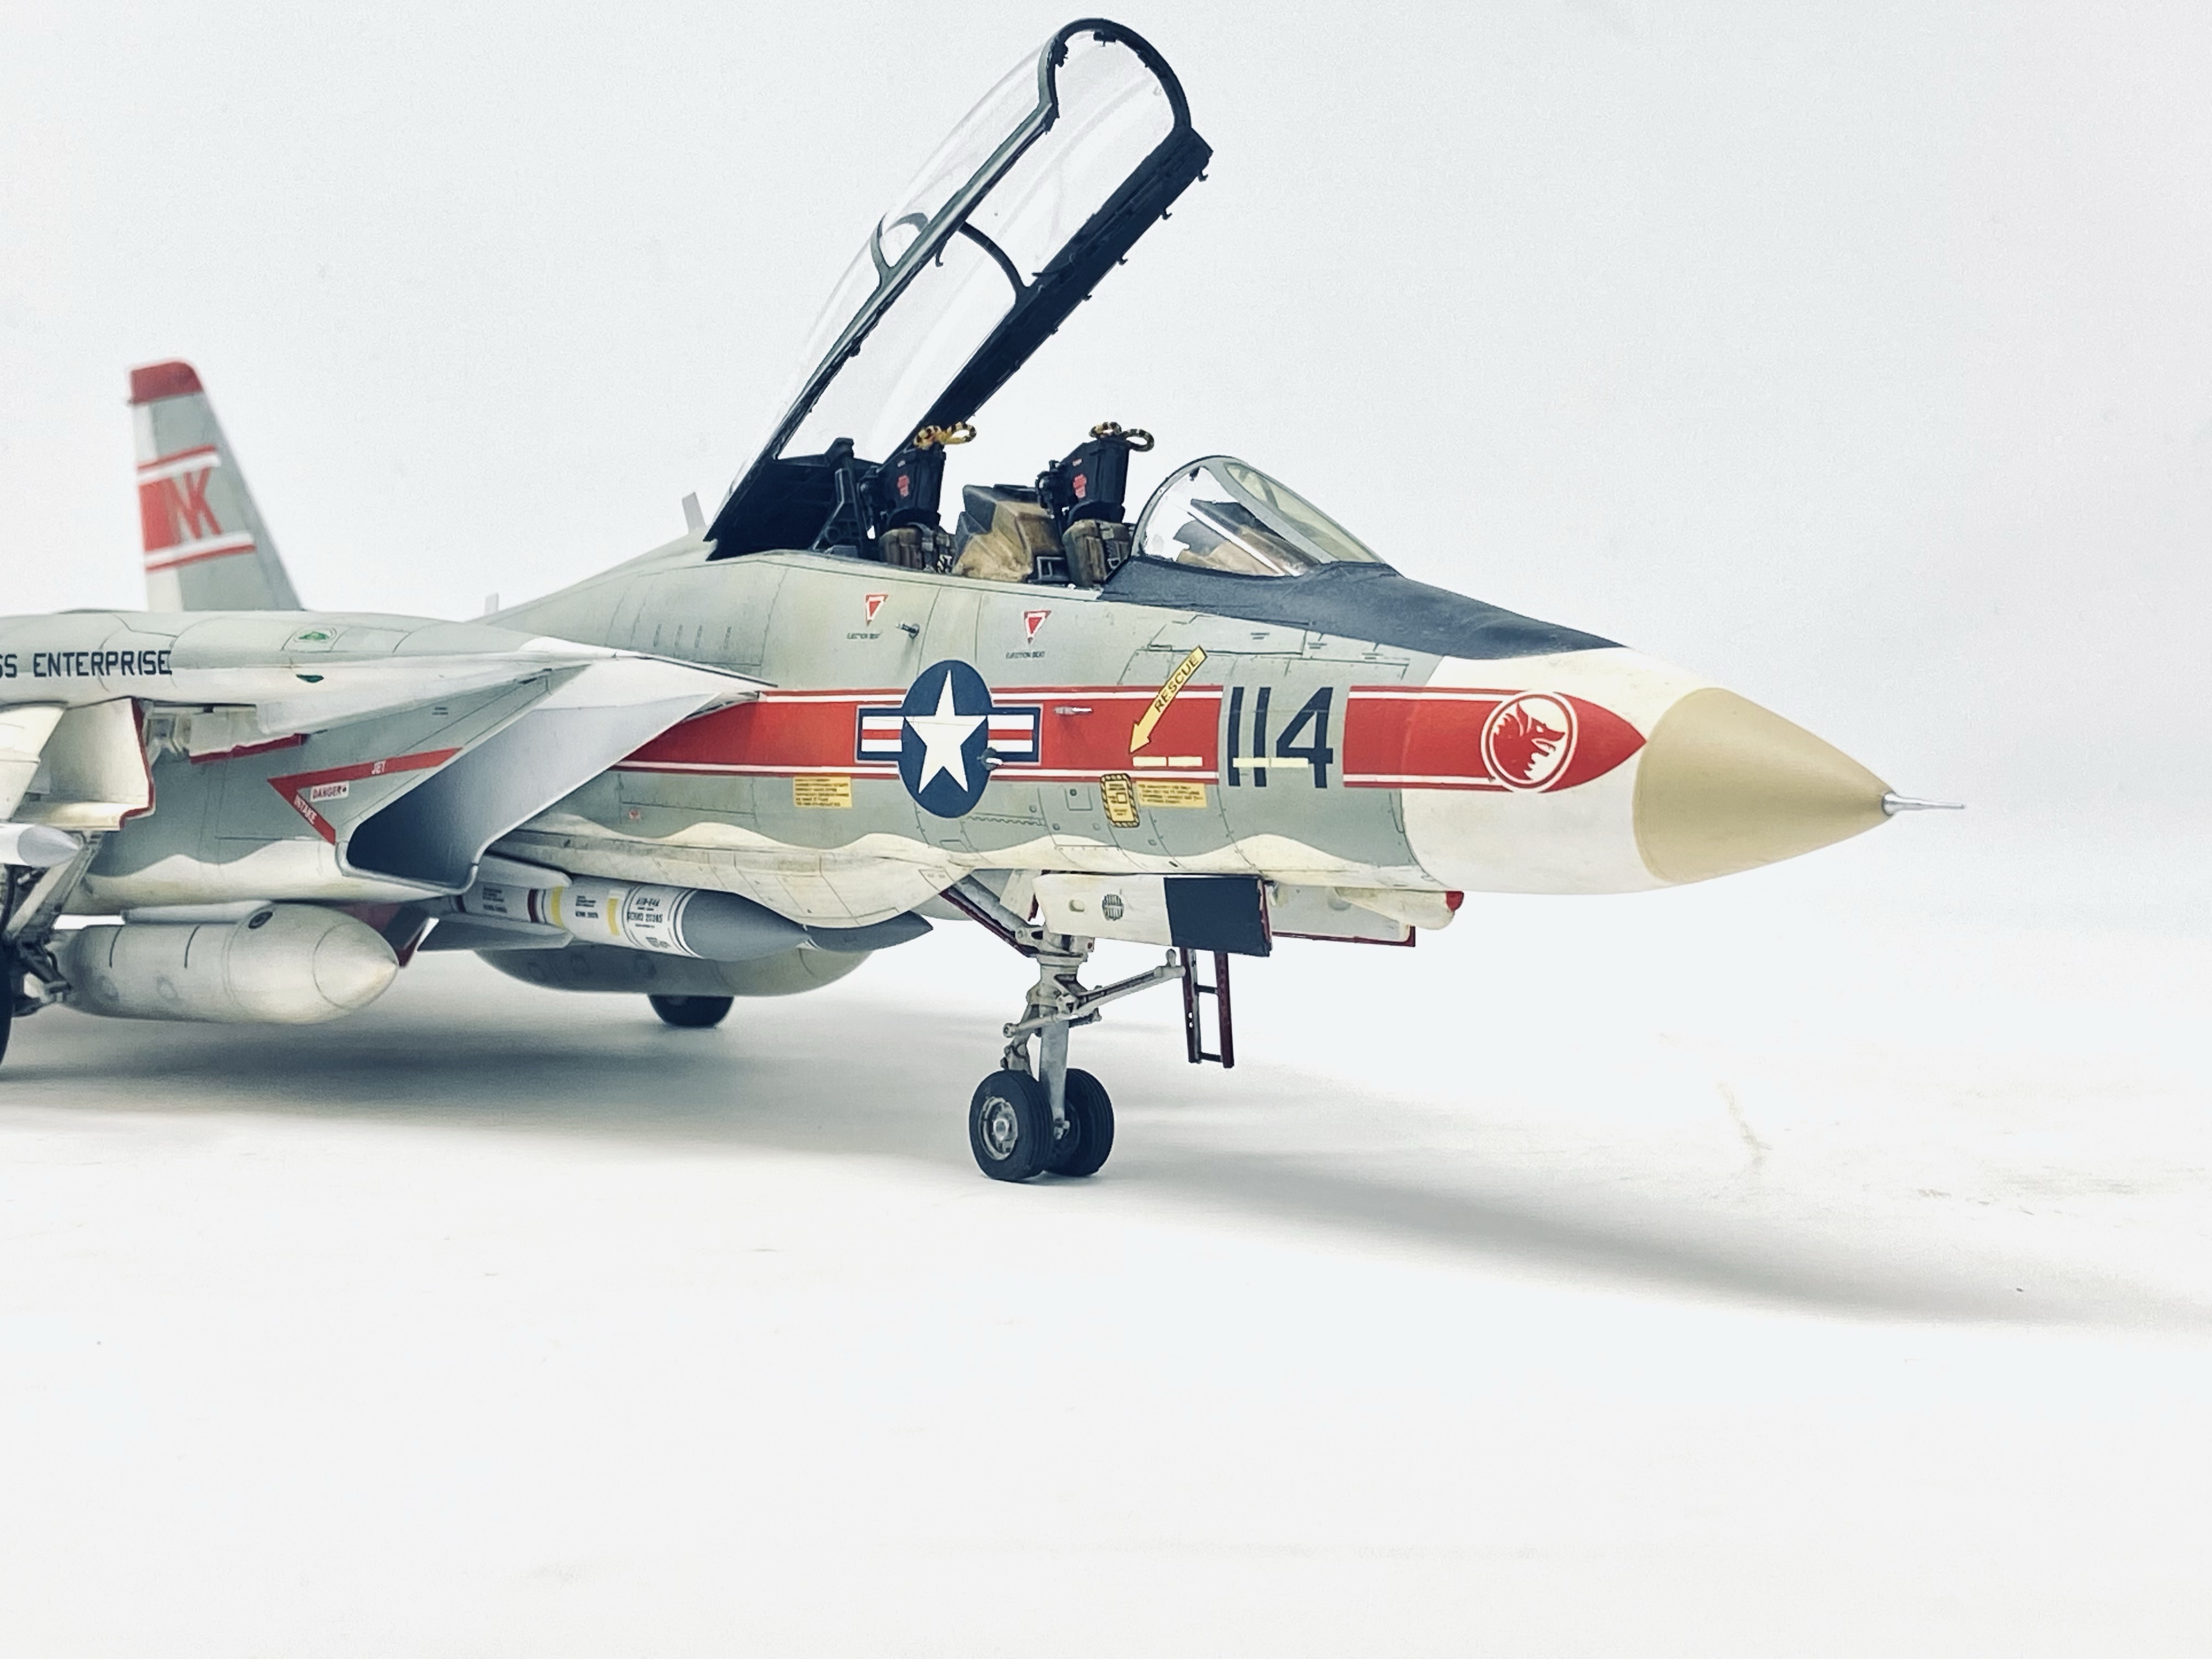
Final assembly: With every part of the model finished, I attached the seats, weapons, boarding ladder and canopy.
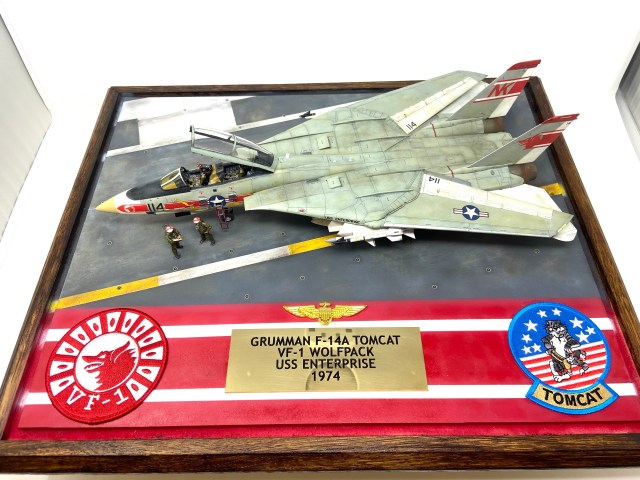
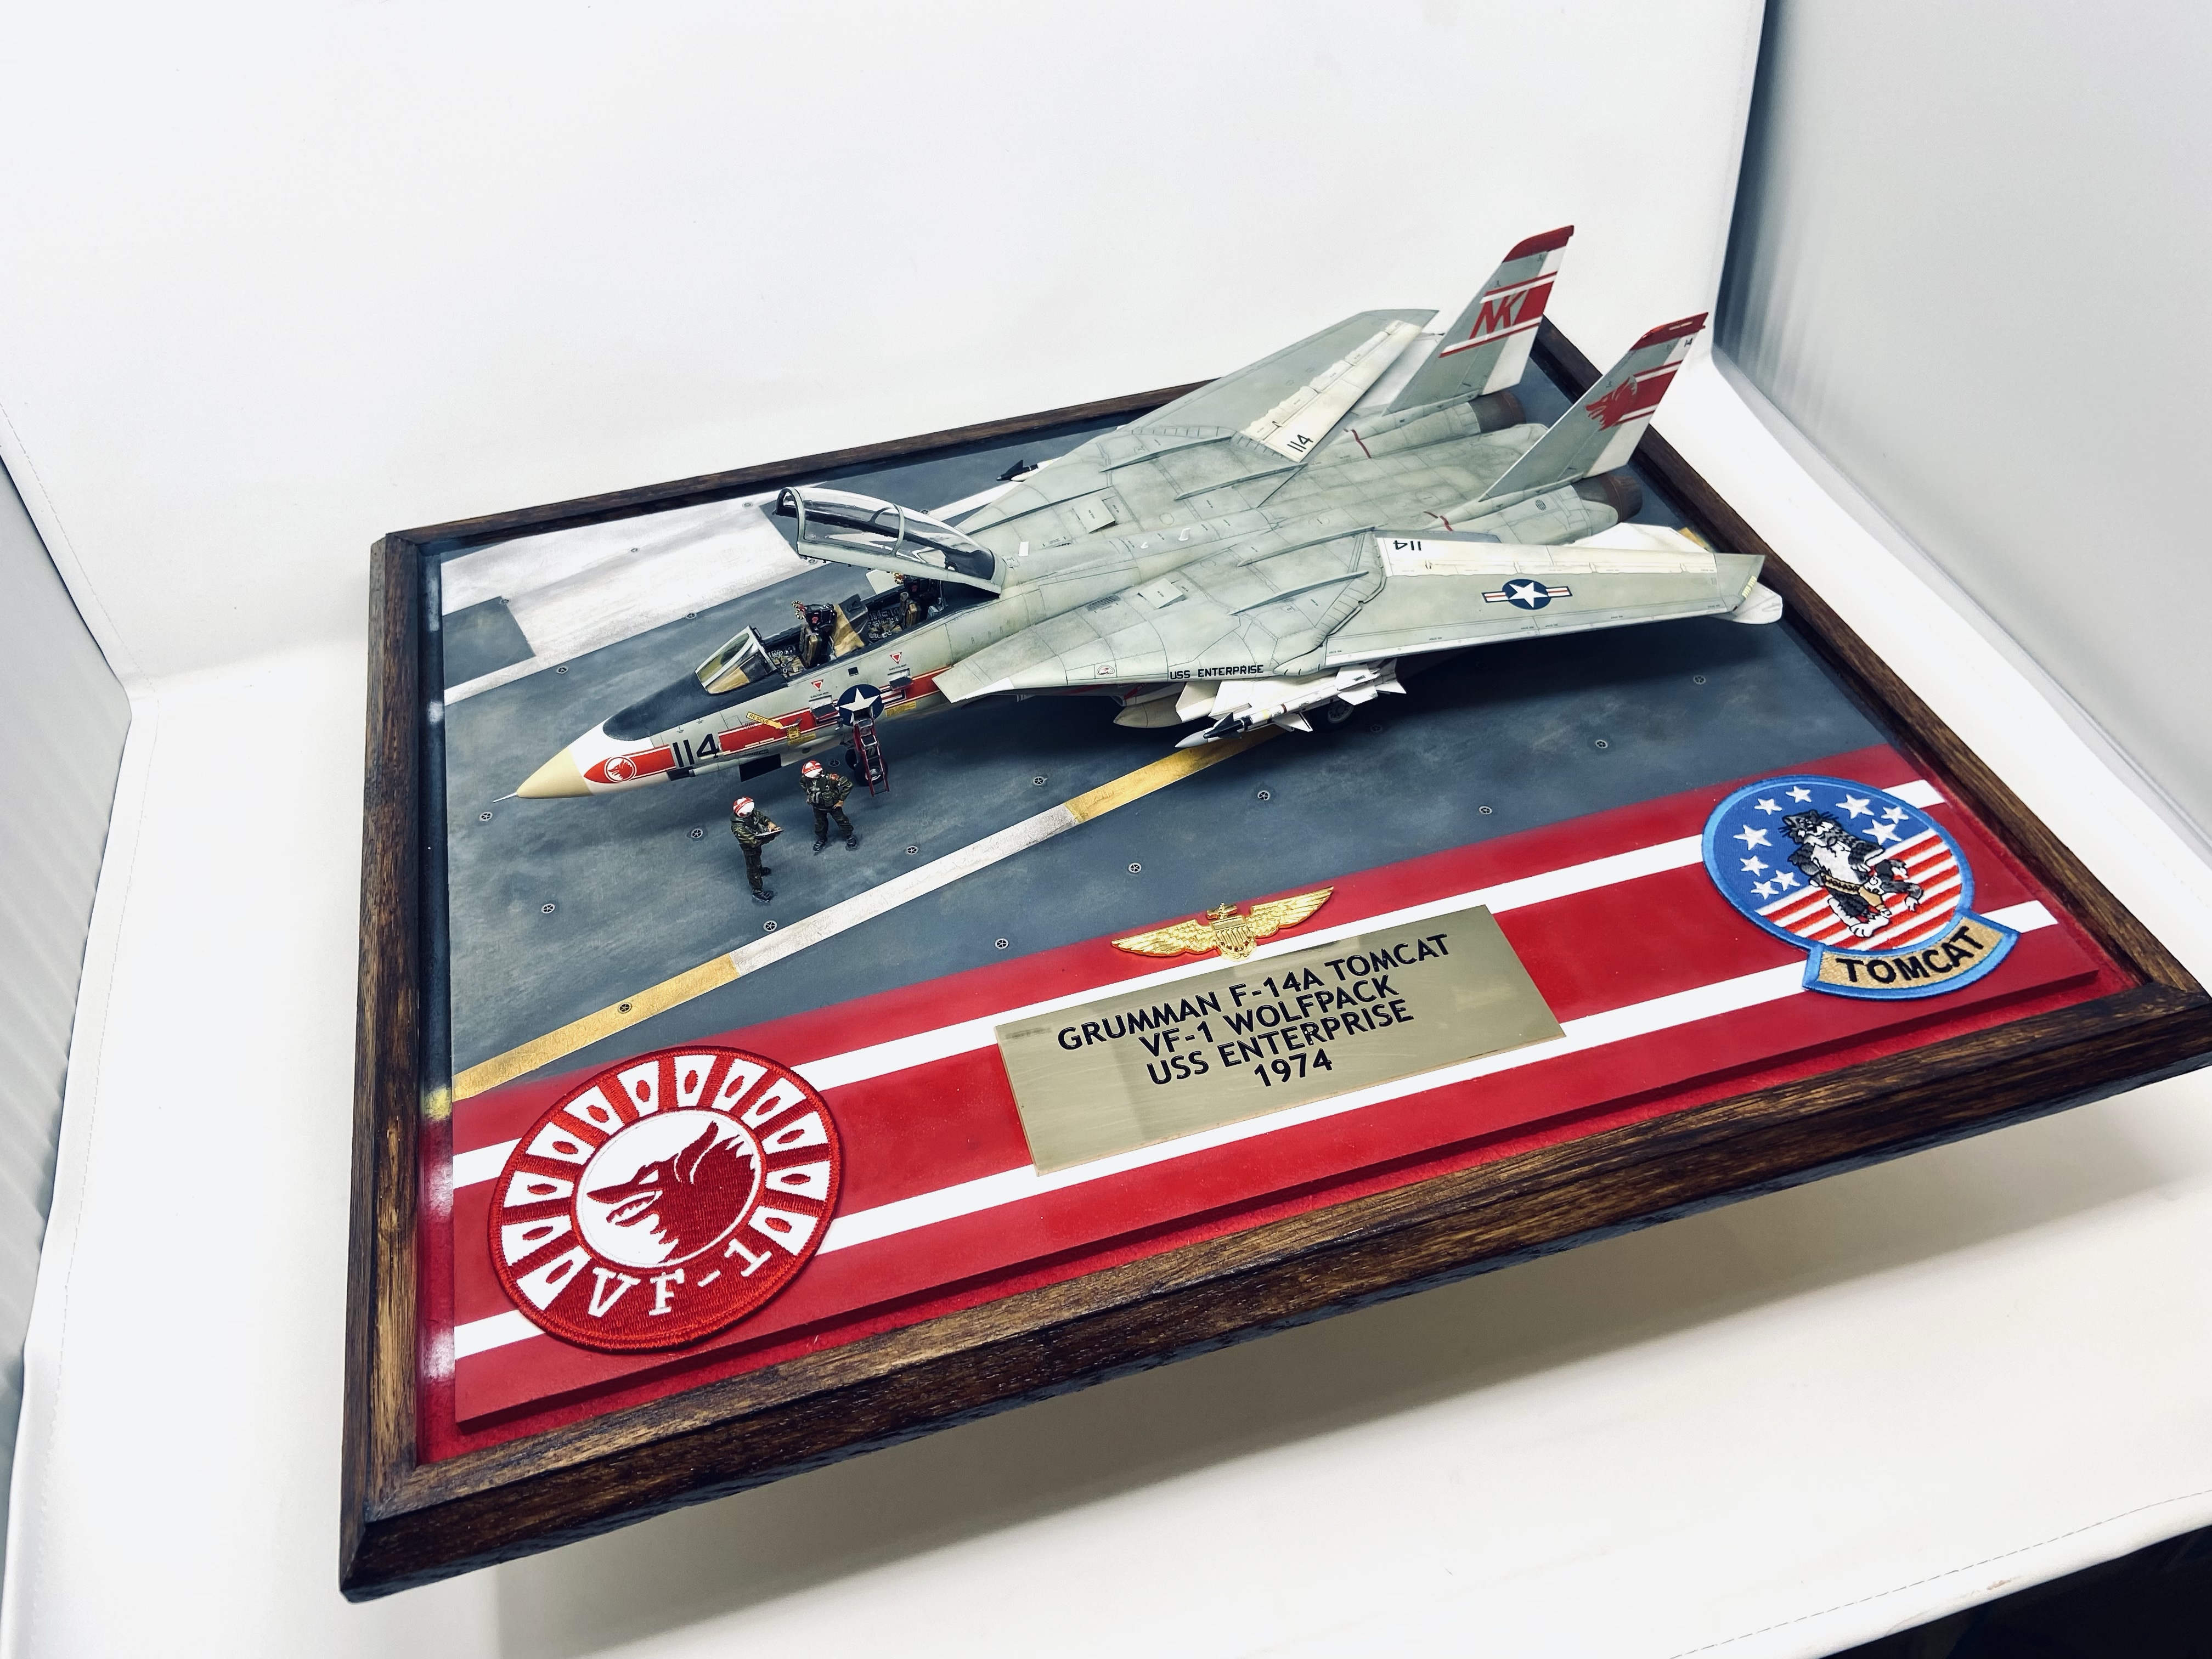
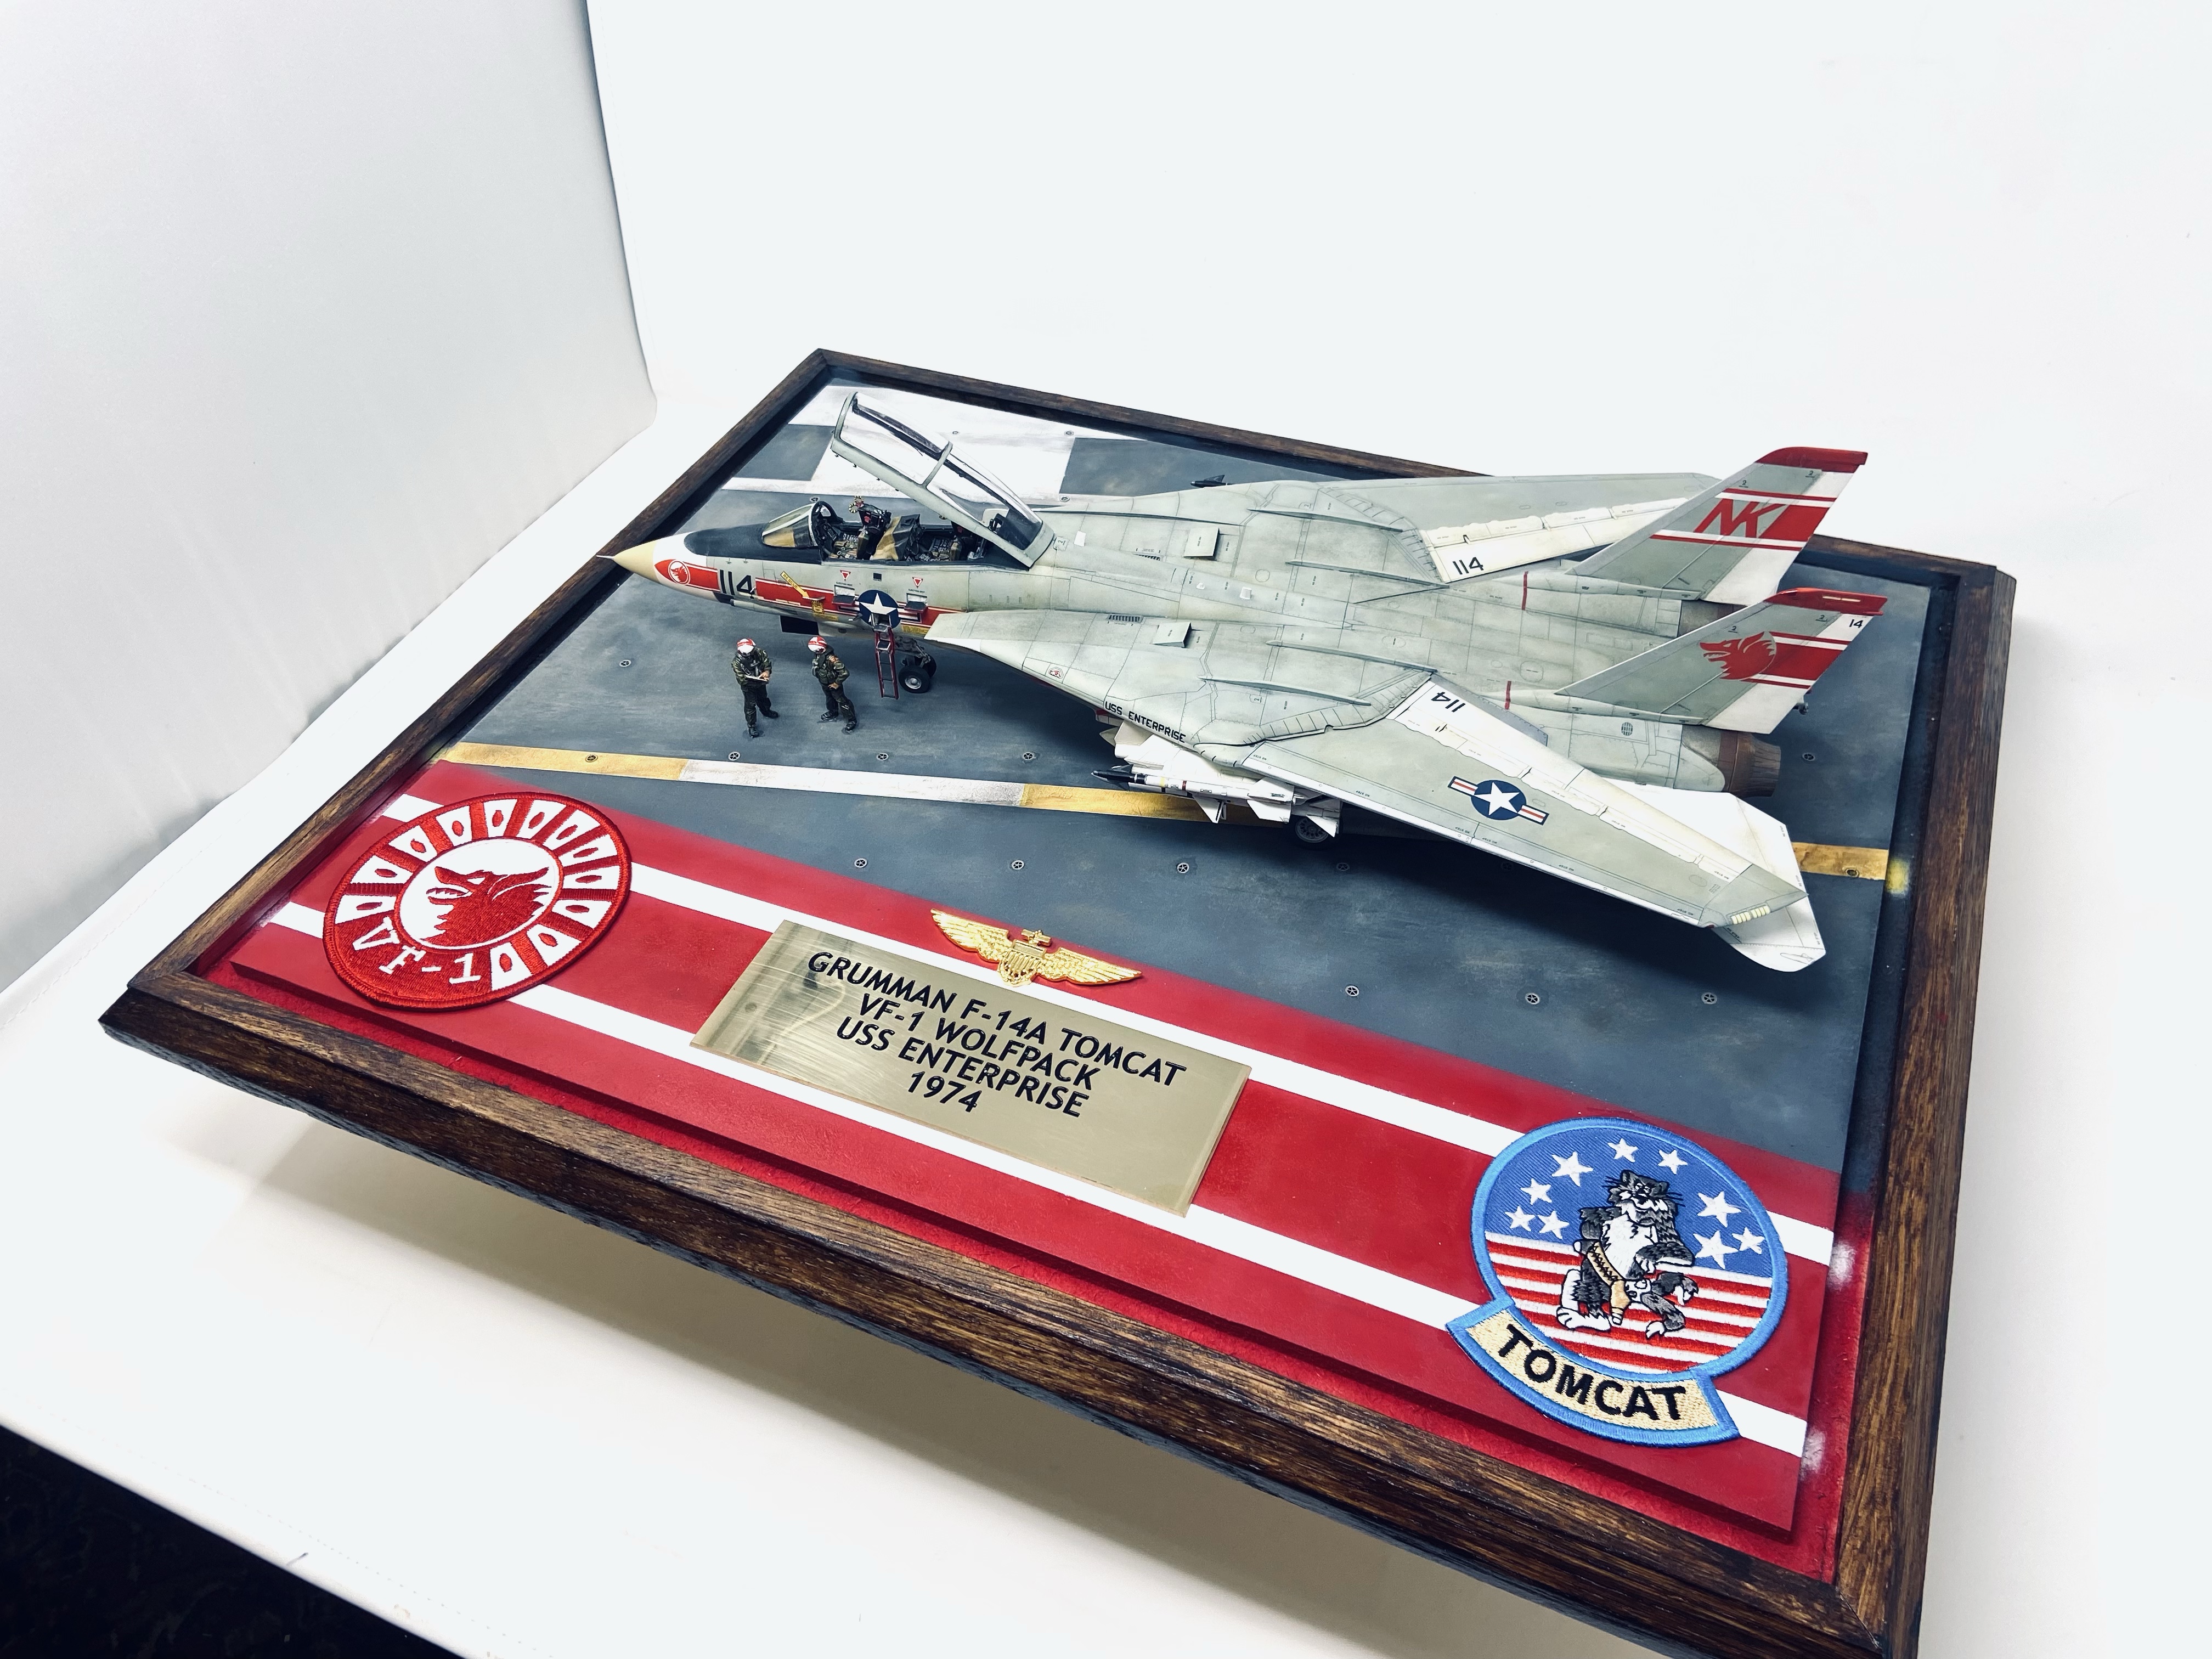
So here is the result of my labours, my very own VF-1 Wolfpack F-14A Tomcat:
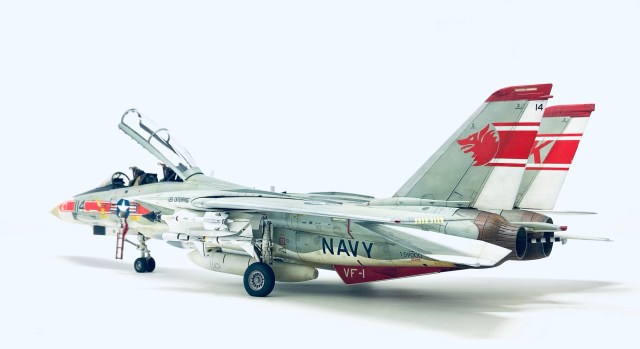


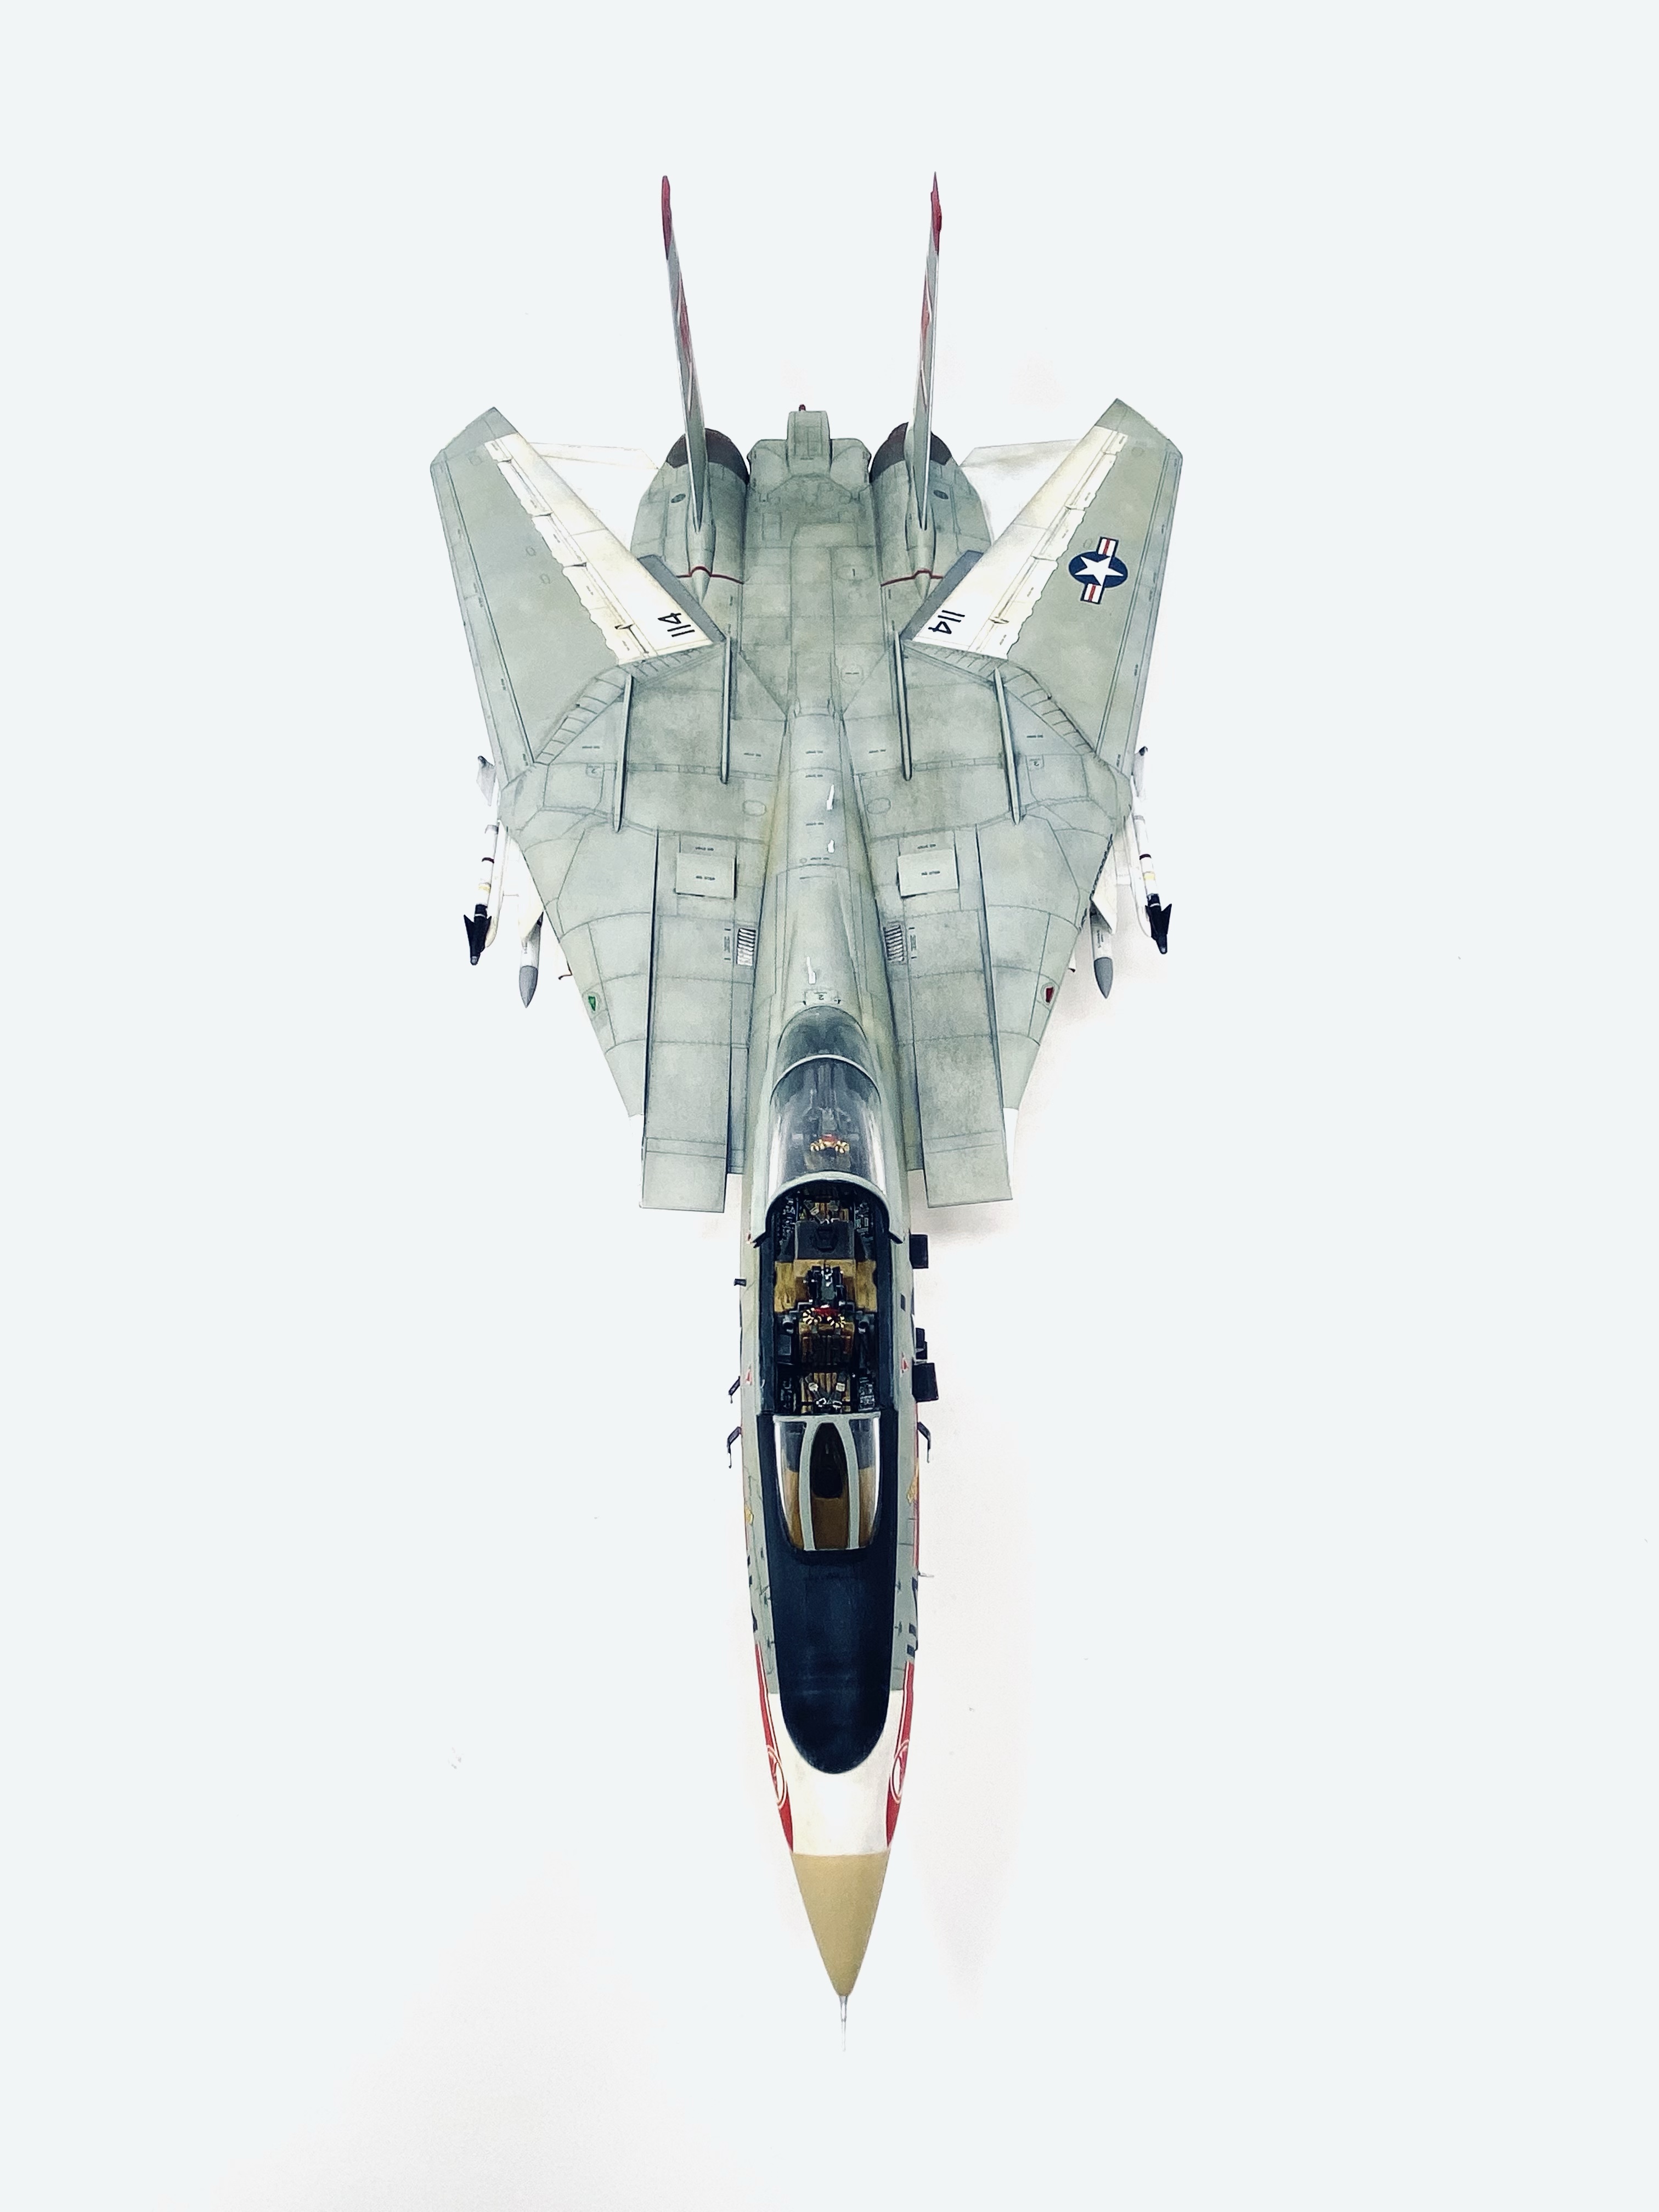


As usual, I chose to display my model in a custom display case, I had the case made by my good friend Paul Thompson and I made the carrier deck display. I am very happy with the finished work and it has taken its place of pride within my own collection.


I hope you have enjoyed seeing this build come to fruition, for me it was the realisation of an idea born long ago that became reality not soon enough, but certainly worth the wait. If you have a desire to build an aircraft you really love, why wait? Get that kit on your bench and build yourself something special, just for you. I did. Its fun!
Thank you for visiting and I hope to see you again soon.
Happy Modelling!
Darren.

In 1/48 that’s an amazing achievement. Congratulations.
LikeLiked by 1 person
Thank you!
LikeLike
Dude, as an Enterprise Sailor and flight deck yellow shirt, I almost feel like I’m starting at the real deal. Do they make tie down chains and chocks in that size? Very nice. I wish the CPO mess had hired one of you guys to build my retirement gift.
LikeLiked by 1 person
Hey thanks Michael! I appreciate that very much! Yes, you can get chocks and tie down chains but I prefer not to use them on my own builds so as to not distract the eye from the model and plaque. Thanks again for your kind words sir.
LikeLike
Dude, as an Enterprise Sailor and flight deck yellow shirt, I almost feel like I’m starting at the real deal. Do they make tie down chains and chocks in that size? Very nice.
LikeLike
Reblogged this on ausevor.
LikeLike
Love this build. I’m in the middle of the same kit and still on the fence about which squadron but likely going with one of the iconic ones.
LikeLiked by 1 person
Go with the Wolfpack! Sorry, it’s just that I love that scheme. I also built a VF-84 Tomcat and I love that one too!
LikeLike
Do you think it’d be possible to get your neighbor to make a display box like that for my Tomcat?
LikeLike
Hi Michael, I really wish I could , my friend ran a case making business and has retired now. He doesn’t want to make them anymore. I pretty sure if you looked around online in the US , you could find a display case maker though.
LikeLike
Outstanding Tomcat, Darren! I’ve built “Wichita 14” myself, but in 1/72 scale, and repainted a couple in 1/18. Do you know who the pilot was?
LikeLiked by 1 person
Hi Jeff! Thank you for your kind words Sir! Unfortunately I do not know the identity of Wichita 14 myself, but if I ever do, I will add his name to the article.
LikeLiked by 1 person
Darren – your model has a cool back-story: https://inchhighguy.wordpress.com/2019/05/02/hasegawa-f-14a-tomcat-in-1-72-scale/
LikeLike