
The A-4 Skyhawk is one of my favourite jets and I have built quite a few over the years. It’s widely appreciated that the best 1/48 kit of the beloved Scooter was produced by Hasegawa models and they still set the standard today.
When I was offered a cheap 1/48 Hobbyboss A-4F Skyhawk I took an open minded approach and thought I would see how it stacks up against the Hasegawa kit which I love.

So what is the kit like? It’s actually better than I expected!
The kits parts are moulded with crisp, clean detail and the model includes an extensive array of underwing stores. There are two decal options included and one of them is a Top Gun adversary jet in a cool wrap around camouflage scheme.

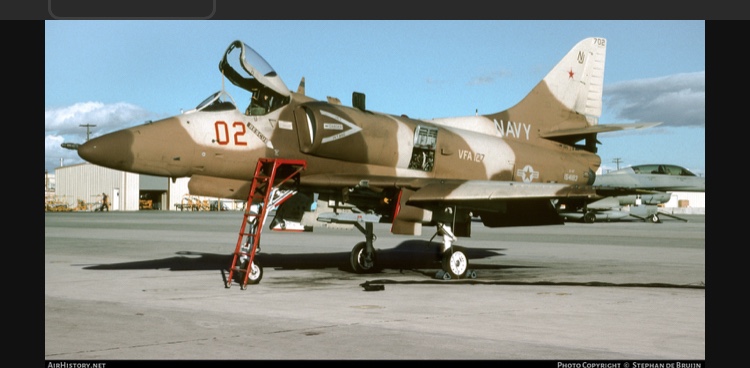
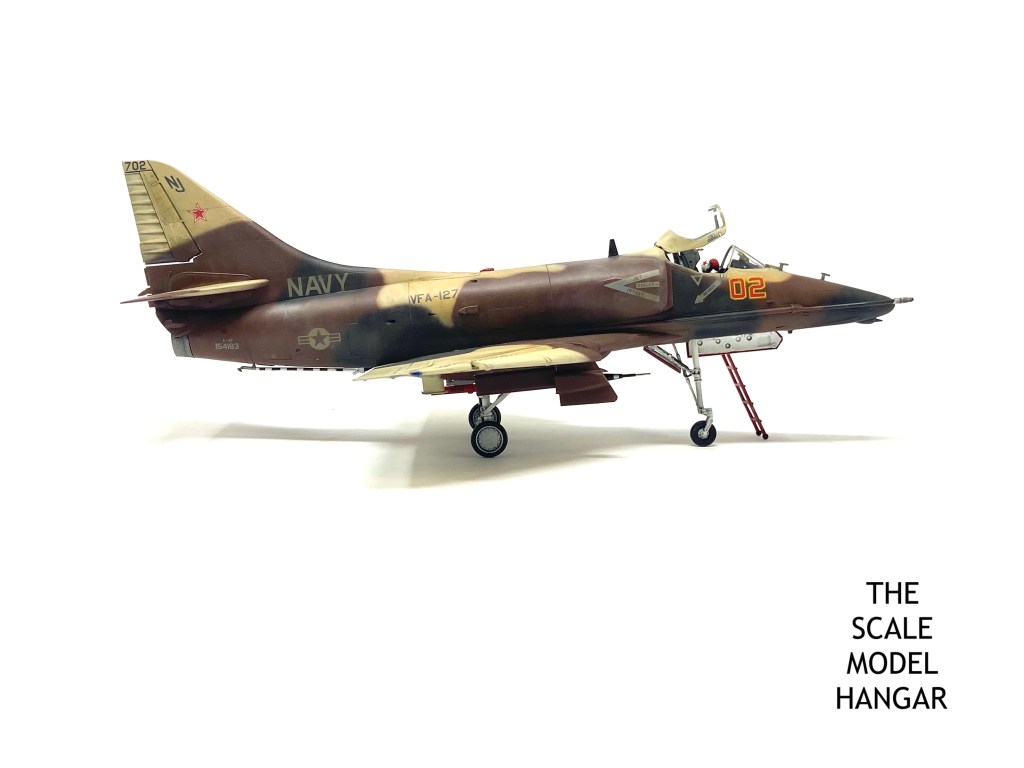
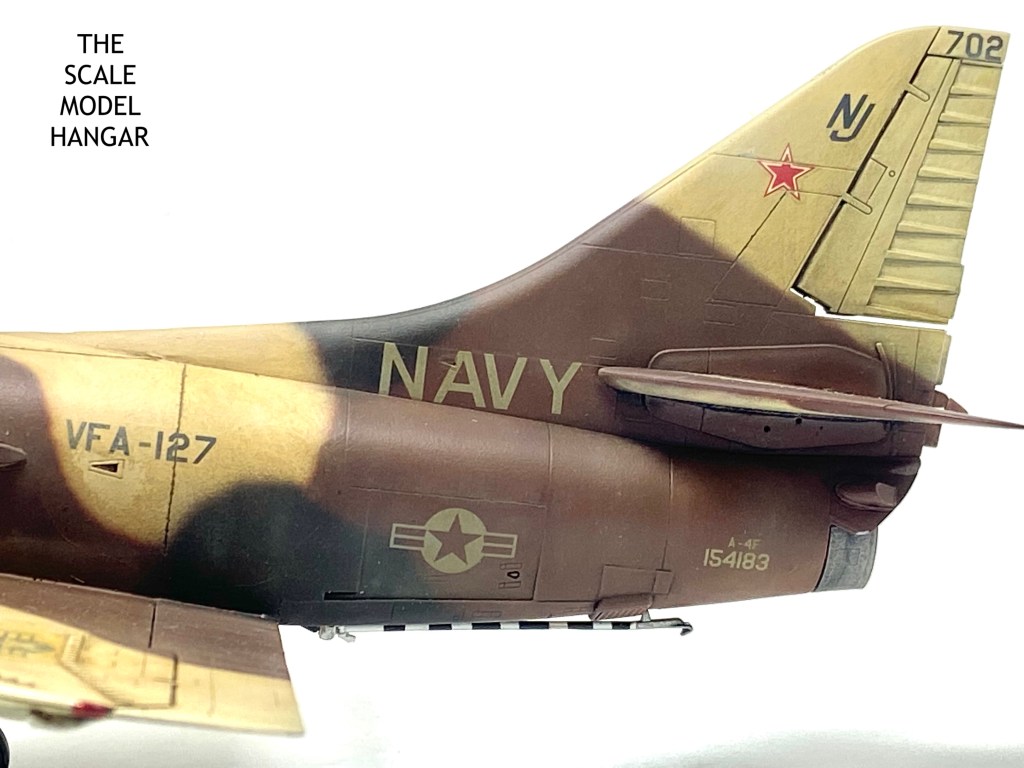
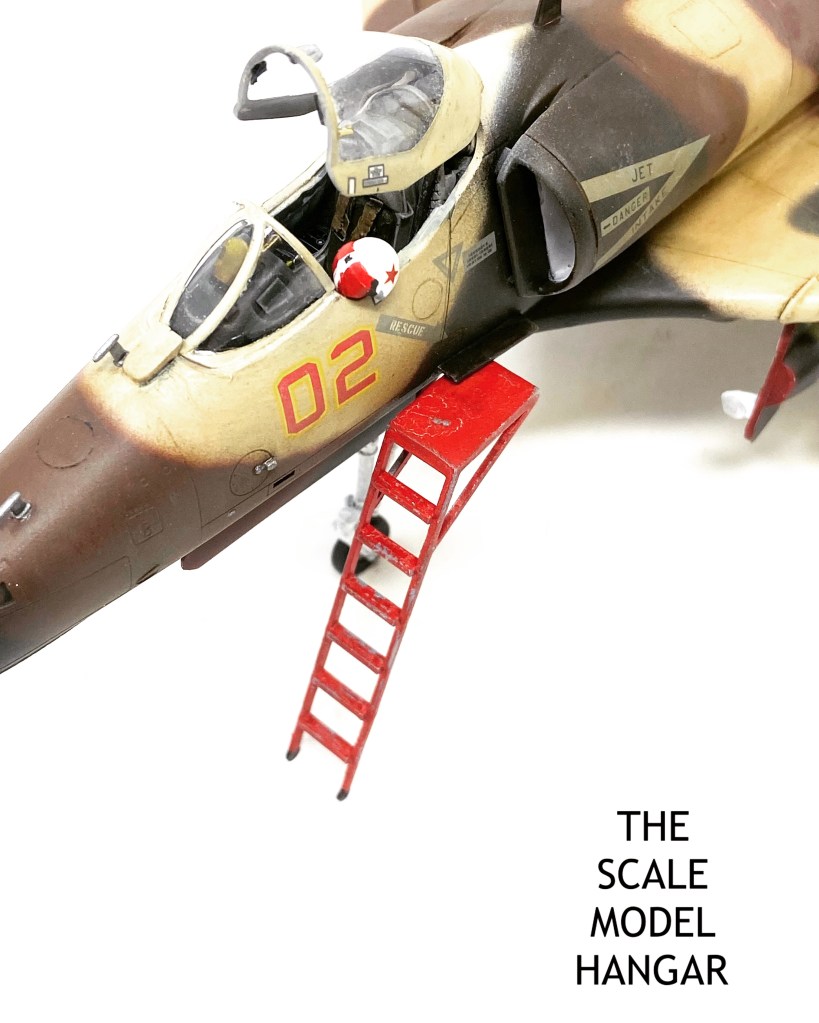
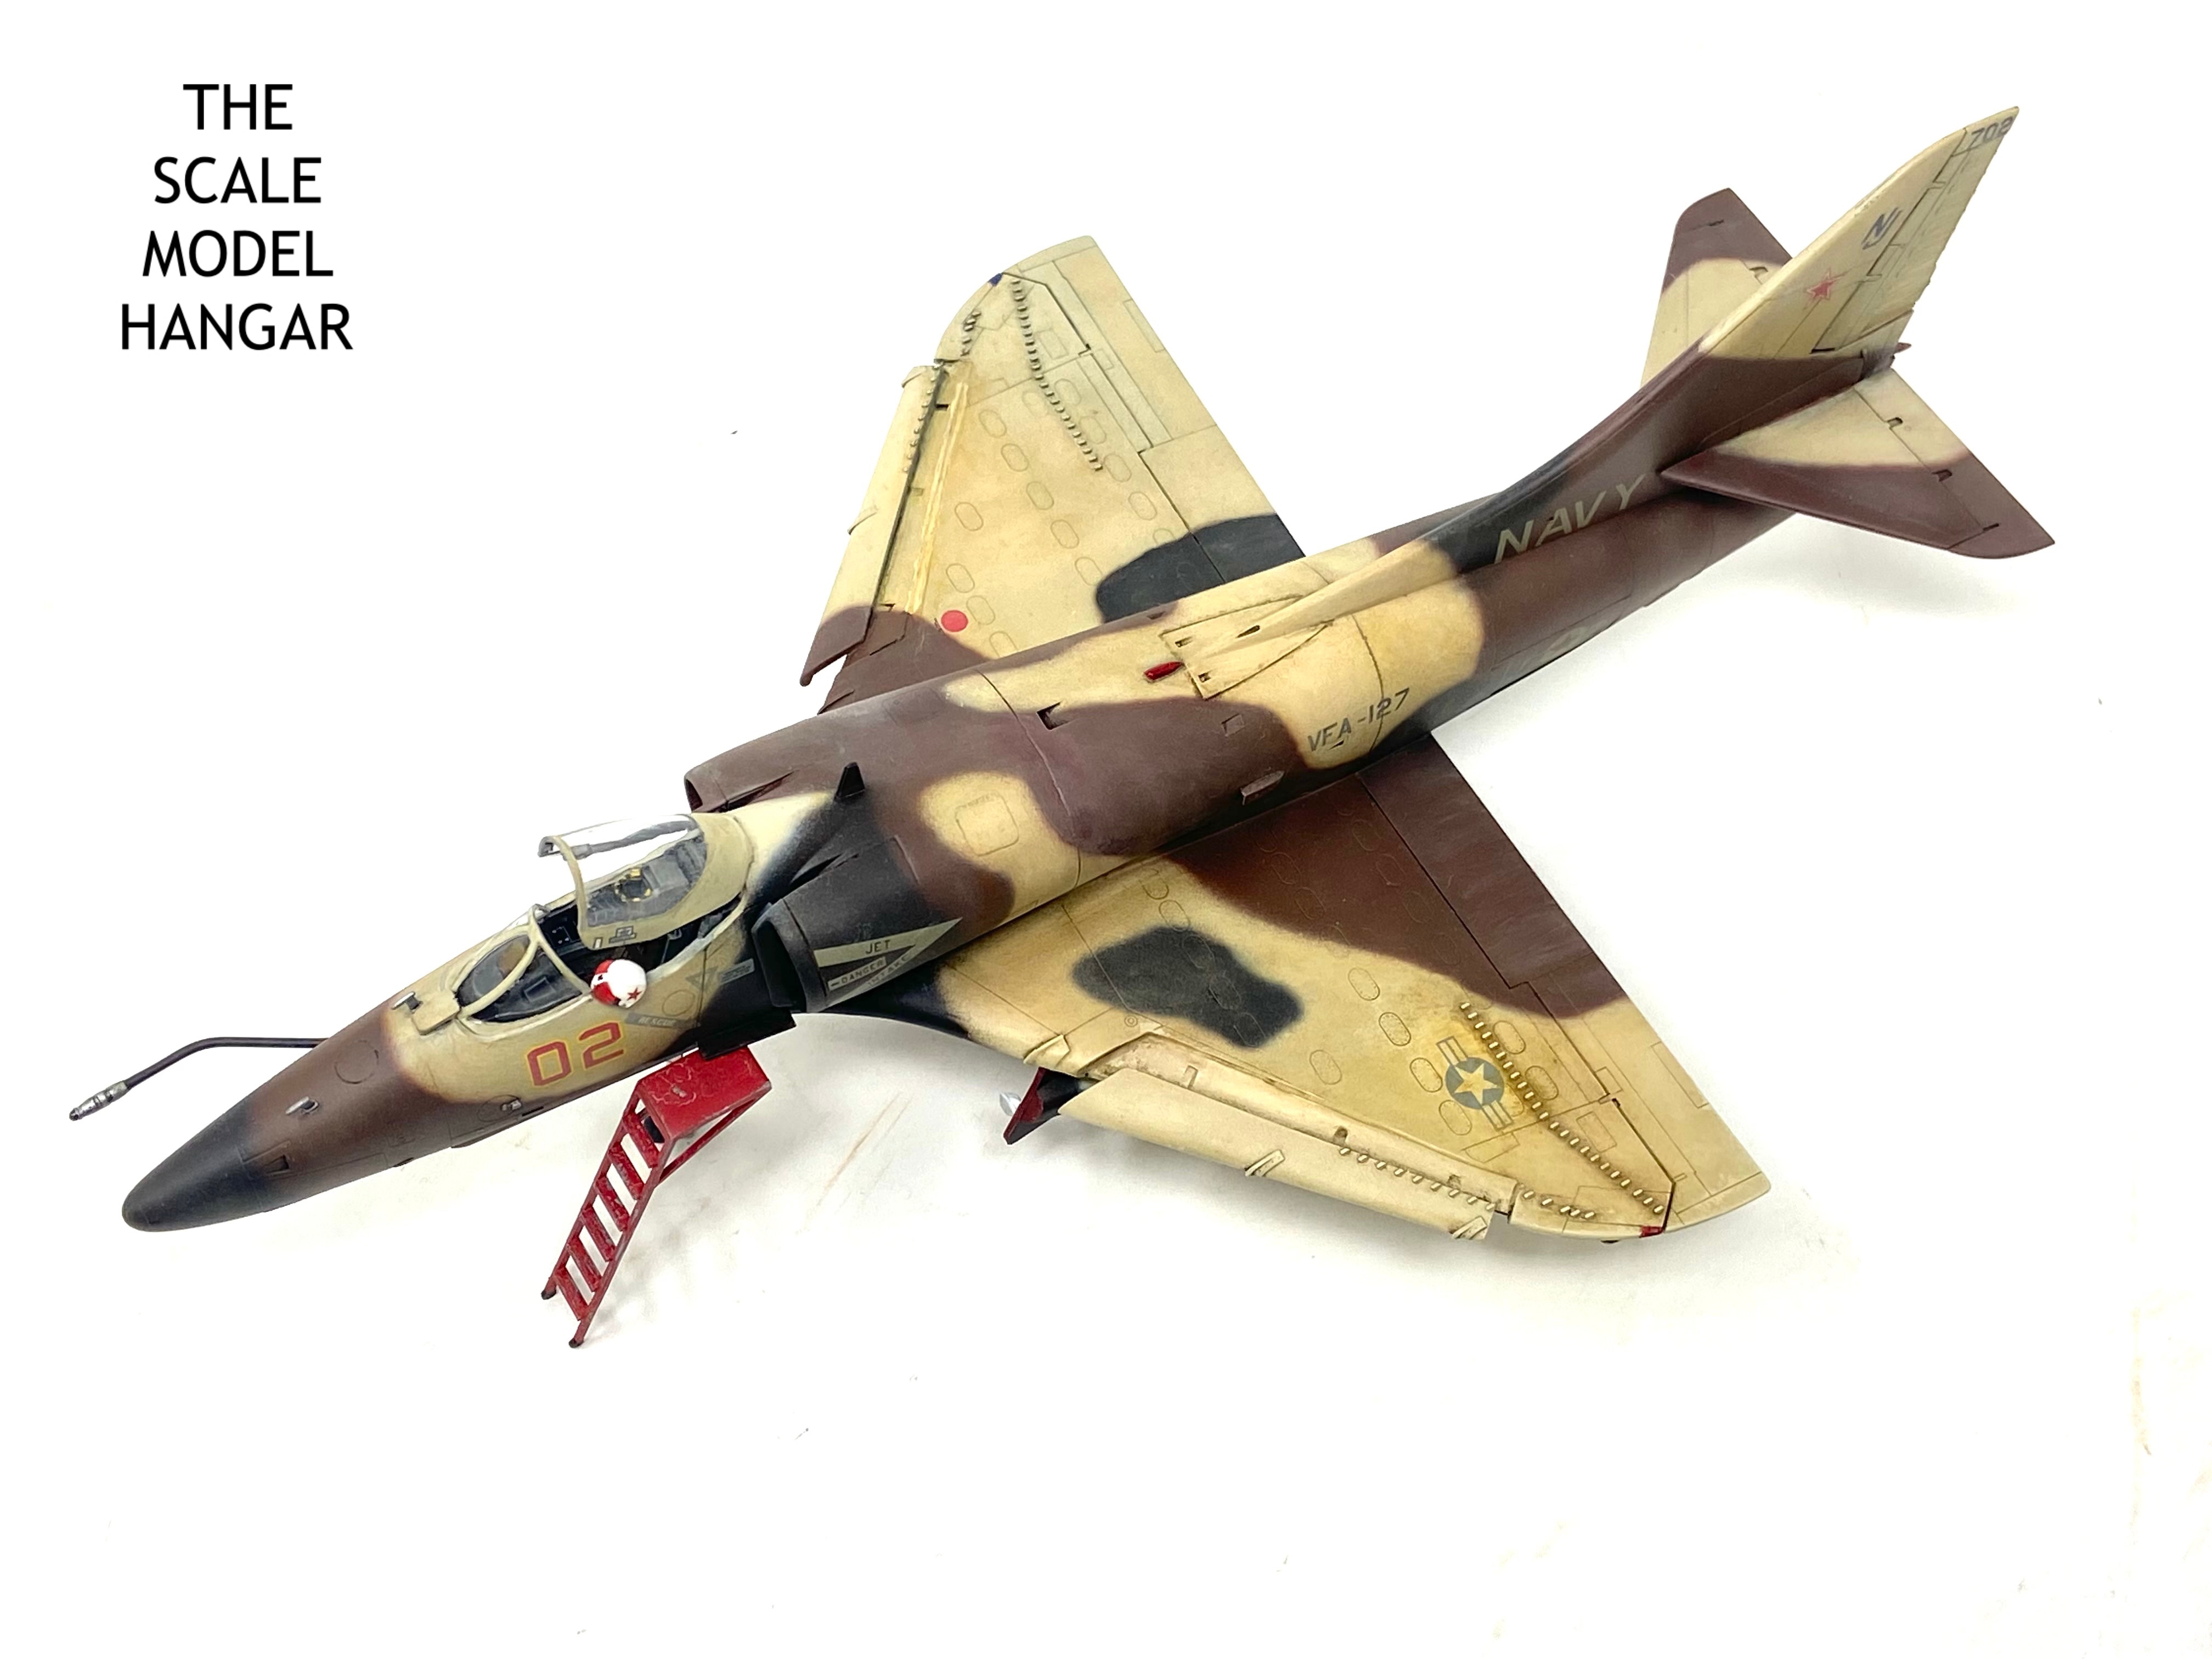
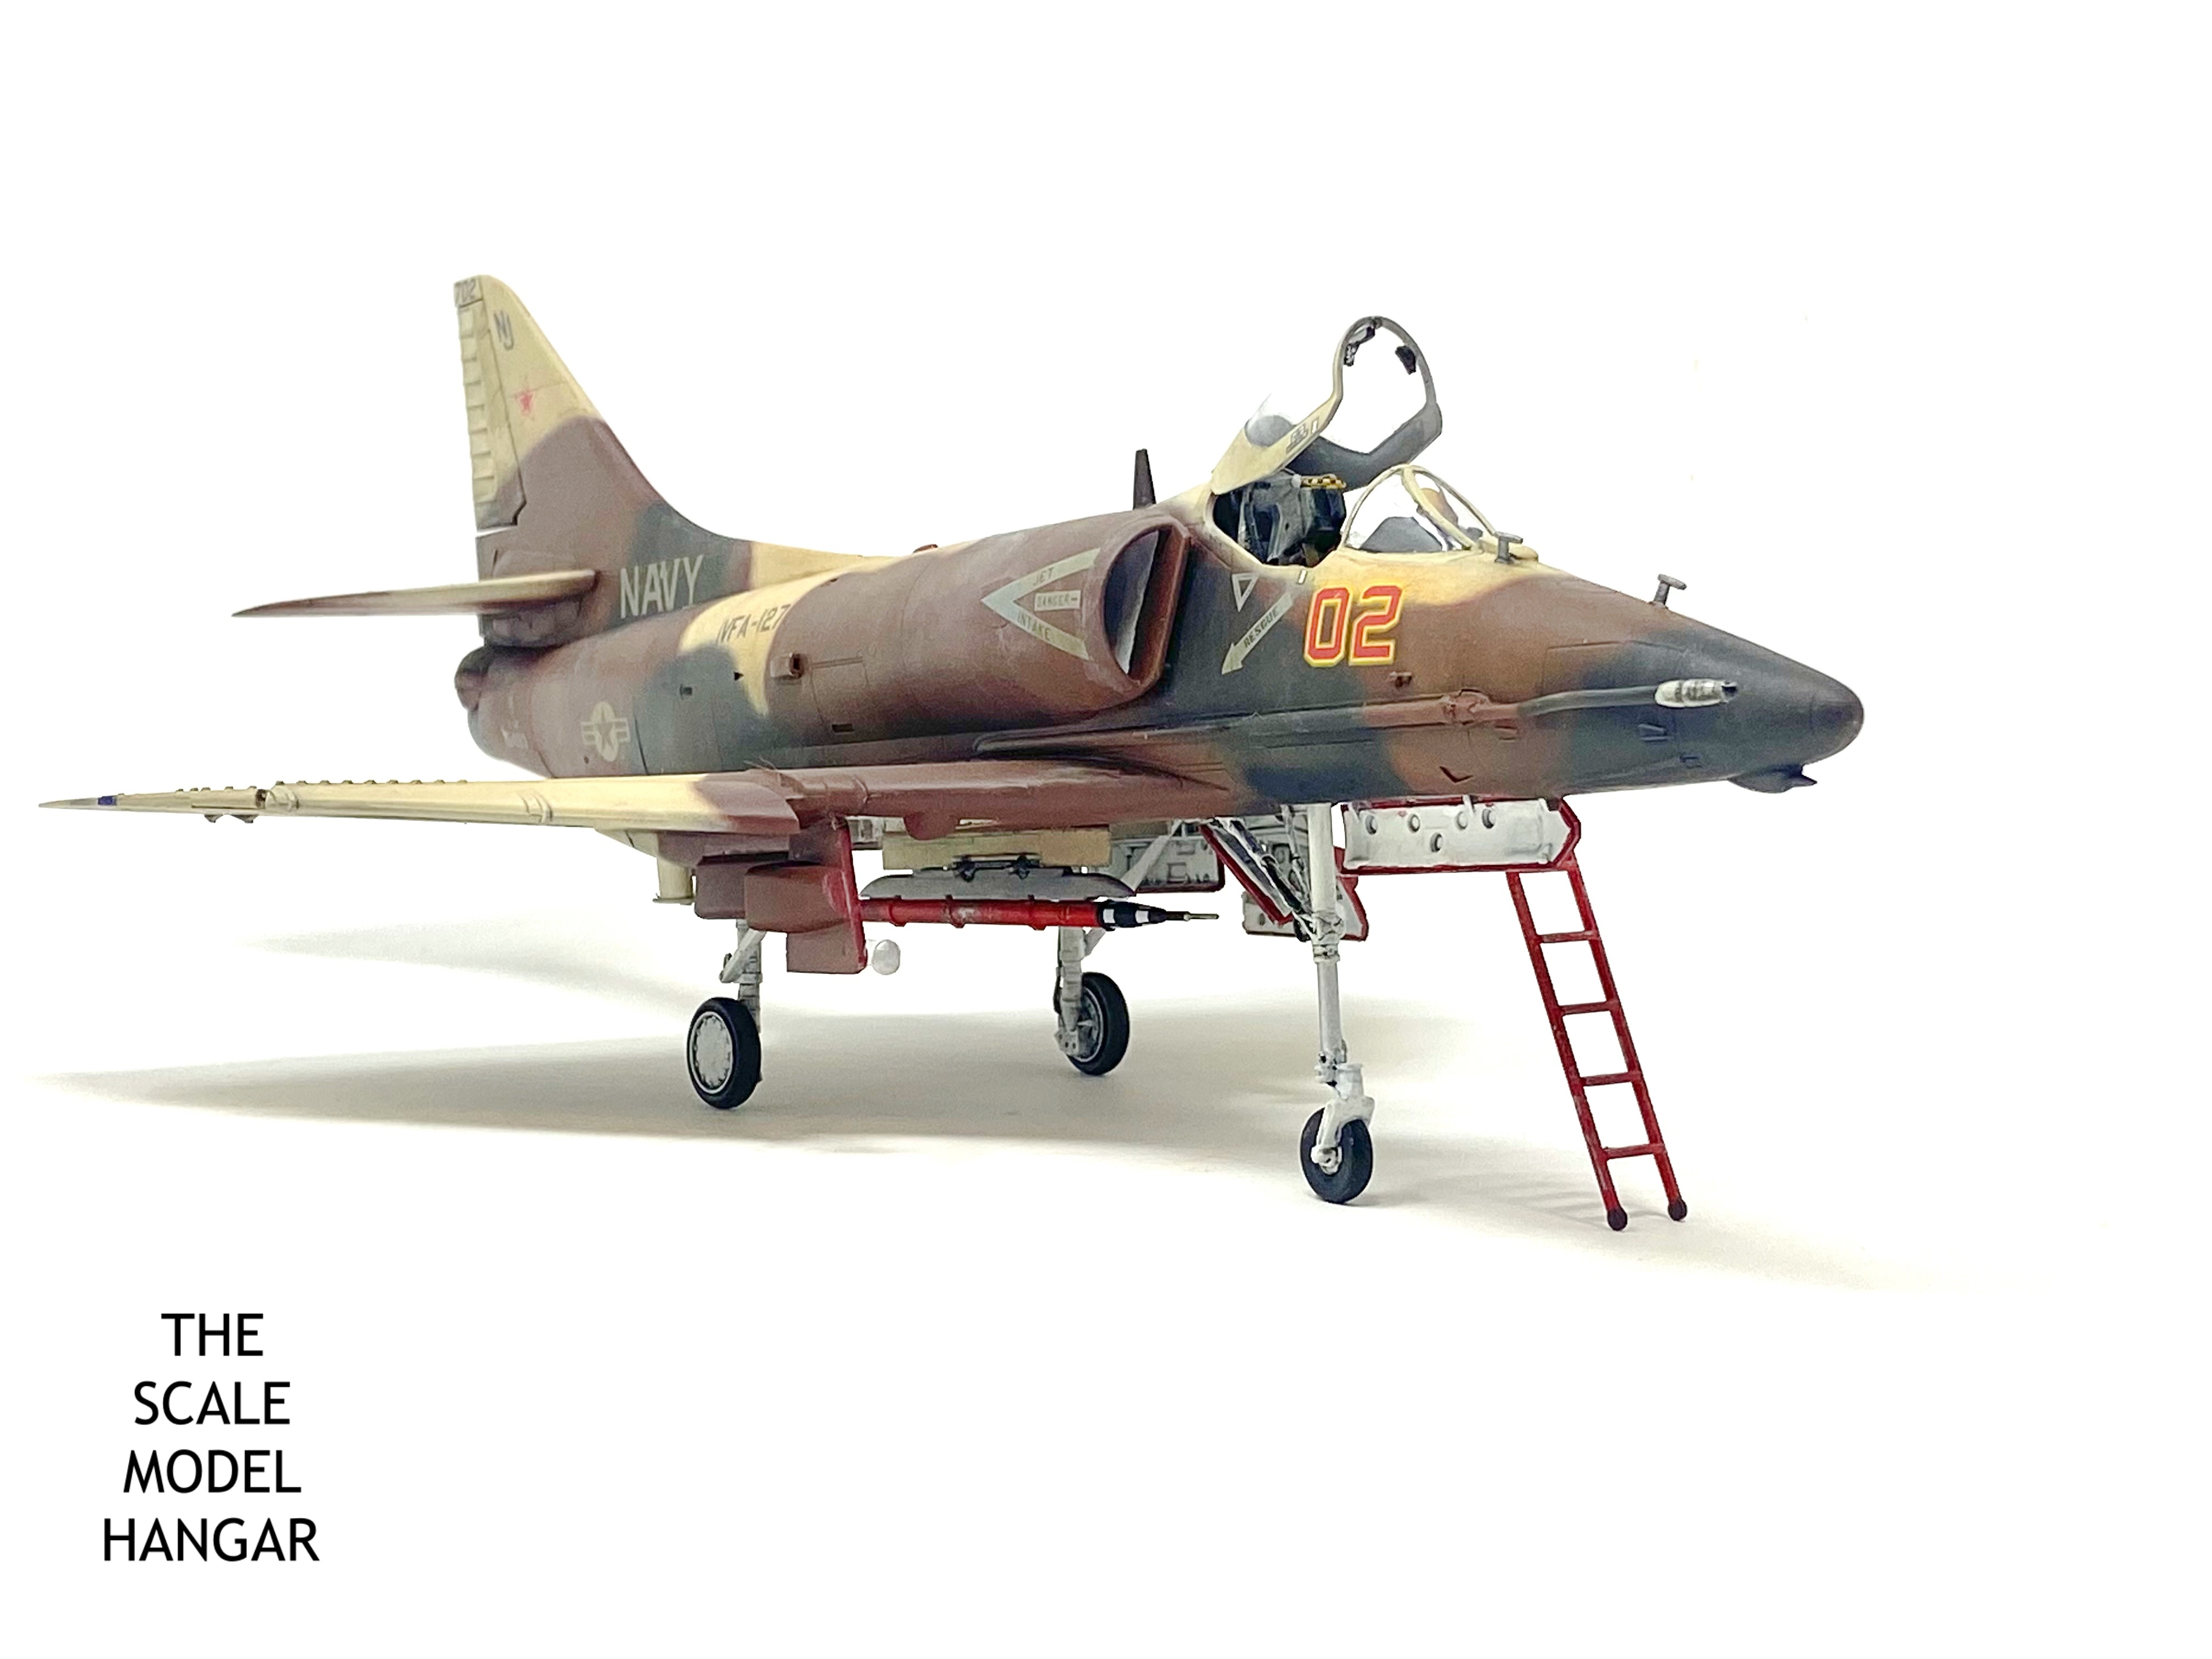
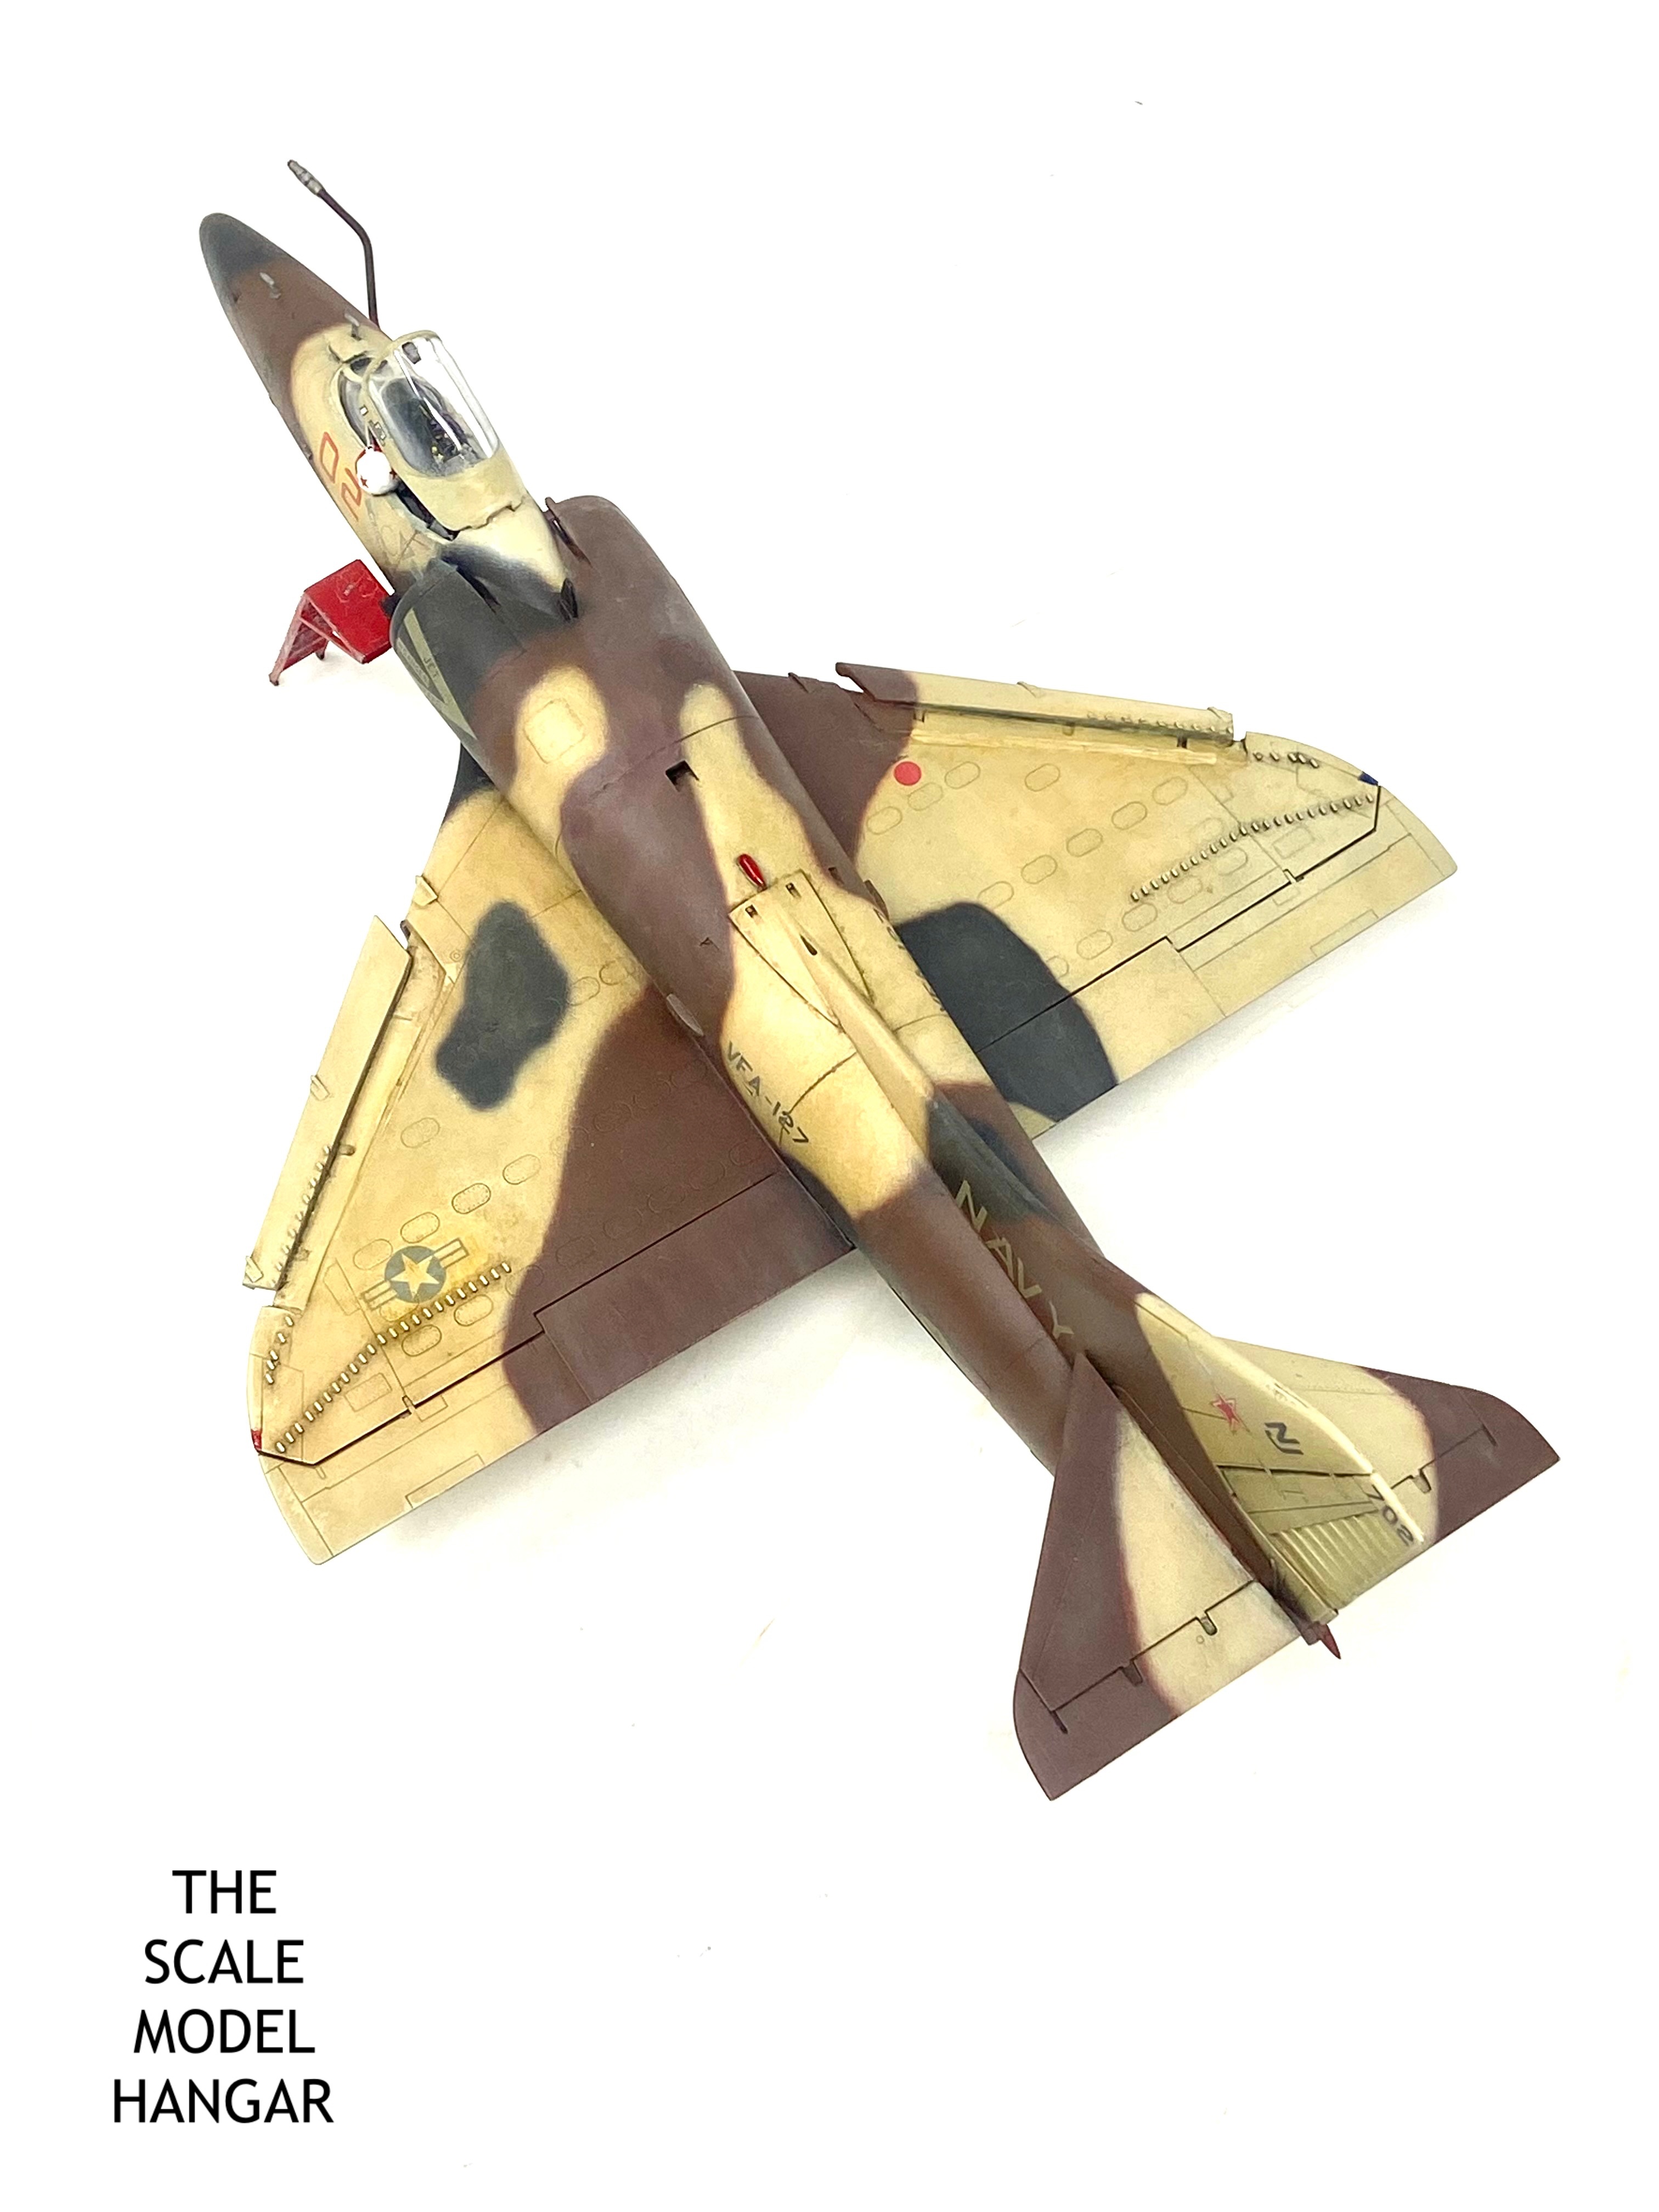
It’s that adversary scheme that captured my attention and I chose to finish my model in that scheme. The US Navy has adversary squadron’s that are based at the United States Navy Fighter Weapons School more commonly known as TOPGUN. Their adversary aircraft are painted in some superb “enemy” schemes and the one included in this kit really fired my imagination. My model will be finished in the markings of VFA-127, based at NAS Fallon in 1986.
The Build:
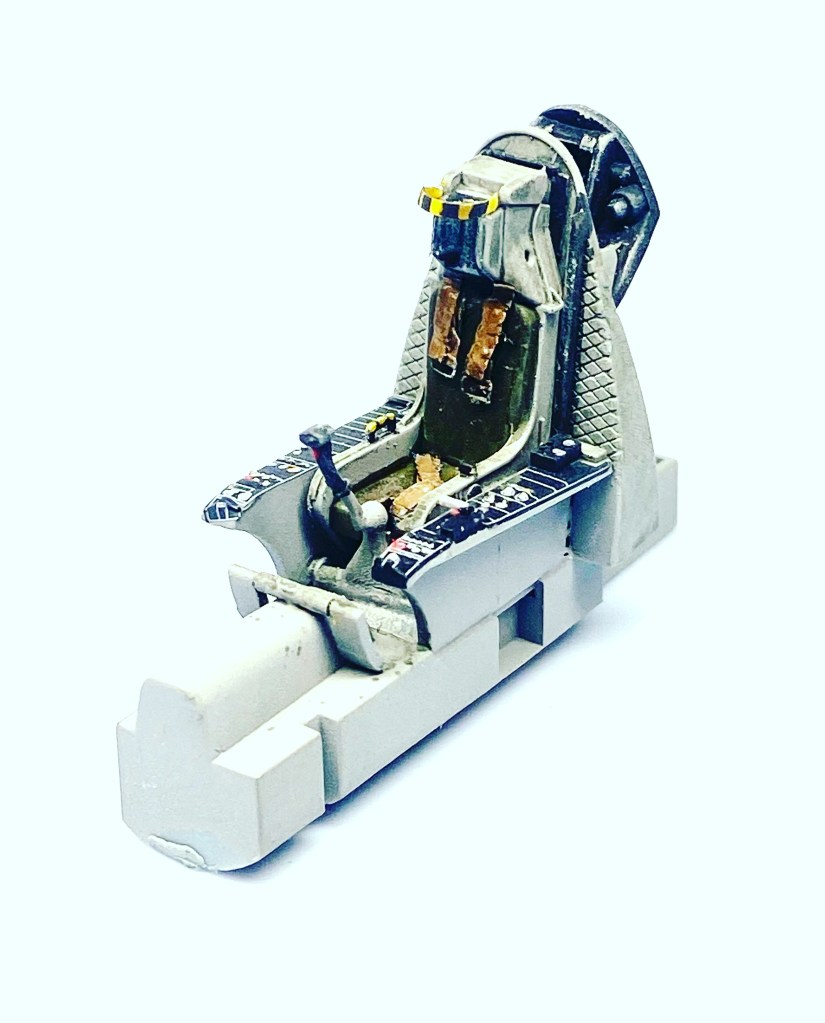
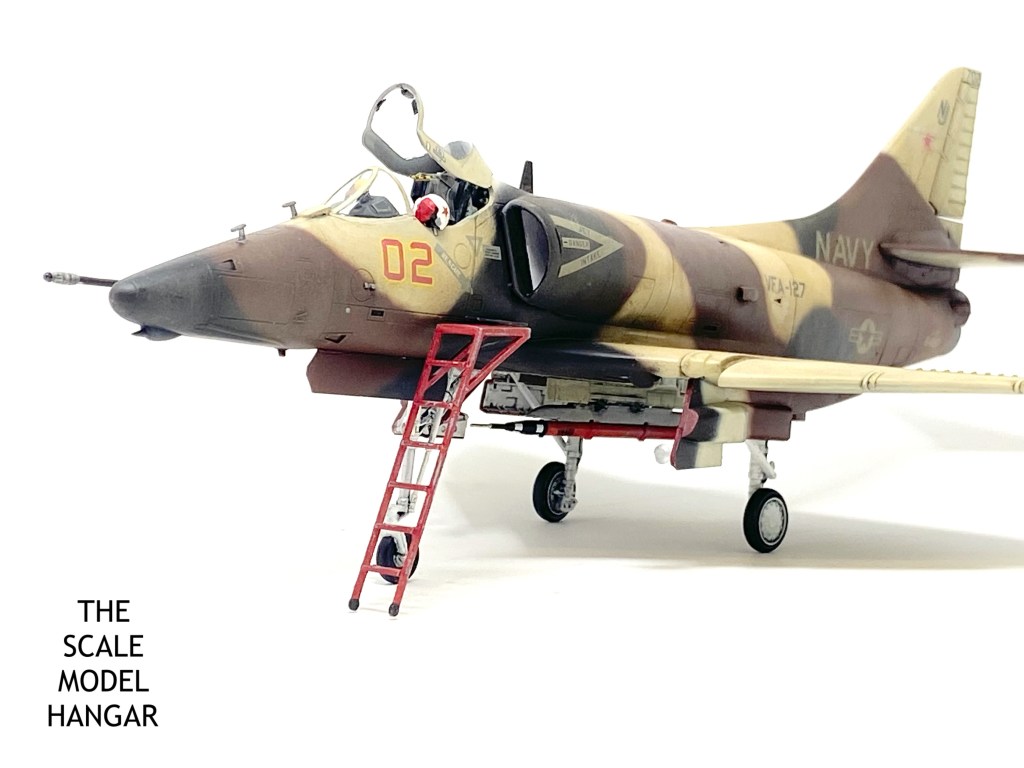
As usual, work commenced in the cockpit, the Hobbyboss kit office is ok, there are some nice touches with details on the rear bulkhead and ejection seat but the instrument panel is not the best. It’s a plastic part with a decal. As the A-4’s cockpit is very cramped I did not want to spend too much time detailing it so I opted to use the kit I/P and add a harness to the bang seat.
I also painted up the side consoles and added weight to the nose. Warning! This model is a tail sitter! Adding weight fixed inside the radome will prevent this from happening.


Once the “office” was sorted it was time to move onto the airframe. This is where Hobbyboss really missed a trick. The leading edge slats on an A-4 are in the dropped position when the aircraft is at rest, which is how most would want to pose their A-4 Skyhawk.
Now this is something that Hasegawa takes care of in their kits of the Skyhawk and it’s a big plus that pushes modellers towards choosing those kits over the Hobbyboss offerings. That said, there is an easy fix to add that extra realism to the Hobbyboss kit.
Winging it!
To remove and reposition the leading edge slats you can cut them out by scribing along the slats panel line with a scribing tool or sharp blade.

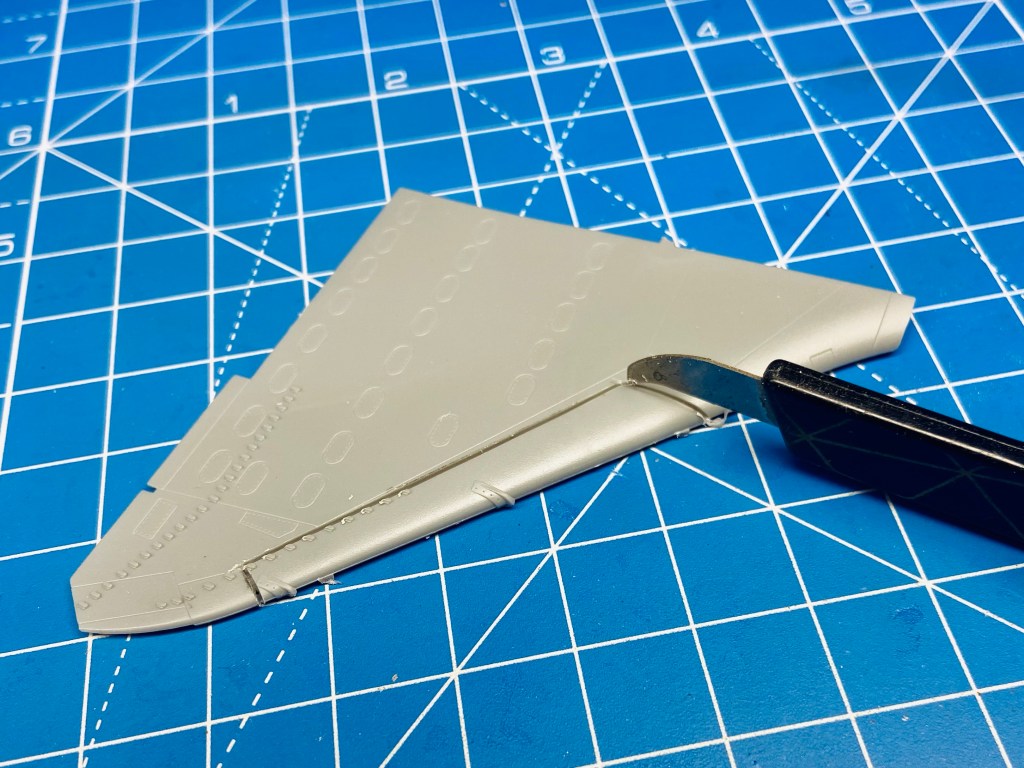
The next stage is assemble the upper and lower wing parts. This will leave a gap at the front end that you can fill in with plastic card cut to size as seen below:
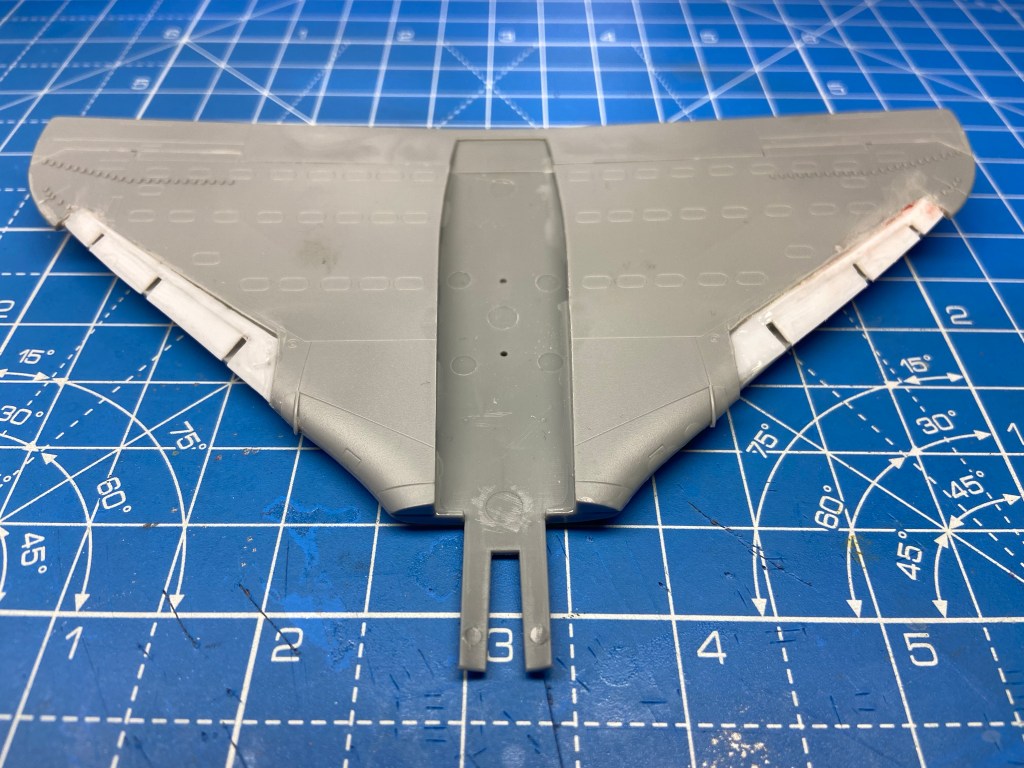
Now the slats can be fixed into place in the natural dropped position;
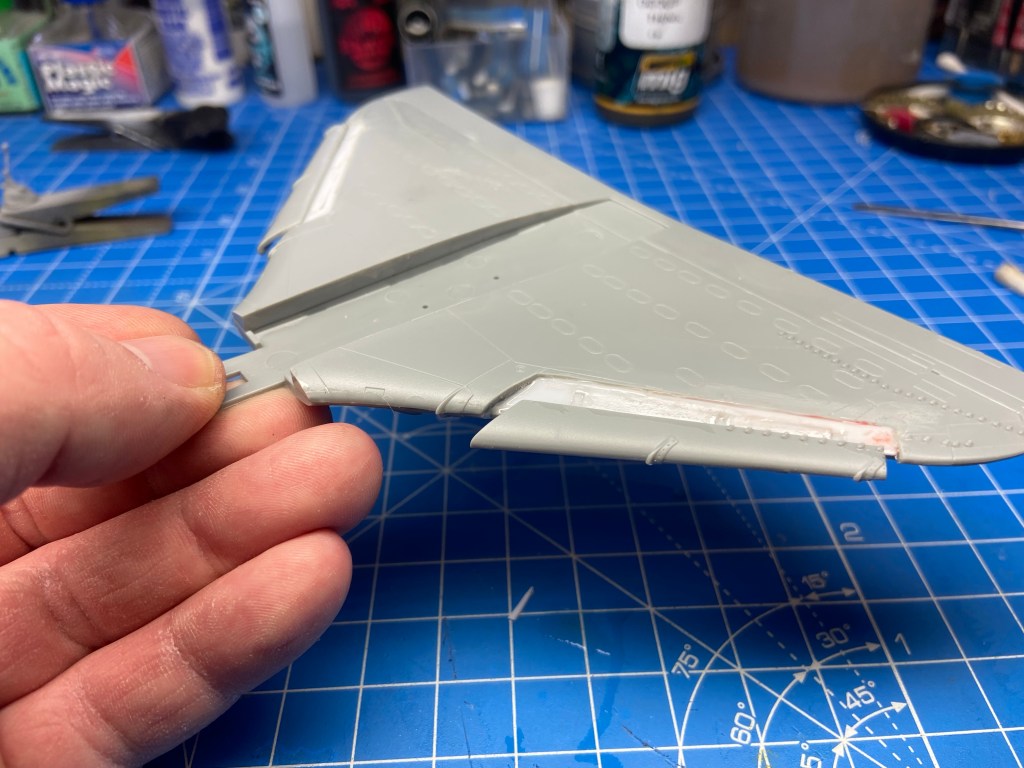
The rest of the assembly was a simple matter of adding the completed fuselage to the wing section and adding the horizontal stabiliser’s .

The Paint Job:
As usual, I began by airbrushing Tamiya NATO black all over the airframe to act as my primer coat. This gives the paint something to bite into and also will show any imperfections on the surface.
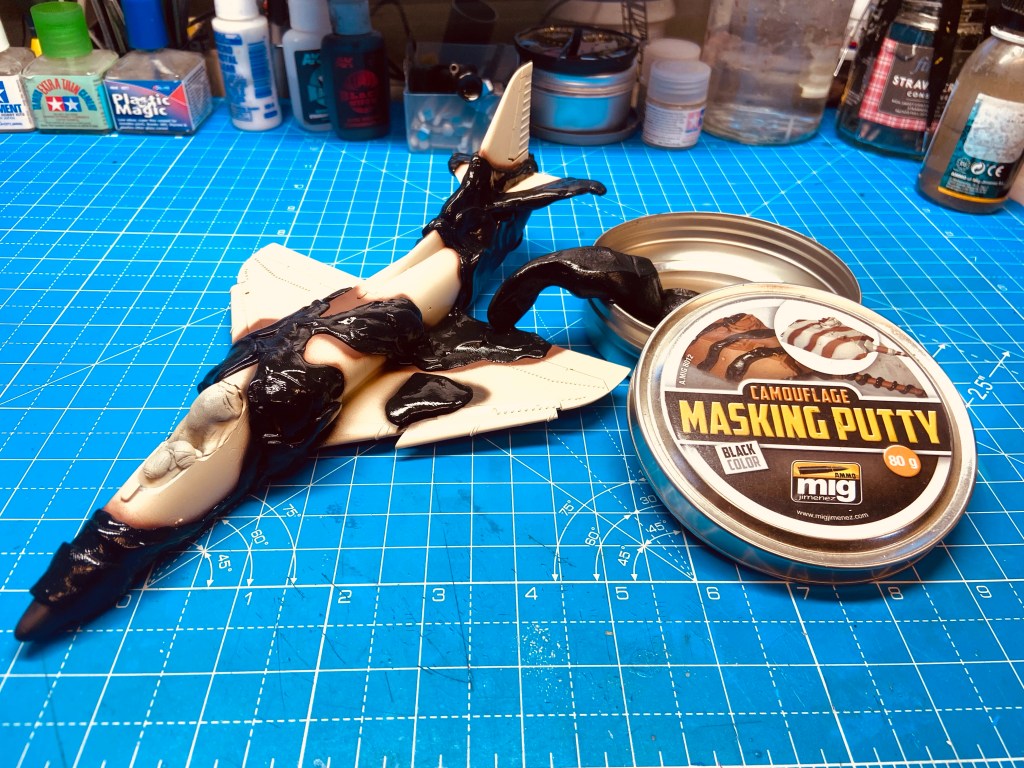
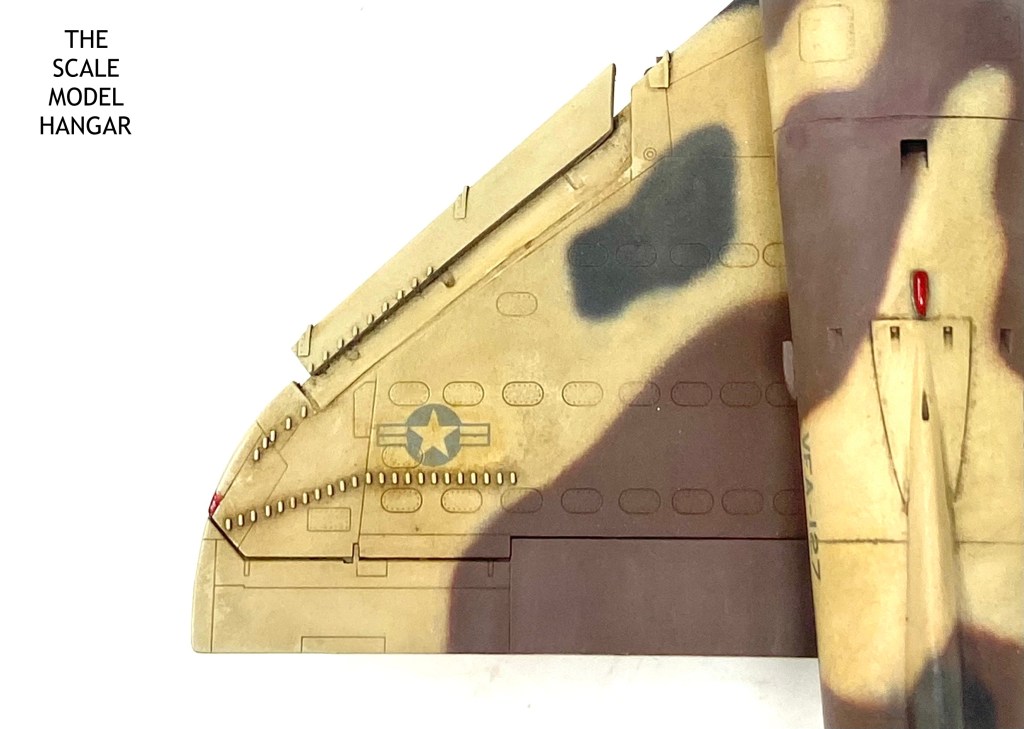
After this, I mixed my own shades of faded yellow, red brown and dark brown. Using the kit instructions painting guide, I sprayed the camouflage pattern freehand and used masks to touch up some of the demarcation lines. Mig Ammo masking putty is great for this!
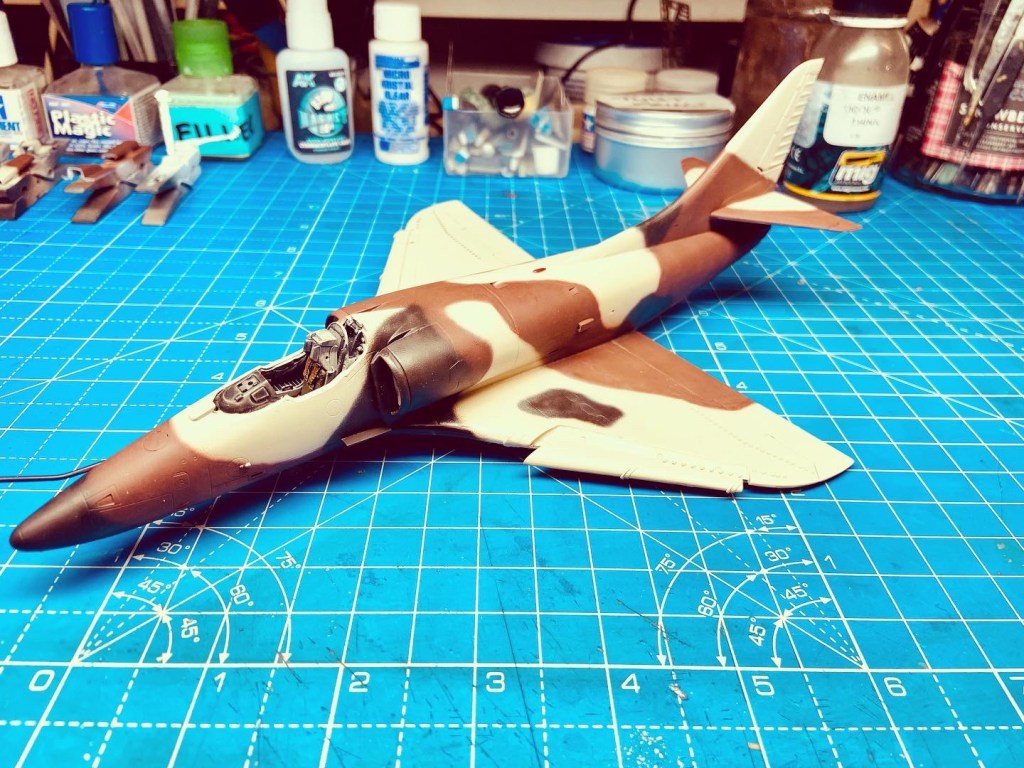
Once the paint had cured overnight, I sprayed the entire model in clear gloss acrylic in preparation for decals and weathering.
To highlight the many panels on the A-4’s airframe I used Mig Ammo enamel washes to bring out the details.

With the details highlighted and decals applied to the airframe, I used an oil paint render to fade the camouflage colours on the airframe, this is a time consuming process but I feel the end result is worth it.
This is the look I was attempting to replicate with my model:
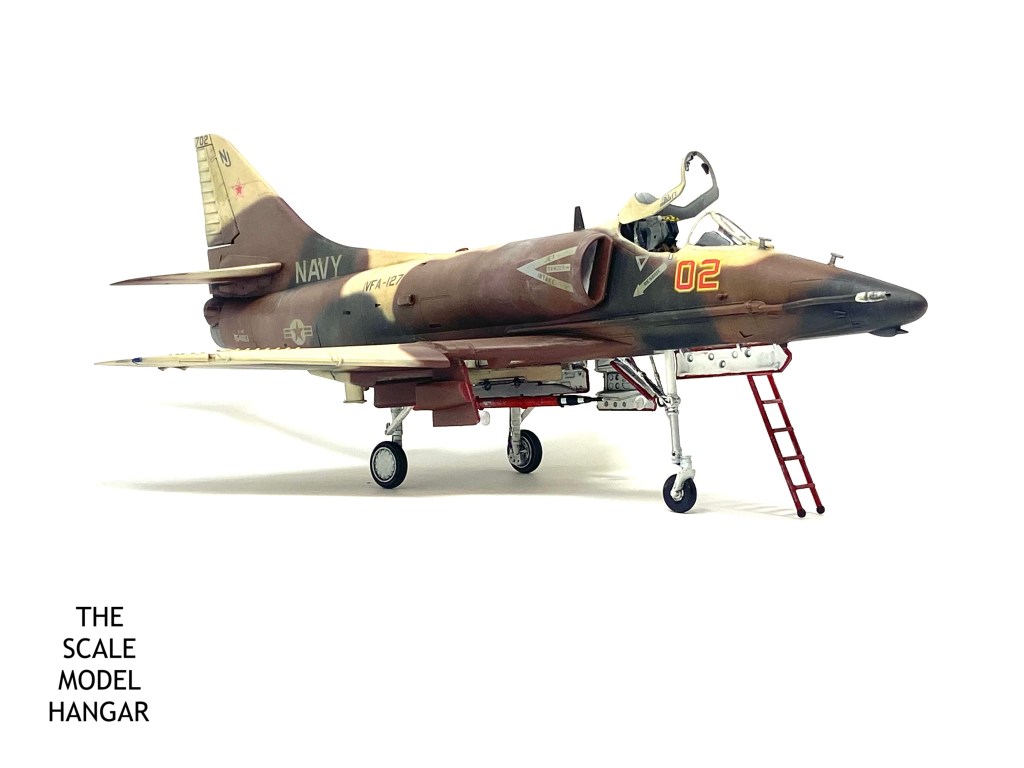
After much OPR work and adding the external details, the landing gear, the targeting pod , boarding ladder and the pilots helmet resting on the canopy rail I had my completed model. Here is how our Scooter looked by the time I finished working on her:


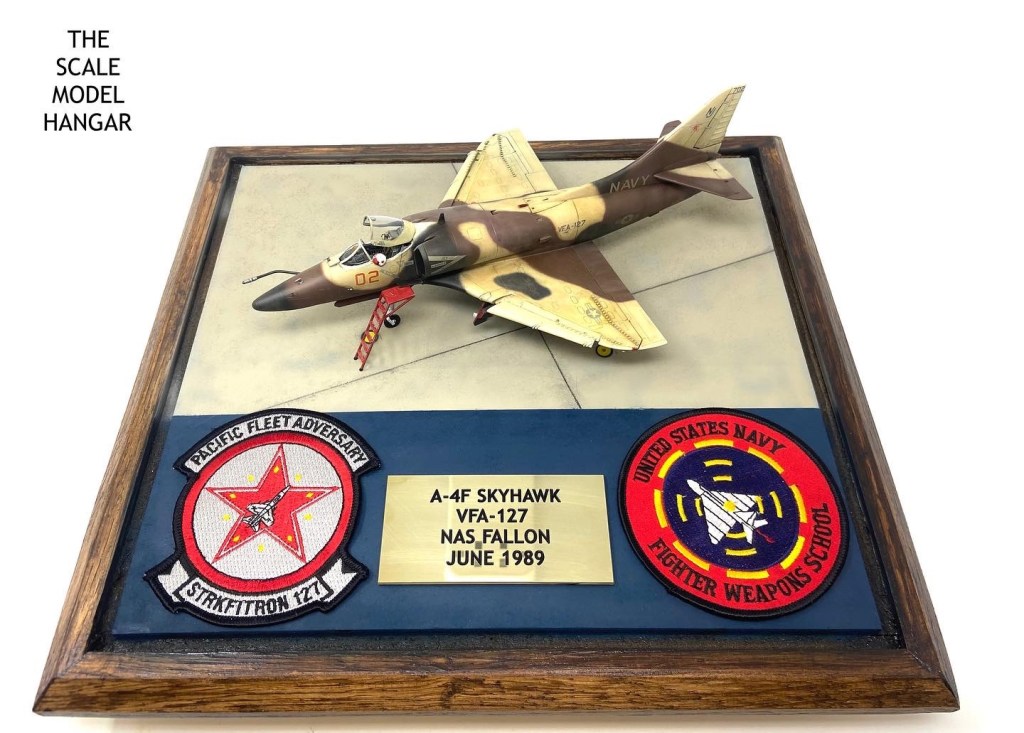
I was so pleased with how this bargain price kit turned out, that I decided to make it extra special and make a display to pose it on.
I took one of my Paul Thompson cases and customised it to set my Adversary Scooter in a TOPGUN setting. Maybe it’s just me, but I think it looks so cool!

I hope you have enjoyed this build, thanks for visiting and until next time, Happy Modelling!
Darren.

