Hello!
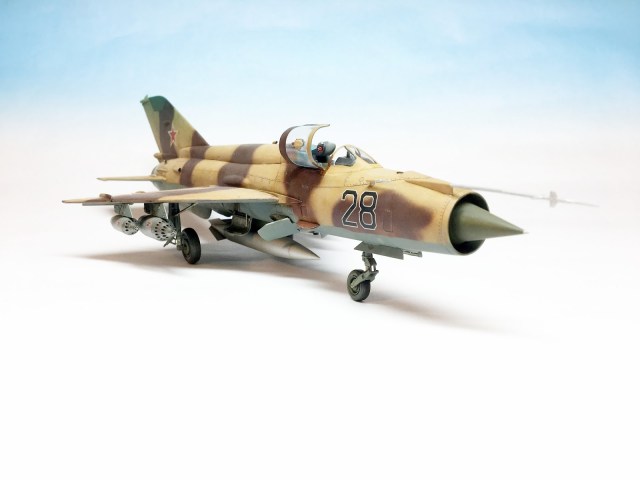
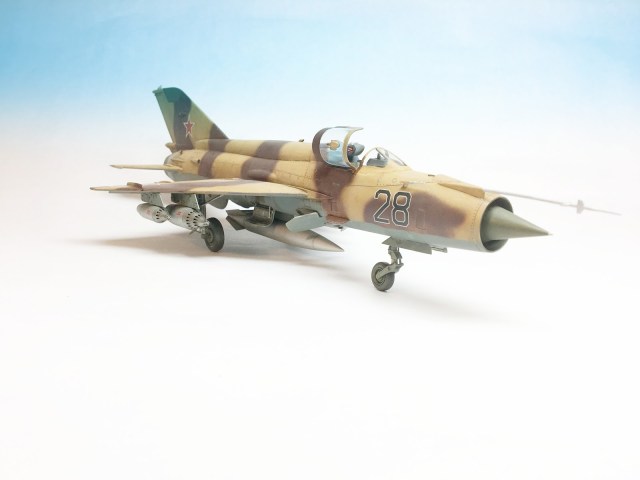
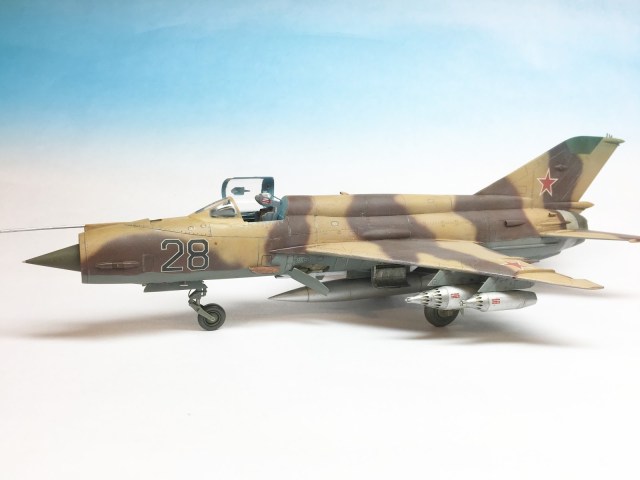
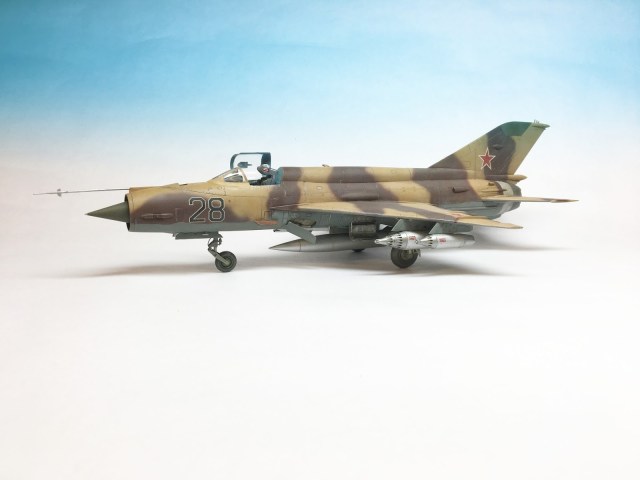
Yes, it’s been awhile and all I can tell you is that I am not at the bench as often as I would like to be these days! Today I had some much enjoyed free time and I spent the afternoon fine tuning my latest work, Academy’s 1/48 Mig-21 MF in Soviet Air Force markings.
I came across this kit whilst going through my stash looking for a simple OOB
(out of the box) build that I may try some new weathering idea’s on. I was attracted to this kit years ago by it’s box art scheme and the fact that I had never built one before.
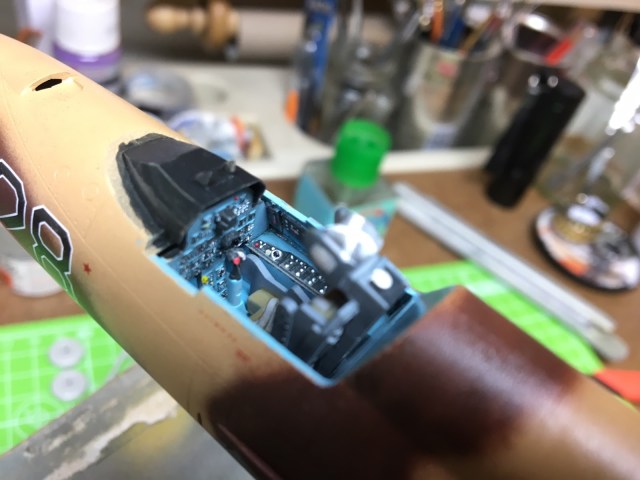
Academy’s kit is well tooled and comes with some nice under wing stores considering it’s age now. However it’s cockpit is fairly uninspiring and the decals are the dreaded Academy old style extra thick ones. Nonetheless, this kit proved to be an entertaining and positive experience.
I did intend to do this one completely OOB but, well what if I added a few scratch built bits here and there? Nothing wrong with that is there?
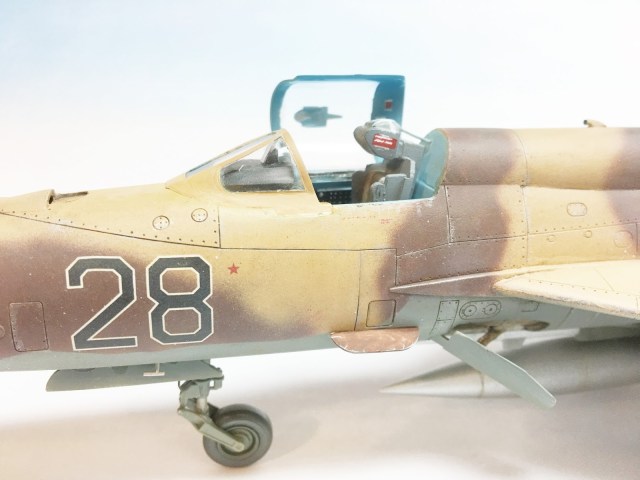
So I added some sidewall panels to the cockpit form plastic card and I took extra effort with the raised detail on the kits instrument panel. I also added some hydraulic lines to the landing gear legs and used some carefully cut spare decals to pass for Russian stencils on the rocket pods. Apart from those mods, everything else is straight from the stock kit.

The fit of the parts was good and only minimal filling was required with some Mr.Hobby dissolved putty. If you haven’t used it yet-You should! It’s great for those small gaps.
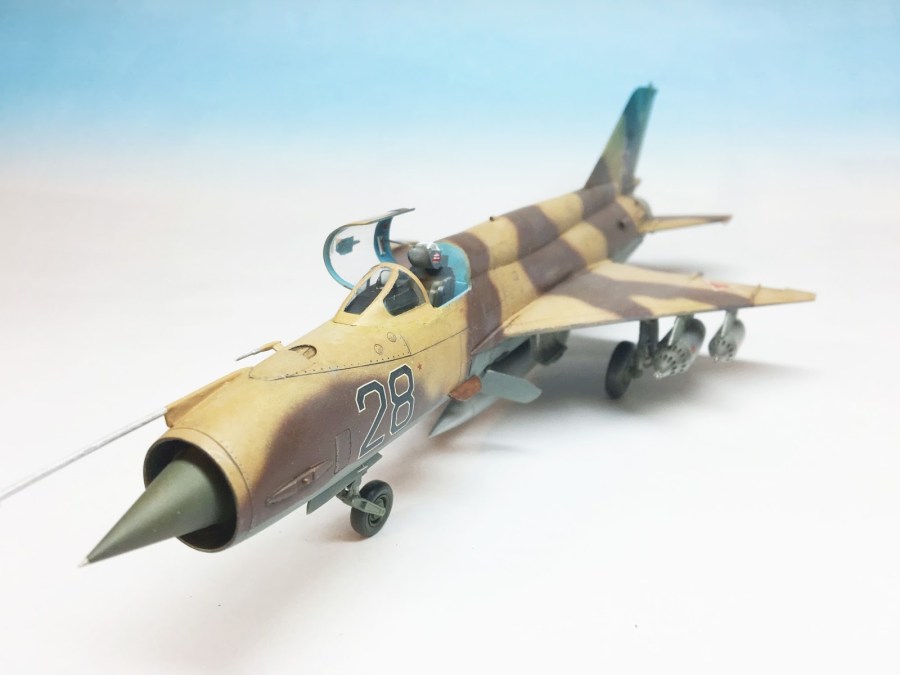
The best part of this build for me was the painting and weathering, I love airframes with desert scheme’s! Tamiya acrylic’s were used for the three basic colours: Flat Brown/Desert Yellow/Sea Grey.
To my complete surprise (and to my friends!) I managed to spray the camo pattern freehand! The only masking was the underside demarcation line and the green panel on the tail! A nice tidy job then!
I sealed it all i with a hard gloss coat and after a long drying time I was ready to crack on with the weathering.
FROM A DIFFERENT POINT OF VIEW……
Usually I will pre-shade my model aircraft along its panel lines, however on this occasion I elected not to as I was going to try something new. This time I put the paint straight onto plastic and sealed it with a clear gloss coat.
The weathering process for this model began with highlighting the panel lines and rivets with AK Interactive’s enamel Panel Liner for desert camouflage.

I have always been sceptical about panel liner products but after using this one I am sold! It’s thin enough to run down the panels and get into any recessed area. It is also formulated to a tone of colour that will blend into desert paint schemes seamlessly. I went all over the airframe panels and rivets with a small brush and I also used the wash to add some stains and streaks to the aircraft.
All of this work was sealed in with Vallejo matt coat acrylic.
The next phase of weathering was the use of oils. I added dots and streaks of white,yellow and ochre paints all over the airframe. These oils were blended in with an old stipple brush and the process was carried out panel by panel until I had reached the desired effect.
I really enjoyed this build and I learned a new way to weather my models along the way. I have some photo’s of the finished model to share with you, I hope you enjoy my latest work.
Happy Modelling!
Darren.