
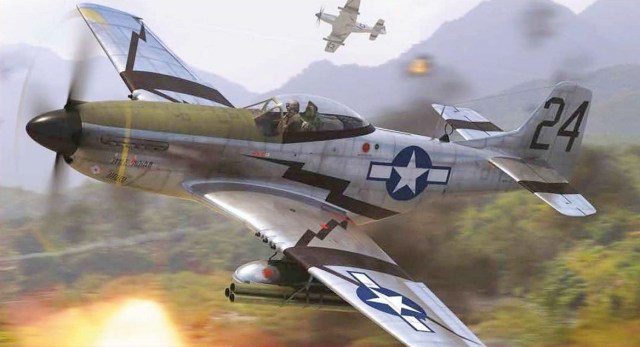
Yes, its another Mustang!
This one is a little different though, it is not my beloved Tamiya 1/48 kit. This is a new kid on the block. This is a new tooling from Airfix!

I picked this kit on its debut at the UK Nationals last November as I had heard that Airfix has really raised its game since being revitalised by The Hornby Hobby Company which now owns Airfix.
I have always had a soft spot for Airfix models. As I child I would build their kits with my dad. They were not great kits by todays standards, but they were cheap and they were easy to build. In the 80’s I loved their 1/72 F-16 Fighting Falcon, it was my favourite model and it regularly flew CAP around my room!
When I picked up the hobby again as an adult I noticed that Airfix kits were a hit or miss affair, a mixed bag. Some were good-Some were not so good.
They did produce some winners though. Who could forget the legendary 1/48 Seafire FR-47 and their 1/48 RAF Lightnings were brilliant!!
Now in 2018 we have a new breed of Airfix kits. A new design and engineering team and better marketing too. Speaking to the Airfix team at Scale Model World I was impressed with how customer focused Airfix has become and they have really listened to their customers. Their new direction has turned heads and impressed!
The new P-51D in 1/48 scale:
This post will be a build review and with that in mind I will be building this model straight from the box with no modifications whatsoever.
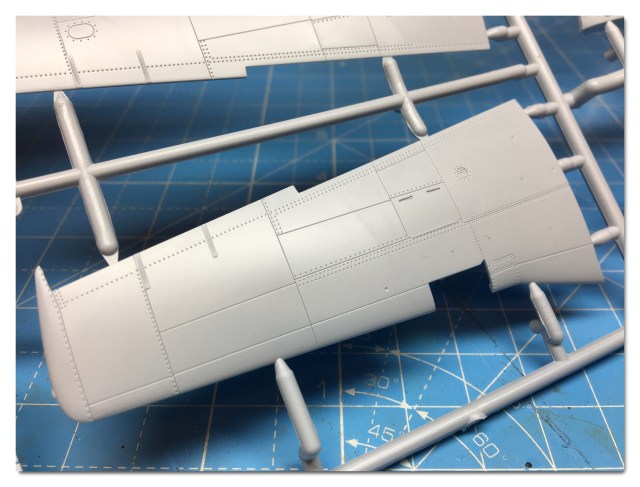
So what’s in the box? The sprues are moulded in a soft grey plastic and the parts exhibit some nice details.
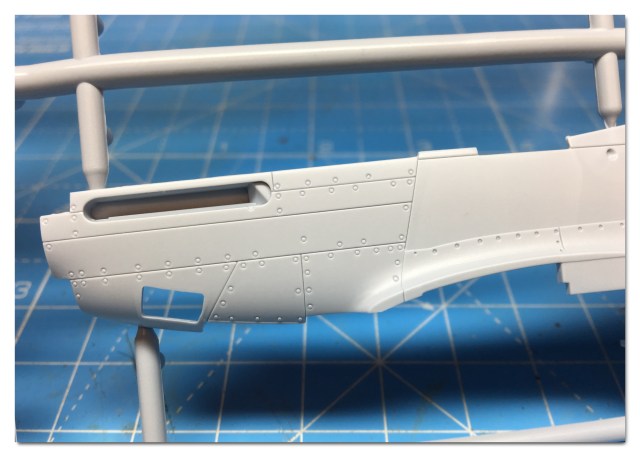
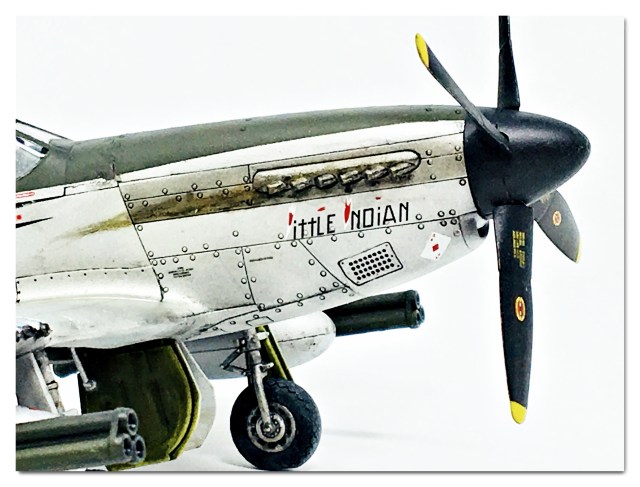
As you can see there is nicely detailed engraving here. I liked the riveting on the airframe.
The new instruction sheets are a welcome improvement too. Diagrams are clear and well laid out.
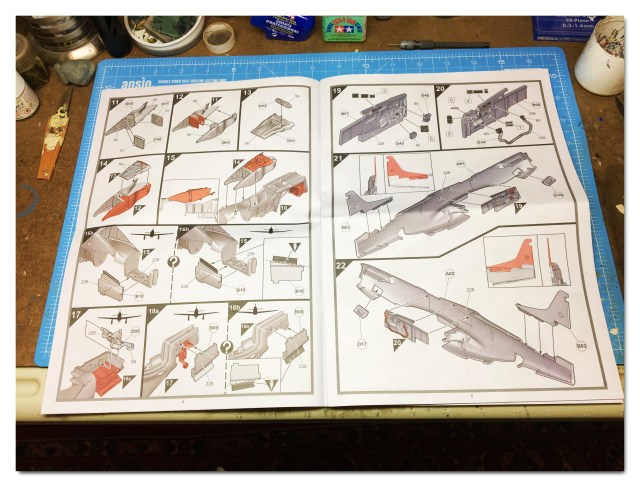
Painting and marking guides are now printed in full colour and that is a good improvement over the older kits.
So what’s it like to build?
Actually, its an absolute doddle! So Easy! This kit has the best fit of any Airfix model that I have ever worked on! The fit is tight, so make sure you do a good clean up on all parts after removing them from the sprue. I noticed that the tolerances do not allow for any ham fisted chap who does not check the mating surfaces before fitting…….

Ahem! Moving swiftly on then…..We begin construction with the cockpit!
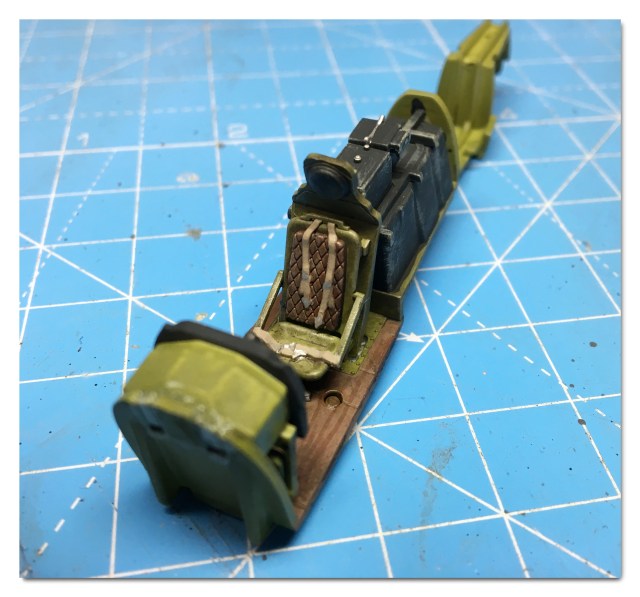
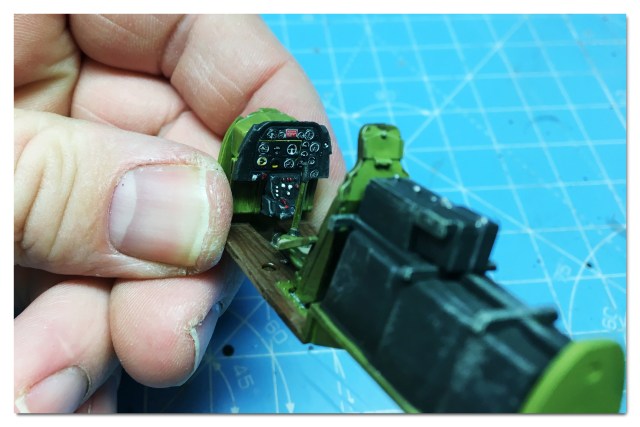
This kit has a great moulded in seat harness that with careful painting actually stands out. The cockpit has a lot of detail built in and also the kit provides a decent instrument panel. There are decals for the instruments and cockpit placards. The kits cockpit side walls are most impressive with plenty of detail to see when the fuselage is closed up.
The construction for this model is a somewhat different for this model in the way that the parts have been designed and engineered to be assembled. My first reaction was quiet skepticism, but as strange as it looked, it worked really well! The lower air intake trunking is fitted underneath the cockpit floor and the tail wheel assembly is fitted to the rear of the intake trunking before the fuselage halves are glued together. However once this is done the fuselage halves fit together almost seamlessly. The wing assembly was next and again it was a good fit. The wing to fuselage fitting went like a dream! No filler needed here at all. 10/10 for that one Airfix!
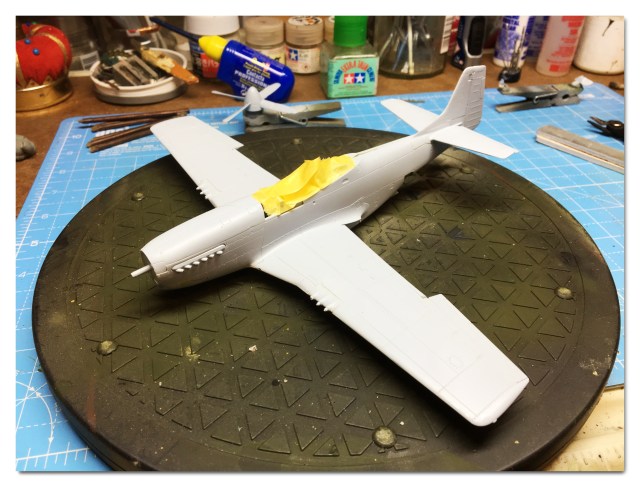
With the airframe assembled, it time to move over to the spray booth and begin the painting process.
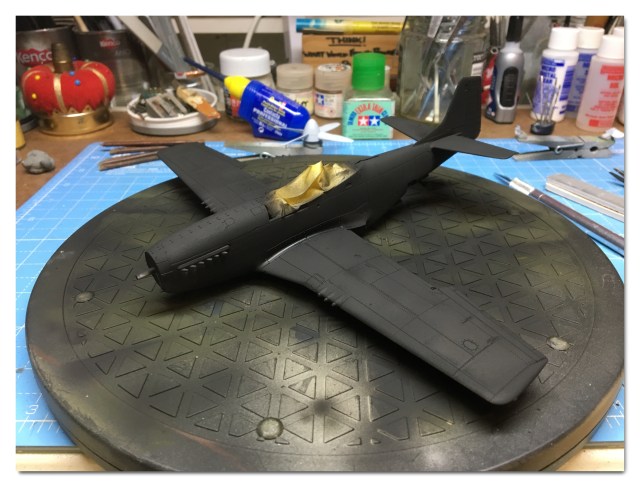
I gave the model a good coat of flat black primer. This gives me a good surface for the metallic paint to key to and defines the panel lines.

I used True Metal Polished Aluminium with some panels masked and over sprayed with Tamiya flat aluminium for contrast. The anti glare panel was painted with Tamiya O/D green.
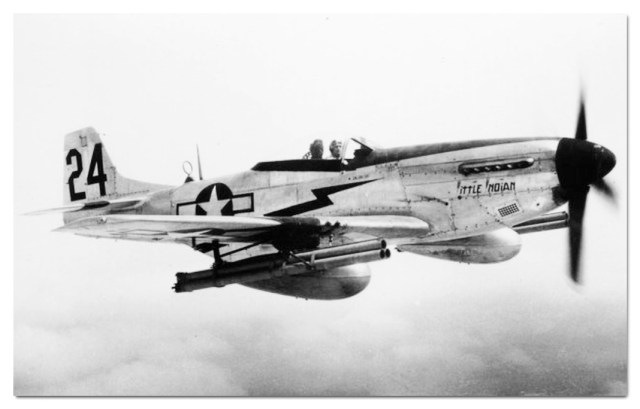
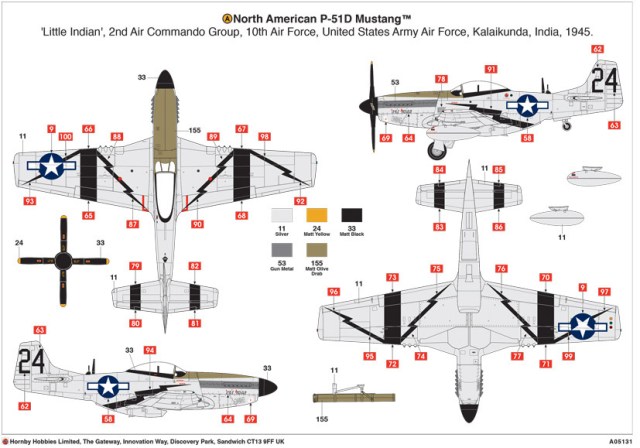
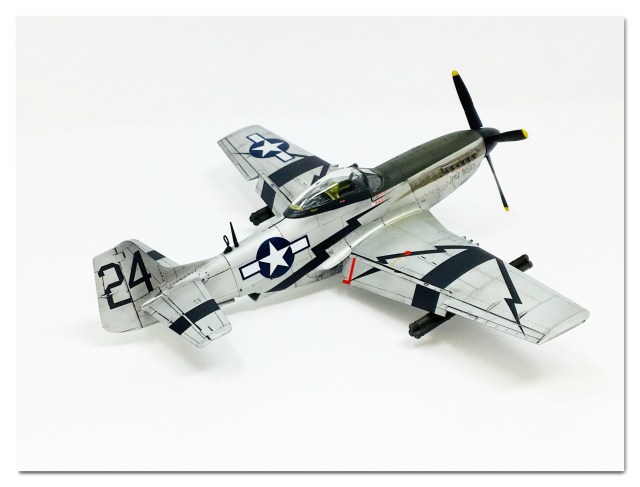
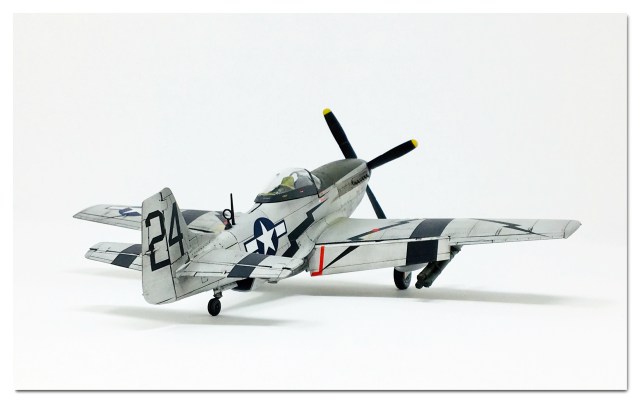
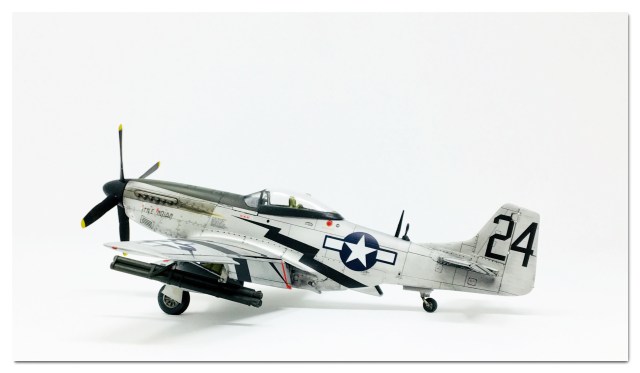
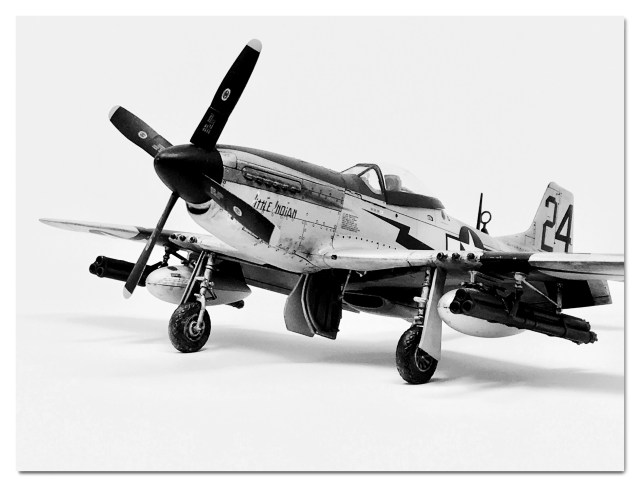
This is the look I was going for-“Little Indian” from the 2nd Air Commando Group, 10th AF, USAAF. Kalaikunda, India, 1945.
With the airframe painted, I built the landing gear and wing stores. The new system Airfix has for positioning wheels to landing gear is superb! The gear has an angled locating lug that means you can only fix the wheel in the correct position. Foolproof!
The new decals were absolutely flawless. Really. I was amazed at the difference between the decals in this new kit and those from the older models. Whatever Airfix are doing with their new decals, they are doing it right!
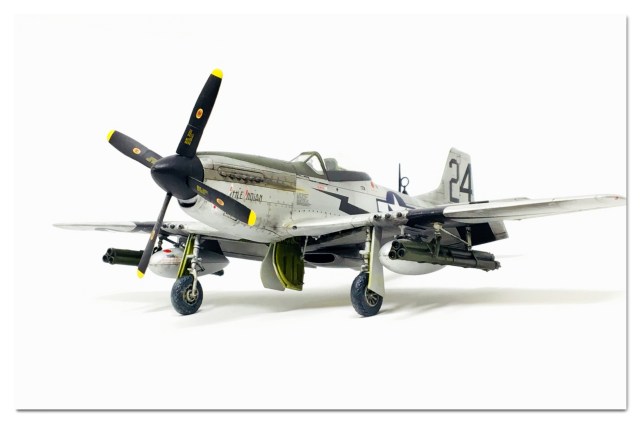
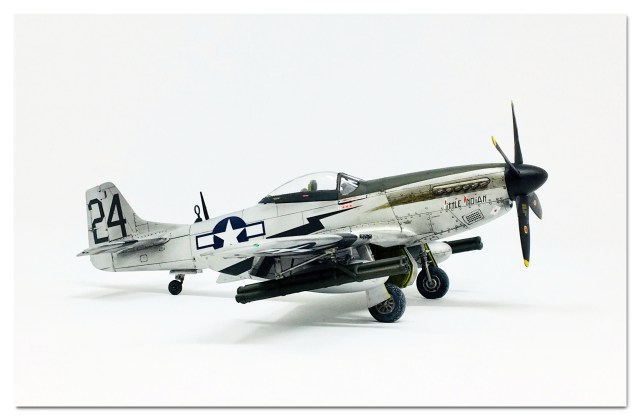
I applied all the decals over a clear gloss coat and then sealed them in with another gloss layer. Weathering was light, I opted for an enamel wash for the panel lines and oils for the exhaust staining. I used MIG’s acrylic satin varnish to seal everything in. I think it gave the NMF a nice patina. After adding landing gear, wing stores and canopy the model was complete and looked the part of WWII Mustang.
Here is my completed model:


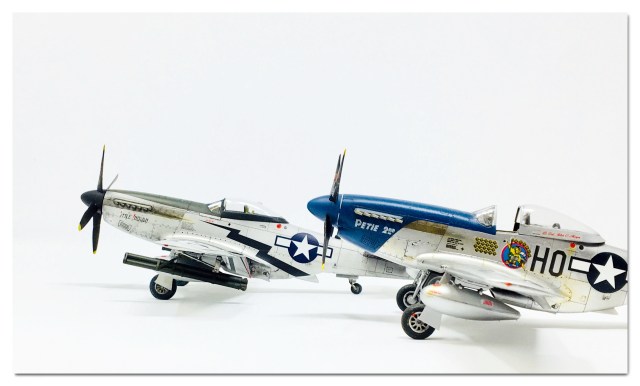
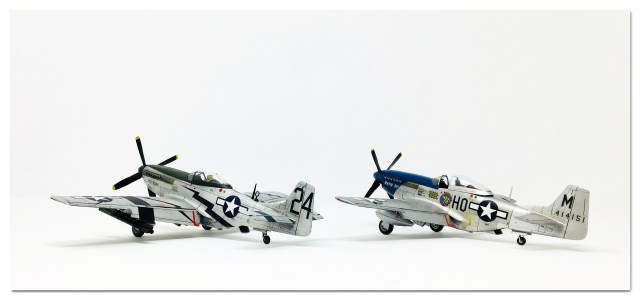
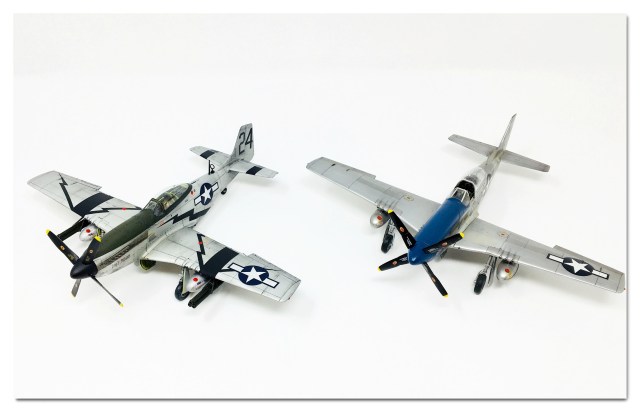
Some pictures of my Airfix and Tamiya Mustangs together:

In conclusion:
What Airfix have produced here is a new standard of model kit for a generation of modellers old and young who want Airfix to hold its head up high and walk tall with all the other manufacturers of WWII fighters.
I wanted an Airfix kit that fitted well together, had nice details , good decals and was a good value price. I got all of that in the box! And do you know what?
It was fun too! Thanks AIRFIX!
![]()
Until next time, take care and Happy Modelling!
Darren.
